

1. Create a Personal Access Token (PAT)
Before registering an agent, you must generate a PAT in Azure DevOps.- Click the Settings (gear) icon near your avatar, then select Personal access tokens.
- Choose New Token.
- Enter a descriptive Name and set an Expiration date.
- Under Scopes, grant only the minimum permissions:
- Agent Pools: read & manage
- Build: read & execute
Always restrict your PAT to the least-privilege scopes required. Avoid selecting Full Access unless absolutely necessary.
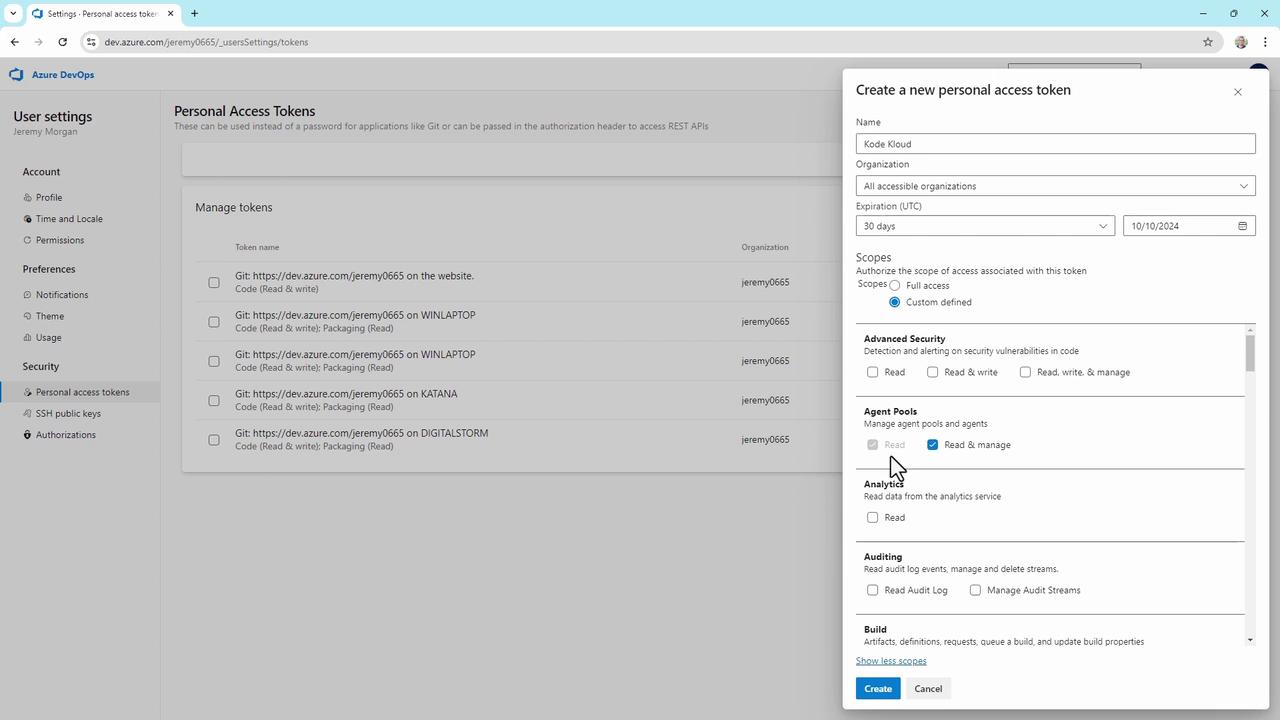
- Click Create, then immediately Copy the token—this is the only time it will be displayed.
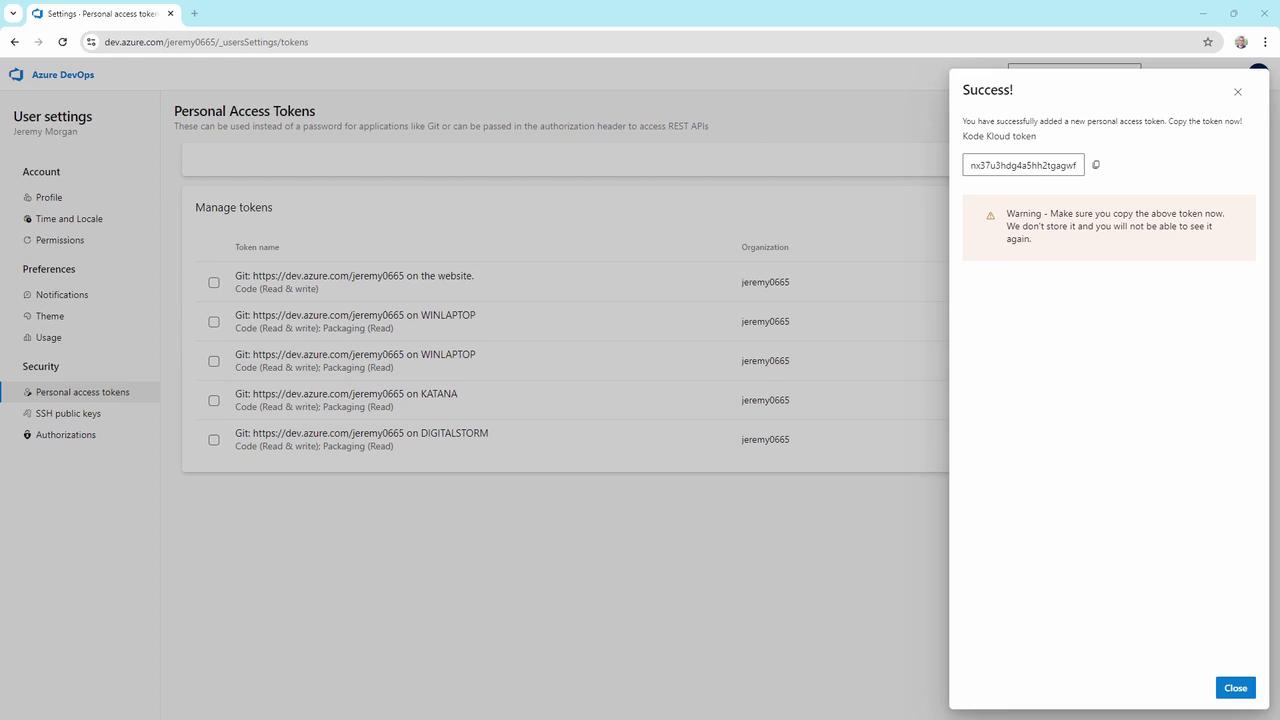
2. Add a Self-Hosted Agent Pool
Now create a dedicated pool to organize your self-hosted agents.- In your project, open Project settings (bottom-left).
- Select Agent pools.
- Click Add pool, choose Self-hosted, and fill in:
- Pool name:
KodeKloudCustomer - Optionally, check Grant access permission to all pipelines
- Pool name:
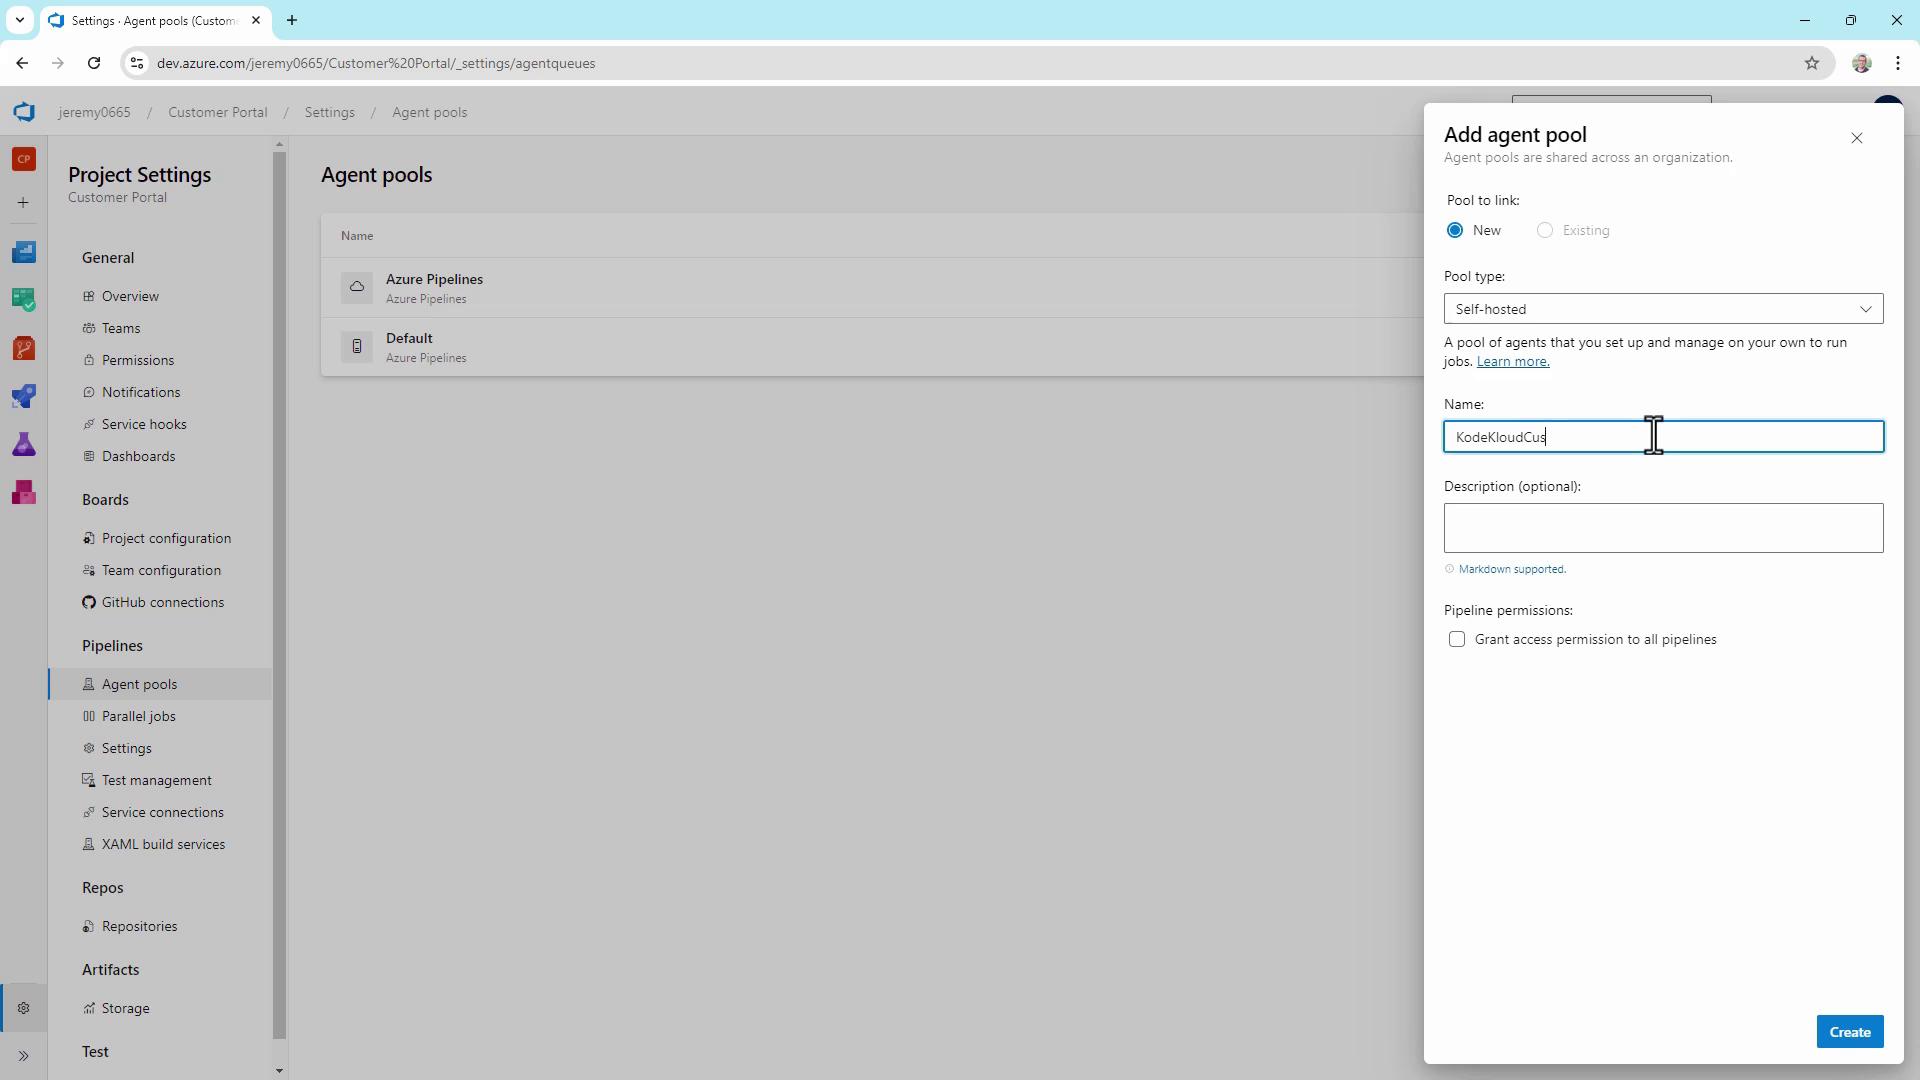
- Click Create.
3. Download, Configure & Run the Agent
Select the agent package for your OS and follow these steps:Windows PowerShell
Linux Bash
- Server URL: e.g.,
https://dev.azure.com/yourOrg/ - Authentication type: press Enter for PAT
- Personal access token: paste your PAT
- Agent pool: press Enter for
KodeKloudCustomer - Agent name: accept the default or enter a custom name
- Work folder: default is
_work - Run as service: choose Yes/No
Sample Interactive Session on Windows
If you choose to run the agent as a service (
Y), it will automatically start on machine reboot.Starting the Agent
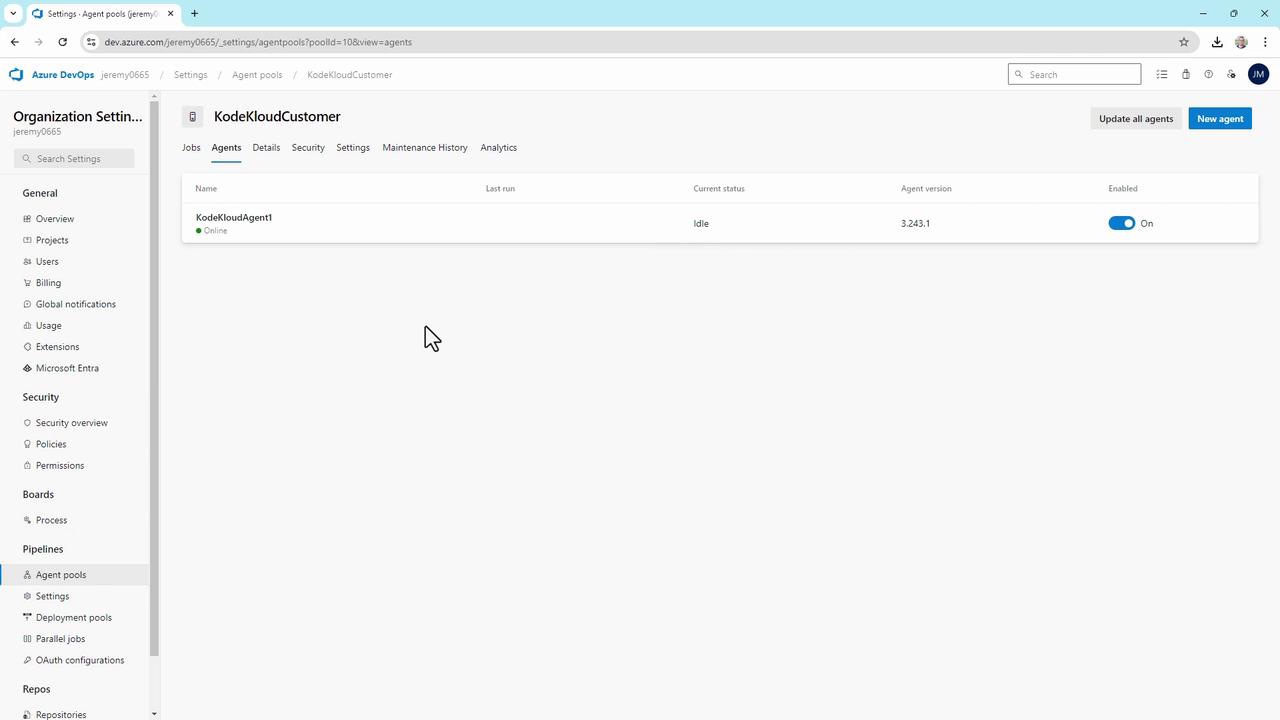
KodeKloudCustomer pool, ready to process pipeline jobs.
4. Troubleshooting & Best Practices
Consider using containerized agents if you need rapid scaling and tighter isolation between builds.