Overview
- Manual snapshots capture the entire cluster state at the moment you take them and are retained until you delete them.
- Automated backups (base snapshots + transaction logs) allow you to perform point-in-time restore (PITR) within a configured retention window.
- Use manual snapshots for indefinite rollback points (for example, before upgrades), and PITR to recover to a precise timestamp within the automated backup window.
Prerequisite
Make sure you have:- An Aurora cluster in the same AWS account and region you will use.
- The RDS console or AWS CLI configured with permissions to create snapshots and restores.
Create a manual snapshot (Console + CLI)
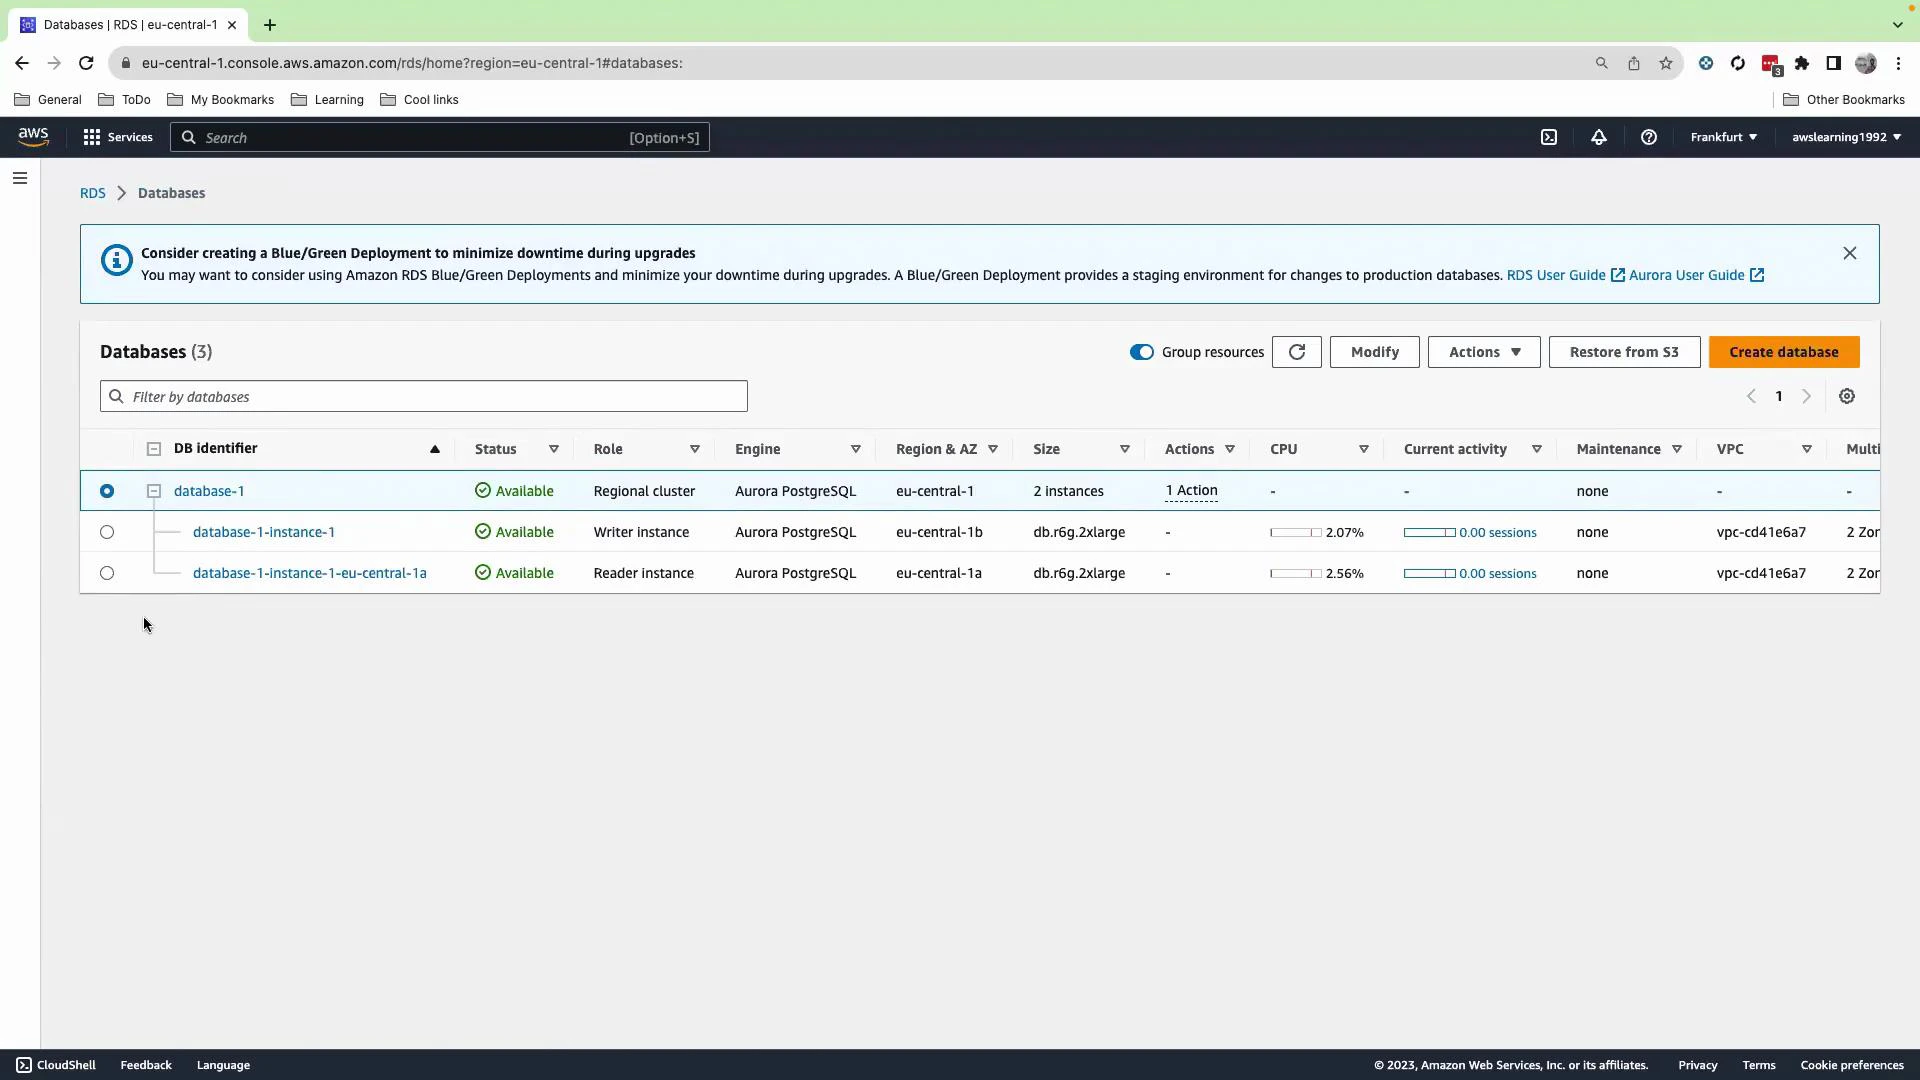
Console:- Open the RDS console and select your Aurora cluster.
- Choose Actions → Take snapshot.
- Provide a snapshot identifier and confirm. The manual snapshot will remain until you explicitly delete it.
Automated backups and retention
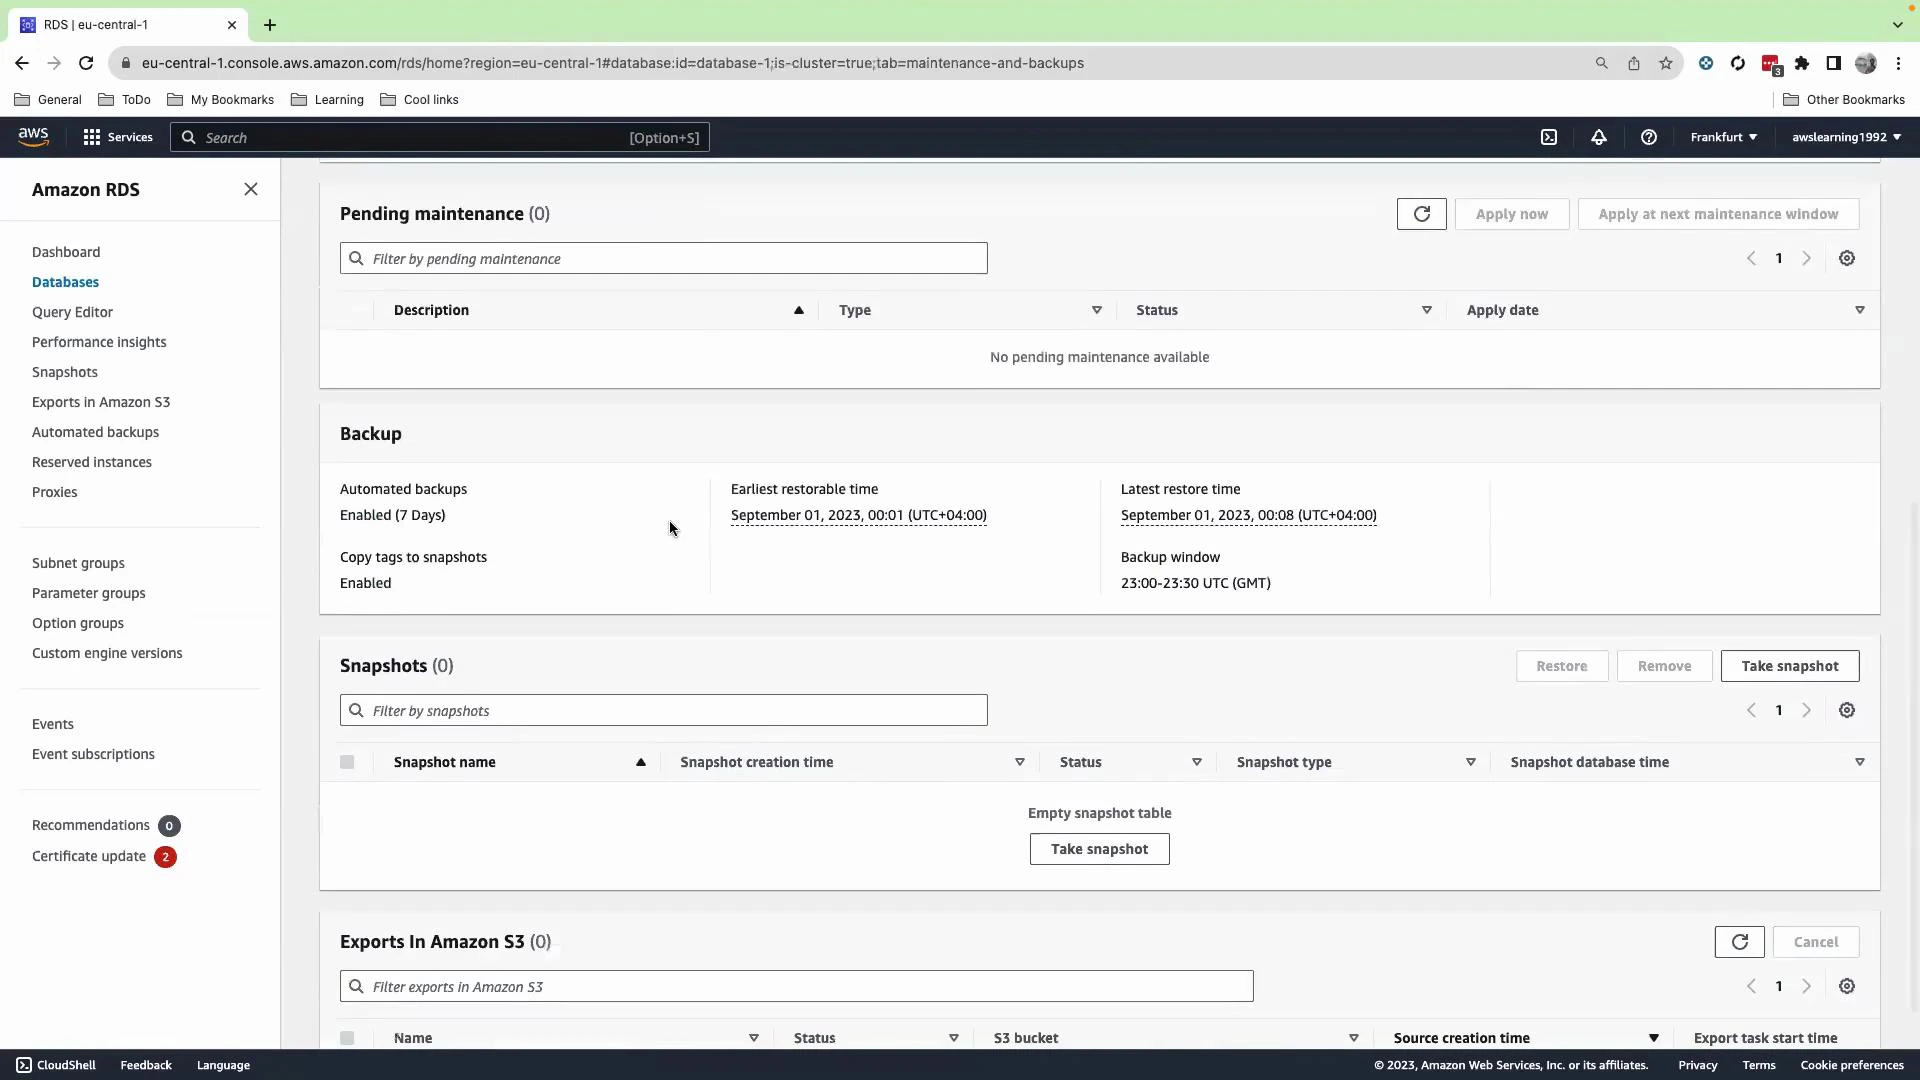
Console:- Select the database, then open the Maintenance & backups (or Maintenance and backup) section.
- Review and configure:
- Automated backup retention period (for example, 7 days).
- Maintenance window and backup window.
| Retention Window | Use Case |
|---|---|
| 1–7 days | Short-term recovery from recent accidental changes |
| 7–30 days | Standard operational recovery and troubleshooting |
| 30+ days | Long-term compliance or infrequent restore needs (cost trade-off) |
Point-in-time restore (PITR)
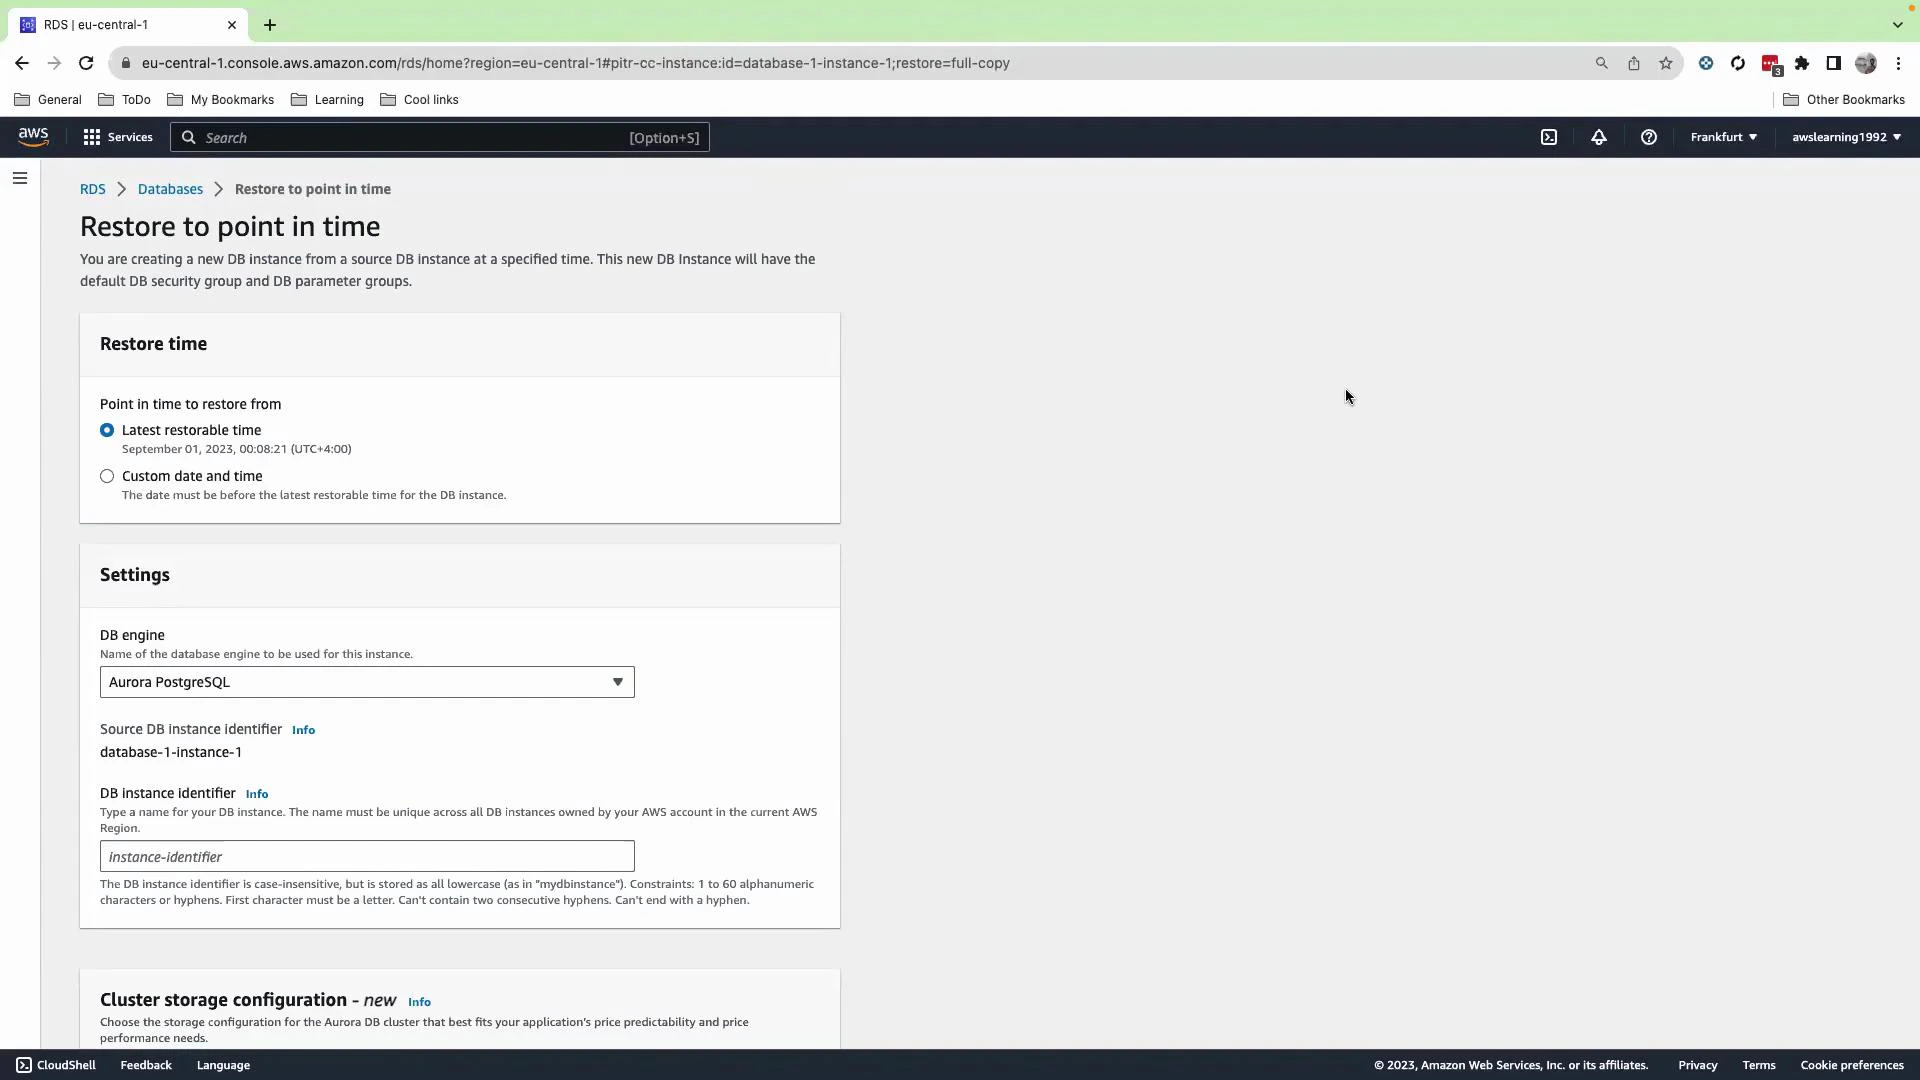
Console:- Select the cluster (or instance) you want to recover.
- Choose Actions → Restore to point in time.
- Pick a restore timestamp within the automated backup retention window.
- Provide a new DB identifier for the restored cluster and launch the restore. AWS will create a new DB cluster restored to that exact timestamp.
When to use manual snapshots vs. PITR
| Feature | Manual Snapshot | Point-in-Time Restore (PITR) |
|---|---|---|
| Retention | Indefinite, until you delete it | Limited to automated backup retention window |
| Use case | Pre-upgrade checkpoints, long-term archival | Recover to a specific recent timestamp (undo destructive migrations, accidental deletes) |
| Creation | Manual via console/CLI/API | Automated backups + transaction logs; restore initiated when needed |
| Cost | Snapshot storage costs while retained | Automated backup storage + restored cluster costs during recovery |
Point-in-time restore depends on automated backups (base snapshot + transaction logs). Ensure automated backups are enabled and the retention window covers the period you might need to recover. Manual snapshots are independent and are not removed by automated retention policies.
Typical recovery scenario (example workflow)
- A deployed migration accidentally adds a column and breaks queries in production.
- Immediately: identify the approximate time of failure.
- Use PITR to restore a new cluster to a timestamp just before the migration.
- Update the application connection string to point to the restored cluster while you fix the migration.
- Once the fix is validated, cut over or re-sync data as needed.
Make sure automated backups are enabled and your IAM user or role has necessary RDS permissions to create snapshots and perform restores. Note that storing snapshots and running restored clusters incur charges — review costs in your AWS Billing console.
Summary
- Manual snapshots give you permanent rollback points until you explicitly delete them.
- Automated backups + transaction logs enable PITR within the retention window.
- Use the console for quick operations and the AWS CLI for automation and scripting.
- Combine manual snapshots and PITR in your disaster recovery plan for flexibility.
Links and references
- Amazon RDS Backups and Snapshots
- Restore a DB Cluster to a Point in Time (AWS CLI)
- Amazon Aurora documentation