Welcome back. In the previous lesson we deployed the application to an EC2 instance. Submitting data from the web UI previously failed to persist because there was no database attached. In this guide we’ll:
  • Create an Amazon RDS PostgreSQL instance.
  • Configure network access so the EC2 application can connect.
  • Update the Flask app to use the RDS endpoint and verify data persistence.
This walkthrough assumes you have an EC2 instance running the application and appropriate AWS console access to create RDS instances and modify security groups. Step 1 — Create an RDS PostgreSQL instance
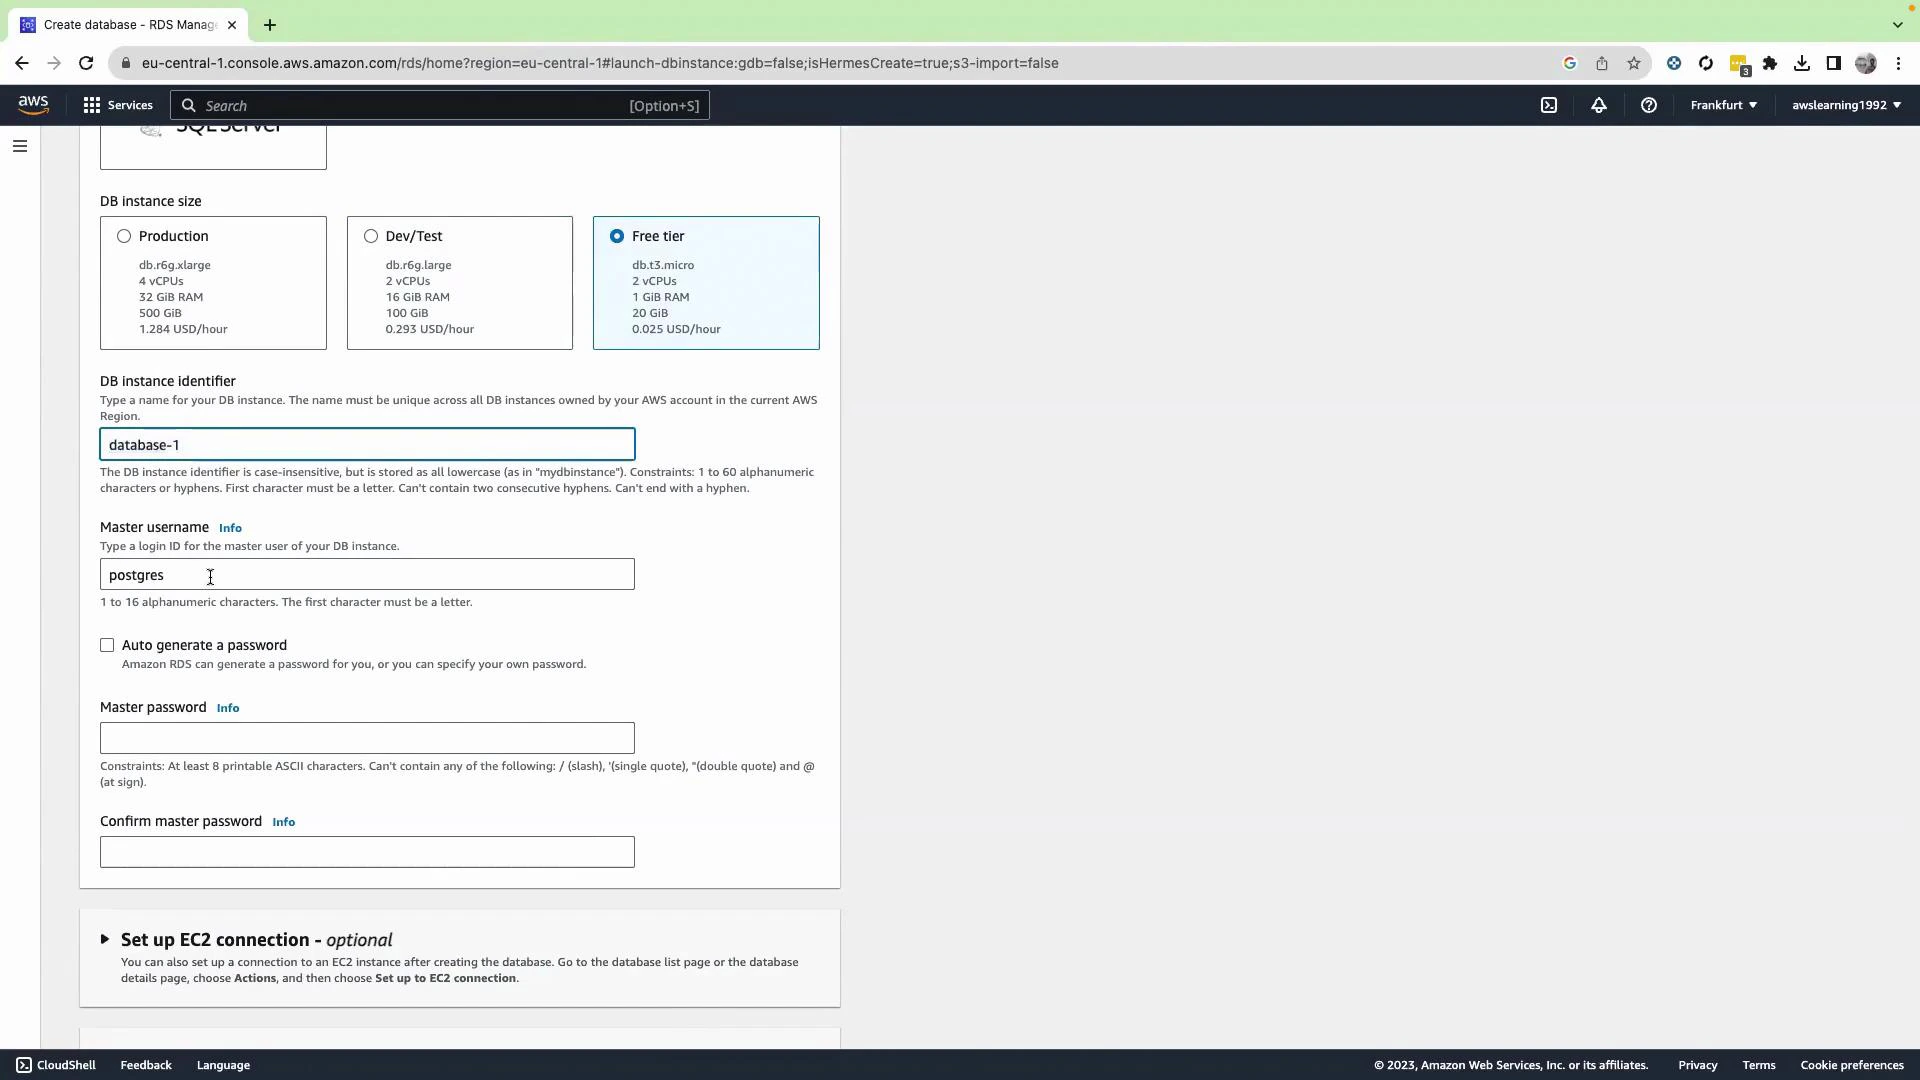
  1. Open the RDS console and click Create database.
  2. For a simple demo, choose the Easy create option and select PostgreSQL (Free tier if eligible).
  3. Provide a DB instance identifier (example: database-one) and the master username (example: postgres). Let RDS auto-generate the master password or set your own.
A screenshot of the AWS RDS "Create database" console showing DB instance size options (Production, Dev/Test, Free tier) and form fields for DB instance identifier and master username (set to "postgres"). The page also includes master password fields and an optional "Set up EC2 connection" section.
Optional — Use the “Set up EC2 connection” helper
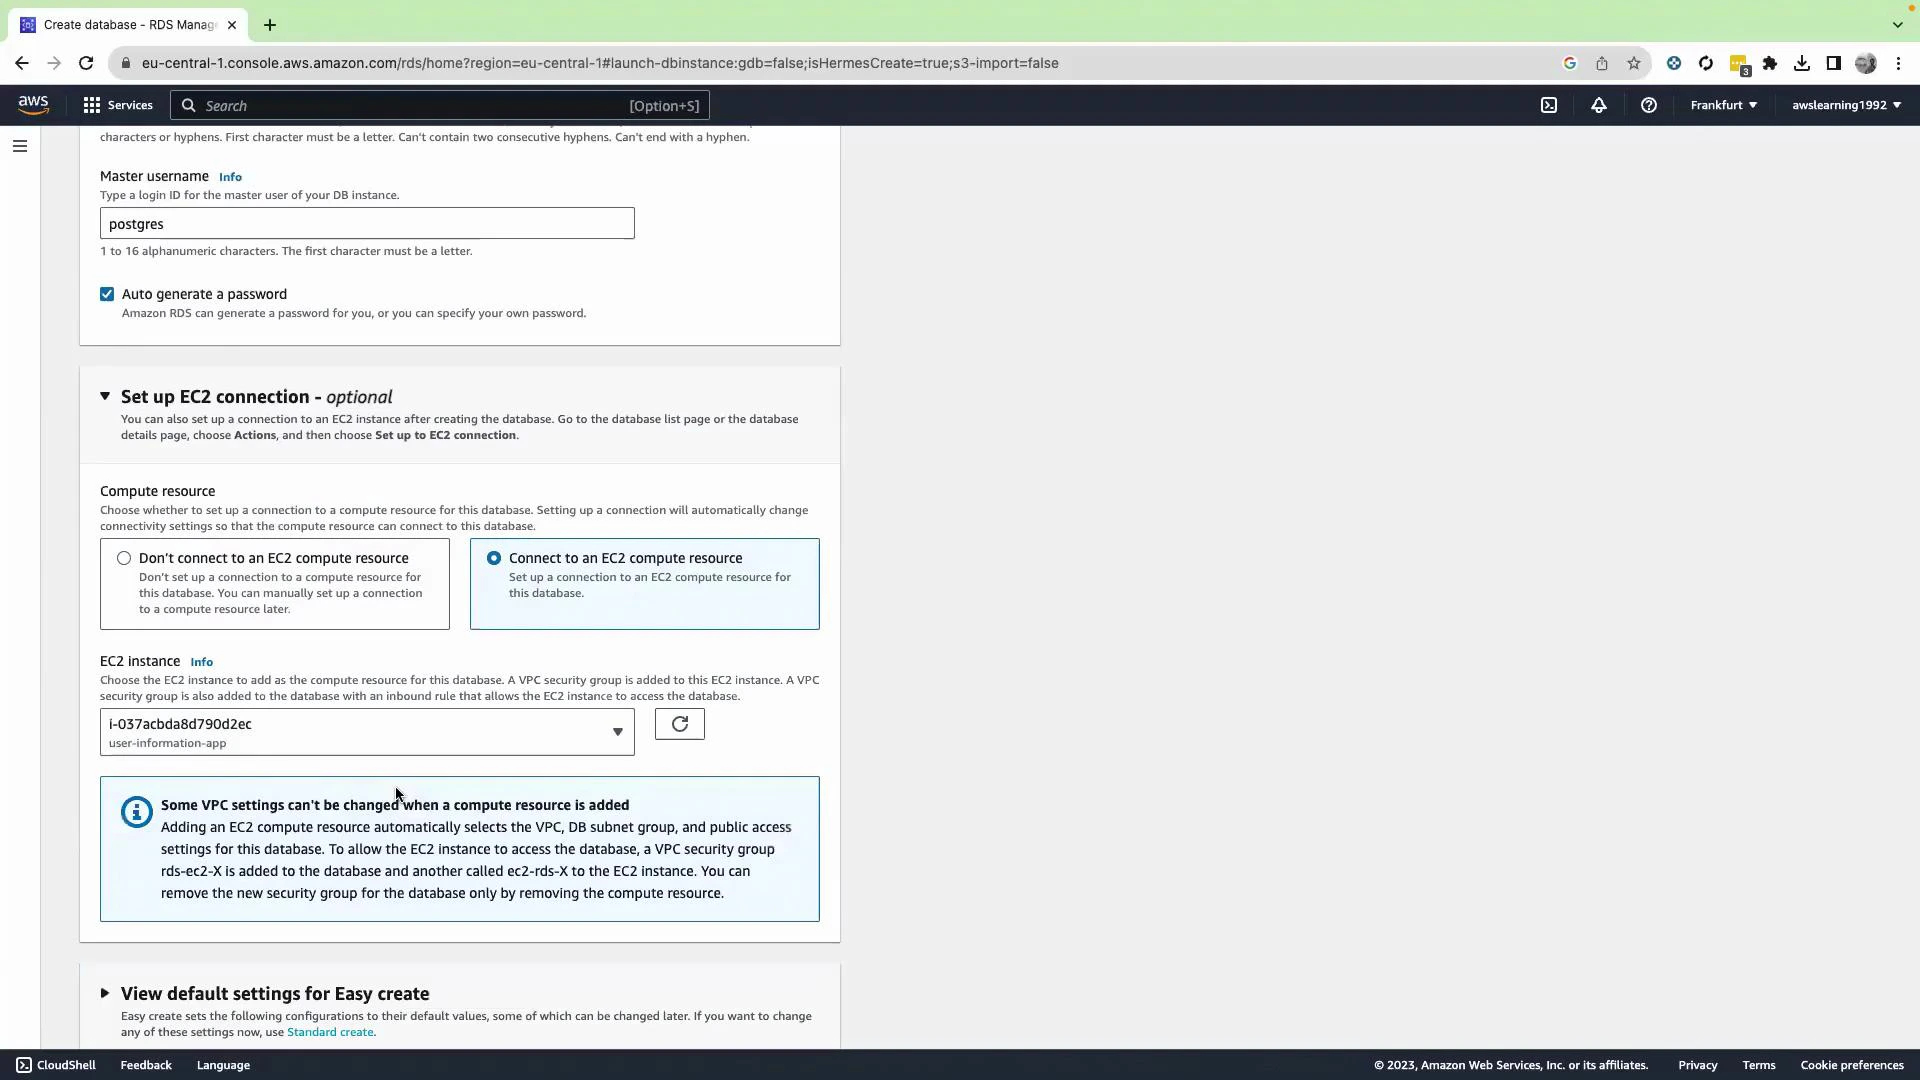
  • On the Create database page, there is an optional “Set up EC2 connection” section. Enabling it and selecting your EC2 instance gives RDS permission to adjust network settings (security group/VPC) so the selected EC2 instance can reach the DB instance directly.
  • This simplifies networking when your DB and EC2 instance are in different subnets or VPCs.
A screenshot of the AWS RDS "Create database" console showing the master username set to "postgres" and the optional "Set up EC2 connection" section selected. It also displays an EC2 instance dropdown and an informational box about VPC settings and compute resources.
When RDS shows the auto-generated master password, copy it immediately and store it securely. The password is only visible once on the creation success page — refreshing will hide it and require a reset via the RDS console.
Step 2 — Wait for the instance and capture connection details
  • After creation, wait until the DB instance status becomes Available.
  • Open the DB details and copy the endpoint and port (PostgreSQL default port: 5432). Note the master username and password you used/received.
Quick reference — typical PostgreSQL connection values
ParameterExample value / notes
Host (endpoint)database-1.caywlfxrbtml.eu-central-1.rds.amazonaws.com
Port5432
Usernamepostgres (or your master user)
PasswordAuto-generated or chosen at creation — store it securely
Database namepostgres (default)
Table namepostgres_user (example used in code)
Step 3 — Connect to your EC2 instance
  • SSH into the EC2 instance running the application (or use the EC2 console Connect option).
  • Become root if necessary and navigate to the application directory to edit the code.
Step 4 — Update the Flask application to use RDS Edit your application configuration to point to the RDS endpoint and credentials you copied. The example below shows an app.py that:
  • Uses psycopg2 to connect to PostgreSQL.
  • Creates the postgres_user table if it does not exist.
  • Starts the Flask app listening on 0.0.0.0:5000.
from flask import Flask, render_template, request
import psycopg2
from psycopg2 import sql

app = Flask(__name__)

# RDS database configuration
db_host = 'database-1.caywlfxrbtml.eu-central-1.rds.amazonaws.com'
db_port = '5432'
db_user = 'postgres'
db_password = '02kq1ON6PFt8Lj3rf08h'
db_name = 'postgres'
table_name = 'postgres_user'

# Connect to the database
def get_db_connection():
    try:
        connection = psycopg2.connect(
            host=db_host,
            port=db_port,
            user=db_user,
            password=db_password,
            database=db_name
        )
        return connection
    except psycopg2.Error as e:
        print("Connection to the database failed:", e)
        return None

# Create the table if it doesn't exist (uses psycopg2.sql for safe identifier formatting)
def create_table():
    connection = get_db_connection()
    if not connection:
        print("Failed to connect to the database")
        return

    try:
        with connection.cursor() as cursor:
            cursor.execute(
                sql.SQL(
                    "CREATE TABLE IF NOT EXISTS {} ("
                    "id SERIAL PRIMARY KEY, "
                    "name VARCHAR(255) NOT NULL, "
                    "email VARCHAR(255) NOT NULL, "
                    "country VARCHAR(255) NOT NULL"
                    ")"
                ).format(sql.Identifier(table_name))
            )
        connection.commit()
        print("Table created successfully!")
    except psycopg2.Error as e:
        print("Error while creating table:", e)
    finally:
        connection.close()

if __name__ == '__main__':
    create_table()
    app.run(host='0.0.0.0', port=5000)
Do not hardcode production credentials in source code. Use environment variables, AWS Secrets Manager, or AWS Systems Manager Parameter Store to manage secrets securely. Also ensure security groups and VPC/subnet routing restrict access to only necessary IPs and services.
Example: verifying the project layout and editing app.py on the EC2 instance
[ec2-user@ip-172-31-19-201 ~]$ sudo su
[root@ip-172-31-19-201 ec2-user]# cd
[root@ip-172-31-19-201 ~]# ls -lrt
total 0
drwxr-xr-x. 4 root root 49 Aug 31 22:08 aws-rds
[root@ip-172-31-19-201 ~]# cd aws-rds/
[root@ip-172-31-19-201 aws-rds]# ls -lrt
total 4
-rw-r--r--. 1 root root 129 Aug 31 22:08 README.md
drwxr-xr-x. 3 root root 37 Aug 31 22:09 db-app
[root@ip-172-31-19-201 aws-rds]# cd db-app/
[root@ip-172-31-19-201 db-app]# ls -lrt
total 4
-rw-r--r--. 1 root root 3085 Aug 31 22:08 app.py
drwxr-xr-x. 2 root root 65 Aug 31 22:09 templates
[root@ip-172-31-19-201 db-app]# vim app.py
[root@ip-172-31-19-201 db-app]#
Step 5 — Start the Flask app and test
  • Start the Flask application (for example: python3 app.py or using your process manager).
  • Open the application URL in your browser and submit user details.
  • The app will insert rows into the RDS PostgreSQL table.
Verify stored records
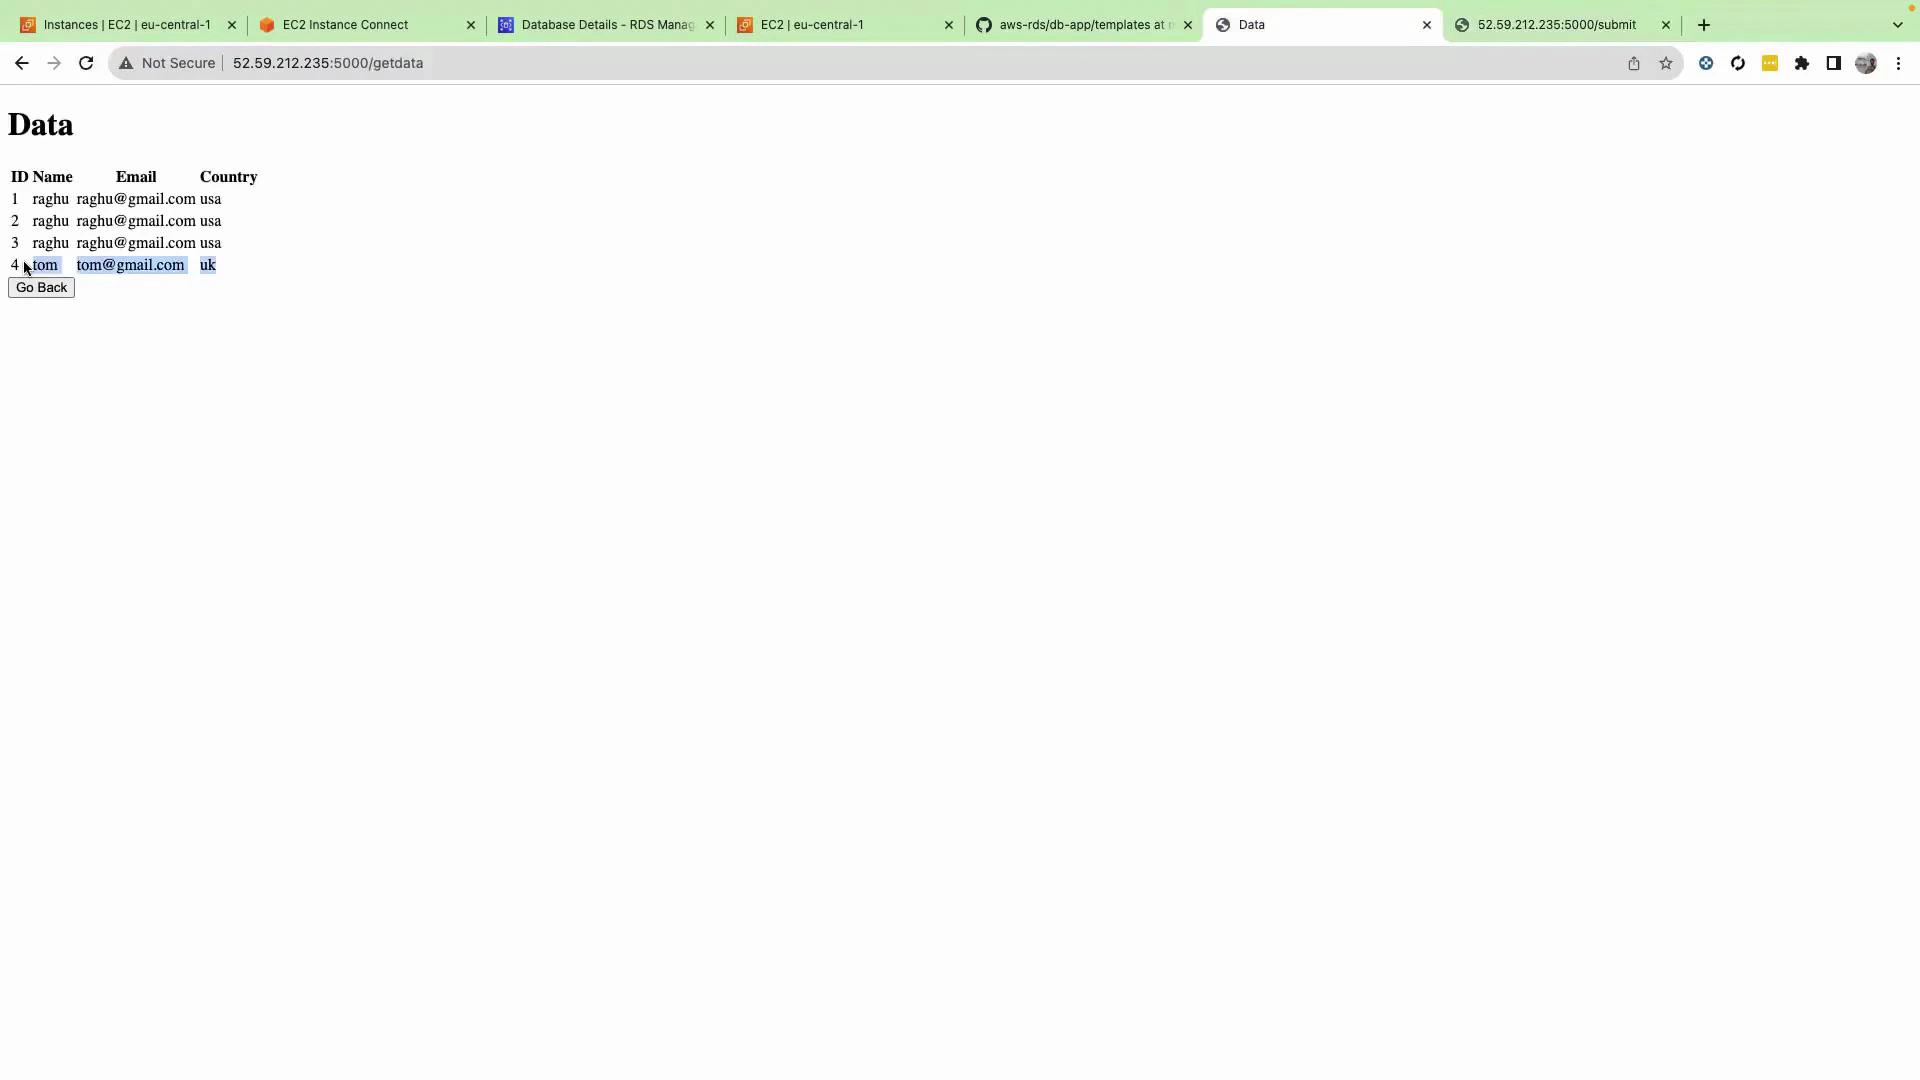
  • The sample application provides a /getdata endpoint that queries the table and renders results.
  • Visit http://<ec2_ip>:5000/getdata to confirm entries are stored.
A screenshot of a simple web page titled "Data" showing a small table of user records (ID, Name, Email, Country) with entries like "raghu" and "tom" and a "Go Back" button. The browser tab bar and the URL (52.59.212.235:5000/getdata) are visible at the top.
Summary
  • Created a PostgreSQL instance in Amazon RDS and captured the endpoint, port, username, and password.
  • Used the optional RDS “Set up EC2 connection” helper to simplify networking when applicable.
  • Updated the Flask application to connect to the RDS endpoint, ensuring the required table is created at startup.
  • Verified data insertion and retrieval via the application UI and the /getdata endpoint.
Further reading and references That concludes this hands-on lesson on connecting a Flask application on EC2 to a PostgreSQL database hosted in Amazon RDS. Thank you for following along.

Watch Video

Practice Lab