Prerequisites
- An AWS account with permissions to create RDS instances.
- Familiarity with the AWS Management Console.
- Decide the AWS Region to use (billing and latency depend on region).
Quick overview
- Choose the AWS Region.
- Open the RDS console and start Create database.
- Select MariaDB and Free tier options.
- Configure DB instance identifier and master credentials.
- Create the database and retrieve credentials.
- Review instance details, monitoring, backups, and tags.
Step-by-step: Create the MariaDB instance
- Sign in to the AWS Management Console and confirm the Region (for this example: Europe (Frankfurt)).
- Open Amazon RDS from the Services menu or Recently visited apps.
- On the RDS landing page click Create database.
- Choose Easy create and select MariaDB. If you’re eligible for the Free Tier, choose the Free tier configuration.
- Set a DB instance identifier (name). Use a descriptive name to identify project or environment — for example,
my-first-db. - For the master username, use a meaningful admin name (the console defaults to
admin). For the password, click Auto-generate password so RDS creates a strong password and displays it immediately.
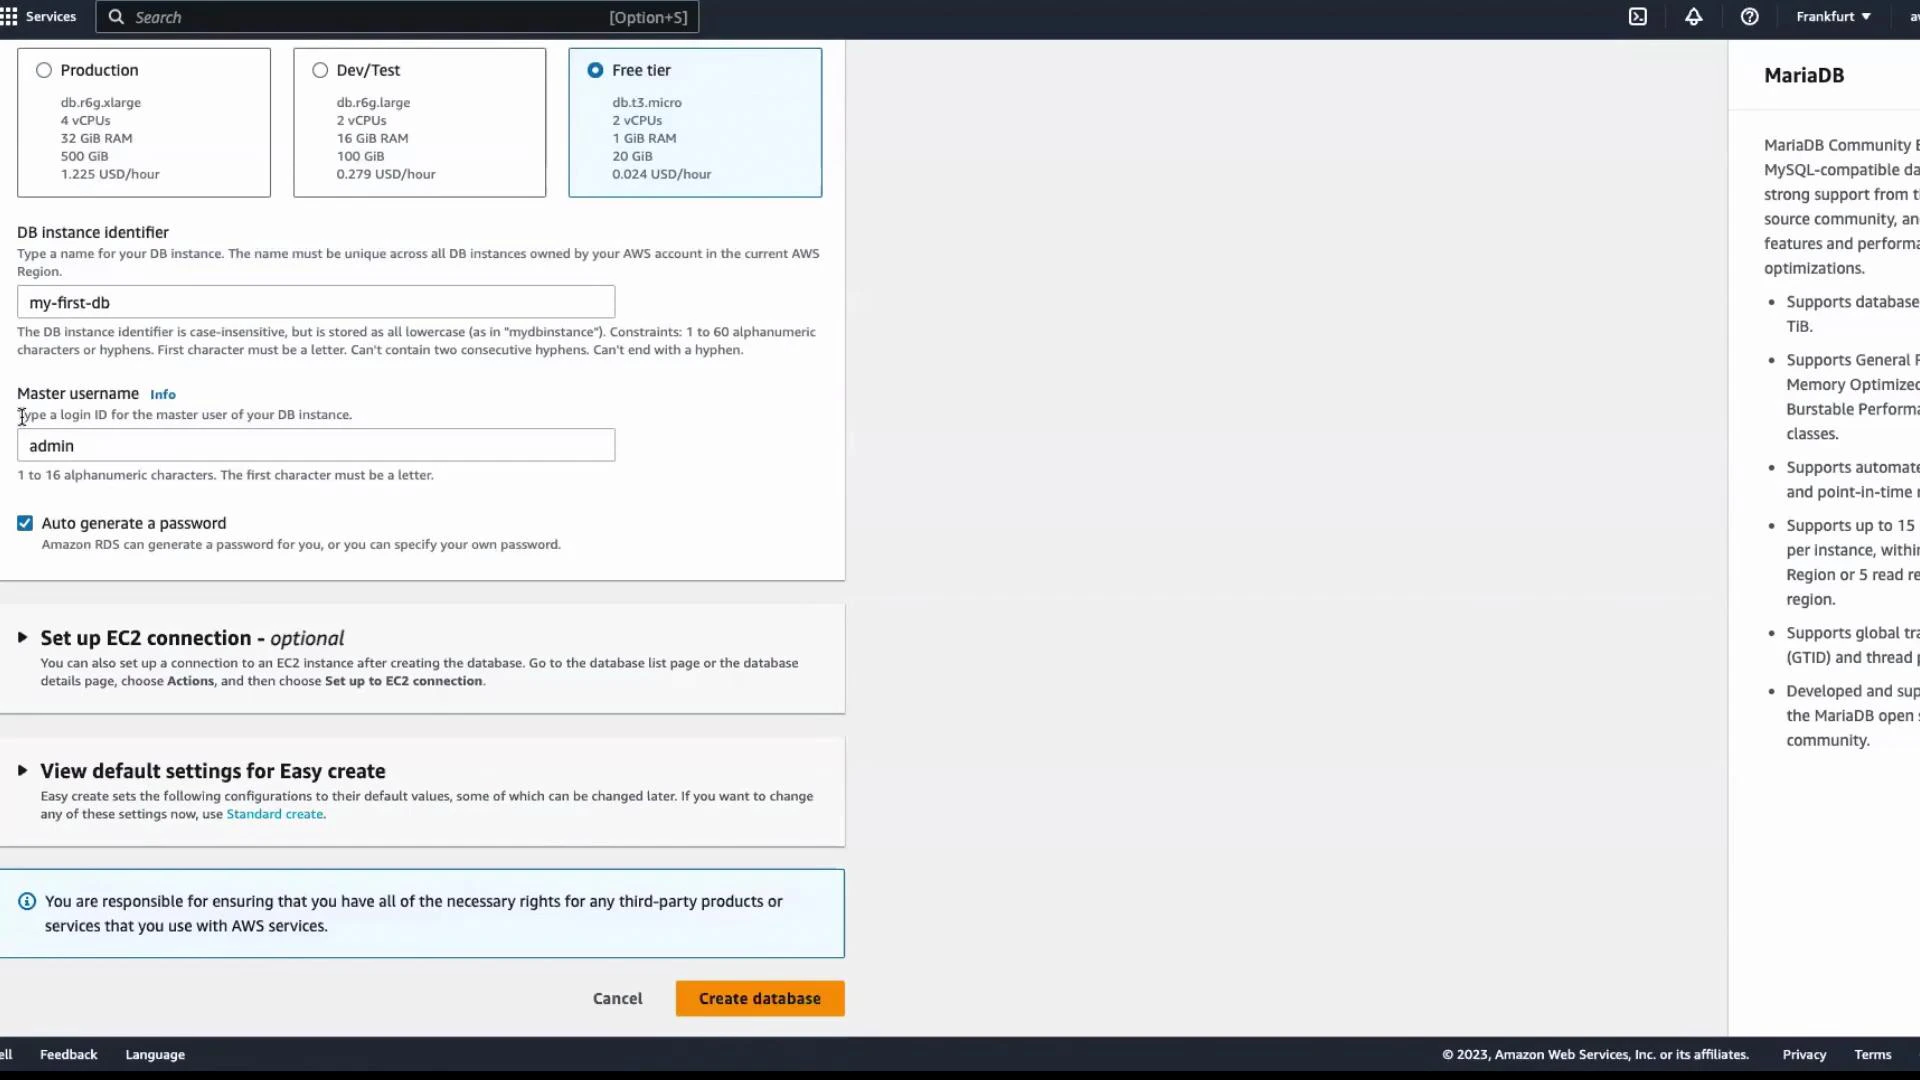
- Confirm the settings and click Create database.
What happens after you click Create
- RDS begins automated provisioning. Typical availability time is around 5 minutes, but provisioning can take up to 20 minutes depending on region and configuration.
- While provisioning, the DB instance status will read Creating. Use the Refresh button to update the console view.
Important: The master password is shown only once during creation. After the DB is created successfully, the master password will not be visible in the RDS console. If you lose it, you’ll need to reset the password or create a new user.
After creation: Instance Available
When provisioning completes the instance status becomes Available. At that point you can view CPU utilization and other performance metrics in the console. Click the DB instance name to open the details page. The console groups instance information into these sections:- Connectivity & security
- Monitoring (metrics)
- Logs & events
- Configuration
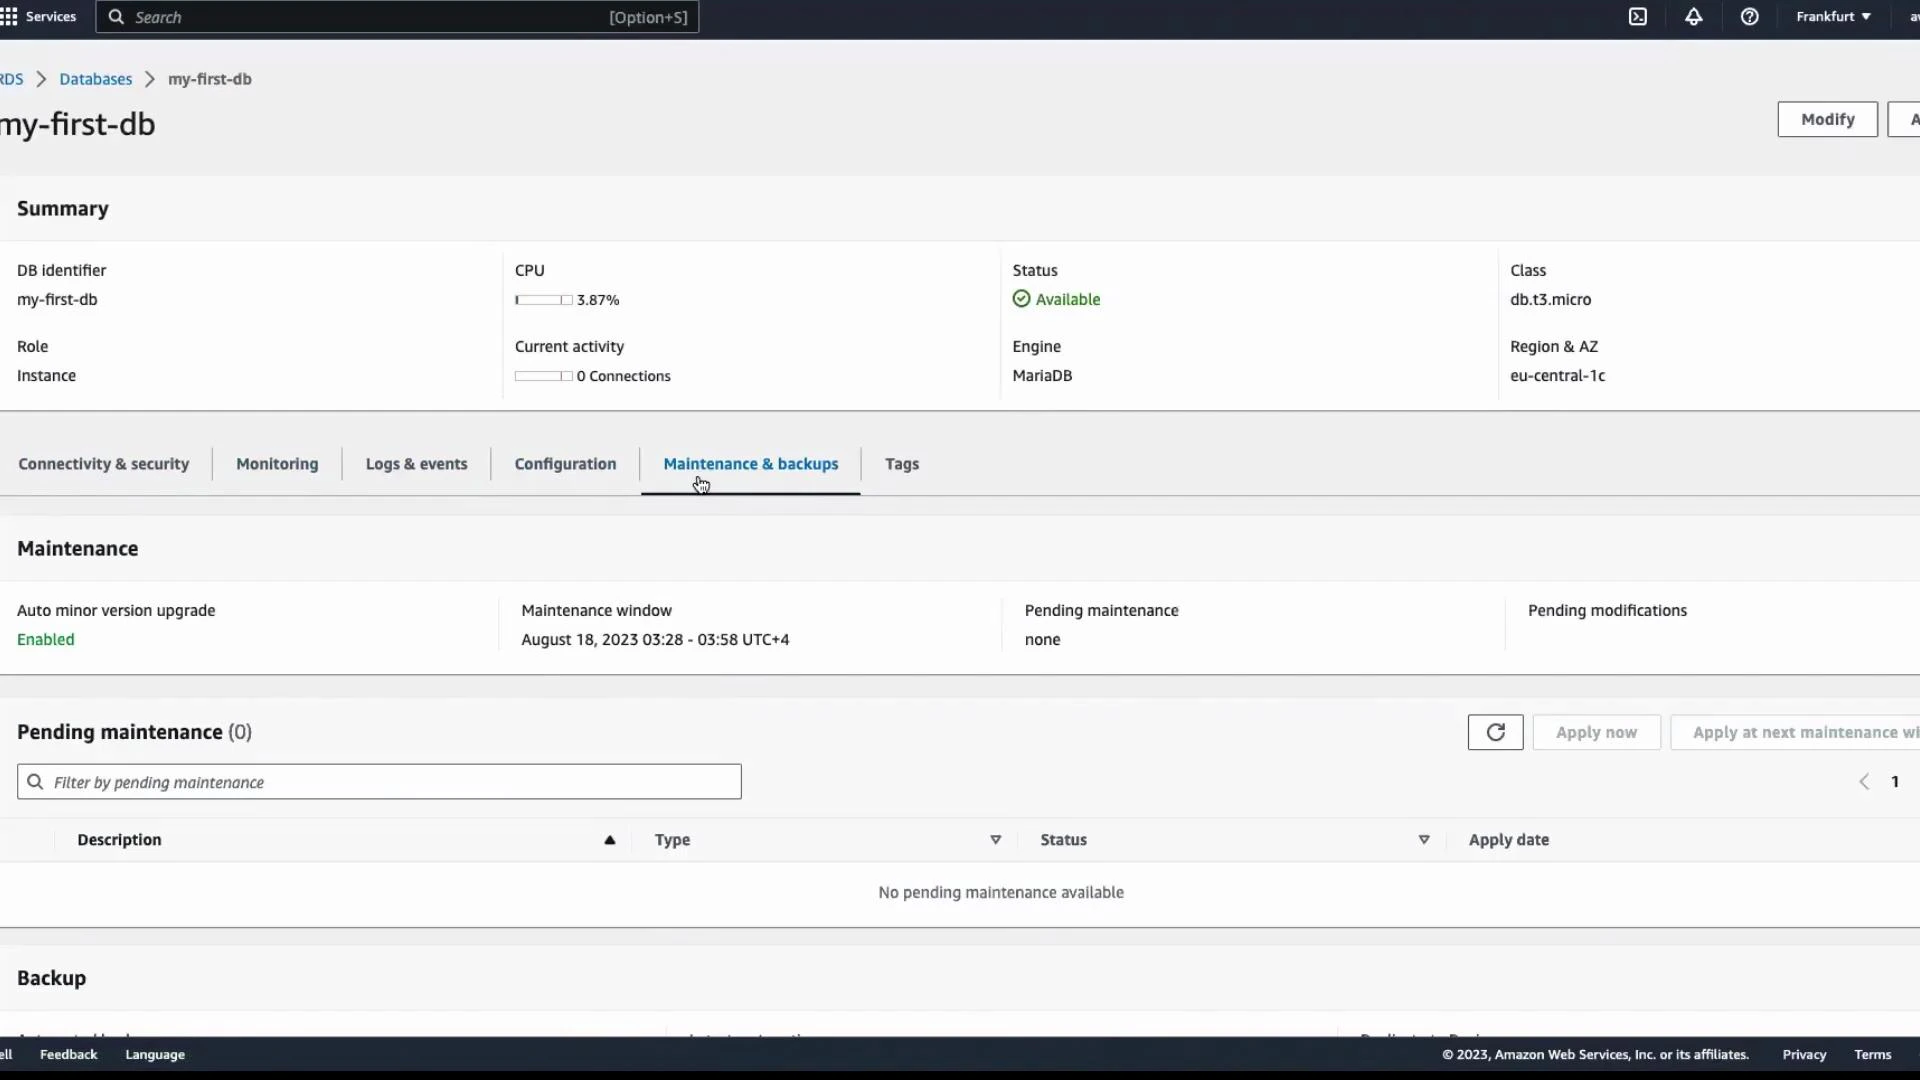
- Maintenance & backups
- Tags
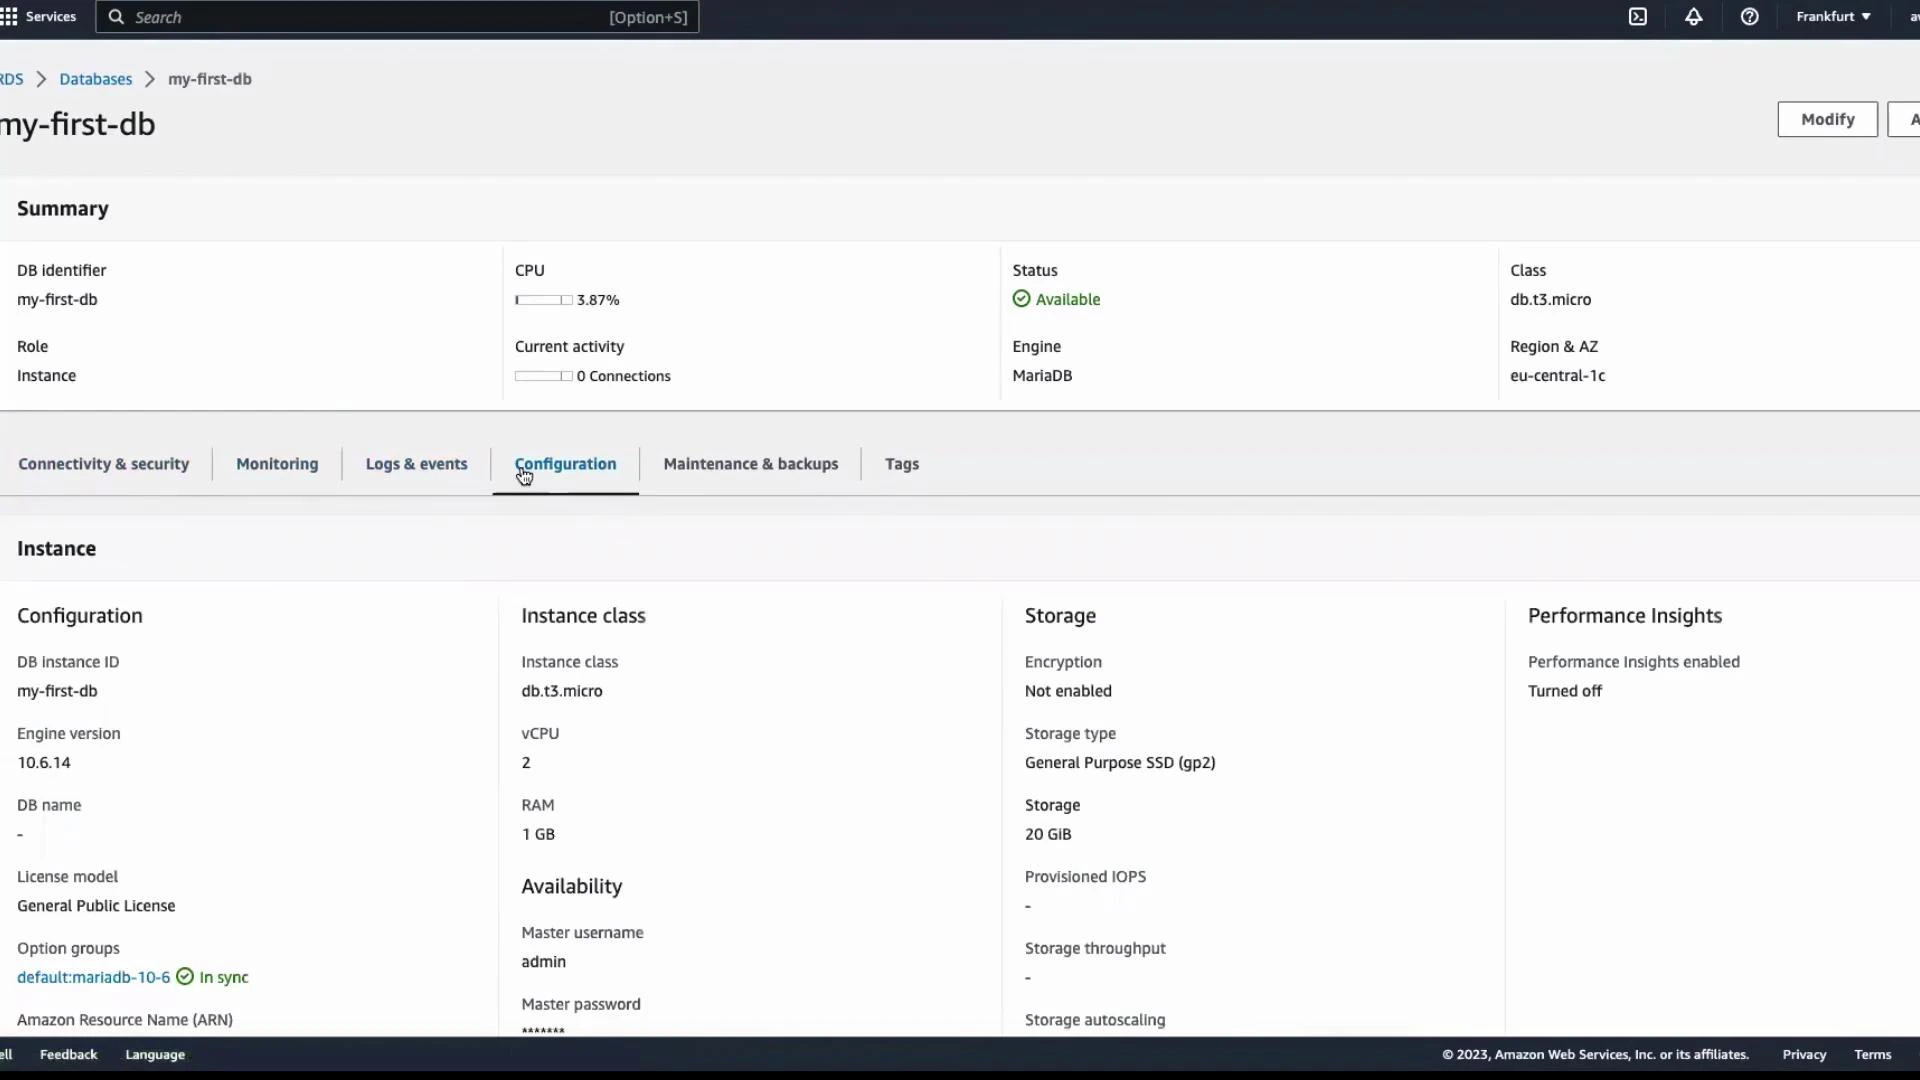
- Configuration displays instance class (for example
db.t3.micro), CPU, memory, storage type and size. - Monitoring shows metrics (CPU, memory, disk I/O) useful for understanding resource consumption and guiding right-sizing decisions.
Maintenance, backups, and tags
Maintenance and backups are managed separately:- Enable automatic minor version upgrades if you want RDS to apply non-disruptive patches automatically.
- View or modify the maintenance window and see any pending maintenance operations.
Deleting the DB instance
To delete the DB instance:- Select the DB instance.
- Choose Actions → Delete.
- The console prompts you to create a final snapshot. If you do not need a final backup, uncheck Create final snapshot (skip final snapshot), type the confirmation text (often the DB instance identifier), and click Delete.
Choosing an RDS engine
MariaDB is one of several managed database engines available on Amazon RDS. Choose an engine based on application compatibility, required features, performance needs, licensing, and operational preferences.| Engine | Use case | Reference |
|---|---|---|
| MariaDB | MySQL-compatible workloads that want MariaDB features | https://mariadb.org/ |
| MySQL | Widely-used open-source relational database | https://www.mysql.com/ |
| PostgreSQL | Advanced SQL features, extensions, analytics workloads | https://www.postgresql.org/ |
| Oracle Database | Enterprise features and Oracle-specific workloads (licensed) | https://www.oracle.com/database/ |
| Microsoft SQL Server | Windows/.NET heavy workloads and enterprise features | https://www.microsoft.com/en-us/sql-server |
| Amazon Aurora | High-performance, MySQL- or PostgreSQL-compatible managed DB | https://aws.amazon.com/rds/aurora/ |
Links and references
- Amazon RDS documentation: https://docs.aws.amazon.com/rds/
- MariaDB: https://mariadb.org/
- MySQL: https://www.mysql.com/
- PostgreSQL: https://www.postgresql.org/
- Amazon Aurora: https://aws.amazon.com/rds/aurora/