

Verifying Deployment in Azure
After your deployment finishes, confirm that all resources (VM, network interfaces, disks, VNet, NSGs, public IP) show a Succeeded status: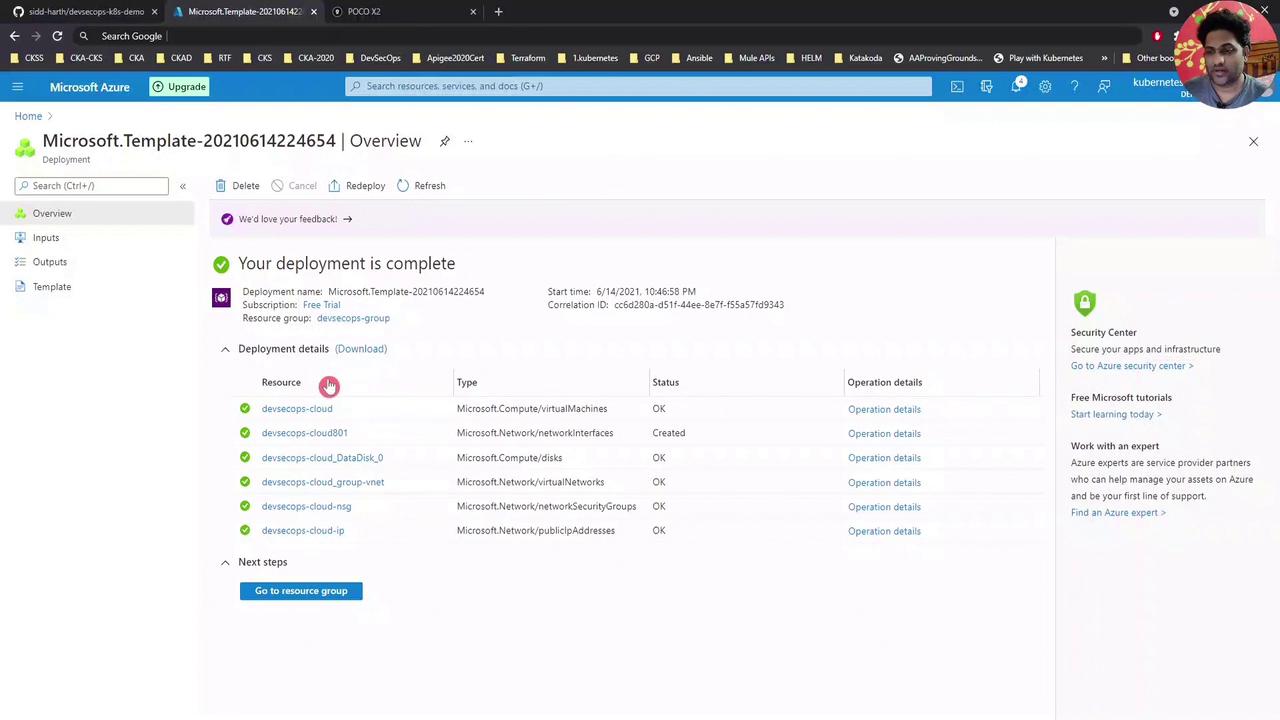
Configuring a DNS Name
Assigning a DNS label to your VM’s public IP makes SSH and service URLs easier to remember:- In the Azure portal, go to your Resource Group.
- Select the Public IP resource (e.g.,
devsecops-cloud-ip). - Under Configuration, enter a DNS name label (e.g.,
DevSecOpsDemo). - Click Save.
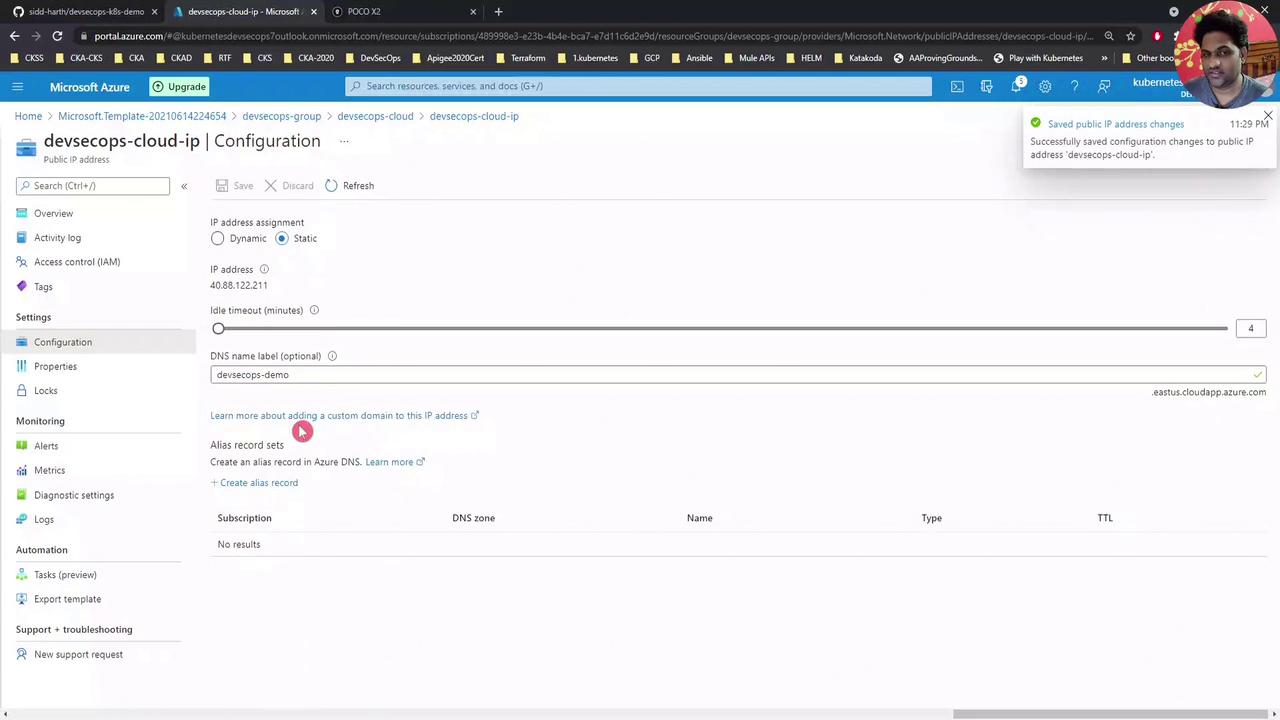
DevSecOpsDemo.eastus.cloudapp.azure.com
DNS changes can take a few minutes to propagate. Use
nslookup DevSecOpsDemo.eastus.cloudapp.azure.com to verify resolution.Connecting via SSH
Use any SSH client. Here’s an example with MobaXterm: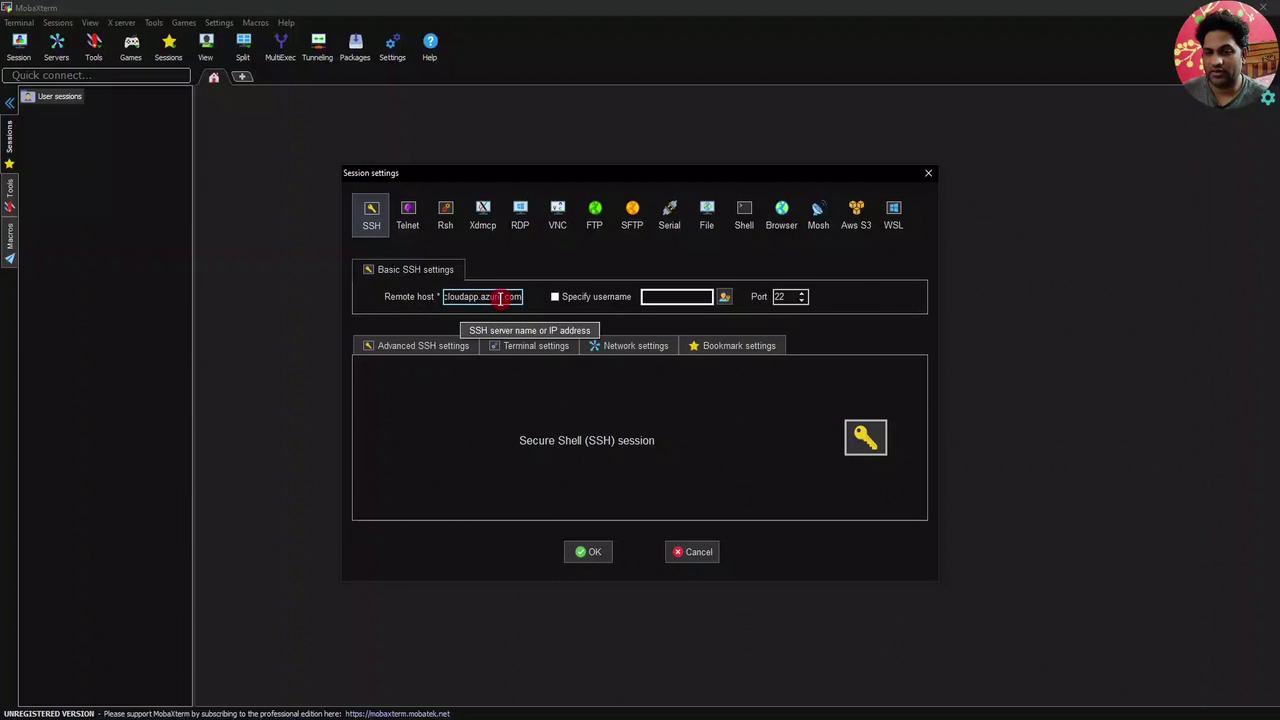
- Remote host:
DevSecOpsDemo.eastus.cloudapp.azure.com - Username: your VM admin (e.g.,
devsecops)
Preparing the VM
Switch to the root user to avoid typingsudo repeatedly:
Cloning the Demo Repository
Download the demo scripts and navigate to the install script directory:Running the Install Script
Theinstall-script.sh automates installation of:
Always review scripts from external sources before executing them on production systems.
Deploying a Sample Nginx Application
-
Create the Nginx pod:
-
Check pod status:
Watch until it’s running:
-
Expose it via a NodePort service:
-
In your browser, go to:
Next, we’ll configure a Jenkins pipeline to automate builds and deployments in Kubernetes.
Links and References
- Azure Virtual Machines Documentation
- Docker Documentation
- Kubernetes Basics
- Jenkins User Handbook
- Apache Maven Project