

- Configuring the Maven POM
- Updating the Jenkinsfile
- Installing and configuring the PIT plugin in Jenkins
- Running the pipeline and diagnosing failures
- Inspecting coverage and mutation results
- Strengthening unit tests to kill mutations
- Re-running tests and accessing reports
Table of Contents
- Configure Maven POM
- Update Jenkinsfile for Mutation Tests
- Install PIT Plugin in Jenkins
- Run Pipeline & Analyze Failures
- Inspect Coverage & Mutation Reports
- Understanding PIT Mutators
- Improve Tests to Kill Mutations
- Re-Run Mutation Tests
- Access Reports on Jenkins Agent
1. Configure Maven POM
Open yourpom.xml and ensure you have Spring Boot and JaCoCo configured. Then add the PIT plugin:
The
<mutationThreshold> of 70% fails the build if the mutation score is below 70%. Reports are generated under target/pit-reports.2. Update Jenkinsfile for Mutation Tests
Add a dedicated stage for PIT after unit tests. Use this example pipeline:3. Install PIT Plugin in Jenkins
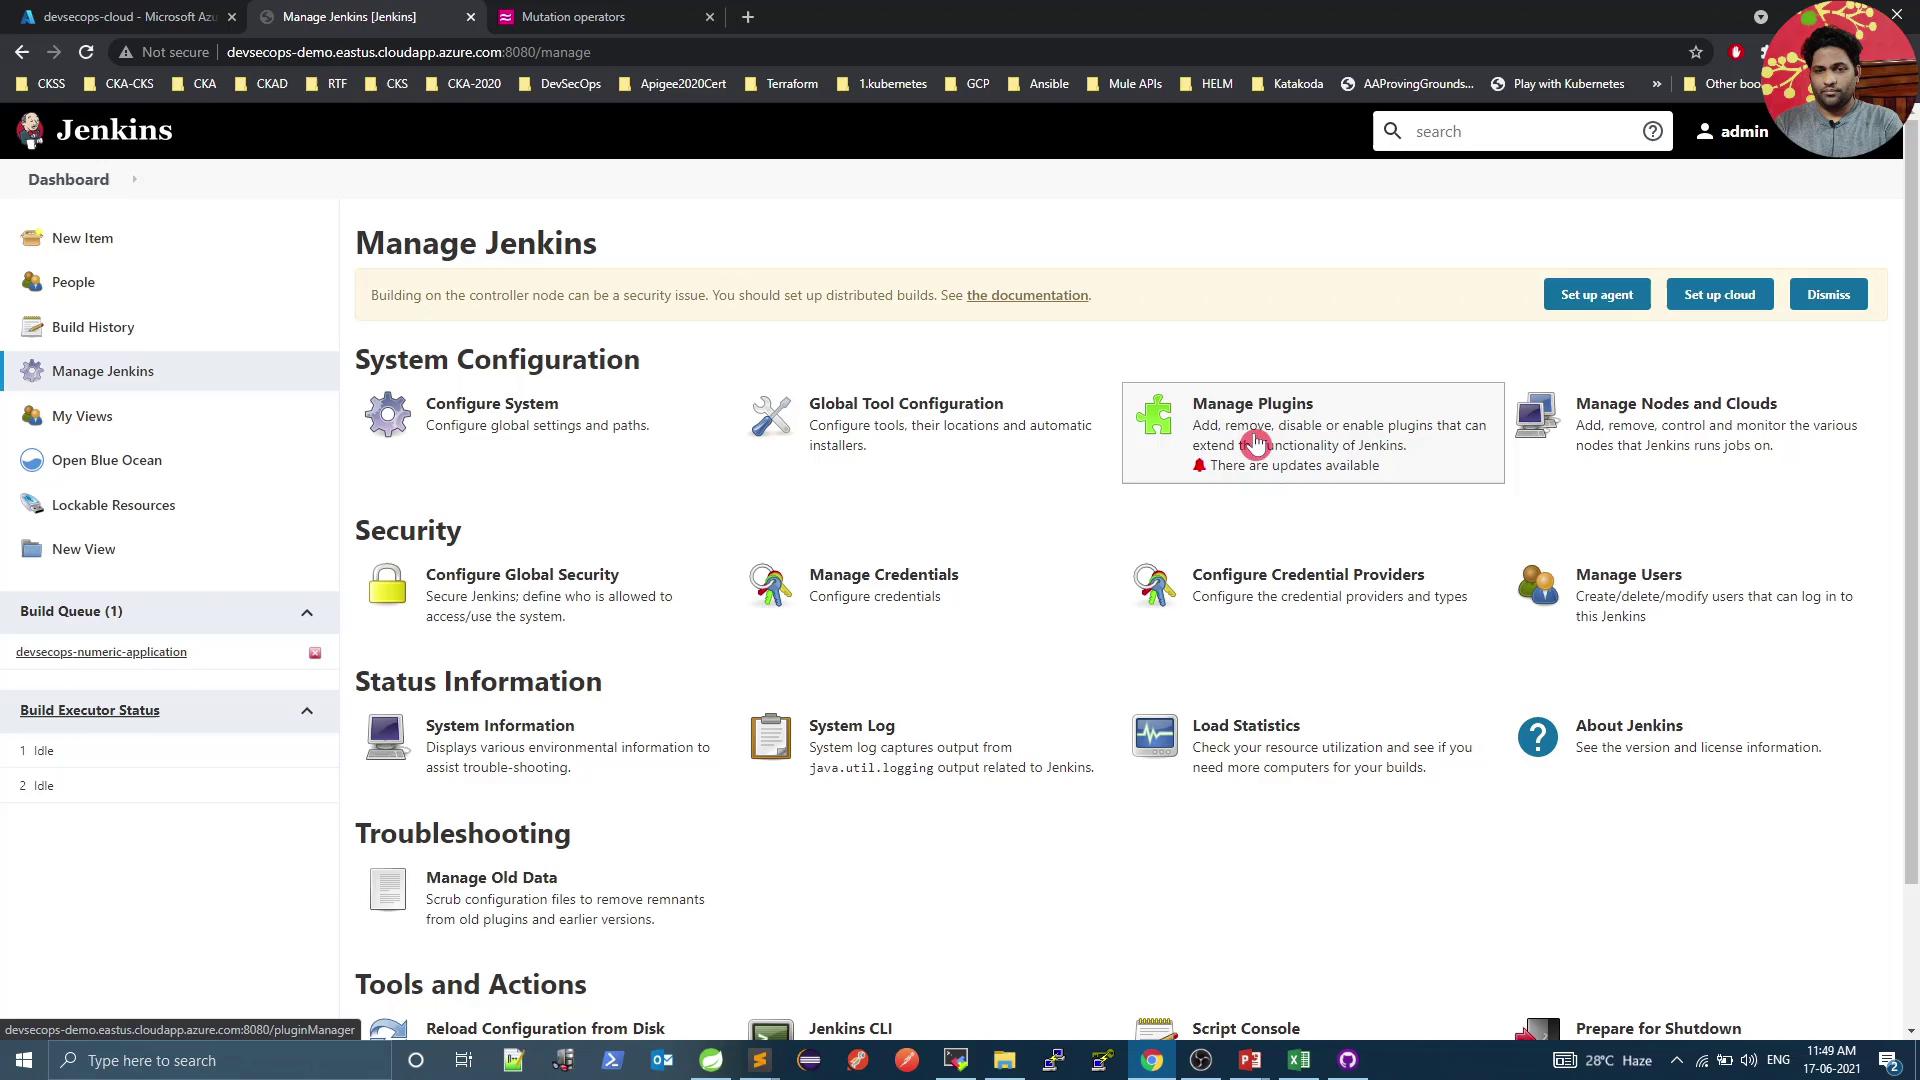
- Go to Manage Jenkins → Manage Plugins
- Search for PIT Mutation Plugin and install
- Configure the report path:
4. Run Pipeline & Analyze Failures
Trigger the Jenkins pipeline. If the mutation score is below threshold, the stage will fail: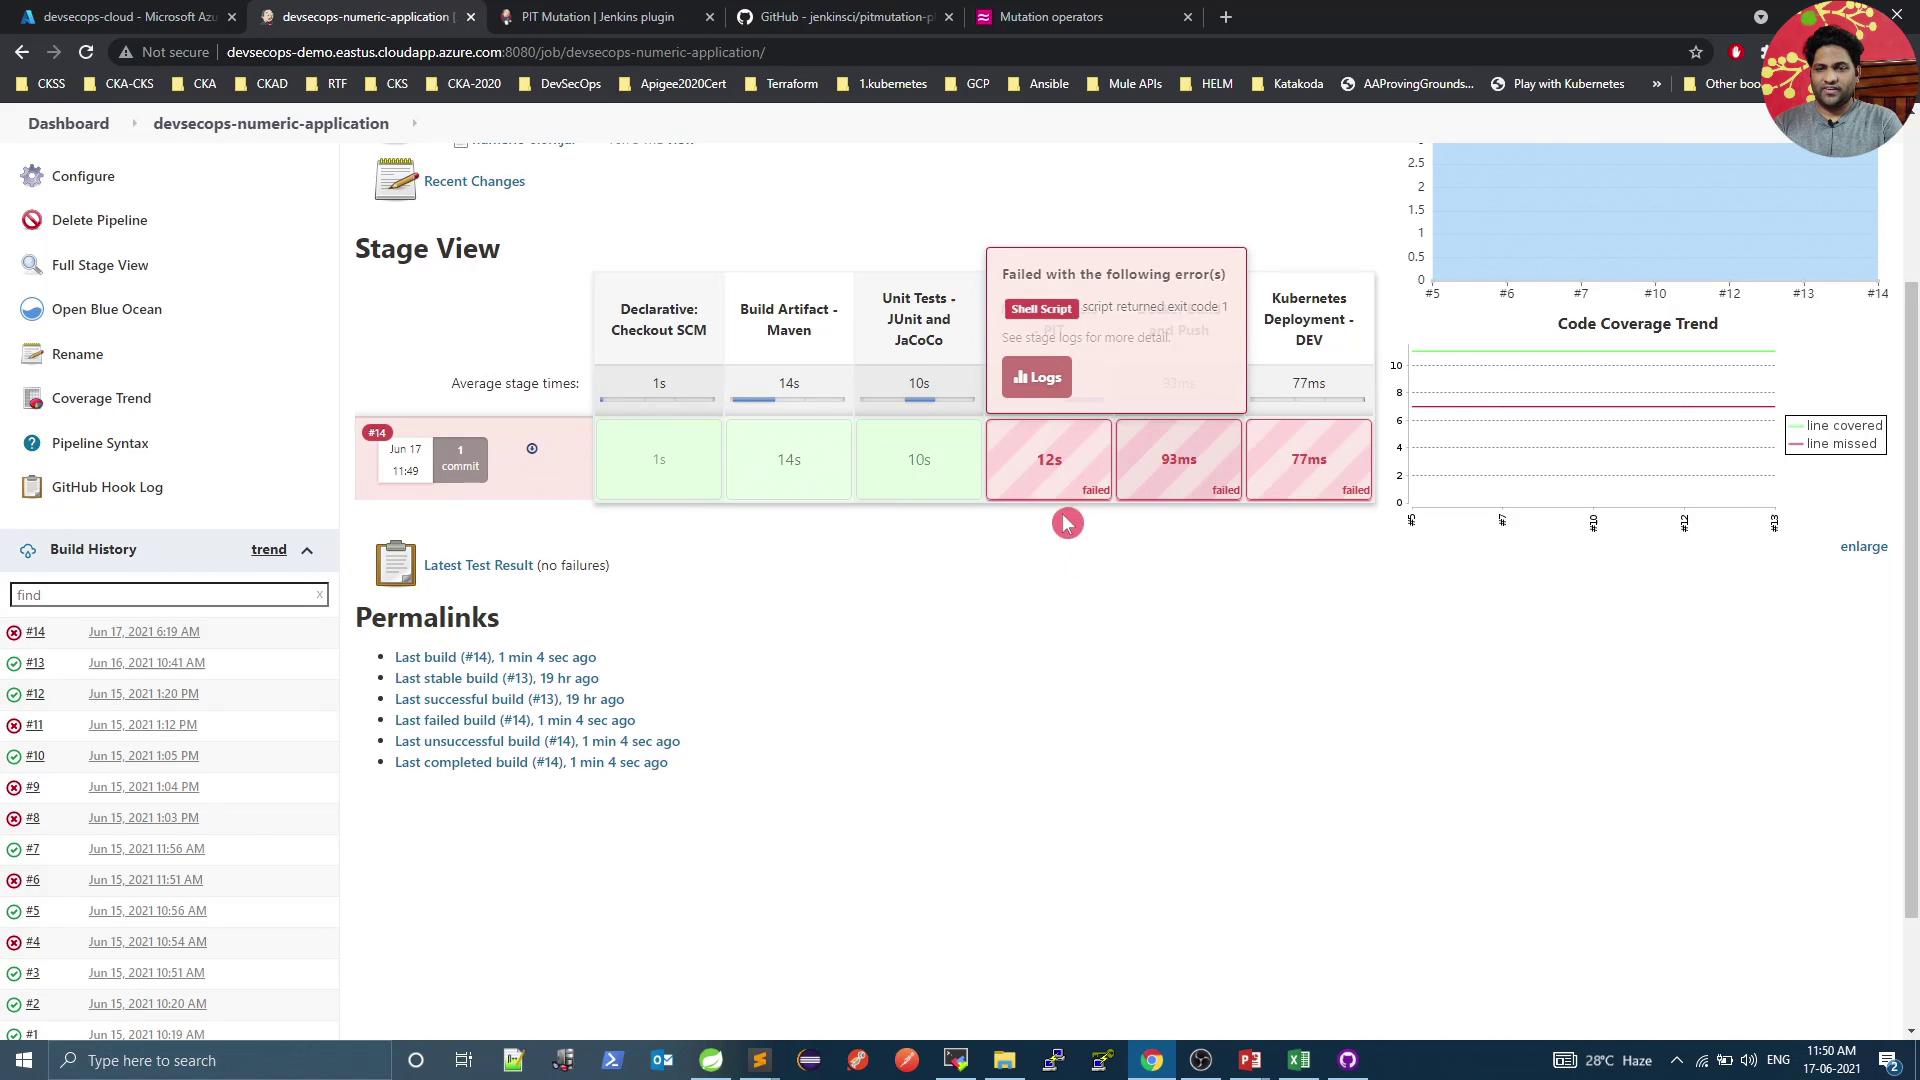
A low mutation score indicates untested code paths. Strengthen your tests to catch mutated behavior.
5. Inspect Coverage & Mutation Reports
Even on failure, Jenkins archives test reports. View the JaCoCo summary: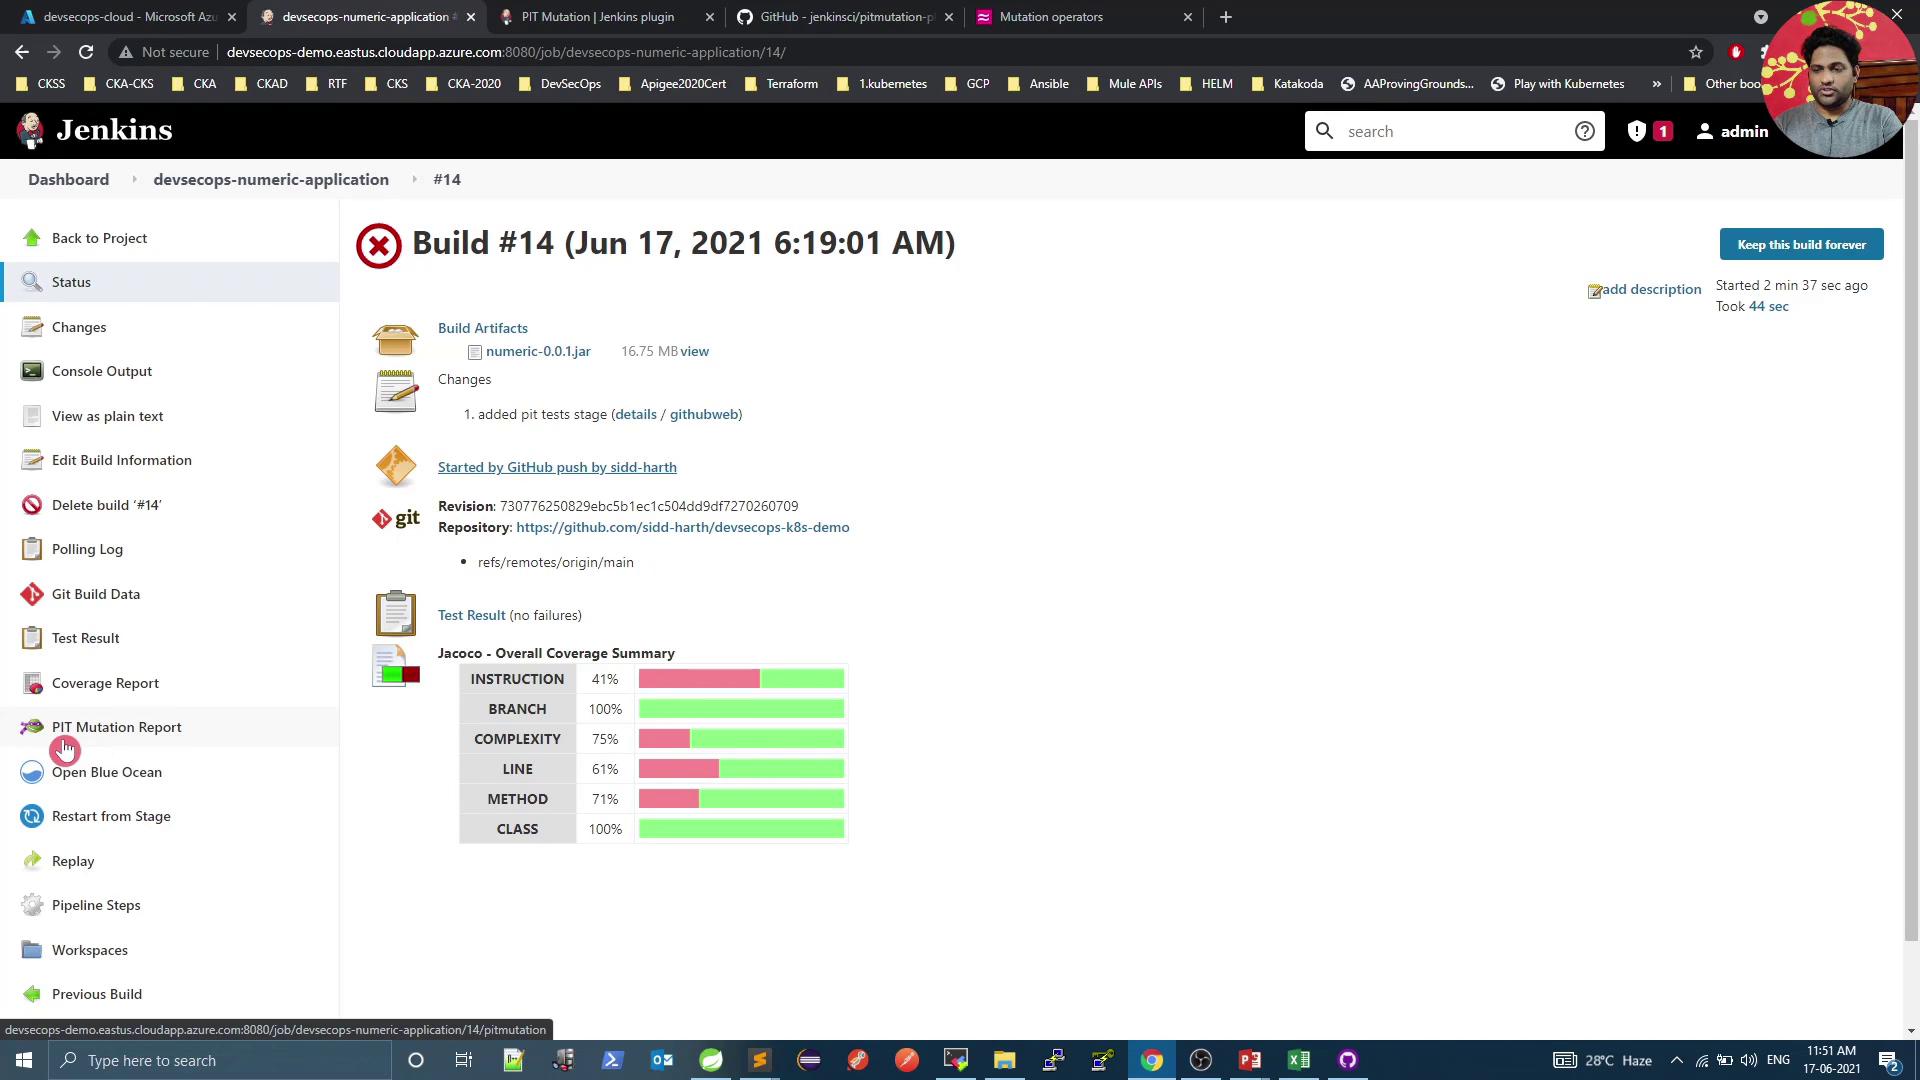
6. Understanding PIT Mutators
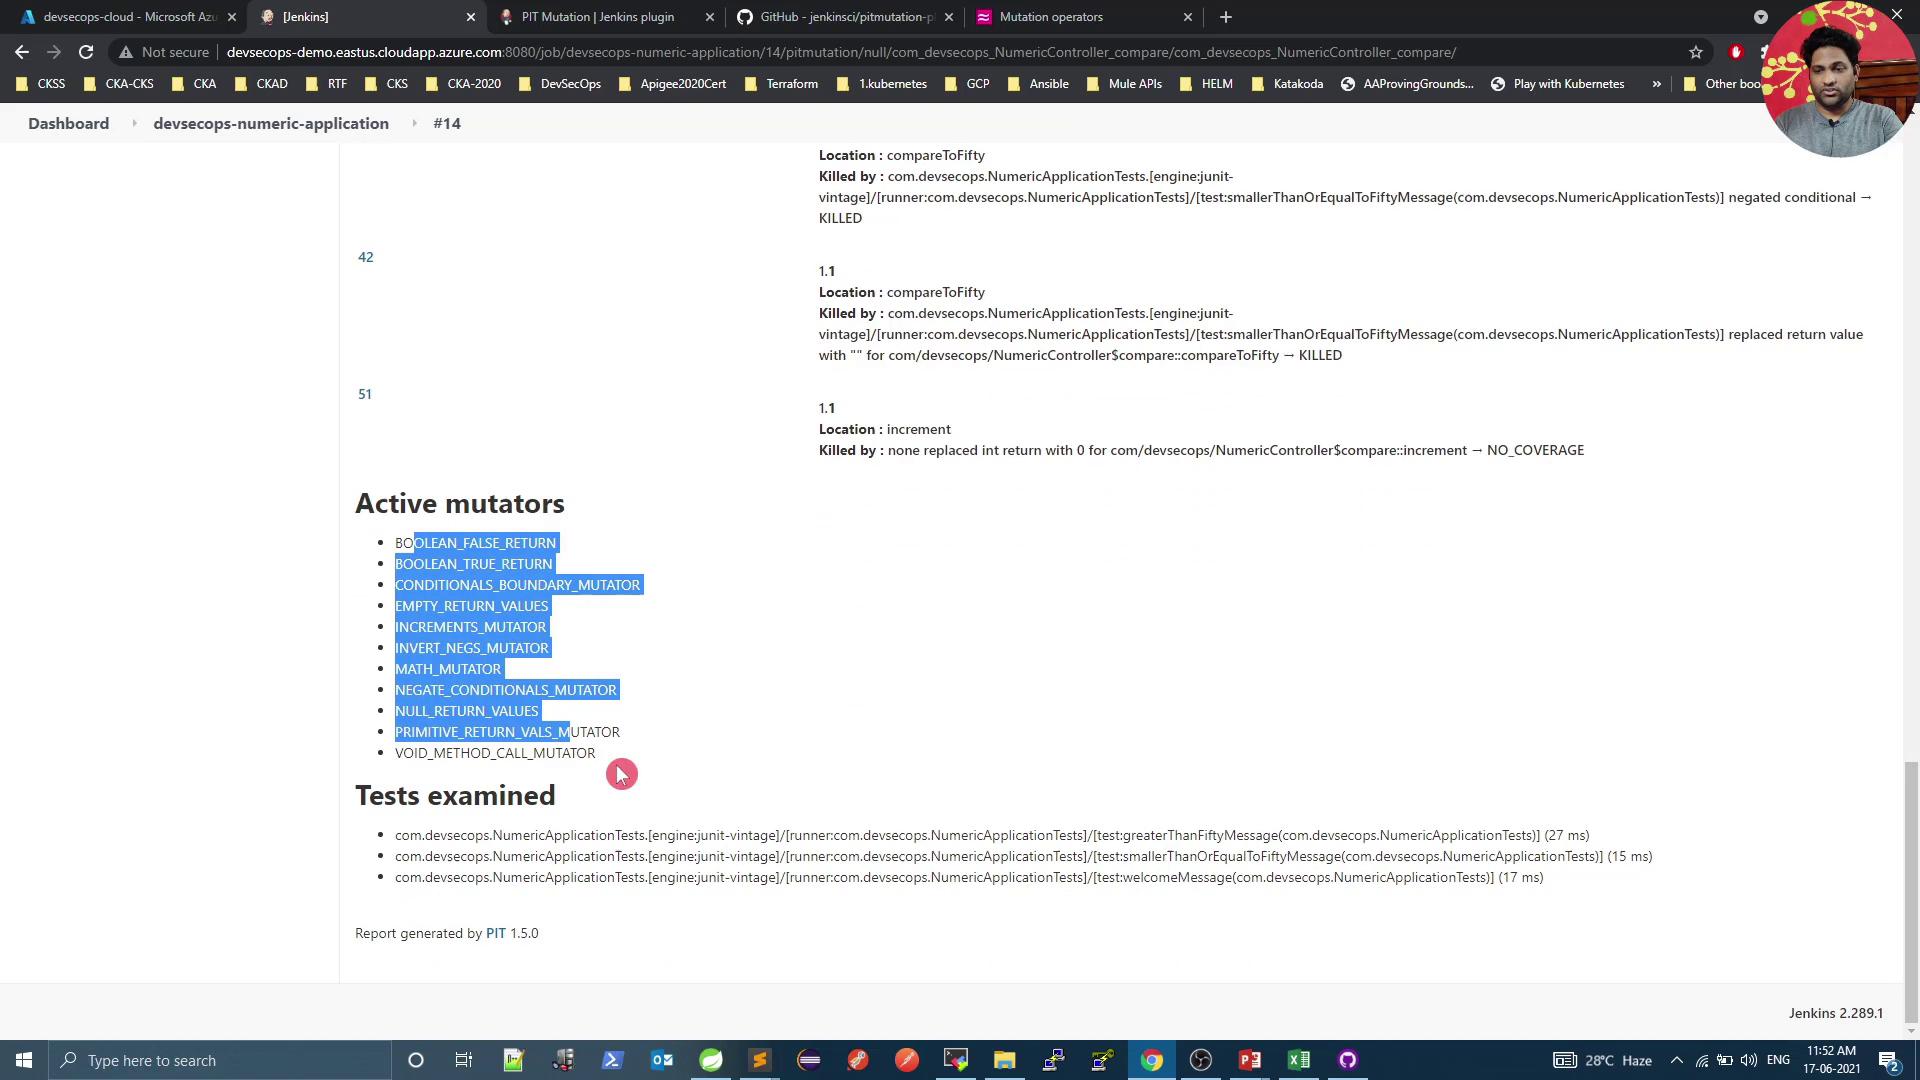
PIT applies mutators that change your code to test the effectiveness of your tests. Example: Conditional boundary mutator7. Improve Tests to Kill Mutations
Consider this REST controller: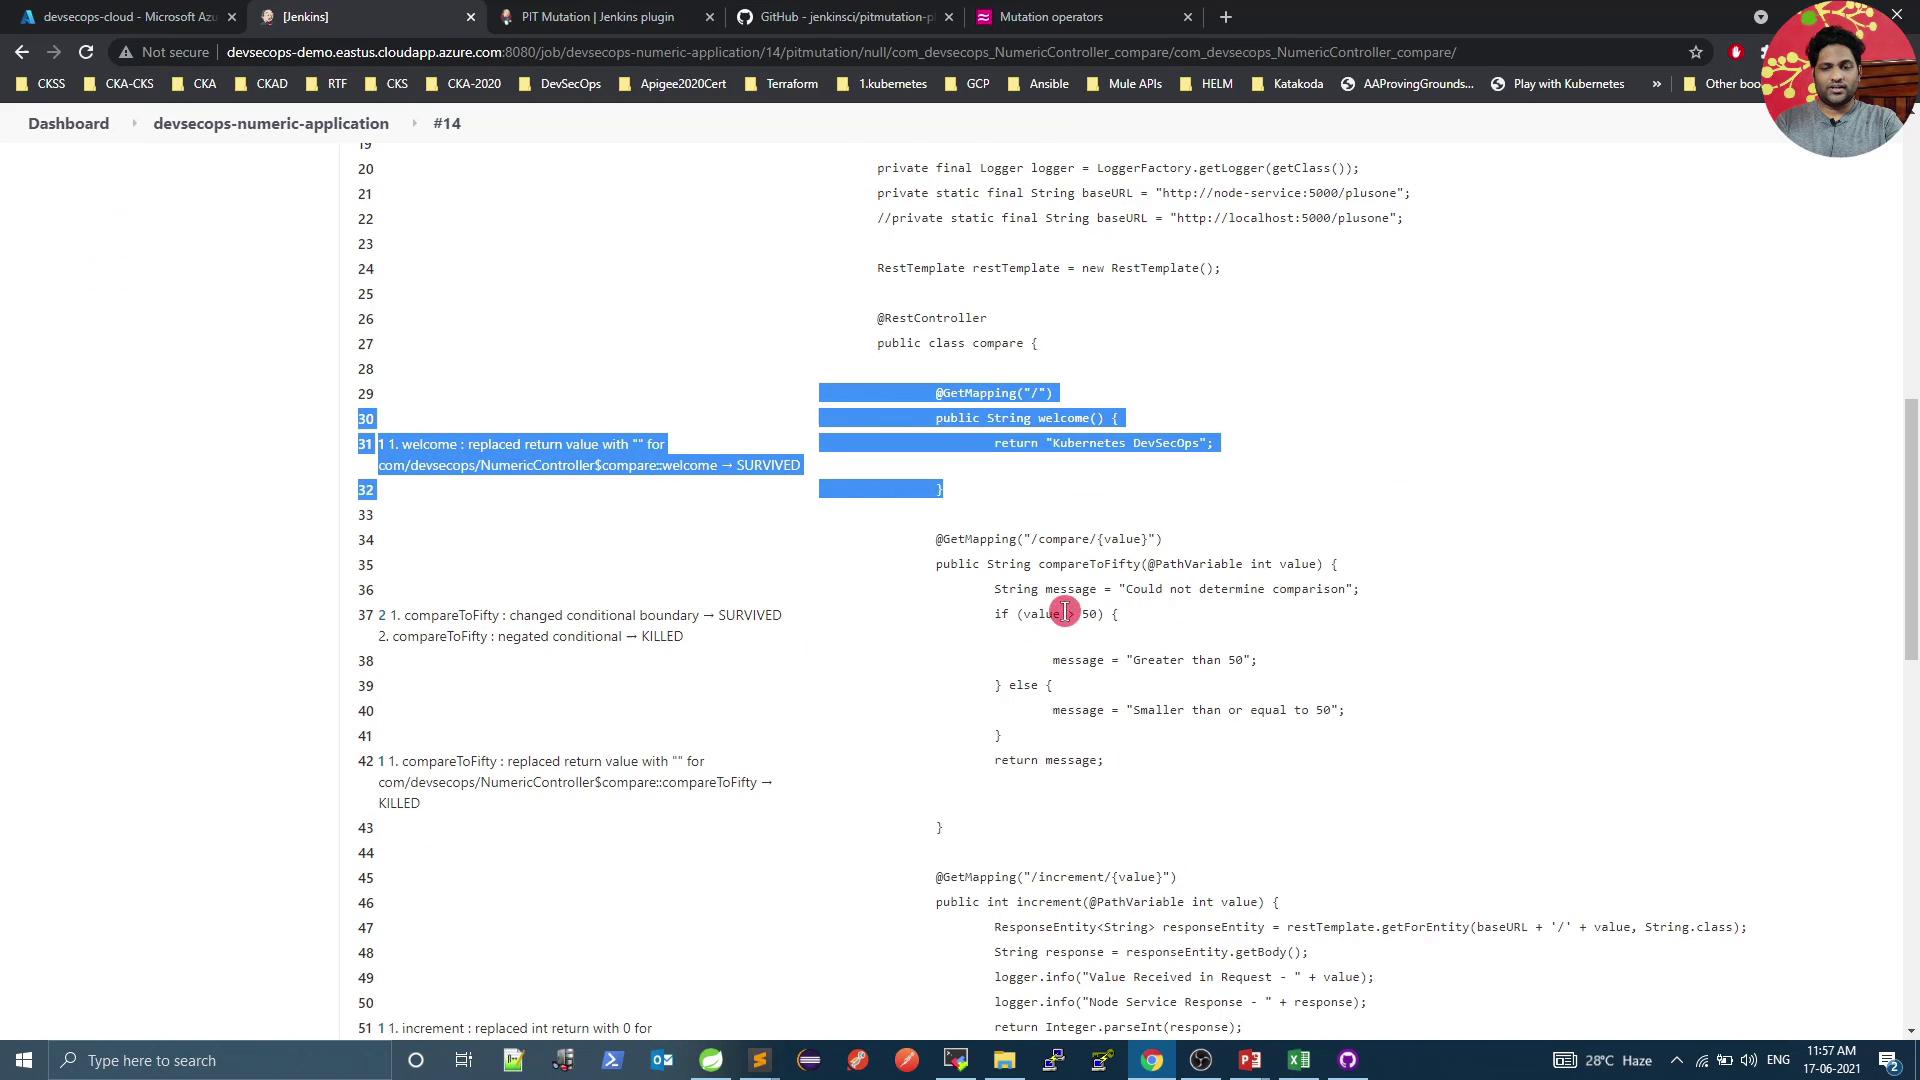
8. Re-Run Mutation Tests
Re-trigger the pipeline. A successful mutation stage should look like:9. Access Reports on Jenkins Agent
On your Jenkins server:index.html in a browser to explore the complete mutation report.
Congratulations! You’ve successfully integrated PIT mutation testing, configured Jenkins for automated reporting, identified weak spots, and enhanced your tests for robust coverage.
Links and References
- PIT Mutation Testing Documentation
- Spring Boot Reference Guide
- Jenkins Pipeline Syntax
- JaCoCo Maven Plugin