

Introduction
Istio sidecar injection embeds an Envoy proxy alongside your application container to enable advanced traffic management, mutual TLS, and telemetry within Kubernetes. In this guide, you’ll learn how to:- Inject an Envoy sidecar into a pod automatically
- Deploy a Node.js microservice in a dedicated namespace
- Verify the injected sidecar and inspect traffic flows
Sidecar Injection Methods
Istio offers two approaches to inject the Envoy proxy into your workloads:We’ll use Automatic Injection for this demo, since it requires no modifications to your application manifests.
Istio Demo Architecture
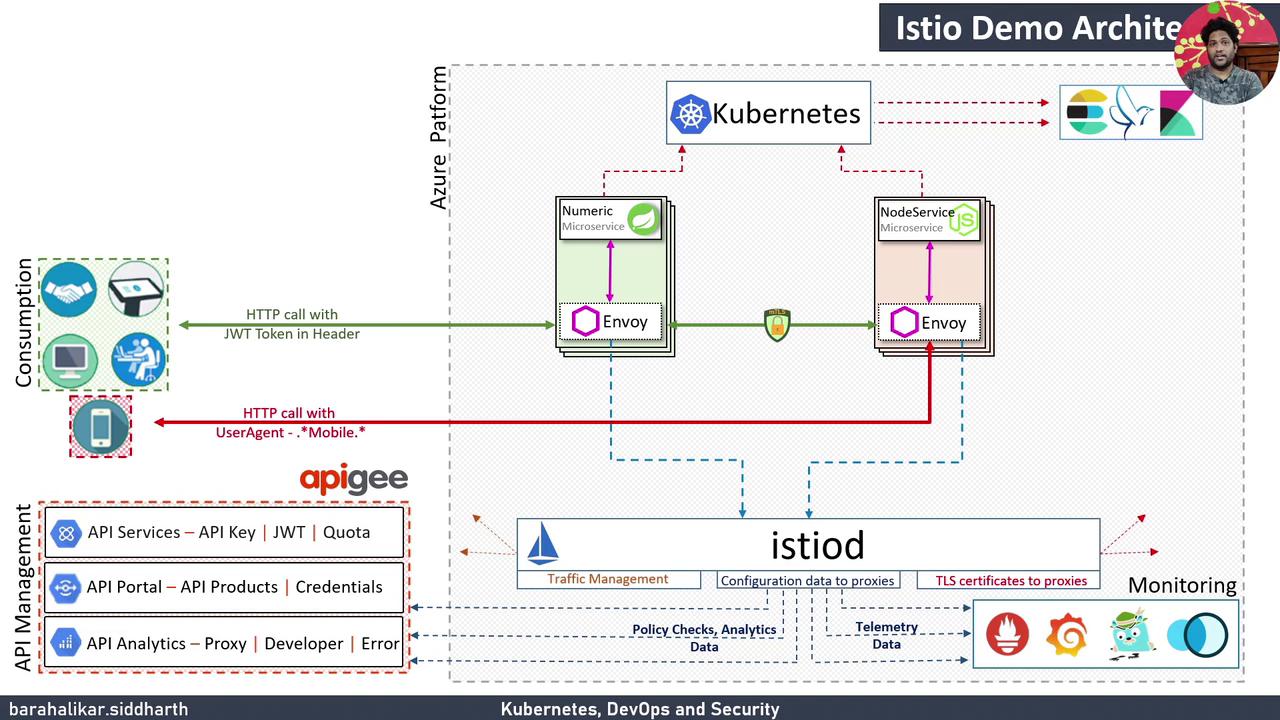
Prerequisites
- A Kubernetes cluster with Istio installed
kubectlandistioctlCLI tools available- Docker image
siddharth67/node-service:v1pushed to a registry
1. Create and Label the prod Namespace
First, set a shorthand for kubectl:
prod and confirm:
2. Deploy the Node.js Service
Deploy the Node.js microservice with a single container initially:3. Enable Automatic Sidecar Injection
Inspect existing namespace labels:prod for Istio:
The
istio-system namespace is generally labeled istio-injection=disabled to prevent sidecar injection into control plane components.4. Restart the Deployment
Trigger pod recreation so the Envoy sidecar is injected:2/2 READY:
5. Verify the Sidecar Injection
Inspect one of the pods in detail:node-service(your application)istio-proxy(Envoy sidecar, e.g.,docker.io/istio/proxyv2:1.9.0)
Next Steps
You can extend this workflow by deploying additional services—such as a Spring Boot app via Jenkins Pipeline—or by customizing traffic routing with Istio VirtualServices and DestinationRules.Links and References
- Istio Documentation
- Kubernetes Concepts
- Grafana & Prometheus & Kiali & Jaeger
- Apigee on Google Cloud