What Is Vault?
Vault is a centralized secrets management tool designed for securely storing and accessing sensitive data such as:- Credentials for authenticating users or services
- Encryption keys for data encryption and decryption
- API tokens, TLS certificates, and other secret types
- A unified REST API for secret management
- Fine-grained access control with policies
- Detailed audit logging of all operations
Installation Methods
You can install Vault using one of the following approaches:| Method | Description | Example Command |
|---|---|---|
| Linux Package Manager | Install via APT or Yum on supported distros | sudo apt-get install vault |
| Precompiled Binary | Download and place in your PATH | wget https://releases.hashicorp.com/vault |
| Build from Source | Clone the repo and compile yourself | go build github.com/hashicorp/vault |
For production, run Vault in a highly available configuration across multiple hosts. Use a durable storage backend like Consul or AWS S3.
Installing via APT (Ubuntu/Debian)
Deploying Vault with Helm
We’ll deploy Vault into Kubernetes using the official Helm chart. Ensure you have:- Kubernetes ≥1.14
- Helm 3.x installed
kubectlconfigured to access your cluster
1. Add the HashiCorp Helm Repository
2. Review the Vault Helm Chart
Check the chart’s prerequisites and usage on GitHub: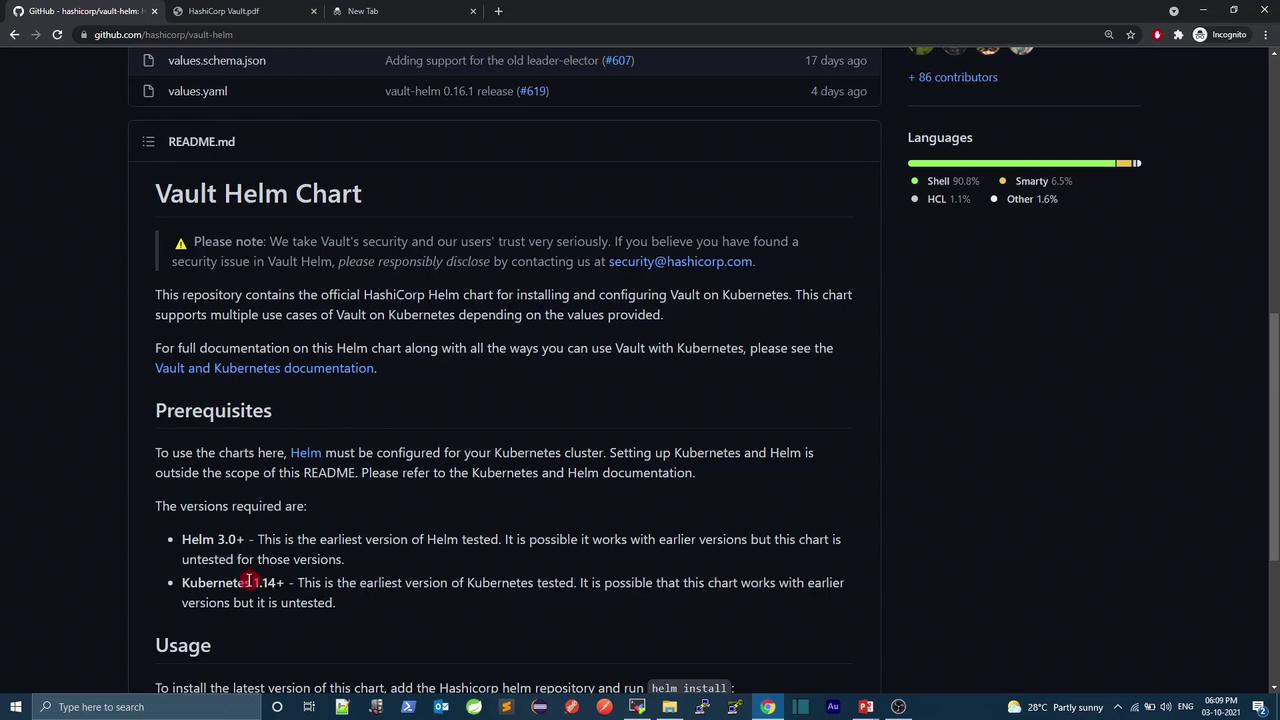
3. Inspect Default Configuration
View the excerpt fromvalues.yaml:
- Enable the Vault UI
- Expose the UI via
NodePort - Disable persistent storage (for demo purposes)
Prerequisites Check
Step by Step: Deploying to a Dedicated Namespace
-
Create and switch to the
demonamespace: -
Install the Vault chart with custom settings:
-
Verify Kubernetes resources:
Wait until the
vault-0pod and related components are in theRunningstate:
Checking Vault Status
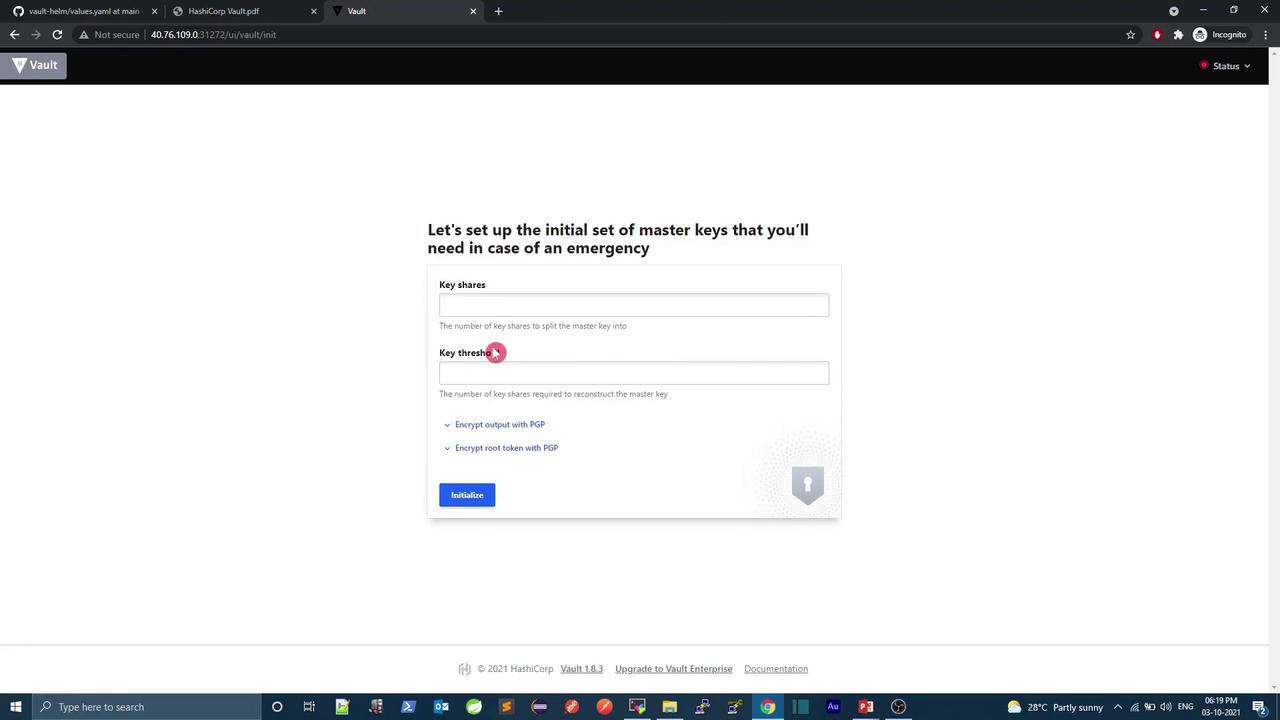
Once the pods are running, access the Vault pod and check its seal status:Vault is sealed by default. You must initialize and unseal it using key shares and a threshold. These steps can be done via CLI or the UI.
Accessing the Vault UI
The Vault UI is exposed on a NodePort (e.g., 31272). Open your browser to: