

- Falco Sidekick GitHub: https://github.com/falcosecurity/falcosidekick
- Falco charts: https://falcosecurity.github.io/charts
- Helm documentation: https://helm.sh/docs/
- Kubernetes basics: https://kubernetes.io/docs/concepts/overview/what-is-kubernetes/
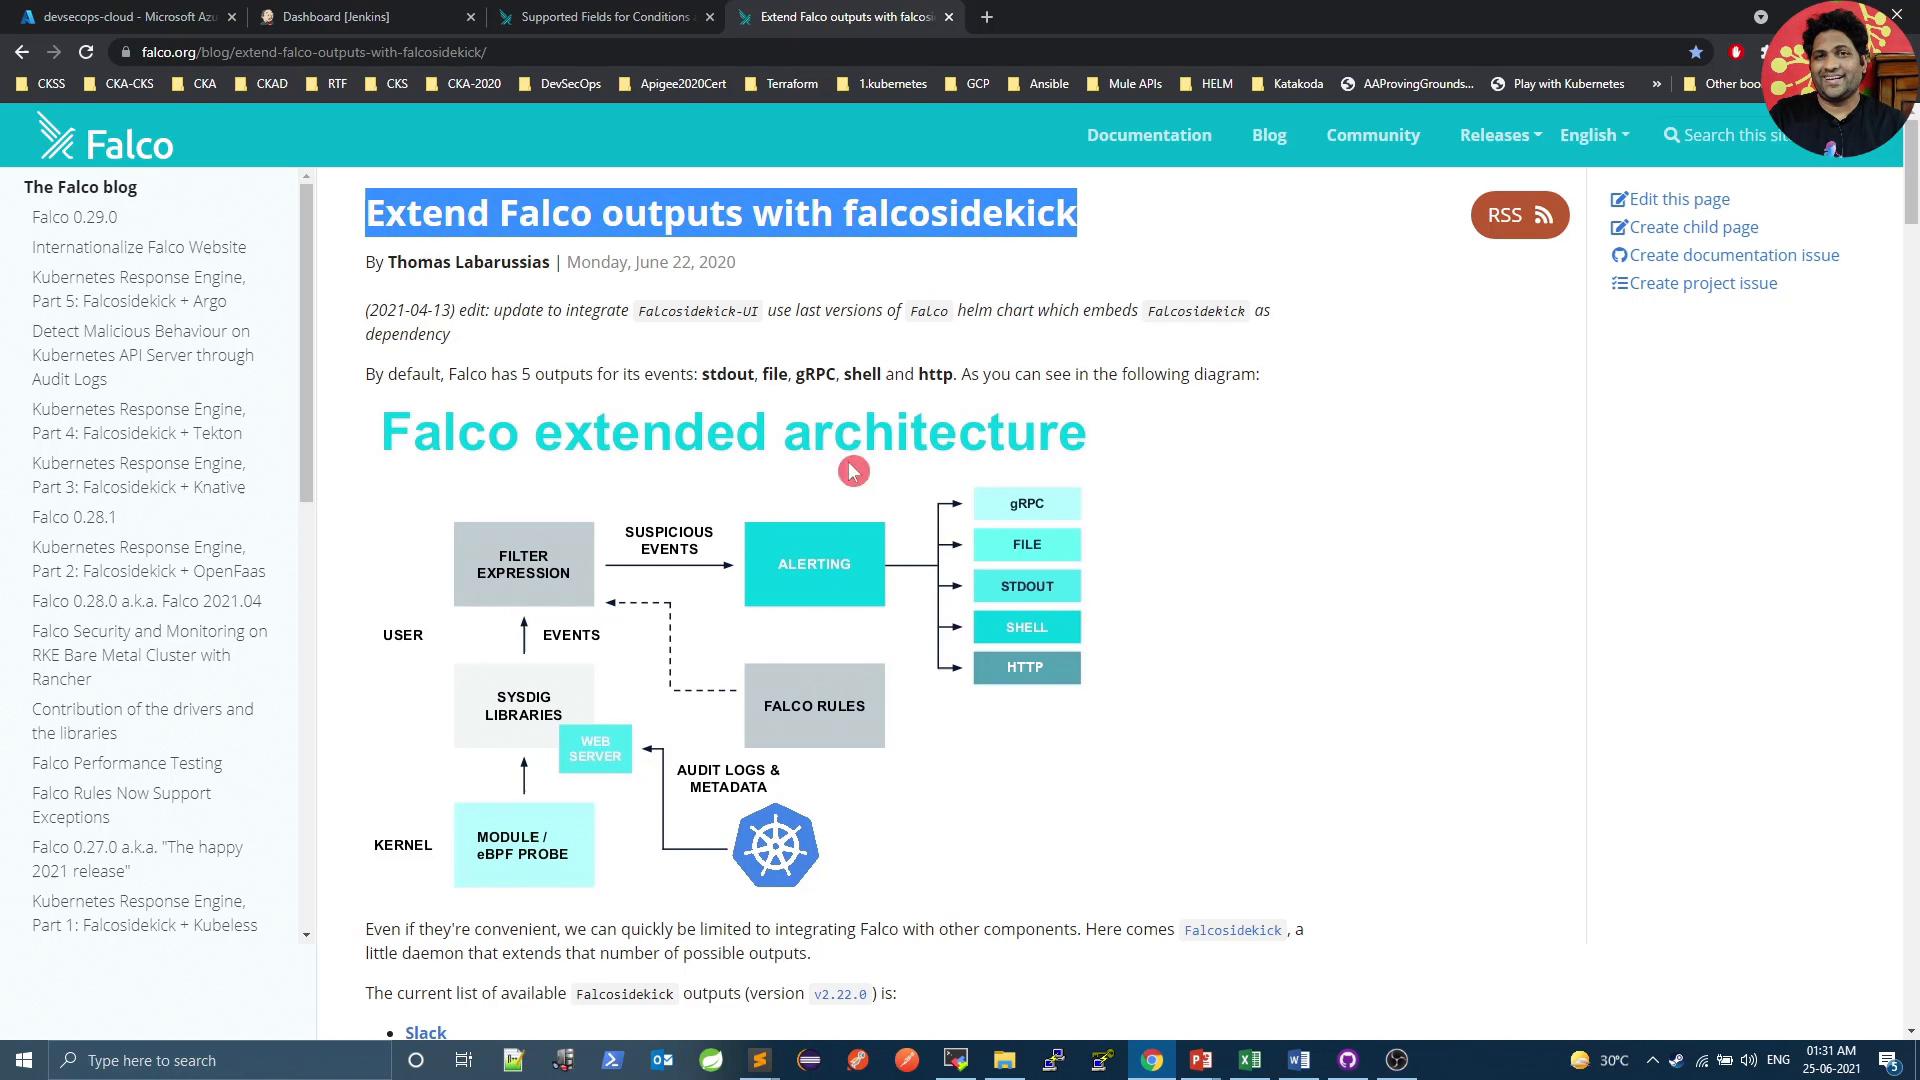
- Falco Sidekick acts as a bridge: it consumes Falco alerts (via stdout, file, gRPC, syslog, HTTP) and forwards them to multiple outputs.
- The optional Falco Sidekick web UI displays recent events and supports filtering and search for rapid investigation.
- Helm is used to install Falco, Falco Sidekick, and the UI into a Kubernetes cluster.
Helm charts package Kubernetes manifests and default configuration. Installing the Falco chart with
falcosidekick.enabled=true deploys Sidekick alongside Falco agents. Use the Sidekick web UI for interactive event exploration.- Helm charts are packages containing Kubernetes manifests and default configuration (ConfigMaps, Deployments, Services, Ingress, etc.).
- Helm CLI is the Kubernetes package manager that installs chart “releases” into your cluster.
- Think of Helm charts like RPM packages and Helm like YUM: YUM resolves dependencies and installs RPMs; Helm resolves chart requirements and deploys resources.
Helm installation (example script)
Helm v3 removed Tiller and runs client-side, directly interacting with the Kubernetes API. Ensure your kubeconfig and cluster permissions are correct before installing charts.
- Create the
falconamespace and add the Falco Helm repo (see the quick install above). - Install the Falco chart enabling Falco Sidekick and the web UI:
kubectl -n falco get all output (trimmed)
- By default the Falco Sidekick UI service is
ClusterIP. To access it externally from a browser, change the service toNodePort.
2802:30576/TCP).
Exposing the Falco UI via NodePort or LoadBalancer can expose event data externally. Protect access with network controls, authentication, or by using an internal ingress. Do not expose sensitive operational logs publicly.
- Use the node IP (or node DNS) and the assigned NodePort, then open the UI path in your browser:
- Example:
http://<node-ip>:30576/UI(replace<node-ip>and port with your environment values)
- Example:
- The UI shows recent Falco alerts and provides filters: rule, severity, namespace, pod, container, and timestamp.
- Terminal shell spawned in container:
- Privileged container started:
Next steps & recommendations
- If you want Slack notifications, reinstall or upgrade the chart with your Slack webhook:
- Secure the UI: use an internal-only service, restrict access with network policies, or place the UI behind an authenticated ingress.
- Explore additional Falco Sidekick outputs (Teams, Datadog, PagerDuty, Elasticsearch) via the Sidekick configuration documented in the Falco Sidekick repo.