

Authentication and Authorization Flow
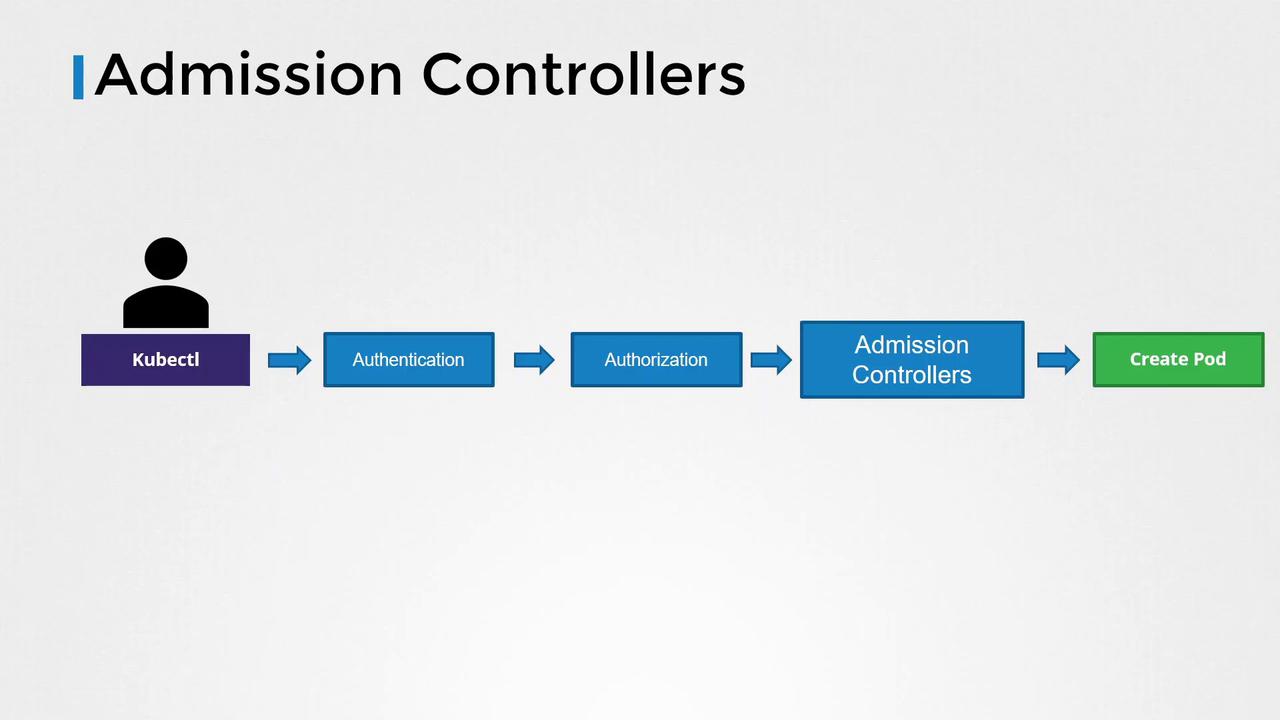
When a command like creating a pod is issued, the following steps occur:-
Authentication:
The API server authenticates the request. For example, when you run a command via kubectl, the KubeConfig file provides the necessary certificates. Consider the following configuration: -
Authorization (RBAC):
Once authenticated, the API server checks if the user is authorized to perform the requested action. Role-based Access Control (RBAC) is commonly used here. For instance, if a user is assigned the following role:The user is permitted to list, get, create, update, or delete pods. RBAC can also restrict access to specific resource names or namespaces:
These RBAC rules are enforced at the API level and determine which API operations a user can access.
The Role of Admission Controllers
While RBAC handles basic authorization, it does not offer advanced validations or mutations. Admission controllers step in to provide additional security by:- Validating pod specifications (e.g., ensuring that images are not from a public Docker Hub registry or enforcing the prohibition of the “latest” tag).
- Rejecting pods running containers as the root user, or enforcing specific Linux capabilities.
- Ensuring required metadata like labels is included.
Built-In Admission Controllers
Some of the built-in admission controllers in Kubernetes include:- AlwaysPullImages: Forces image pulling on each pod creation.
- DefaultStorageClass: Automatically assigns a default storage class to PVCs if none is specified.
- EventRateLimit: Limits the number of concurrent API server requests to prevent overload.
- NamespaceExists: Rejects requests to operate in non-existent namespaces.
Detailed Example: Namespace Existence Check
Consider attempting to create a pod in a non-existent namespace named “blue.” When you execute:Configuring Admission Controllers
Enabling Admission Controllers
To add a new admission controller, update theenable-admission-plugins flag on the Kube API server service. For a kubeadm-based setup, modify the kube-apiserver manifest file.
Traditional Kube API Server Service
Kubeadm-Based Setup (API Server as a Pod)
To disable specific admission controllers, use the
disable-admission-plugins flag in a similar manner.Auto-Provisioning a Namespace
Once the admission controller is correctly configured, executing the pod creation command in a previously non-existent namespace “blue” will trigger the NamespaceAutoProvision controller, which will automatically create the namespace and allow the pod creation to succeed. For example:Transition from Deprecated Controllers
It is important to note that the NamespaceAutoProvision and NamespaceExists admission controllers have been deprecated. They have been replaced by the NamespaceLifecycle admission controller, which:- Rejects requests to non-existent namespaces.
- Protects default namespaces (default, kube-system, kube-public) from deletion.
This lesson has provided an in-depth look at how admission controllers enhance Kubernetes security by validating, mutating, and even auto-provisioning resources as required. Head over to the labs to practice working with admission controllers and further solidify your understanding. For more information, explore the following resources: