This article reviews inspecting and modifying resource limits for Kubernetes pods, demonstrating troubleshooting techniques with example pods rabbit and elephant.
In this article, we review how to inspect and modify resource limits and requests for Kubernetes pods. The guide demonstrates troubleshooting techniques for resource constraints by using two example pods: “rabbit” and “elephant”. For more details on Kubernetes resource management, check out the Kubernetes Documentation.
We start by inspecting a pod named “rabbit” to identify its CPU request specifications.
List the pods to verify that “rabbit” exists:
kubectl get pod rabbit
Use the describe command to retrieve detailed information about the pod:
kubectl describe pod rabbit
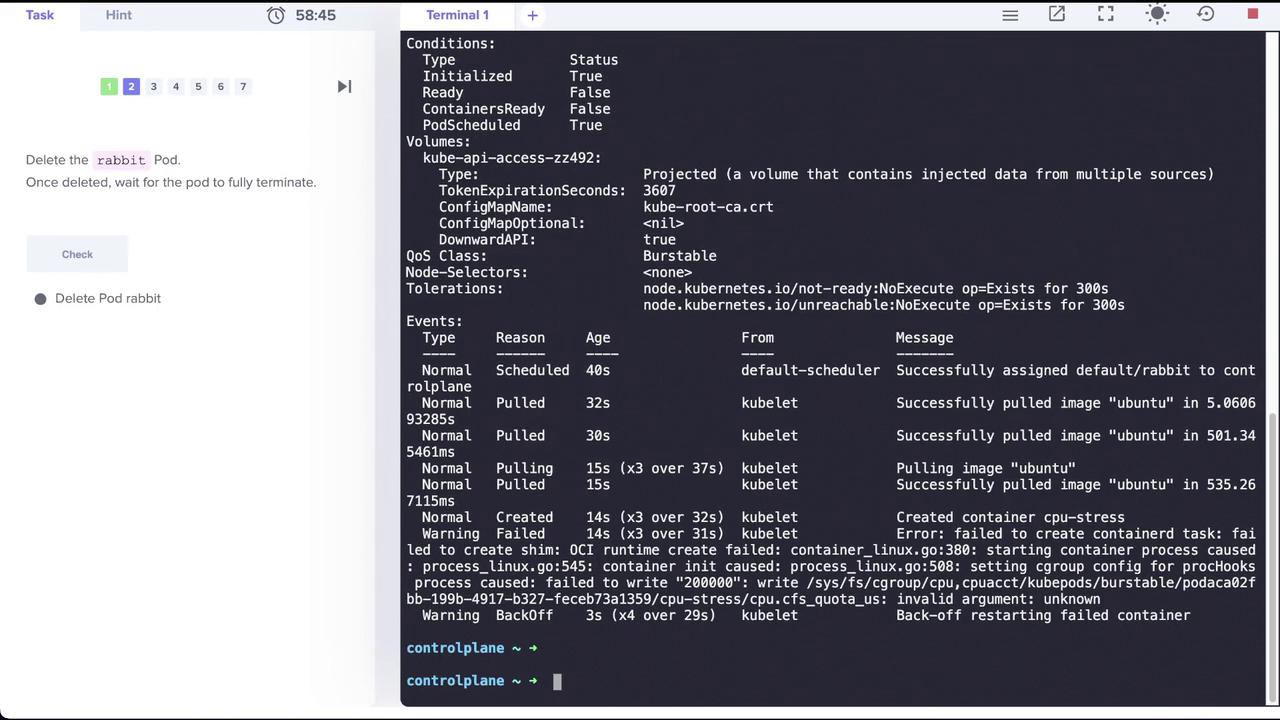
Within the output, locate the container’s resource specifications. You should see a section similar to this, which highlights the CPU limits and requests:
cpu-stress:
  Container ID: containerd://e10dfa67ccbb4d8cb646c8040c72fba2446a0679f73e6804c7a118b3dd236
  Image: ubuntu
  Image ID: docker.io/library/ubuntu@sha256:9101220a875cee98b01666834289ff0674f247f6ca20dfc91b9
  Port: <none>
  Host Port: <none>
  Args:
    - sleep
    - "1000"
  State: Waiting
  Reason: CrashLoopBackOff
  Last State:
    Reason: Terminated
    Message: failed to create containerd task: failed to create shim: OCI runtime create failed: container_linux.go:380: starting container process caused "process_linux.go:545: container init caused: process_linux.go:508: setting cgroup config for prochook's process caused: failed to write "200000": write /sys/fs/cgroup/cpu,cpuacct/kube pods/burstable/podaca02fb-199b-4917-b327-feceb73a1359/e10dfa67ccbb4d8cb646c8040c72fba2446a0679f73e6804c7a118b3dd236/cpu.cfs_quota_us: invalid argument: unknown"
  Exit Code: 128
  Started: Thu, 01 Jan 1970 00:00:00 +0000
  Finished: Sat, 16 Apr 2022 18:00:44 +0000
  Ready: False
  Restart Count: 2
  Limits:
    cpu: "2"
  Requests:
    cpu: "1"
  Environment: <none>
  Mounts:
    - /var/run/secrets/kubernetes.io/serviceaccount from kube-api-access-zz492 (ro)
  Conditions:
    Type: Status
    Initialized: True
    Ready: False
    ContainersReady: False
    PodsScheduled: True
  Volumes:
    kube-api-access-zz492:
      Type: Projected (a volume that contains injected data from multiple sources)
From the output, it is evident that the CPU request is set to “1”.Next, delete the “rabbit” pod since it is no longer needed:
Let’s inspect another pod called “elephant” that is failing to reach a running state.
List the pods:
kubectl get pod
The output displays:
NAME READY STATUS RESTARTS AGEelephant 0/1 CrashLoopBackOff 1 (3s ago) 8s
Describe the pod to understand why it is not running:
kubectl describe pod elephant
In the “Last State” section, you may notice that the container was terminated due to an out-of-memory (OOM) error. Although the pod’s memory limit is set around 1010 Mi (or similar), the process inside the pod consumes 15 Mi, causing it to exceed the allowed amount.
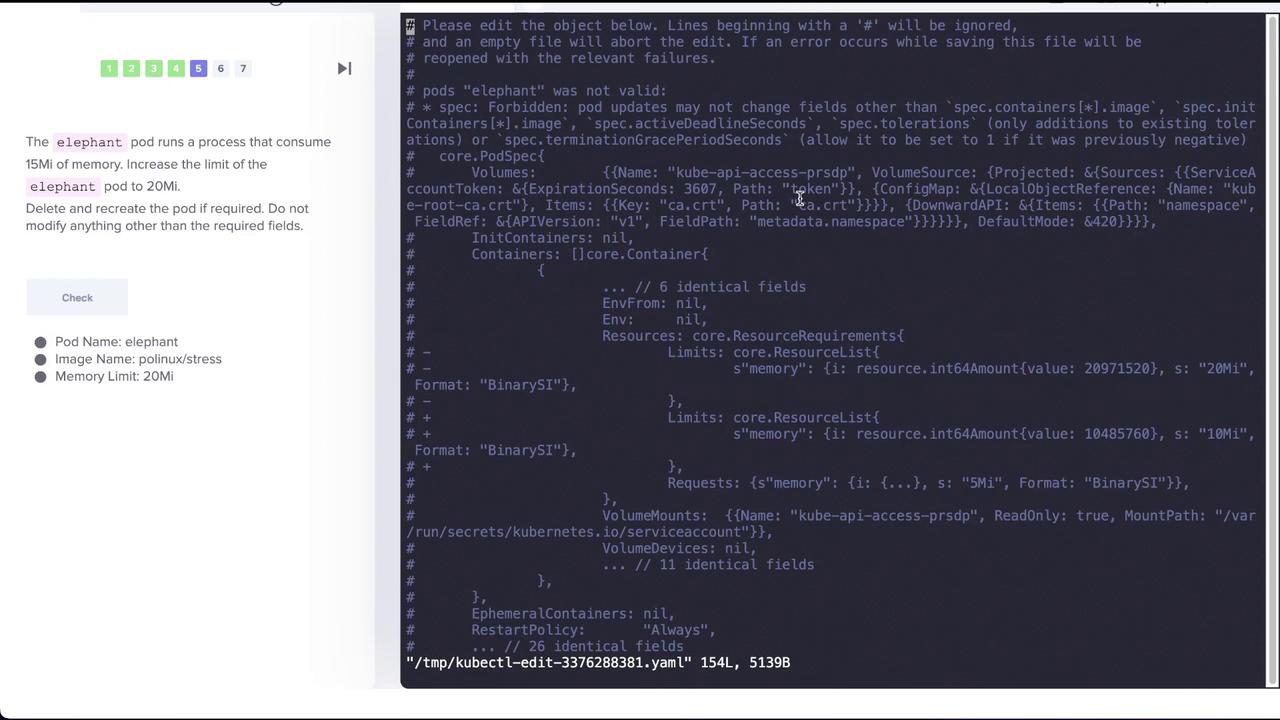
To resolve this issue, you must update the pod specification to allocate more memory. In this example, increasing the memory limit to 20 Mi should suffice.
After saving your changes, you may encounter an error like this:
controlplane ~ kubectl edit pod elephanterror: pods "elephant" is invalidA copy of your changes has been stored to "/tmp/kubectl-edit-3376288381.yaml"error: Edit cancelled, no valid changes were saved.controlplane ~
Changing resource limits on a running pod is not supported. Your updates have been saved to a temporary file (/tmp/kubectl-edit-3376288381.yaml) instead.
To apply your changes, use the replace command, which will delete the existing pod and recreate it with the updated configuration:
This lab demonstrated how to inspect and update resource limits in Kubernetes pods. You learned to verify CPU and memory settings using the describe command, diagnose issues like CrashLoopBackOff and OOM errors, and apply changes through the replace command. For further reading on resource management in Kubernetes, visit the Kubernetes Basics.Happy Kubernetes troubleshooting!