

Scenario: Why Ingress?
Imagine you deploy an online store at myonlinestore.com:- Your storefront is built into a Docker image and deployed as a Deployment.
- MySQL runs as a Pod and is exposed internally via a ClusterIP Service (
mysql-service) so your app can access the database. - The storefront app is exposed using a NodePort Service (
wear-service) which assigns a high port (e.g., 30080) on every node.
- http://
<node-ip>:30080
- Friendly hostnames (DNS pointing to an external IP rather than node IPs).
- Standard ports (80/443), not high NodePort numbers.
- Path- or host-based routing for multiple applications (e.g.,
/watchorwatch.myonlinestore.com). - Centralized TLS termination and certificate management.
LoadBalancer provisions a cloud load balancer (and still uses a NodePort under the hood). But if every Service required its own cloud load balancer, costs and complexity would grow quickly. Instead, you want a single HTTP(S) entrypoint that routes to multiple Services and handles TLS — that’s what Ingress provides.
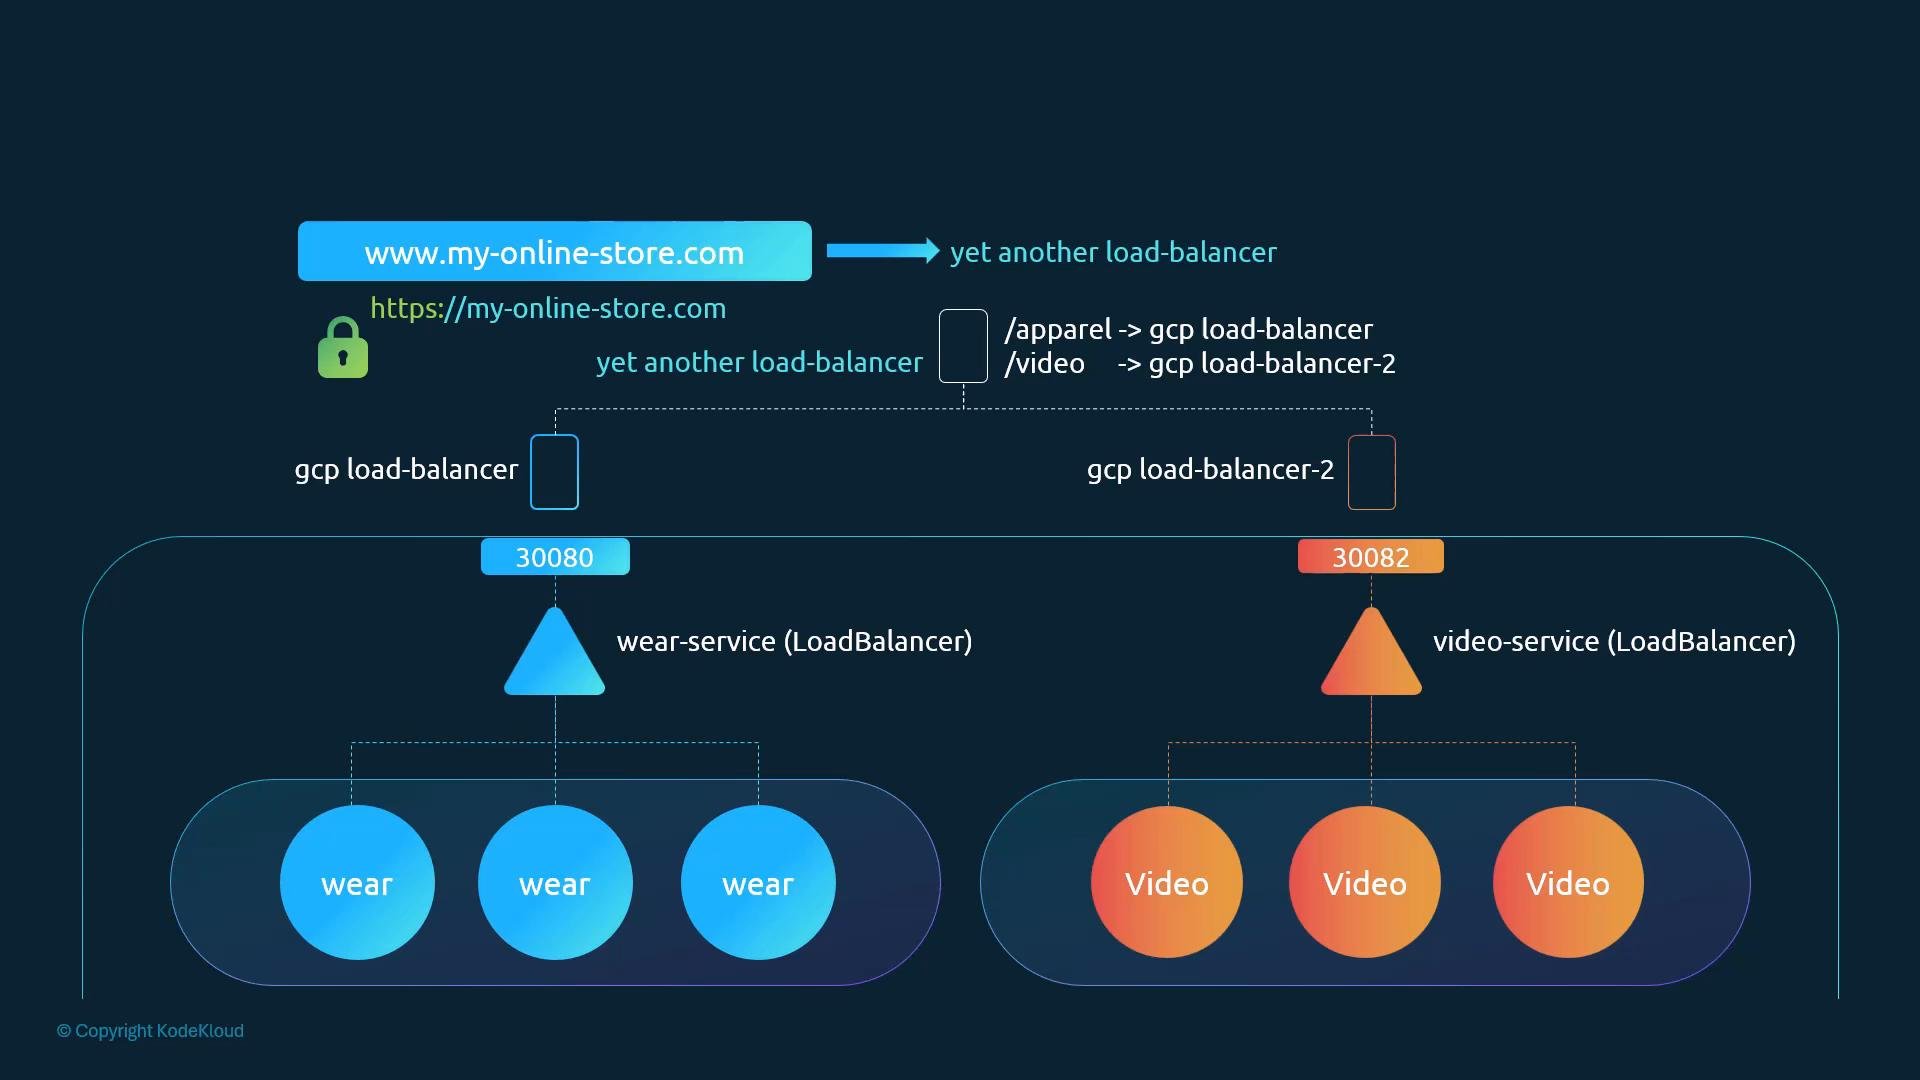
- Route traffic by hostnames and URL paths (e.g.,
/apparel→ apparel service,/video→ video service). - Terminate TLS and centralize certificate handling.
- Avoid provisioning a cloud load balancer for every Service.
An Ingress resource is a declarative set of HTTP(S) routing rules. The Ingress controller (NGINX, Traefik, GCE, etc.) watches those resources and configures the underlying proxy to enforce routing and TLS.
Kubernetes does not include an Ingress controller by default. You must deploy one (NGINX, Traefik, cloud provider controller, etc.) before Ingress resources will be enforced.
How Ingress works — components and flow
- Deploy an Ingress controller (a Deployment/DaemonSet running NGINX, Traefik, Contour, HAProxy, etc.).
- Create Ingress resources (Kubernetes objects) describing host/path → Service mappings and TLS configuration.
- The controller watches the API for Ingress objects and updates its proxy configuration accordingly (routing, load balancing, TLS termination, rewrites, etc.).
- Expose the controller externally (Service type
LoadBalancerorNodePort). That external exposure is typically a one-time setup; adding routes or certificates is handled by updating Ingress resources.
Ingress controller typical components
- Deployment (or DaemonSet) running controller pods.
- Service exposing the controller (NodePort or LoadBalancer) to receive external traffic.
- Optional ConfigMap for controller-specific settings.
- ServiceAccount + RBAC so the controller can watch Ingress, Services, Endpoints, Secrets, Pods, etc.
Simplified example: NGINX Ingress controller manifest
This is a minimal example showing the Deployment, ConfigMap, Service (NodePort), and ServiceAccount:Ingress resources: rules and examples
An Ingress resource defines how to route HTTP(S) traffic. The Ingress controller translates those rules into proxy configuration. Three common patterns:- Default backend — route all traffic to a single Service.
- Path-based routing — same host, route different URL paths to different Services.
- Host-based routing — route by host header (subdomains) to different Services.
Example 1 — Default backend
Use a default backend when all incoming requests should go to one Service.default-http-backend Service that returns a friendly 404 page.
Example 2 — Path-based routing
Route different URL paths on the same host to multiple backends.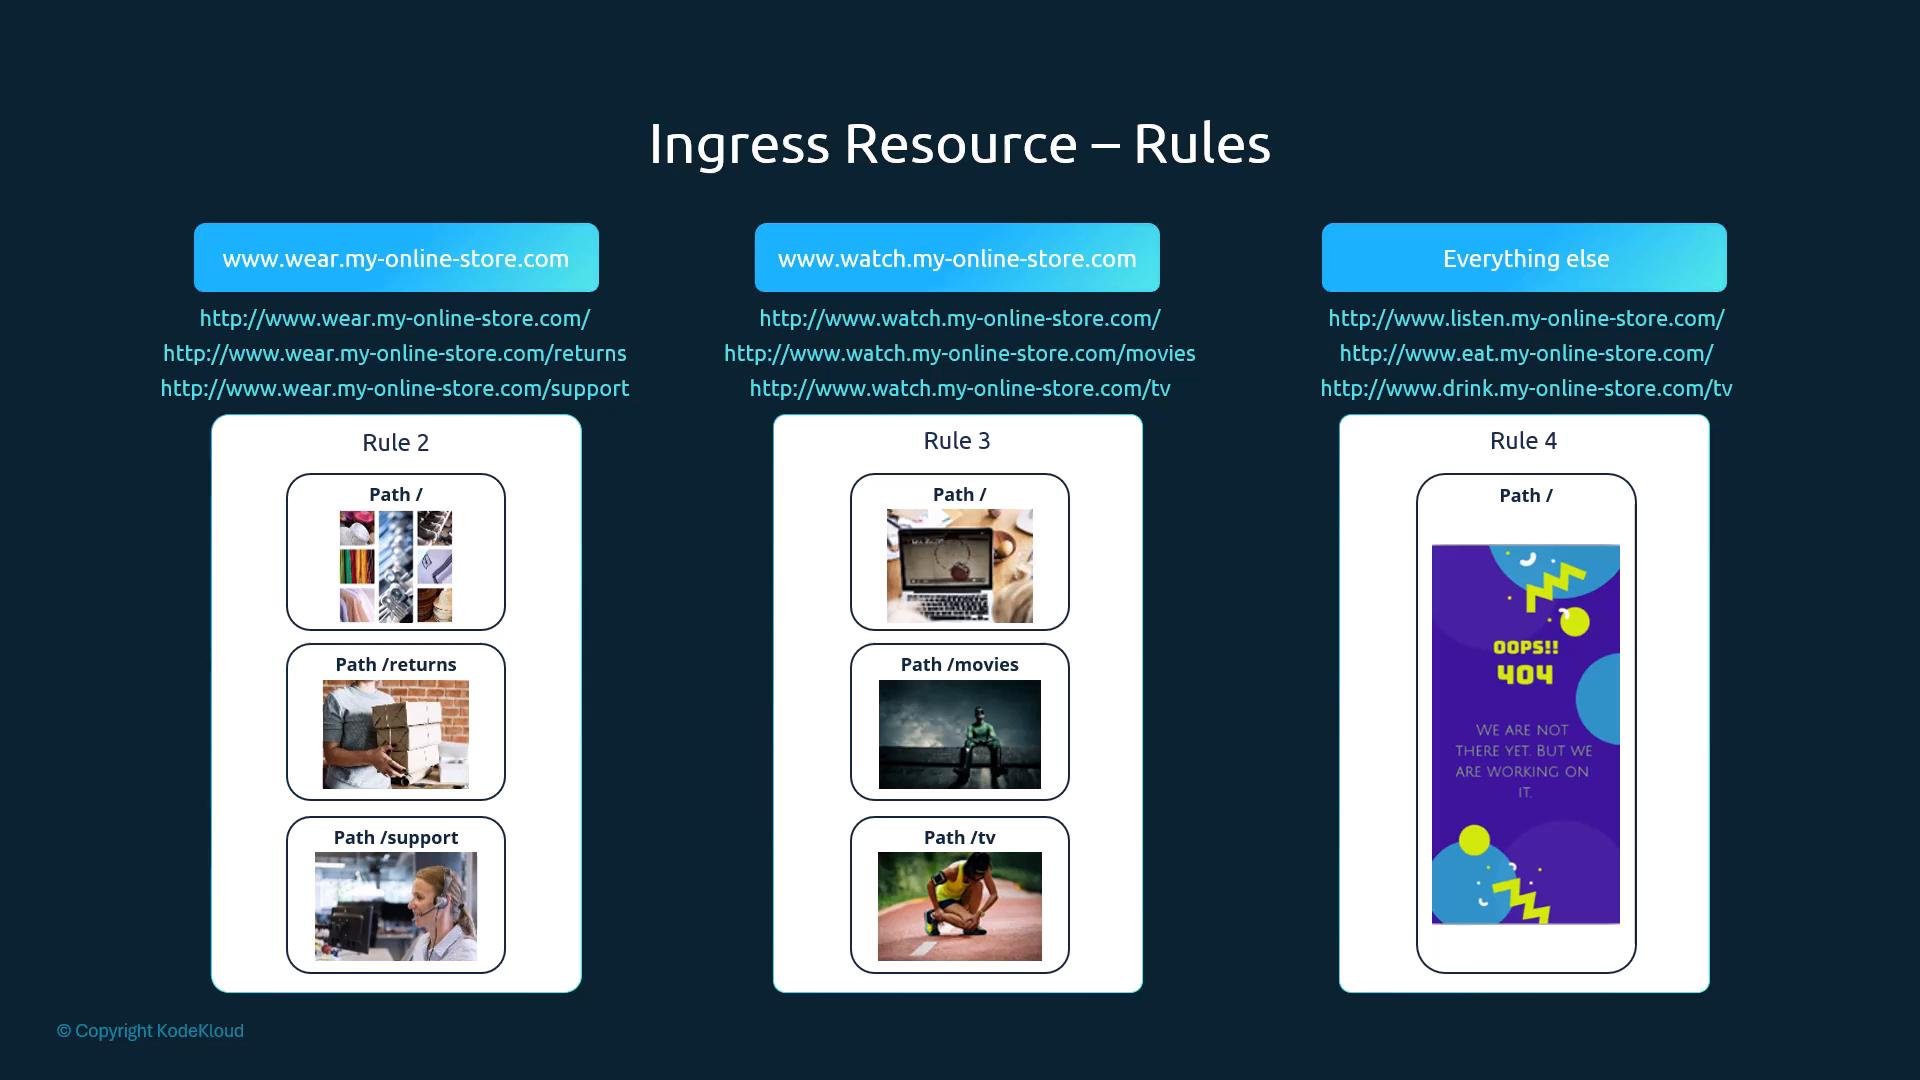
Example 3 — Host-based routing
Route traffic using the Host header (subdomains).wear. vs watch.). Path-based routing is useful when a single host serves multiple apps under different paths.
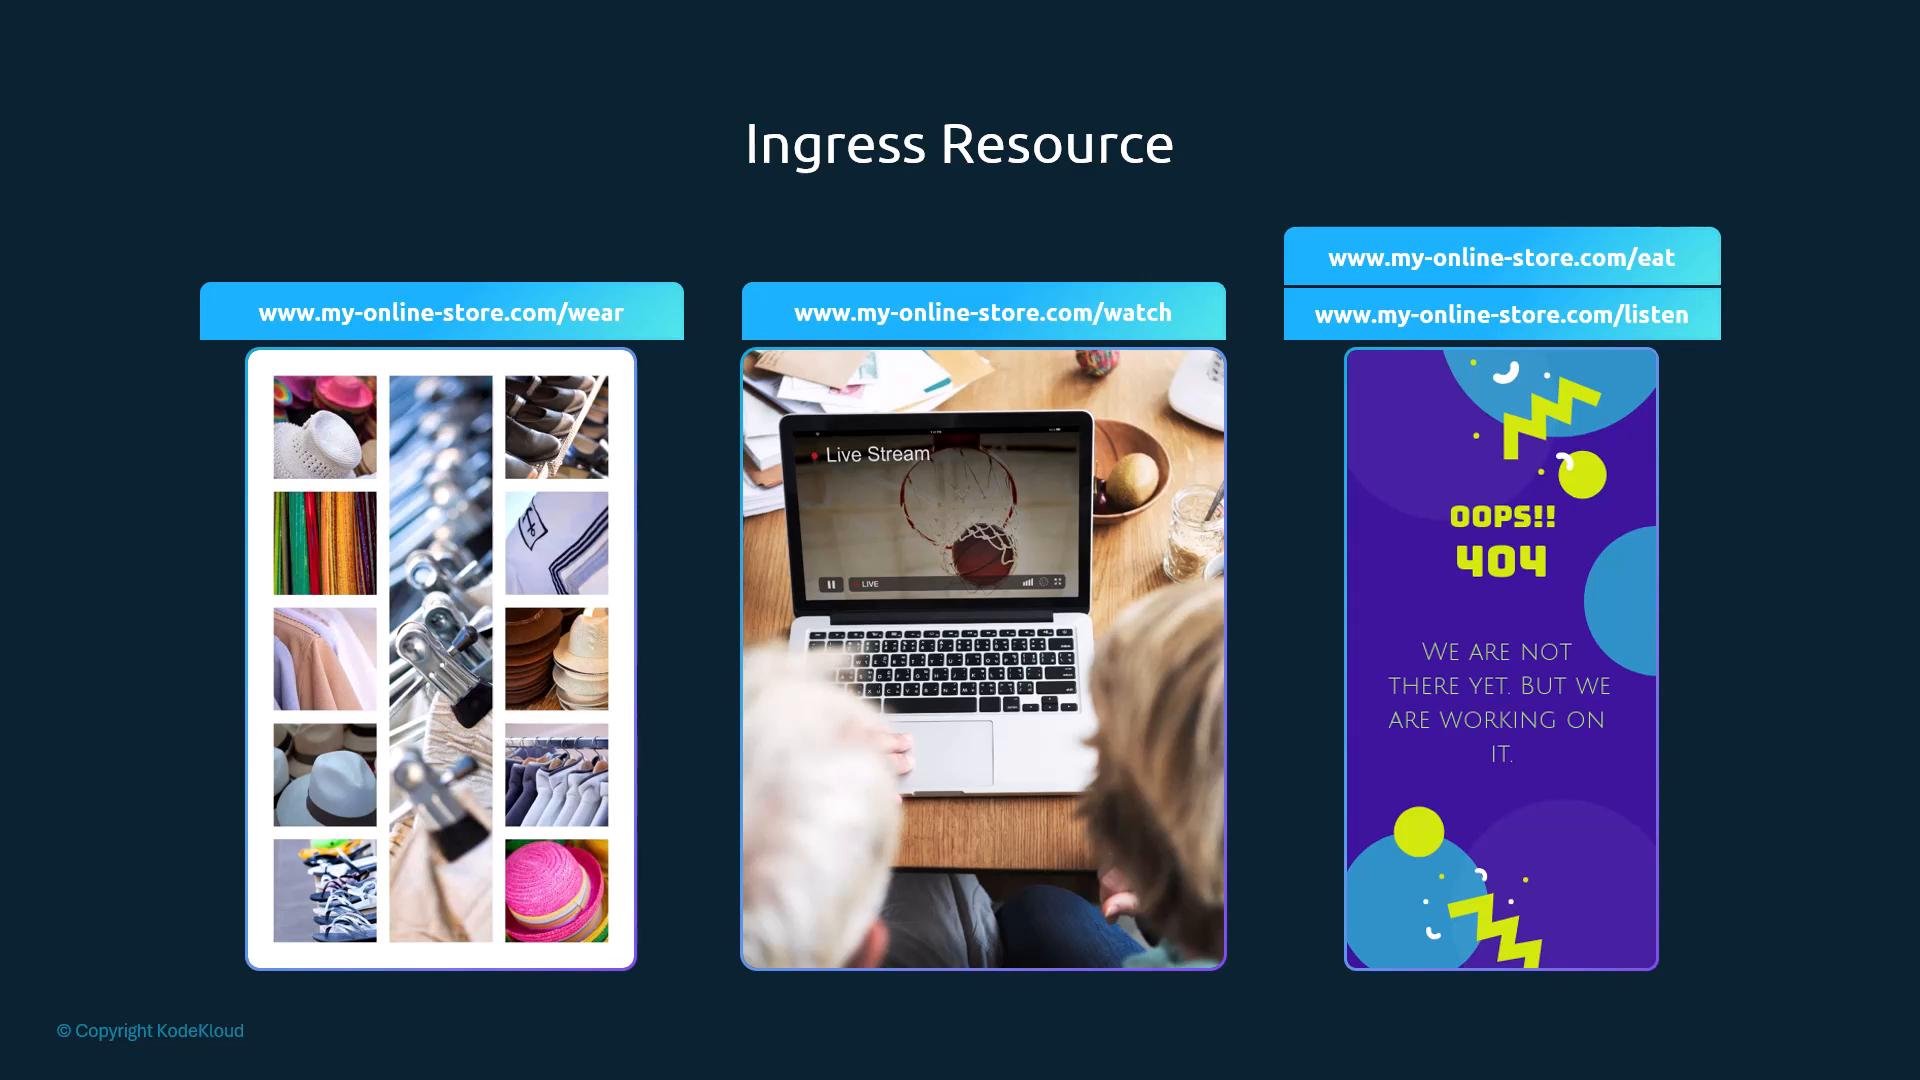
Comparison: routing approaches
TLS / HTTPS with Ingress
- Ingress supports TLS termination. Create a Kubernetes Secret of type
kubernetes.io/tlscontaining your certificate and private key, then reference that secret in the Ingresstlssection. - TLS can be applied per-host (recommended) or globally, depending on the controller’s capability.
- Use certificate automation tools like cert-manager to obtain and renew certificates from Let’s Encrypt automatically.
Best practices and notes
- Deploy a single Ingress controller (or a controller per team/namespace if needed) and expose it externally once (LoadBalancer or NodePort). Then manage routing via Ingress resources.
- Keep certificate secrets secure (RBAC and namespace scoping).
- Use pathType
PrefixorExactdepending on desired behavior. Check controller docs for regex or advanced matching options. - Test Ingress behavior with
kubectl describe ingressand controller logs when troubleshooting.
Summary
- Ingress is the Kubernetes-native way to provide HTTP/HTTPS routing and TLS termination at Layer 7.
- You must deploy an Ingress controller (NGINX, Traefik, cloud controller, etc.) to implement Ingress resources.
- Choose default, path-based, or host-based routing based on your application topology.
- Expose the controller externally once, then add routes and TLS via Kubernetes manifests.
Practice labs
- Lab type 1: Ingress controller, Ingress resources, and apps are pre-deployed. Explore the cluster, inspect resources, and answer scenario-driven questions.
- Lab type 2: Deploy an Ingress controller and create Ingress resources from scratch; configure TLS and test routing.
Links and references
- Kubernetes Ingress documentation: https://kubernetes.io/docs/concepts/services-networking/ingress/
- cert-manager: https://cert-manager.io/
- Let’s Encrypt: https://letsencrypt.org/
- NGINX Ingress controller: https://kubernetes.github.io/ingress-nginx/
- Istio (service mesh): https://istio.io/