

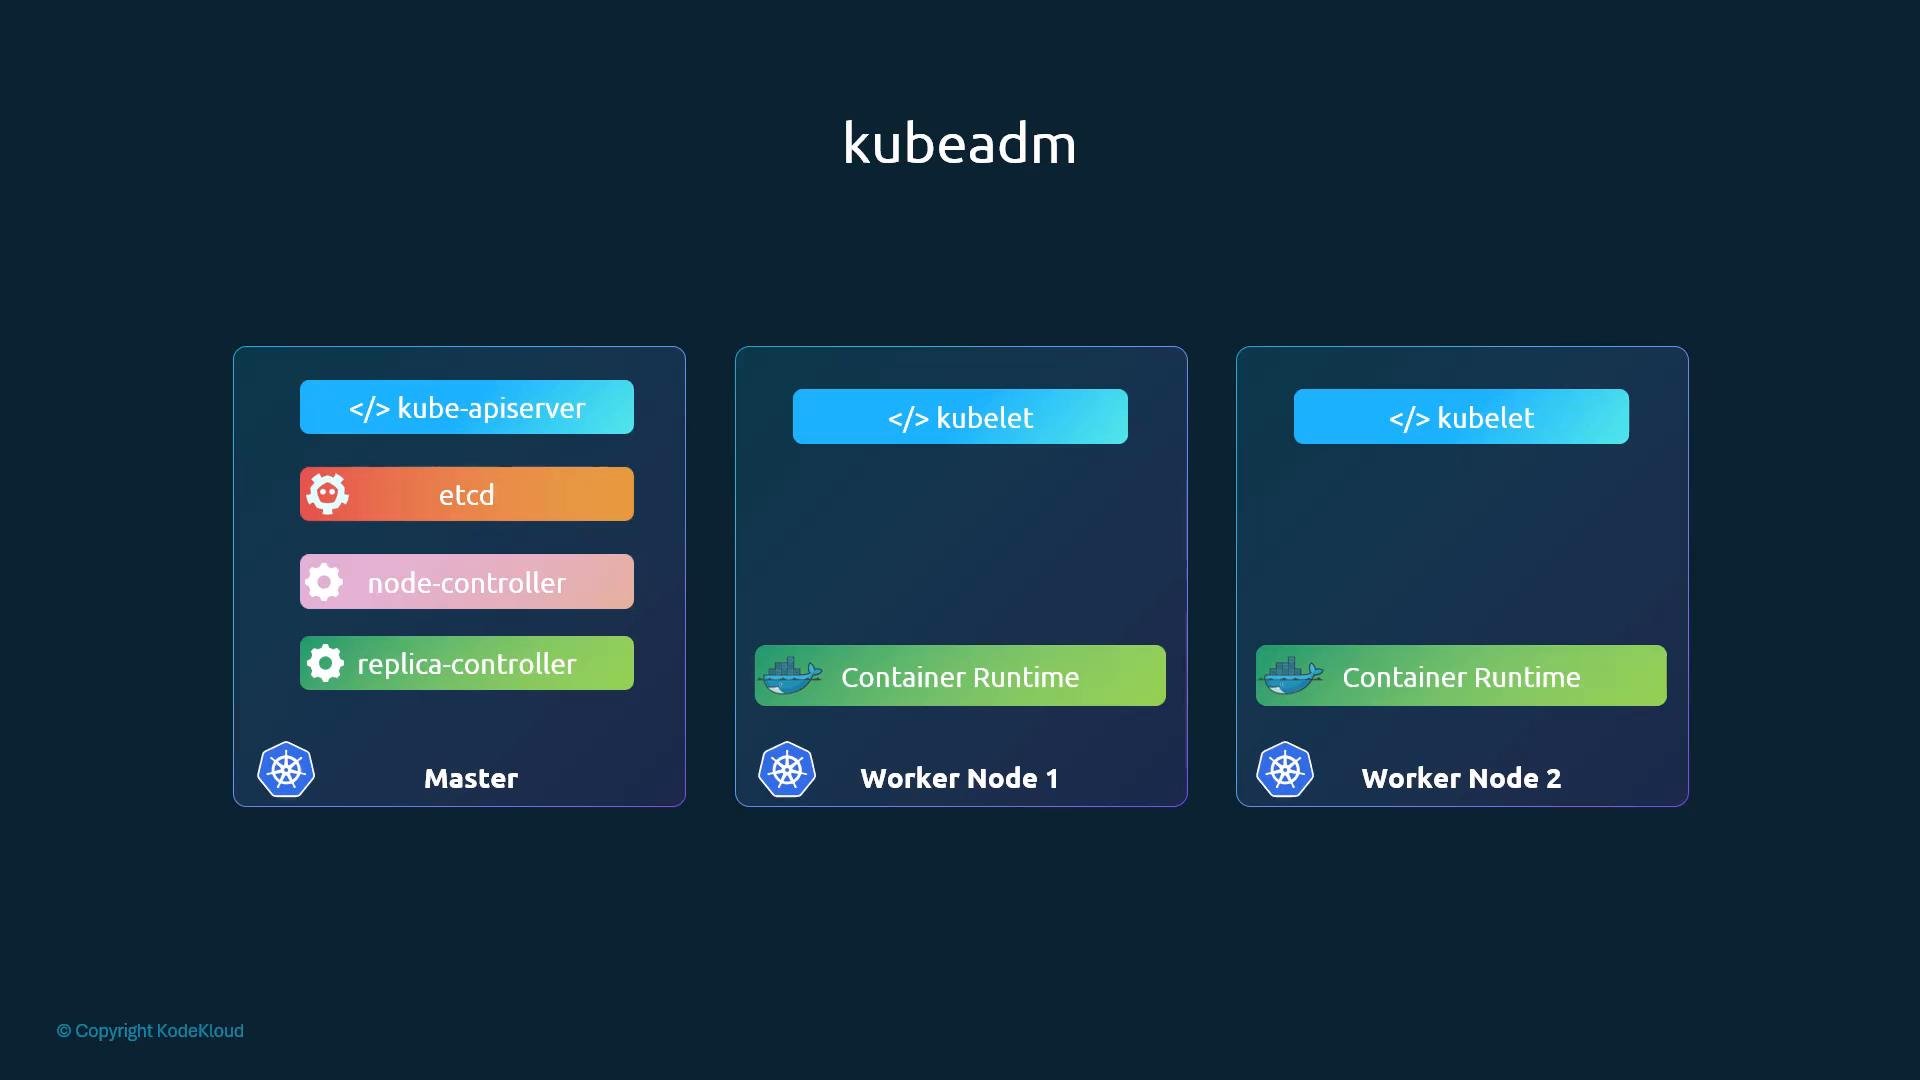
Why use kubeadm? Installing these components manually on different hosts, creating and distributing certificates, and updating config files so components can authenticate and communicate is error-prone and time-consuming. kubeadm standardizes and automates the bootstrapping phase so you get a working control plane reliably and reproducibly.
High-level kubeadm workflow
- Provision the systems (VMs or physical machines) that will form the cluster.
- Designate one host as the control-plane (master) and the rest as worker nodes.
- Install a container runtime on every host. This lesson uses
containerd. - Install kubeadm (and the associated
kubeletandkubectl) on all nodes. - Initialize the control-plane host with
kubeadm init. This generates certificates, writes kubeconfig files, and creates static pod manifests for control-plane components. - Ensure networking prerequisites are satisfied; Kubernetes requires a Pod network (CNI) beyond standard host connectivity.
- Apply a Pod network add-on (CNI) on the control-plane host after
kubeadm initto enable cross-node Pod communication. - Join worker nodes to the control plane using the
kubeadm joincommand produced during initialization. - Once nodes are joined and the Pod network is active, deploy applications to the cluster.
- Provisioning and maintaining the underlying machines (VMs or bare metal).
- Installing and patching the container runtime (we use
containerdin this lesson). - Choosing and installing a CNI plugin for Pod networking (for example, Flannel, Calico, or Weave Net).
- Setting and maintaining required system-level prerequisites (disable swap, load kernel modules, and set required sysctl values).
Before running
kubeadm, make sure system prerequisites are met: disable swap, enable bridged IPv4/IPv6 traffic to iptables, load required kernel modules, and configure any containerd-specific settings. Remember: kubeadm does not install a CNI plugin — apply a Pod network add-on after kubeadm init.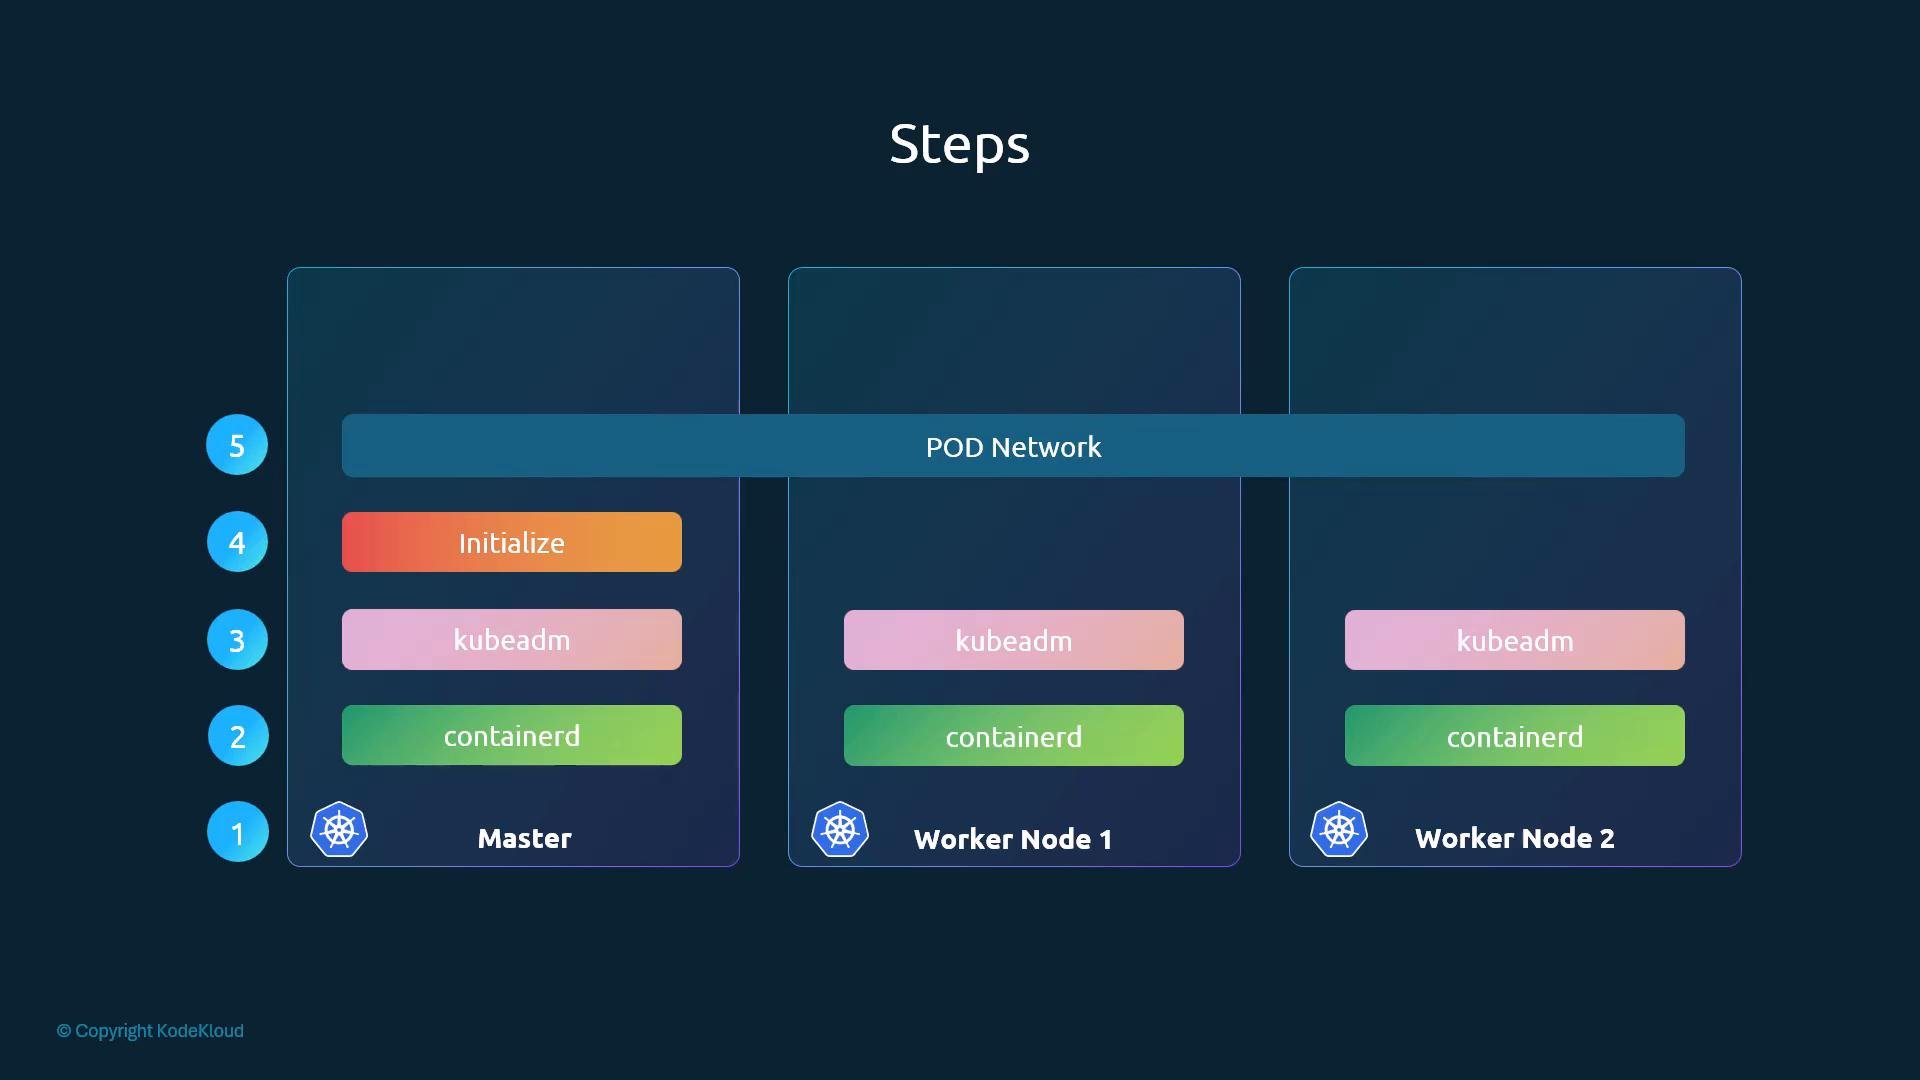
containerd and kubeadm, initializing the control plane with kubeadm init, applying a CNI Pod network add-on, and joining worker nodes using kubeadm join.
Links and references
- Kubernetes documentation: https://kubernetes.io/docs/
- kubeadm: https://kubernetes.io/docs/setup/production-environment/tools/kubeadm/
- containerd: https://containerd.io/
- CNI plugins (Flannel, Calico, Weave Net): https://github.com/containernetworking/plugins