- What is the purpose of the cluster — learning, development, testing, or production?
- Do you want a managed cloud service or a self-hosted solution?
- What workloads will run on the cluster (web apps, analytics, batch jobs)?
- How many applications will you host — few or many?
- What are the resource requirements of those applications (CPU, memory, disk I/O)?
- What kind of network traffic do the applications expect — steady, bursty, or spiky?
Cluster types and recommended tooling
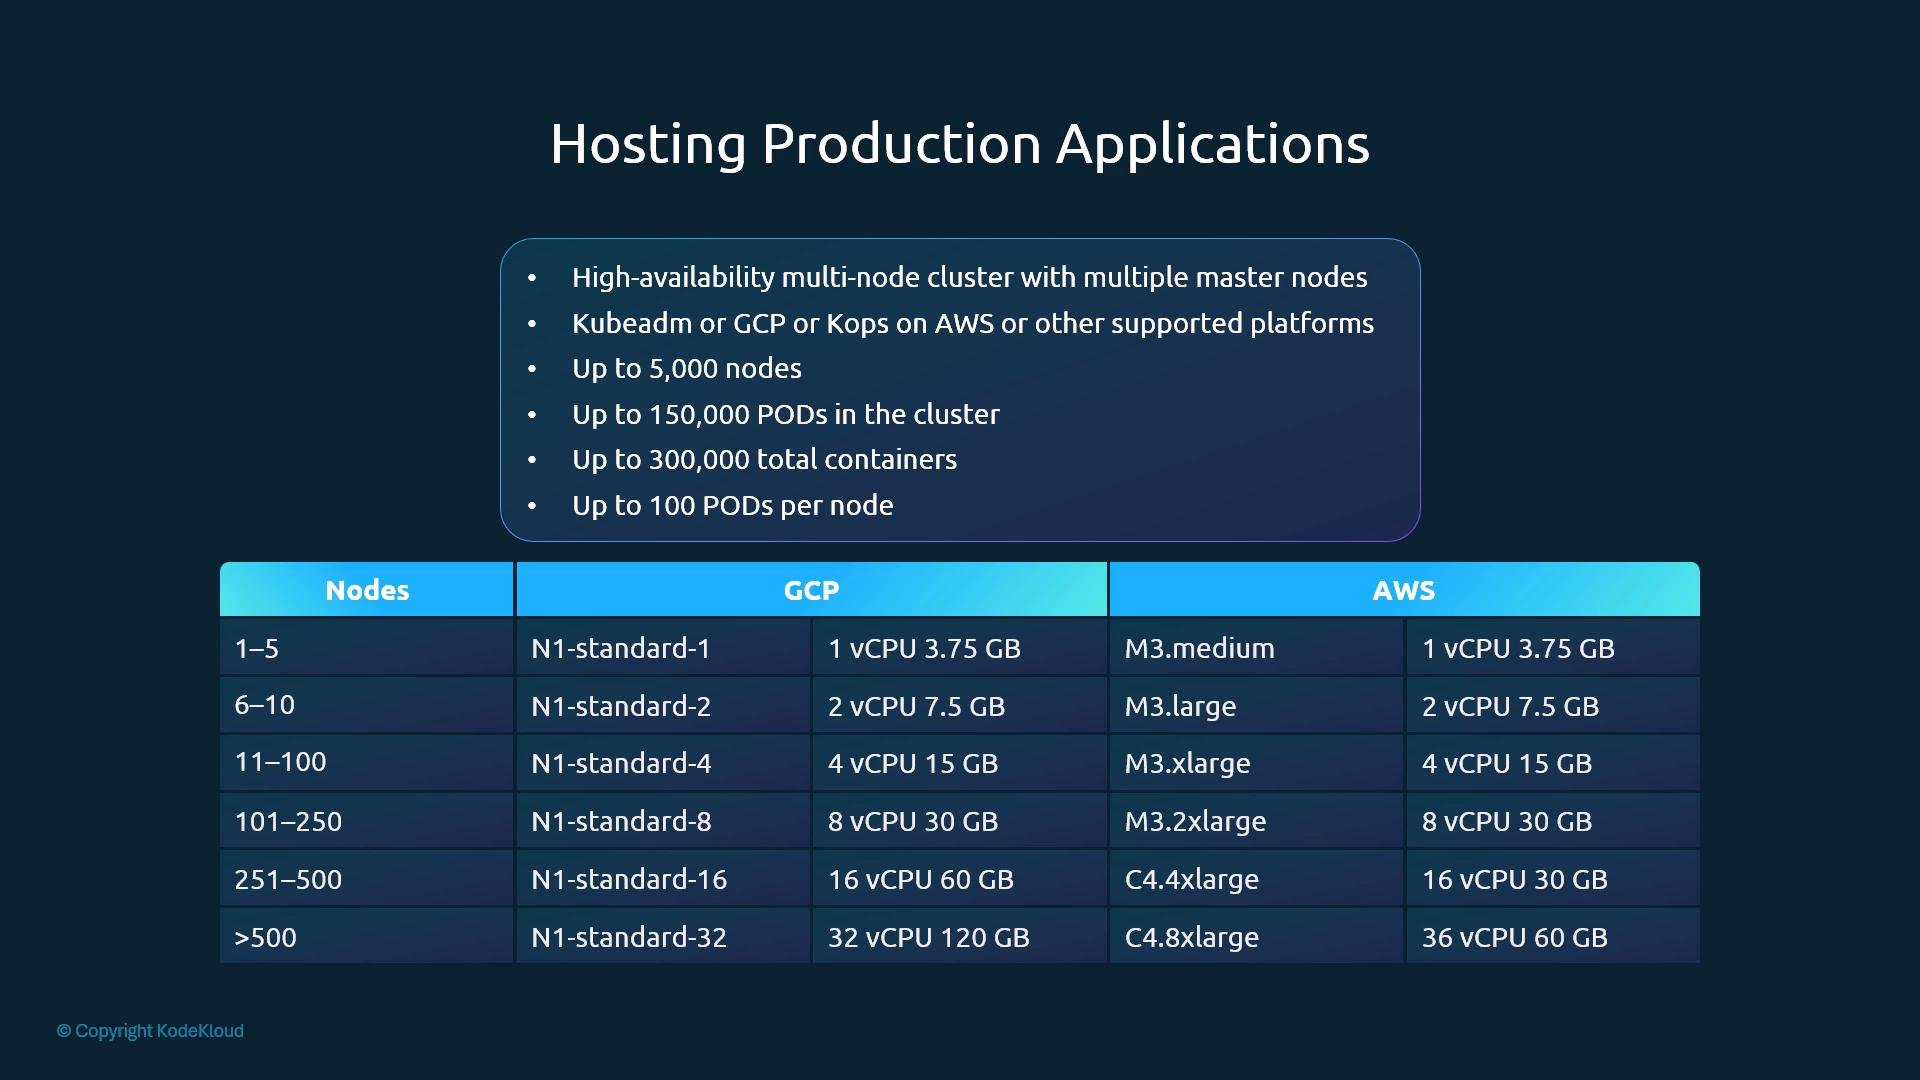
Choose tooling and topology based on your use case. The table below summarizes recommended approaches for common deployment scenarios.
For cloud-managed clusters, providers often handle control plane HA, etcd, and upgrades for you. For self-managed clusters, kubeadm and kops give flexibility but require more operational effort.
Capacity guidance
Kubernetes supports large clusters. Reference limits (subject to change by Kubernetes or cloud provider):- Example maximums often cited: up to ~5,000 nodes, ~150,000 pods, and ~300,000 containers.
- Typical defaults include ~110 pods per node (can be tuned).
Storage considerations
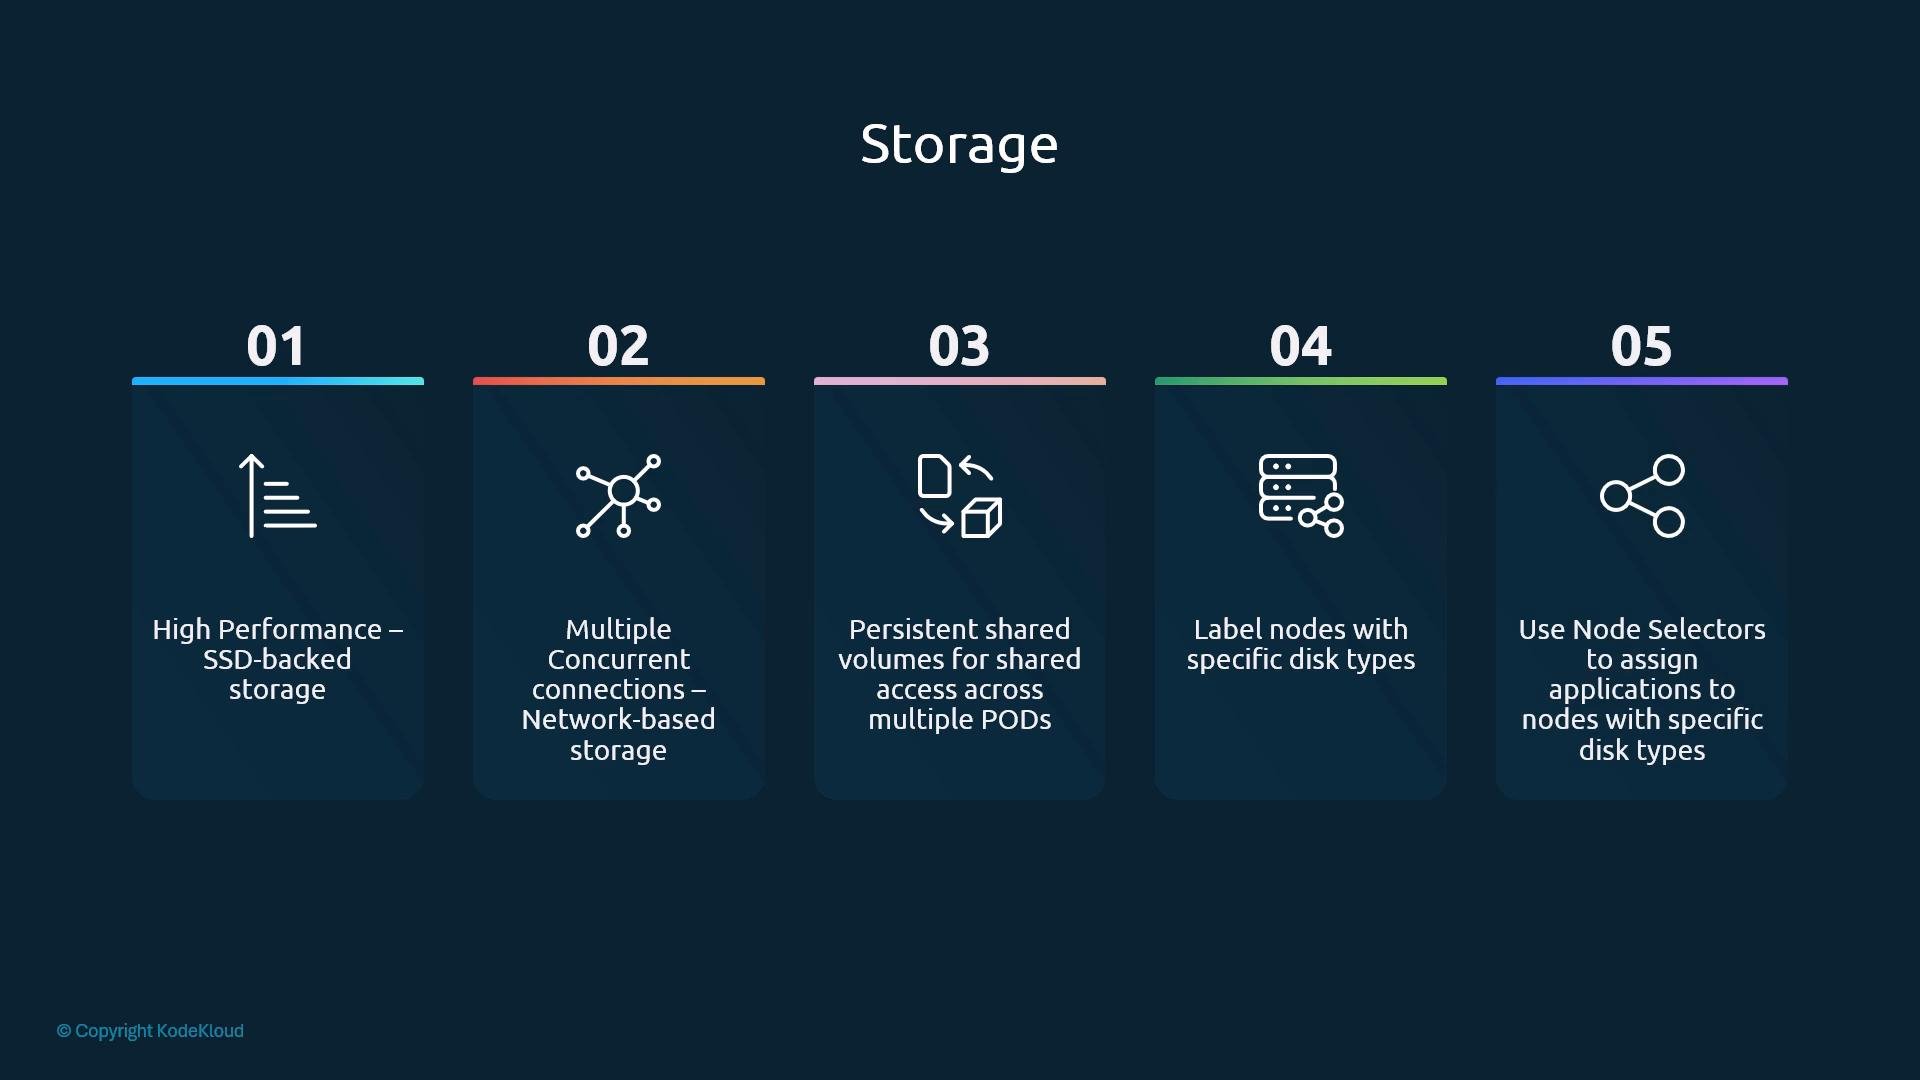
Pick storage based on workload I/O, durability, and sharing requirements:- High-performance workloads: prefer SSD-backed storage for low latency and high IOPS.
- Concurrent access: use NAS or distributed block storage that supports multi-attach when many clients need simultaneous read/write.
- Shared volumes: use PersistentVolumes (PV) and PersistentVolumeClaims (PVC) and define StorageClasses for different performance tiers.
- Node labeling for disks: label nodes by disk capability (for example,
fast-ssd) and use node selectors / node affinity to schedule workloads to those nodes. - Use taints and tolerations to keep general workloads off specialized nodes unless explicitly allowed.
Nodes, control plane, and topology
Key topology and node design points:- Nodes can be physical machines or VMs (cloud instances). For small setups, VirtualBox VMs or small cloud VMs are common.
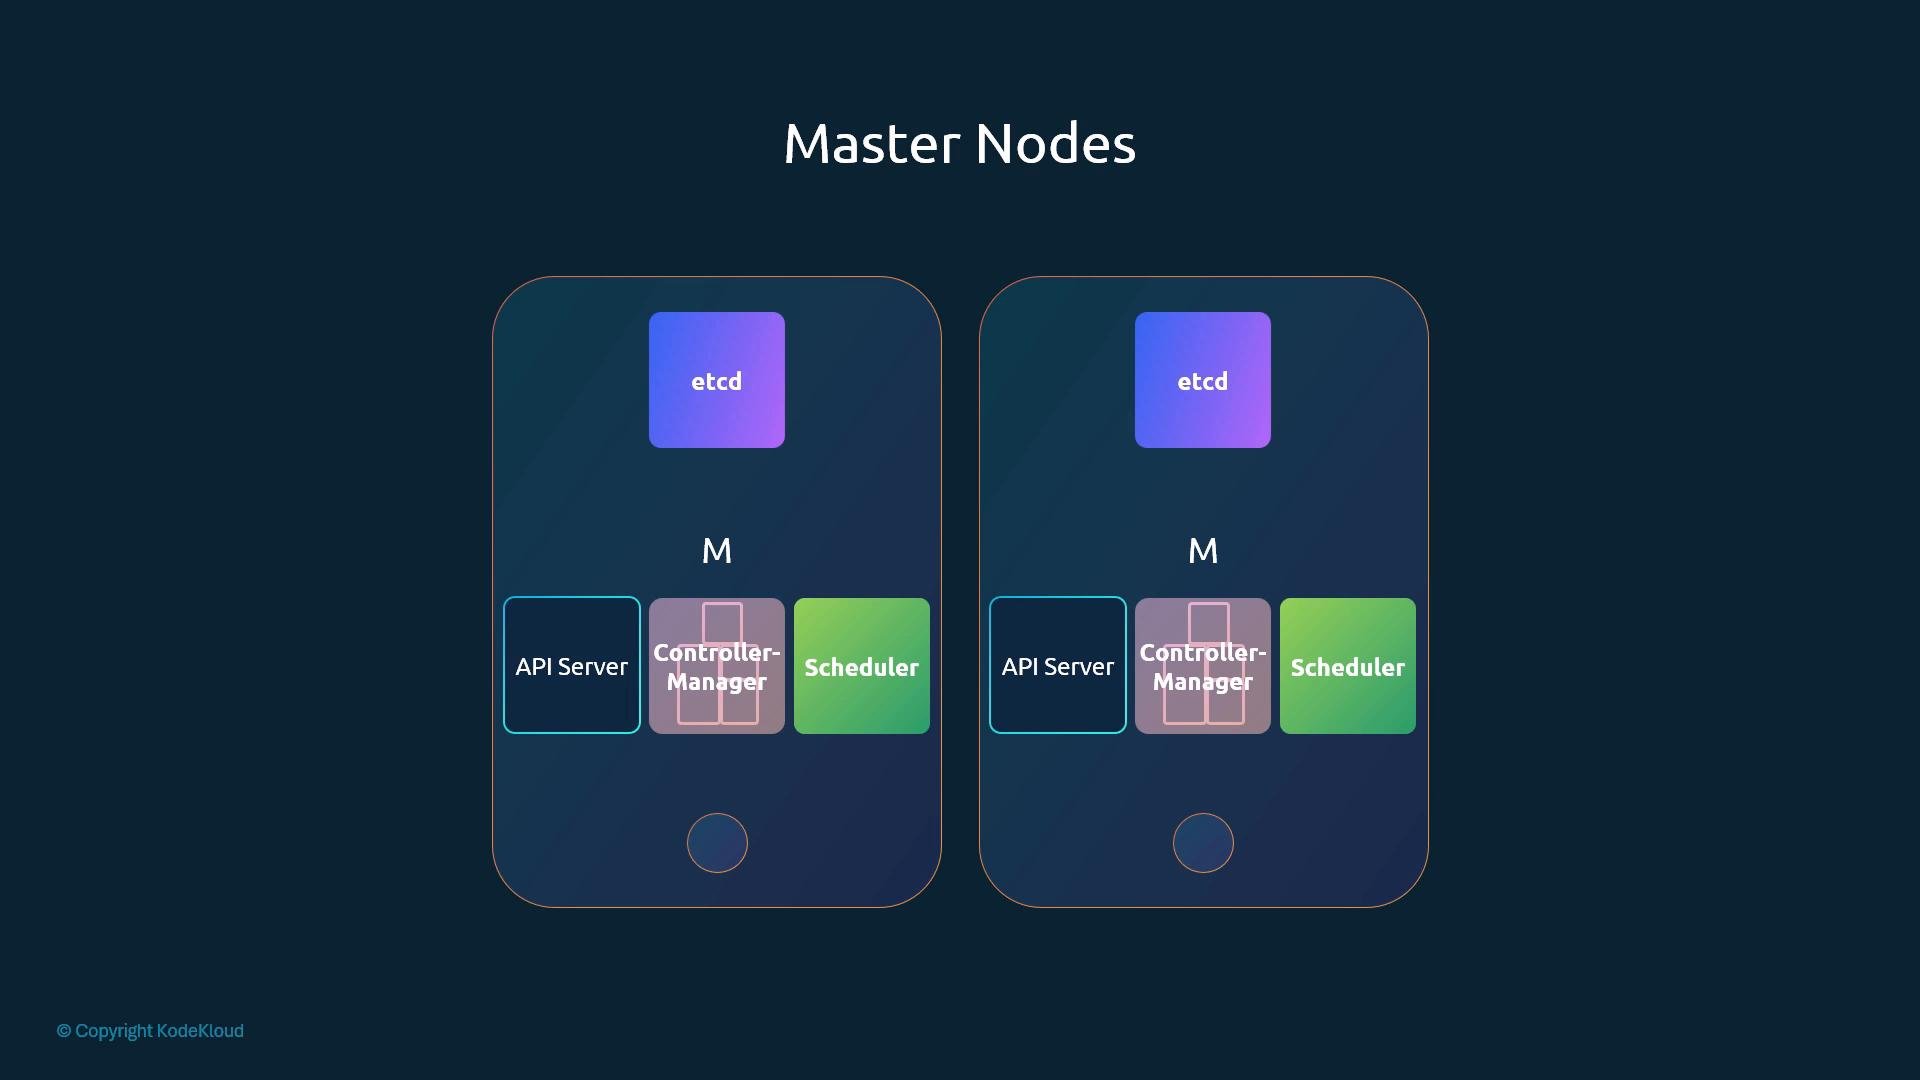
- A minimal production-ready cluster typically has multiple control plane nodes (to provide HA) and multiple workers. A common small configuration is 3 control-plane nodes and 2+ worker nodes.
- Control plane components include: etcd, kube-apiserver, kube-controller-manager, and kube-scheduler.
- In larger clusters, consider isolating etcd on dedicated nodes to reduce contention for I/O and memory.
- kubeadm taints control-plane/master nodes by default to prevent scheduling regular workloads; keeping masters dedicated is best practice. Only use taints/tolerations to run workloads on masters if you understand the operational trade-offs.
For production, dedicate control plane nodes to control plane components only. Use taints and tolerations deliberately if you must run workloads on master nodes.
Other practical considerations
- Operating system: use a supported 64-bit Linux distribution for control plane and most worker nodes. Windows worker nodes are supported for Windows containers (control plane remains Linux).
- Networking: choose a CNI plugin that matches your needs for performance, policy, and cloud integration (Calico, Cilium, Flannel, etc.).
- Monitoring and logging: include cluster-level monitoring (Prometheus, metrics-server), alerting, and centralized logging (e.g., Fluentd/Fluent Bit + ELK/EFK) from the start.
- Upgrades and lifecycle: plan and test upgrades in non-production first. Managed services reduce upgrade complexity; self-managed clusters require a documented upgrade process.
References and certification notes
For authoritative details, consult:- Kubernetes official documentation: https://kubernetes.io/docs/
- Google Kubernetes Engine (GKE): https://cloud.google.com/kubernetes-engine
- Amazon EKS: https://aws.amazon.com/eks
- Azure Kubernetes Service (AKS): https://azure.microsoft.com/en-us/services/kubernetes-service/
Exam tip: Know the concepts and trade-offs (HA control plane, storage classes, node sizing). Rely on official docs for exact capacity numbers rather than memorizing them.
Control plane illustration
Below is a simple depiction of master nodes showing typical control plane components (etcd, API server, controller-manager, scheduler).