

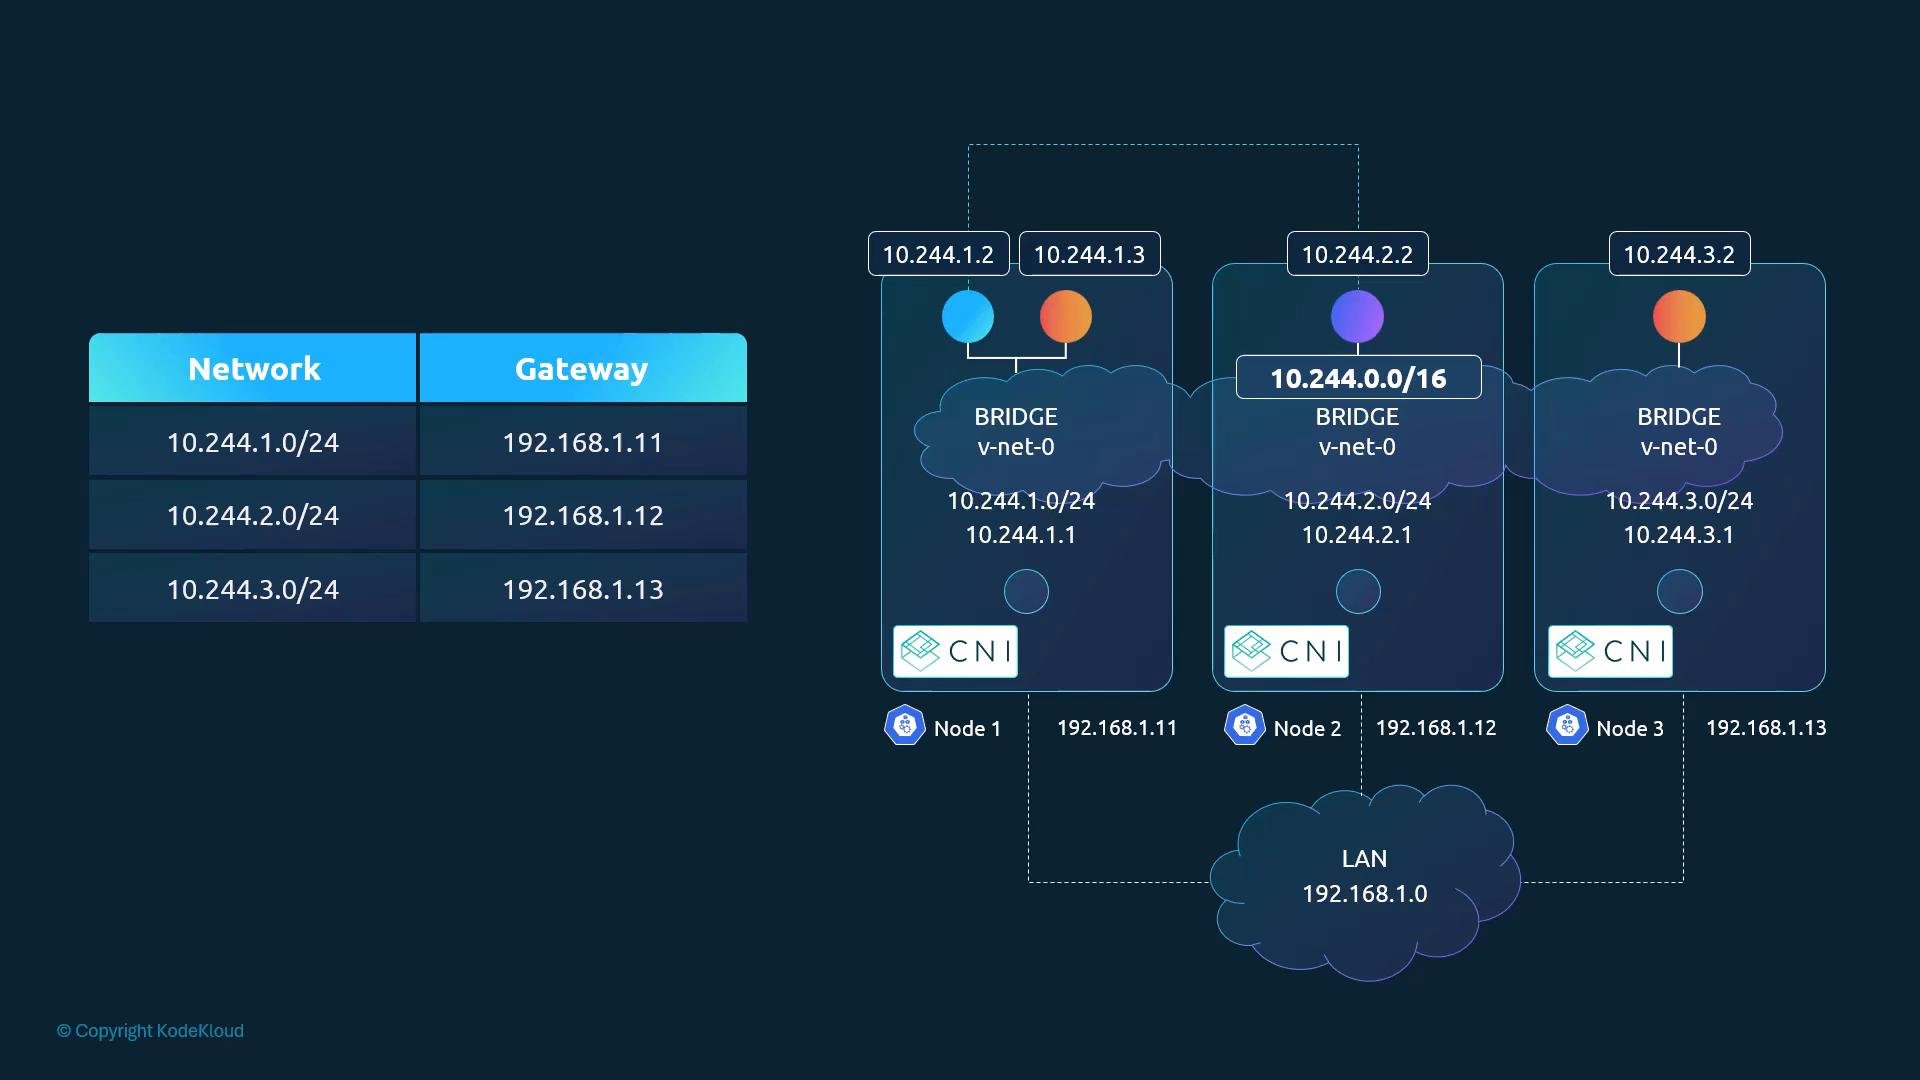
Common Service types
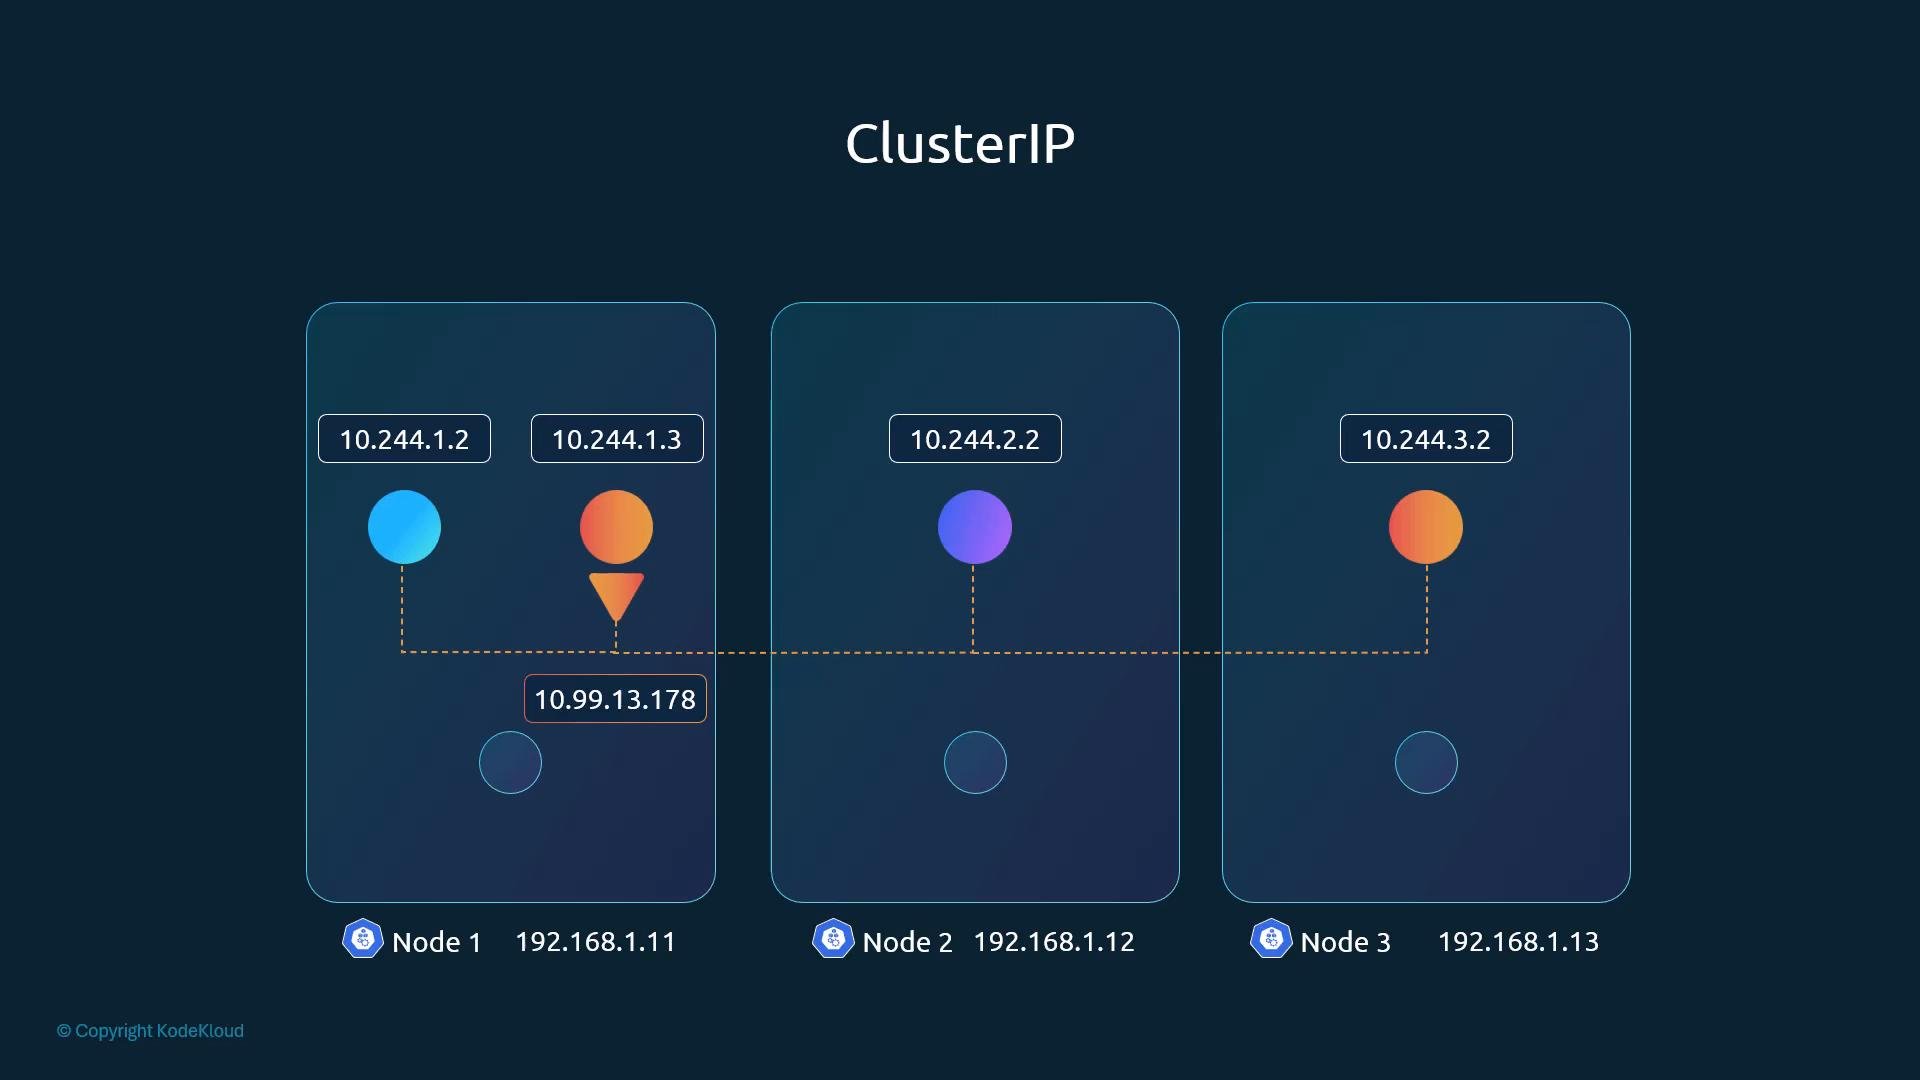
The simplest and most common type is
ClusterIP. It exposes the Service only inside the cluster — a good fit for internal databases or microservices.
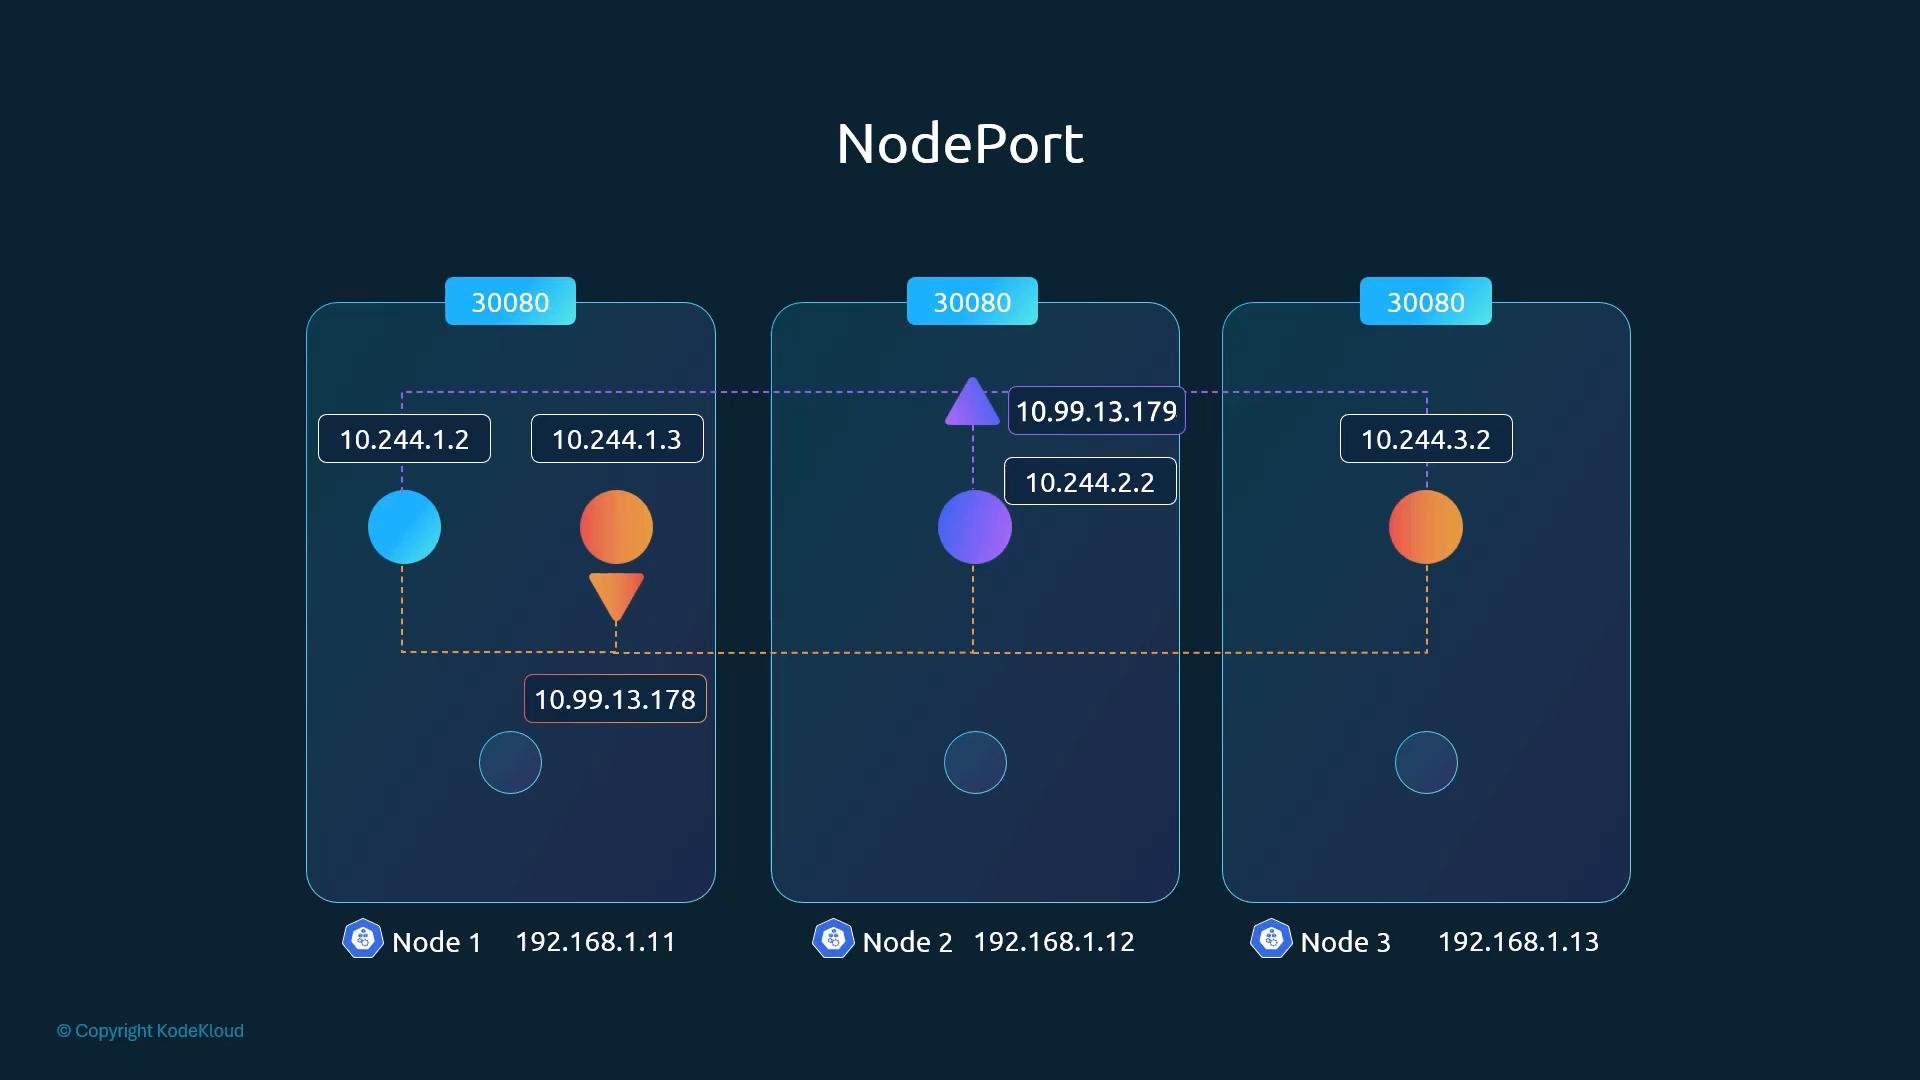
NodePort extends ClusterIP by opening a port on every node. External clients can connect to any node IP and the allocated NodePort to reach the Service.
How Services get IPs and forward traffic
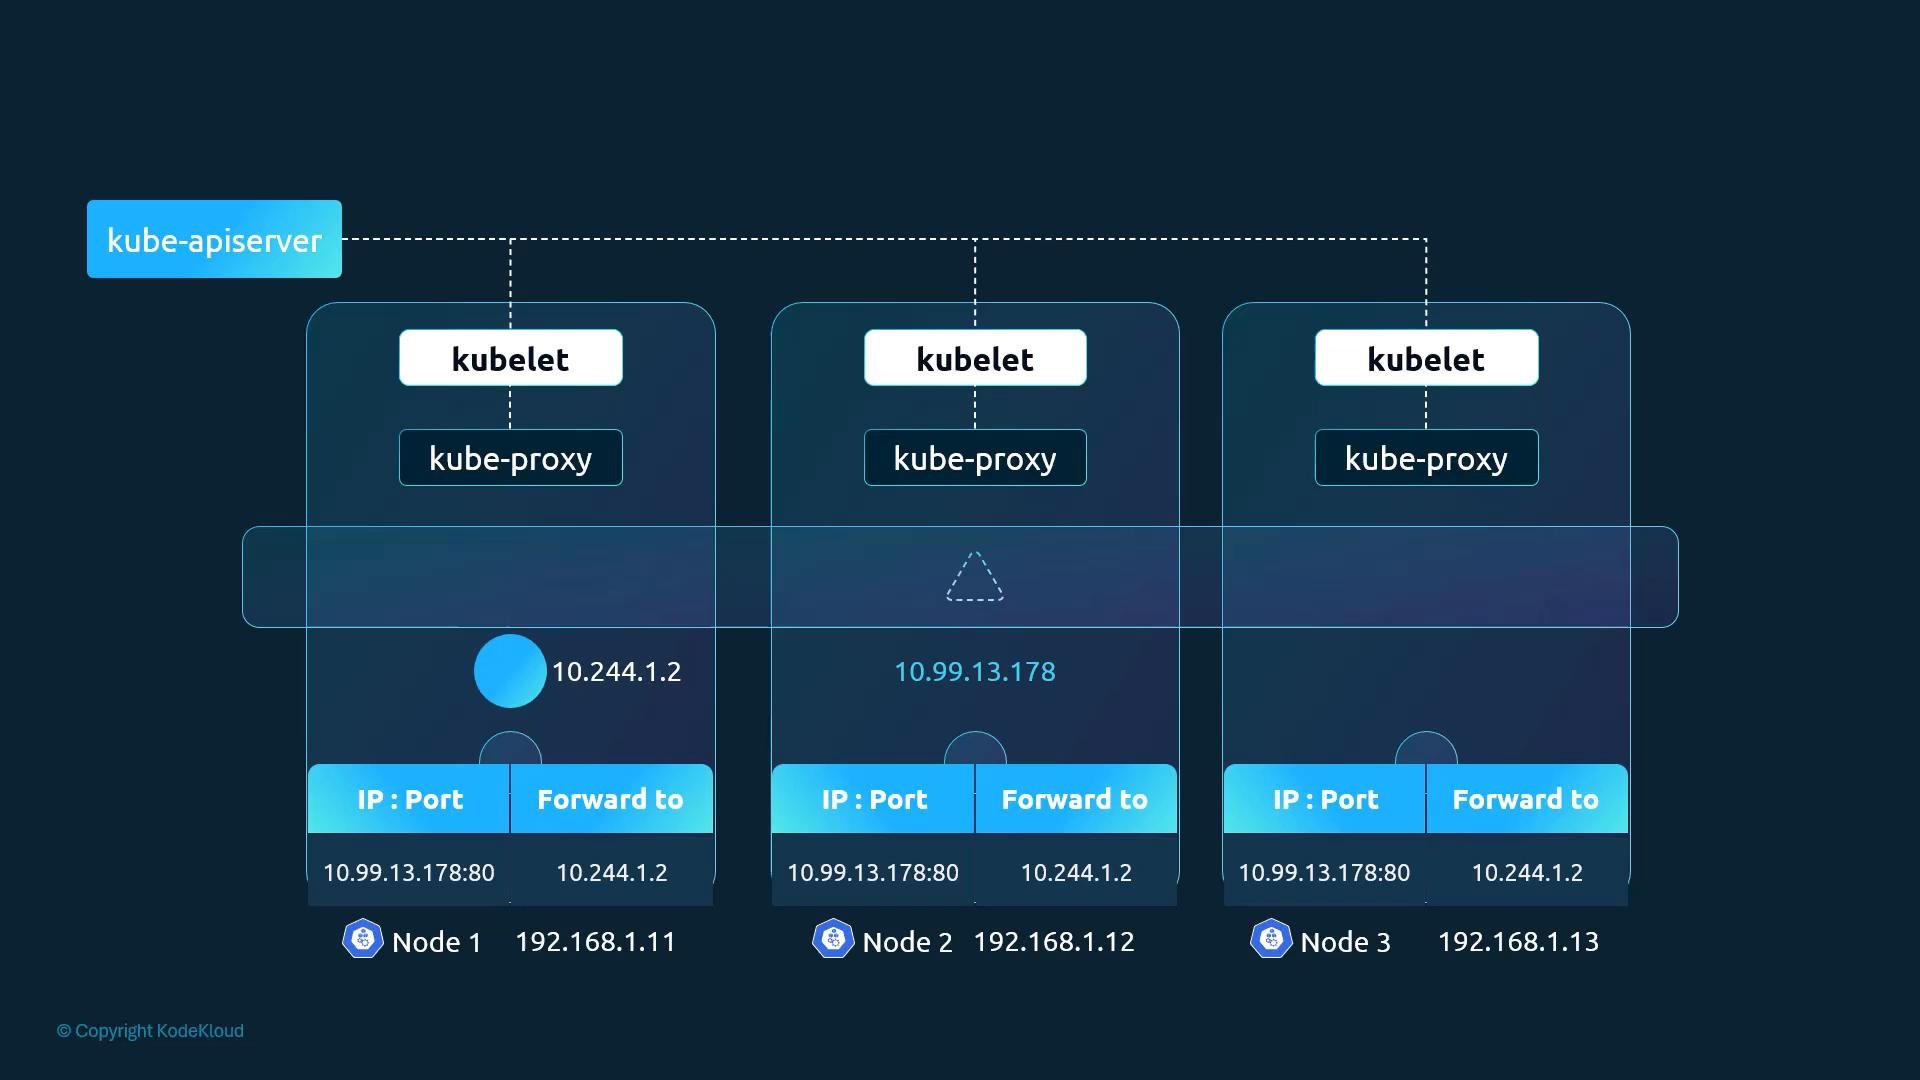
Services are logical, cluster-scoped objects stored in the API server. There is no real process listening on the Service IP — the address is virtual. When you create a Service, the API server assigns an IP from the configured service CIDR (controlled by the API server option--service-cluster-ip-range).
Each node runs two components relevant to Service networking:
- kubelet — manages Pods on the node and interacts with the CNI to configure Pod networking.
- kube-proxy — watches the API server for Services and Endpoints and programs forwarding rules on the node to map a Service IP:port to one of the backend Pod IP:ports.
- userspace (legacy)
iptables(widely used default)- IPVS (high-performance alternative)
iptables proxier.
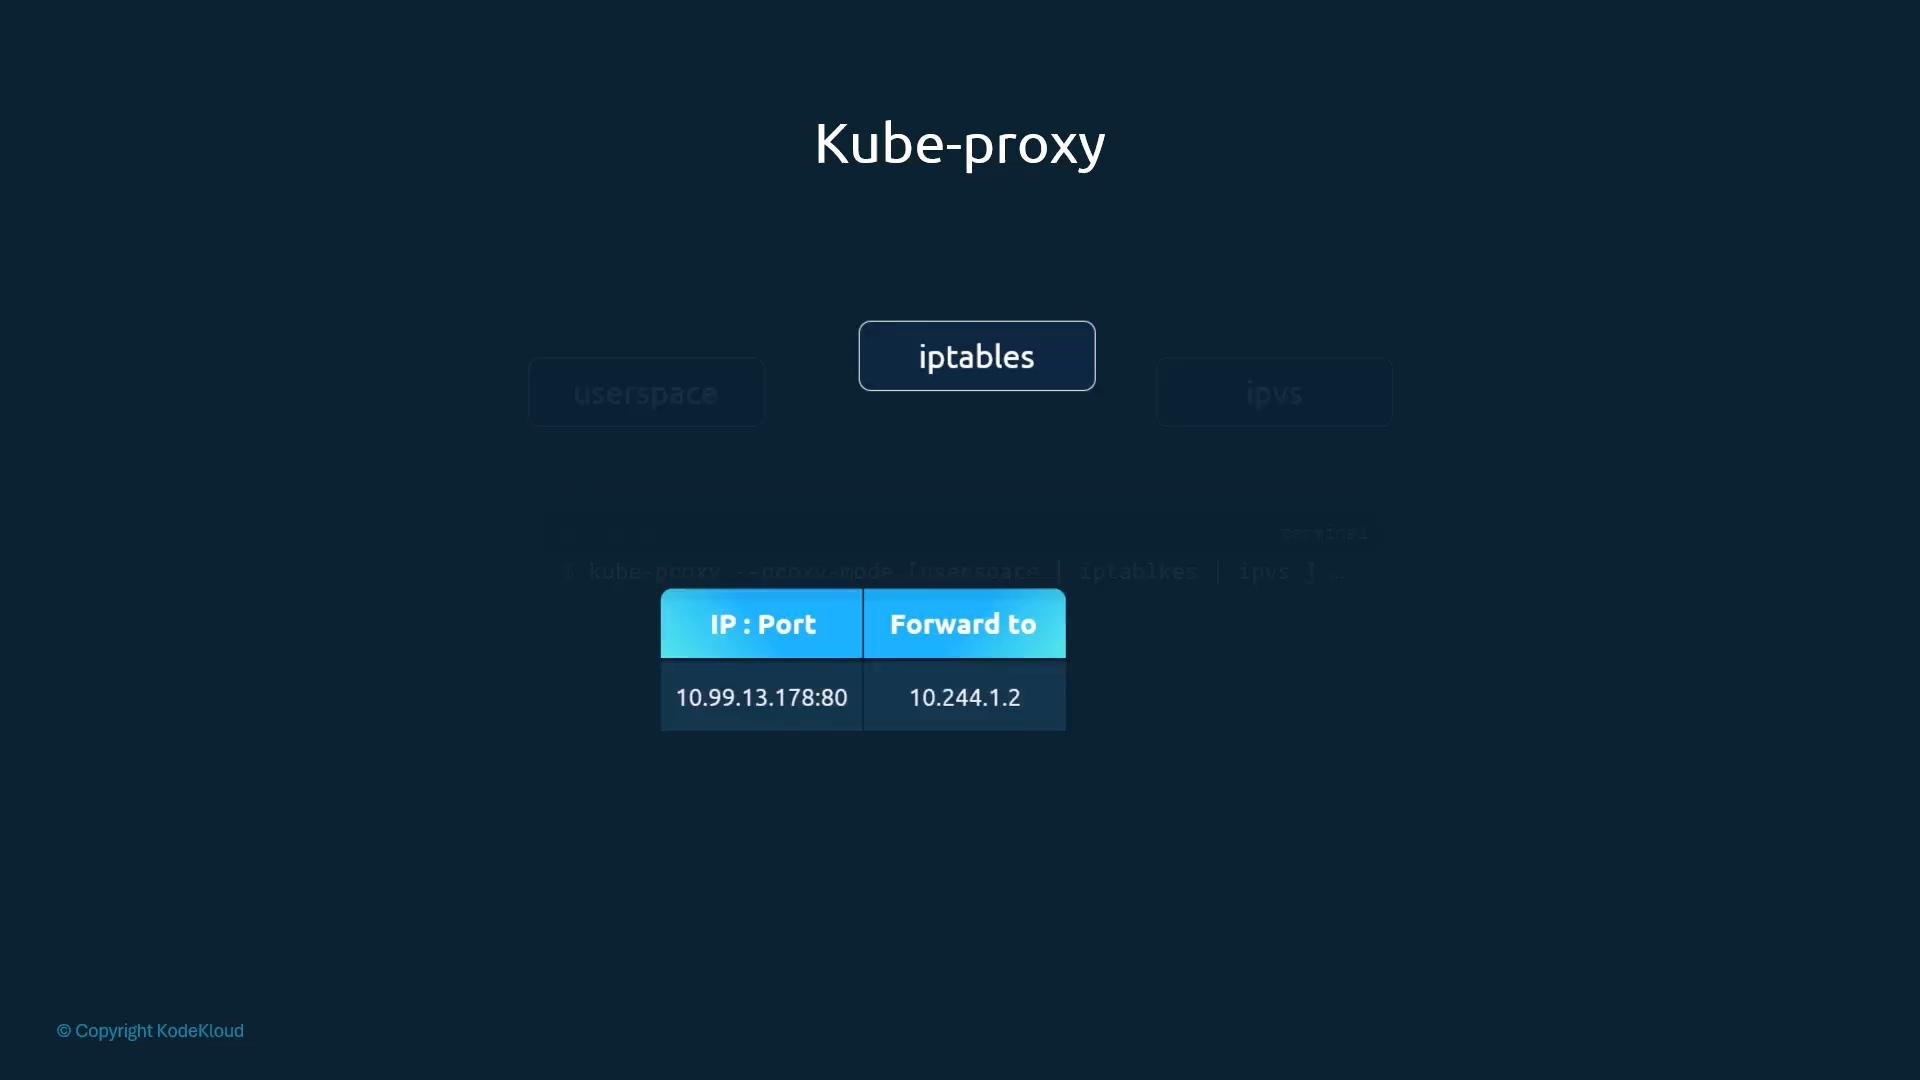
- The API server assigns a ClusterIP from the Service CIDR.
- kube-proxy on every node sees the new Service and programs kernel-level rules (iptables or IPVS) so traffic to that virtual IP:port is NATed to one of the endpoint Pod IPs:ports.
- Pod
dbruns onnode-1with IP10.244.1.2. - You create a
ClusterIPService nameddb-service; the API assigns10.103.132.104and the Service exposes port3306. - kube-proxy on each node programs rules to DNAT traffic destined for
10.103.132.104:3306to the backend pod10.244.1.2:3306.
Always allocate separate, non-overlapping CIDR ranges for Pod networks and Service networks (for example, Pod network
10.244.0.0/16 and Service CIDR 10.96.0.0/12). Overlapping CIDRs break routing and NAT, causing traffic to be misrouted.Inspecting kube-proxy / iptables behavior
Iniptables mode, kube-proxy inserts rules in the nat table so packets destined for the ClusterIP are DNATed to backend Pods. On a node you can list these rules:
- The
KUBE-SVCchain matches traffic to the Service IP10.103.132.104on port3306. - A DNAT rule rewrites the destination to a selected backend pod IP
10.244.1.2:3306. - kube-proxy creates and manages these chains, adding comments with the Service name for identification.
- Confirm kube-proxy is running and connected to the API server.
- Verify kube-proxy’s log output and configured proxy mode.
- Check that Services and Endpoints exist (
kubectl get svc,kubectl get endpoints).
kube-proxy logs
kube-proxy logs which proxier it uses and when it adds/removes Services or Endpoints. Example:- kube-proxy log location depends on the distribution and deployment method (systemd, static Pod manifest, or DaemonSet). Adjust the path as needed.
- Increase kube-proxy verbosity for troubleshooting (via
--vflag) if necessary.
Summary
- Services are virtual, cluster-scoped objects that receive an IP from the Service CIDR.
- kube-proxy on each node programs kernel-level forwarding (iptables or IPVS) so traffic to a Service IP:port is DNATed to a backend Pod IP:port.
NodePortextendsClusterIPto make a Service reachable via any node IP and a fixed node port.- Ensure Pod and Service CIDRs do not overlap to avoid routing/NAT issues.
Links and references
- Kubernetes Services: https://kubernetes.io/docs/concepts/services-networking/service/
- kube-proxy modes (iptables, IPVS): https://kubernetes.io/docs/concepts/services-networking/service/#proxy-mode-iptables
- Kubernetes networking basics: https://kubernetes.io/docs/concepts/cluster-administration/networking/