

For full details, see the Environments and Deployments reference in GitLab docs.
- Defining environments in
.gitlab-ci.yml - A sample pipeline with containerization, testing, and deployment
- Static vs. dynamic environments
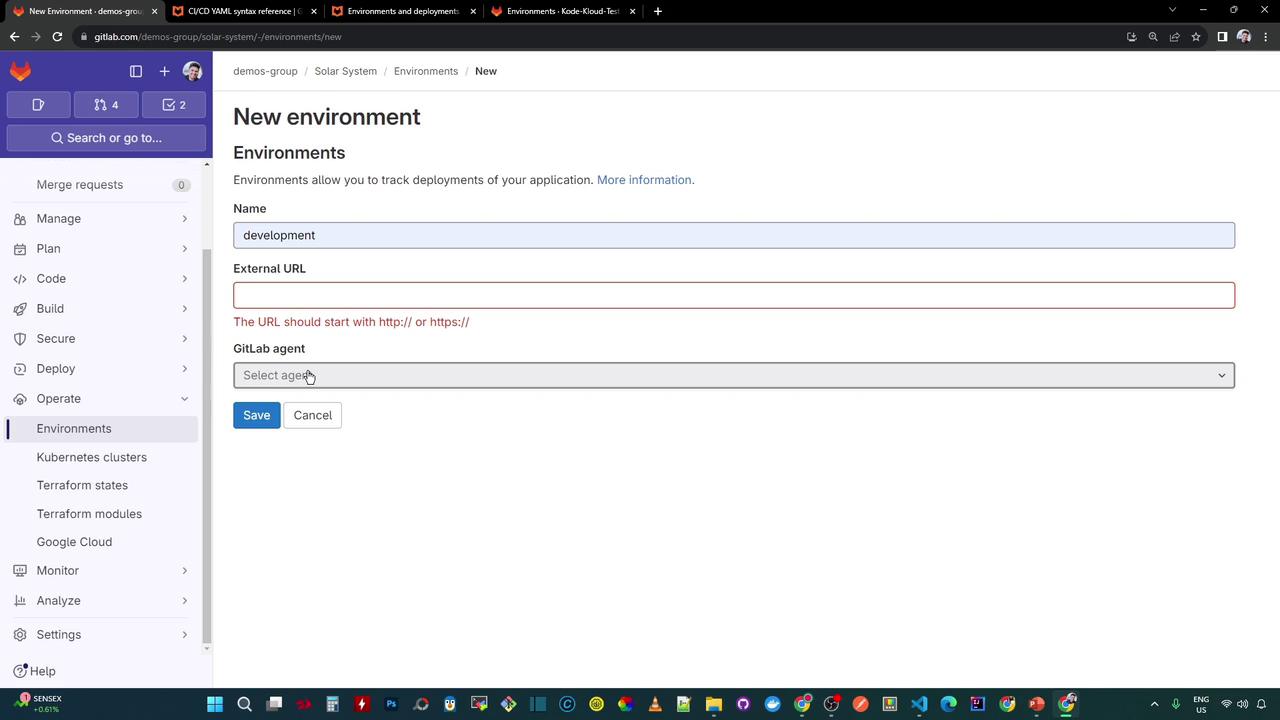
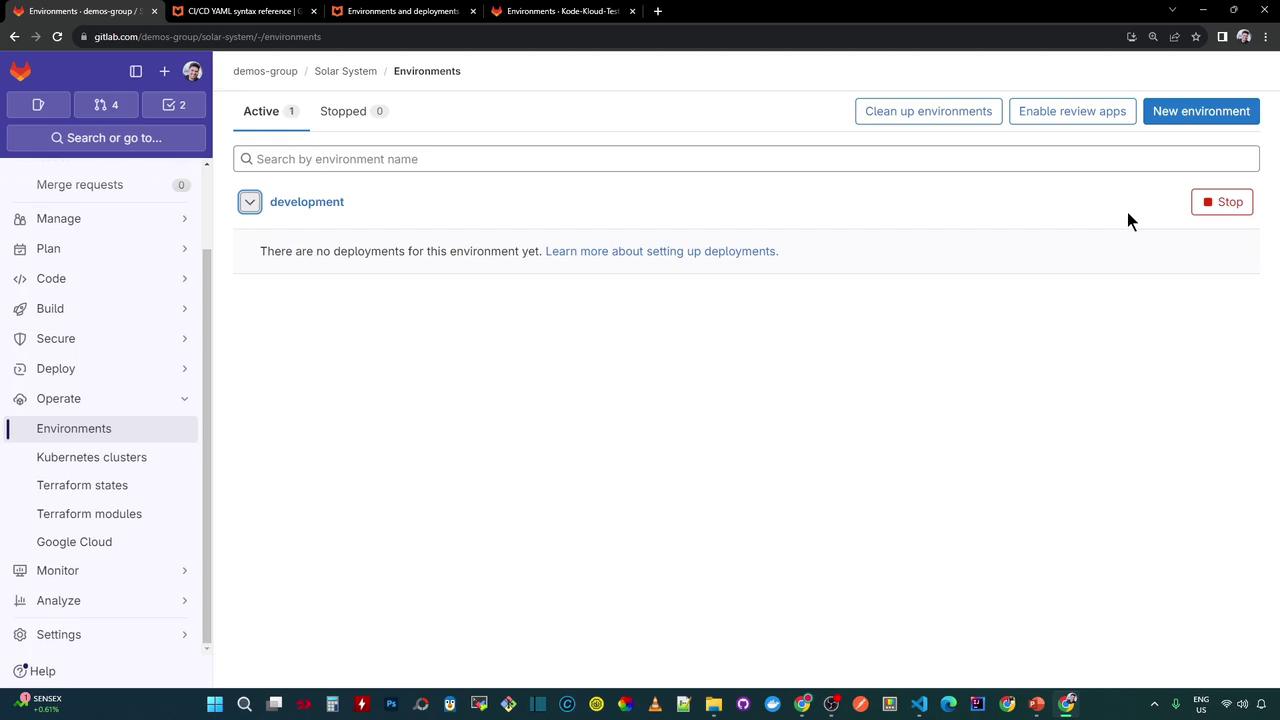
- Creating environments in the GitLab UI
- Viewing, rolling back, and redeploying applications
1. Defining an Environment in .gitlab-ci.yml
You can declare environments directly in job definitions to track deployments and enable quick-access links.
Simple Environment Declaration
production environment name.
Expanded Environment Configuration
- name: The identifier displayed in the GitLab UI.
- url: External link to the live application for rapid access.
2. Example Pipeline Configuration
Here’s a streamlined pipeline showcasing containerization, tests, and deployment to a Kubernetes namespace:3. Static vs. Dynamic Environments
GitLab supports two environment types:4. Creating a Static Environment
- In GitLab, navigate to Operations > Environments > New environment.
- Enter the Name and optional External URL.
- (Optional) Link a GitLab Agent for Kubernetes.
- Click Save.
5. Running the Pipeline & Viewing Deployments
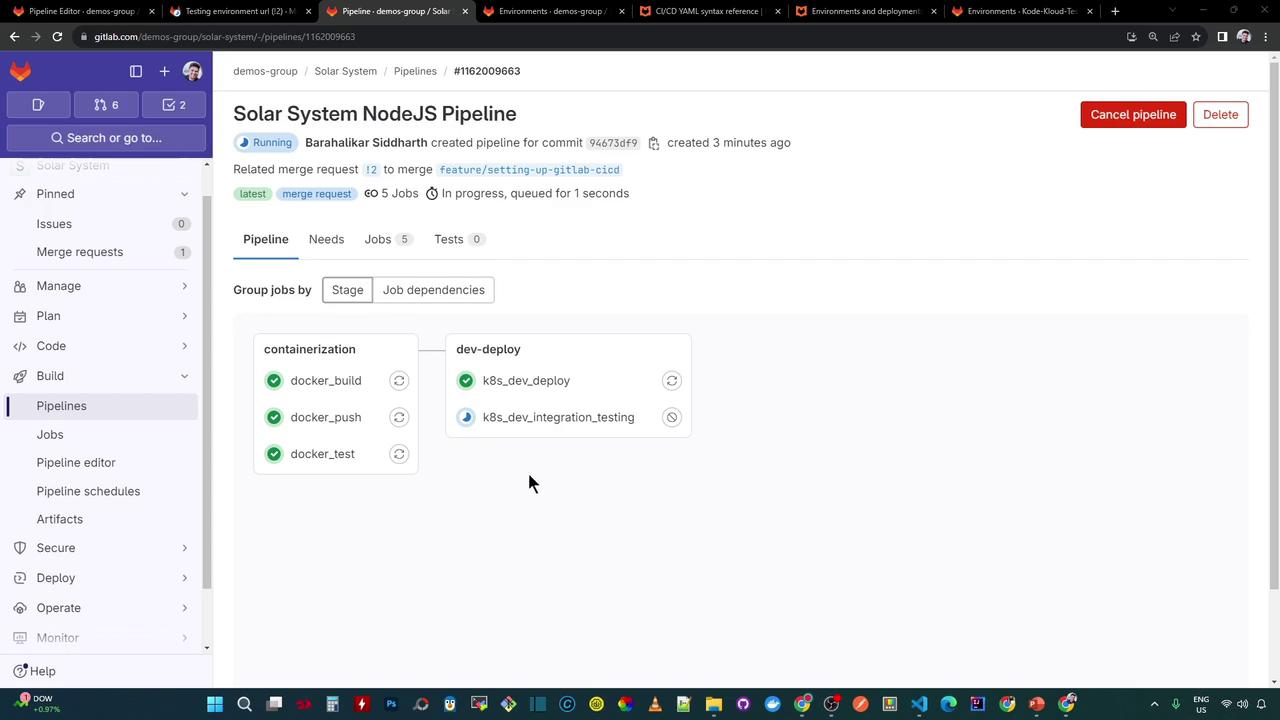
Once you push changes or create a Merge Request, the pipeline executes:- Containerization
- Testing
- Deployment
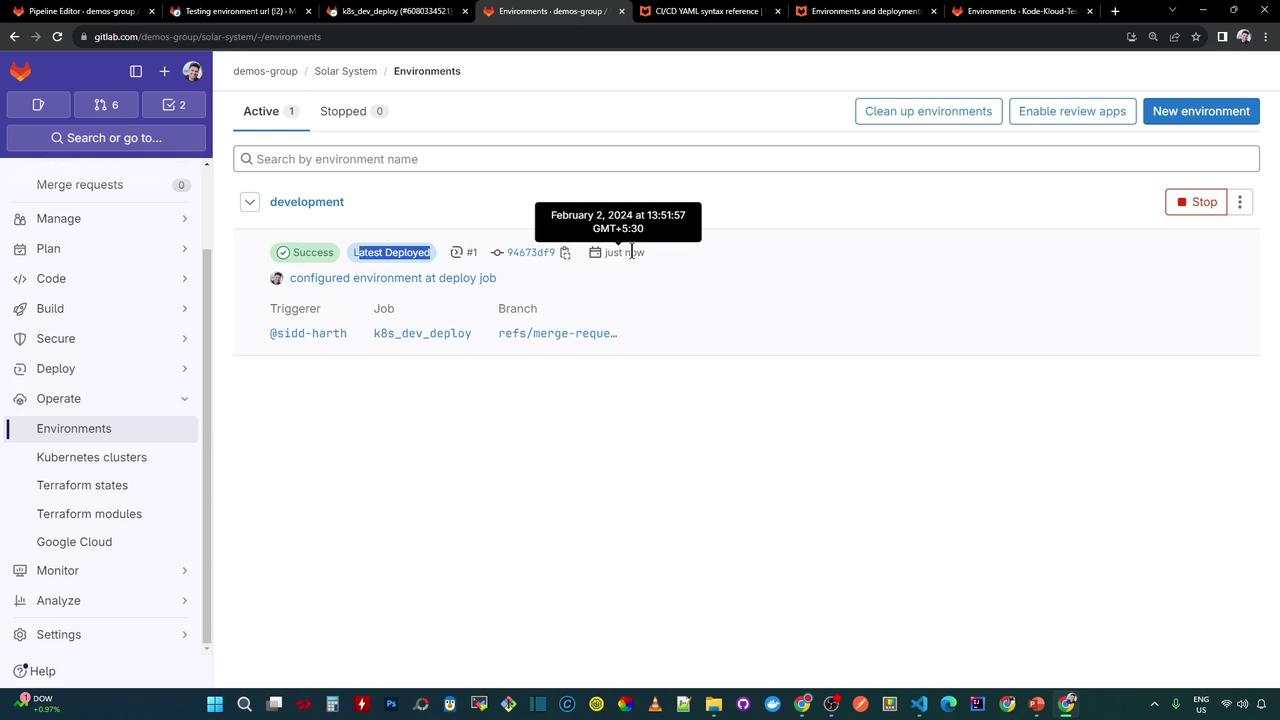
url specified in your job’s environment settings and is also visible in Merge Requests for quick previews.
6. Rollback and Redeploy
If a deployment fails or you need to revert changes, GitLab offers Finish, Rollback, and Redeploy actions: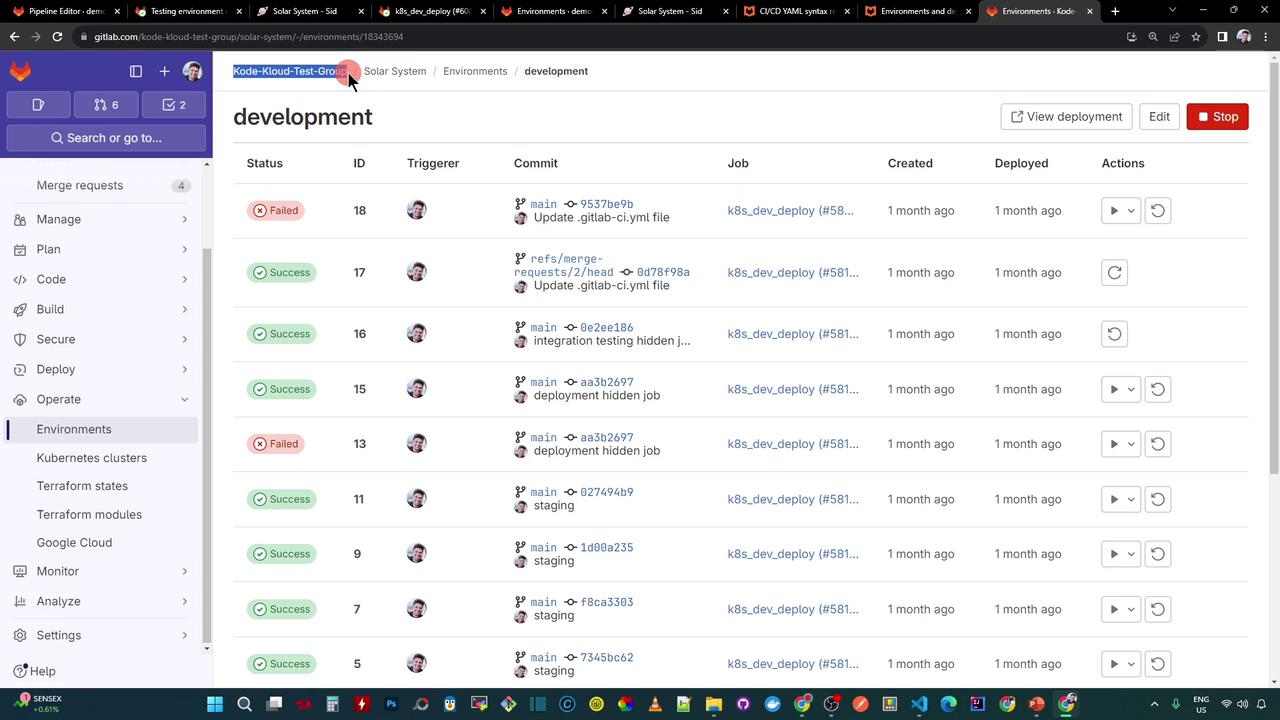
- Rollback: Reverts to the last successful deployment (using the recorded commit ID).
- Redeploy: Re-runs the deployment job for the same commit.
Use rollback carefully: any data migrations or schema changes may not be reversible.
Links and References
- GitLab CI/CD Environments Documentation
- Kubernetes Official Documentation
- Docker Hub
- Terraform Registry