In the previous lesson we changed repository files on a feature branch, opened a merge request, and inspected the MR pipeline and its reports. In this lesson we accept that merge request and walk through how GitLab Auto DevOps performs a staged canary deployment to production — including manual approvals for incremental rollouts (10%, 25%, 50%, 100%). This pipeline already ran successfully in the prior lesson; all jobs passed.
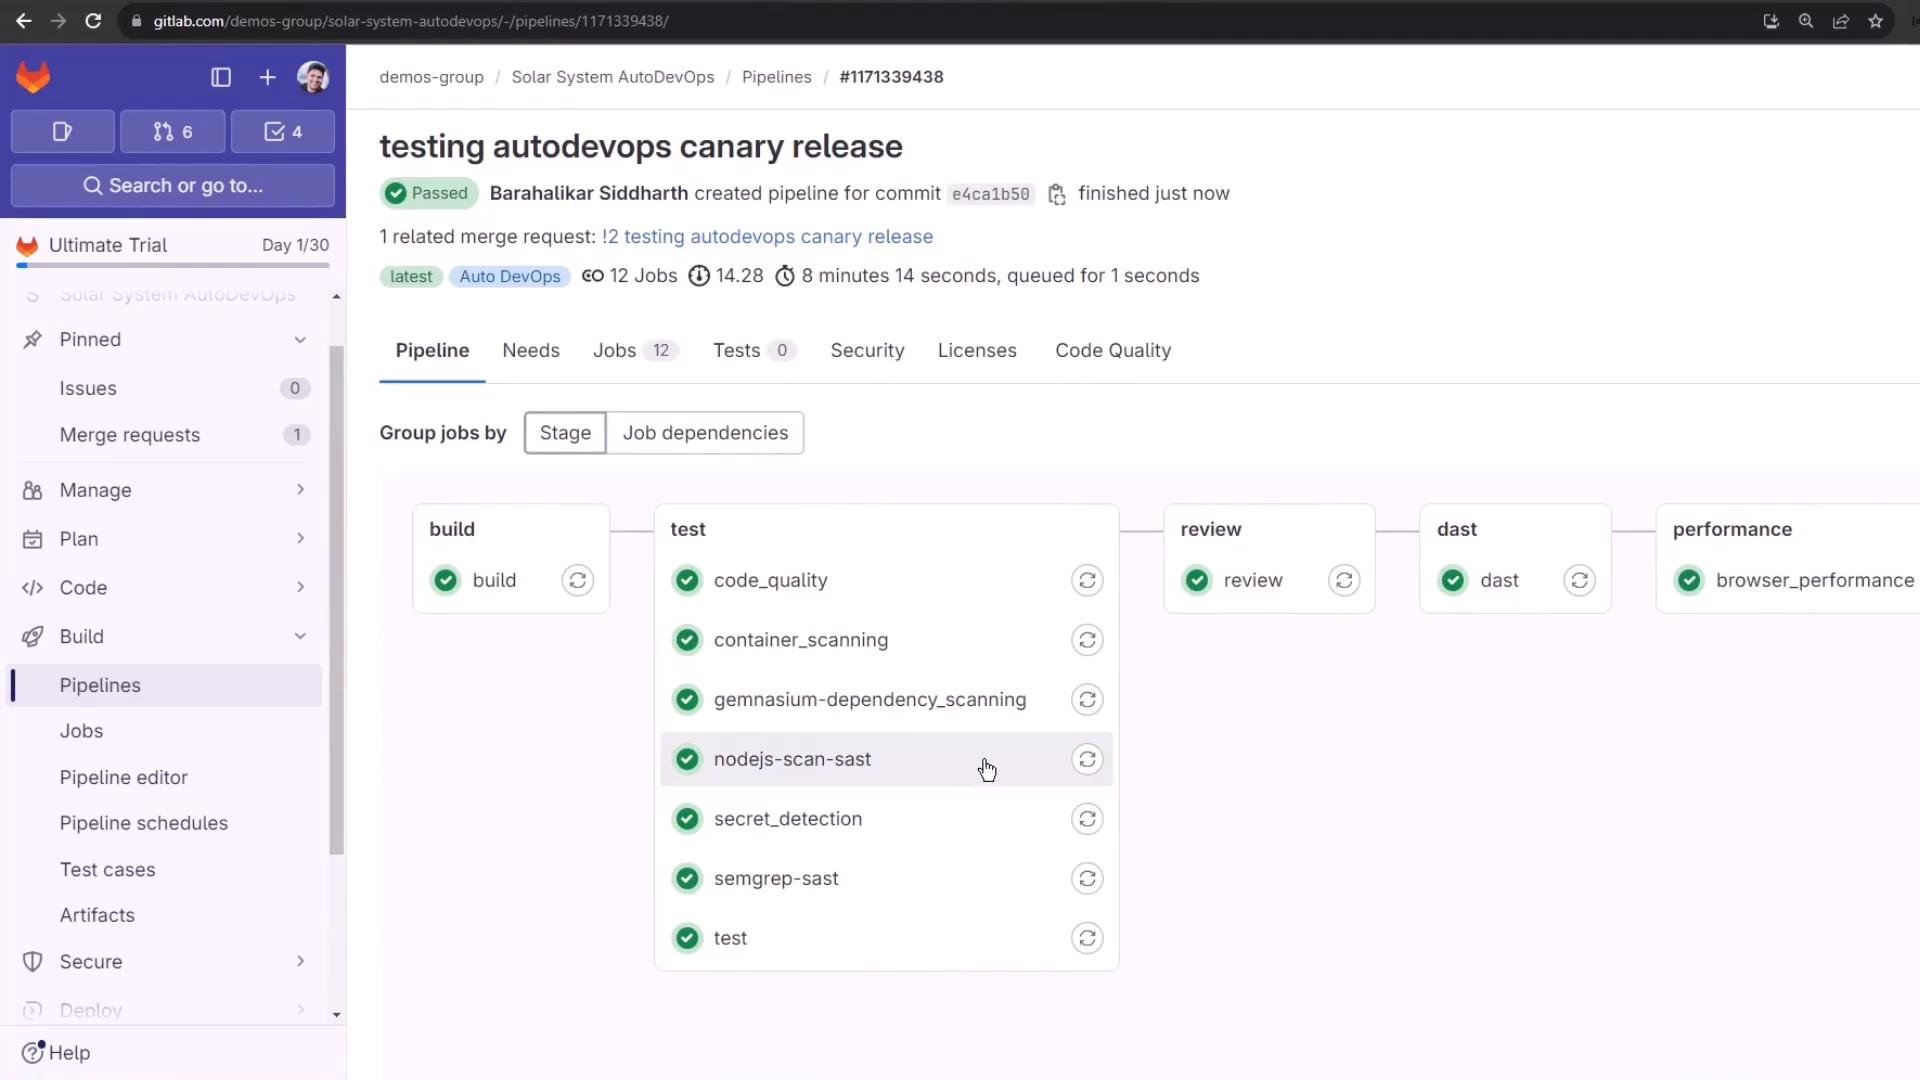
A screenshot of a GitLab Pipelines page for a pipeline titled "testing autodevops canary release," showing stages (build, test, review, dast, performance) with green checkmarks indicating passed jobs. The left sidebar shows project navigation (Issues, Merge requests, Pipelines, etc.).
After reviewing the MR pipeline and scan reports, we merged the feature branch into main. Merging to the protected main branch automatically triggers a pipeline with additional stages compared with a feature-branch pipeline: build, test, review (DAST), staging, and manual production rollout jobs that enable incremental canary promotion. The pipeline also includes performance and cleanup jobs.
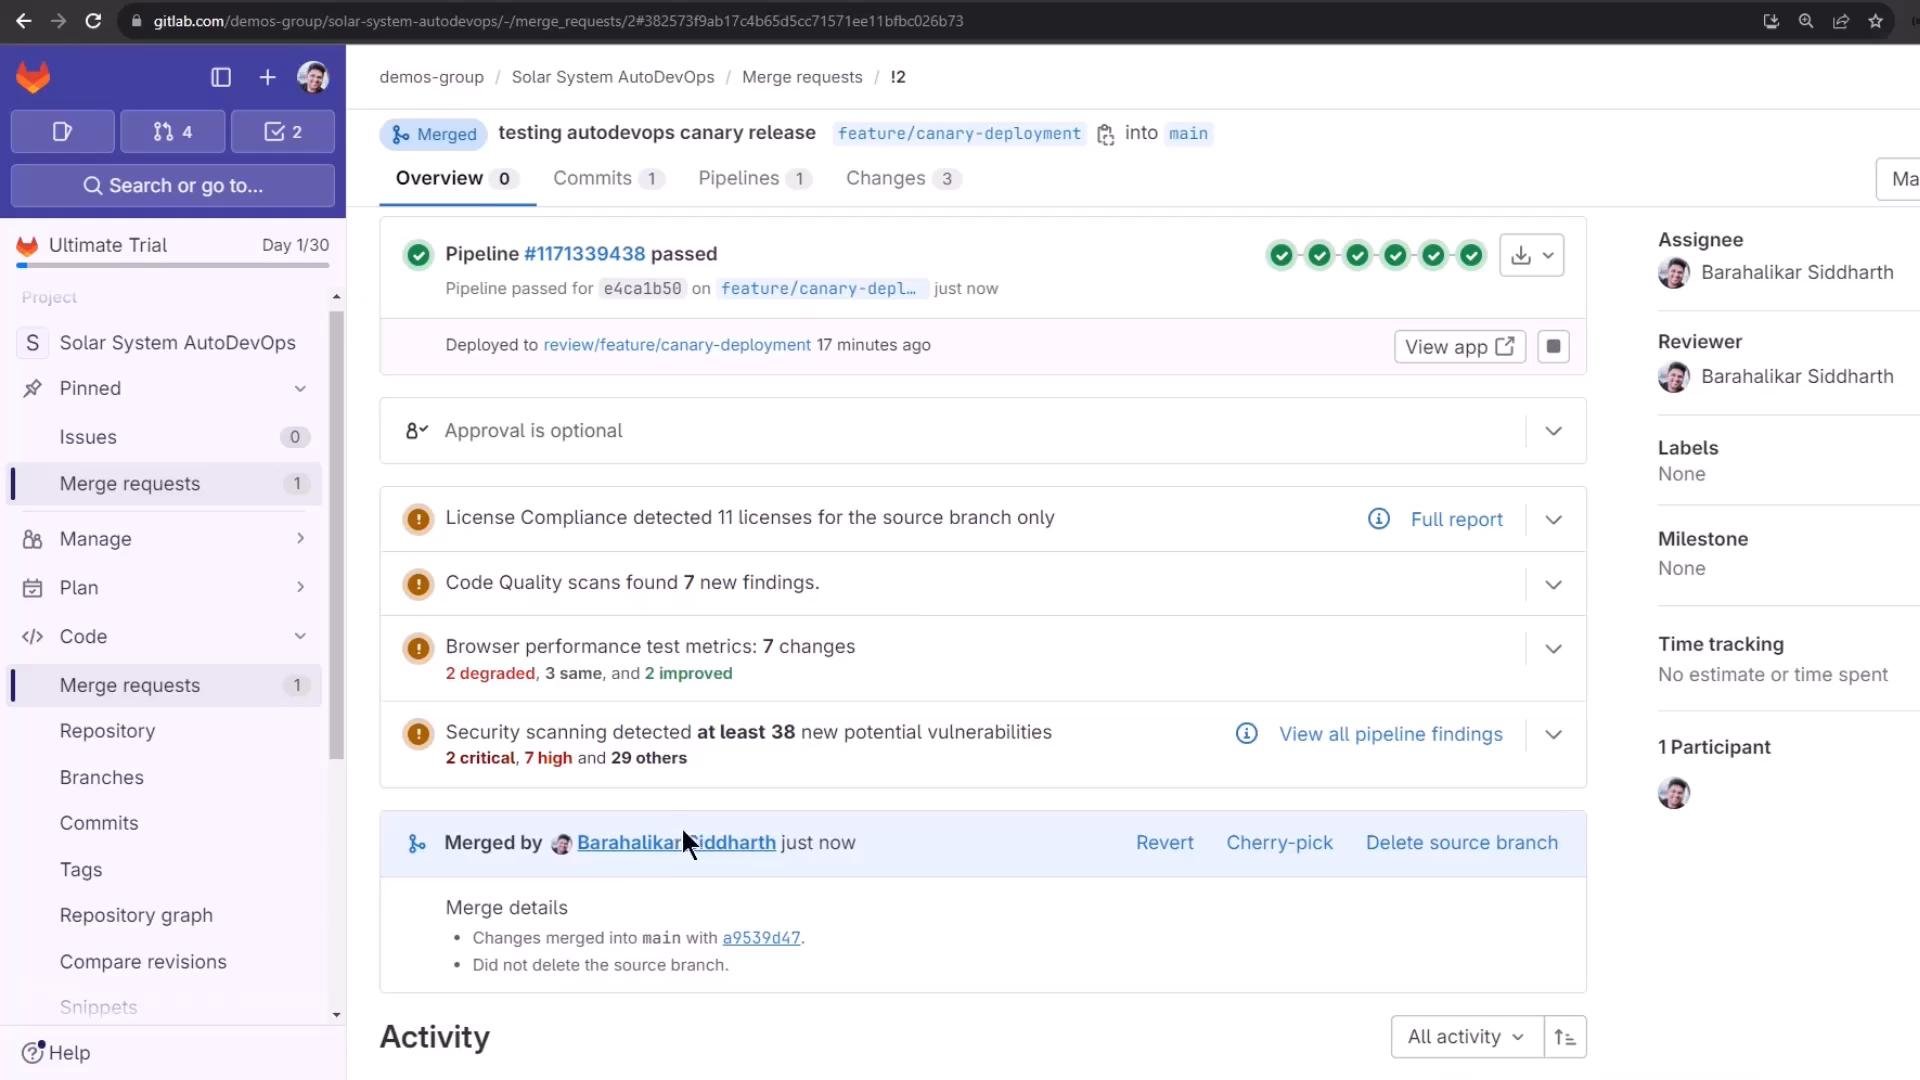
A screenshot of a GitLab merge request/CI page showing a merged canary release with a passed pipeline. The page lists license compliance, code quality, performance and security scan findings, with project navigation in the left sidebar.
Because build, test, review, DAST, and staging are often long-running and already completed, the pipeline pauses and waits for manual approvals before performing production rollouts. Below we inspect the staging deployment and then perform the manual canary rollouts. Staging environment The staging job deploys the application into the staging namespace. Verify the deployed resources with kubectl (or your alias k):
Sample output (condensed):
You can also open Operate → Environments in GitLab to view the staging environment and confirm the application visually. The staging step spawns a temporary DAST environment to run security scans; that temporary environment is started and stopped automatically as part of the DAST job. Auto DevOps behavior can be configured using CI/CD variables. Common variables include STAGING_ENABLED, CANARY_ENABLED, and PRODUCTION_MANUAL.
You can toggle staging and production behaviors with CI/CD variables:
  • STAGING_ENABLED=true enables the staging step.
  • CANARY_ENABLED=true enables canary-style deployments.
  • PRODUCTION_MANUAL=true requires manual jobs for production rollouts (useful with protected environments).
Table: Common Auto DevOps CI/CD variables Production state before changes Before launching any rollout, check the current production resources:
Sample output (condensed):
You can confirm load balancing across production pods by repeatedly calling the endpoint and observing which pod serves each request:
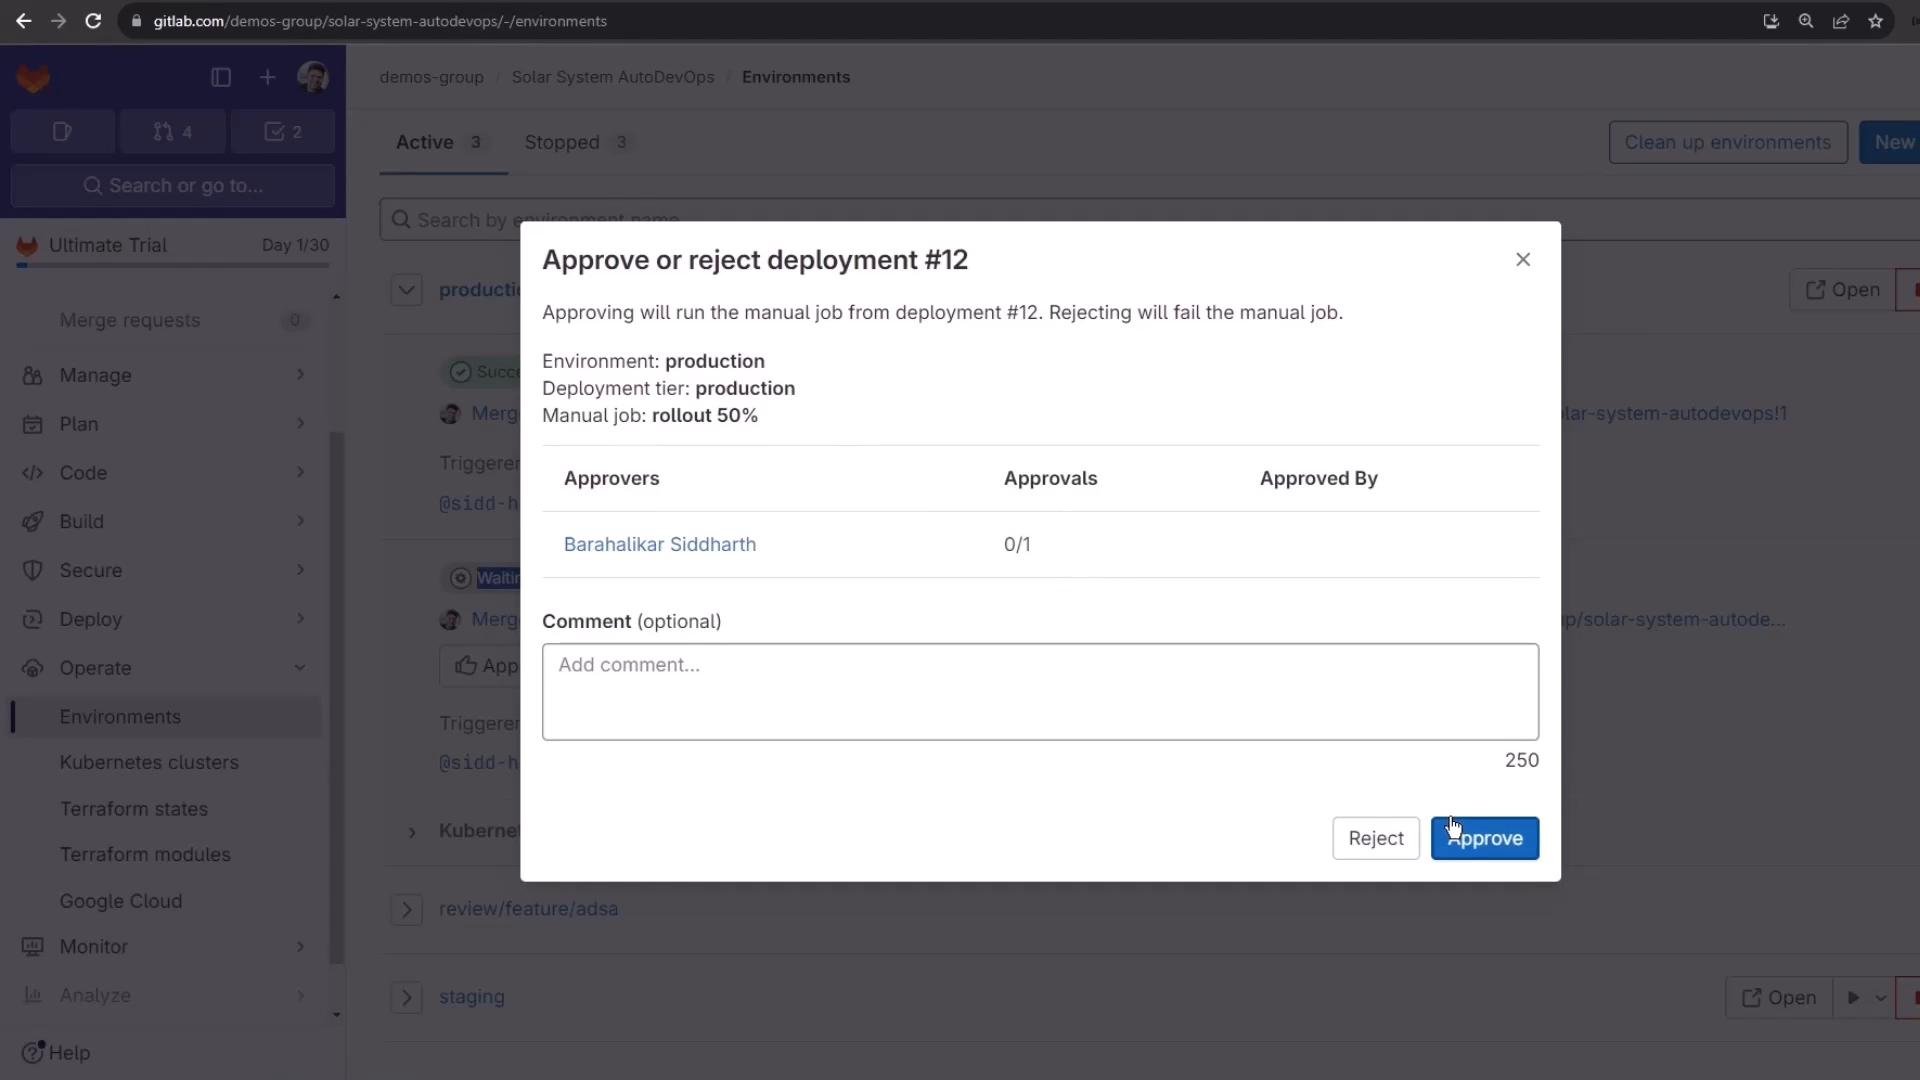
Manual rollout approvals and running a rollout job Production rollouts are protected by environment-level approvals when the environment is configured as protected. Each canary increment (10%, 25%, 50%, 100%) is implemented as a separate manual job that requires approval. Approvals can be granted from the Environments page — selecting a waiting deployment opens an approval modal that lists approvers and required counts.
A GitLab web UI showing a modal dialog to approve or reject "deployment #12" for the production environment with fields for approvers and an optional comment. The dialog includes Reject and Approve buttons (the Approve button is highlighted).
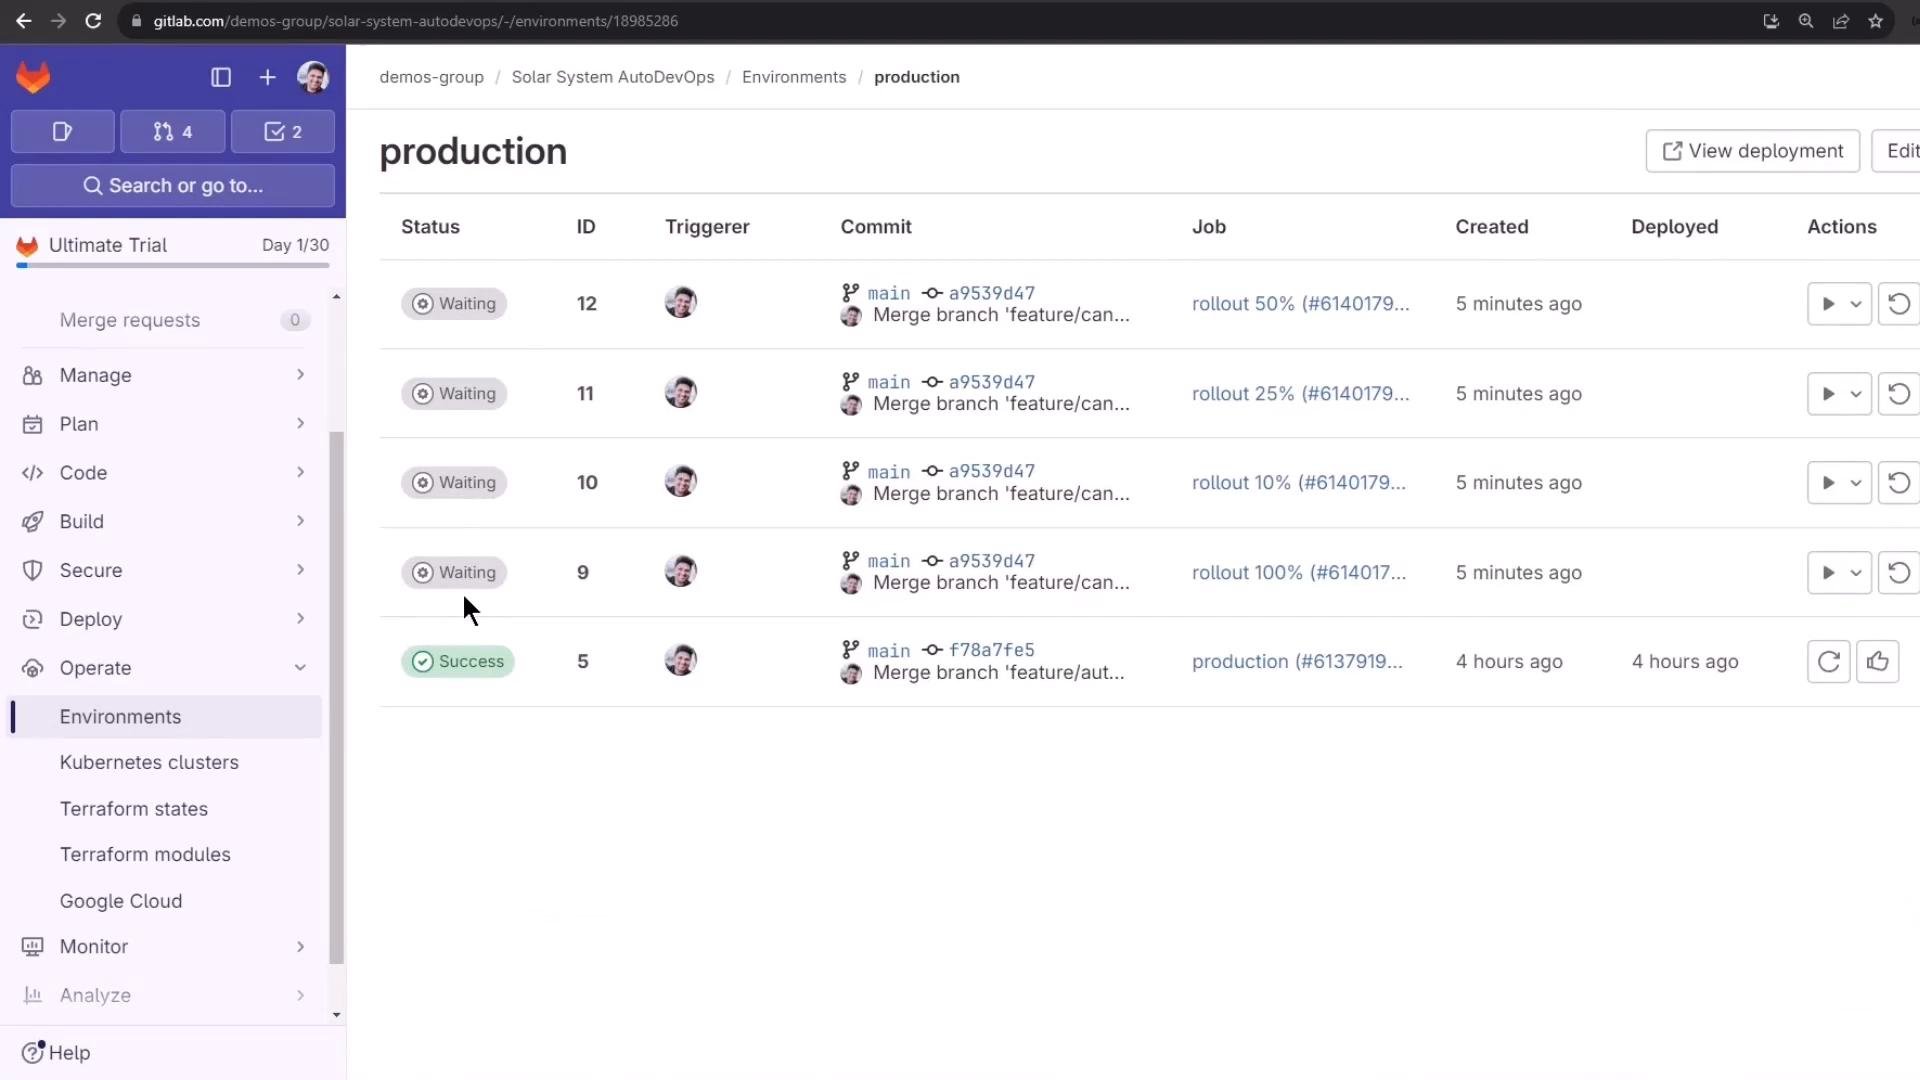
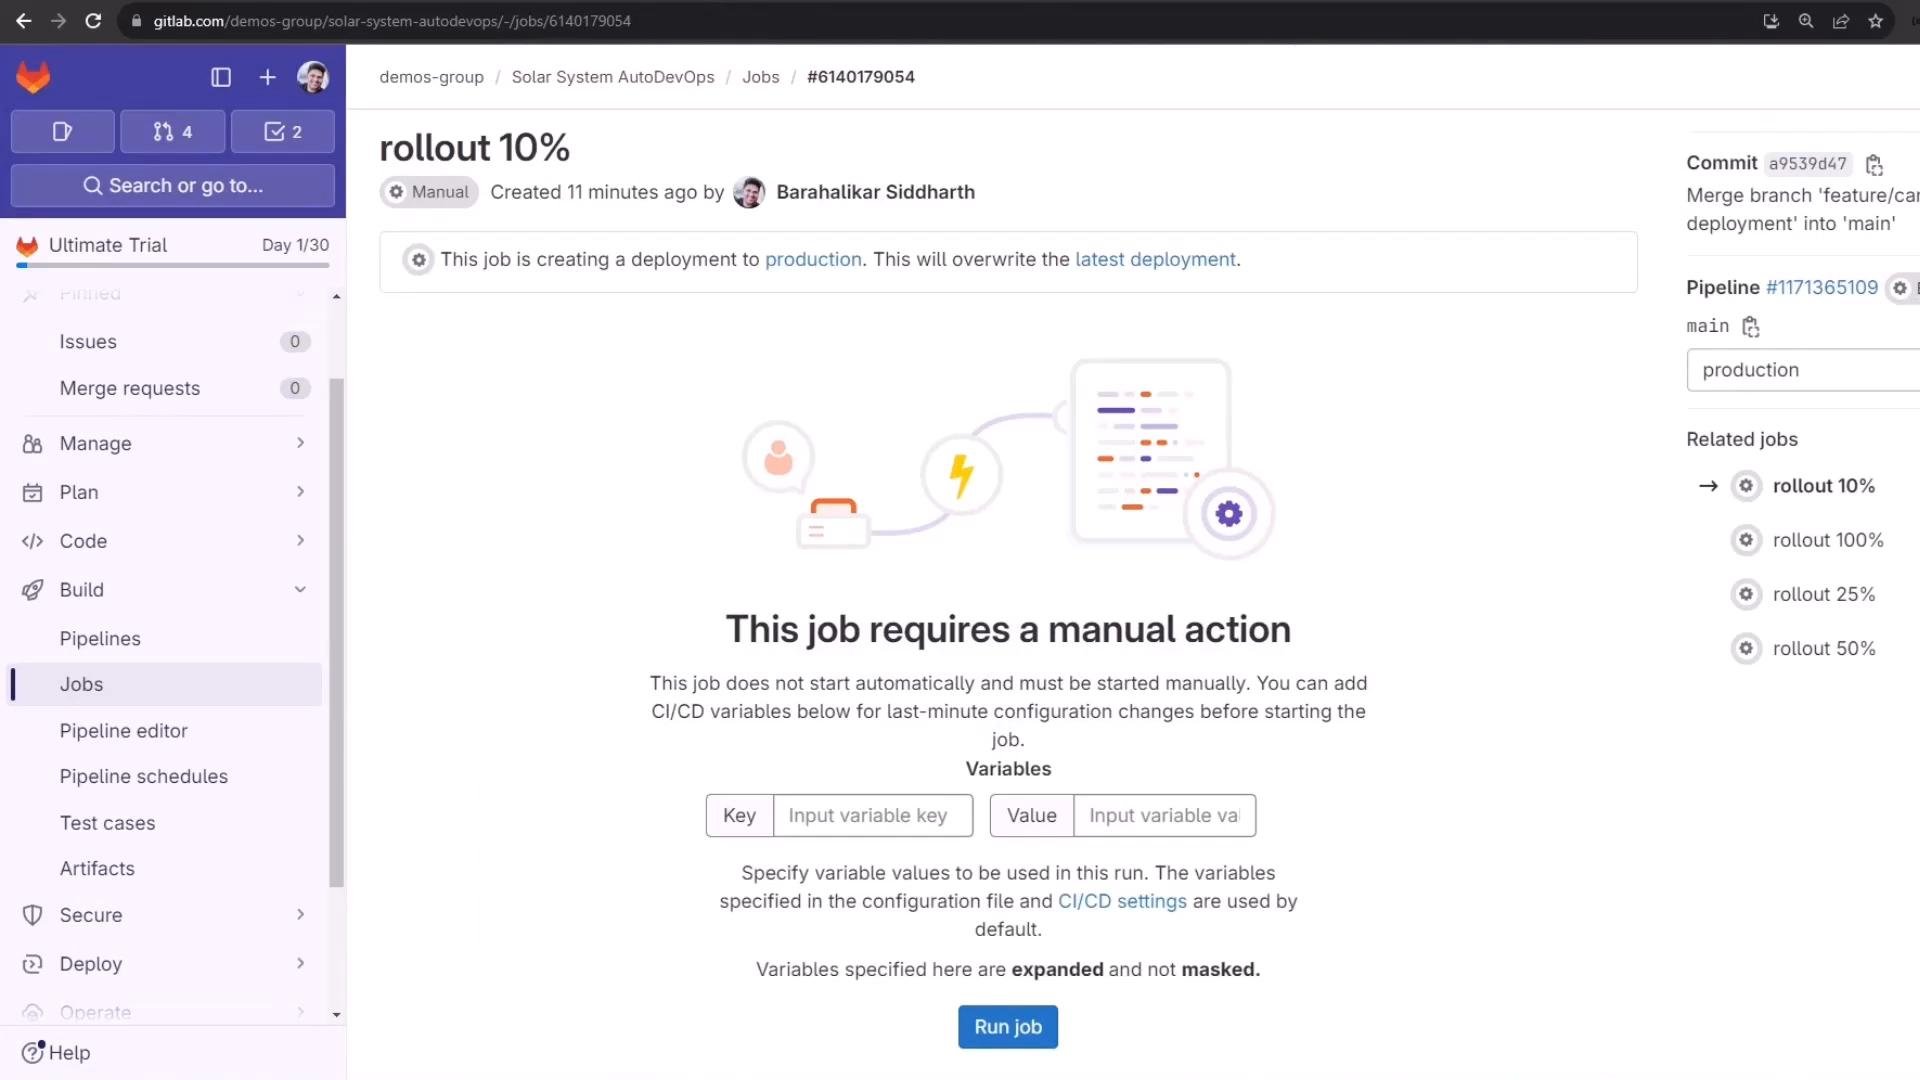
The Production environment UI will show multiple pending rollout jobs (e.g., Waiting for 10%, 25%, 50%, 100%). Approve the first rollout (10%), then run the corresponding manual job from the pipeline job page (“This job requires a manual action” → Run job).
A GitLab web UI screenshot showing the "production" environment with a list of recent deployments, their statuses (Waiting, Success), commit info, job names and timestamps. The left sidebar shows navigation items like Manage, Plan, Code, Build, Secure, Deploy and Environments.
Screenshot of a GitLab CI/CD Jobs page for a "rollout 10%" manual deployment, showing the message "This job requires a manual action" with input fields for CI/CD variables and a "Run job" button. The left sidebar shows project navigation and the right panel lists related rollout jobs and pipeline/commit information.
What the 10% rollout does When you run the 10% rollout, Auto DevOps (via the auto-deploy helper) generally performs these actions:
  • Validate Kubernetes domain and kubecontext.
  • Fetch or use the built-in Helm chart for your app.
  • Ensure the production namespace exists.
  • Create or update any required Kubernetes secrets.
  • Install a canary Helm release (for example, production-canary) into the production namespace.
  • Create a canary-specific Ingress annotated with a weight to split traffic.
  • Persist the environment URL as a job artifact.
Example job log excerpt (condensed):
After the 10% rollout completes, you will see extra canary pods alongside stable production pods. Note: traffic split is controlled by the Ingress weight annotation — not by the relative pod counts. It’s common to have similar replica counts for stable and canary deployments while the ingress sends only ~10% of traffic to canary. Checking the deployments and the Ingress You’ll have two Deployments and two Ingresses when canary is running. The canary Ingress contains nginx annotations that trigger weighted routing:
Sample output (condensed):
Ingress YAML snippet (production canary ingress):
How traffic is split
  • nginx.ingress.kubernetes.io/canary: "true" marks the ingress resource as a canary target.
  • nginx.ingress.kubernetes.io/canary-weight: "10" instructs the ingress controller to route ~10% of requests to the canary backend and the remainder to stable.
  • nginx.ingress.kubernetes.io/canary-by-header: canary enables header-based routing if you want deterministic routing for tests.
Verify the split by issuing many requests and observing which pod responds (the sample app returns the pod name in /os):
On a 10% rollout you should see roughly 1 in 10 responses coming from production-canary-* pods. UI verification From the browser you may notice small visual differences when a canary is active. In this demo the canary uses a static, non-spinning solar system background while the stable production uses a dynamic/spinning version. Refreshing the page repeatedly will intermittently show the canary UI for some requests.
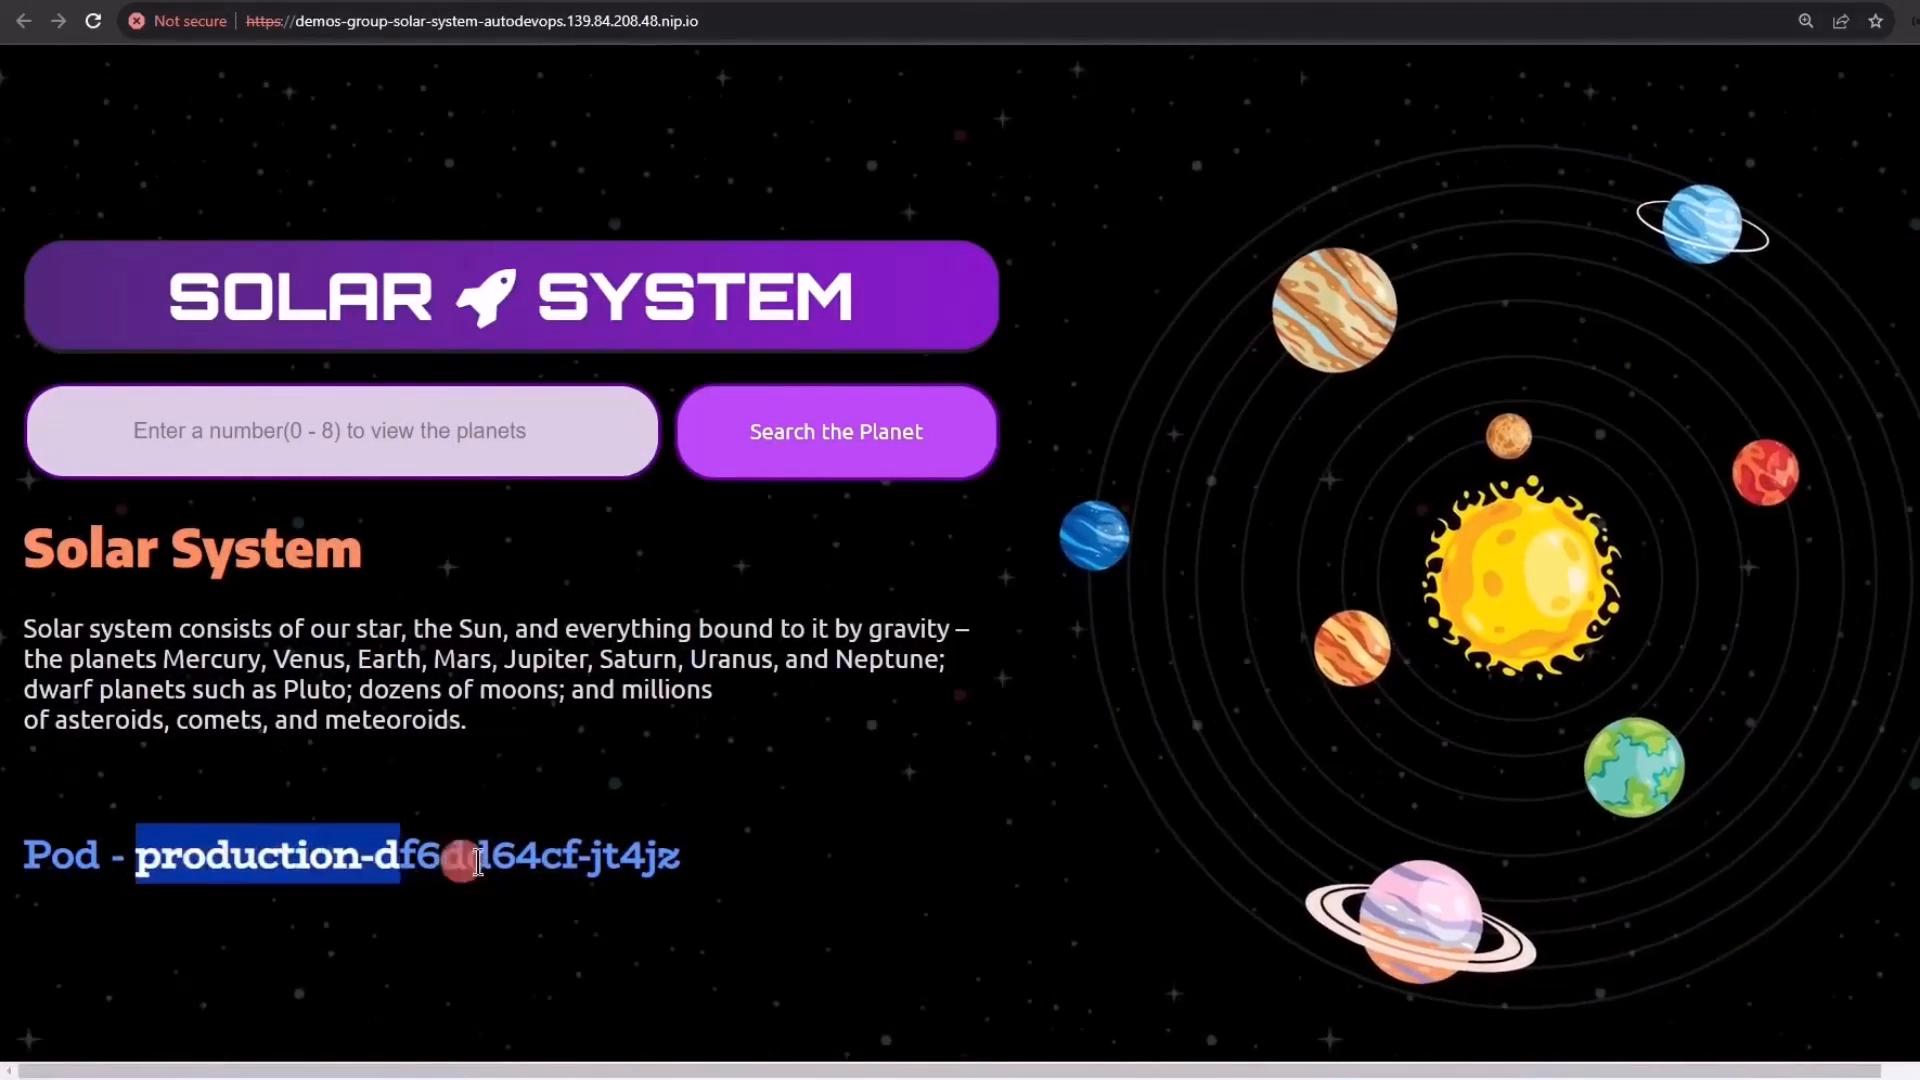
A colorful webpage titled "Solar System" showing a stylized sun and planets on orbital rings to the right, with a purple header, search button, and input field on the left. Descriptive text about the solar system appears below the header.
Increasing the canary percentage To increase traffic to canary, approve and run the next manual rollout (25% or 50%). The pipeline updates the production-canary Helm release and updates the canary ingress annotation, for example:
Example job log excerpt for updating the canary:
With a higher weight, more requests will be routed to production-canary-* pods. Rolling out 100% (promote canary to stable) When you approve the 100% rollout, Auto DevOps promotes the canary to stable:
  • Update the production Helm release with the new version.
  • Wait for the stable rollout to complete.
  • Uninstall the production-canary release and delete canary-specific secrets/resources.
  • Persist the environment URL and finish the job.
Example log excerpt during promotion and cleanup:
After the 100% rollout completes, validate that only the stable production-* pods remain:
Sample output after successful promotion:
Important behavior and rollback considerations
Once you perform a 100% rollout (promotion), the canary release is removed and the new version becomes the stable production release. You cannot reduce the production rollout percentage after promotion — to revert to a previous version you must perform a rollback to an earlier release.
Summary
  • Merging into main triggered the Auto DevOps pipeline that runs review, staging, and manual production rollouts.
  • Staging validates the deployment in its own namespace, and Auto DevOps can create temporary DAST environments for security scans.
  • Production rollouts are manual when the environment is protected and support incremental canary percentages (10%, 25%, 50%, 100%) — each percentage maps to a manual job requiring approval.
  • The canary is deployed as a separate Helm release plus an Ingress annotated for weighted routing. The ingress weight (not pod counts) determines the traffic split.
  • Promoting to 100% updates the stable production release and deletes canary resources.
  • To revert after a 100% promotion, perform a rollback to a previous release.
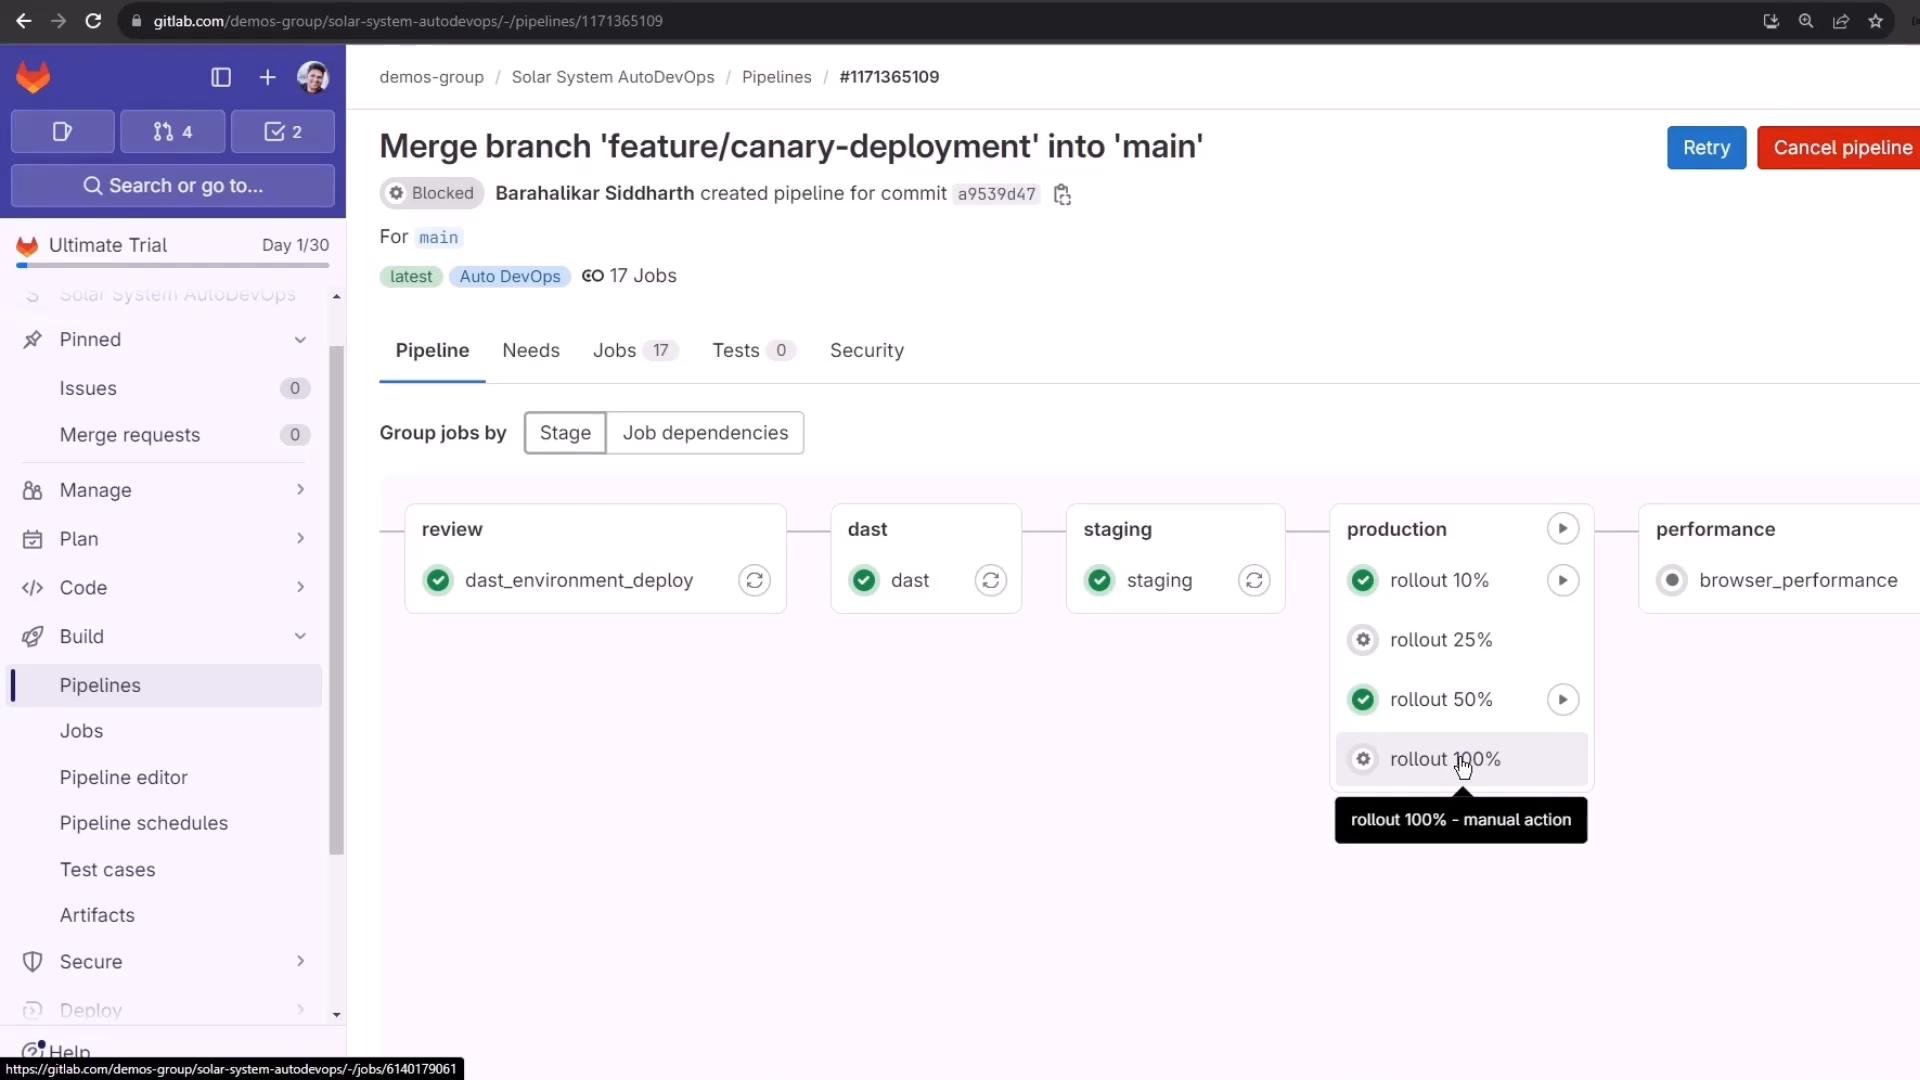
A screenshot of a GitLab pipeline page for merging branch "feature/canary-deployment" into "main," showing pipeline stages and jobs. The visual shows stages like review, dast, staging, production and performance with manual rollout steps (10%, 25%, 50%, 100%).
Further reading and references

Watch Video