dev, UAT, SIT, or prod, ensuring each has its own safeguards and credentials.
For more details, see the GitHub Environments documentation.
1. Create the Environment
- Go to Settings in your repository.
- Click Environments in the sidebar.
- Select New environment and enter
development.
- Protection rules (required reviewers, wait timers, branch/tag restrictions)
- Environment secrets
- Environment variables
- Deployment branch and tag restrictions
1.1 Configure Protection Rules
Under Protection rules, you can enforce deployment policies. Use the table below as a quick reference:| Rule Type | Configurable Options |
|---|---|
| Wait timer | Duration (e.g., 1 minute), admin bypass |
| Required reviewers | Number of reviewers, specific teams or users |
| Branch/tag filters | Only allow deployments from selected refs |
- Enable Wait timer.
- Set the value to 1 minute.
- Check Allow repository administrators to bypass if desired.
- Click Save.
You can extend protection with custom rules by exploring third-party Actions or writing your own.
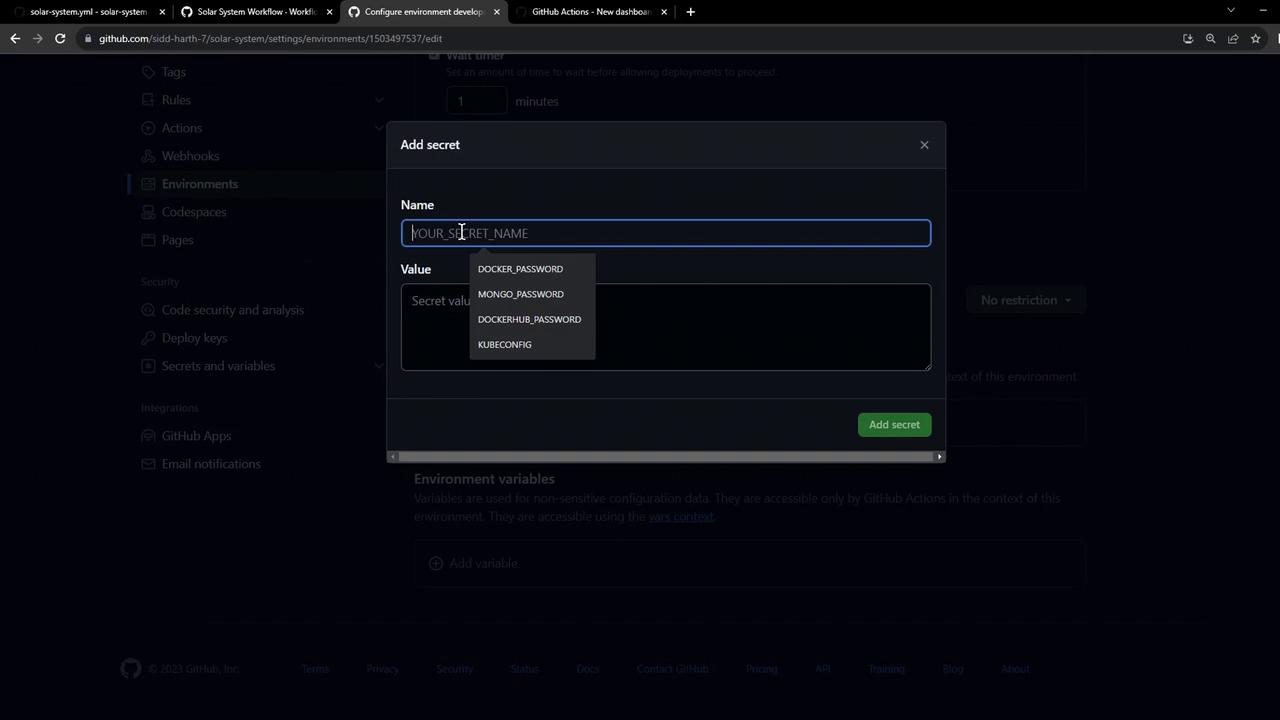
1.2 Add an Environment Secret
Environment secrets have higher precedence than repository-level secrets. To add aKUBECONFIG secret:
- In the Secrets section, click Add secret.
- Enter
KUBECONFIGas the name and paste its value. - Click Add secret.
Environment secrets override repository secrets with the same name.
1.3 Review Protection Rules
Here’s how the Protection rules page appears, including reviewers, wait timers, and restrictions: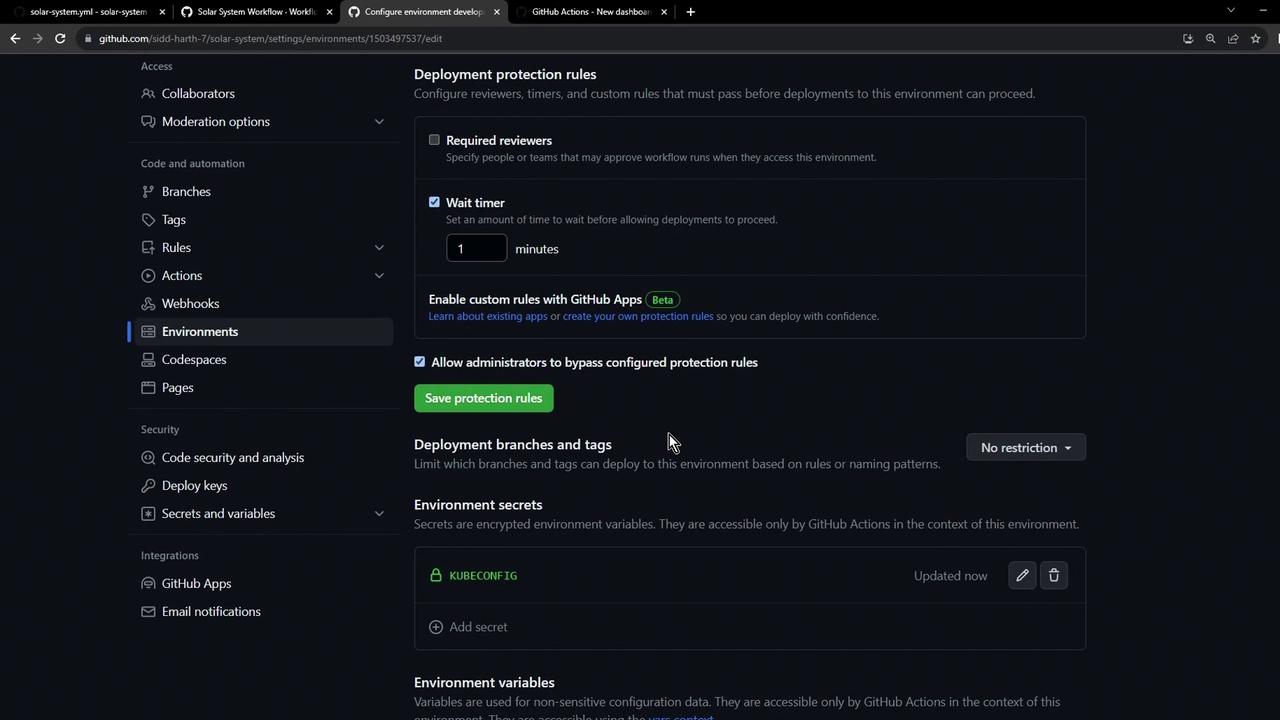
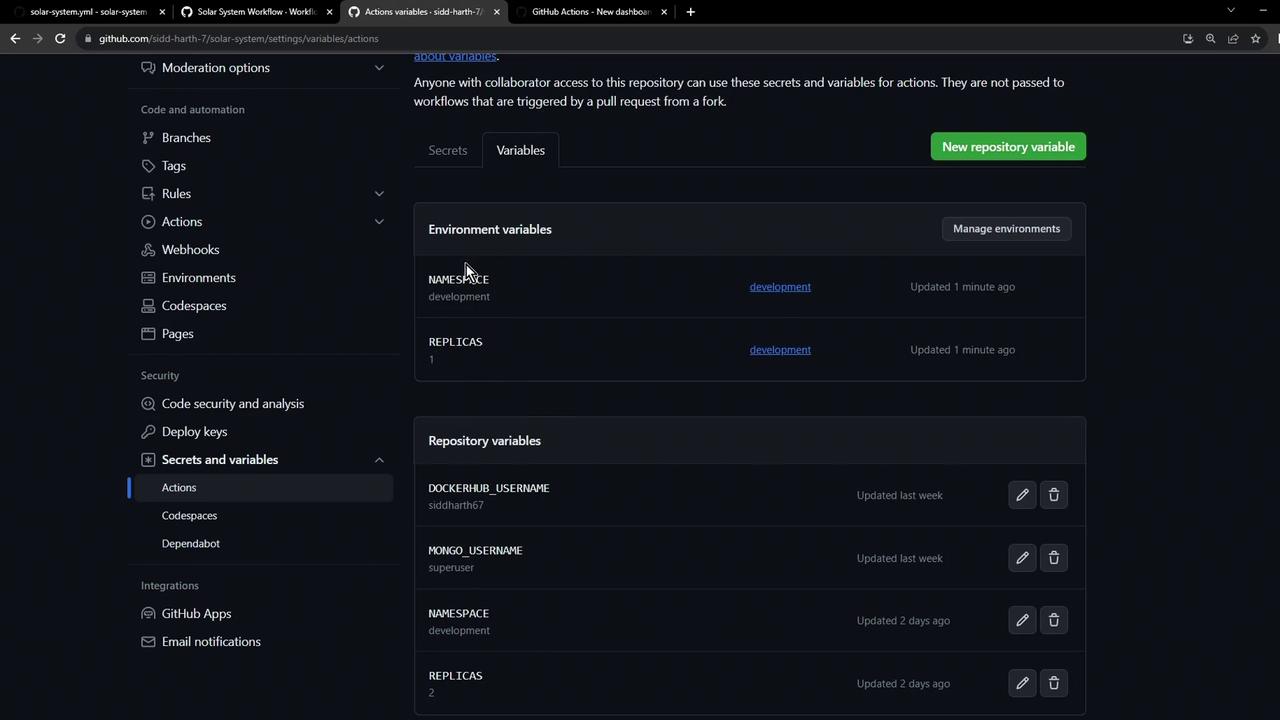
2. Add Environment Variables
Switch to Variables under the same environment and add the following:| Variable | Value | Description |
|---|---|---|
| NAMESPACE | development | Kubernetes namespace name |
| REPLICAS | 1 | Number of pod replicas |
3. Verify Environment Setup
After saving, navigate back to Settings → Environments. You should see:- Environment:
development - Protection rule: 1-minute wait timer
- Secret:
KUBECONFIG - Variables:
NAMESPACE,REPLICAS
4. Integrate with GitHub Actions
Reference yourdevelopment environment in workflows: