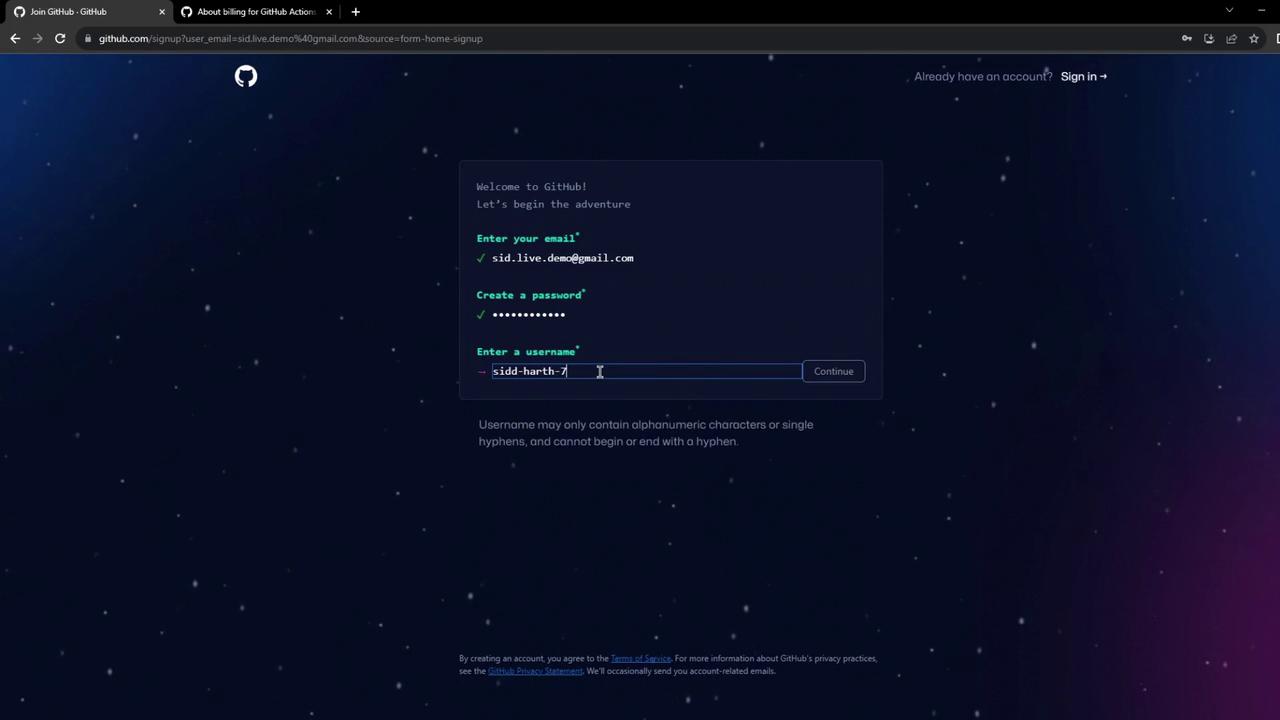
1. Sign Up for GitHub
- Go to https://github.com.
- Click Sign up (or Sign in if you already have an account).
- Enter your email, password, and username. Opt out of announcements if you prefer.
- Verify your email by entering the code sent to your inbox.
- Skip any optional personalization steps to finish setting up your dashboard.


2. Explore the GitHub Dashboard
After signing in, the Dashboard is your central hub for:- Creating new repositories
- Adding a profile README to showcase your work
- Browsing activity feeds and trending projects
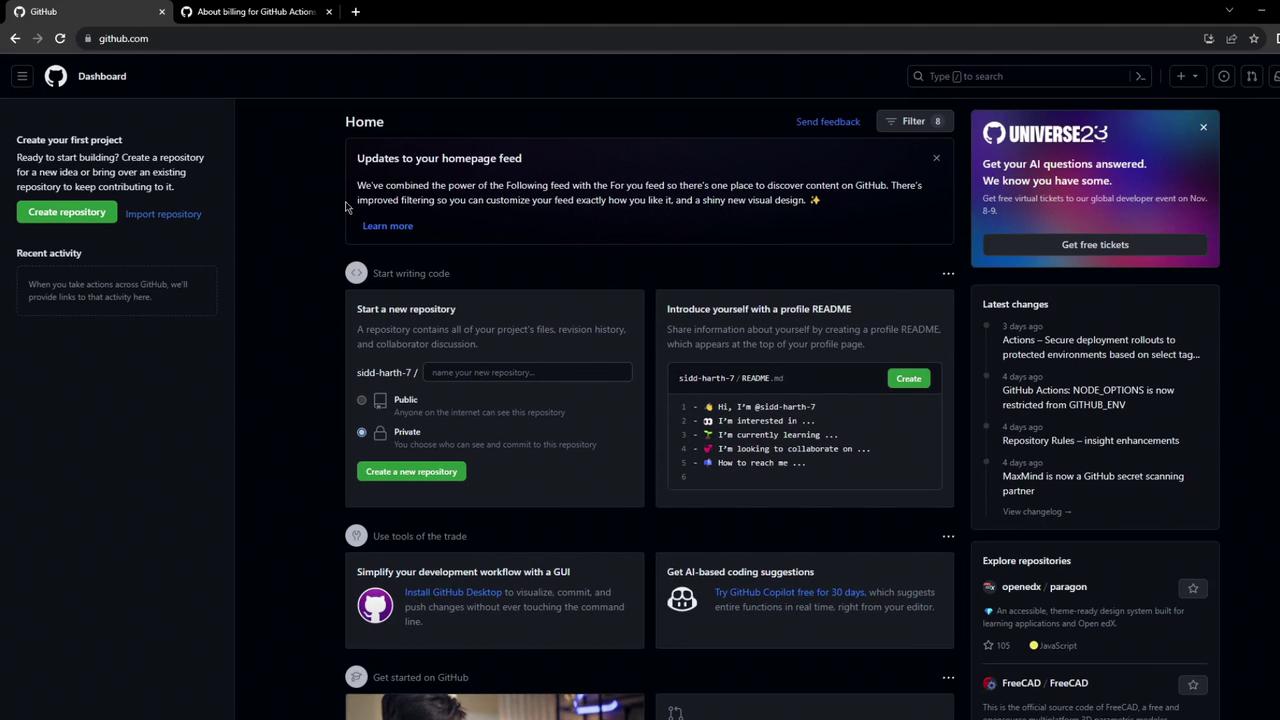
Customize your profile README to introduce yourself, share your projects, or link to your portfolio.
3. Review Billing & Plan Limits for GitHub Actions
To see your current plan and usage:- Click your avatar → Settings.
- In the sidebar, select Billing & plans.
| Resource | Allocation | Description |
|---|---|---|
| GitHub Actions minutes | 2,000 minutes/month | Linux runners only |
| Package storage | 500 MB | GitHub Packages & workflow artifacts |
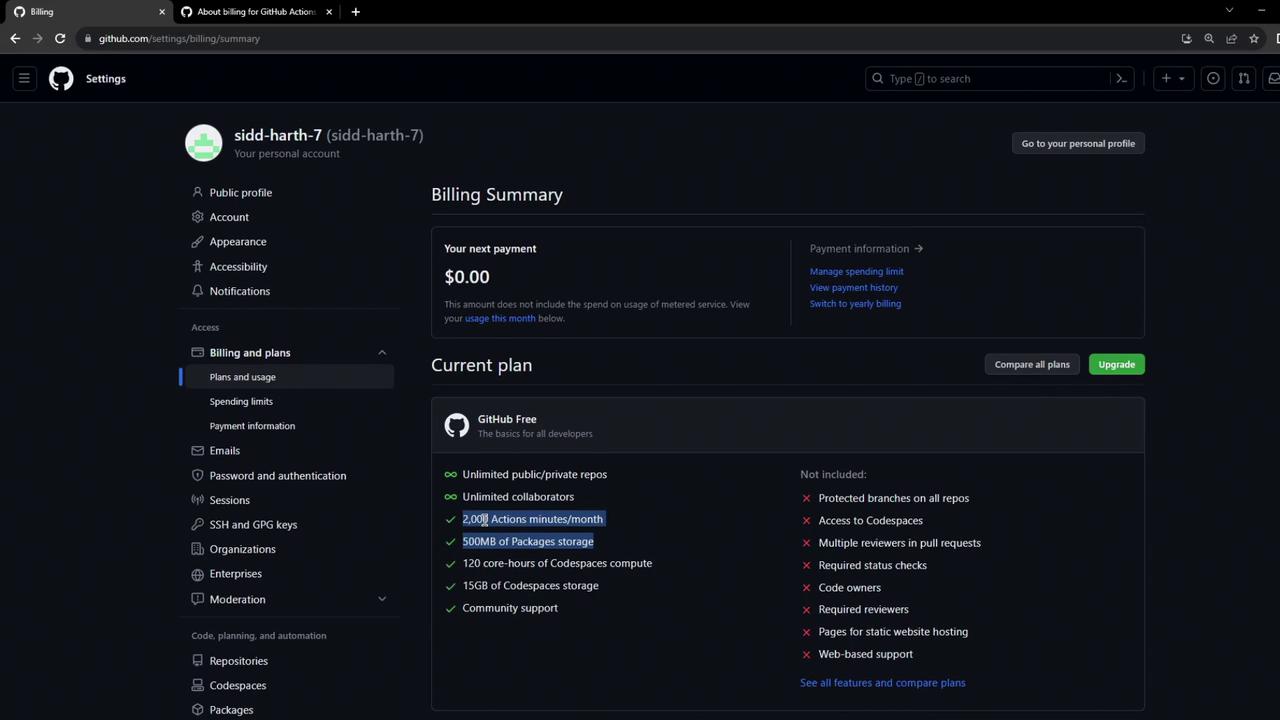
Windows runners cost 2× as much as Linux; macOS runners cost 10× as much. Plan your workflows accordingly.
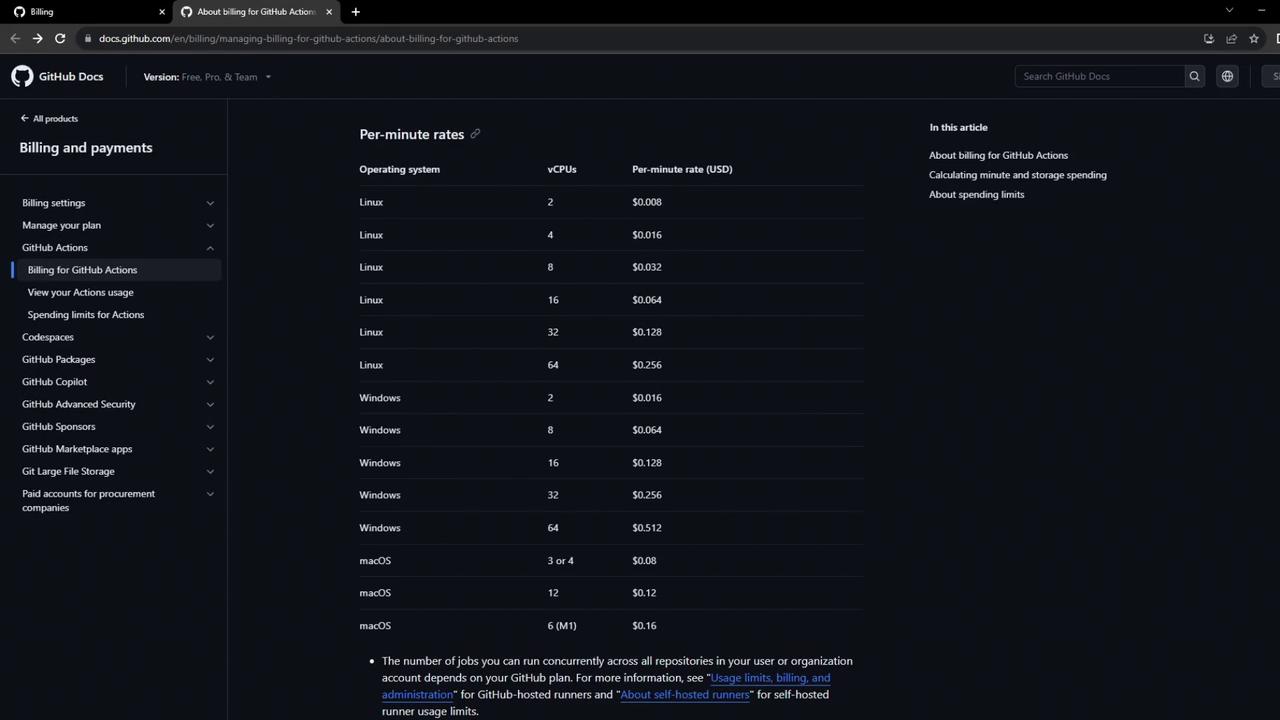
4. Understand GitHub Actions Billing Documentation
For deeper insights, consult the official billing docs. You’ll find:- How multipliers affect your minute usage
- Per-minute rates by CPU configuration and OS
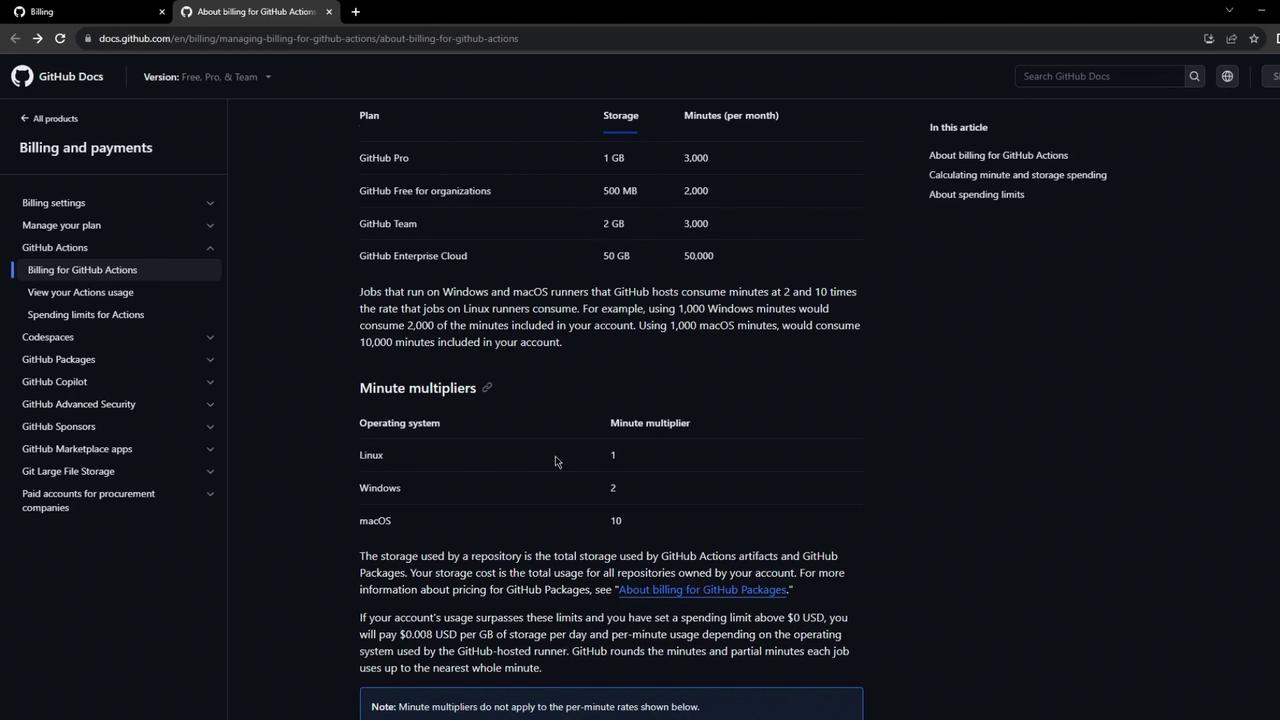
| Operating System | Multiplier vs Linux | Example Rate (USD/min) |
|---|---|---|
| Linux | 1× | $0.008 |
| Windows | 2× | $0.016 |
| macOS | 10× | $0.080 |