

- Export to a Canvas dataset (low-code, Canvas-managed)
- Export to Amazon S3 (for downstream processing or storage)
- Export a Jupyter Notebook + .flow file (reproducible Processing job)
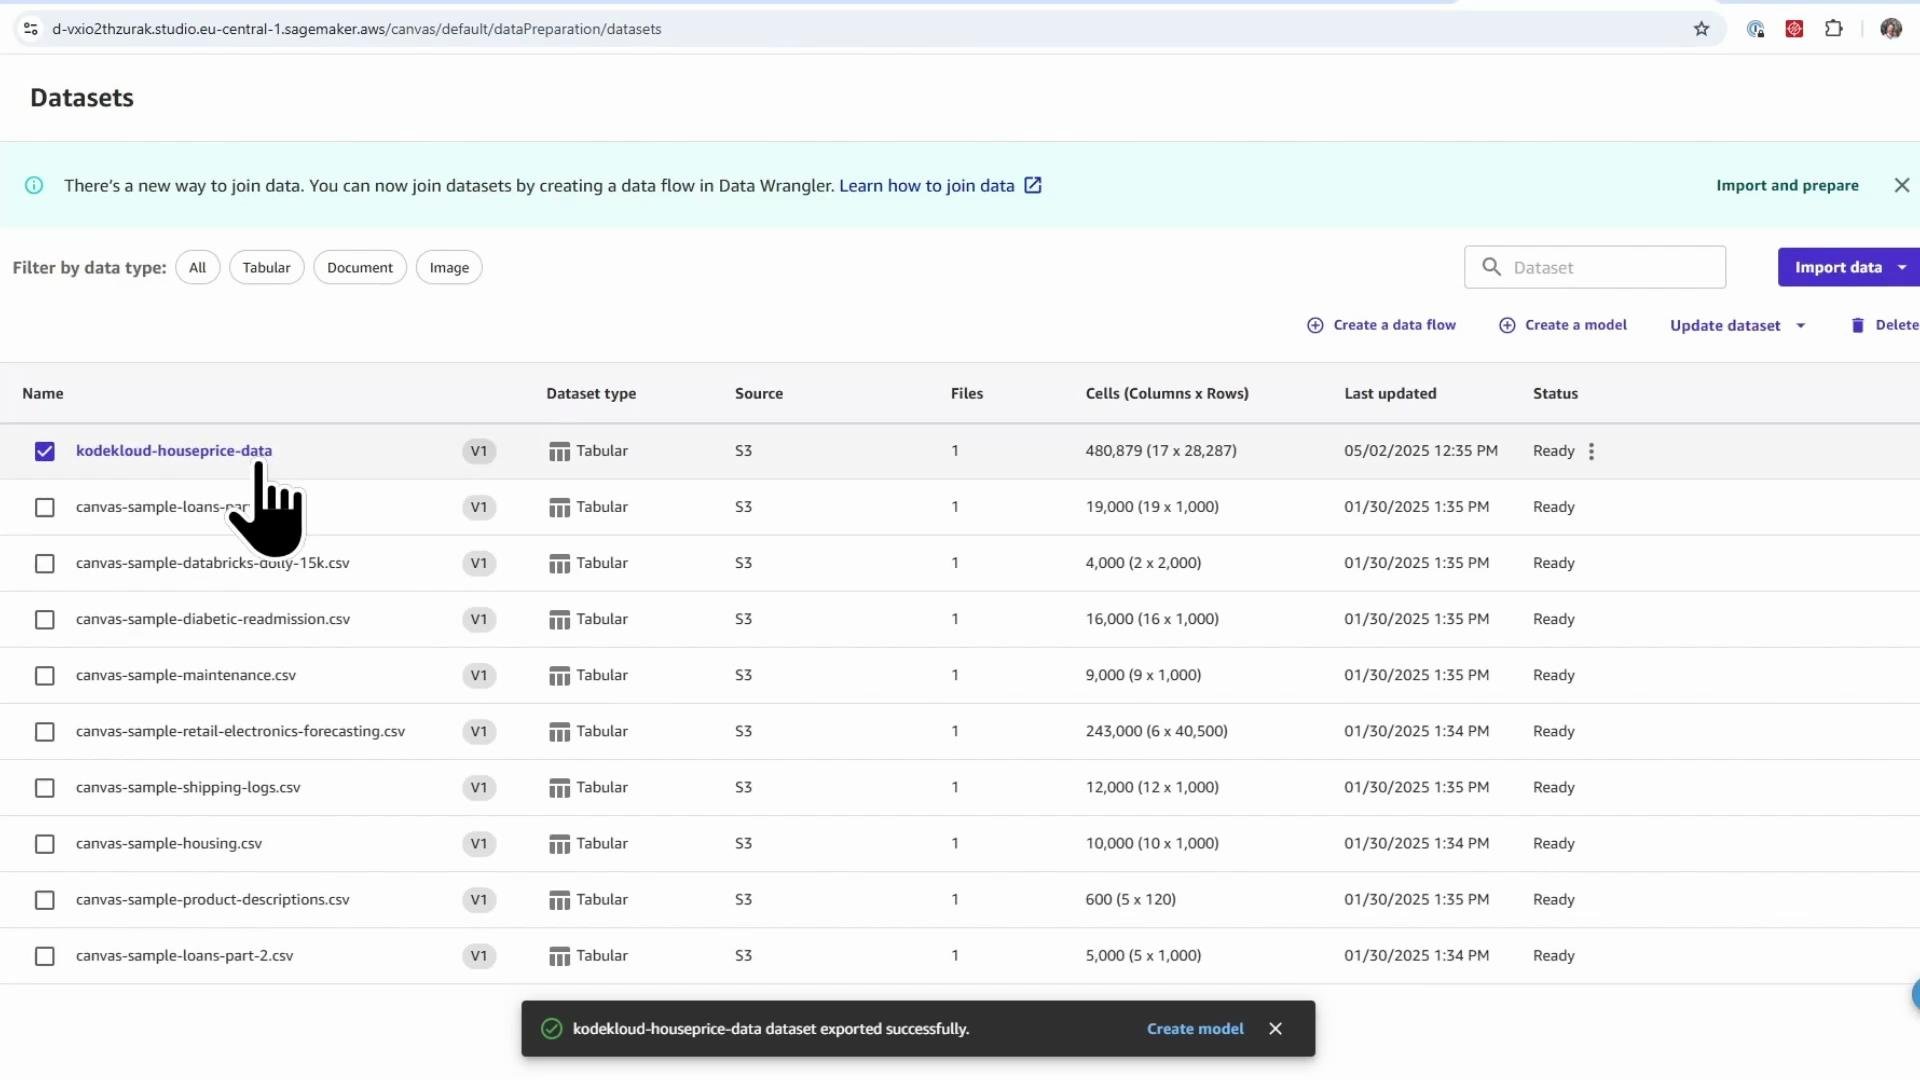
Export to a Canvas dataset
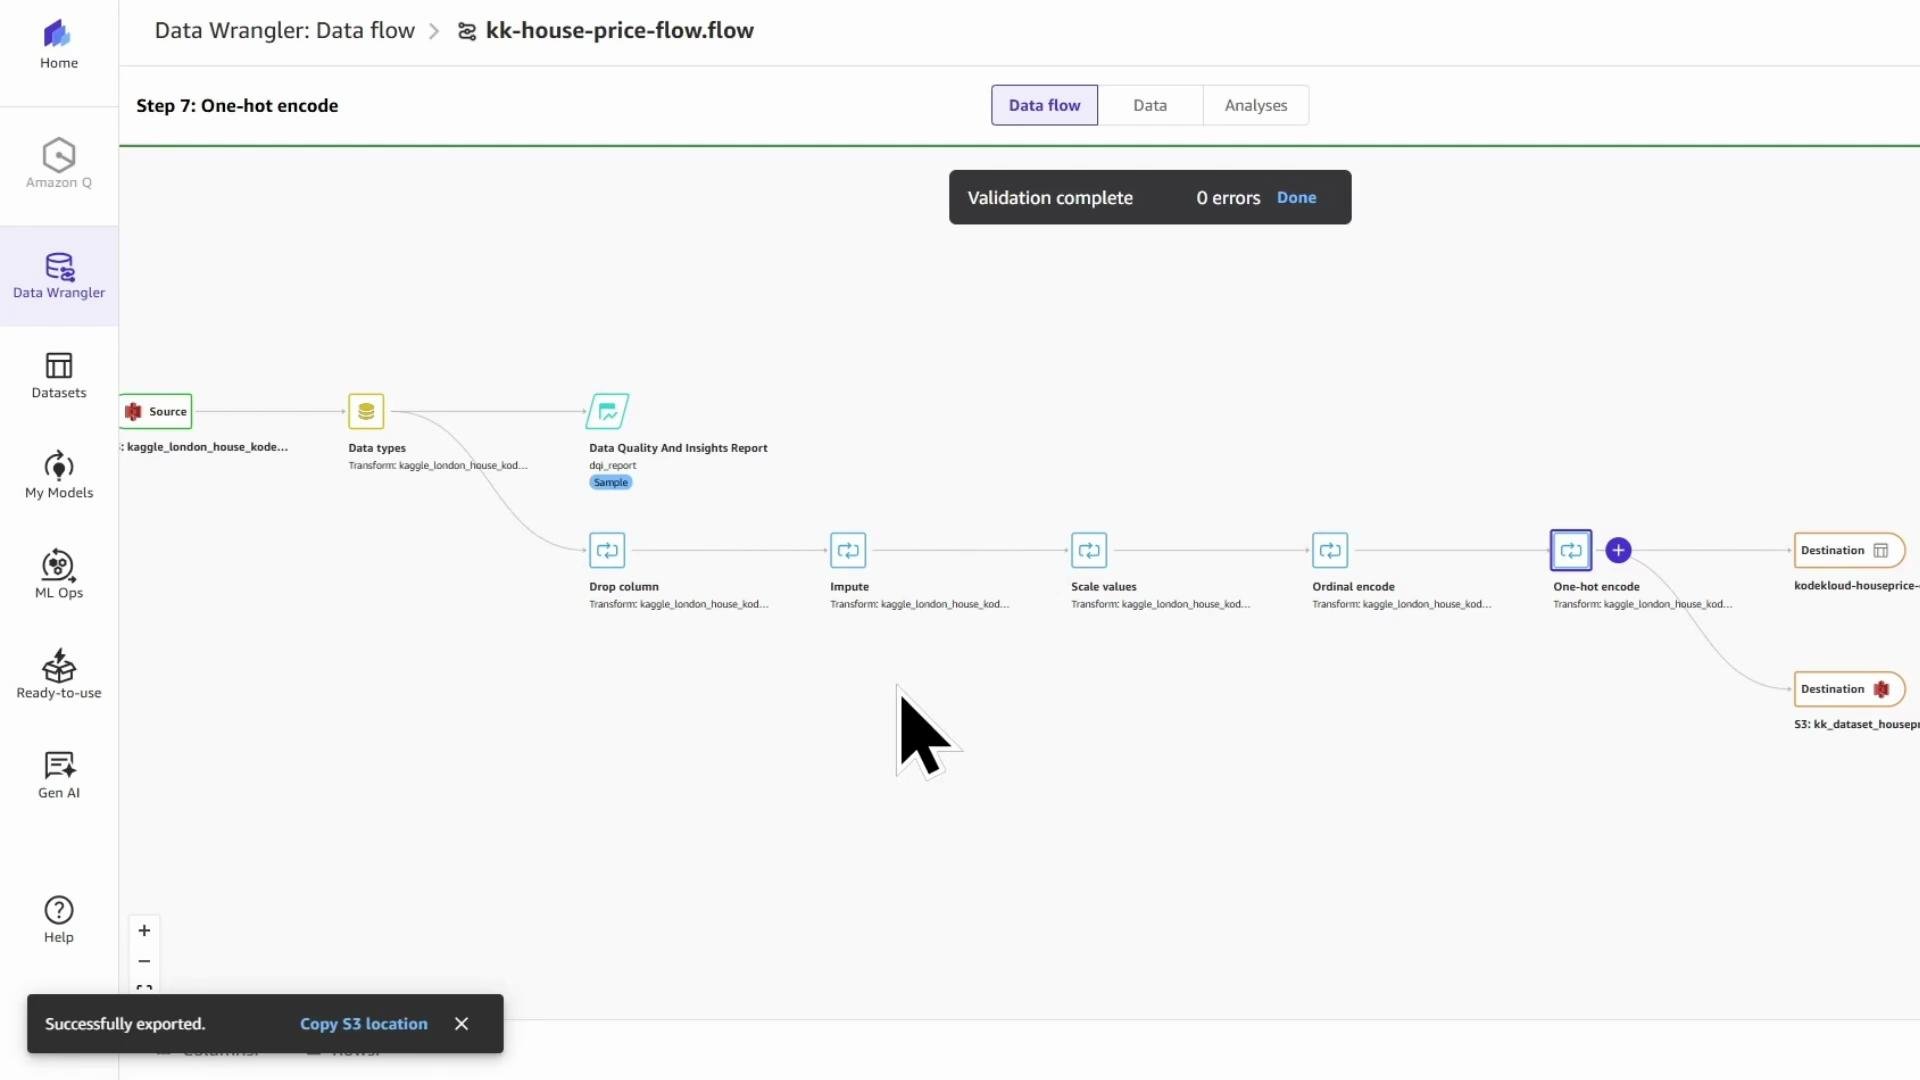
- From the end of the Data Wrangler flow, click the plus sign → Export → Canvas dataset.
- Give the dataset a clear, descriptive name (for example, “KodeKloud house price data”).
- Optionally choose whether to process a sample (fast iteration) or the entire dataset. For demos, a subset is fine.
- Run the export. Data Wrangler will choose where to execute the transform:
- If it fits within the Canvas managed instance limits, it runs locally there.
- Otherwise Data Wrangler uses a managed Spark backend (for example, EMR).
Export to Amazon S3
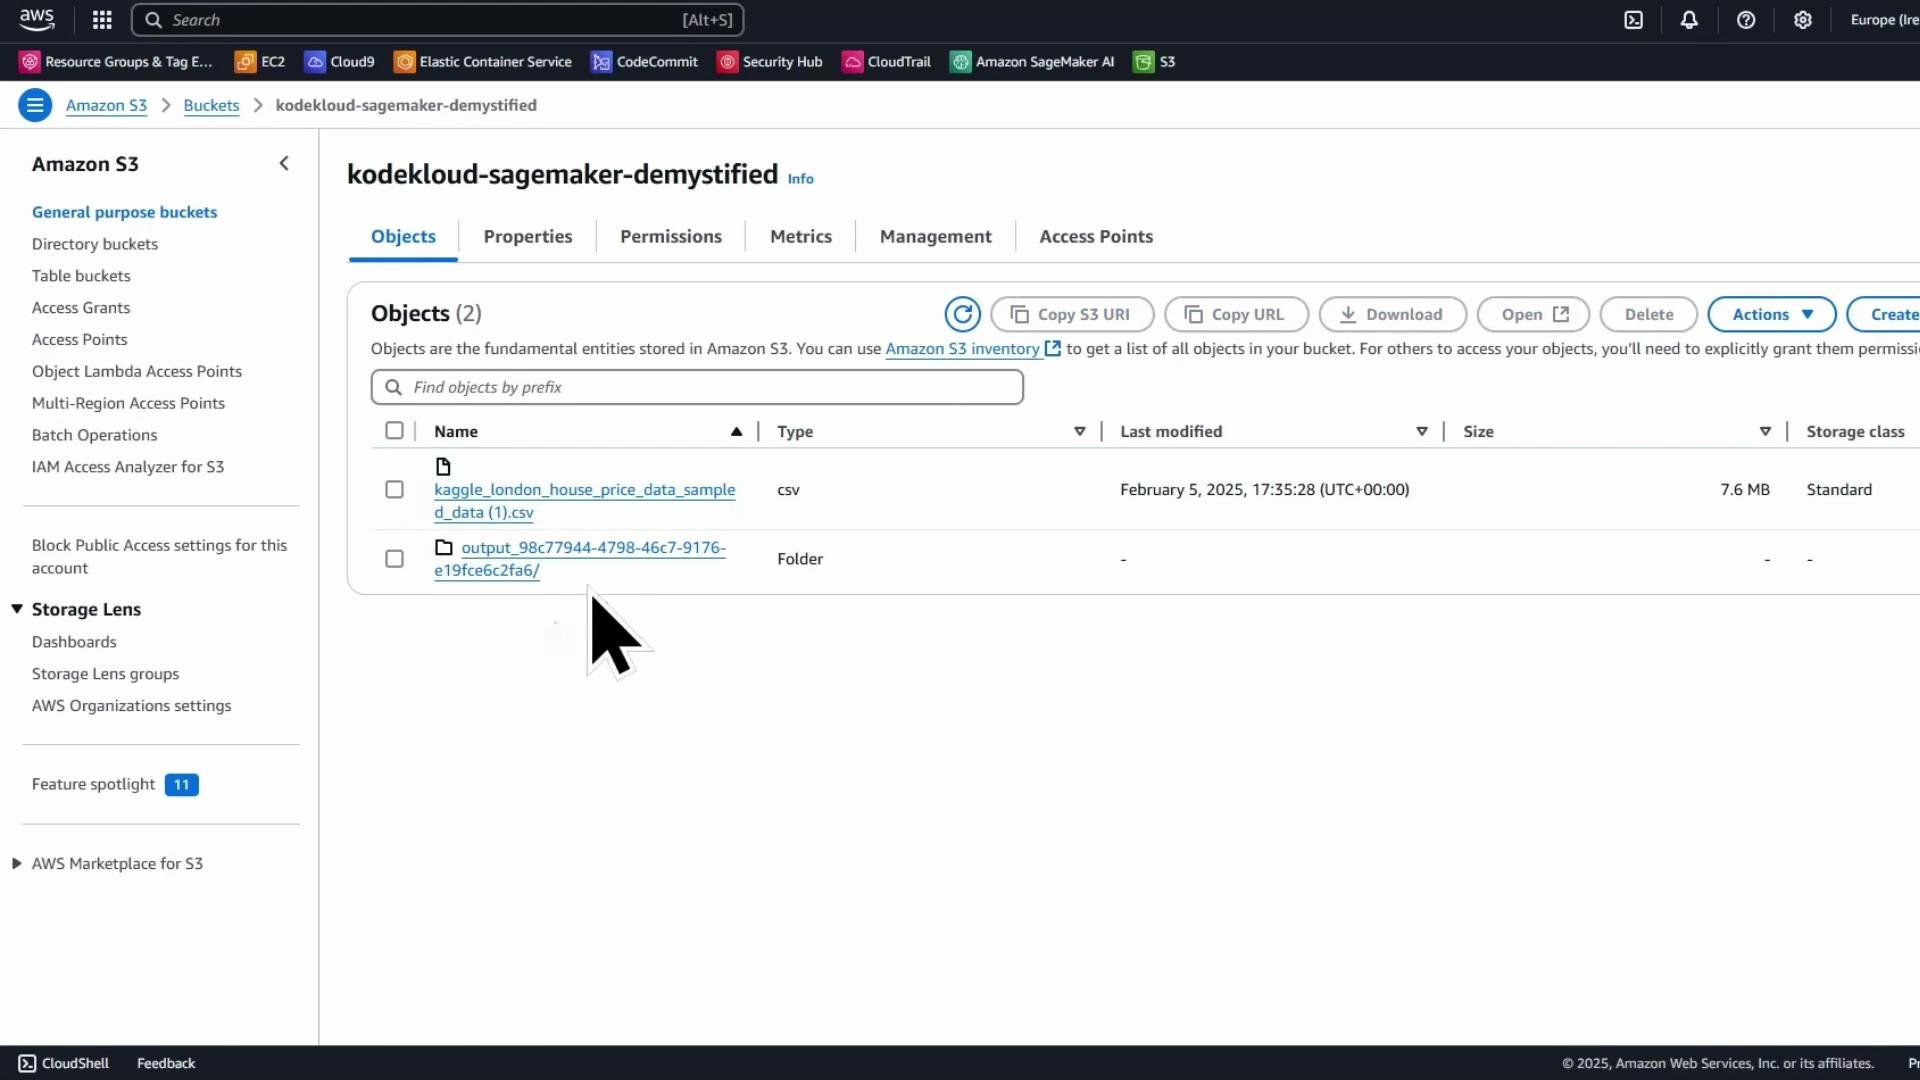
To export transformed data to S3:- Open your Data Wrangler flow and add a destination node: Export → Amazon S3.
- Choose a descriptive dataset name (example: “KodeKloud dataset house price”) and select an S3 bucket and path.
- For production/full runs choose to process the entire dataset. Click Export and wait for the job to finish.
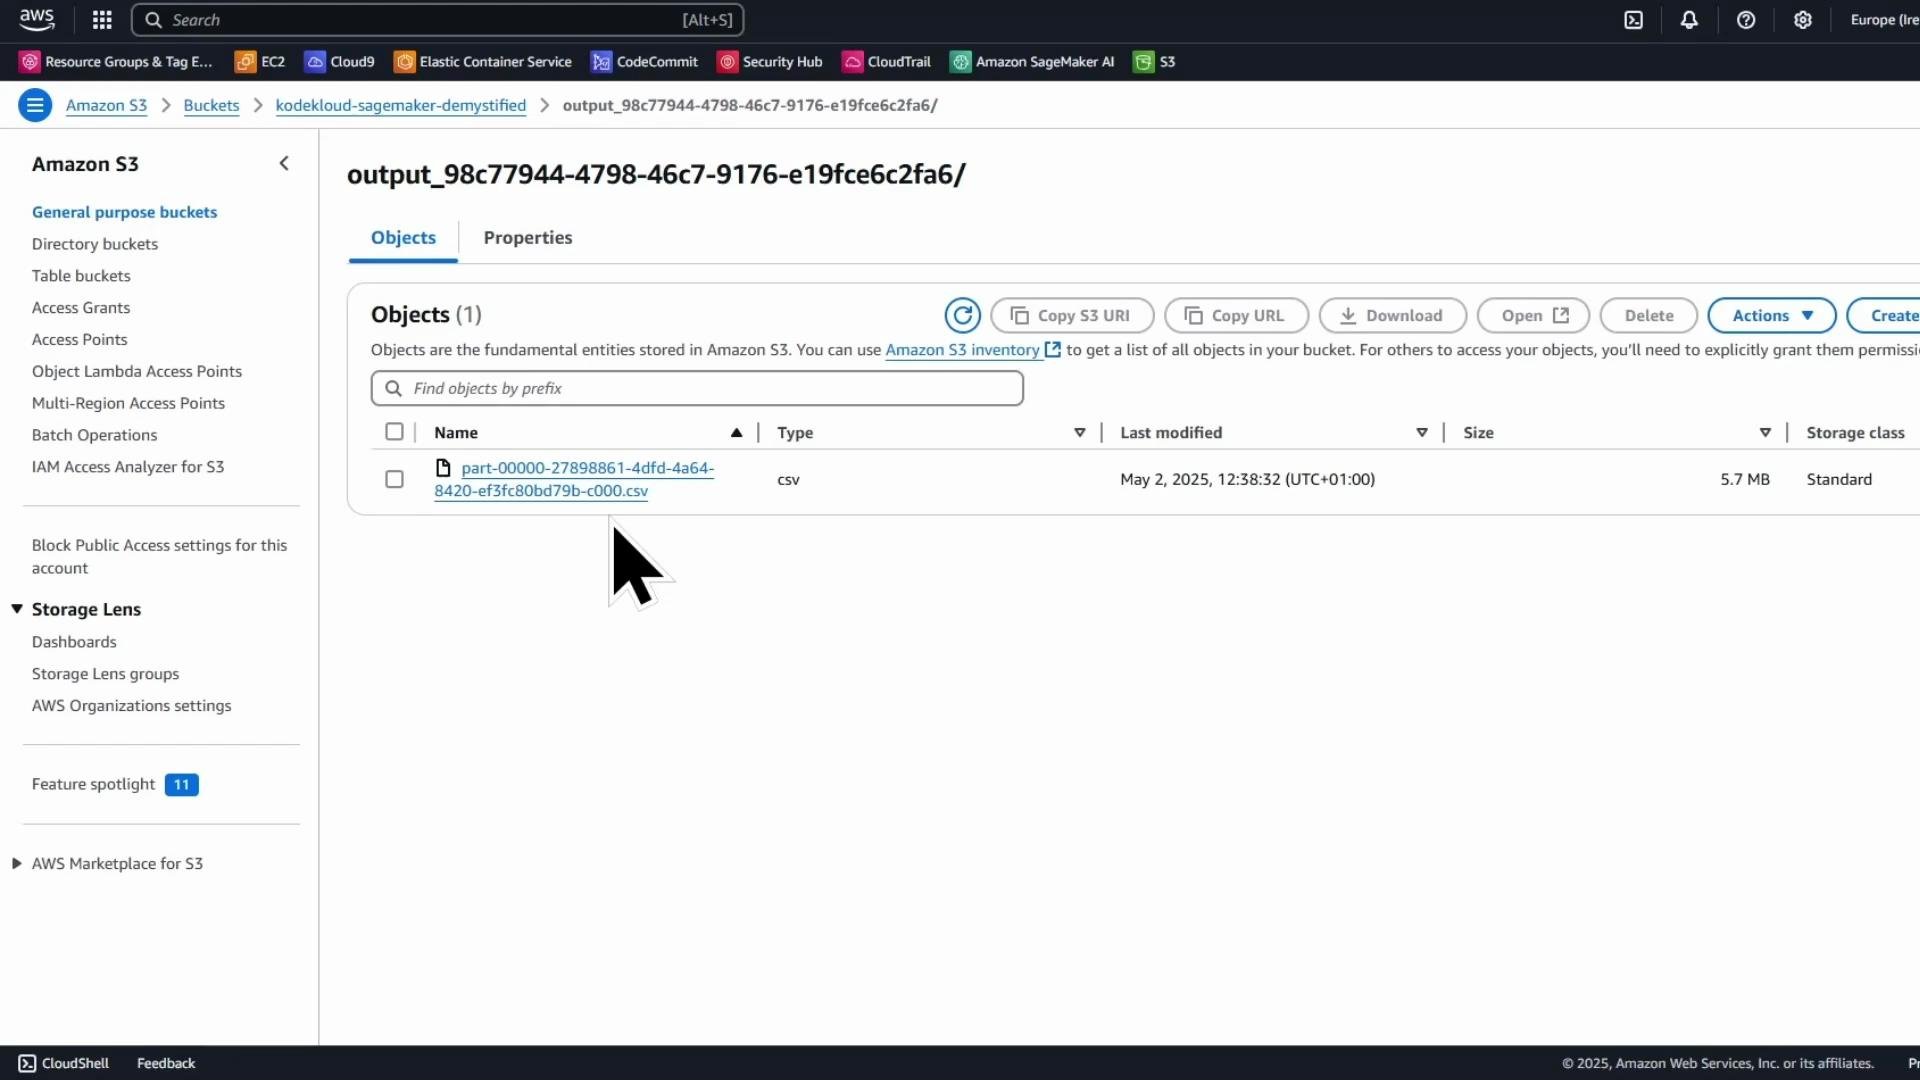
part-00000-... and an output prefix/directory created by the export job.
part-00000-....
Export the flow as a Jupyter Notebook (and .flow)
Exporting the flow as a Jupyter Notebook gives a reproducible artifact that sets up a SageMaker Processing job to apply the same transformations. This is ideal for handing work to a developer or integrating into CI/CD. From the Data Wrangler flow:- Add Export → Jupyter Notebooks → Amazon S3 and choose an S3 destination.
- Data Wrangler will store a
.ipynband a.flowfile in the chosen location. The notebook contains boilerplate code to create and run a SageMaker Processing job that uses the.flowfile as the transformation spec.
Open JupyterLab and copy exported files from S3
SageMaker Studio/JupyterLab does not show S3 objects directly in the file browser. Use the AWS CLI in a terminal to copy the exported notebook and.flow file into the Studio filesystem.
First, verify you can list buckets:
Open the exported notebook
Launch the notebook in JupyterLab and select an appropriate Python kernel. The notebook includes:- Markdown explaining the flow and export
- Code to configure and run a SageMaker Processing job that executes the
.flowtransformation - References to the
.flowfile and input CSV(s)
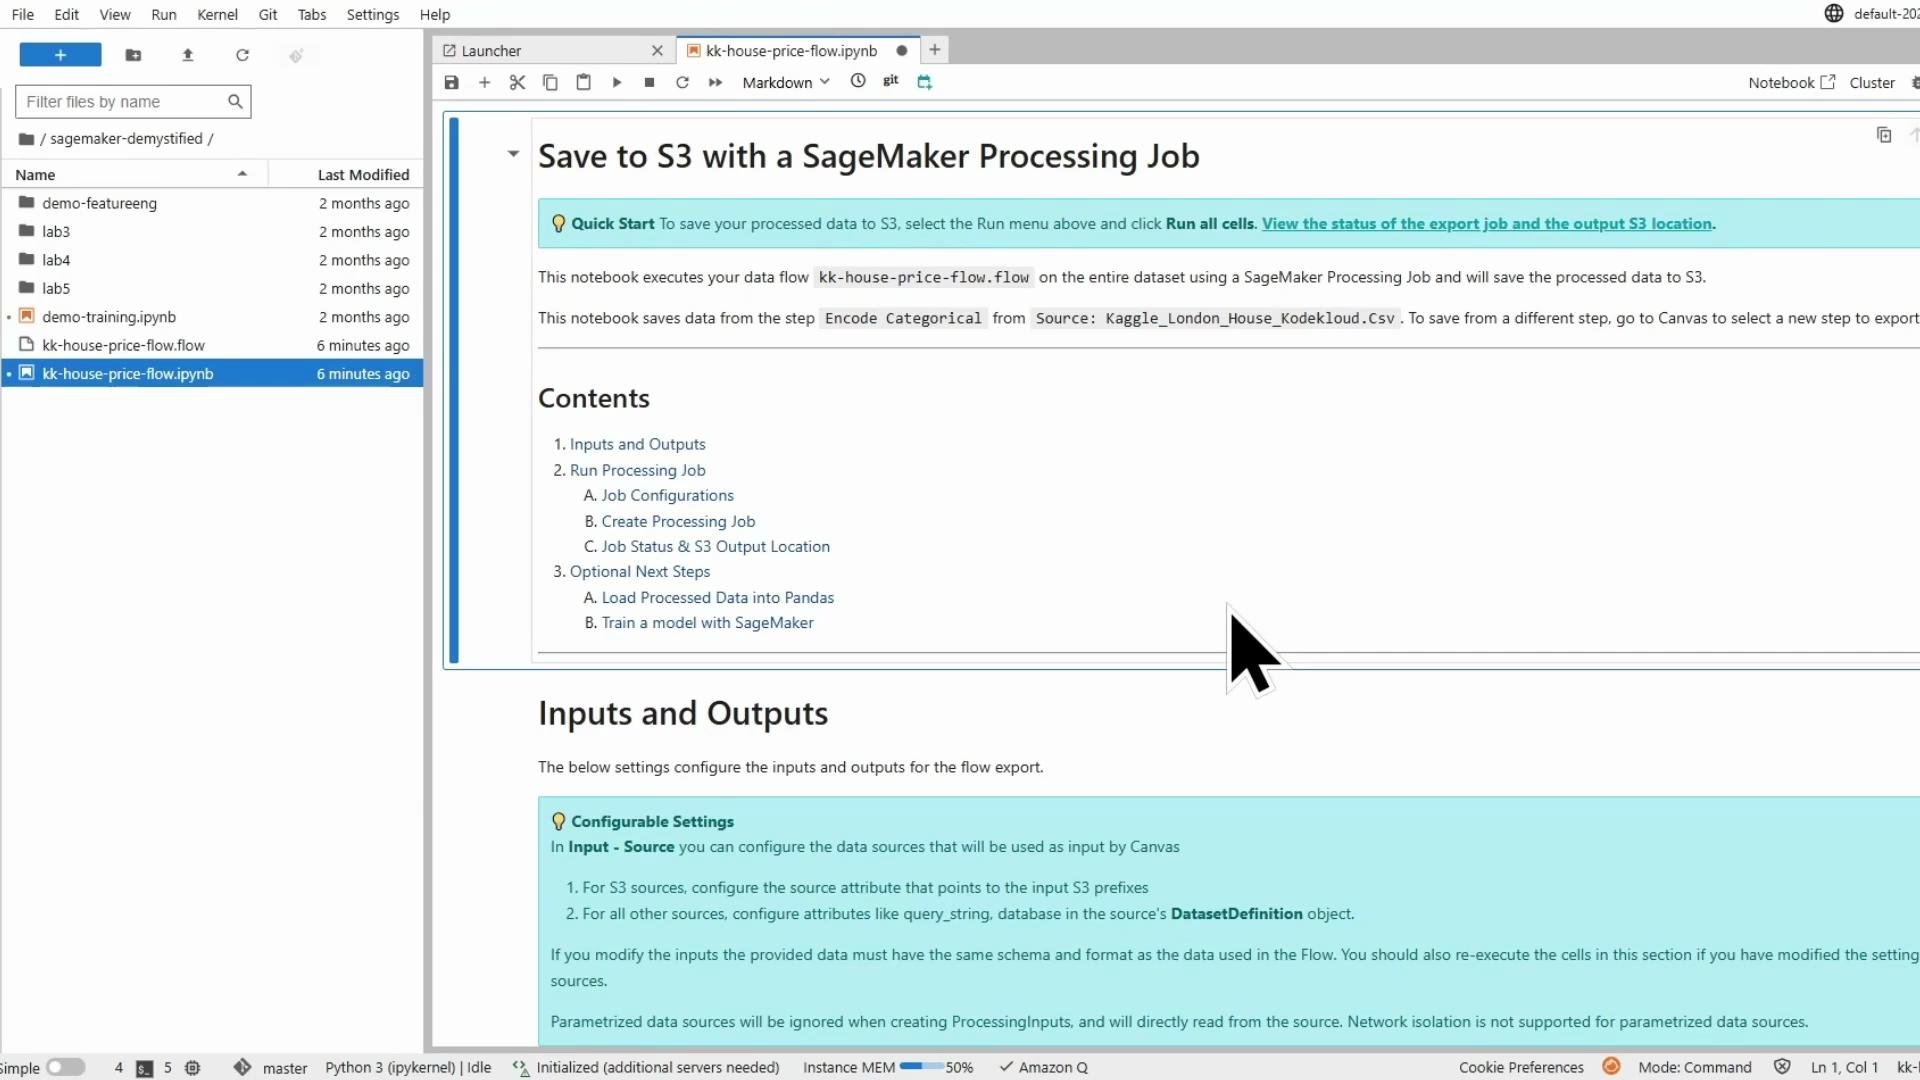
Notebook contents — core snippets
The exported notebook sets up ProcessingInput(s) for the flow and inputs, and ProcessingOutput(s) for S3. Below are representative snippets you will find (adapt as needed). Typical imports used in the exported notebook:.flow file as a ProcessingInput:
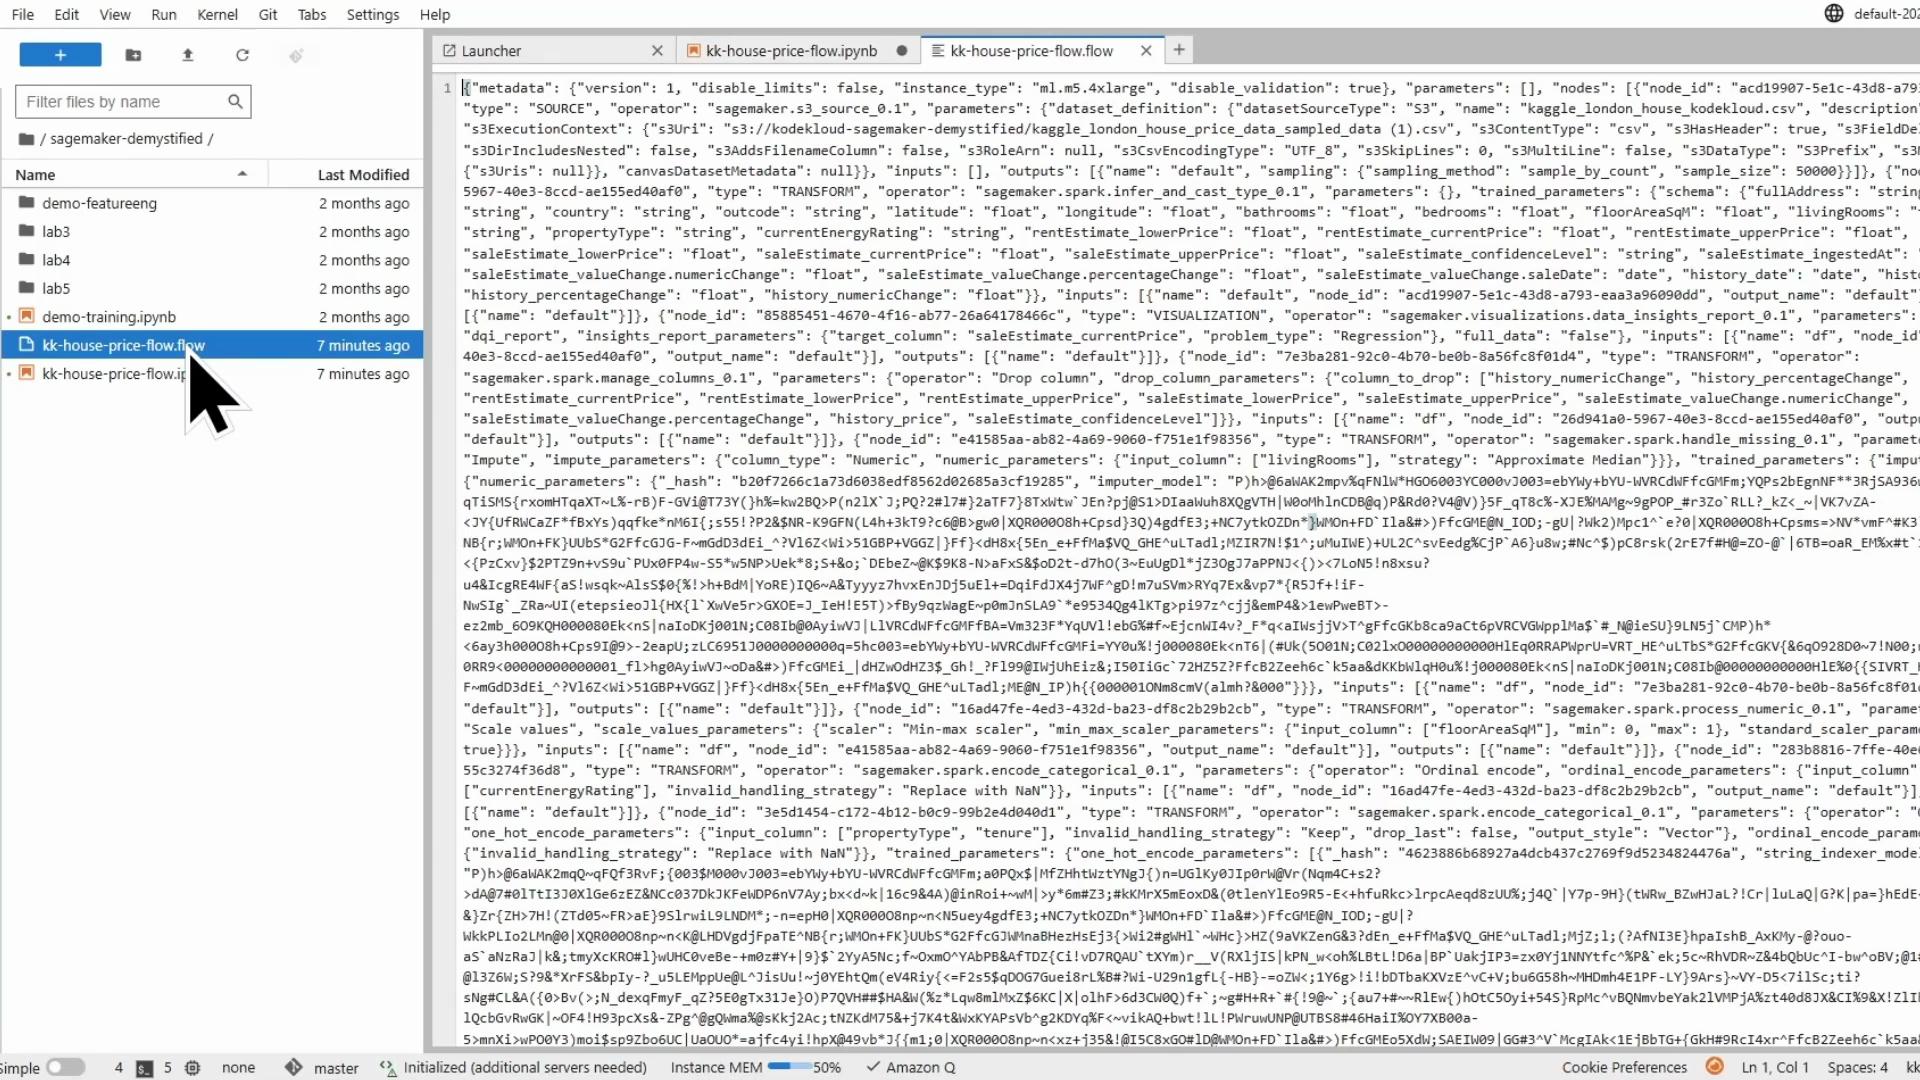
Inspect the .flow file (JSON) locally
The.flow file is JSON and contains the pipeline metadata, nodes, operators, and parameters. Loading and pretty-printing it in the notebook helps you review the exact transformations and execution settings:
- metadata (for example, an
instance_typesuggestion like “ml.m5.4xlarge”) - nodes list with SOURCE and TRANSFORM nodes (infer_and_cast_type, drop column, impute, scale, ordinal encode, one-hot encode)
- operator implementations (often under
sagemaker.spark.*) - transform parameters and any trained parameters (e.g., learned imputations or encodings)
Wrap-up and next steps
- The exported notebook plus the
.flowfile provide a reproducible way to run the same Data Wrangler transformations in a SageMaker Processing job. - Hand the notebook to data scientists or integrate it into automated pipelines to produce transformed datasets for training.
- Always shut down idle SageMaker Canvas instances to avoid unnecessary charges.
Links and references
- Amazon SageMaker Data Wrangler
- Amazon SageMaker Canvas overview
- SageMaker Processing jobs
- Amazon S3 documentation
When copying S3 objects whose key contains spaces, quote the S3 URI (or URL-encode the path) so the CLI treats it as a single argument. Also ensure the IAM role or credentials used by your notebook/studio have access to the bucket.