- Review limitations of SageMaker Jupyter notebook instances and why Studio is preferable for team workflows.
- Explain the components and architecture of a SageMaker Domain and how Studio uses them.
- Compare quick setup vs. manual (organization) setup choices.
- Walk through accessing Studio from the AWS Management Console and managing user profiles and personal apps.
Limitations of Jupyter notebook instances
SageMaker supports single-user Jupyter notebook instances, but they present practical and operational limits for teams and production workflows:- One instance per user leads to many long-running VMs when teams each create an instance.
- Billing continues while instances run; they do not auto-stop by default, increasing costs if users forget to shut them down.
- No built-in experiment tracking or standard reproducibility workflow.
- No automatic Git integration—each user must clone or configure repositories manually.
- Notebook instances provide only the Jupyter environment; integrating other SageMaker features often requires manual work.
| Limitation Area | Notebook Instances | SageMaker Studio |
|---|---|---|
| Multi-user collaboration | No (one-to-one) | Shared workspaces available |
| Experiment tracking | None built-in | SageMaker Experiments, MLflow integrations |
| Git integration | Manual | Built-in or mountable repos |
| Cost control | Manual stop required | Centralized management and policies |
| Multi-IDE support | Jupyter only | JupyterLab, RStudio, Code Editor, and more |
Experiment tracking and reproducibility
Tracking experiment inputs (data versions, preprocessing, model code, hyperparameters) and outputs (metrics, model artifacts) is essential for reproducibility and collaboration. Without a standard approach, teams risk losing context from prior runs—hyperparameters or dataset versions can be forgotten, and results become hard to compare. SageMaker Studio addresses this by offering integrated experiment tools:- SageMaker Experiments for tracking runs, lineage, and metadata: https://docs.aws.amazon.com/sagemaker/latest/dg/experiments.html
- Integrations with external frameworks such as MLflow: https://mlflow.org
SageMaker Domain and Studio architecture
SageMaker Studio is deployed inside a SageMaker Domain. A Domain is an administrative boundary that groups users, shared storage, execution roles, and policy controls. Main components include:- Shared file system: an Amazon EFS share is created for the Domain so users can access shared files. Note that Studio storage architectures and trade-offs have evolved; evaluate EFS performance and costs for production use.
- User profiles: each person must have a user profile in the Domain to open Studio. An AWS account or IAM user alone does not grant Studio access; the user profile binds the user to the Domain.
- Studio applications: the browser IDE exposes multiple applications (JupyterLab, RStudio, Code Editor, and other Studio apps).
- Execution role(s): IAM role(s) define what AWS resources Studio and user workloads can access (S3 buckets, model APIs, etc.).

What Studio provides over notebook instances
Moving from isolated notebook instances to a SageMaker Domain + Studio yields several operational and developer productivity benefits:- Shared workspaces and file storage for team collaboration.
- Built-in or easily mounted Git repositories to support version-control driven workflows.
- Native experiment tracking (SageMaker Experiments) plus integrations like MLflow.
- Orchestration with SageMaker Pipelines to build repeatable ML workflows: https://docs.aws.amazon.com/sagemaker/latest/dg/pipelines.html
- Fine-grained IAM control for datasets, models, and pipelines.
- Multiple hosted IDEs: JupyterLab, RStudio (check licensing), and a hosted VS Code-like Code Editor.
| Feature | Notebook Instances | Studio (Domain) |
|---|---|---|
| Collaboration | Limited | Shared EFS, shared notebooks |
| Experiment management | External tooling | Built-in and integrated |
| Orchestration | Manual | SageMaker Pipelines |
| IDE options | Jupyter only | JupyterLab, RStudio, Code Editor |
| Access control | Instance-level | Domain + IAM roles + user profiles |
- Studio Classic refers to the original UI and older architecture. AWS recommends using the current SageMaker Studio, which exposes newer capabilities and UI updates. Plan migration if you still use Studio Classic.
Accessing SageMaker Studio (console walkthrough)
To open Studio from the AWS Management Console:- Open Amazon SageMaker.
- In the left navigation under “Applications and IDEs”, click Studio.
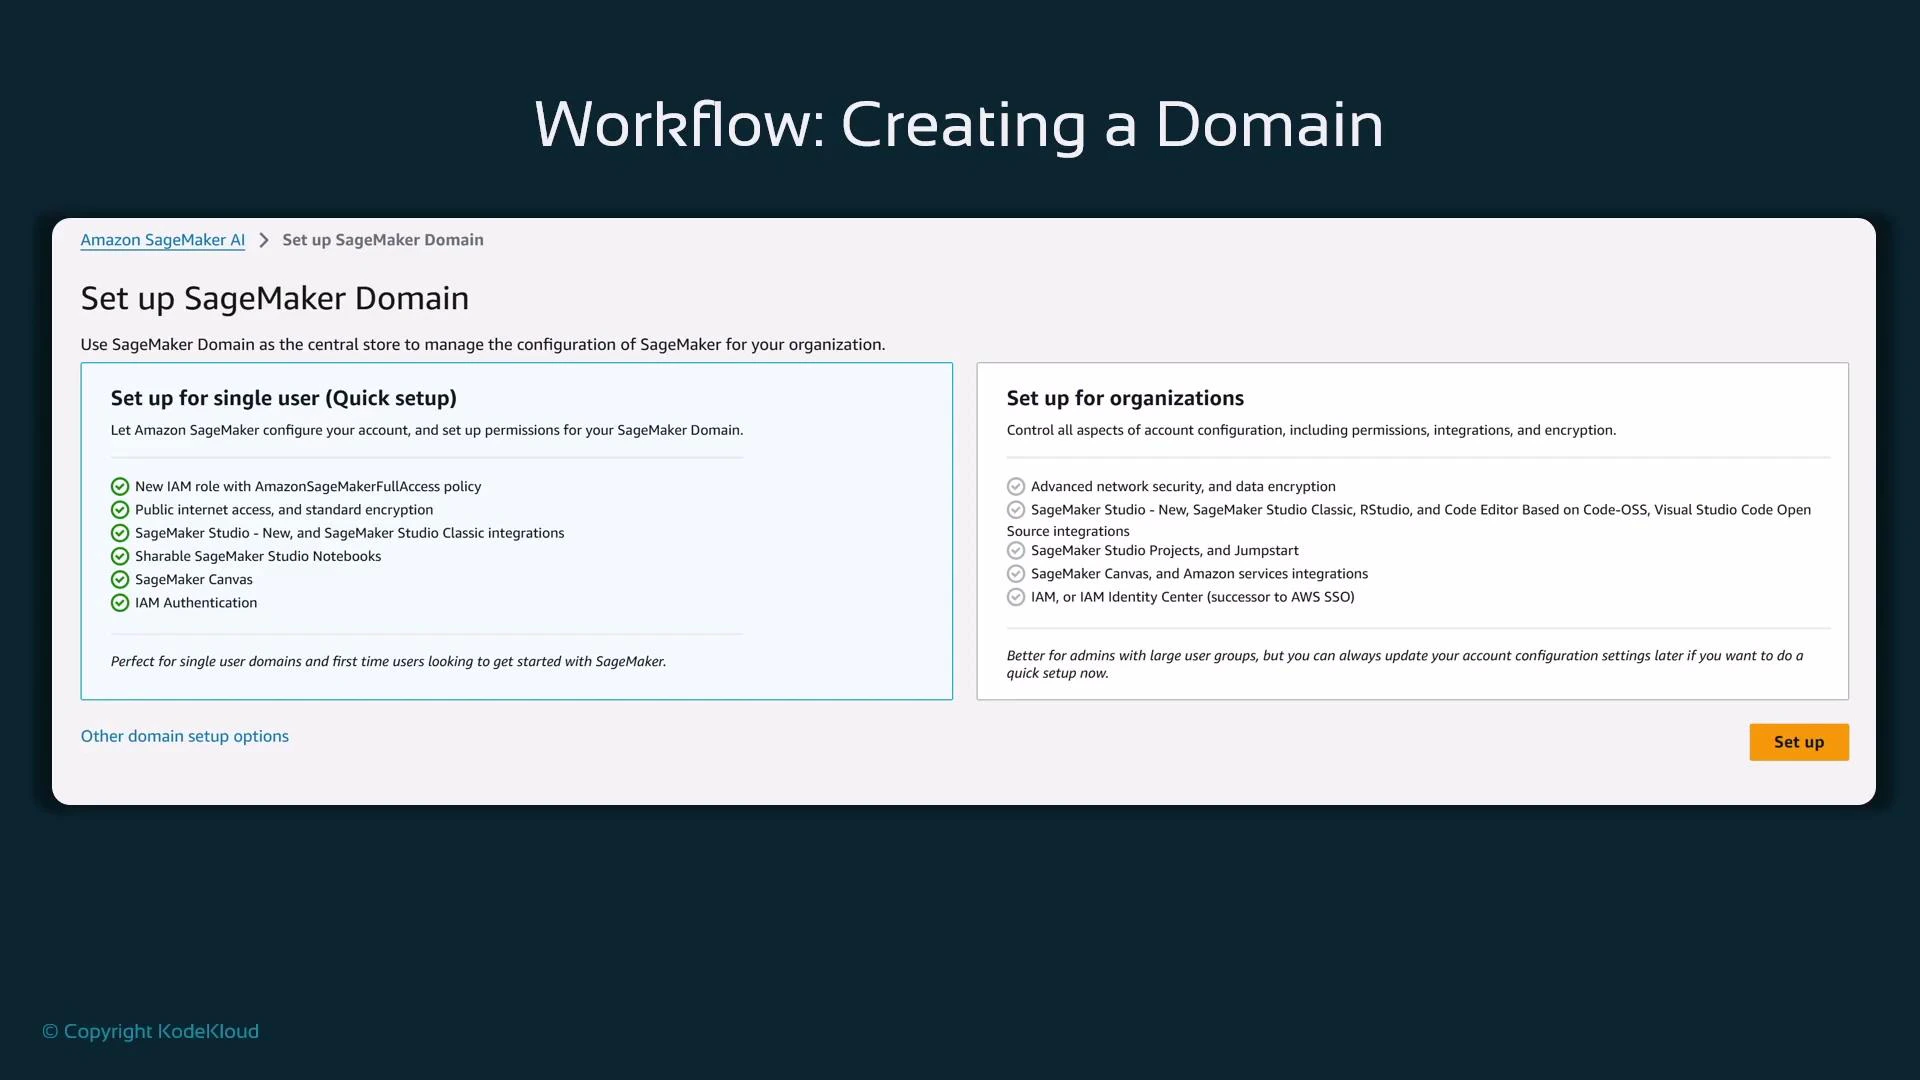
Quick setup vs. manual setup
- Quick setup: fastest path to a Domain. It creates a Domain with defaults (region default VPC, default user profile). Ideal for personal learning, experiments, or proofs-of-concept.
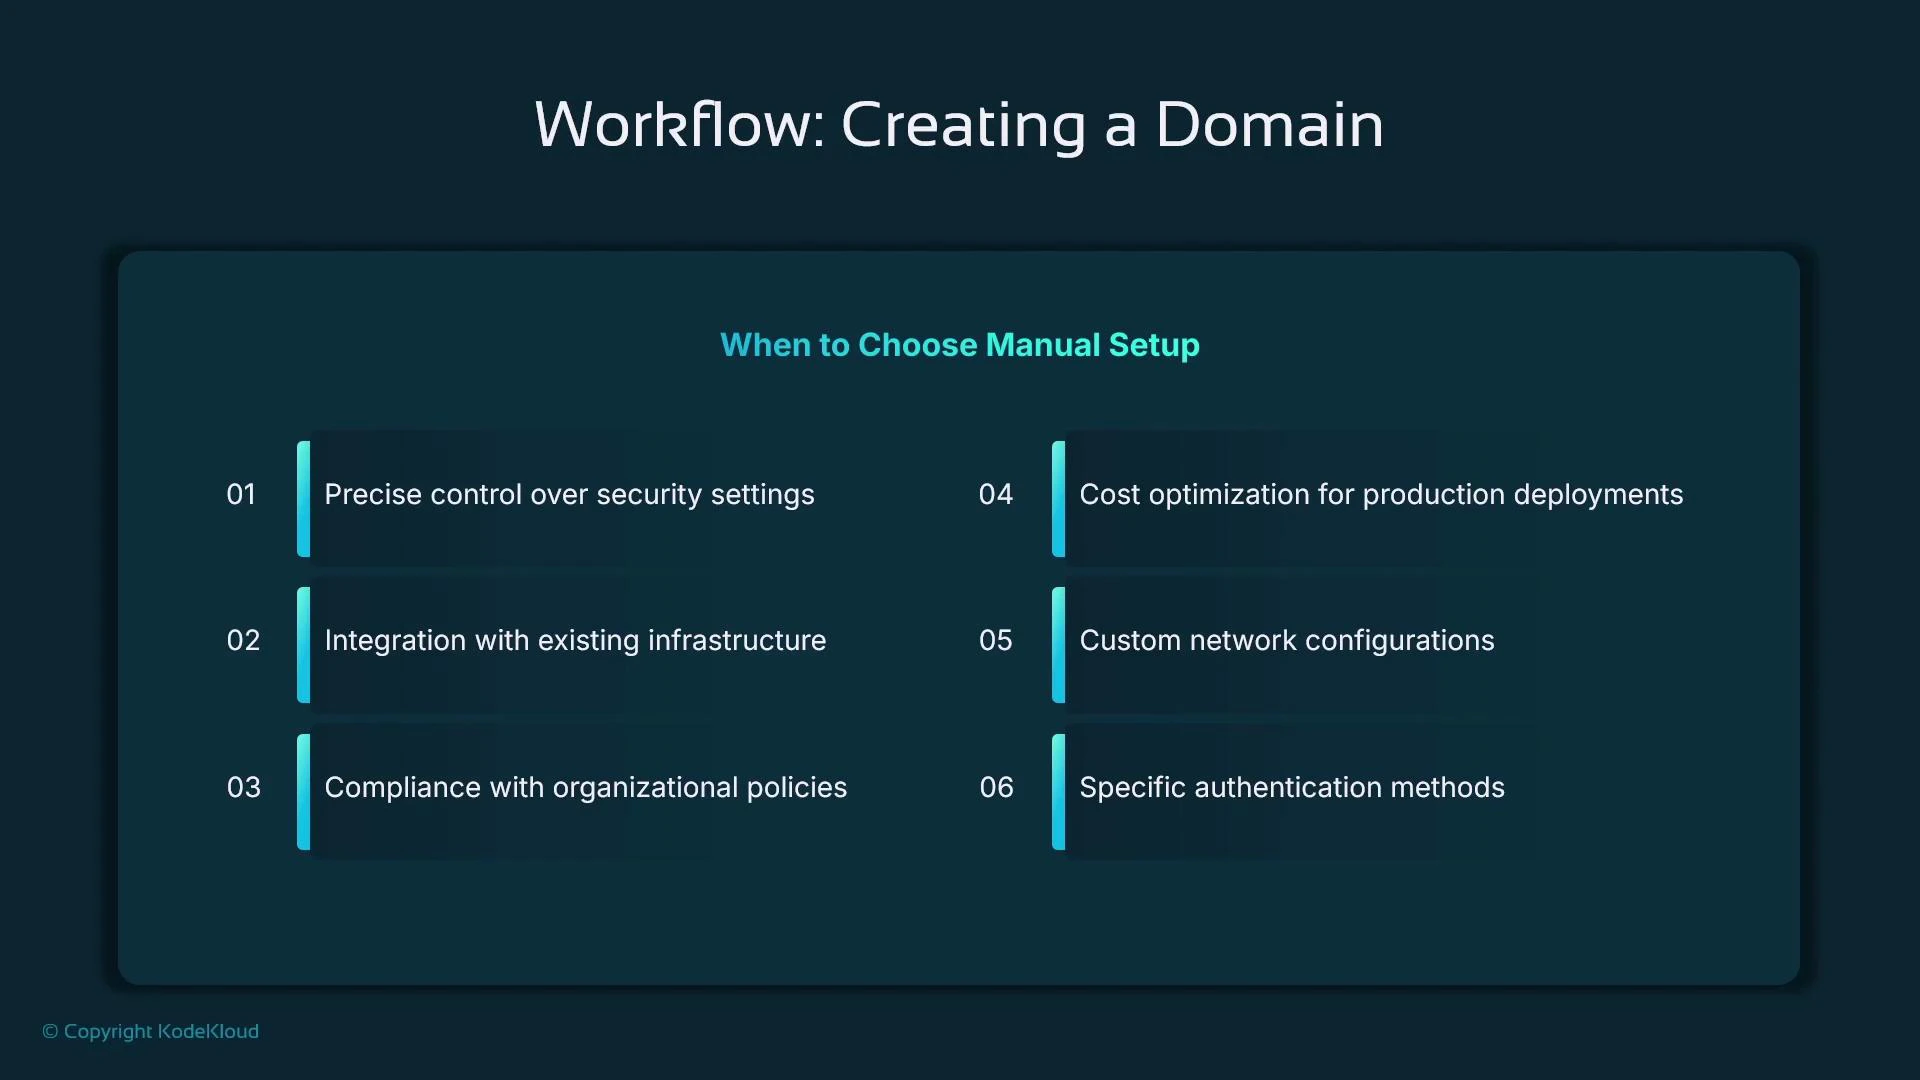
- Manual setup: required for production or regulated environments. It allows full control over VPC/subnets, KMS encryption keys, authentication (federated SSO via AWS Identity Center / Microsoft Entra), and granular IAM policies.
Use quick setup for learning, demos, and short-term experimentation. For production, compliance, or private-network workloads, select manual setup to control networking, encryption, and authentication.
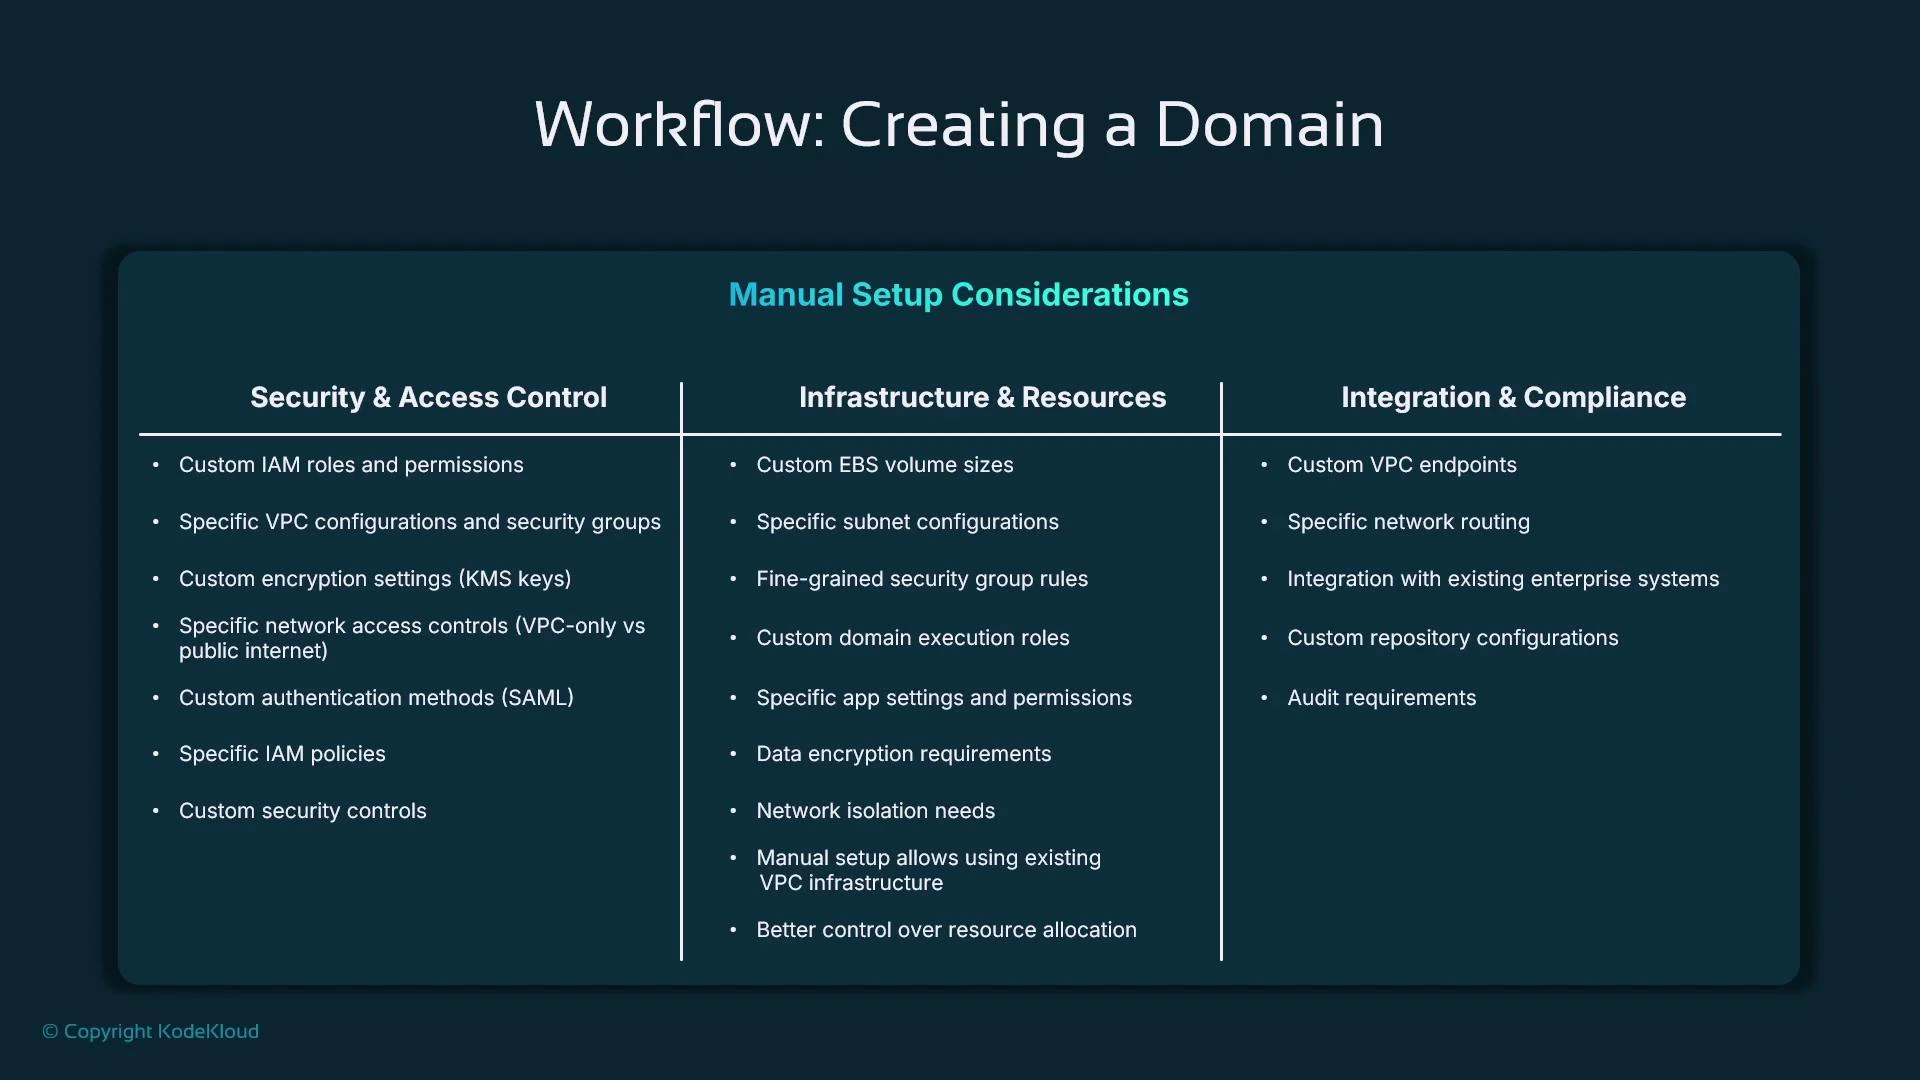
- Security & access control: design custom IAM roles and policies, configure KMS keys, and integrate identity federation where needed.
- Infrastructure & resources: choose subnets, EBS or other storage choices, and configure VPC endpoints for secure access.
- Integration & compliance: enable audit logging, align with organizational policies, and integrate required services.
JupyterLab 3 notebooks on SageMaker Studio Classic have reached end of support. If you are still using Studio Classic, migrate to the current SageMaker Studio and newer JupyterLab versions to continue receiving security fixes and feature updates.
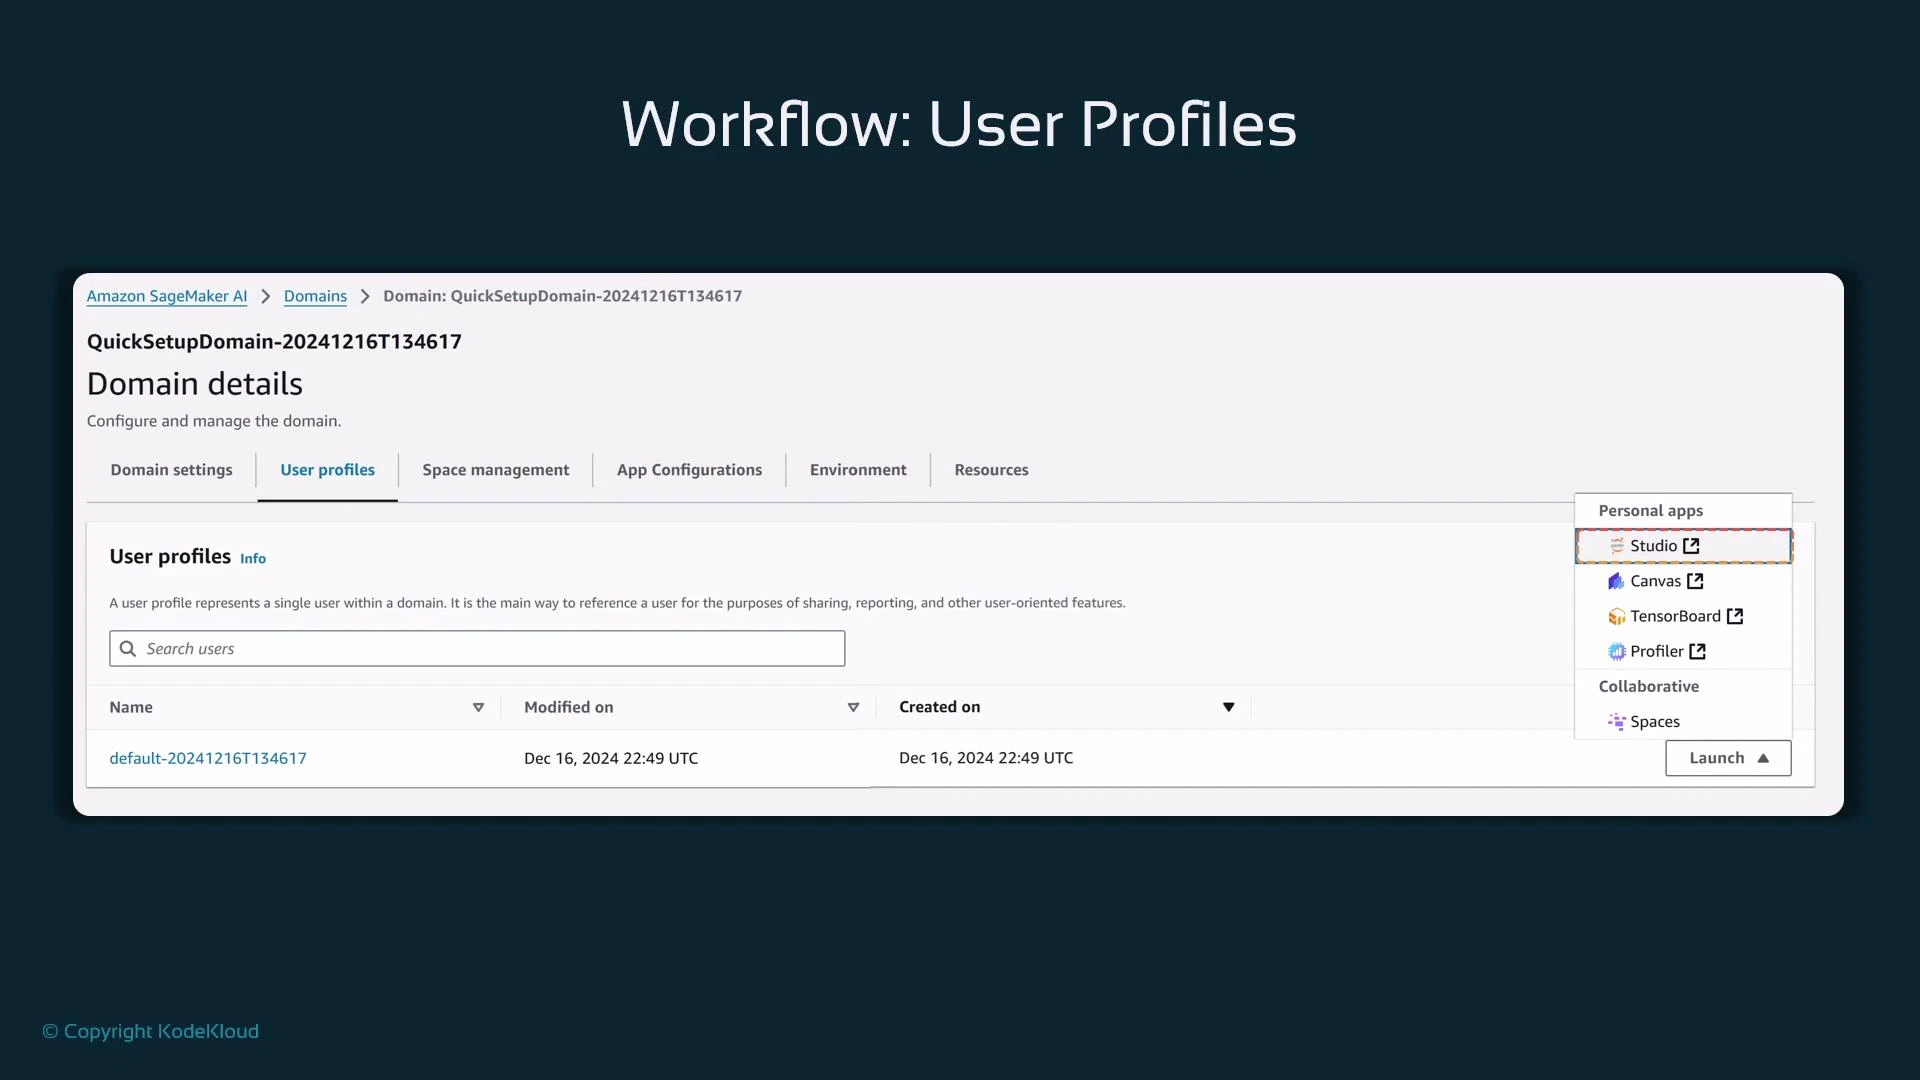
Domains, user profiles, and launching Studio
After a Domain is created:- The Studio section in SageMaker will show an “Open Studio” action under Applications and IDEs.
- Domains contain user profiles—each person needs a user profile associated with the Domain to launch Studio. Having IAM credentials alone does not grant access.
- Quick setup creates a default user profile; manual setup requires you to create user profiles explicitly.
- In the SageMaker console sidebar, open “Admin configurations” → “Domains”.
- Click the domain name, then open the “User profiles” tab.
https://studio-<unique-id>.<region>.sagemaker.aws), which is distinct from the AWS Management Console URL.
Summary
SageMaker Domains + SageMaker Studio deliver a managed, collaborative, and production-capable environment that addresses limitations of single-user notebook instances. Key takeaways:- Studio provides shared file storage, integrated experiment tracking, and pipeline orchestration.
- Studio supports Git integration and multiple IDEs (JupyterLab, RStudio, Code Editor).
- For rapid evaluation, use quick setup. For production, compliance, or private-network requirements, choose manual setup and design networking, encryption, and IAM accordingly.
- Ensure migration from Studio Classic and older JupyterLab versions to benefit from continued support.
- SageMaker Documentation: https://docs.aws.amazon.com/sagemaker/
- SageMaker Experiments: https://docs.aws.amazon.com/sagemaker/latest/dg/experiments.html
- SageMaker Pipelines: https://docs.aws.amazon.com/sagemaker/latest/dg/pipelines.html
- JupyterLab: https://jupyter.org
- MLflow: https://mlflow.org
- AWS Identity Center: https://aws.amazon.com/identity/identity-center/
- Microsoft Entra (identity docs): https://learn.microsoft.com/en-us/entra/