Demo Keeping Track of Models Using the SageMaker Model Registry
Shows how to register, version, approve, and deploy machine learning models using Amazon SageMaker Model Registry with the Python SDK and Boto3
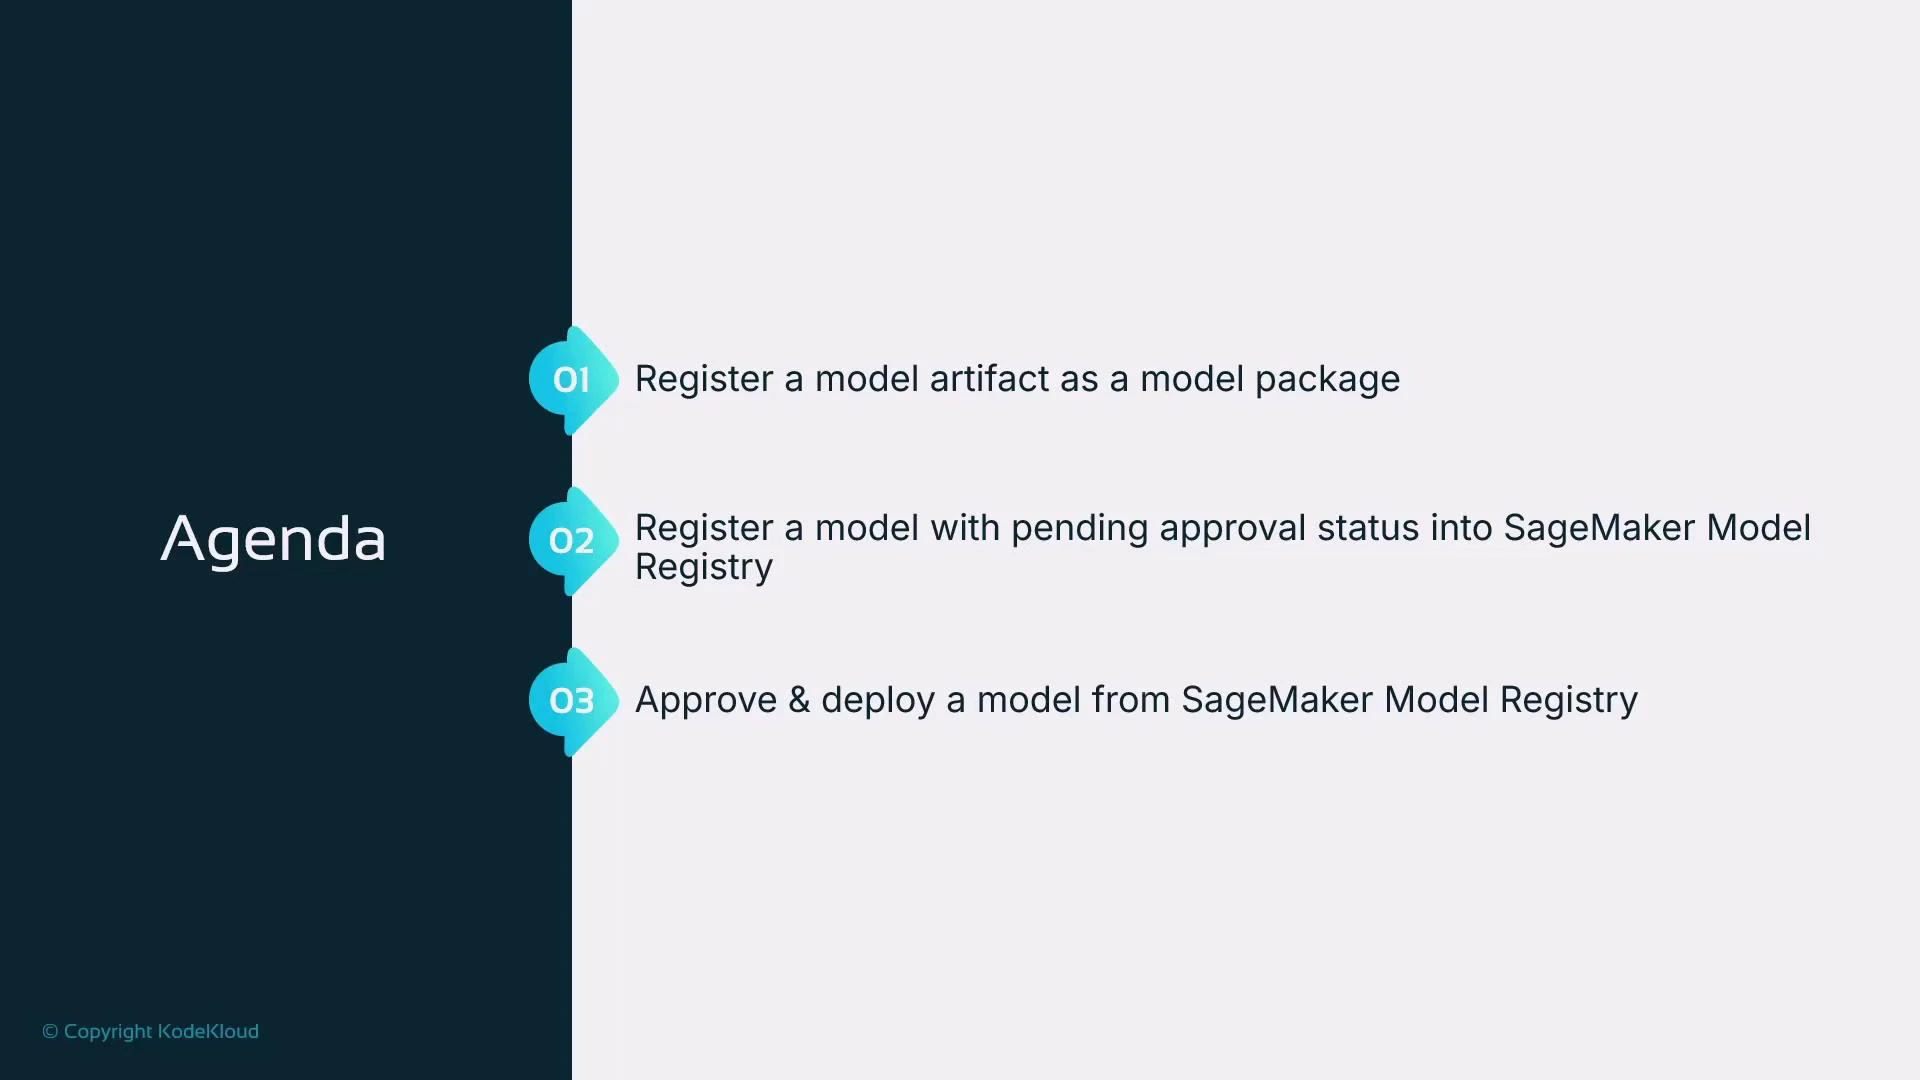
This lesson demonstrates how to use the SageMaker Model Registry to track model artifacts, manage versions, and deploy approved models. The examples are executed from a Jupyter notebook in SageMaker Studio and use the SageMaker Python SDK along with Boto3.We will:
register a model artifact as a model package,
register that model into the SageMaker Model Registry with an approval status, and
approve a model version and obtain the latest approved model for deployment.
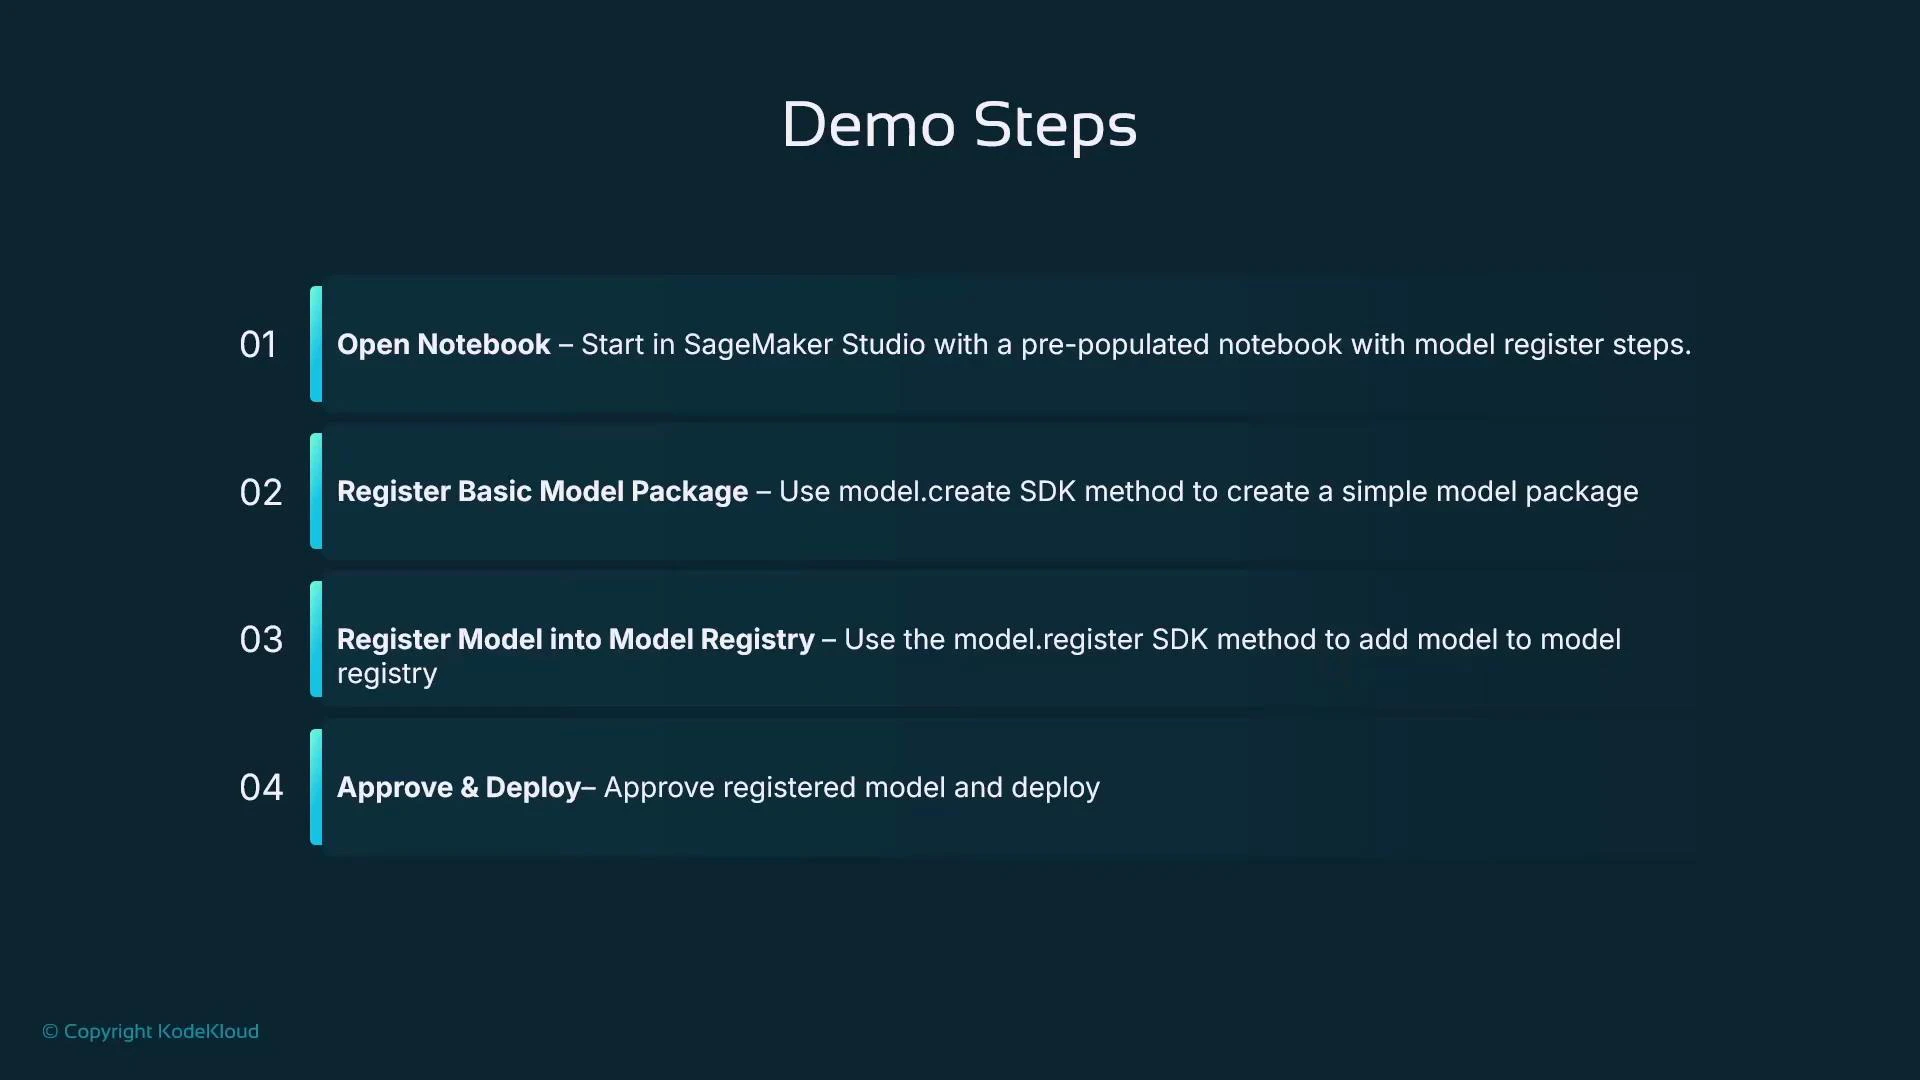
This notebook covers the following SageMaker SDK usage:
create a legacy model package using Model.create,
register a model into the Model Registry using Model.register,
list and obtain the latest approved package from the registry, and
deploy the approved package to an endpoint.
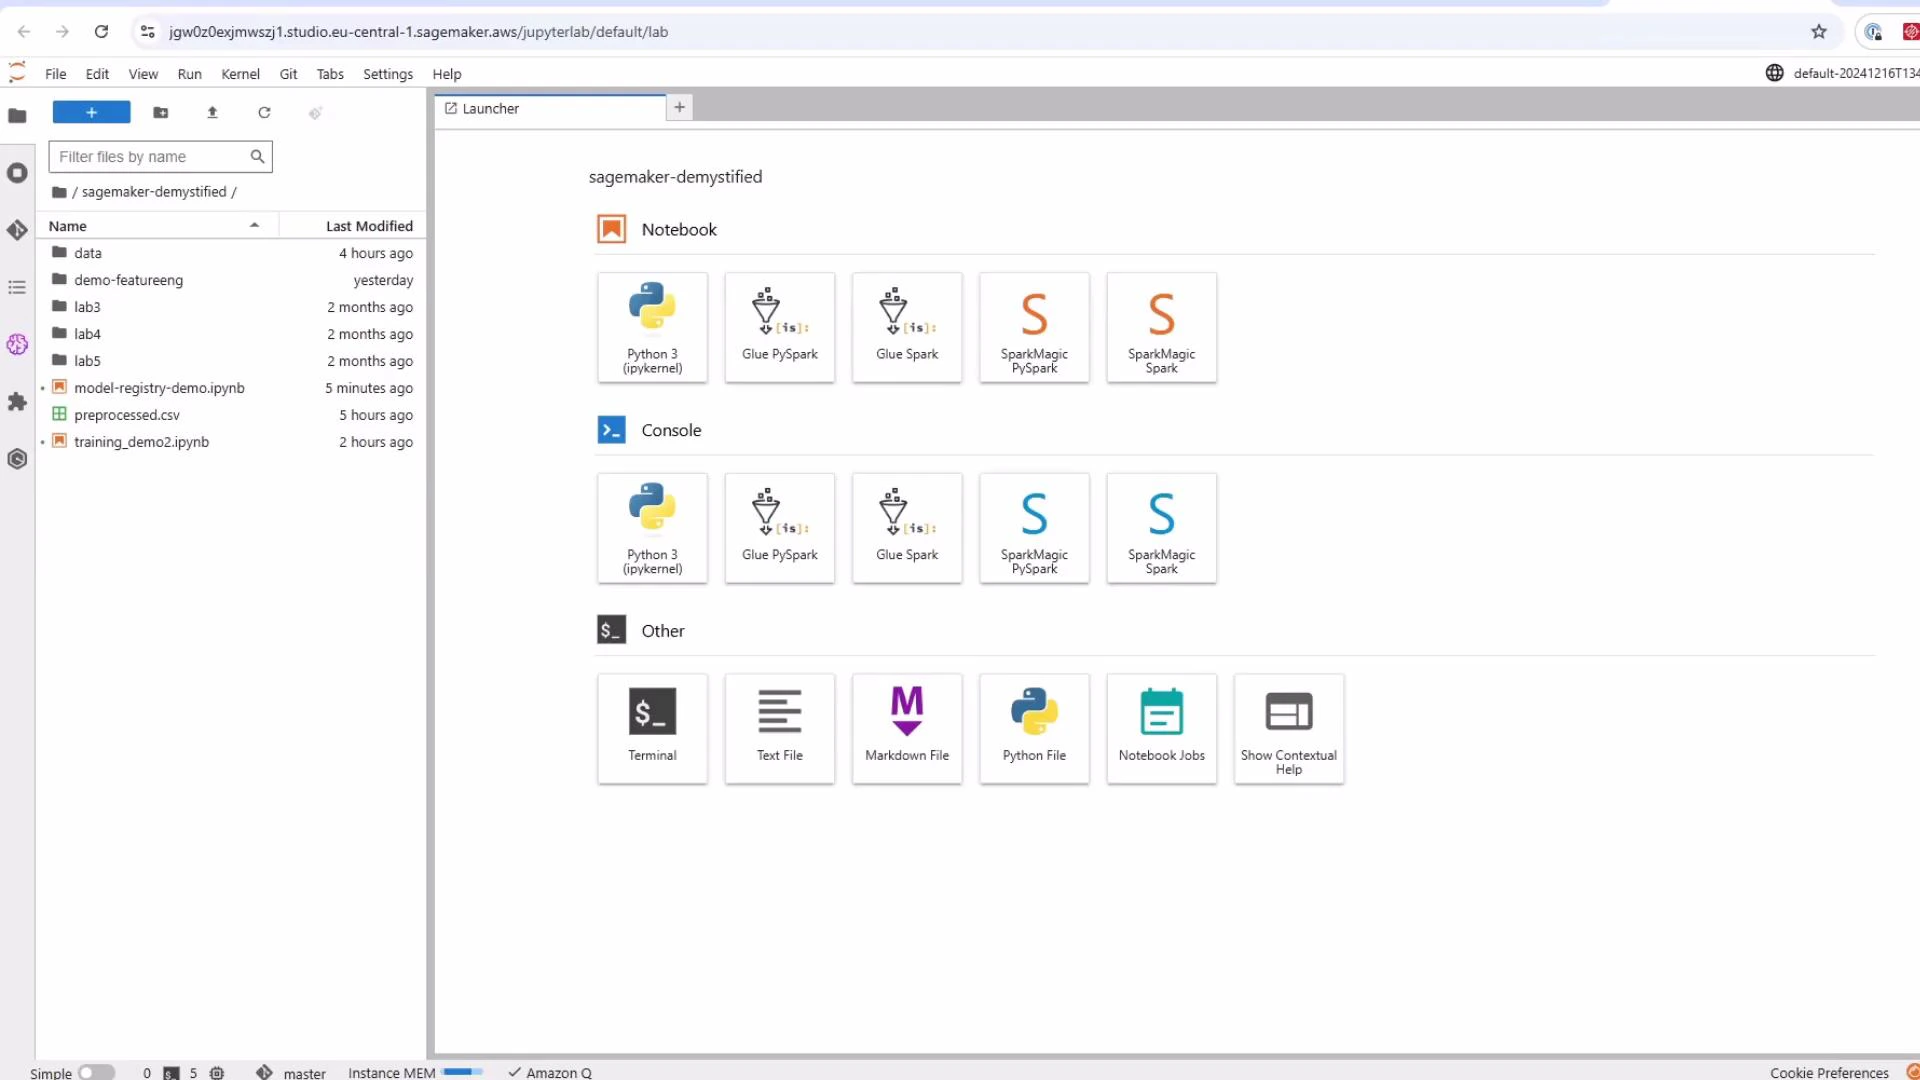
Getting started: open SageMaker Studio, launch JupyterLab, and open the notebook named “Model Registry Demo”.
Start by importing required libraries and creating a SageMaker session and role reference. This session object is used throughout the notebook for SDK operations.
If you already have a trained model artifact saved in S3 and want a quick way to create a SageMaker model package (legacy flow), call Model.create() by supplying the S3 model artifact and the appropriate container image for the framework.
model artifact (output of a training job)
container image URI for the training framework (for example, Linear Learner)
Example:
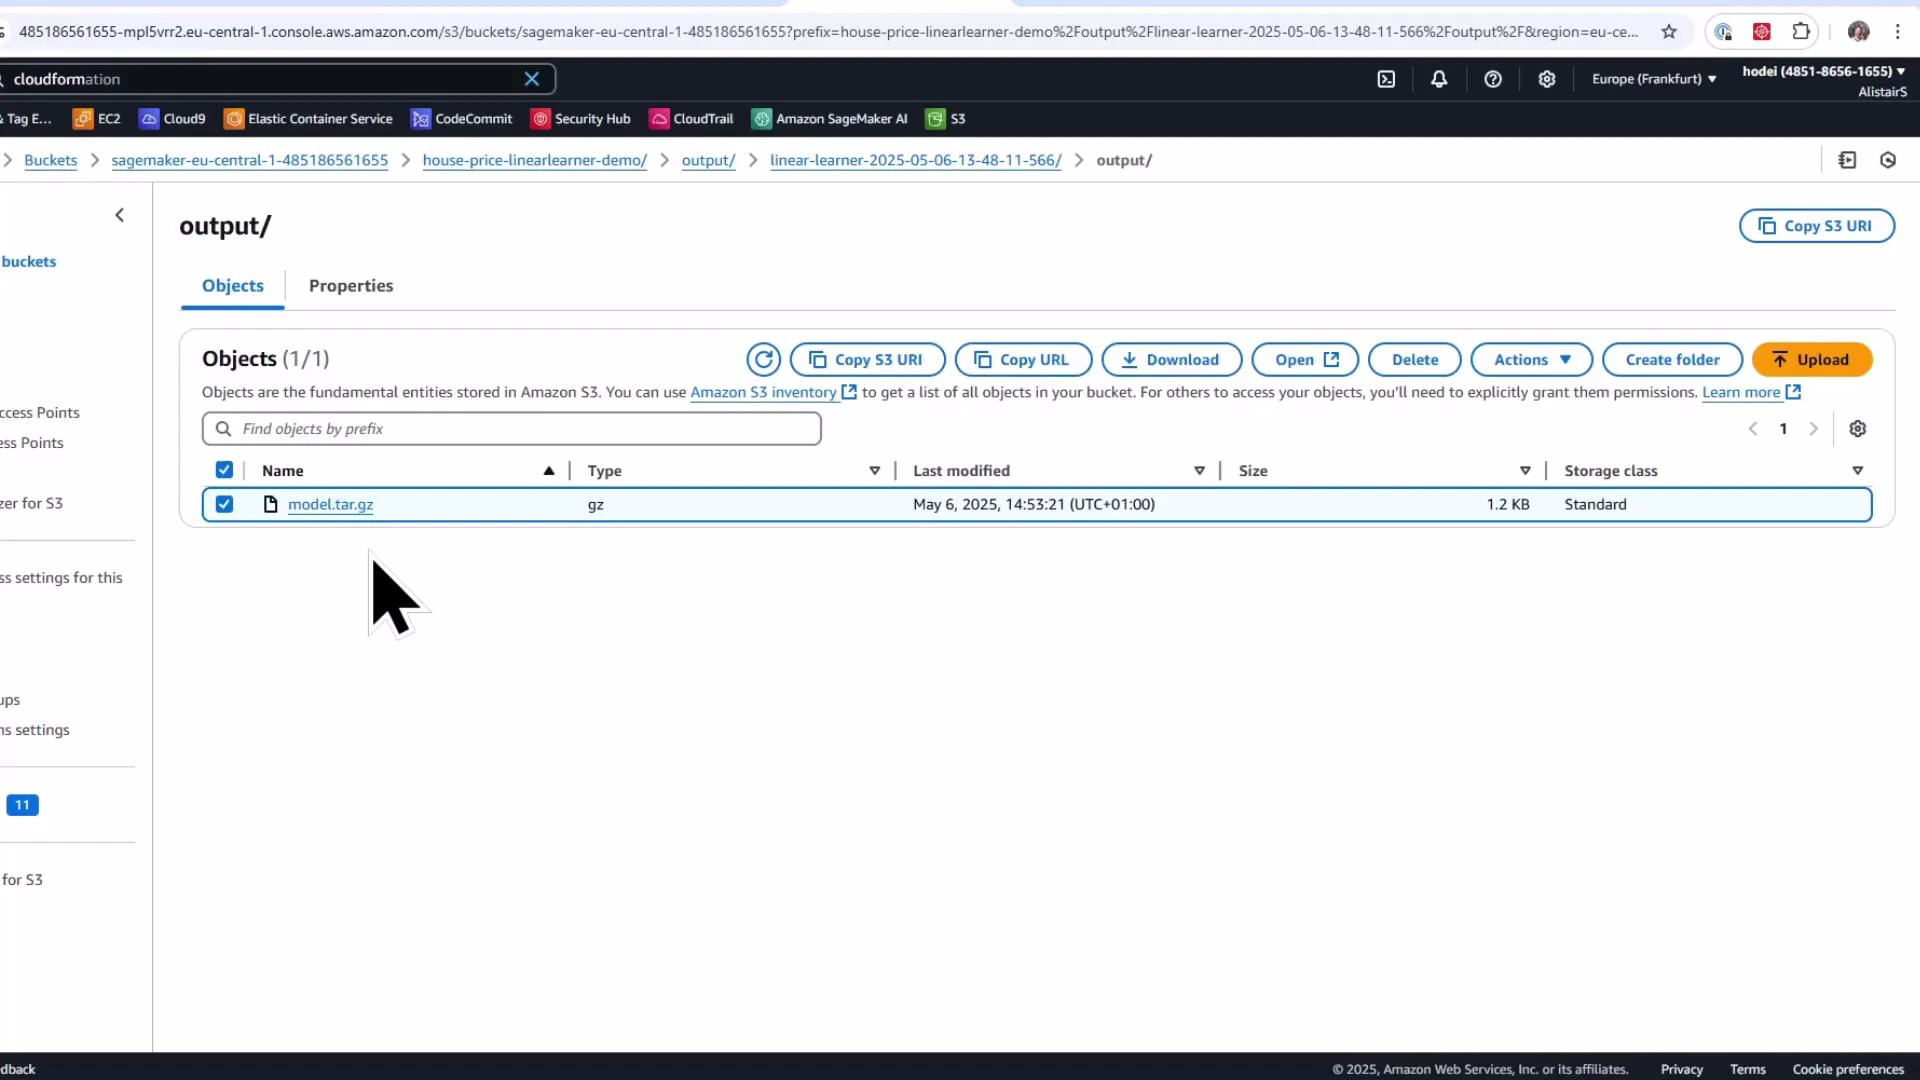
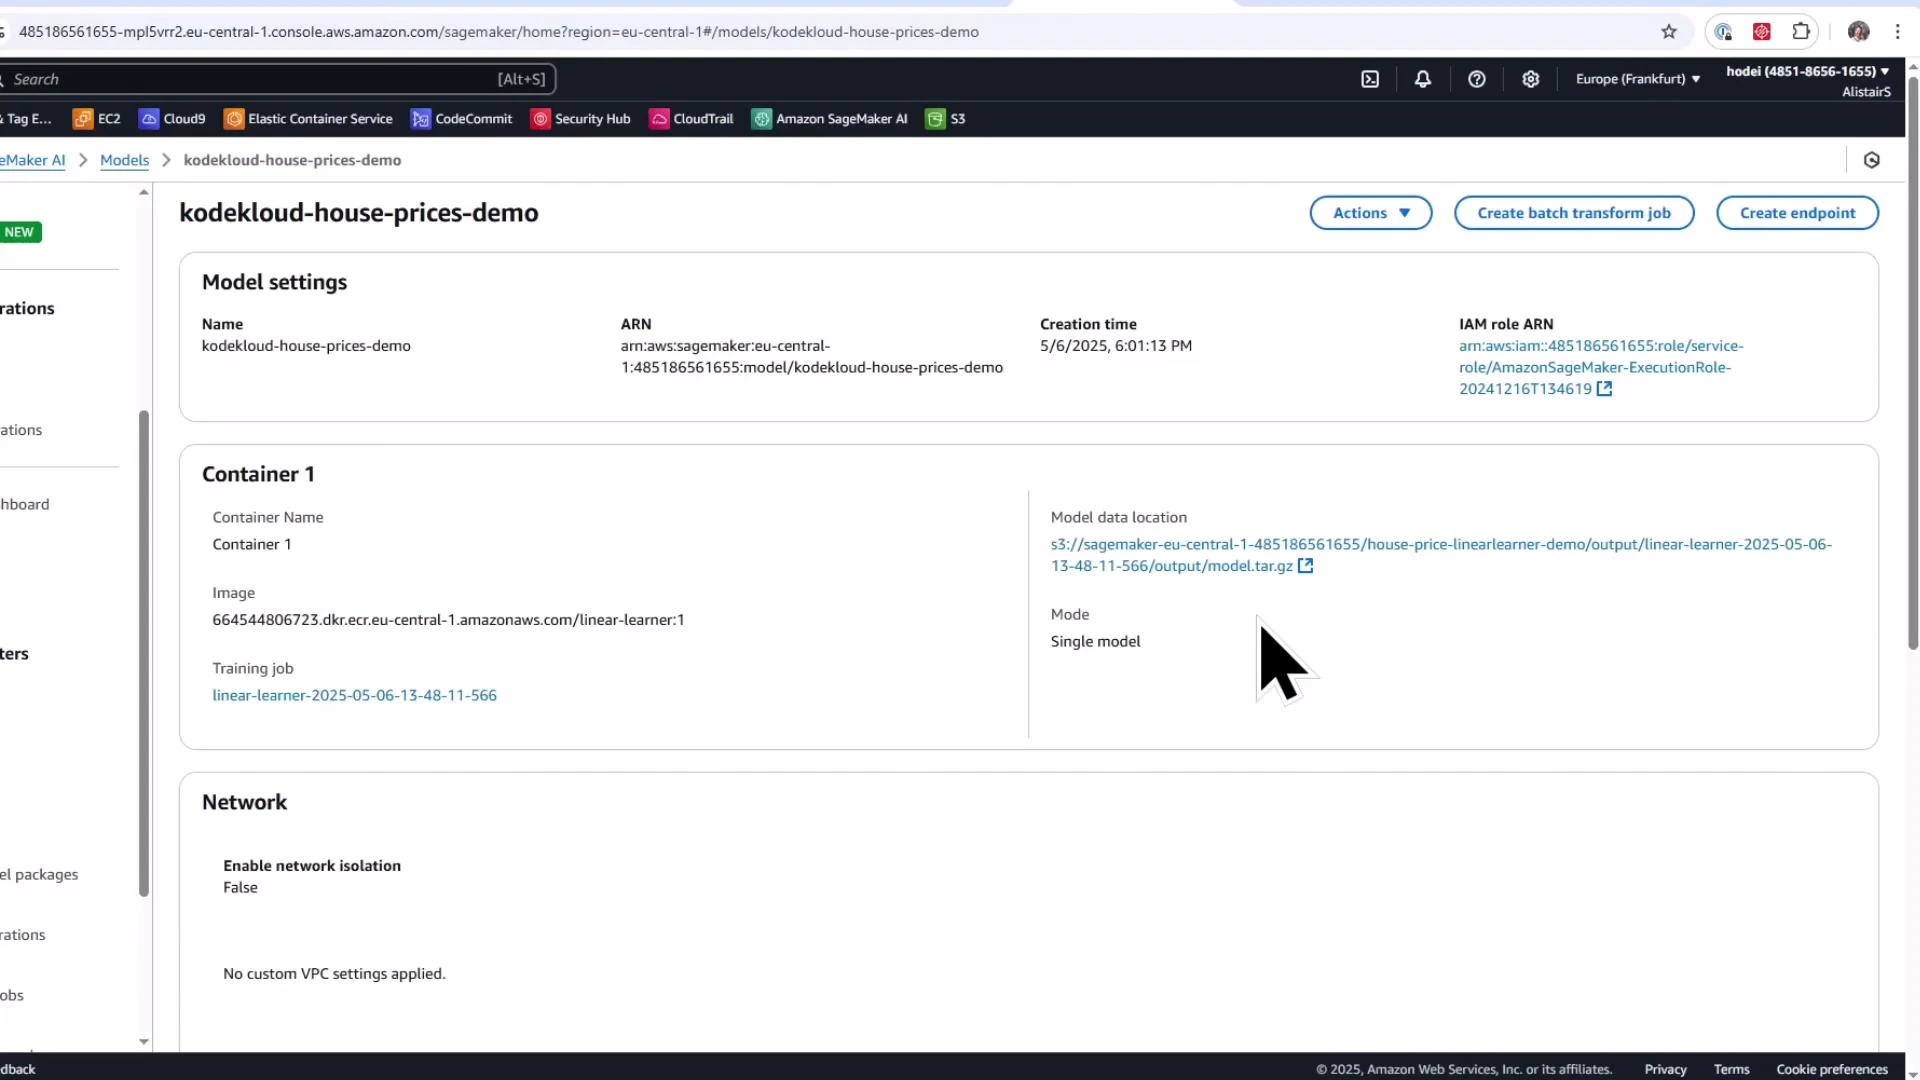
# Reference model artifact in S3 (this is the trained model output)model_artifact = 's3://sagemaker-eu-central-1-485186561655/house-price-linearlearner-demo/output/linear-learner-2025-05-06-13-48-11-566/output/model.tar.gz'# Determine region and fetch container image URI for the Linear Learner frameworkregion = sagemaker_session.boto_region_namecontainer_image_uri = sagemaker.image_uris.retrieve(framework="linear-learner", region=region)print(f"SageMaker Linear Learner Image URI: {container_image_uri}")# Assign a meaningful name to the modelmodel_name = 'kodekloud-house-prices-demo'# Create the SageMaker model (legacy model package)model = Model( image_uri=container_image_uri, model_data=model_artifact, role=role, name=model_name)# Register the model package (legacy)model.create()
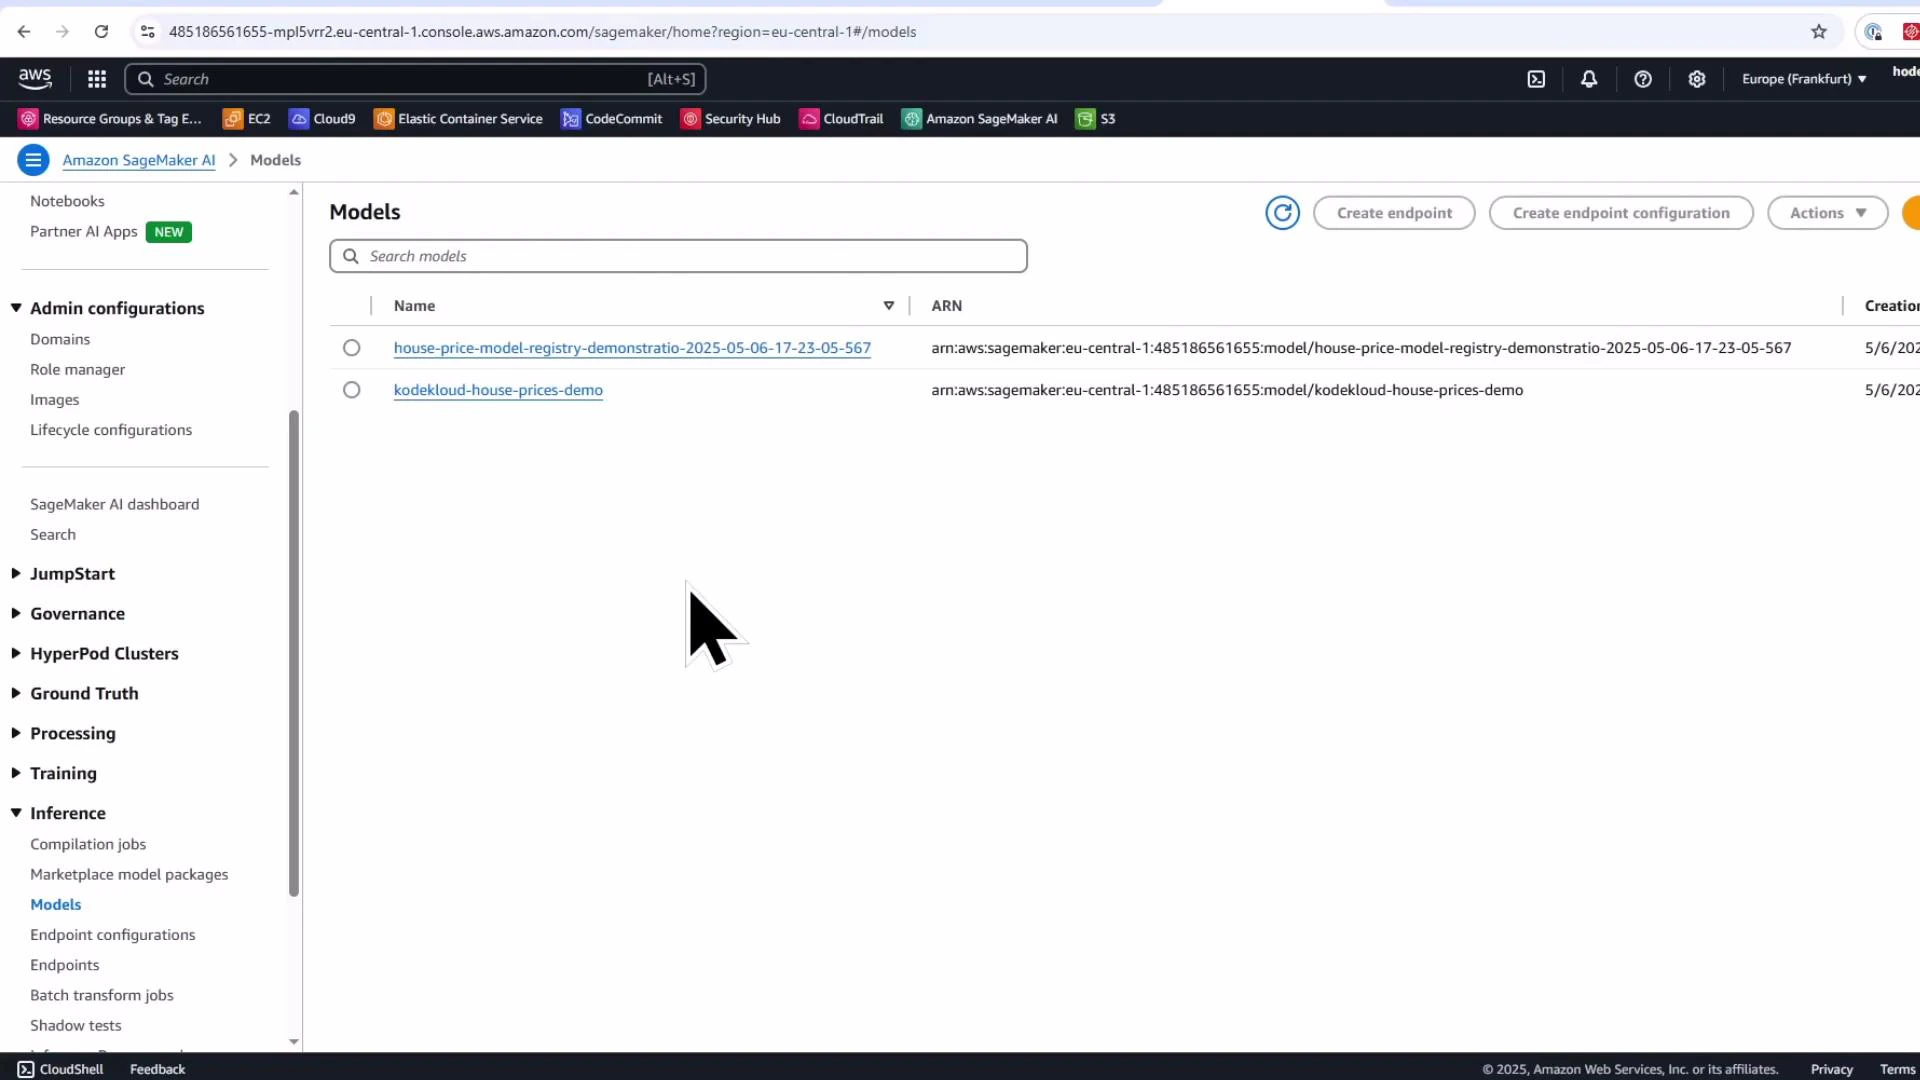
After calling model.create(), the model package shows up in the SageMaker console under Inference → Models, and you can create an endpoint directly from that model object for quick testing.
Model.create is great for rapid prototyping and one-off endpoints. For production tracking, reproducibility, and approval workflows, prefer the SageMaker Model Registry with Model.register.
3. Model Registry: create a Model Package Group and register a model version
The Model Registry stores model versions inside a Model Package Group and provides metadata, metrics, versioning, lineage, and approval workflows. Use the Boto3 SageMaker client to create a model package group, then call Model.register() to add a model version.Create the package group:
# Create a model package group using the low-level boto3 clientmodel_package_group_name = 'house-price-model-registry-demonstration'model_package_group_description = 'KodeKloud model package group for house price prediction'sagemaker_client = boto3.client('sagemaker')try: sagemaker_client.create_model_package_group( ModelPackageGroupName=model_package_group_name, ModelPackageGroupDescription=model_package_group_description ) print(f'Created Model Package Group: {model_package_group_name}')except sagemaker_client.exceptions.ResourceInUse: print(f'Model Package Group {model_package_group_name} already exists.')
Register the model artifact into the registry as a model package version. Set an initial approval status (for example, PendingManualApproval) and attach any custom metadata you want to track.
# Register the model into the model registrymodel_approval_status = "PendingManualApproval"customer_metadata_properties = {"ModelType": "HousePricePrediction"}model_package = model.register( content_types=["text/csv"], response_types=["text/csv"], inference_instances=["ml.t2.medium", "ml.m5.large"], transform_instances=["ml.m5.large"], model_package_group_name=model_package_group_name, approval_status=model_approval_status, customer_metadata_properties=customer_metadata_properties,)print(f"Model package version ARN: {model_package.model_package_arn}")
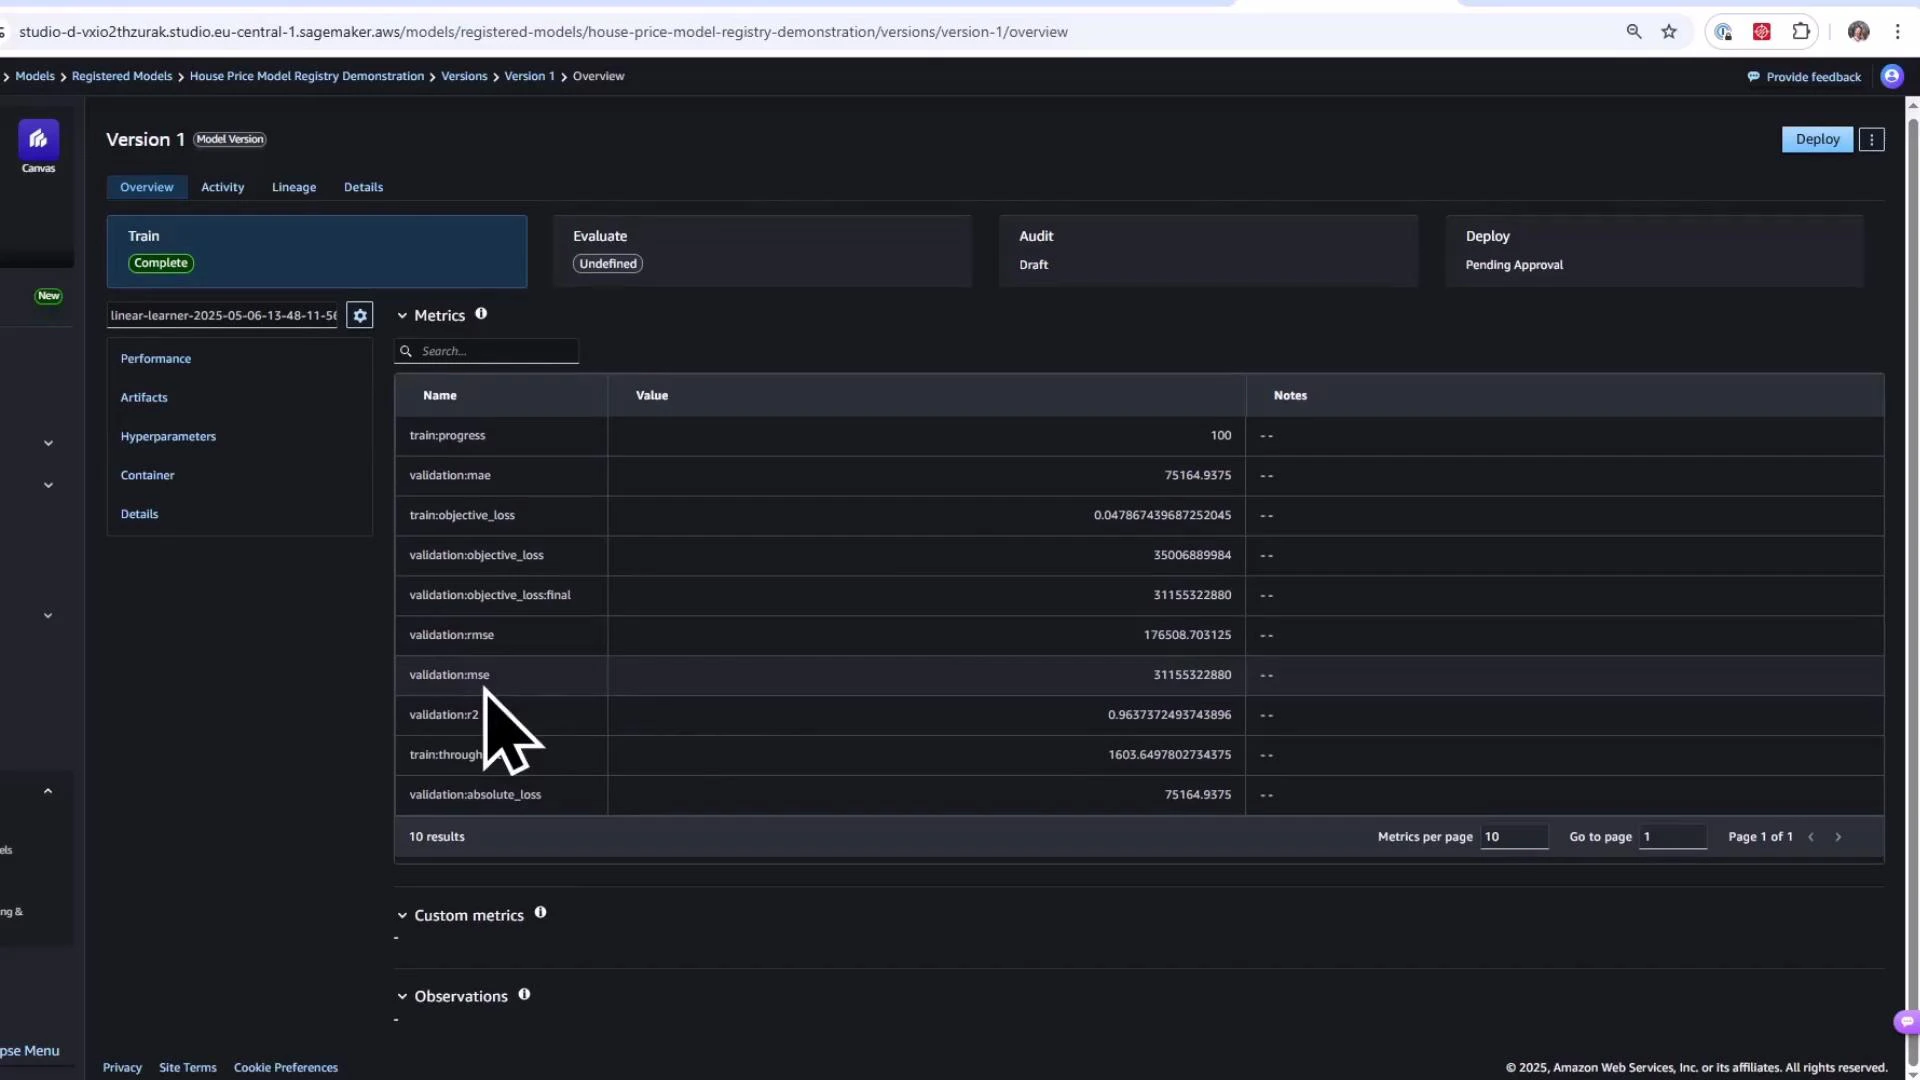
After registration, the version appears in SageMaker Studio → Model Registry under the specified Model Package Group with the approval status you supplied.
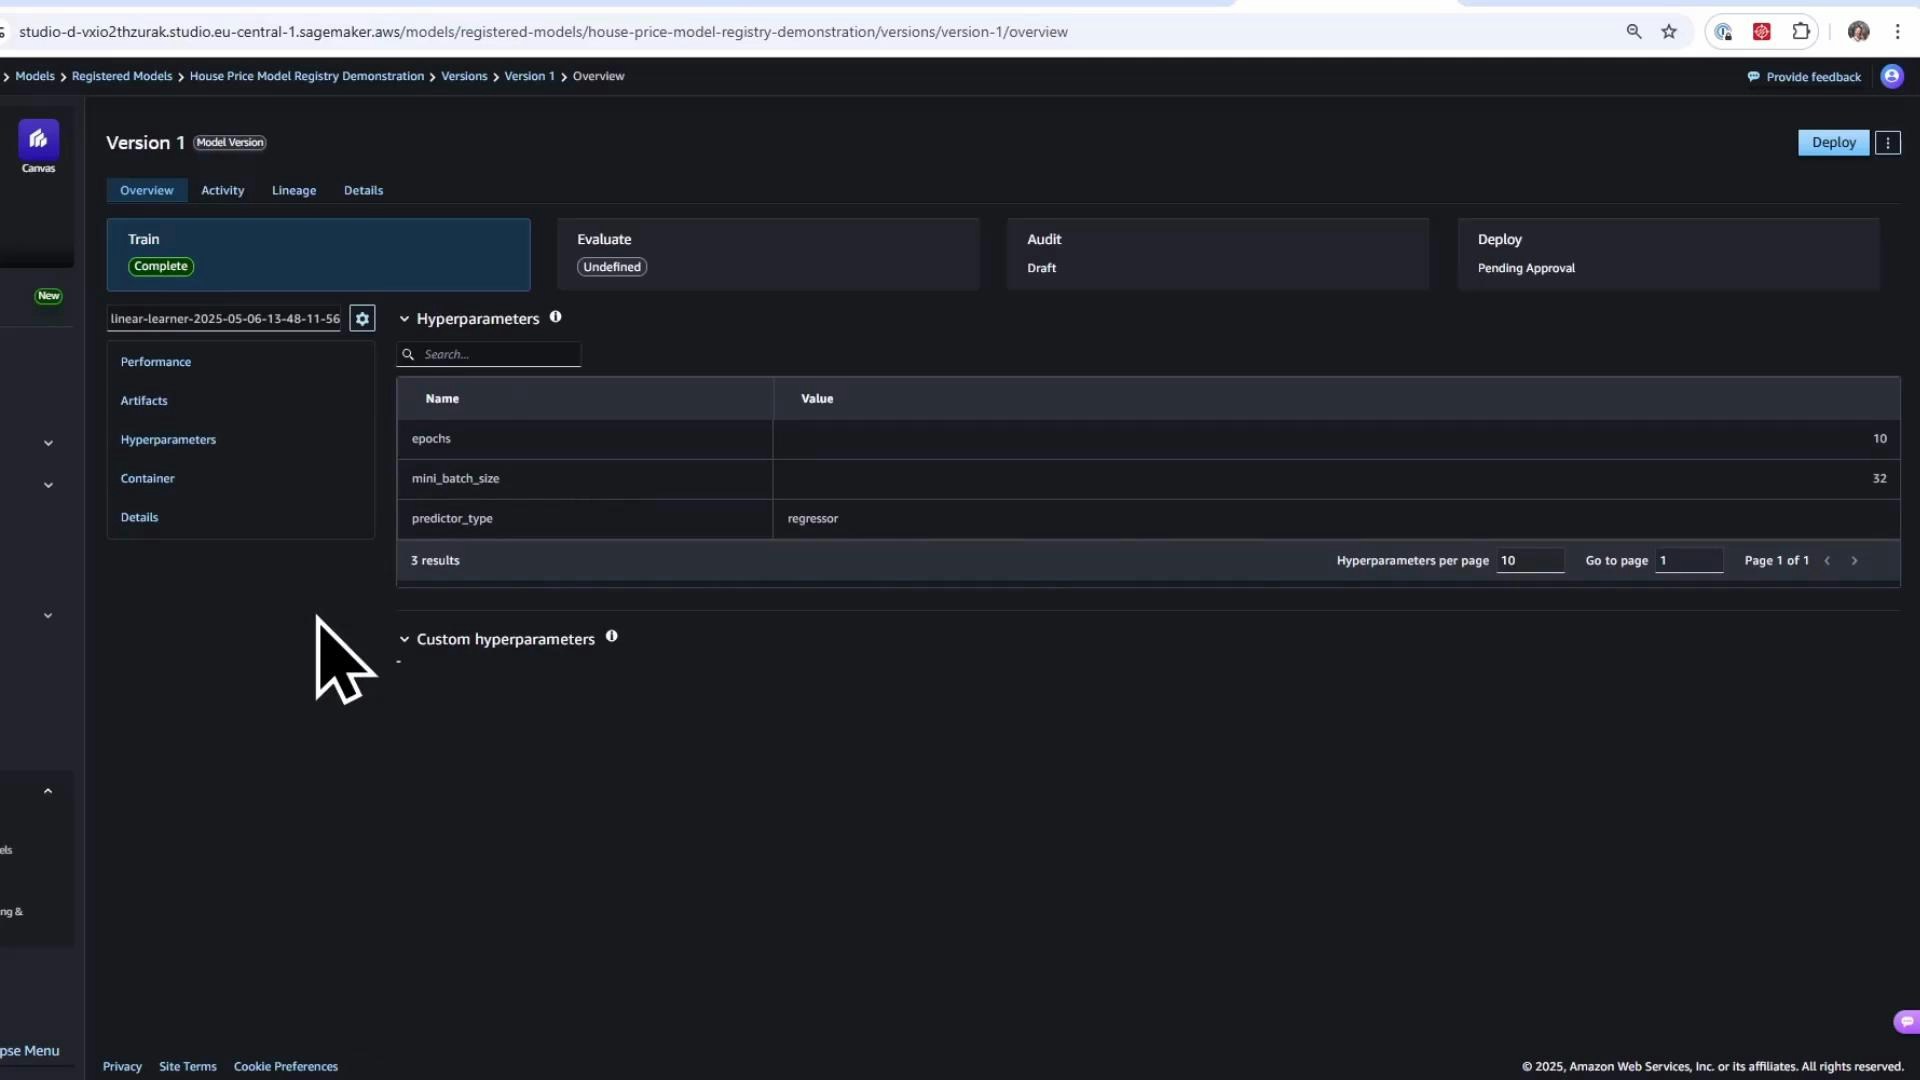
In the Model Registry UI you can inspect:
Metrics collected during training (MAE, MSE, R2, etc.),
Artifacts (training and validation datasets, model artifact S3 paths),
4. Approve a model version (in the UI) and deploy the latest approved version
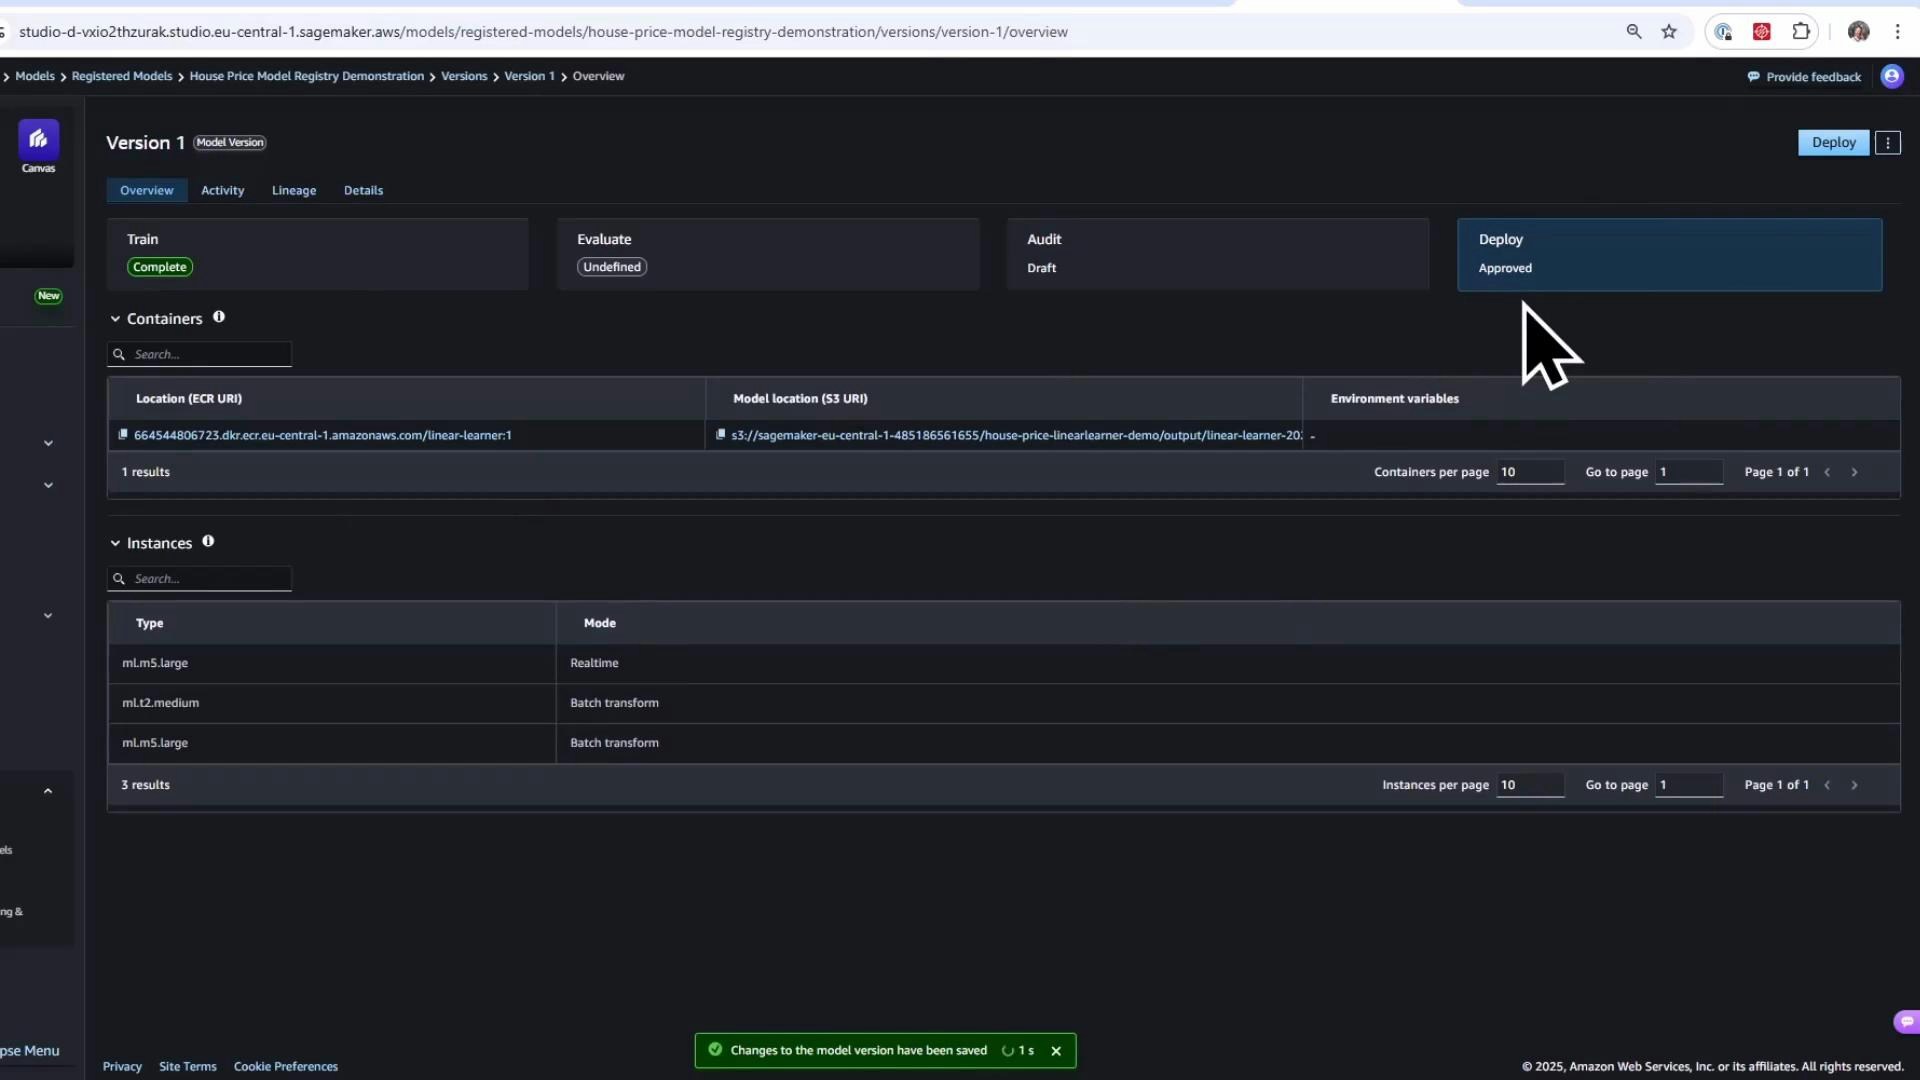
Once a model version is approved in the Model Registry UI (for example, change status from PendingManualApproval → Approved), you can programmatically find the latest approved version and deploy it.
Approving a model should follow your organization’s validation and governance processes. Only approve models that meet performance, fairness, and security requirements.
List the latest approved model packages in the package group (sorted by creation time) and select the most recent:
# List the latest approved model packages in the package group (descending by creation time)response = sagemaker_client.list_model_packages( ModelPackageGroupName=model_package_group_name, ModelApprovalStatus='Approved', SortBy='CreationTime', SortOrder='Descending')if not response.get('ModelPackageSummaryList'): raise RuntimeError('No approved model packages found.')latest_approved_model_package_arn = response['ModelPackageSummaryList'][0]['ModelPackageArn']print(f'Latest Approved Model Package ARN: {latest_approved_model_package_arn}')
Create a ModelPackage object from the approved ARN and deploy it to a real-time endpoint:
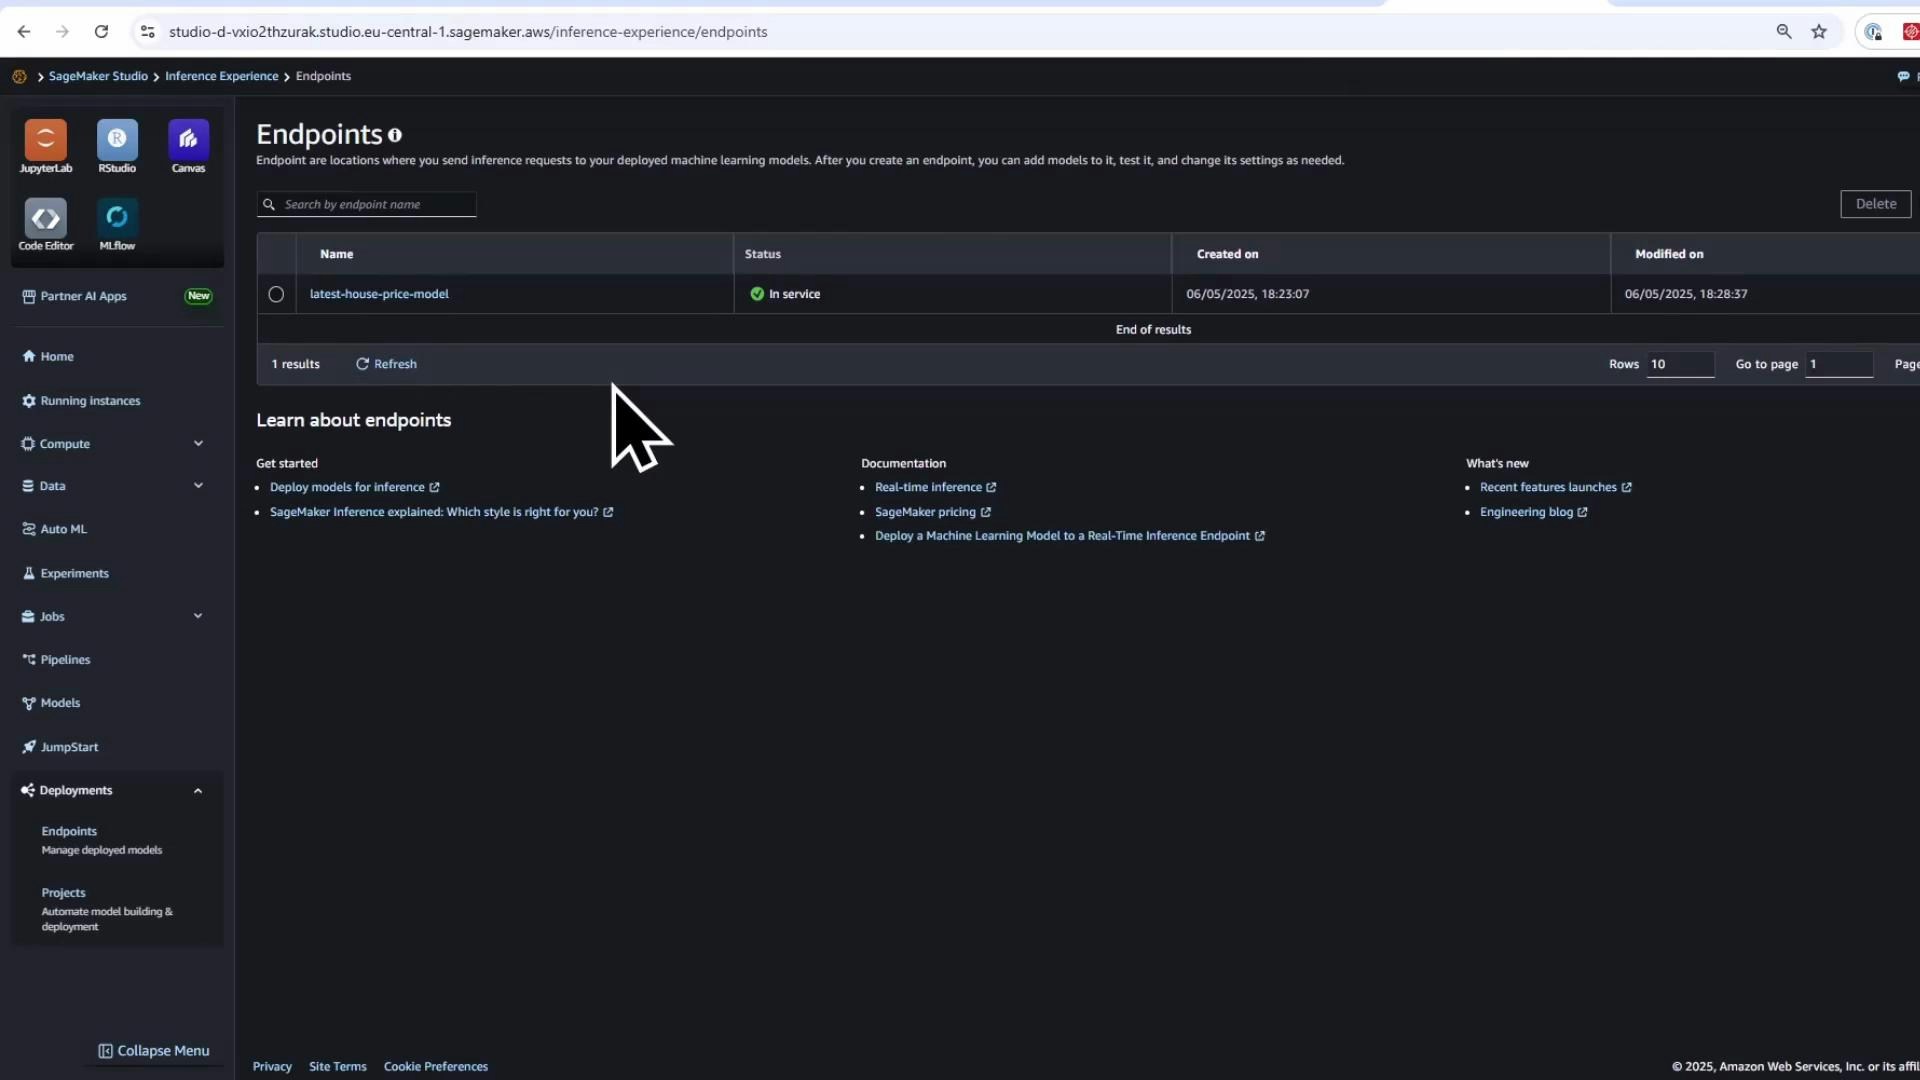
# Create a ModelPackage object and deploy itmodel_package = ModelPackage( role=role, model_package_arn=latest_approved_model_package_arn, sagemaker_session=sagemaker_session)predictor = model_package.deploy( initial_instance_count=1, instance_type="ml.m5.large", endpoint_name="latest-house-price-model")
Deployment can take several minutes. Once deployed, the endpoint will appear under Endpoints in SageMaker Studio/Console.
Deploying a model created from a Model Registry package will also create a model entry under the legacy Models console (Inference → Models), since the deployed artifact is a managed model package.
After deployment you can confirm the endpoint status:
Model.create is a quick, legacy method to create model packages for prototyping and rapid testing.
Model.register combined with the SageMaker Model Registry is the recommended approach for production: it provides robust versioning, approval workflows, stored metrics, activity logs, and lineage for reproducibility.
After a model version is approved in the registry, you can programmatically fetch the latest approved package and deploy it as a real-time endpoint.
We will also explore different hosting options—real-time endpoints and batch transforms—and when to choose each approach.