In this lesson we walk through the Amazon SageMaker console and the legacy managed notebook instance experience. This hands-on demo shows:
  • How to create legacy Jupyter Notebook instances (managed notebook instances).
  • Where to find Processing jobs, Training jobs, Models, and Endpoints in the console.
  • How to open and use both Jupyter Notebook and JupyterLab on a notebook instance.
  • A brief comparison between legacy notebook instances and SageMaker Studio.
A slide titled "Demo Steps" listing six numbered demo items in two columns. The items cover creating notebook instances, data processing and training jobs, showing endpoints and models, and accessing Jupyter notebook vs lab.

Accessing the SageMaker console

Start at the AWS Management Console. If Amazon SageMaker is not visible in your recently visited services, type “SageMaker” into the search bar. Console labels may vary (for example: “Amazon SageMaker”, “SageMaker”, or “SageMaker AI”) depending on console updates. In this lesson we focus on the legacy SageMaker notebook instance experience (managed notebook instances), not SageMaker Studio.
A screenshot of the AWS web console showing search results with a dark sidebar highlighting "Amazon SageMaker" (cursor pointing at it) and related features like SageMaker Studio. The right pane shows the account dashboard with a "Create application" button and a cost/usage chart.
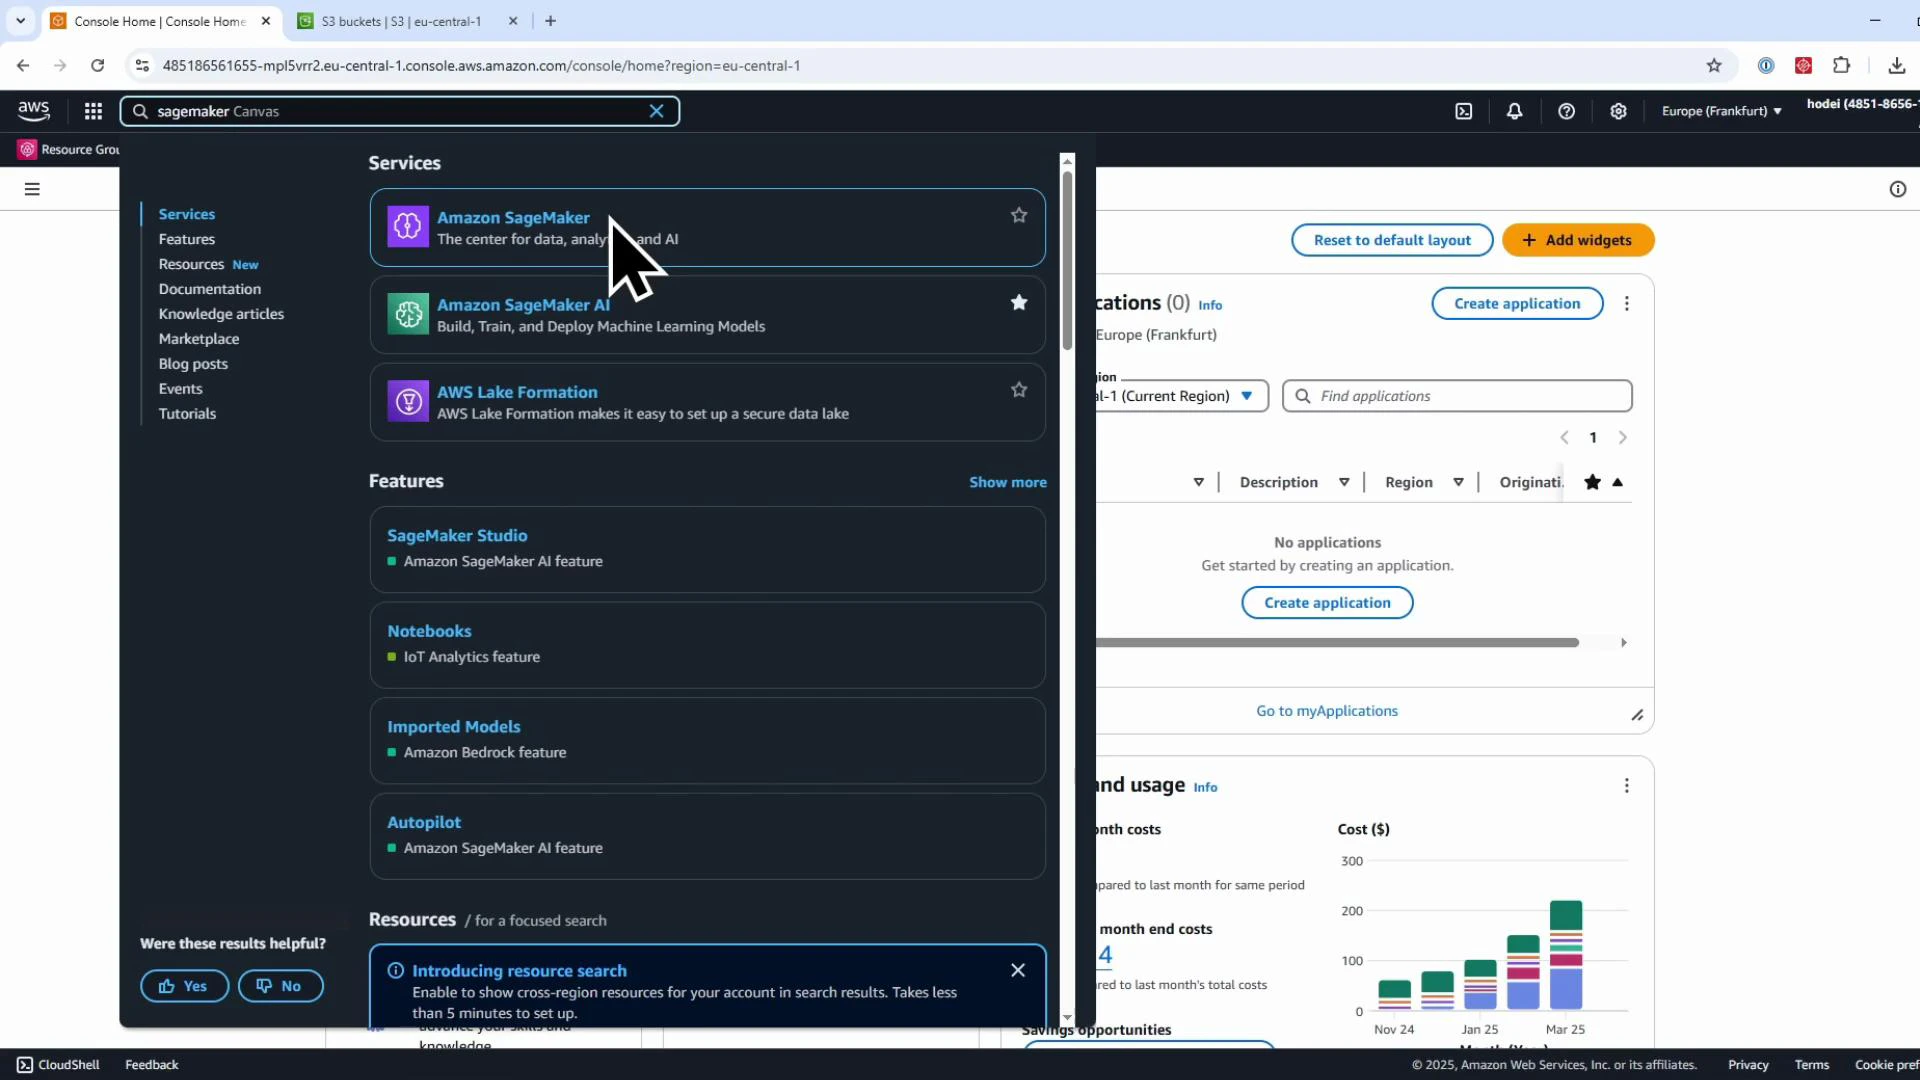
Tip: Console labels and navigation can change. Use the search bar to quickly locate SageMaker if it isn’t visible in your recently used services.

Console navigation — where core resources appear

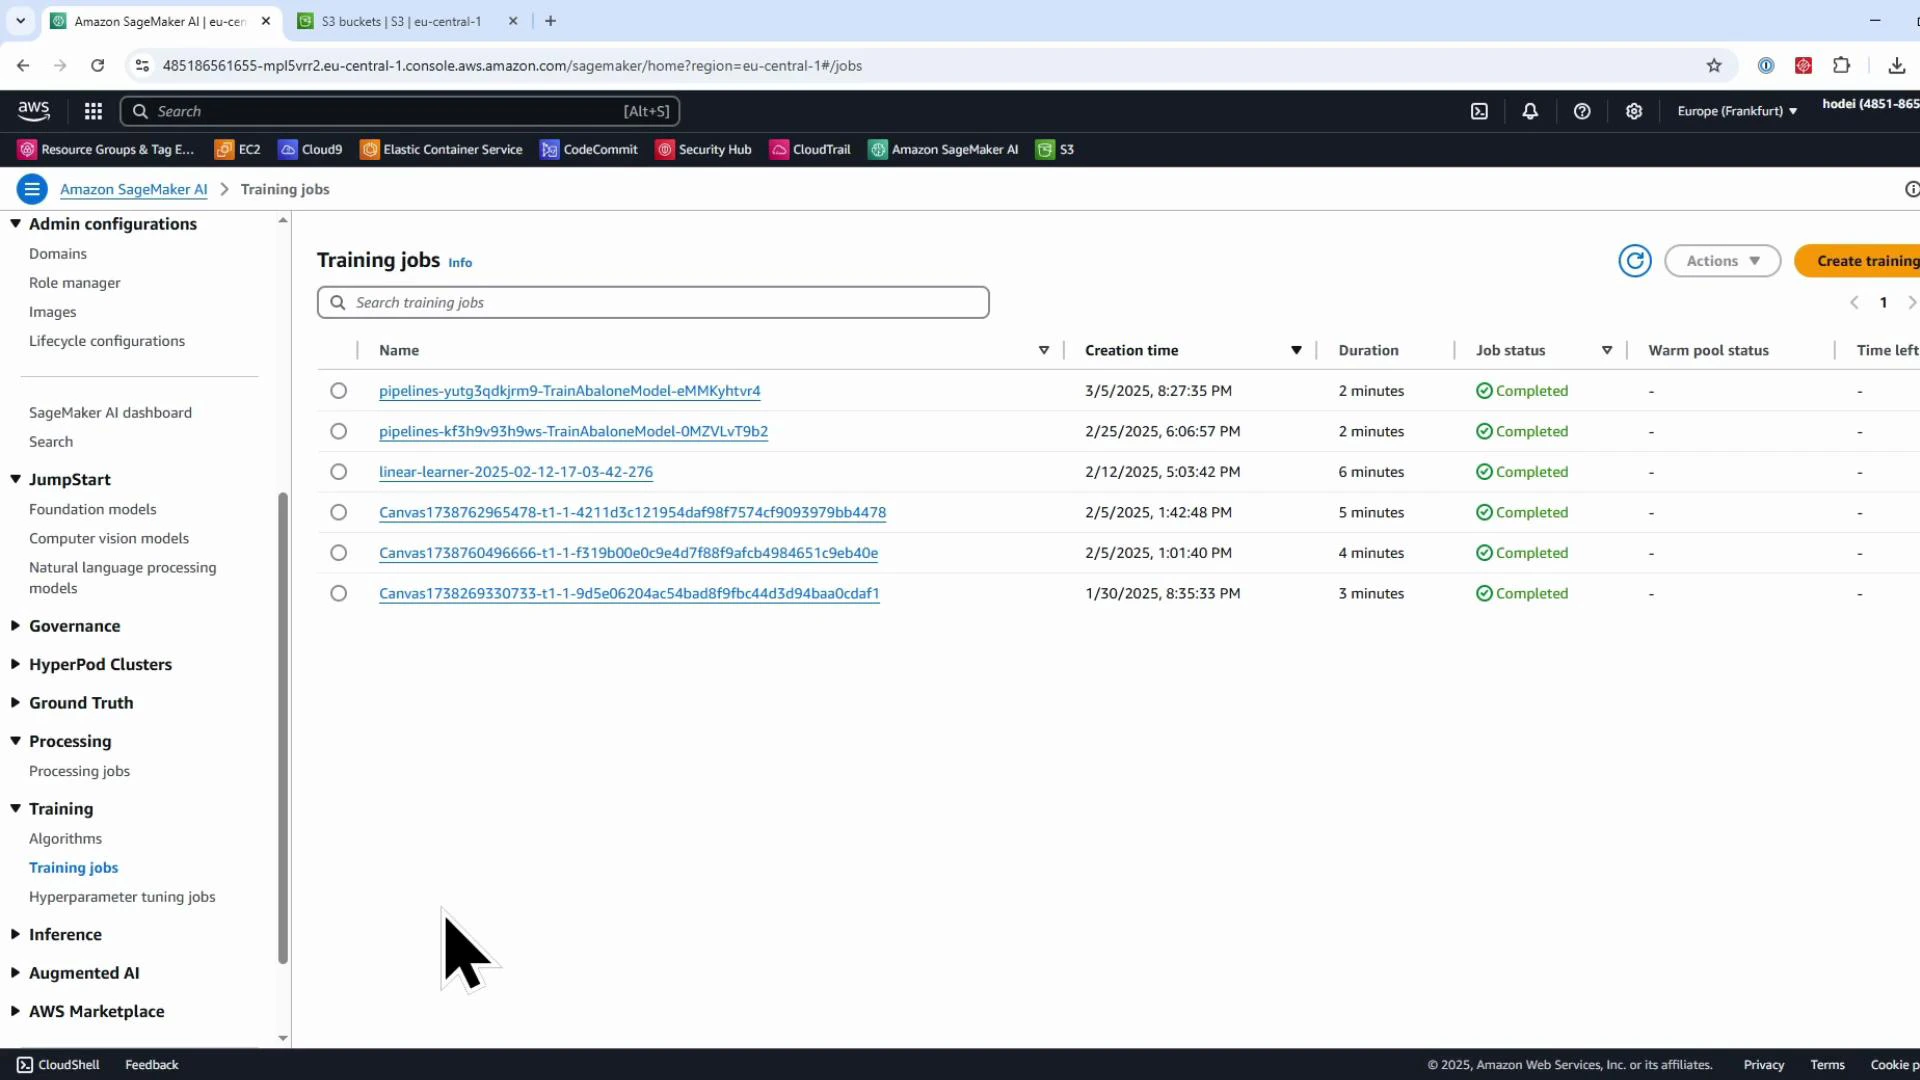
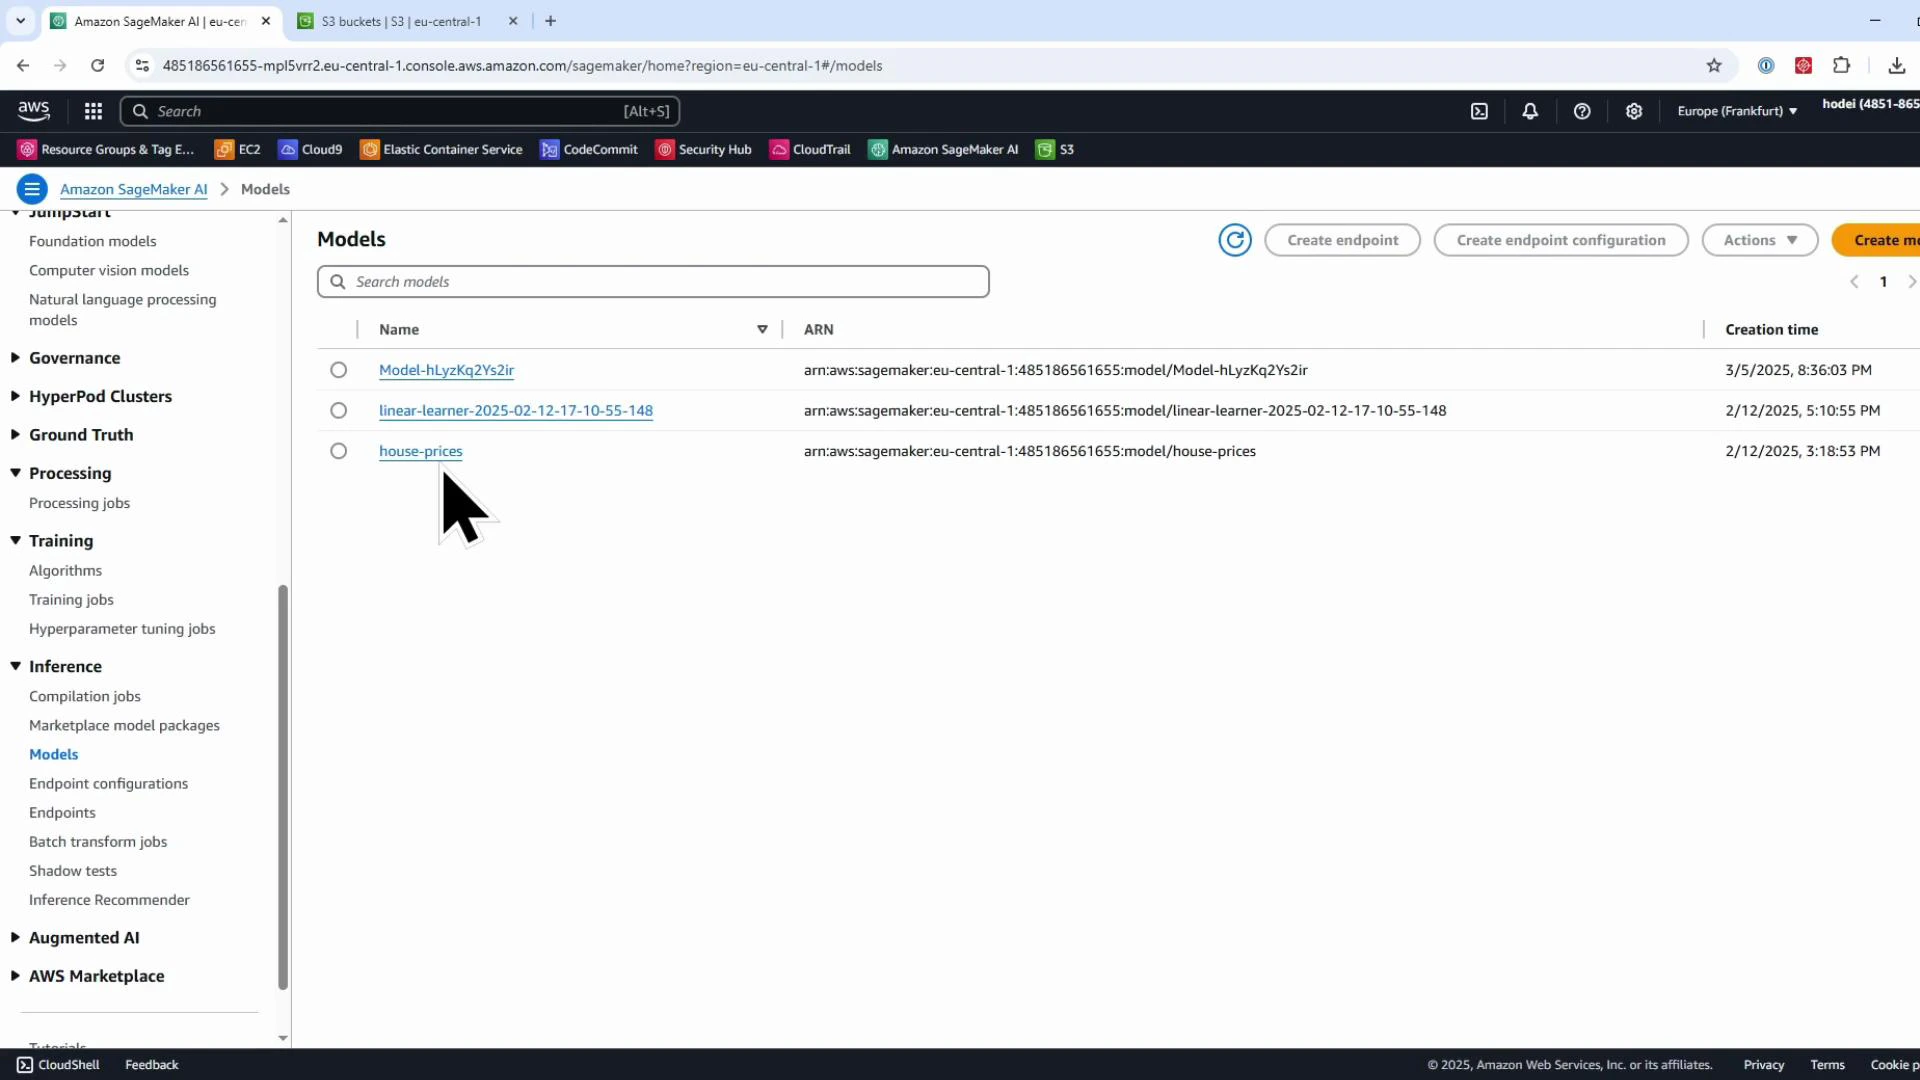
Once inside the SageMaker console, the left navigation shows categories such as Applications & IDEs, Processing, Training, and Inference. New accounts will show empty lists until jobs and resources are created. Below are examples of the resource pages you’ll use most often. Processing jobs (data cleaning, feature engineering, batch transforms) appear under Processing. The console lists each job’s name, ARN, creation time, runtime duration, and status.
A screenshot of the Amazon SageMaker console showing a "Processing jobs" list with job names, ARNs, creation times, durations and status indicators. The left navigation pane displays sections like Admin configurations, JumpStart and Processing.
Training jobs launched from the SageMaker SDK (Estimator APIs) or other tooling appear under Training → Training jobs. The console shows creation time, duration, and completion status for each run.
A screenshot of the Amazon SageMaker console showing the "Training jobs" page with a list of training job names, creation times, durations and "Completed" job statuses. The left sidebar shows SageMaker menu items like Admin configurations, JumpStart, Training and Inference.
Models are listed under Inference → Models. A model entry references the model artifact or container that can be deployed to an endpoint for real-time inference.
A browser screenshot of the Amazon SageMaker console showing the "Models" page with a list of model entries (e.g., Model-hLy..., linear-learner..., house-prices) and the left-hand navigation menu. A large pointer/cursor is hovering over the "house-prices" model.
If you deploy a model, the deployment appears under Endpoints. Endpoints are managed inference endpoints for real-time predictions; without a running endpoint you cannot perform real-time inference.

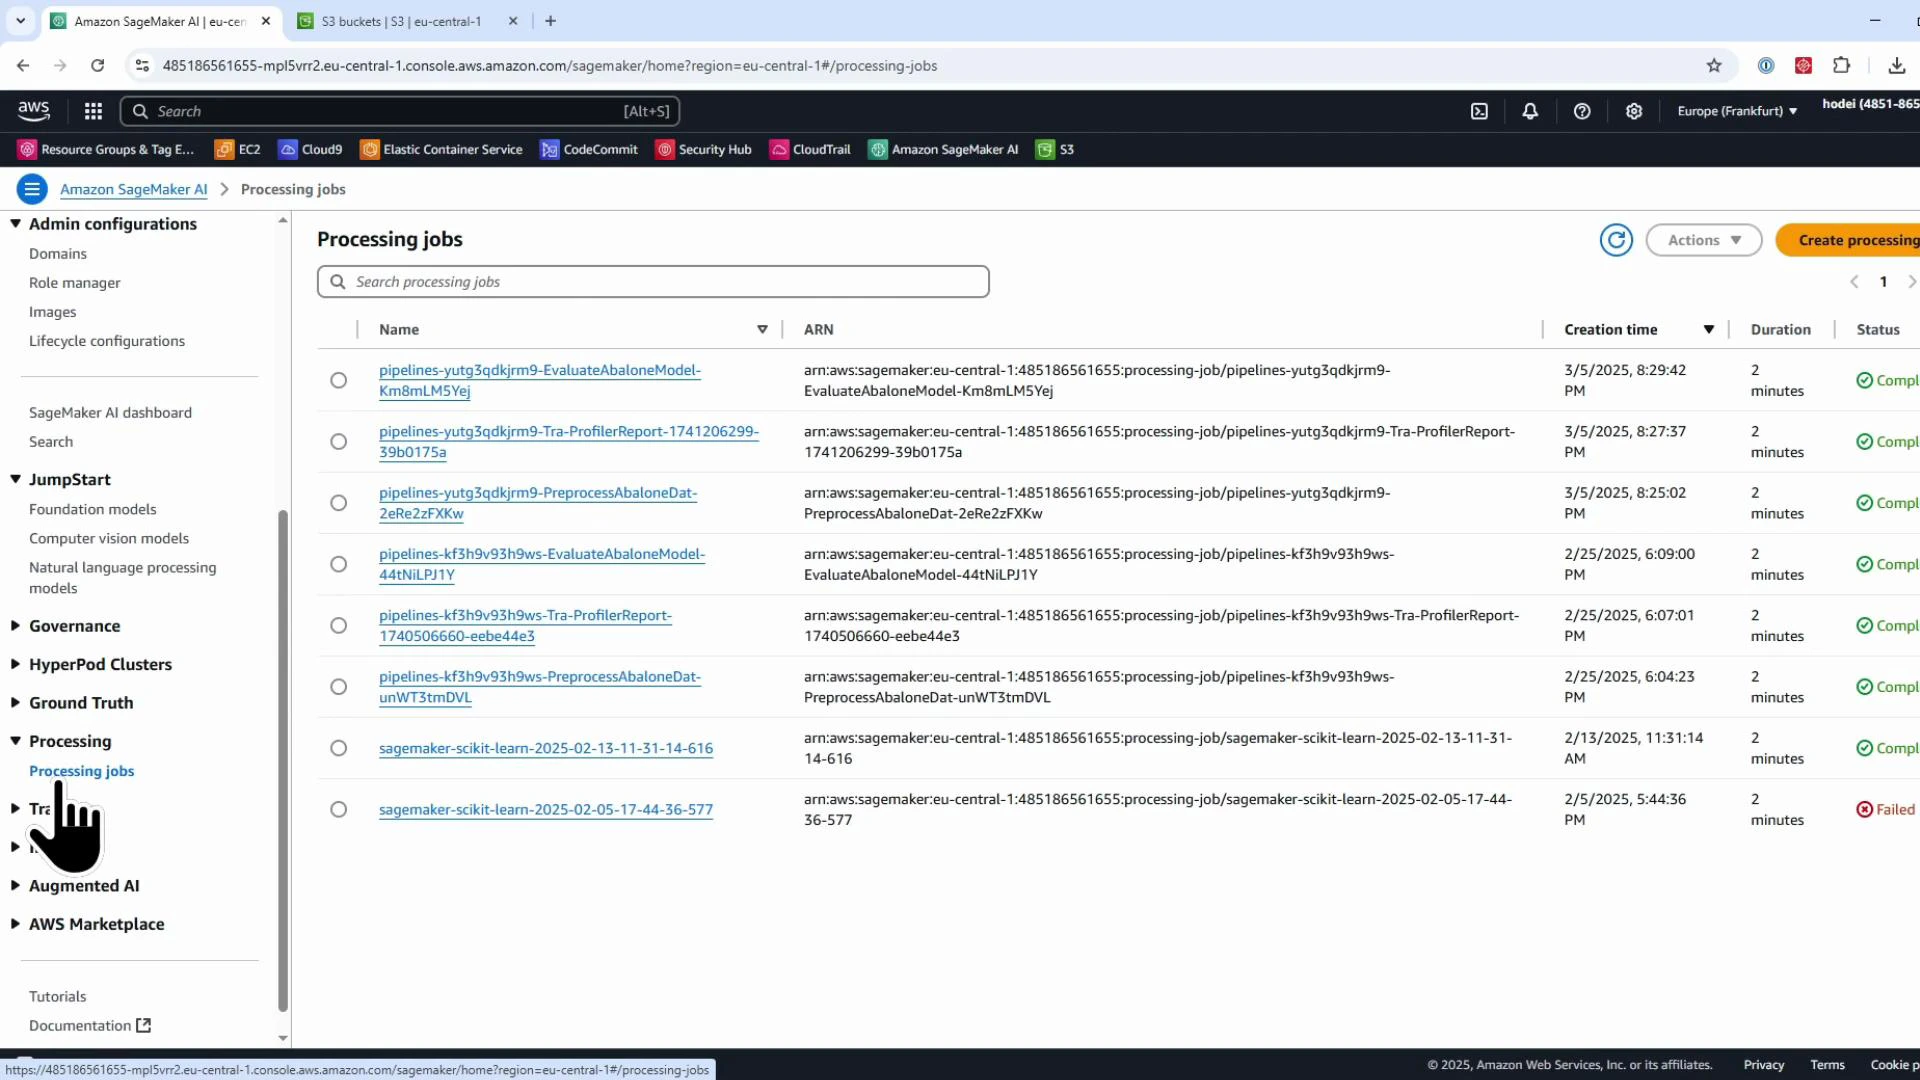
Quick reference: console sections

Console sectionPurposeExample
ProcessingBatch data processing, feature engineering, preprocessingData cleaning jobs, Spark jobs
TrainingModel training runsEstimator / Training jobs launched from SDK
Inference → ModelsRegistered model artifacts for deploymentModel containers and S3 model.tar.gz
EndpointsDeployed real-time inference endpointsMulti-AZ endpoint for production

Notebooks — legacy managed notebook instances vs Studio

Under Applications & IDEs → Notebooks you’ll see the legacy “Notebook instances” panel and a banner encouraging JupyterLab in SageMaker Studio (the newer, preferred environment). This demo shows the legacy managed notebook instances (the older experience) and how to open Jupyter and JupyterLab on them. SageMaker Studio and Domains offer a more integrated, multi-user environment and are outside this lesson’s scope.
A screenshot of the Amazon SageMaker console on the "Notebooks and Git repos" page with a large banner promoting JupyterLab in SageMaker Studio. The Notebook instances panel is shown (empty) along with a left-side navigation for Applications, IDEs, and admin configurations.

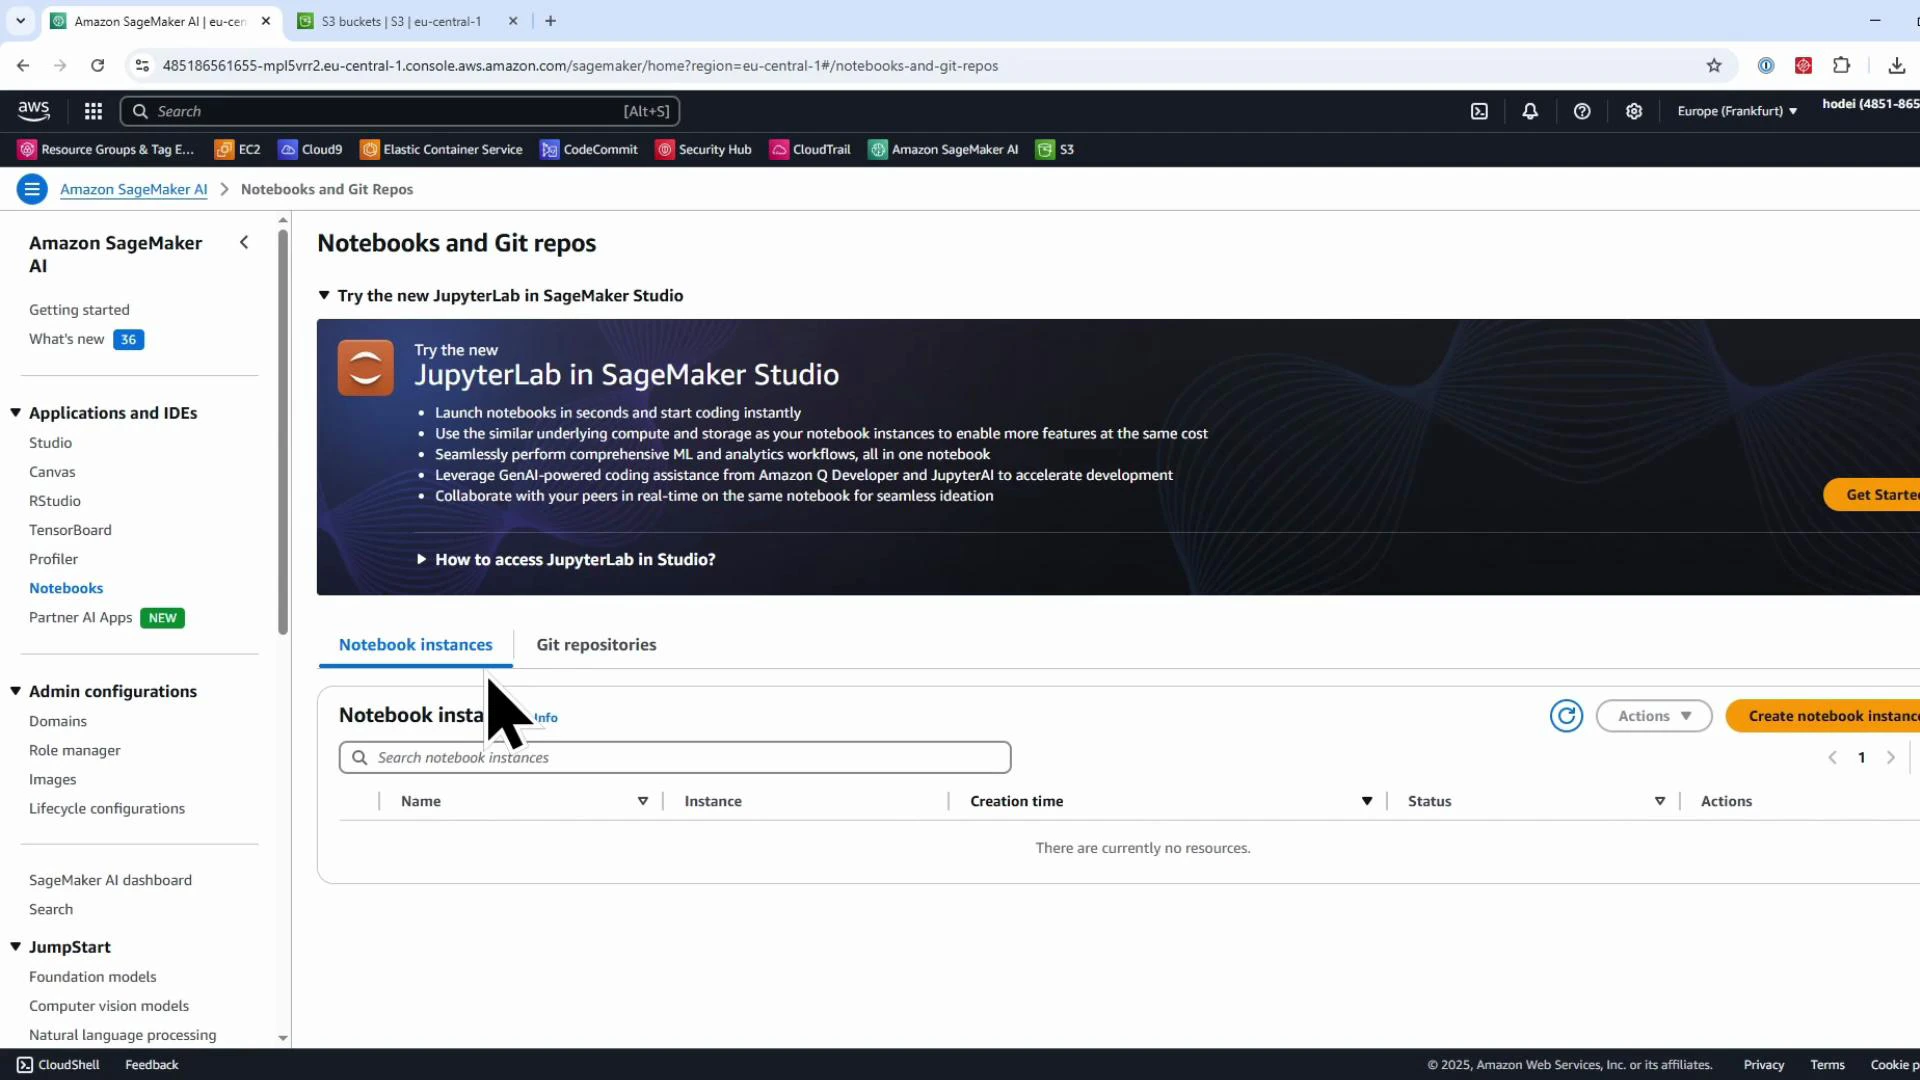
Create a legacy notebook instance (managed)

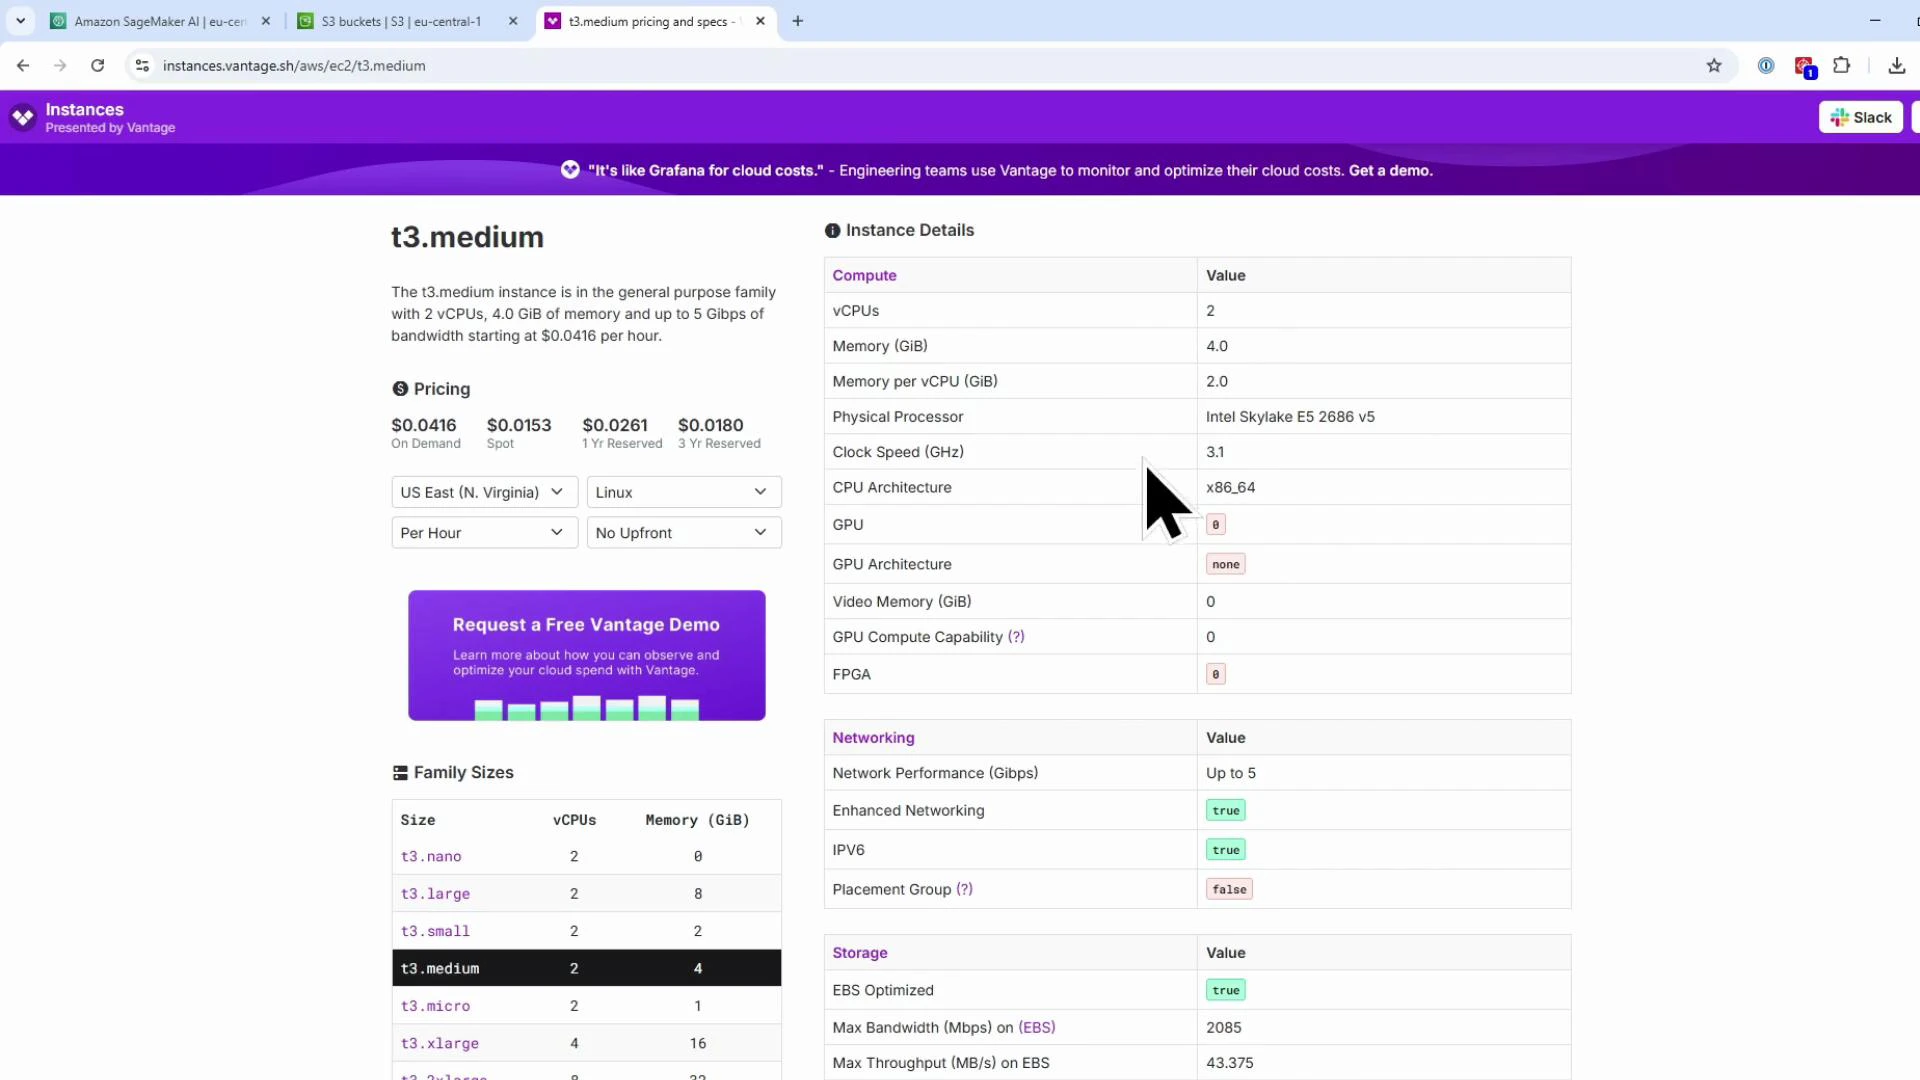
To create a legacy notebook instance, click “Create notebook instance” and provide a name. In the demo we use a recognizably named instance (for example: kodekloud-legacy-jupyter) to highlight that it’s a managed, legacy notebook. A notebook instance runs on an EC2-based managed virtual machine with a Jupyter server preinstalled — you don’t need to install Jupyter yourself. Choose an instance type from the dropdown. For example, ml.t3.medium is a burstable CPU instance (commonly 2 vCPUs and 4 GiB RAM). For more CPU and memory, choose a larger instance (for example, a compute-optimized C5 family instance).
A screenshot of the Amazon SageMaker "Create notebook instance" page showing the Notebook instance settings with the instance type dropdown open and "ml.t3.medium" selected. The Notebook instance name field contains "kodekloud-legacy-jupyter."
If you need to check instance specs, AWS documentation or third-party viewers show details and pricing for each family.
A webpage screenshot showing specifications and pricing for the AWS t3.medium EC2 instance. It lists details like 2 vCPUs, 4 GiB memory, clock speed, networking/storage info, and hourly prices.
A webpage screenshot for the c5.xlarge AWS EC2 instance showing pricing and family sizes on the left and a detailed specs table on the right (4 vCPUs, 8 GiB memory, clock speed, networking and storage info). The page appears to be from a Vantage instance/pricing viewer.

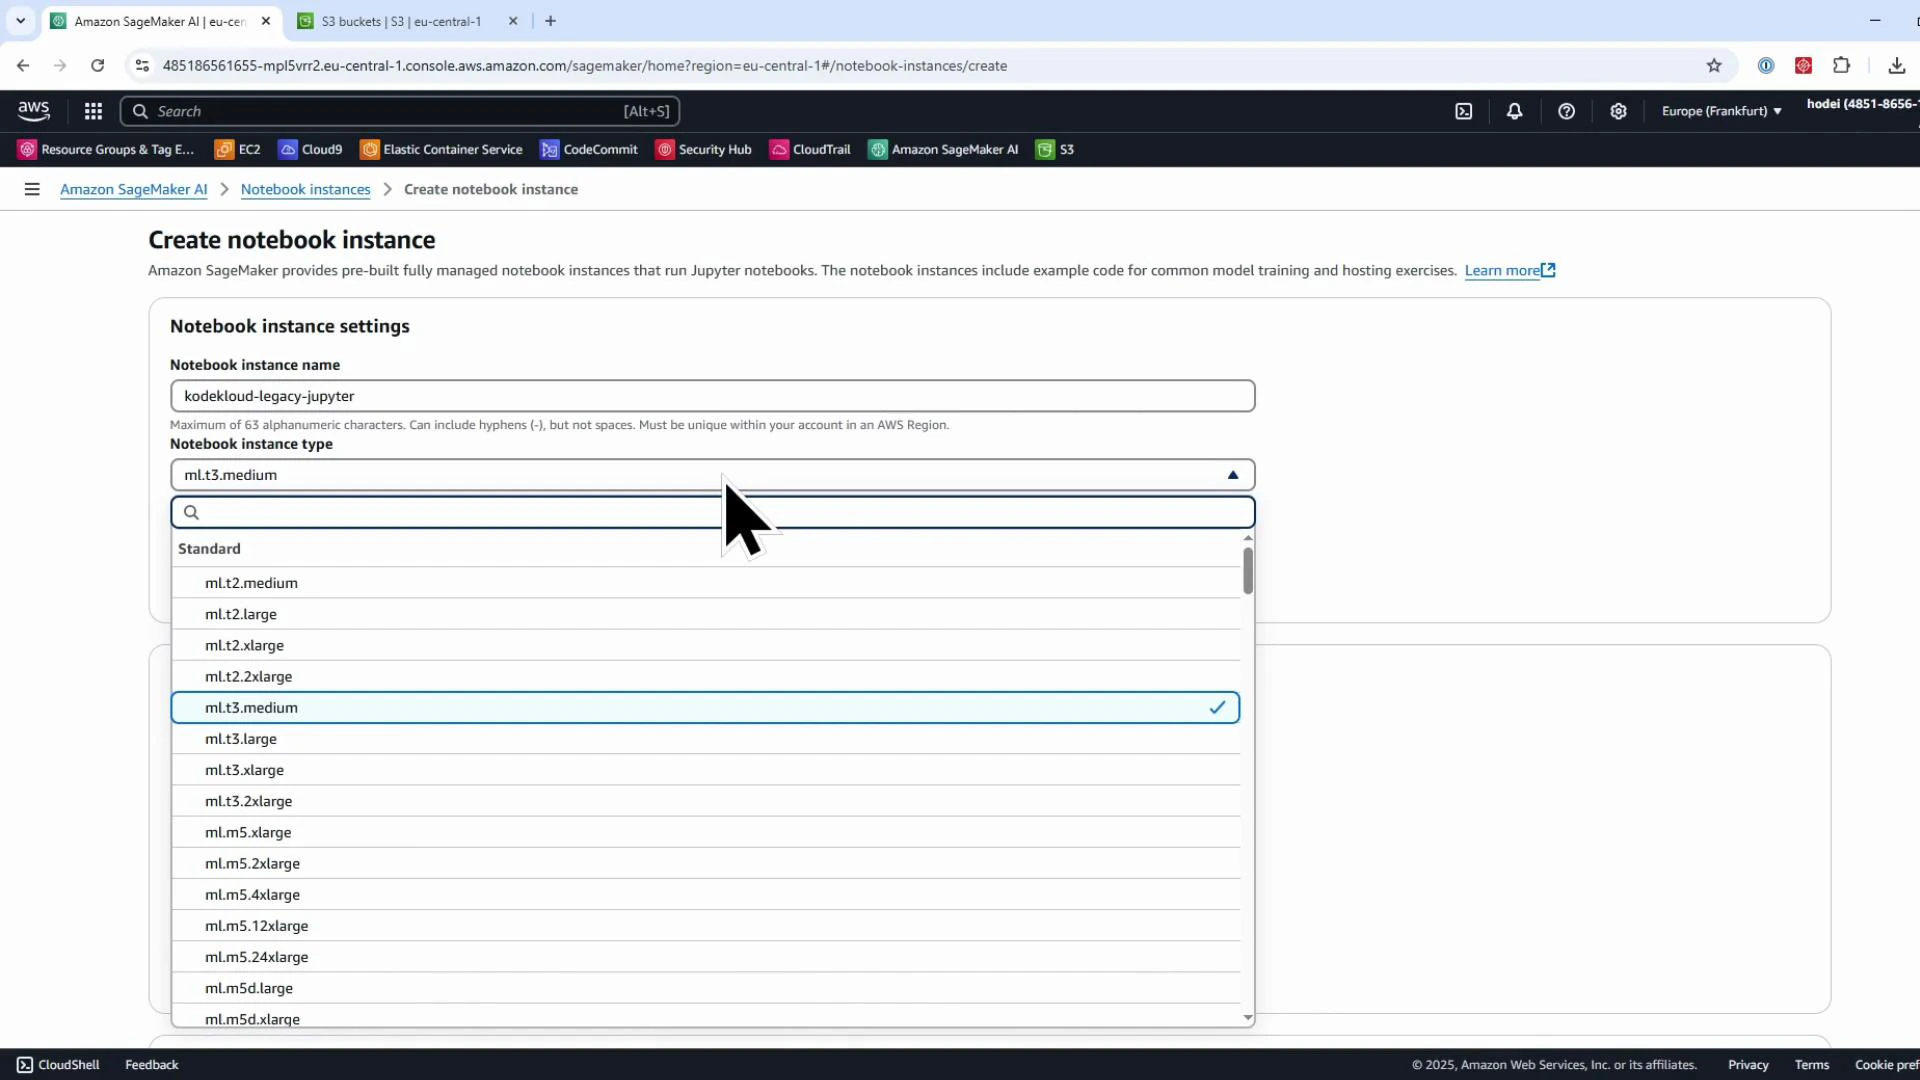
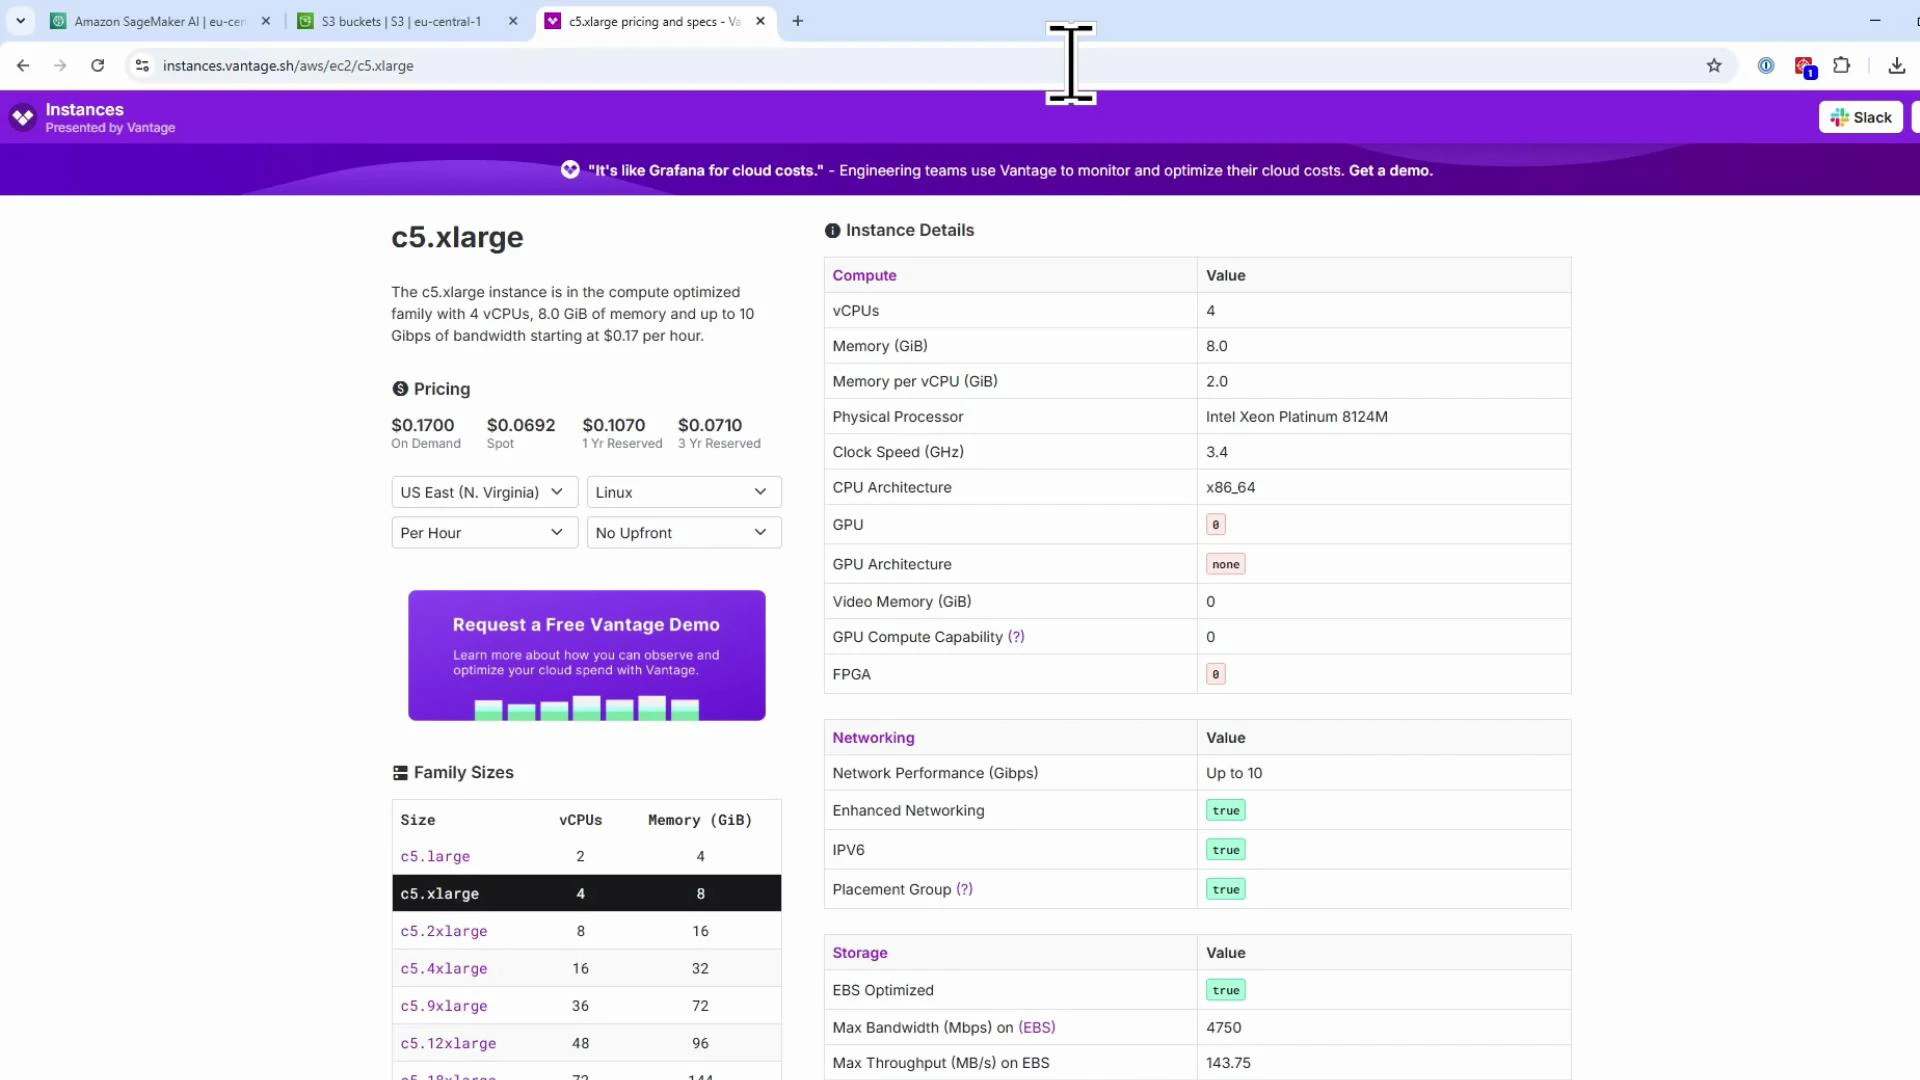
Instance-type selection (quick comparison)

Instance typeUse caseTypical vCPU / RAM
ml.t3.mediumSmall experiments, lightweight notebooks~2 vCPUs, 4 GiB RAM
ml.c5.xlargeCompute-heavy preprocessing or small training jobs~4 vCPUs, 8 GiB RAM

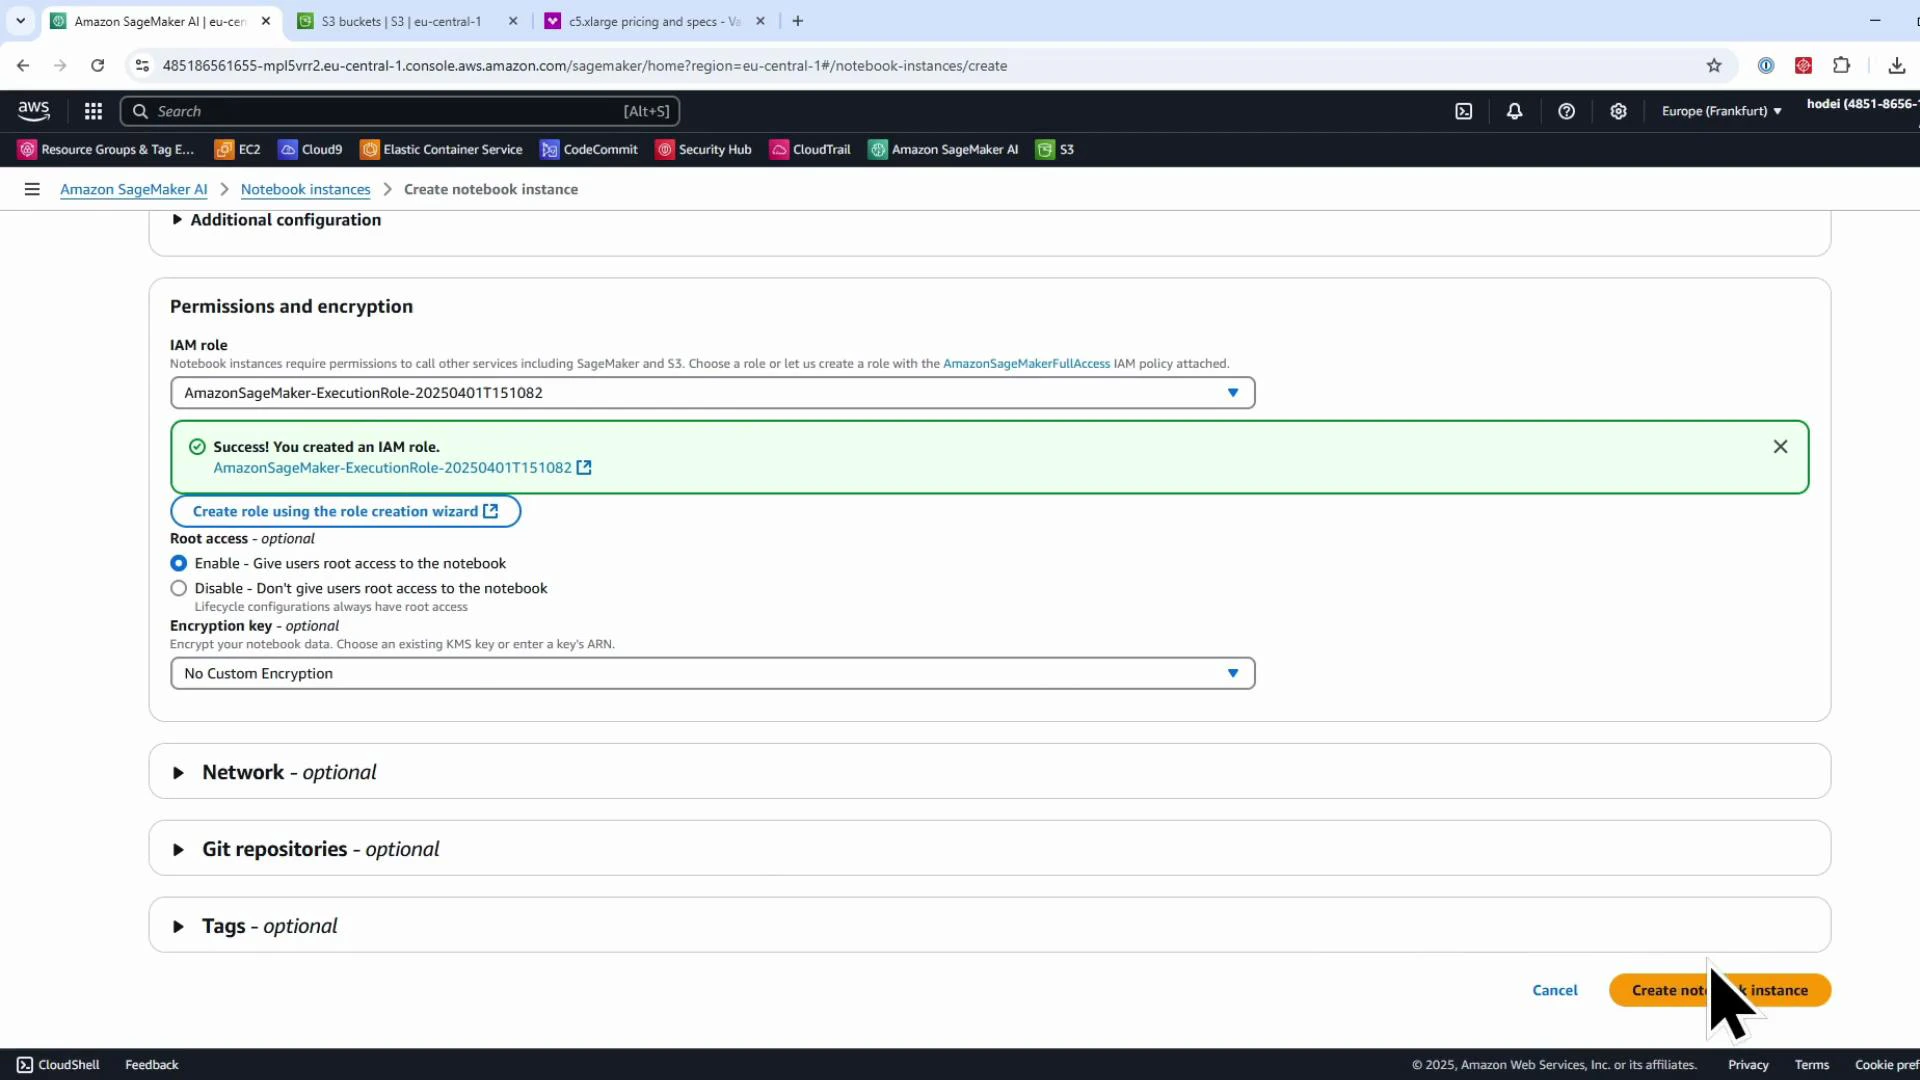
IAM role and S3 access

Next pick the JupyterLab image/version and configure the IAM execution role for the notebook. The IAM role attached to the notebook instance defines what AWS resources (for example S3 buckets) the notebooks can access. For demos you might select “Any S3 bucket” to simplify access, but in production you should limit permissions to only the required resources and follow least-privilege principles.
A screenshot of the AWS SageMaker "Create notebook instance" page with a modal dialog titled "Create an IAM role" listing S3 access options. A large cursor is pointing at the "Any S3 bucket" option in the dialog.
After creating the notebook instance, it will show a pending status while AWS provisions the managed EC2 instance. When the instance state reaches “InService” it is running and will continue to incur charges until stopped or deleted — remember to stop instances you’re not actively using.
A screenshot of the AWS Management Console showing the Amazon SageMaker "Create notebook instance" page, focused on the Permissions and encryption section with a green success message about an IAM role. A large cursor is over the orange "Create notebook instance" button.
When the notebook is InService, select the actions menu and choose “Open Jupyter” or “Open JupyterLab”.
A screenshot of the Amazon SageMaker console showing the Notebook instances page with a green success banner and one notebook instance (kodekloud-legacy-jupyter) listed as InService. A hand-shaped cursor is hovering over the "Open Jupyter" action for that instance.

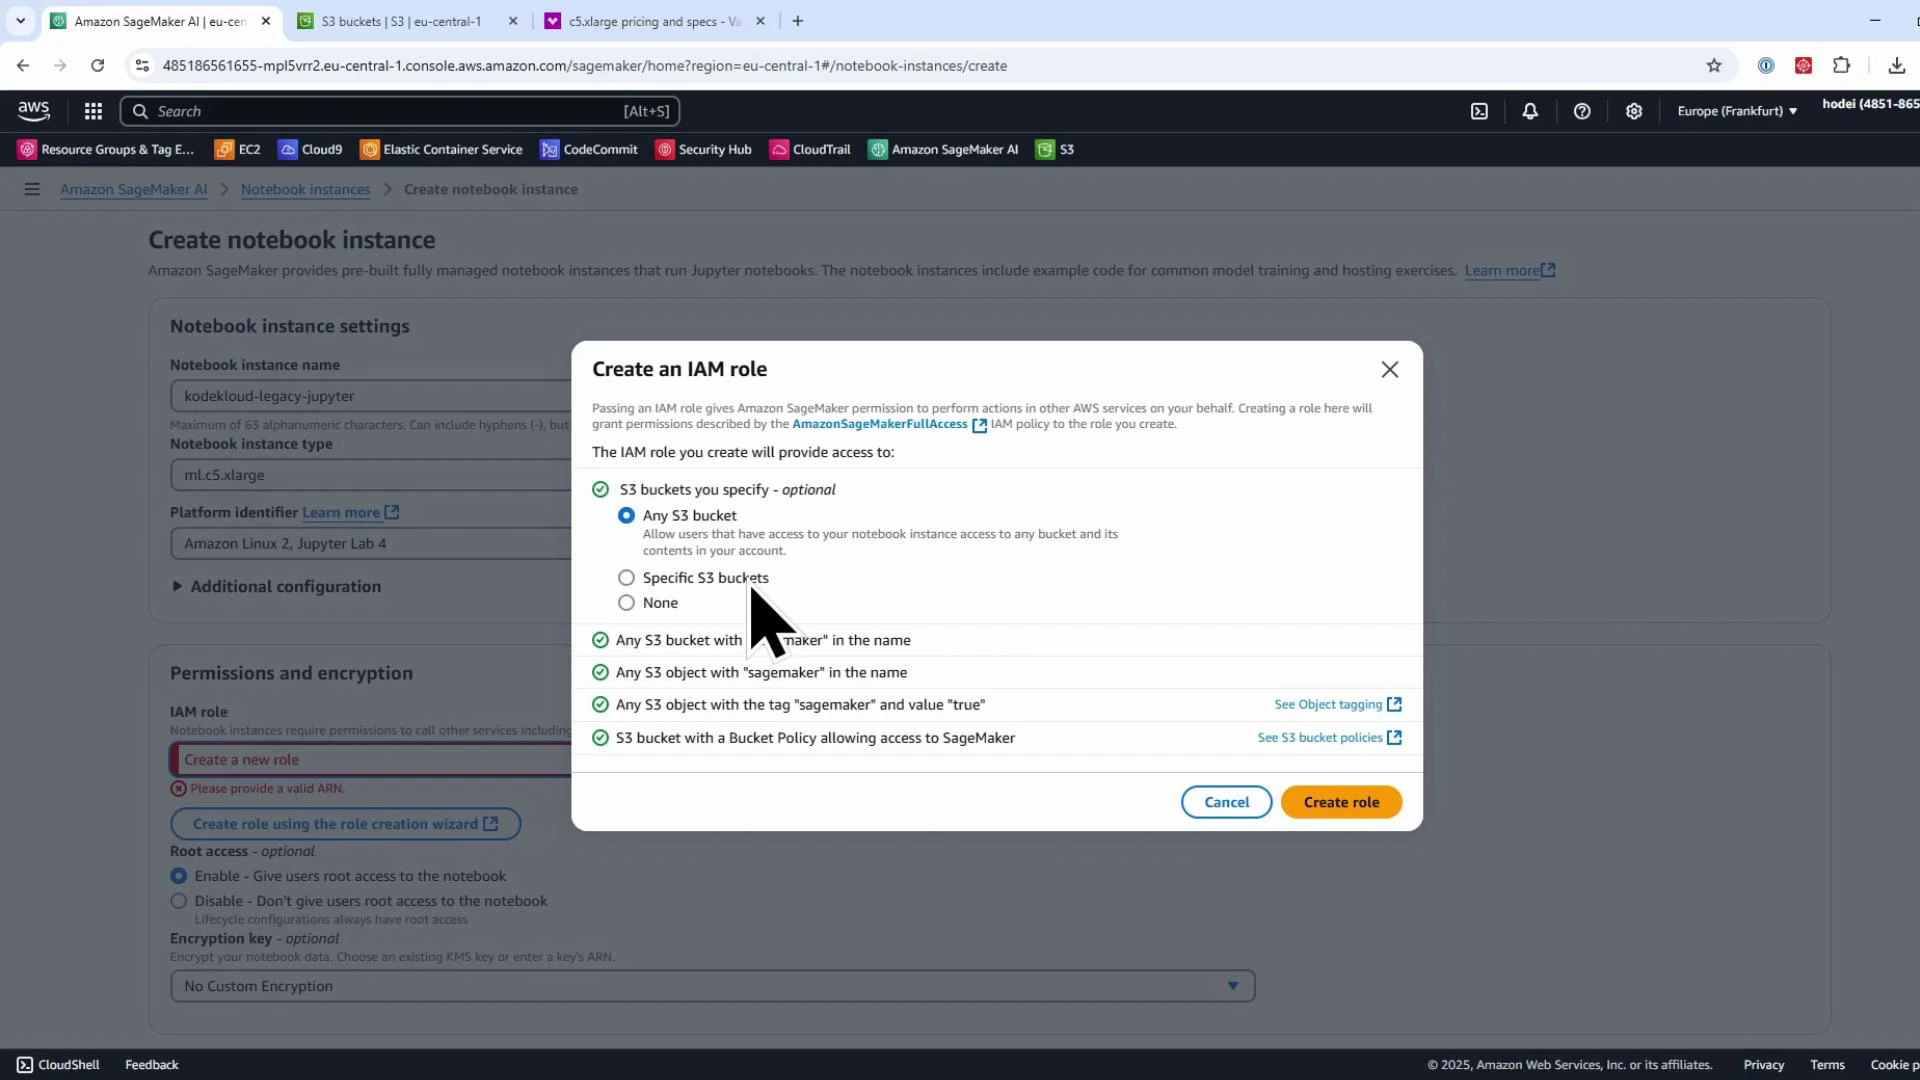
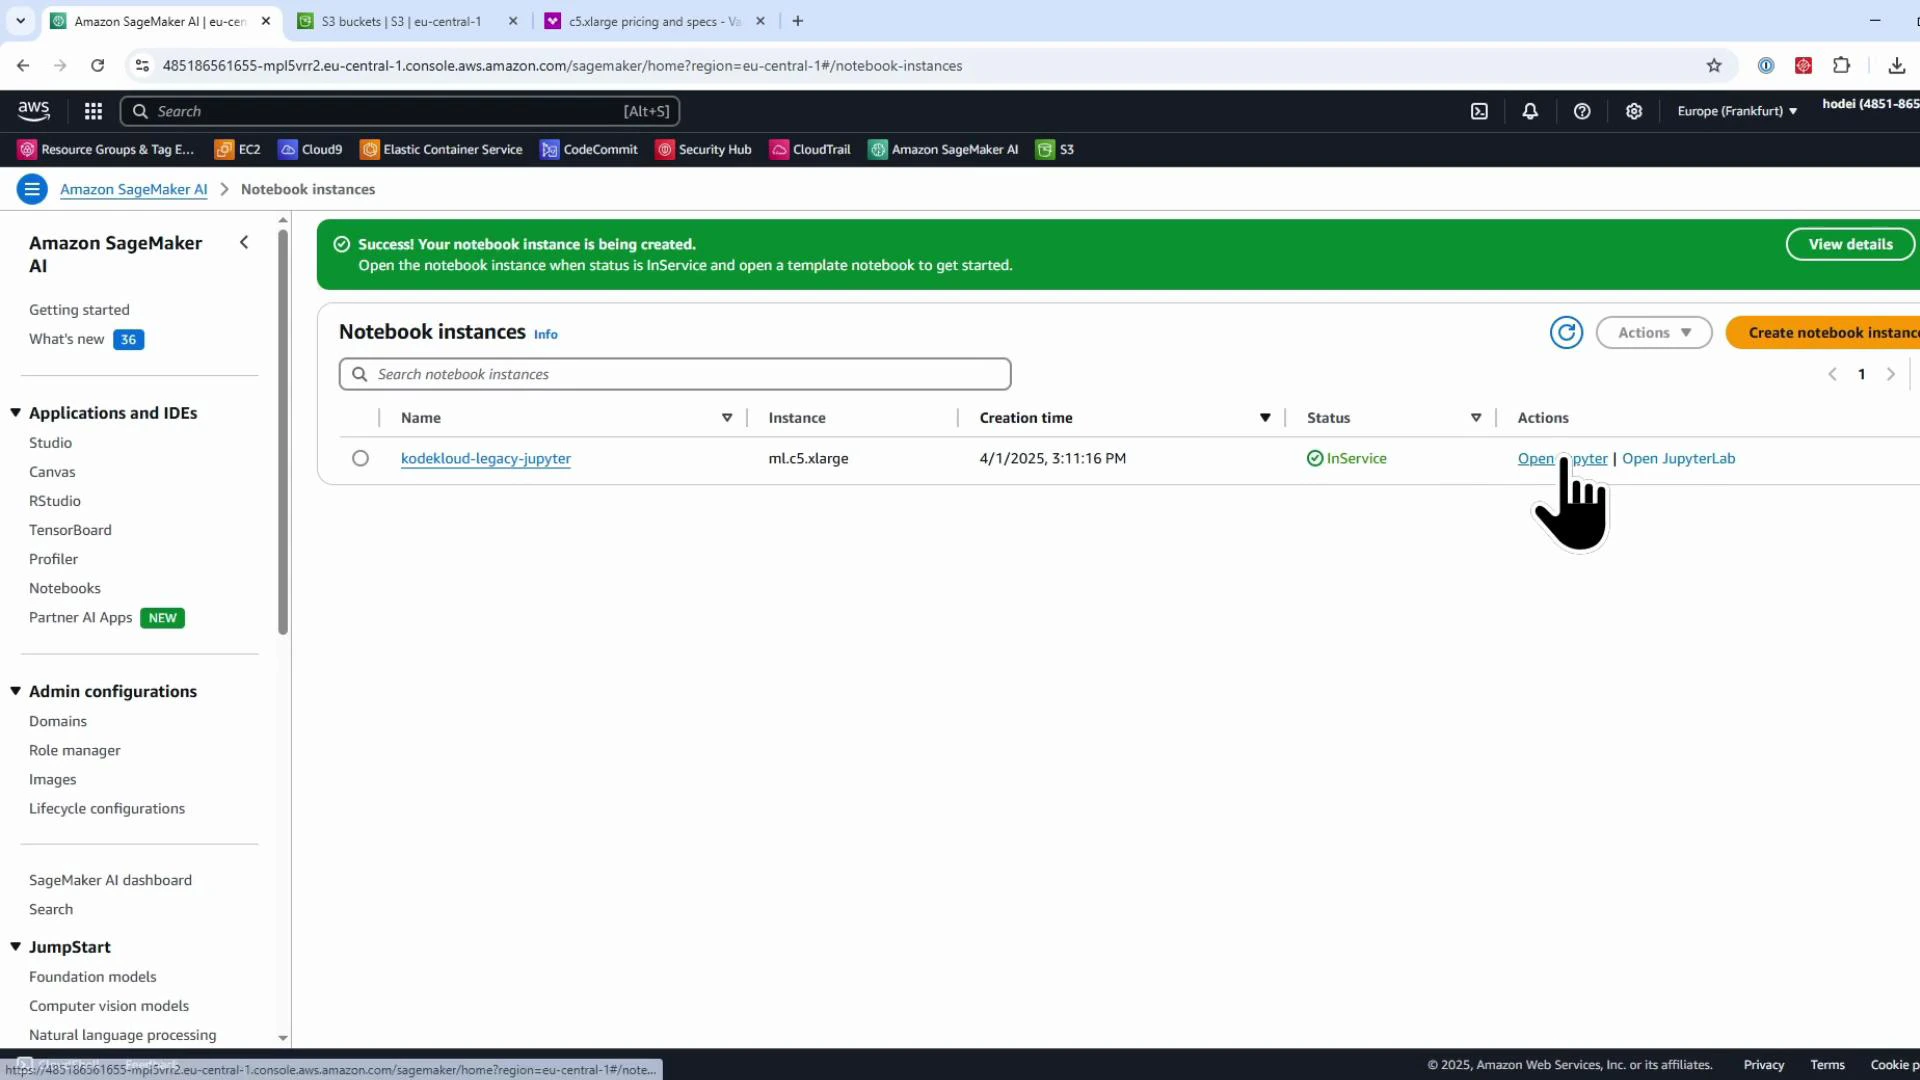
Using Jupyter Notebook and JupyterLab on managed instances

Opening “Jupyter” launches the classic Jupyter Notebook interface. You can create a new notebook and run simple Python cells:
# Example Jupyter notebook cell
a = 7
b = 3
print(a + b)
Output:
10
Opening “JupyterLab” launches the modern, flexible interface that supports multiple notebooks, terminals, file previews (CSV, Markdown), and extensions.
A screenshot of the JupyterLab launcher in a web browser, showing tiles for notebooks, consoles, terminals and file types (Python, R, Markdown) with kernel icons. A file browser pane is visible on the left and a large cursor is near the top.
From JupyterLab you can open a terminal on the managed instance and run commands such as pip list to inspect installed Python packages. Example (truncated) pip list output:
Package                Version
---------------------- -------
boto3                  1.26.0
jupyterlab             4.0.0
matplotlib             3.7.1
numpy                  1.26.2
pandas                 2.2.2
sagemaker              2.241.0
sagemaker-experiments  0.1.45
seaborn                0.13.2
You can also clone Git repositories using JupyterLab’s Git extensions, open multiple notebooks simultaneously, and add extensions such as table-of-contents or notebook templates.

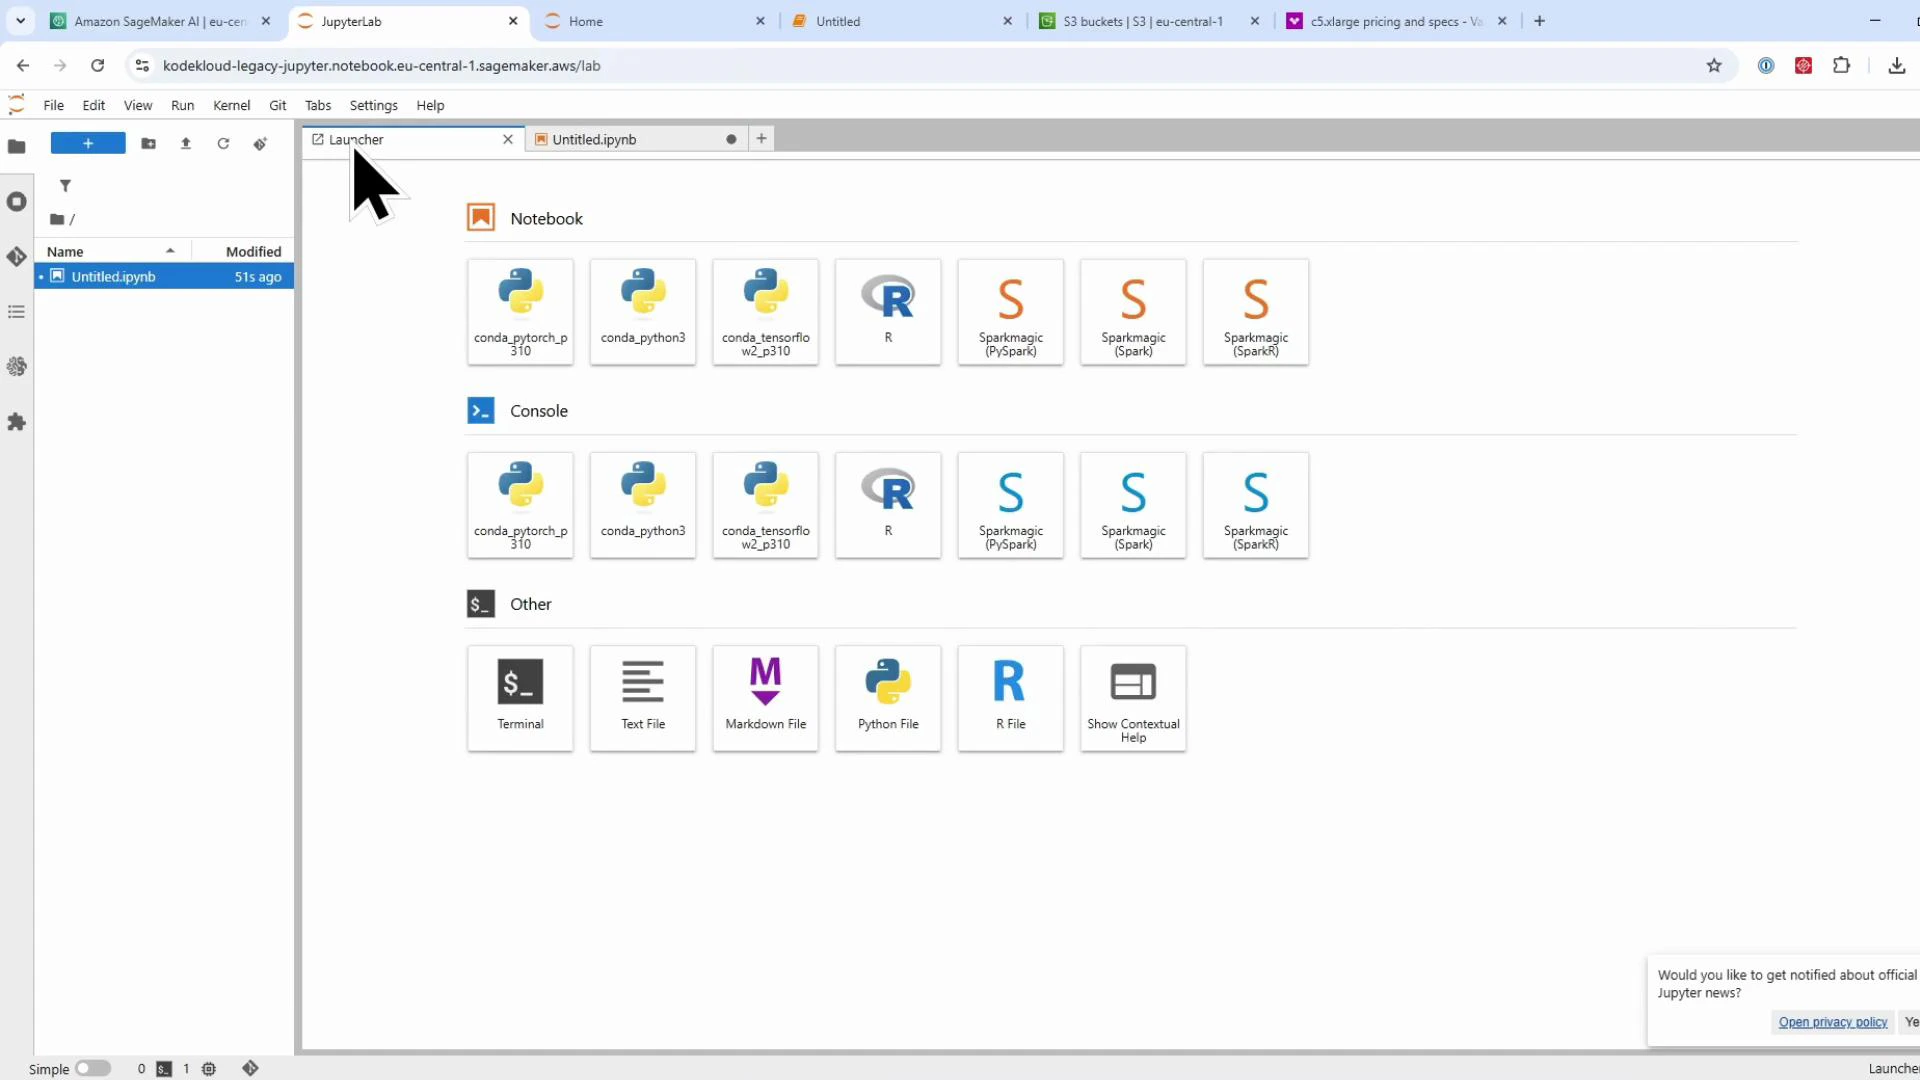
Typical SDK setup in a notebook

Notebooks that use the SageMaker Python SDK typically include setup code to get the execution role, region, and a SageMaker session. Example:
import boto3
import sagemaker
from sagemaker import get_execution_role

aws_role = get_execution_role()
aws_region = boto3.Session().region_name
sess = sagemaker.Session()
This code:
  • Retrieves the IAM execution role available in the notebook environment (if present).
  • Determines the current AWS region from boto3.
  • Creates a SageMaker session object used by higher-level SageMaker SDK APIs (Estimator, Model, Pipeline, etc.).
Remember: legacy notebook instances are charged while they are InService. Stop or delete instances when not in use to avoid unnecessary charges.

Summary — what you’ll remember from this lesson

  • Where to find Processing jobs, Training jobs, Models, and Endpoints in the SageMaker console.
  • How to create and open legacy managed Notebook instances.
  • The difference between classic Jupyter Notebook and JupyterLab on managed instances.
  • Model artifacts appear under Inference → Models and deployed endpoints appear under Endpoints.
  • Recommendation: prefer SageMaker Studio for a more integrated JupyterLab experience in production workflows.
We’ve now covered where core SageMaker entities appear in the console and how to launch and use legacy managed notebook instances. For multi-user collaboration, built-in versioning, and a richer integrated experience, review SageMaker Domains and SageMaker Studio.

Watch Video