This guide walks through migrating a local Terraform configuration and its terraform.tfstate into an HCP (HashiCorp Cloud Platform) Terraform workspace named hcp-demo (Terraform version 1.2.2 configured for the workspace). You’ll initialize locally, apply to create resources, add the HCP cloud backend, authenticate with HCP, migrate the state, and run remote plans/applies.

Prerequisites

  • Terraform CLI installed (>= 1.2.2).
  • An HCP Terraform organization and workspace (hcp-demo) already created.
  • AWS account credentials for creating VPC/subnets.
  • Browser access to complete terraform login.
Useful references:

Project layout

FilePurpose
main.tfCore resources (VPC and subnets)
providers.tfProvider configuration and Terraform settings
variables.tfVariable declarations with defaults
Example resources from main.tf (simple VPC and two subnets):
resource "aws_vpc" "main" {
  cidr_block            = var.vpc_cidr
  enable_dns_support    = true
  enable_dns_hostnames  = true
  tags = {
    Name = "dev-main-vpc"
  }
}

resource "aws_subnet" "private" {
  vpc_id            = aws_vpc.main.id
  cidr_block        = var.private_subnet_cidr
  availability_zone = var.private_subnet_az
  tags = {
    Name = "main-subnet"
  }
}

resource "aws_subnet" "public" {
  vpc_id            = aws_vpc.main.id
  cidr_block        = var.public_subnet_cidr
  availability_zone = var.public_subnet_az
  tags = {
    Name = "public-subnet"
  }
}

Original provider configuration

Before adding the HCP cloud block, providers.tf looks like:
terraform {
  required_providers {
    aws = {
      source  = "hashicorp/aws"
      version = "~> 6.31.0"
    }
  }
  required_version = ">= 1.2.2"
}

provider "aws" {
  region = "us-east-2"
}

1) Initialize locally

  • Ensure AWS credentials are present in your environment (for example, AWS_ACCESS_KEY_ID and AWS_SECRET_ACCESS_KEY exported locally).
  • Run terraform init to download providers and initialize the working directory:
$ terraform init
Initializing provider plugins...
- Finding hashicorp/aws versions matching "~> 6.31.0"...
- Installing hashicorp/aws v6.31.0...

Terraform has been successfully initialized!

You may now begin working with Terraform. Try running "terraform plan" to see any changes that are required for your infrastructure.

2) Plan and apply locally

  • terraform plan should show three resources to add.
  • Apply with terraform apply --auto-approve to create the resources locally.
Example apply output:
$ terraform apply --auto-approve
aws_subnet.public: Creation complete after 11s [id=subnet-042bc17e0105dbd91]

Apply complete! Resources: 3 added, 0 changed, 0 destroyed.
After this step your local directory contains terraform.tfstate managing the three resources. Next you will configure the HCP workspace as the remote backend and migrate that state.
Before migrating state, consider creating a backup of your local terraform.tfstate. While the migration process copies your current state snapshot into the workspace by default, keeping a local backup can help you recover if anything unexpected occurs.

3) Add the HCP cloud block to your configuration

Update providers.tf (or another file) to include the cloud block inside the terraform block so Terraform targets the HCP workspace:
terraform {
  required_providers {
    aws = {
      source  = "hashicorp/aws"
      version = "~> 6.31.0"
    }
  }
  required_version = ">= 1.2.2"

  cloud {
    organization = "krausen-hcp"
    workspaces {
      name = "hcp-demo"
    }
  }
}

provider "aws" {
  region = "us-east-2"
}
Format files if needed:
$ terraform fmt
main.tf
providers.tf

4) Authenticate to HCP Terraform

Run terraform login to generate and store an API token for app.terraform.io (HCP Terraform). The command will open a browser flow to create a token which you paste back into the CLI prompt.
$ terraform login

Generate a token using your browser, and copy-paste it into this prompt.
Terraform will store the token in plain text in the following file
/Users/bk/.terraform.d/credentials.tfrc.json

Token for app.terraform.io:
Enter a value:
After successful login, Terraform CLI can interact with your HCP organization and workspaces.

5) Re-initialize to connect to HCP and migrate state

Run terraform init again. With the cloud backend configured, Terraform will prompt to migrate your local state to the HCP workspace.
$ terraform init
Initializing HCP Terraform...
Do you wish to proceed?
Answer "yes" to copy the latest state snapshot to the configured HCP Terraform workspace.

As part of migrating to HCP Terraform, Terraform can optionally copy your current workspace state to the configured HCP Terraform workspace.

Answer "yes" to copy the latest state snapshot to the configured HCP Terraform workspace.
Answer "no" to ignore the existing state and just activate the configured HCP Terraform workspace with its existing state, if any.

Should Terraform migrate your existing state?
  • Type yes to copy the current local state into the HCP workspace. Terraform completes initialization and activates the workspace with your migrated state.

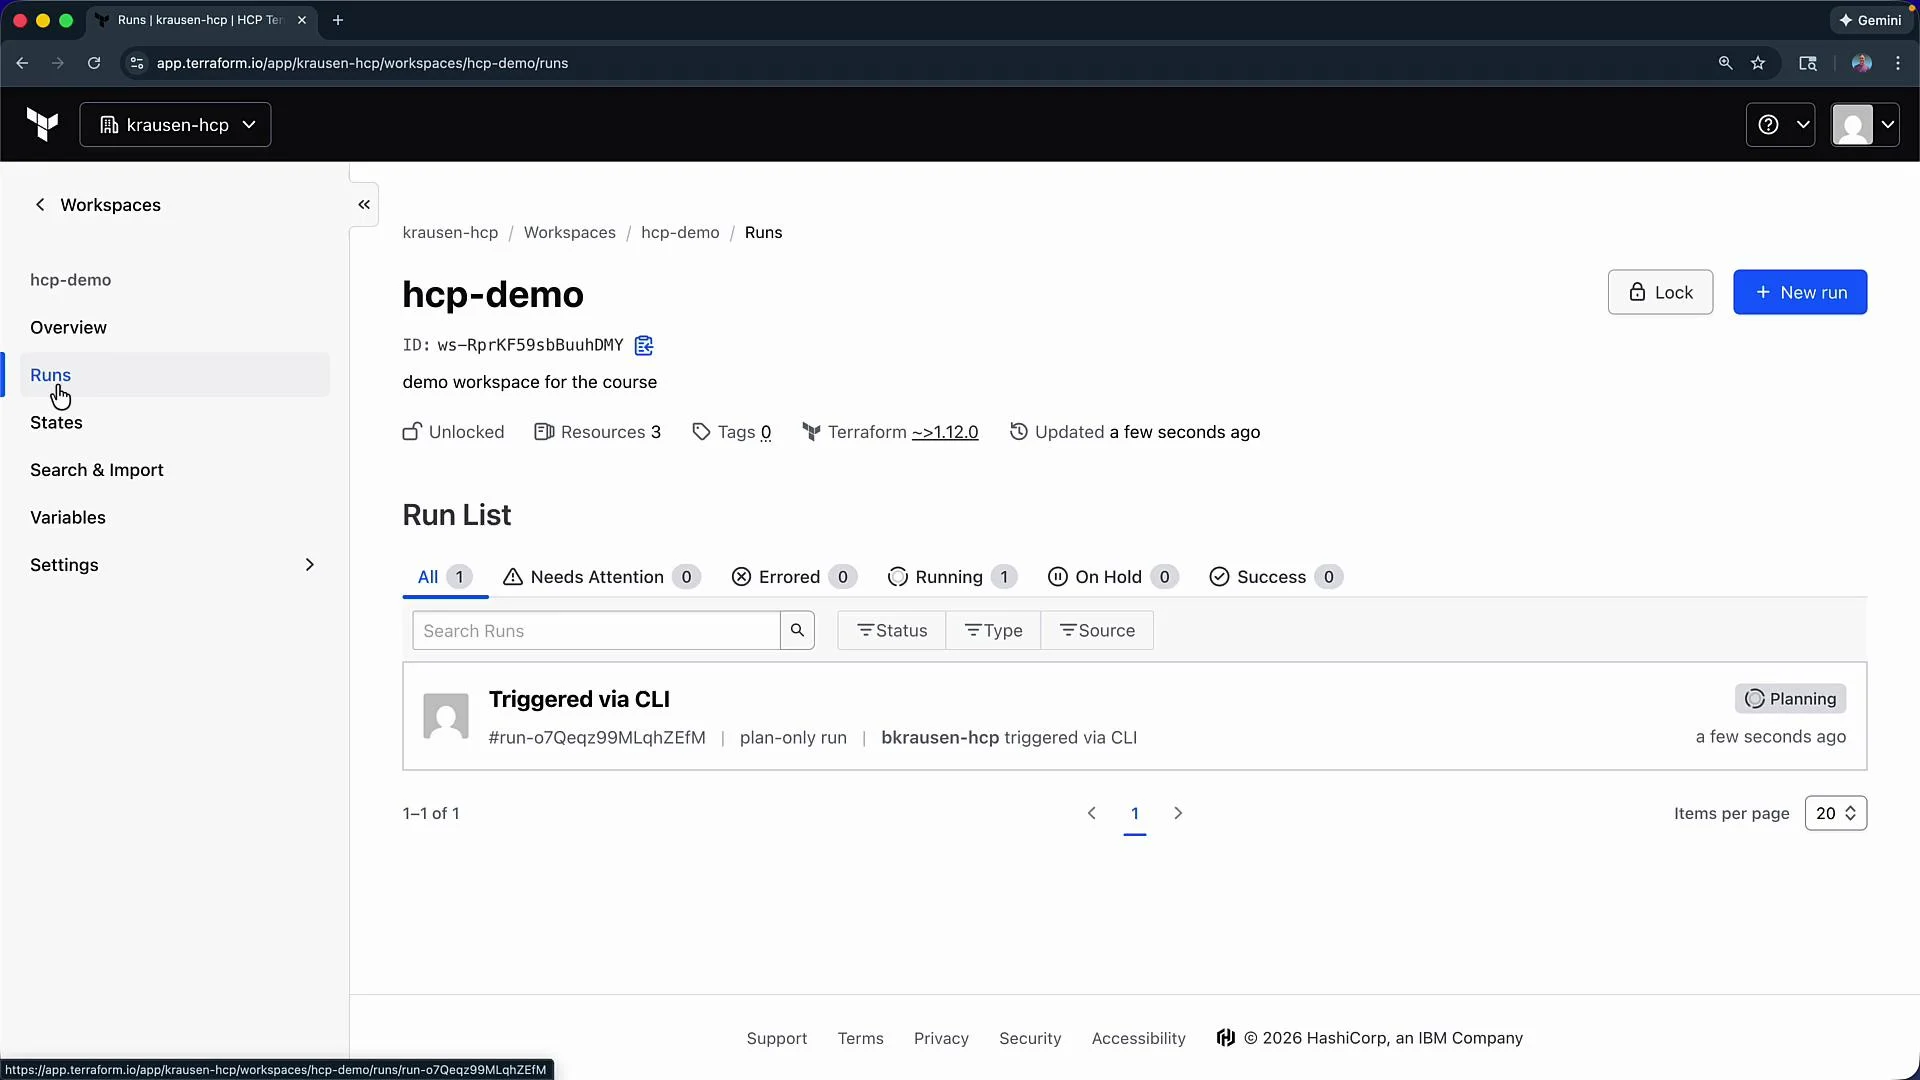
6) Remote runs and the HCP UI

Once the workspace is activated, terraform plan and terraform apply will execute remotely in HCP Terraform. The CLI streams logs while the plan/apply runs on HCP workers. You can also open the workspace Runs in the HCP UI to view details. Example of starting a remote plan:
$ terraform plan
Running plan in HCP Terraform. Output will stream here. Pressing Ctrl-C will stop streaming the logs, but will not stop the plan running remotely.

Preparing the remote plan...

To view this run in a browser, visit: https://app.terraform.io/app/krausen-hcp/hcp-demo/runs/run-4pXWLN3DxkM685TH

Waiting for the plan to start...
A run triggered via CLI will appear in the workspace Run List in the HCP UI (status: Planning):
The image shows a Terraform Cloud workspace interface titled "hcp-demo," with options for managing runs, states, variables, and settings. A run triggered via CLI is listed under "Run List," with its status marked as "Planning."
When using remote execution, the Terraform process runs on HCP Terraform’s workers and cannot access environment variables on your local machine. Configure workspace environment variables (or another credential method) in the HCP workspace so remote runs can authenticate to your cloud provider.

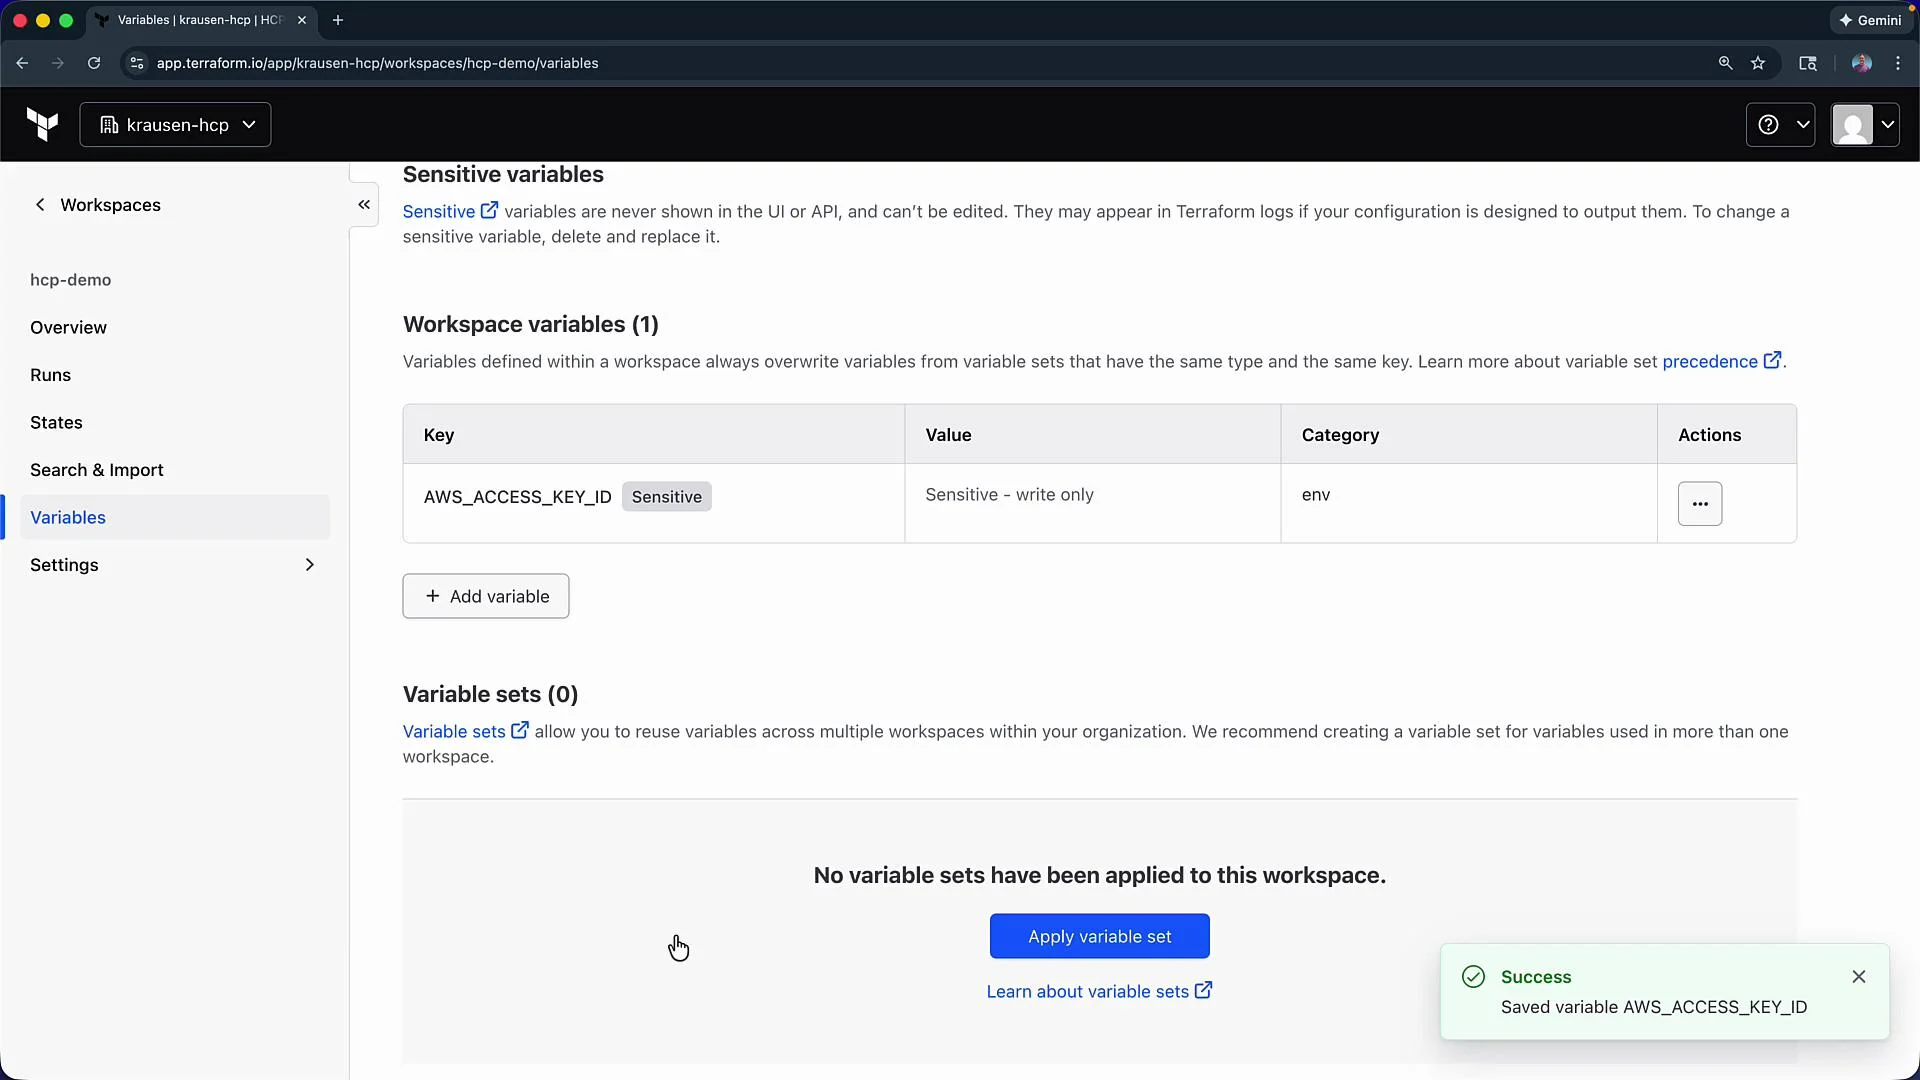
7) Add AWS credentials to workspace variables

In the HCP UI, go to your workspace → Variables and add the following environment variables (mark them as sensitive):
Variable nameNotes
AWS_ACCESS_KEY_IDMark as sensitive
AWS_SECRET_ACCESS_KEYMark as sensitive
AWS_SESSION_TOKENMark as sensitive (only if using STS session tokens)
After saving a variable you should see confirmation that it was saved (sensitive flag enabled):
The image shows a Terraform Cloud workspace variables page, displaying a sensitive workspace variable named "AWS_ACCESS_KEY_ID." There's also an indication that a variable was successfully saved.

8) Re-run plan/apply via CLI (remote execution)

With workspace variables in place, run terraform plan. The plan runs remotely and streams output to your terminal:
$ terraform plan
Preparing the remote plan...

To view this run in a browser, visit:
https://app.terraform.io/app/krausen-hcp/hcp-demo/runs/run-nP3LsVir5p5uCLto

Waiting for the plan to start...
Terraform v1.2.2
on linux_amd64
Initializing plugins and modules...

9) Make and apply a change

Example: add an Environment tag to the VPC resource in main.tf:
resource "aws_vpc" "main" {
  cidr_block            = var.vpc_cidr
  enable_dns_support    = true
  enable_dns_hostnames  = true
  tags = {
    Name        = "dev-main-vpc"
    Environment = "development"
  }
}
Run terraform plan (remote). The plan will show an in-place update to the VPC tags:
$ terraform plan
Terraform will perform the following actions:

# aws_vpc.main will be updated in-place
~ resource "aws_vpc" "main" {
    id   = "vpc-0078106452f9f1bed"
    tags = {
        + "Environment" = "development"
        "Name"         = "dev-main-vpc"
    }
}
Plan: 0 to add, 1 to change, 0 to destroy.
Apply the change:
$ terraform apply --auto-approve
The remote apply triggers a run in the HCP workspace that performs both the plan and the apply steps. Each run can be reviewed in the workspace Runs page, including plan output and apply results.

Workspace overview and resource list

In the HCP Terraform workspace Overview you can inspect:
  • Latest run and detailed logs
  • Resource counts and the list of managed resources (for this example: aws_vpc.main, aws_subnet.private, aws_subnet.public)
  • Provider and module versions used by the workspace

Conclusion

You have migrated a local Terraform configuration and the local terraform.tfstate into an HCP Terraform workspace (hcp-demo). Remote execution is now enabled: plans and applies run on HCP workers and stream their output to your CLI, with provider credentials provided via workspace variables. This setup centralizes state and execution to HCP while preserving your existing configuration and resource graph.

Watch Video