Step 1: Launching the Database Creation Process
Begin by navigating to the RDS page and clicking on Databases. Next, click Create Database. Under engine options, choose Aurora by selecting one of the compatible database engines.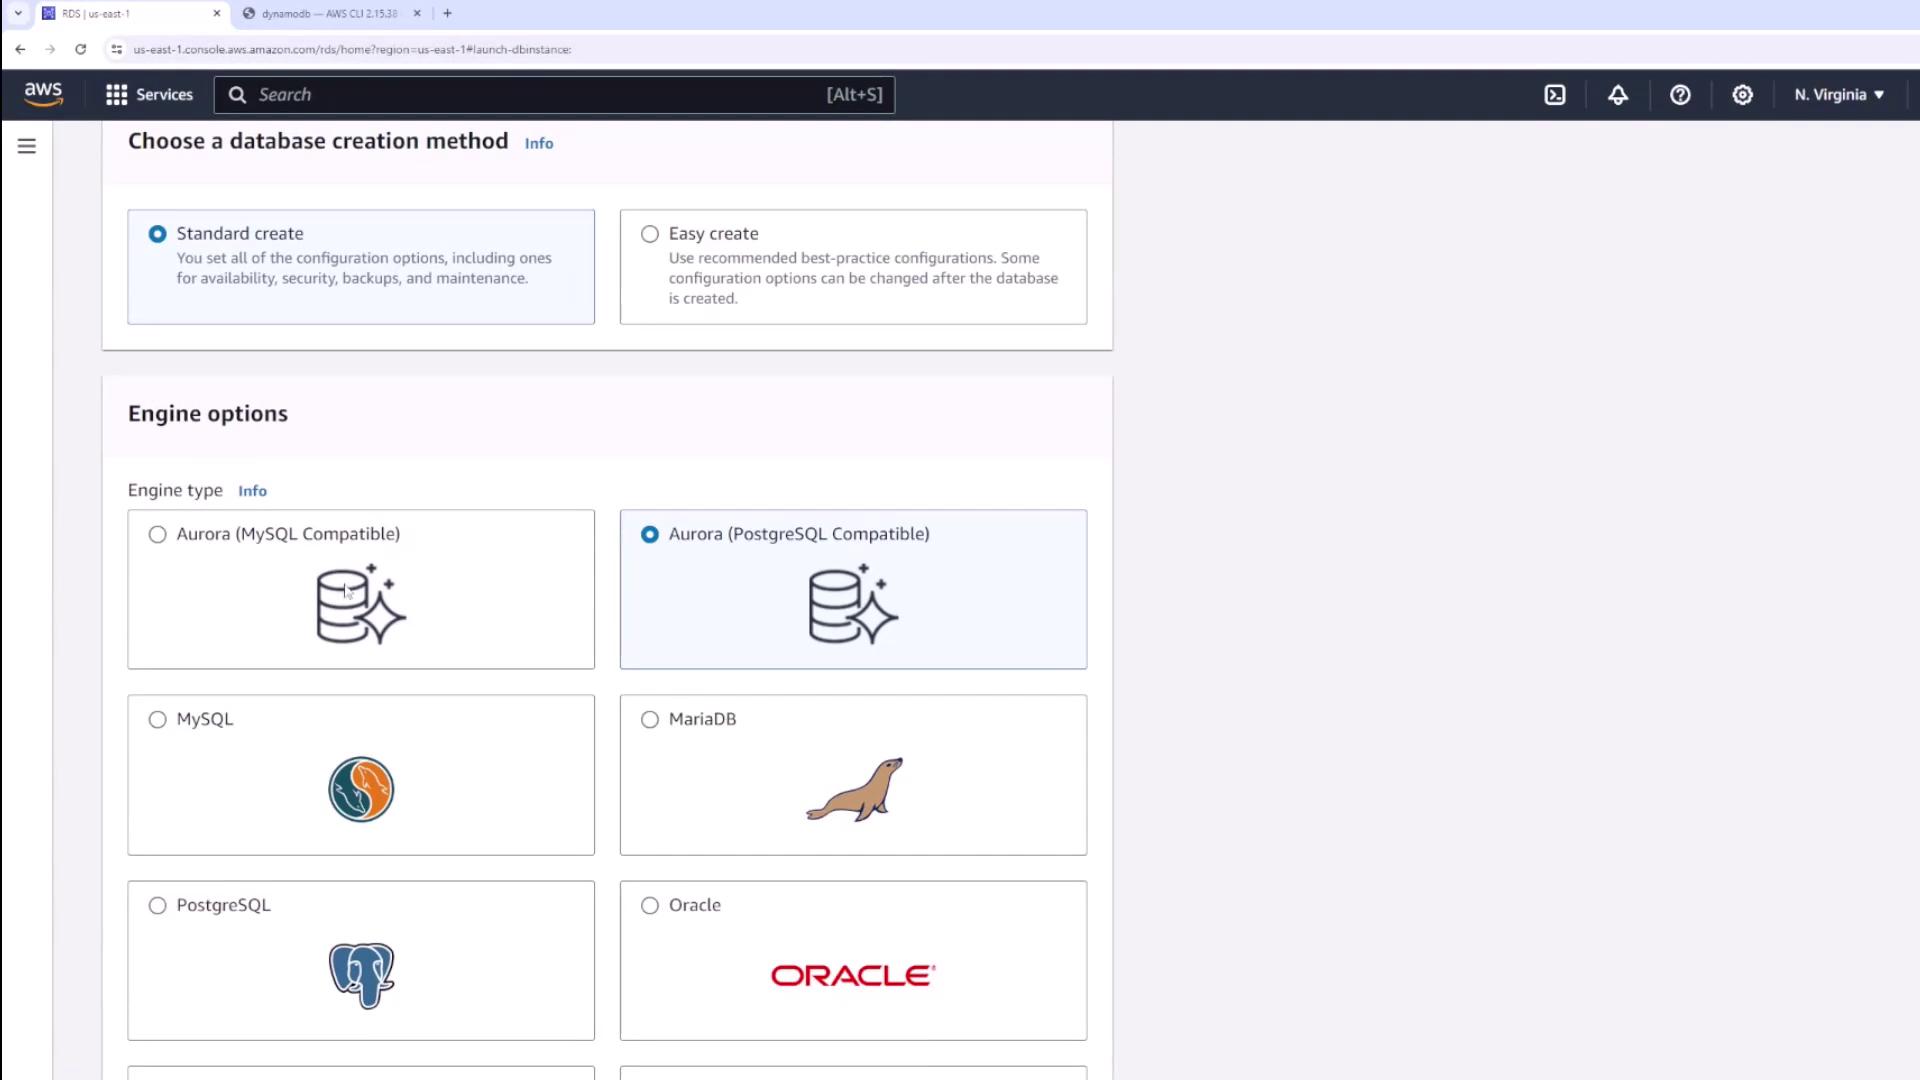
Step 2: Choosing Your Database Engine
Aurora supports both MySQL and PostgreSQL compatibility. Select your preferred engine and choose the specific version you require. For instance, you can choose from PostgreSQL versions such as 15.4, 15.3, 15.2, etc.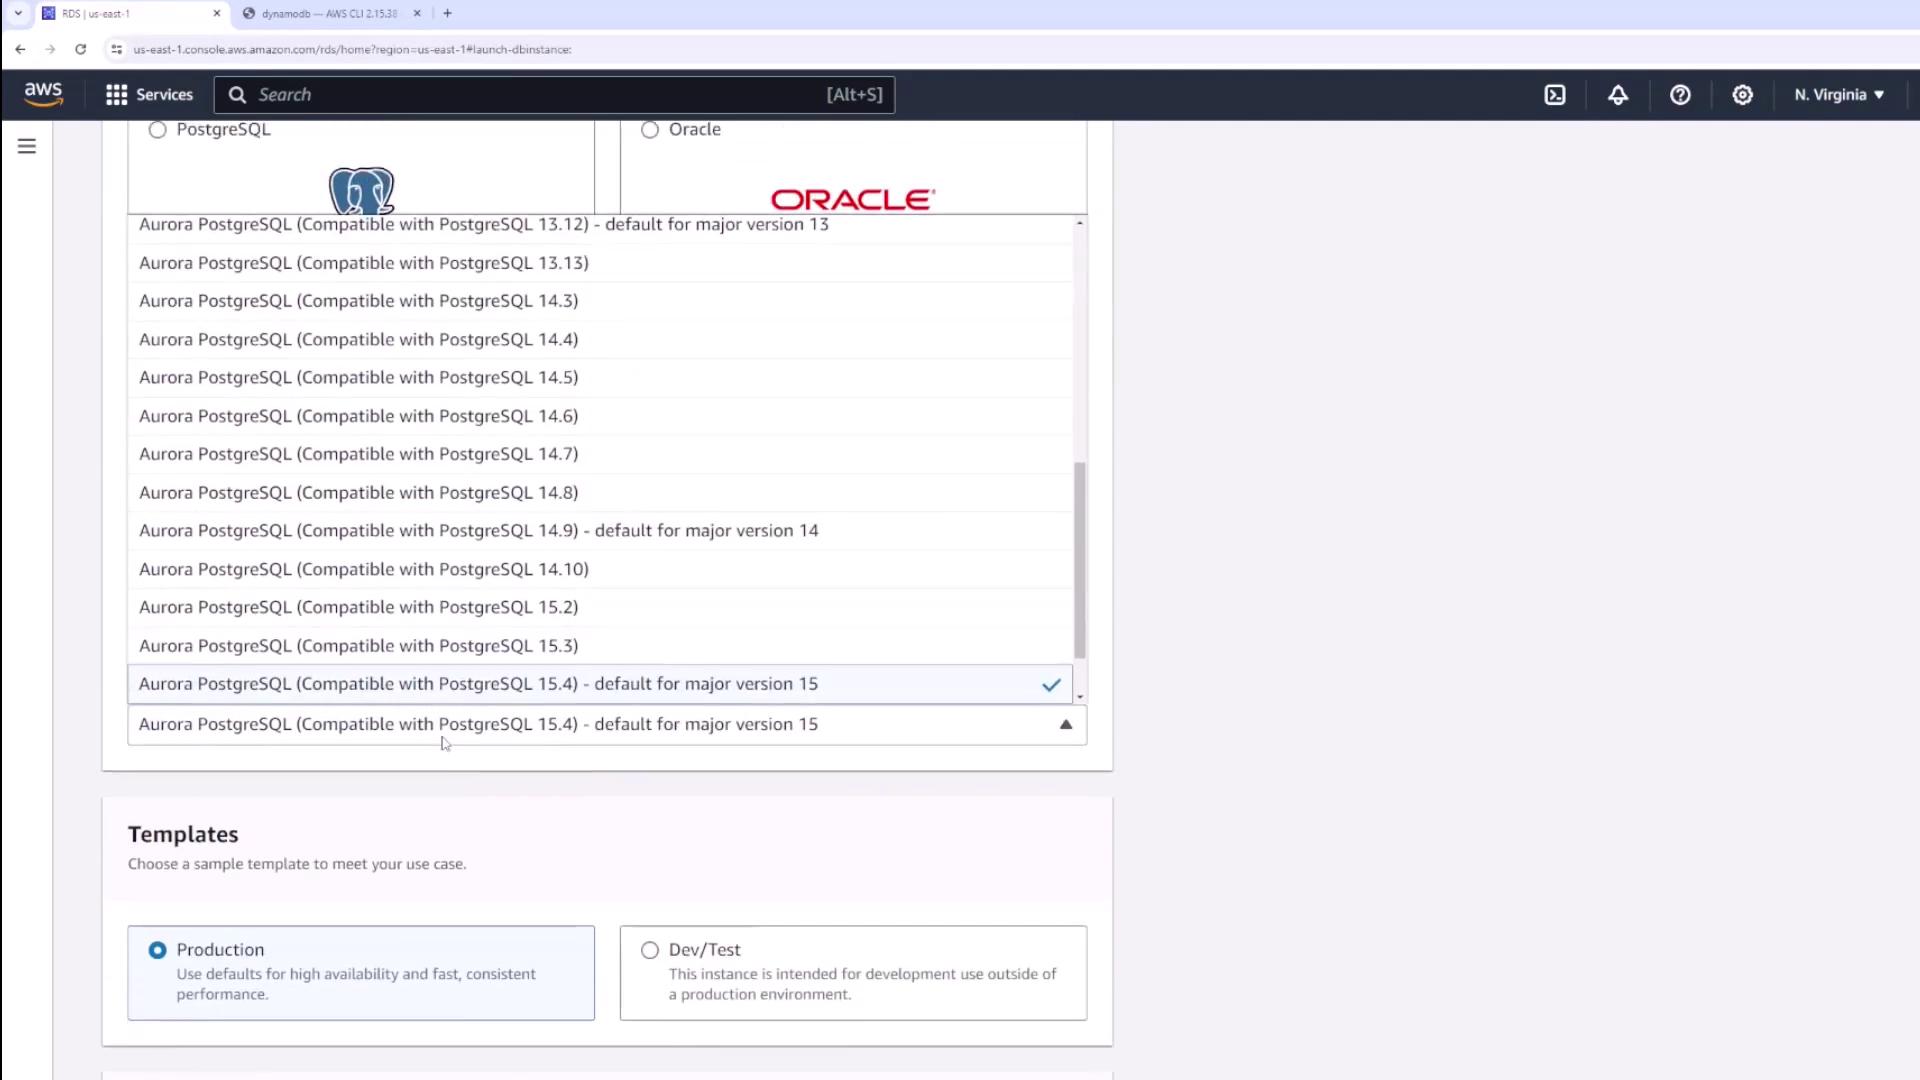
Step 3: Setting Up Database Credentials
Enter a name for your database (for example, “Database Aurora Example”) and set your credentials. You can use the provided master username and decide between letting Secrets Manager generate a password or manually inputting one. In the demonstration, we manually input the password.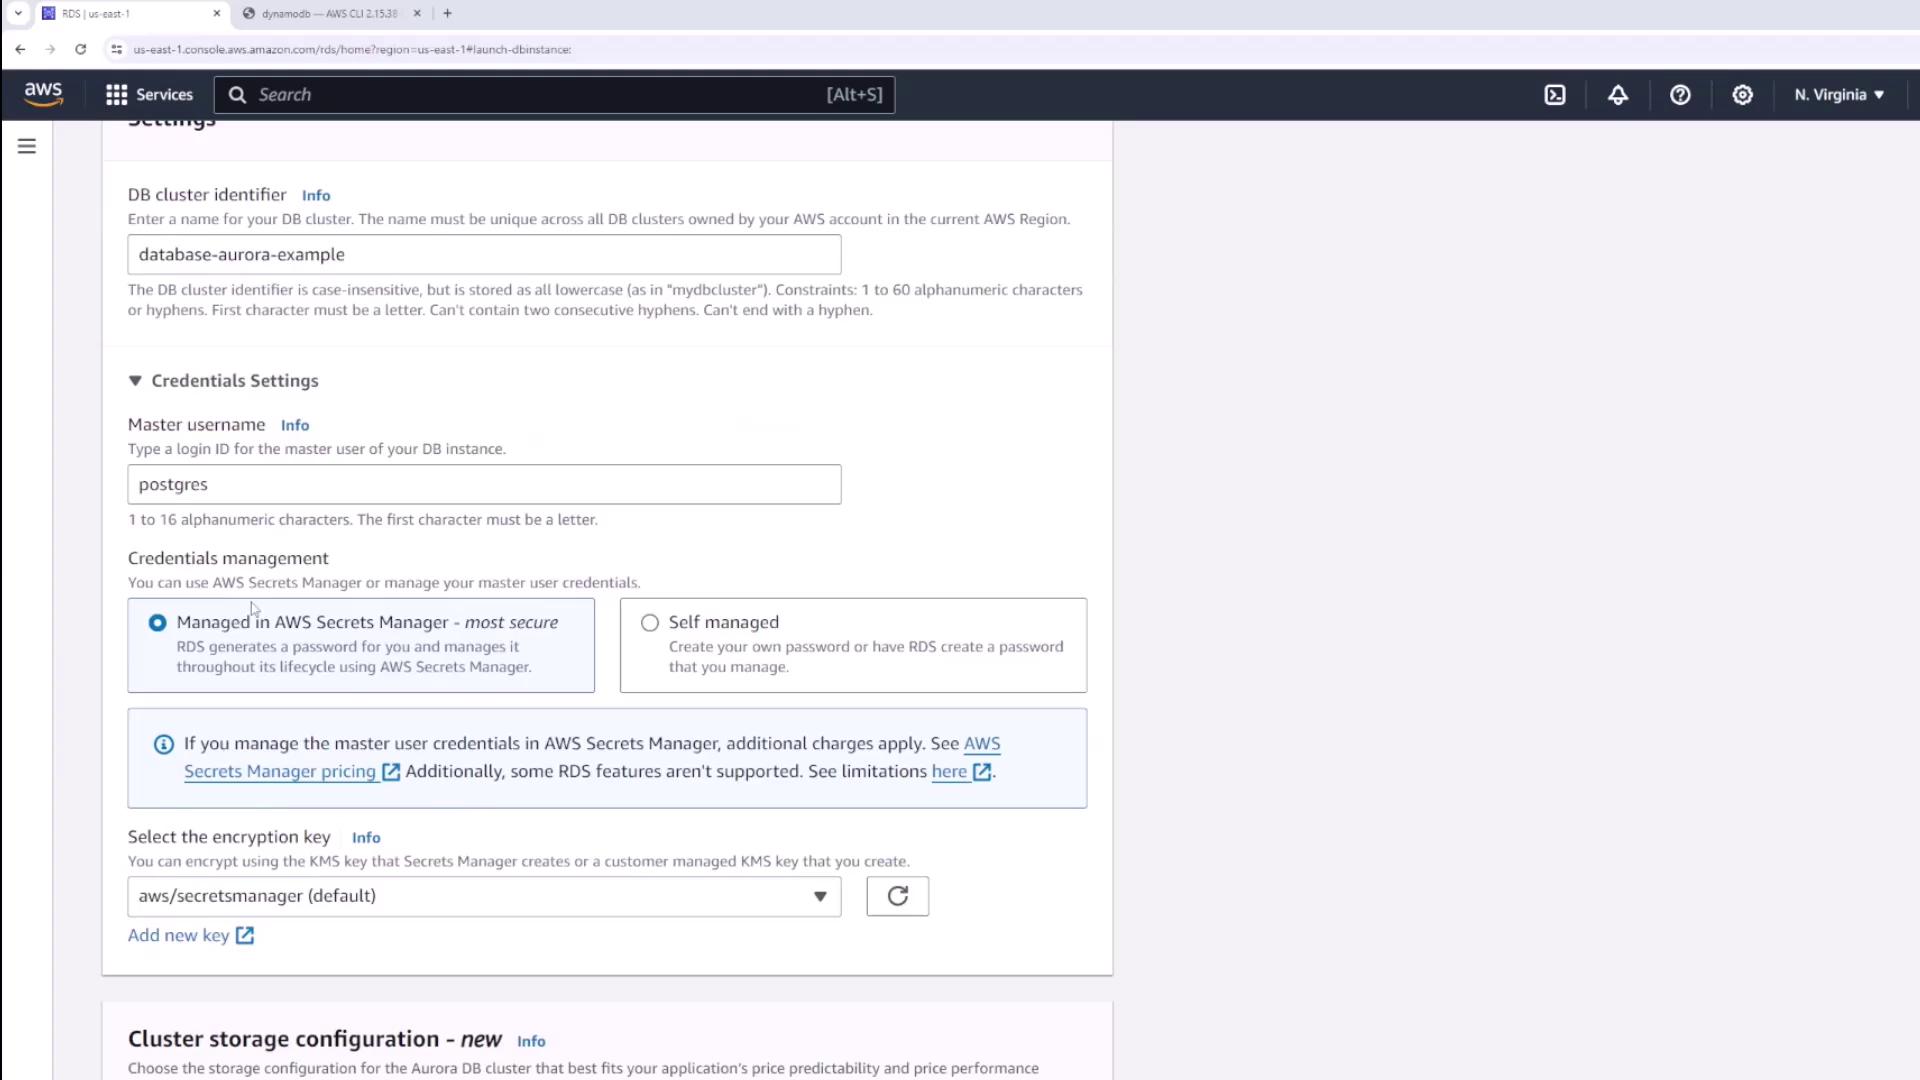
Step 4: Configuring Cluster Storage Options
Choose from the following storage options based on your application needs:- Aurora Standard: An economical choice.
- Aurora Optimized: Best for I/O-intensive applications.
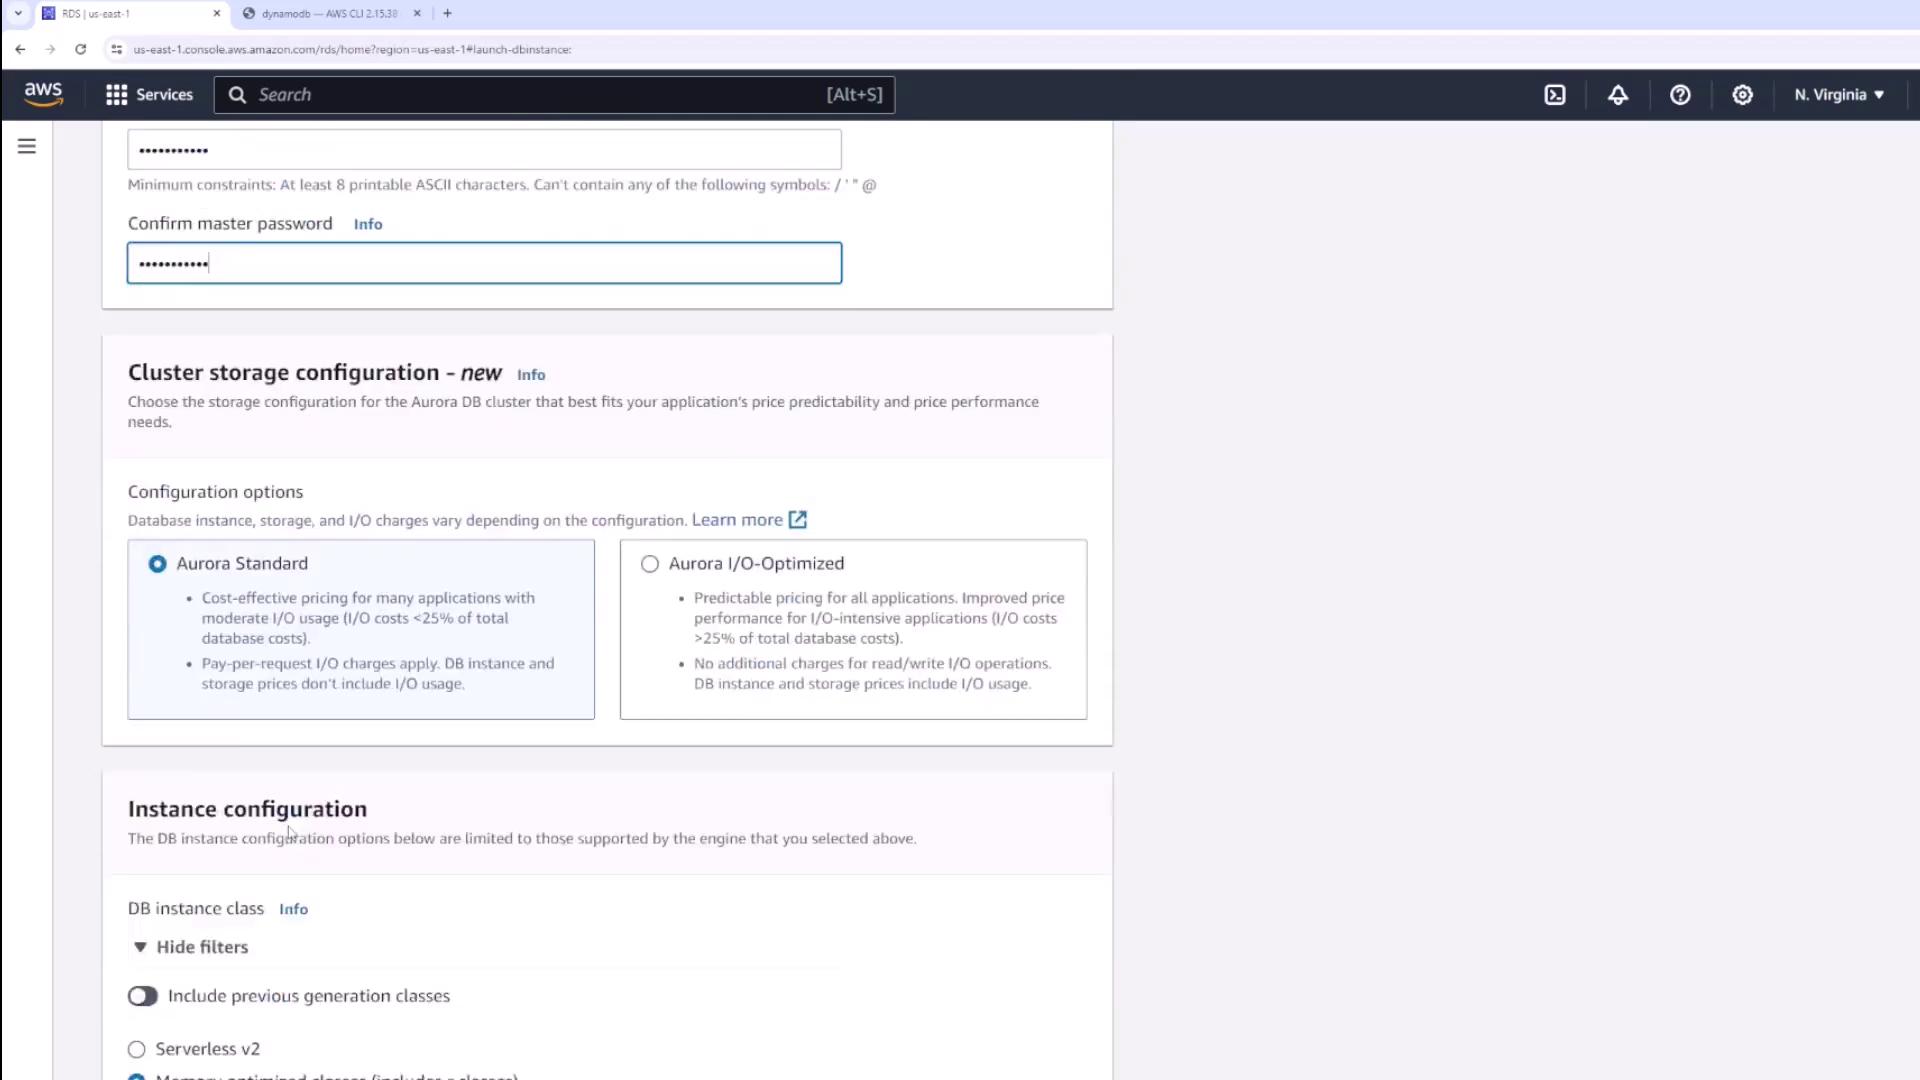
Step 5: Instance Configuration
Determine the type of EC2 instance that will back your database. Your options include:- Serverless: For Aurora Serverless v2 (set minimum and maximum Aurora Capacity Units).
- Non-serverless options: Memory-optimized, burstable, or read-optimized classes.
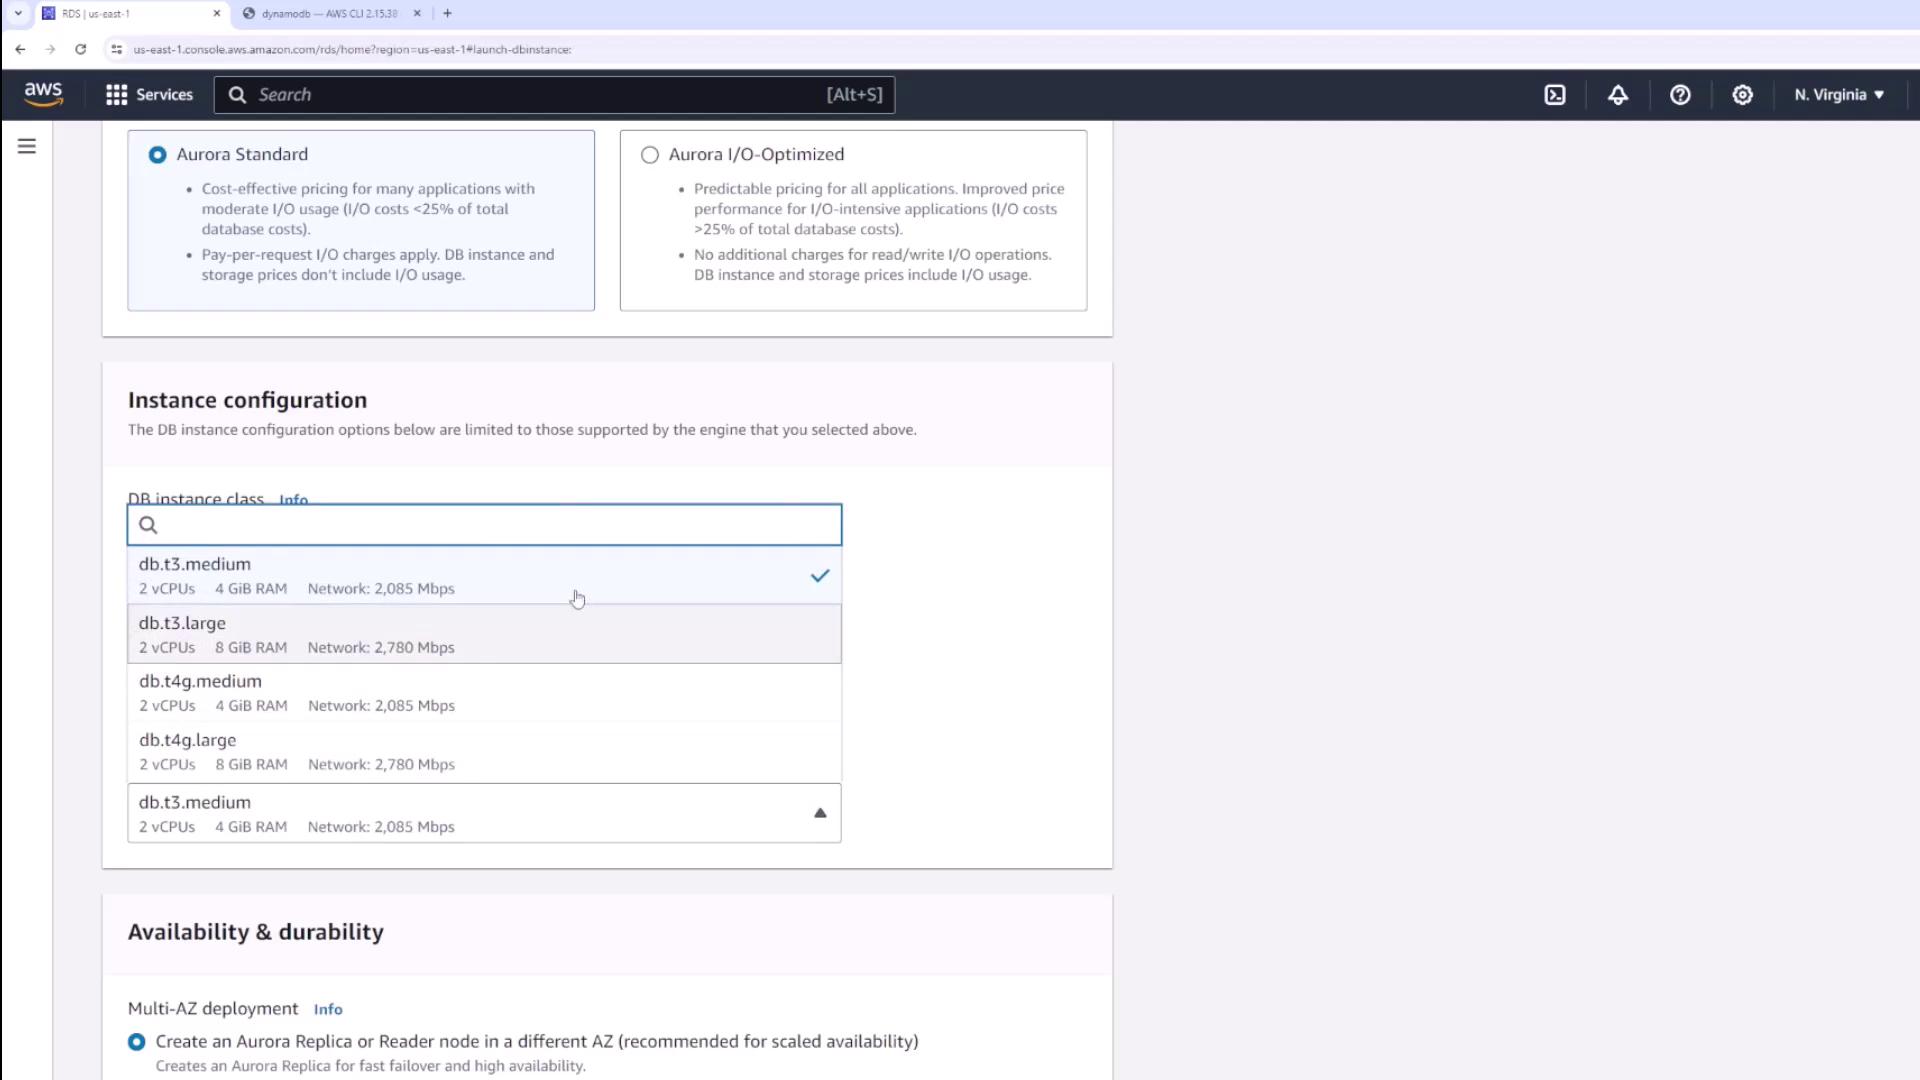
Step 6: Availability and High Availability Setup
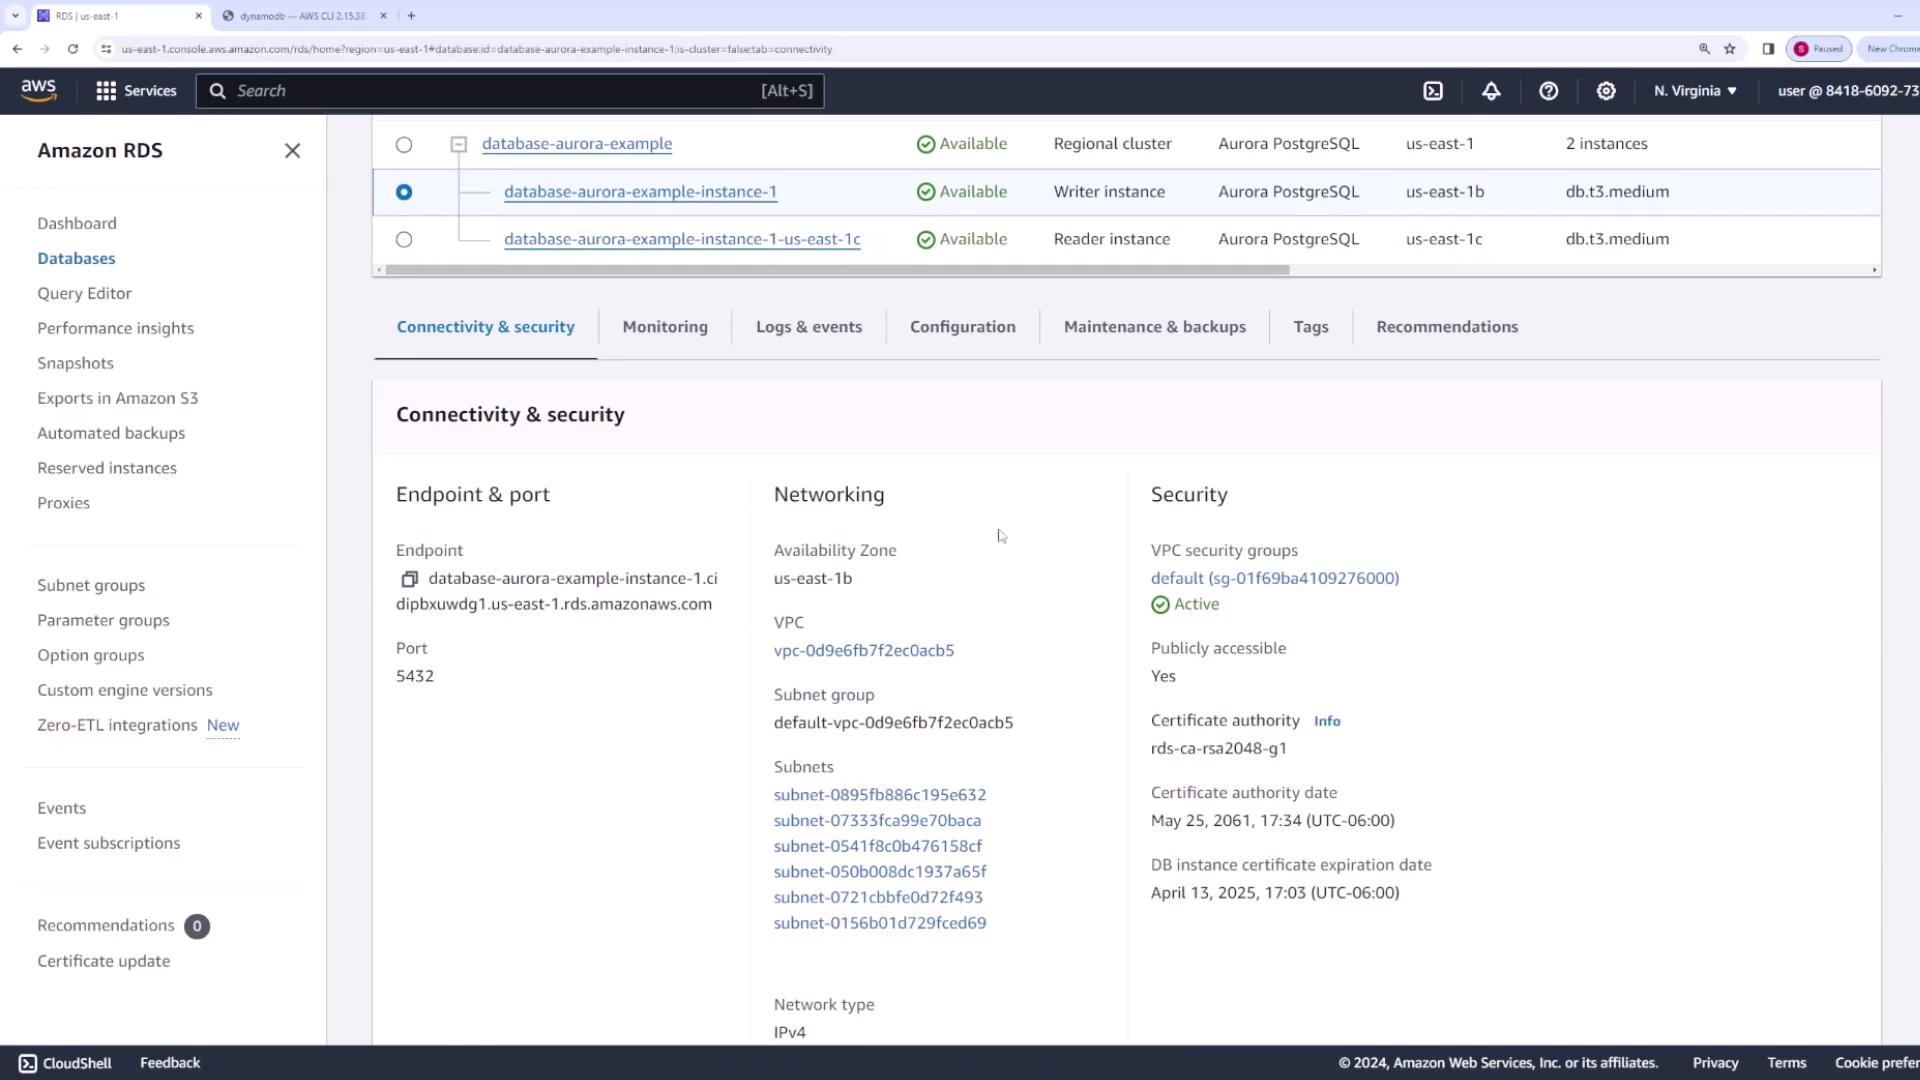
Select whether to establish an Aurora replica or a separate reader node in a different Availability Zone. For high availability, enable the multi-AZ deployment option.Step 7: Network and Security Settings
Configure your network settings as follows:- Network Type: Choose IPv4 or dual stack (IPv4 and IPv6).
- VPC: Use the default VPC for this example.
- Subnet Group: Select the appropriate subnet group across Availability Zones.
- Public Accessibility: Enable only if necessary for demonstration (avoid in production environments).
Step 8: Enabling Monitoring and Performance Options
Within the Monitoring section, you can enable Performance Insights. Note that enabling additional features such as DevOps Guru may incur extra costs.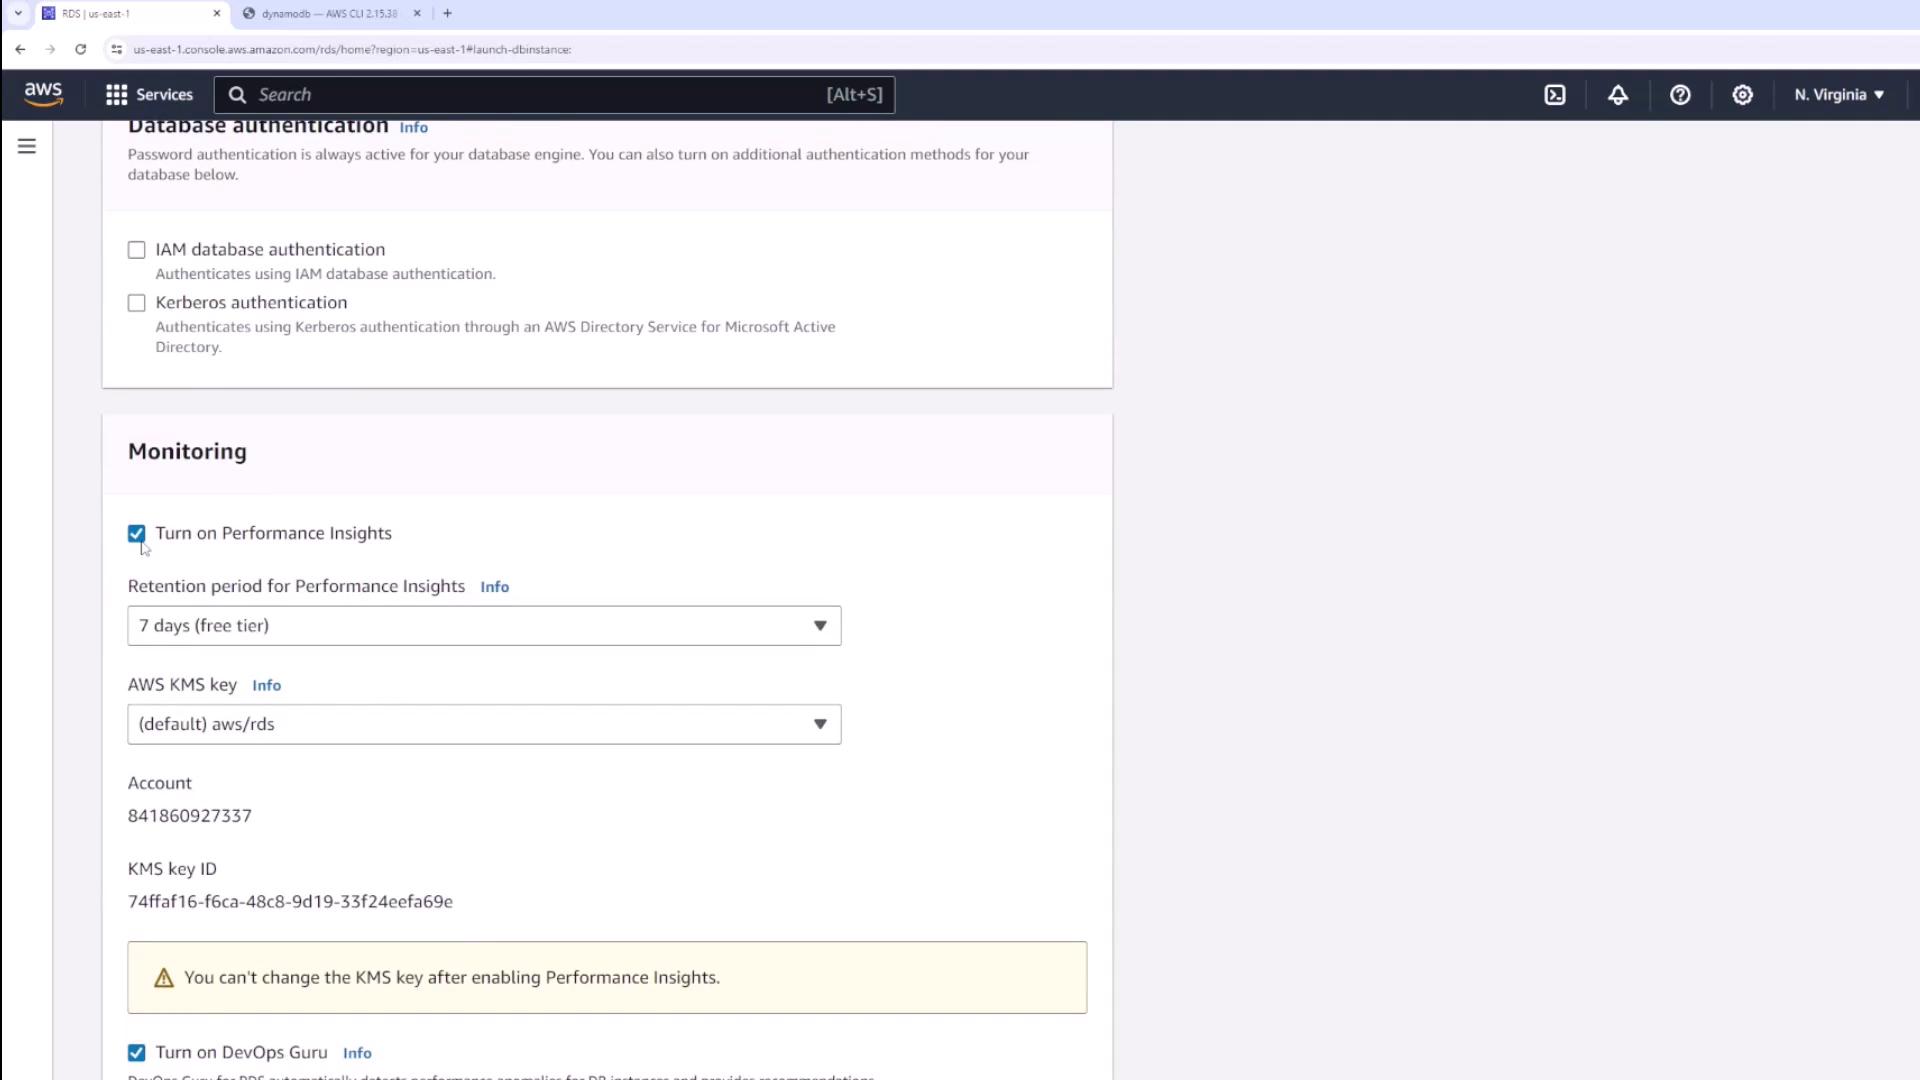
Step 9: Additional Configuration Settings
In this section, you can further configure:- Extra Database Name: Defaults to the engine name (e.g., PostgreSQL).
- Parameter Group: Select the appropriate group.
- Backup Retention Period: Defaults to seven days.
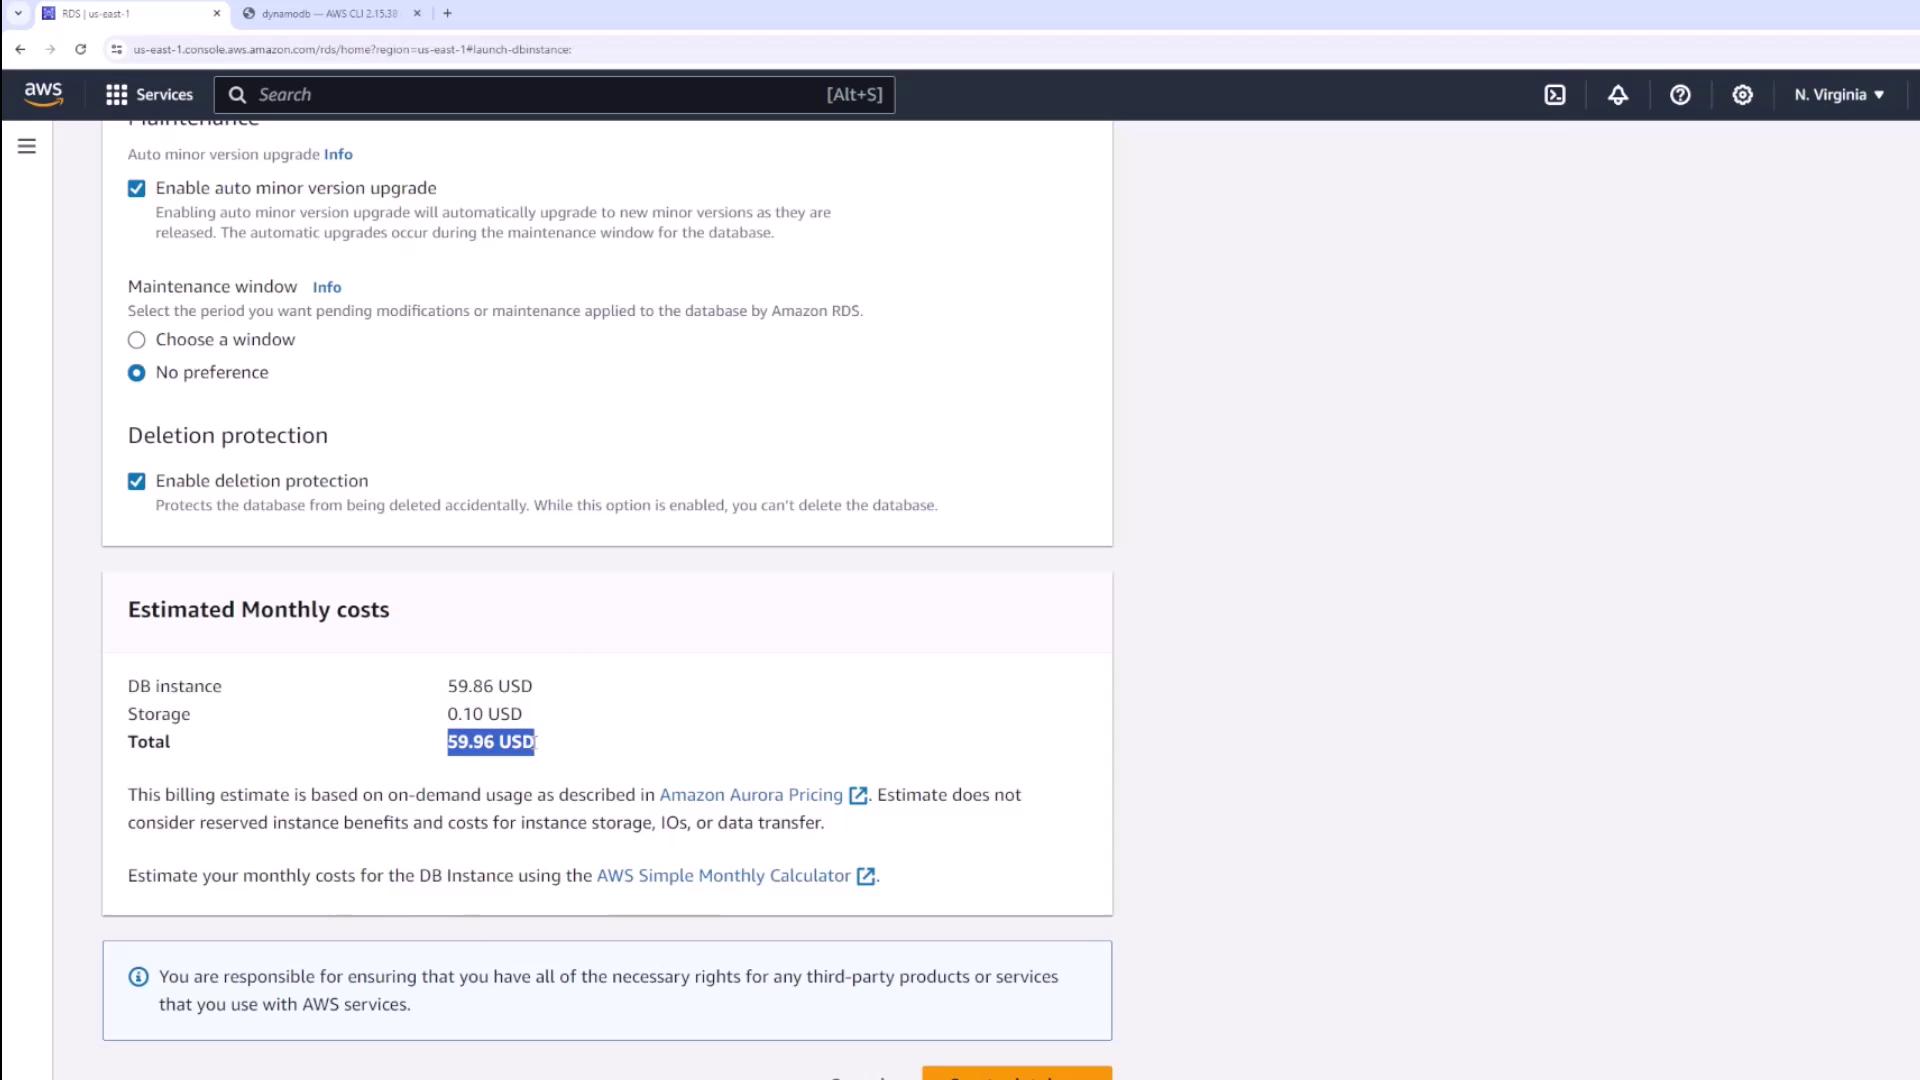
- Encryption and Maintenance Options: Set based on your requirements.
- Deletion Protection: Enable to prevent accidental deletion.
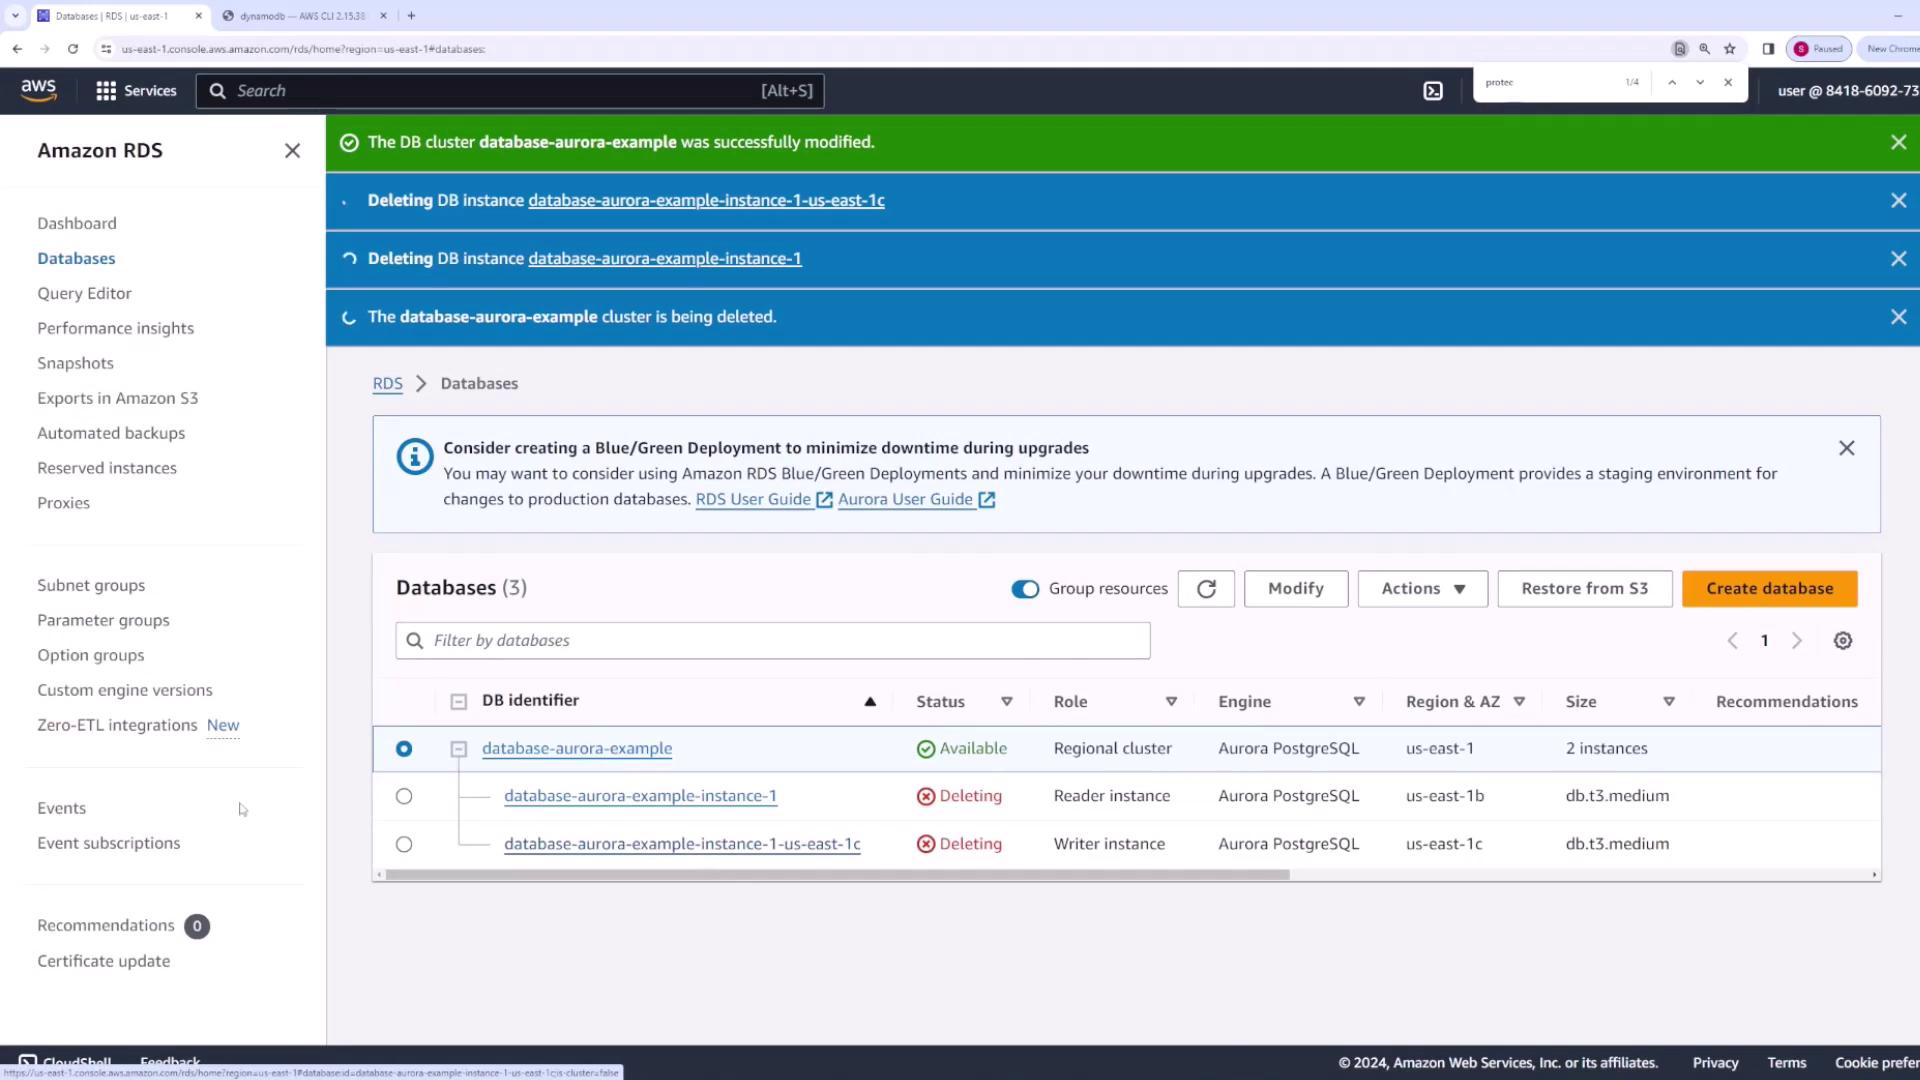
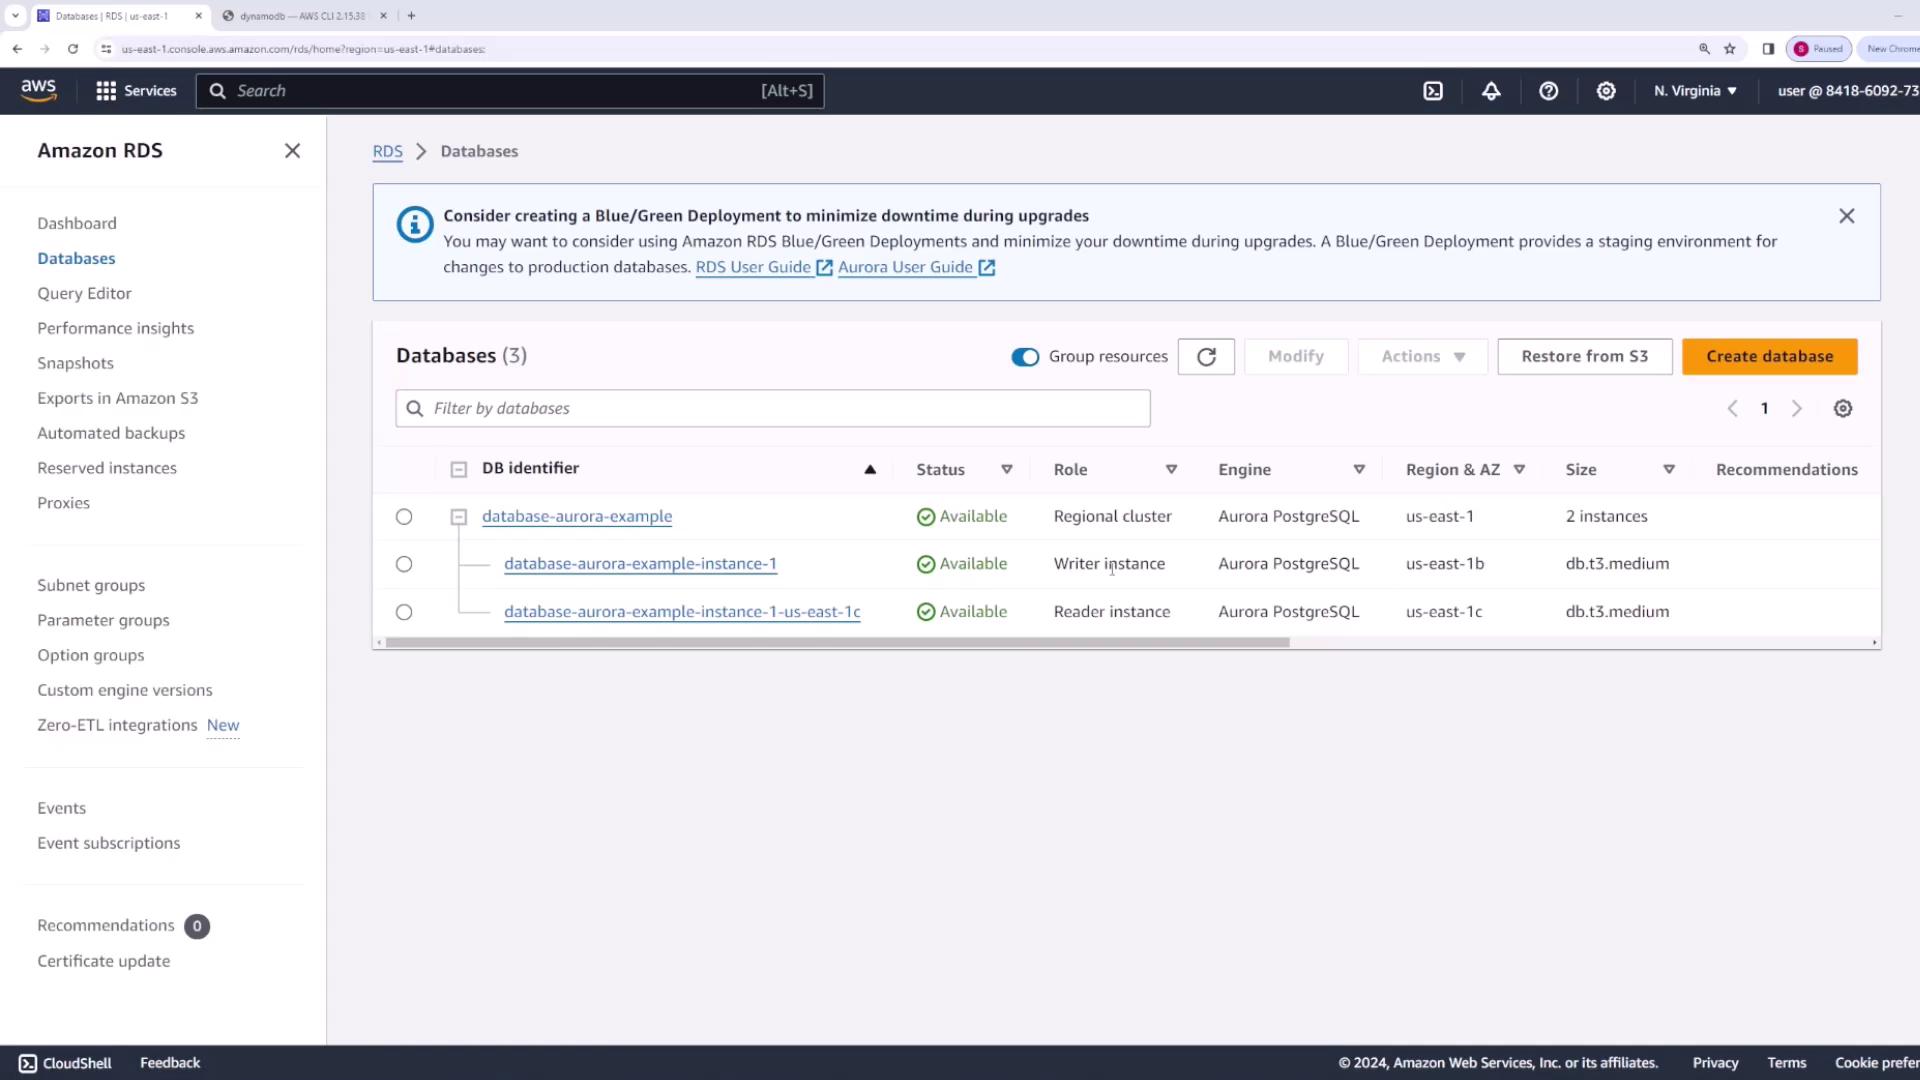
Step 10: Accessing and Navigating the Cluster
After creation, your database “Database Aurora Example” appears with two instances:- Writer Instance: For forwarding write requests.
- Reader Instance: For forwarding read requests.
Step 11: Managing Cluster Operations
From the main cluster view, you can perform a range of actions, including:- Adding another reader.
- Creating a blue-green deployment.
- Taking and restoring snapshots.
- Exporting data to S3.
- Adding a replica for autoscaling.
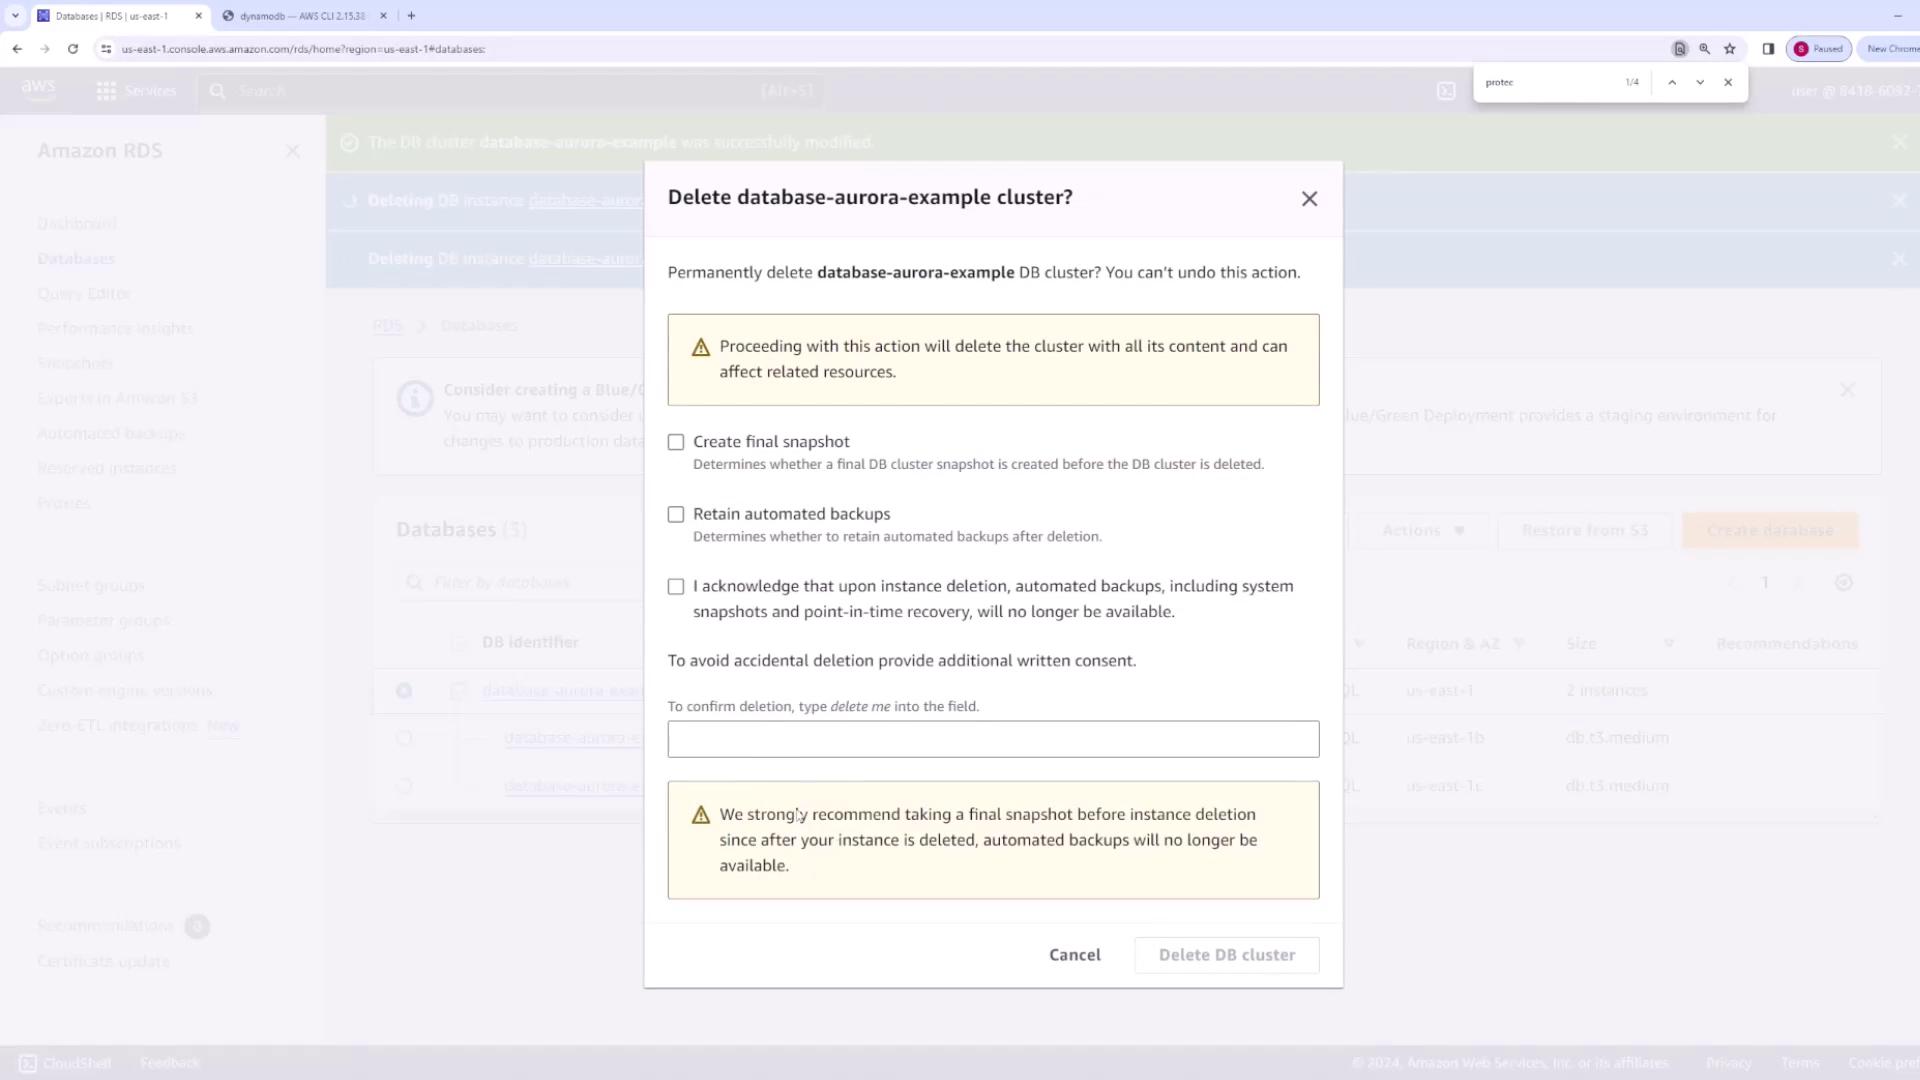
Step 12: Deleting the Aurora Cluster
For demonstration purposes, follow these steps to delete the Aurora cluster:- Navigate to Actions. You might notice that deletion is disabled because instances must be deleted individually first.
- Delete each instance. If prompted, disable deletion protection for the final instance by following these steps:
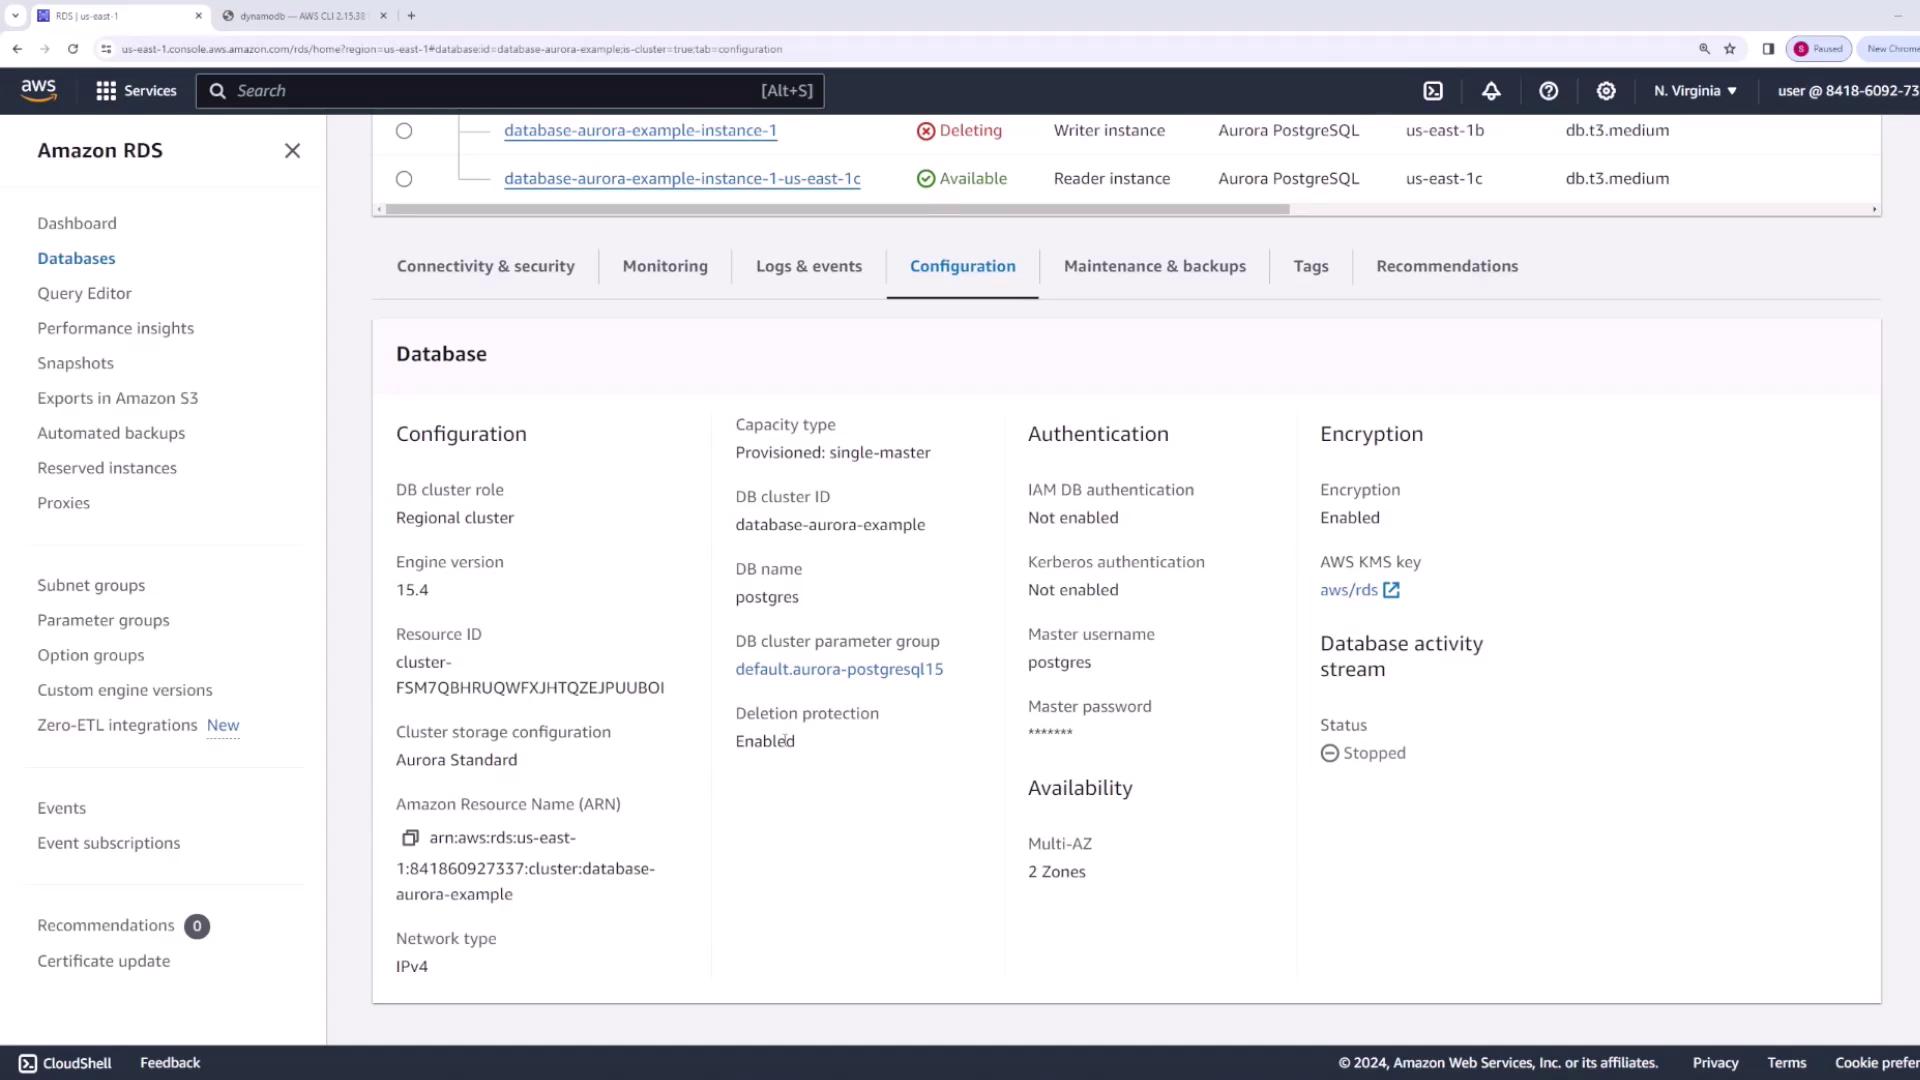
- Go to the main cluster and select Configuration. 2. Under Protection settings, disable deletion protection. 3. Click Continue and then Modify Cluster to apply the changes immediately.
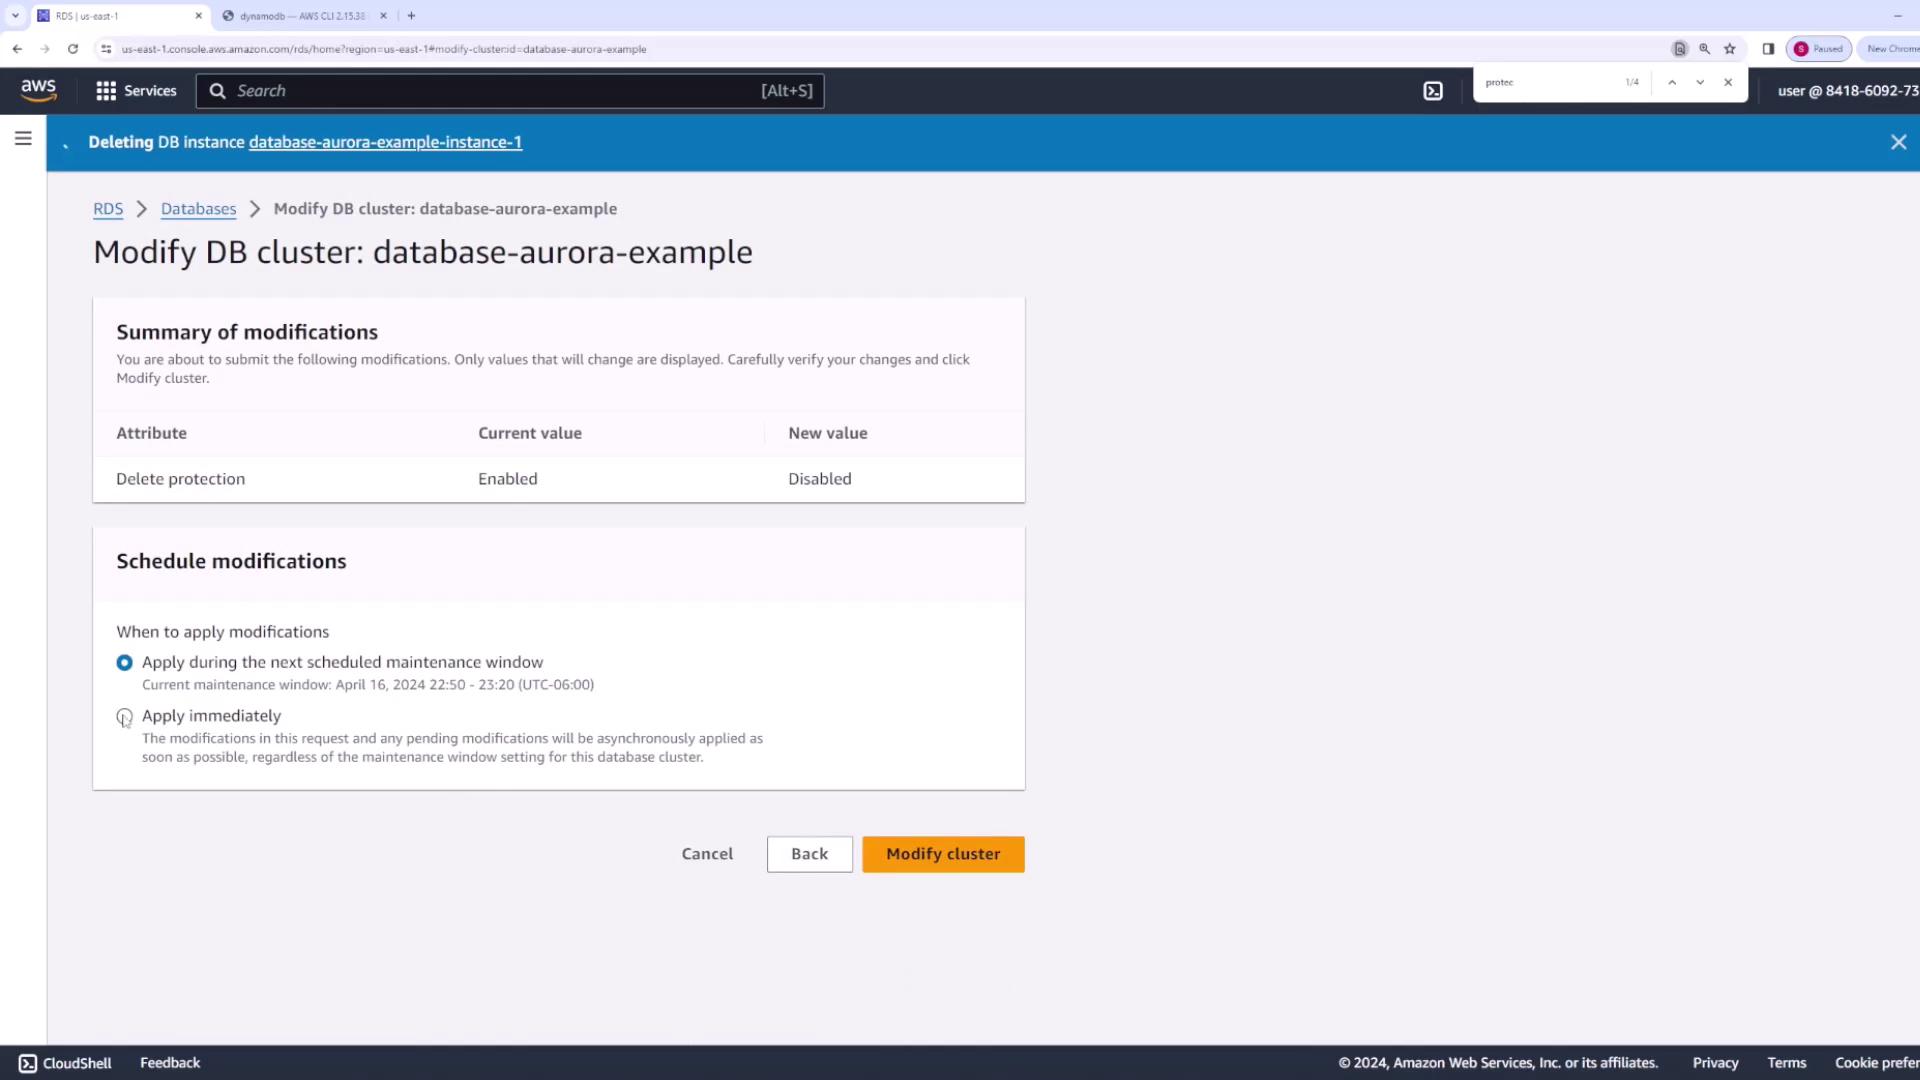
- After modification, delete the instance and then proceed to delete the entire database cluster.
- When prompted, choose not to create a final snapshot if not needed, and confirm by selecting Delete Database Cluster.