Use this file to discover all available pages before exploring further.
Welcome to the second installment of our EBS management series. In this guide, we demonstrate how to move an Amazon Elastic Block Store (EBS) volume between EC2 instances. You’ll first see how to transfer a volume while the instances reside in the same Availability Zone, then learn how to migrate the volume to a different Availability Zone, and finally, how to copy the volume across regions.In a previous lesson, we moved an EBS volume from one instance to another within the same Availability Zone. Now, we will attach the same EBS volume to Server Three in a different Availability Zone (us-east-1b).
Before detaching the EBS volume from its current instance, you must unmount it. Run the following command on your instance to unmount the volume (note that the correct command is “umount” rather than “unmount”):
sudo umount /ebsdemo
After unmounting, verify that no file system is actively mounted by using:
df -k
The console output below displays the block devices and confirms that the filesystem on /dev/xvdf (formatted with XFS) is ready for detachment:
After unmounting, refresh your AWS console. Go to the EBS volumes section, select the volume, and detach it. Continue refreshing the console until the volume state changes from “in use” to “available.” Now, attempt to attach the volume to Server Three. Because Server Three is in a different Availability Zone (us-east-1b), it won’t appear in the available selection list.
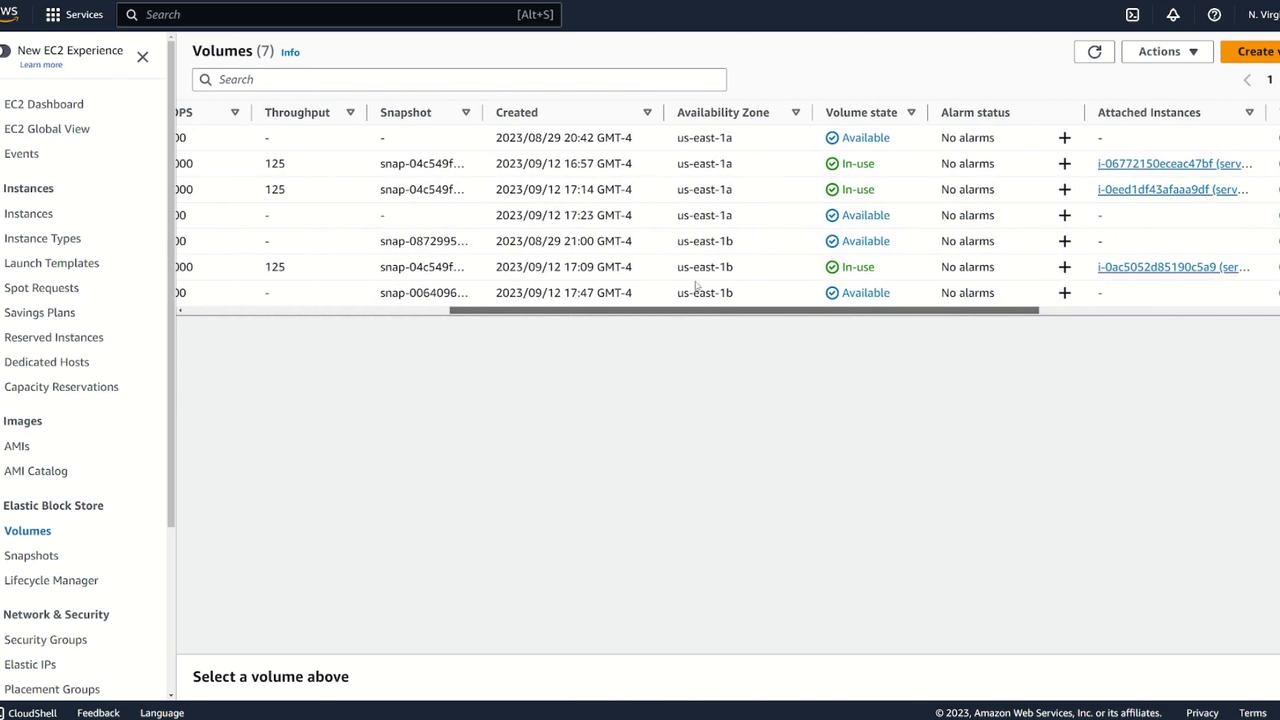
2. Creating a Snapshot and Moving to a New Availability Zone
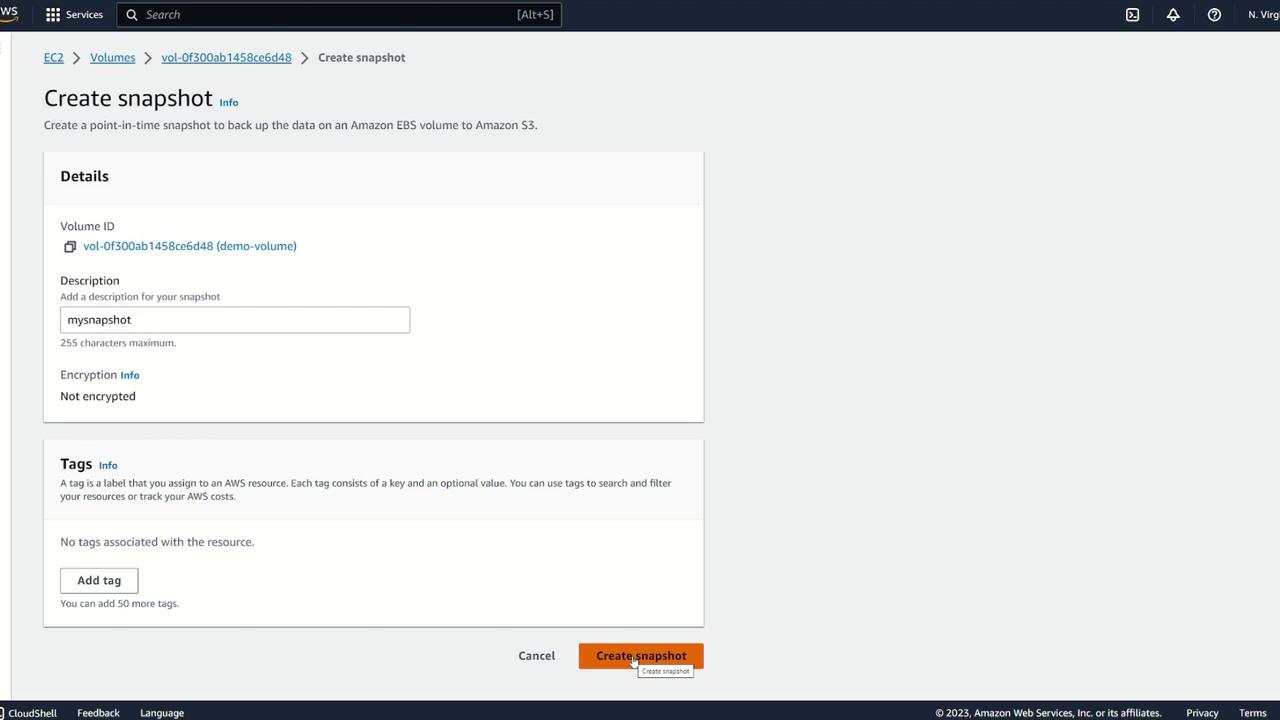
To move the volume to a different Availability Zone, create a snapshot:
Select the volume.
Choose Create Snapshot.
Optionally, provide a description (e.g., “my snapshot”) and review the snapshot details.
After initiating the snapshot, wait until its status shows as “available” (it may initially display as 7% complete). Navigate to the snapshots list to monitor its progress.
Next, use the snapshot to create a new volume in the desired Availability Zone (us-east-1b):
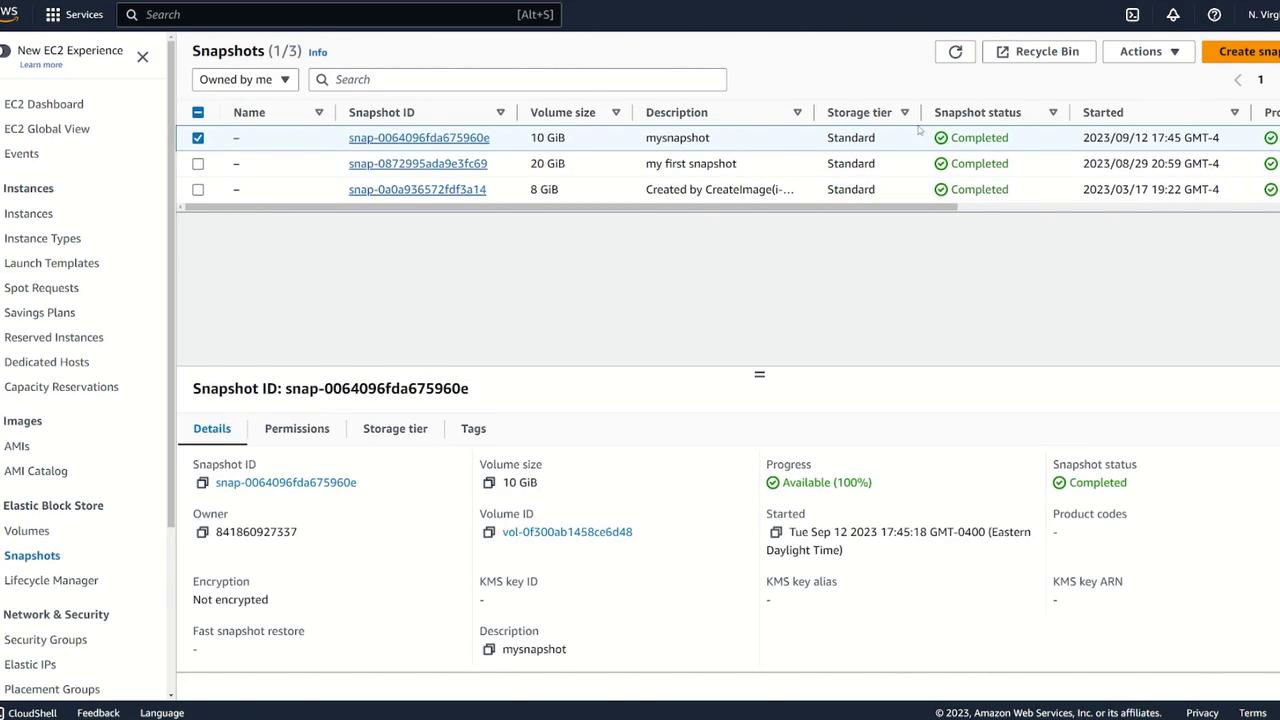
Select the snapshot.
Click on Actions and choose Create Volume from Snapshot.
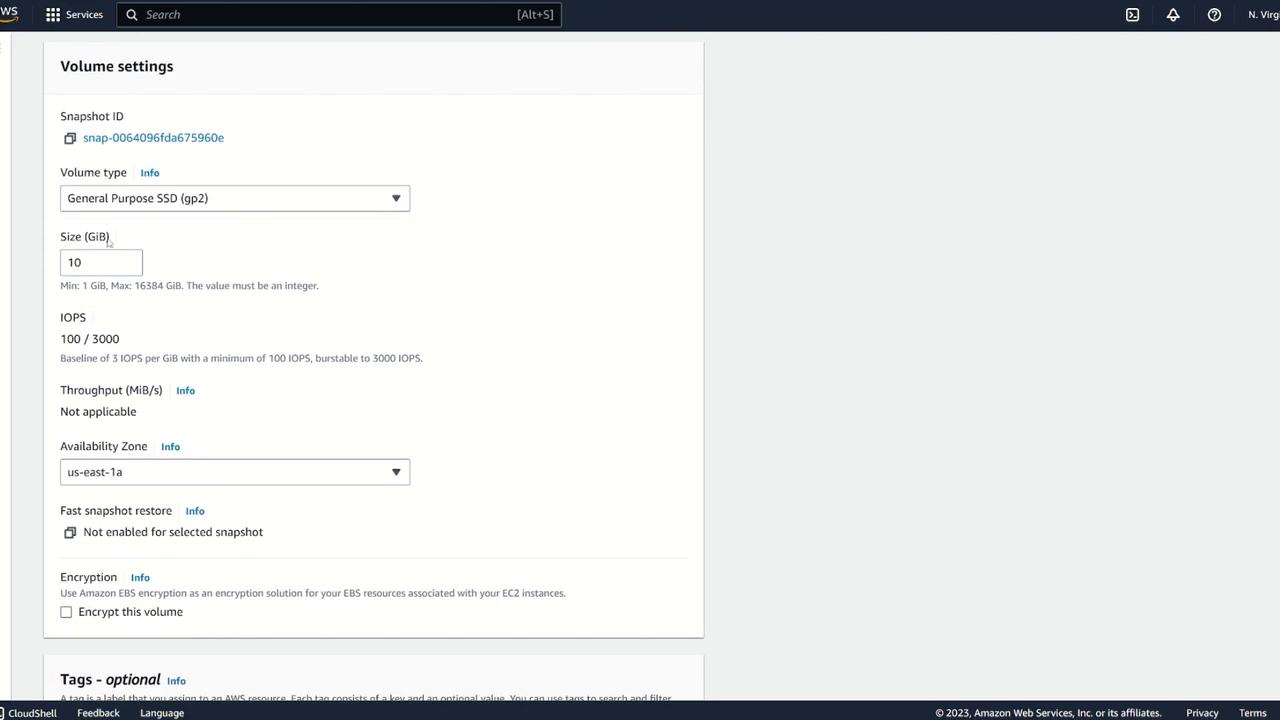
Adjust specifications (volume type or size) if necessary, ensuring the Availability Zone is set to us-east-1b.
Optionally, add a tag such as Name: EBS clone.
Create the new volume.
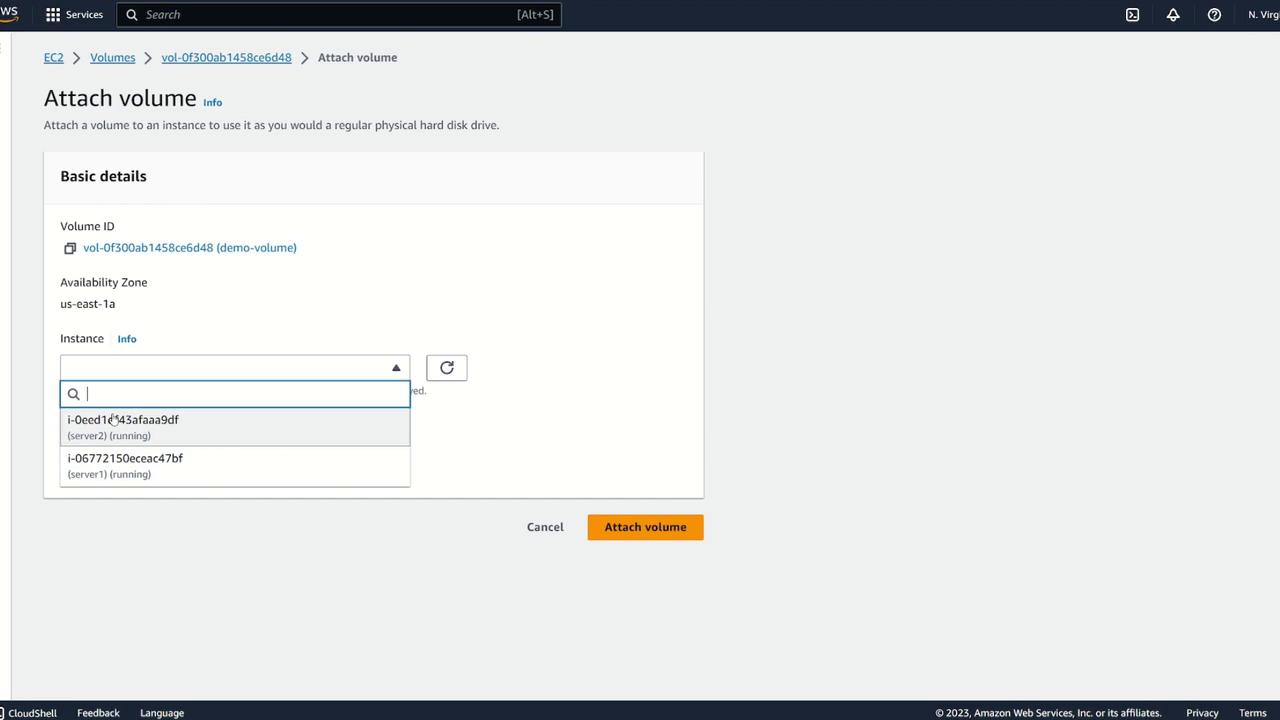
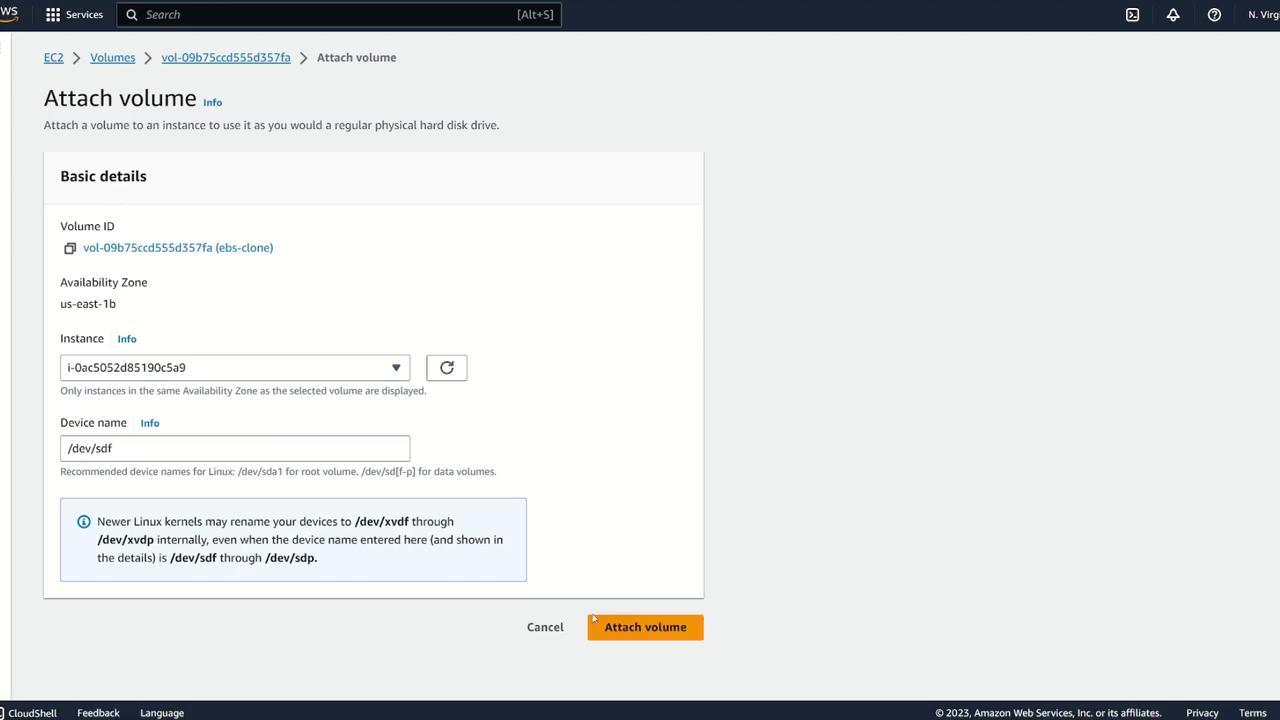
Once the new volume (EBS clone) is available in us-east-1b, attach it to Server Three:
Log in to Server Three and verify that the block device is attached by running:
lsblk
An entry for /dev/xvdf should be visible. To confirm the file system, use:
sudo file -s /dev/xvdf
The output will indicate that an XFS filesystem is present on the volume. Next, mount the volume by creating a directory and executing the mount command:
sudo mkdir /ebsdemosudo mount /dev/xvdf /ebsdemocd /ebsdemo/cat demo.txt
The content of demo.txt confirms that the original data is available:
[ec2-user@ip-10-0-20-104 ~]$ lsblkNAME MAJ:MIN RM SIZE RO TYPE MOUNTPOINTSxvda 202:0 0 8G 0 disk├─xvda1 202:1 0 8G 0 part /├─xvda127 259:0 0 1M 0 part└─xvda128 259:1 0 10M 0 partxvdf 202:80 0 10G 0 disk[ec2-user@ip-10-0-20-104 ~]$ sudo file -s /dev/xvdf/dev/xvdf: SGI XFS filesystem data (blksz 4096, inosz 512, v2 dirs)[ec2-user@ip-10-0-20-104 ~]$ sudo mkdir /ebsdemo[ec2-user@ip-10-0-20-104 ~]$ sudo mount /dev/xvdf /ebsdemo[ec2-user@ip-10-0-20-104 ~]$ cd /ebsdemo/[ec2-user@ip-10-0-20-104 ebsdemo]$ cat demo.txtI made this on server[ec2-user@ip-10-0-20-104 ebsdemo]$
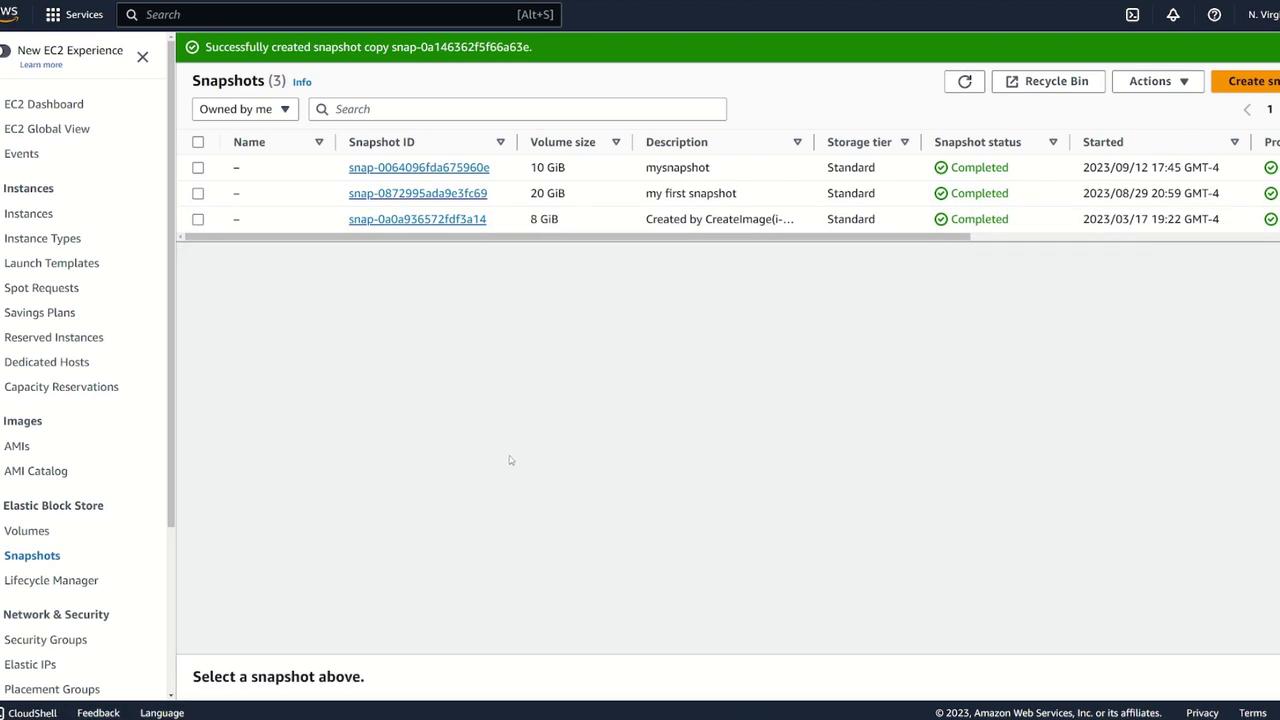
If your goal is to attach the same block storage to an EC2 instance in a different region (for example, from Northern Virginia to Ohio), you cannot directly create a volume from a snapshot in another region. Instead, copy the snapshot to the target region by following these steps:
In your snapshots view, locate and select the desired snapshot.
Click Copy Snapshot.
Provide a description (e.g., “copy of my snapshot”) and choose the destination region (for example, US East 2 for Ohio).
Complete the copy process.
Once the snapshot copy is complete, navigate to the snapshots view in the destination region (US East 2) to verify its presence.
Create a volume from the copied snapshot by:
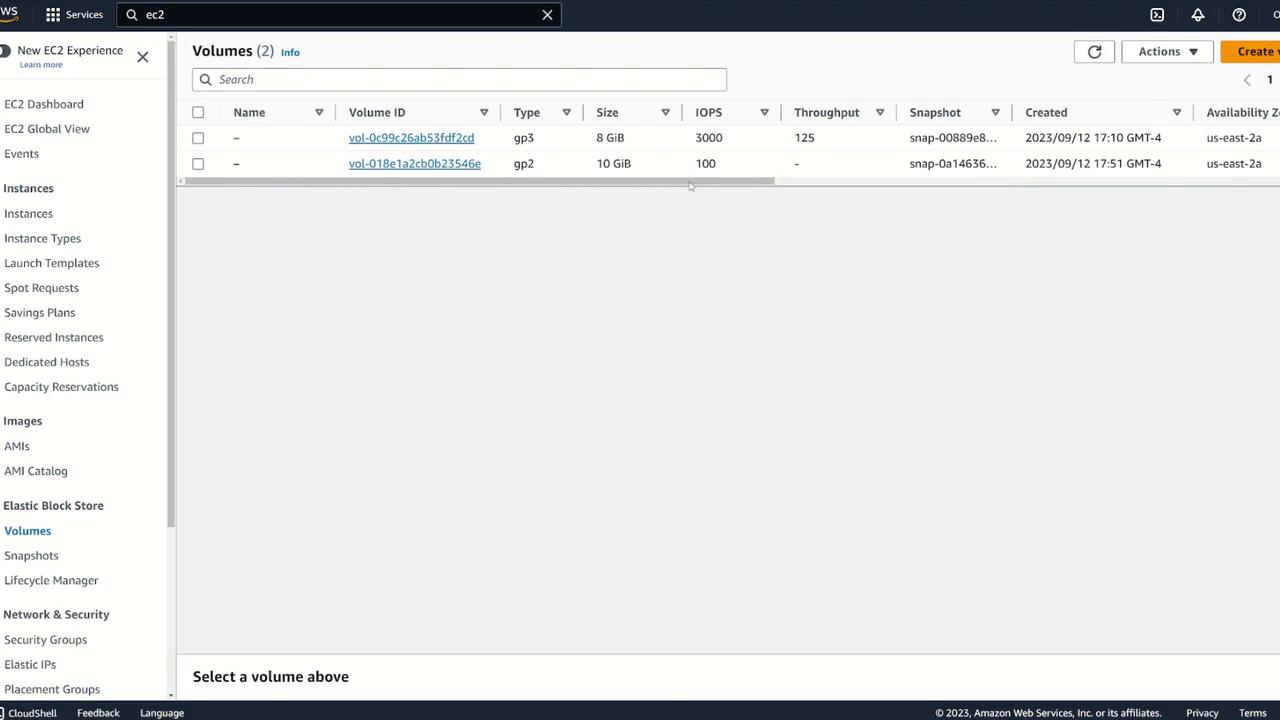
Selecting the copied snapshot.
Choosing Create Volume from Snapshot.
Setting the Availability Zone (for example, us-east-2a).
Once created, attach the new volume to Server Four.
After attaching the volume to Server Four, verify its status and data integrity by opening a terminal on Server Four and executing the following commands:
[ec2-user@ip-172-31-4-213 ~]$ sudo mkdir /ebsdemo[ec2-user@ip-172-31-4-213 ~]$ sudo mount /dev/xvdf /ebsdemo[ec2-user@ip-172-31-4-213 ~]$ cd /ebsdemo/[ec2-user@ip-172-31-4-213 ebsdemo]$ cat demo.txtI made this on server
Below is a recap of the validation commands on Server Four:
[ec2-user@ip-172-31-4-213 ~]$ lsblkNAME MAJ:MIN RM SIZE RO TYPE MOUNTPOINTSxvda 202:0 0 8G 0 disk├─xvda1 202:1 0 8G 0 part├─xvda127 259:0 0 1M 0 part└─xvda128 259:1 0 10G 0 partxvdf 202:80 0 10G 0 disk[ec2-user@ip-172-31-4-213 ~]$ sudo file -s /dev/xvdf/dev/xvdf: SGI XFS filesystem data (blksz 4096, inosz 512, v2 dirs)[ec2-user@ip-172-31-4-213 ~]$ sudo mkdir /ebsdemo[ec2-user@ip-172-31-4-213 ~]$ sudo mount /dev/xvdf /ebsdemo[ec2-user@ip-172-31-4-213 ~]$ cd /ebsdemo/[ec2-user@ip-172-31-4-213 ebsdemo]$ cat demo.txtI made this on server
This guide demonstrates:
How to move an EBS volume between instances in the same Availability Zone.
How to create a snapshot and use it to transfer data to an instance in a different Availability Zone.
How to copy a snapshot across regions and create a volume from it.
Thank you for following along. We hope this article improves your efficiency in managing EBS volumes within AWS. For additional reading, refer to the AWS Documentation.