

Navigating to the EC2 Service
Begin by searching for the EC2 service in the AWS console. Scroll down and select the Auto Scaling groups option, then click Create Auto Scaling group.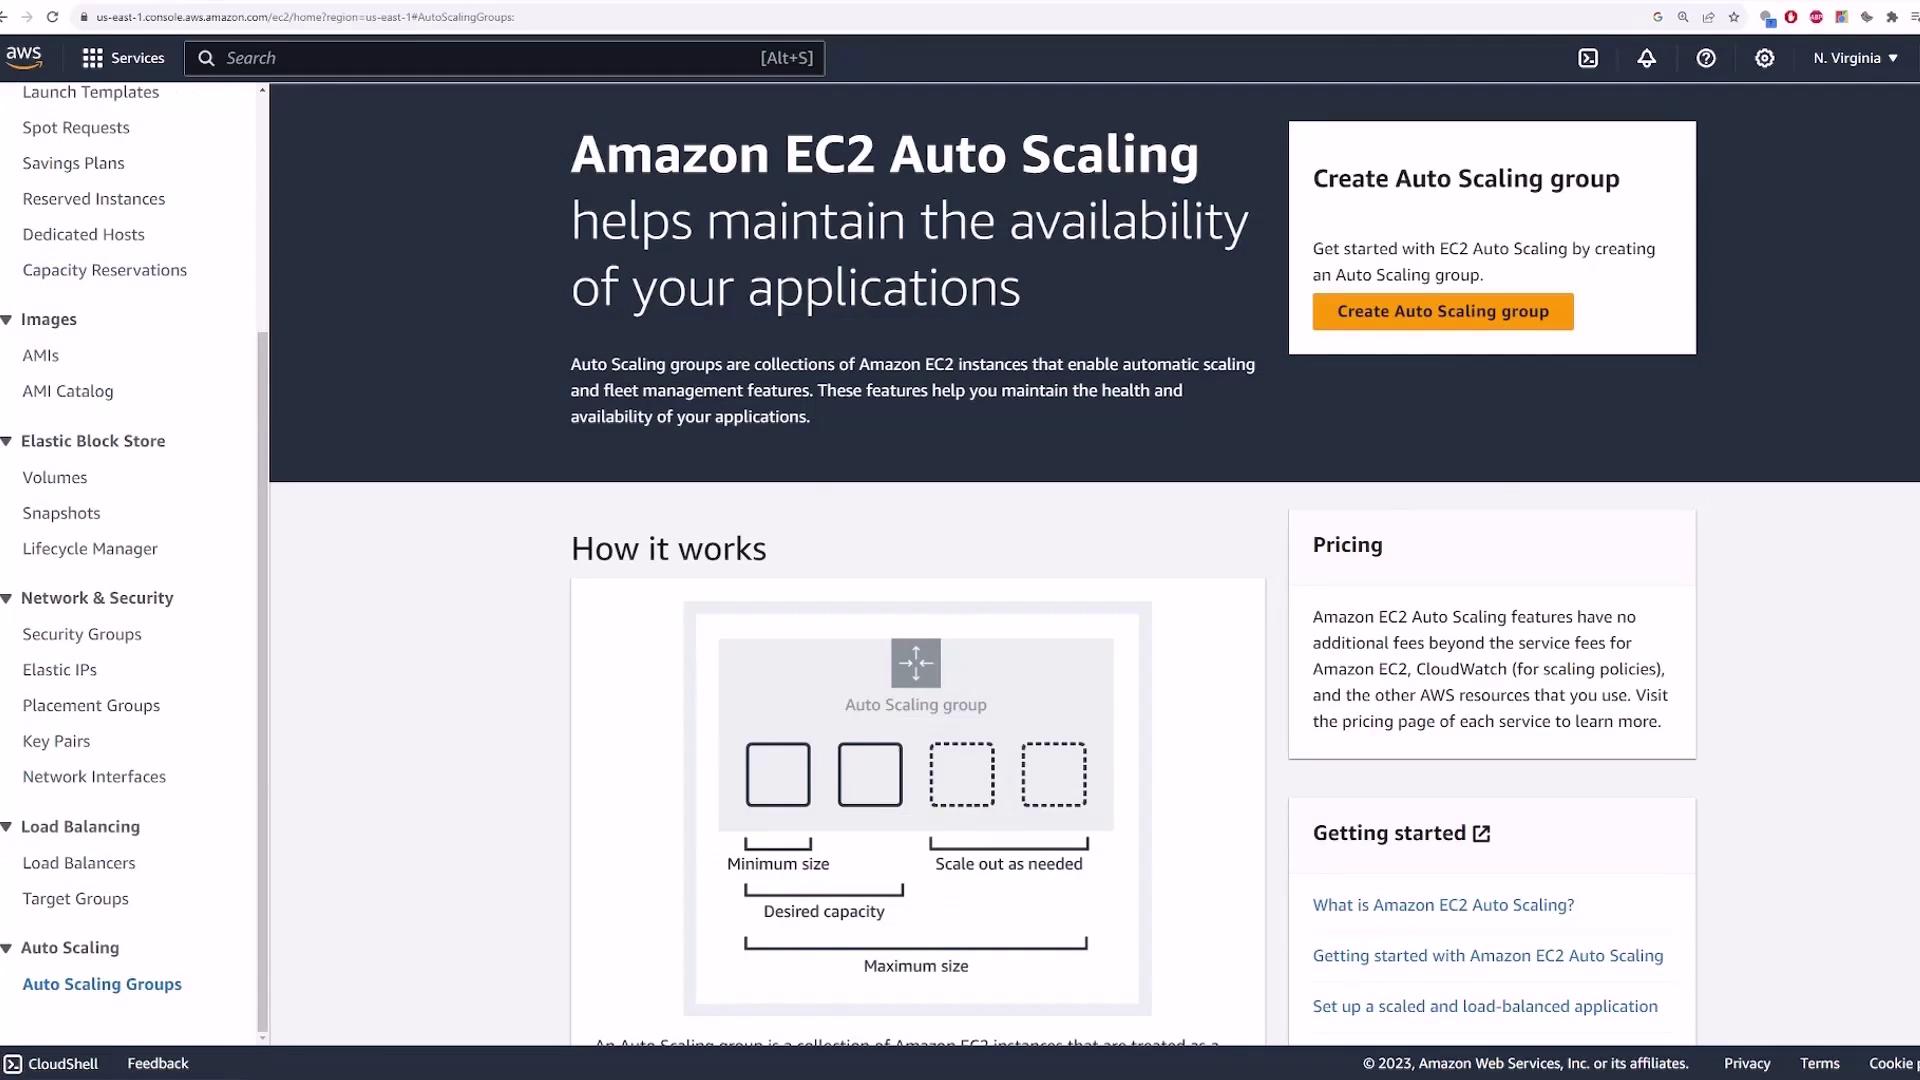
Creating an Auto Scaling Group
Enter a name for the group (e.g., “web auto scale”) and specify either a launch template or a launch configuration. A launch template is recommended because it provides more customization options such as EC2 instance type, key pair, and security groups.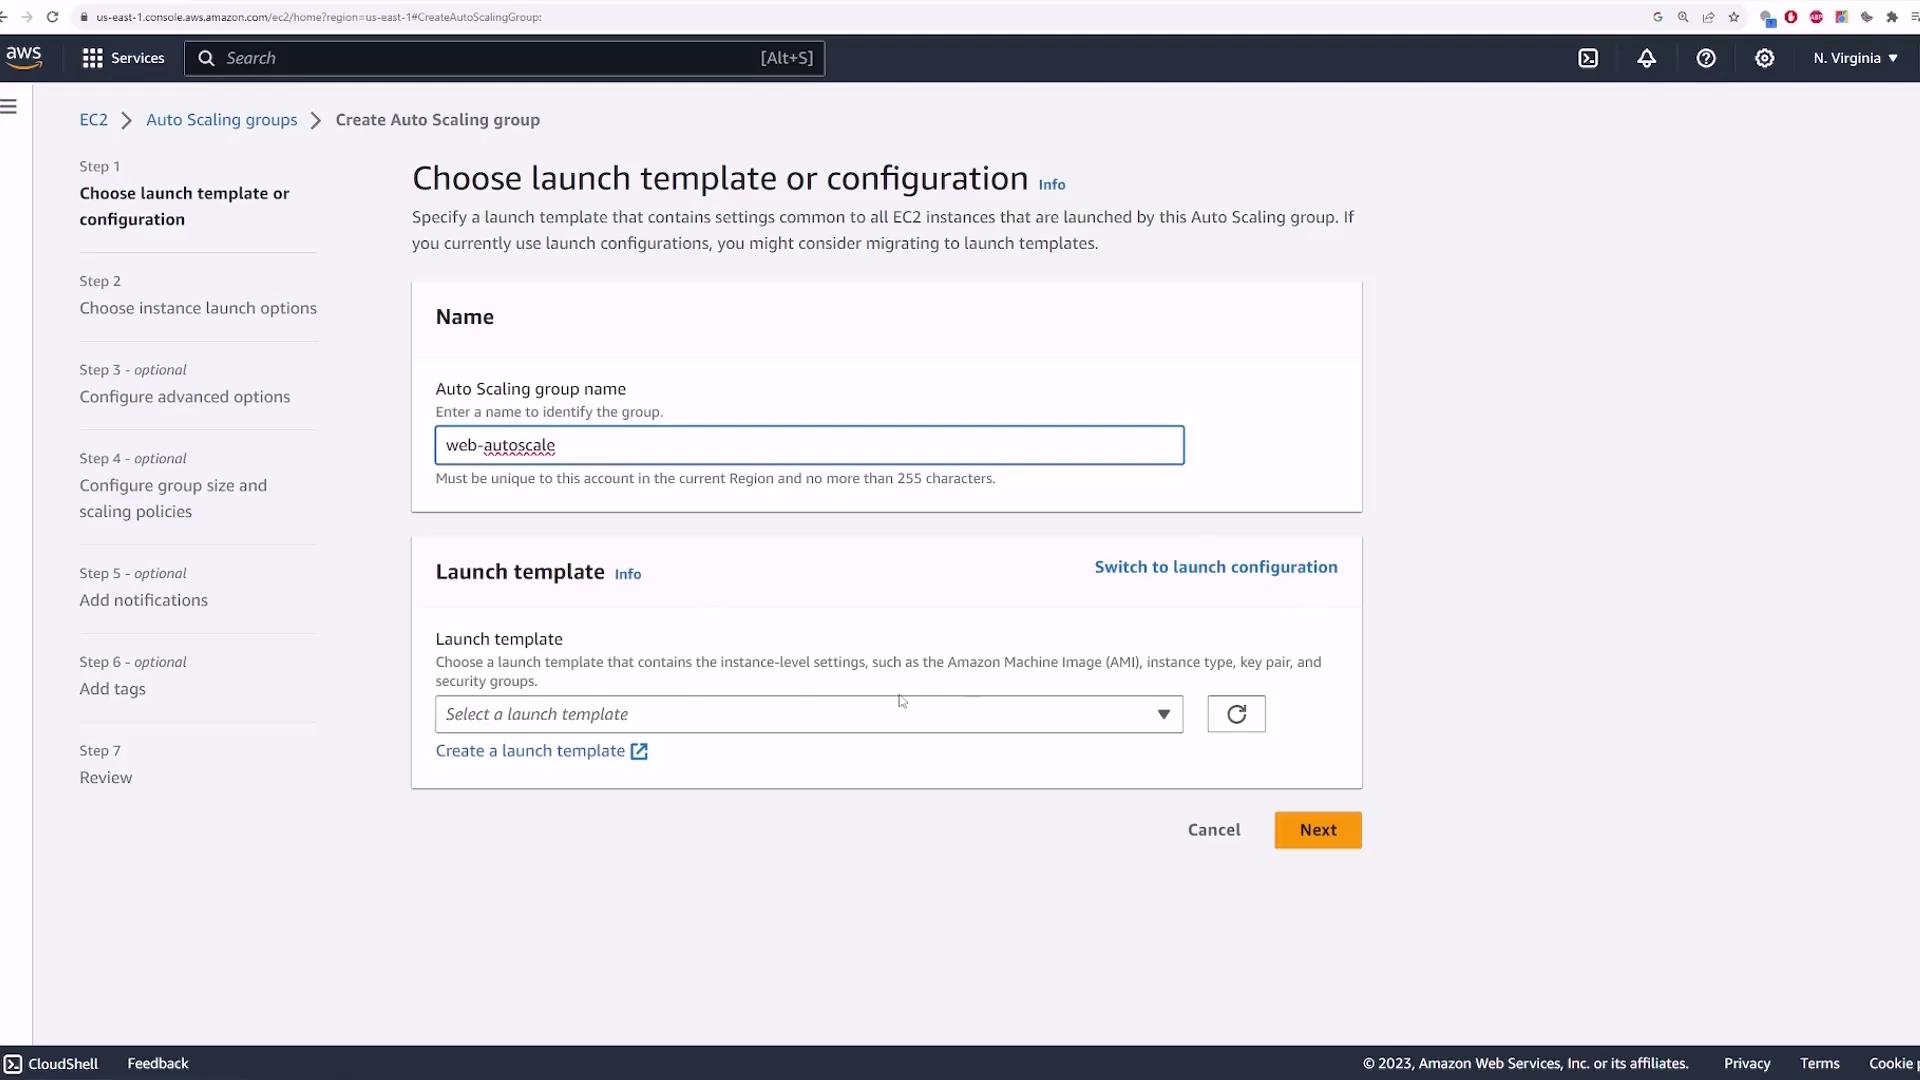
Creating a Launch Template
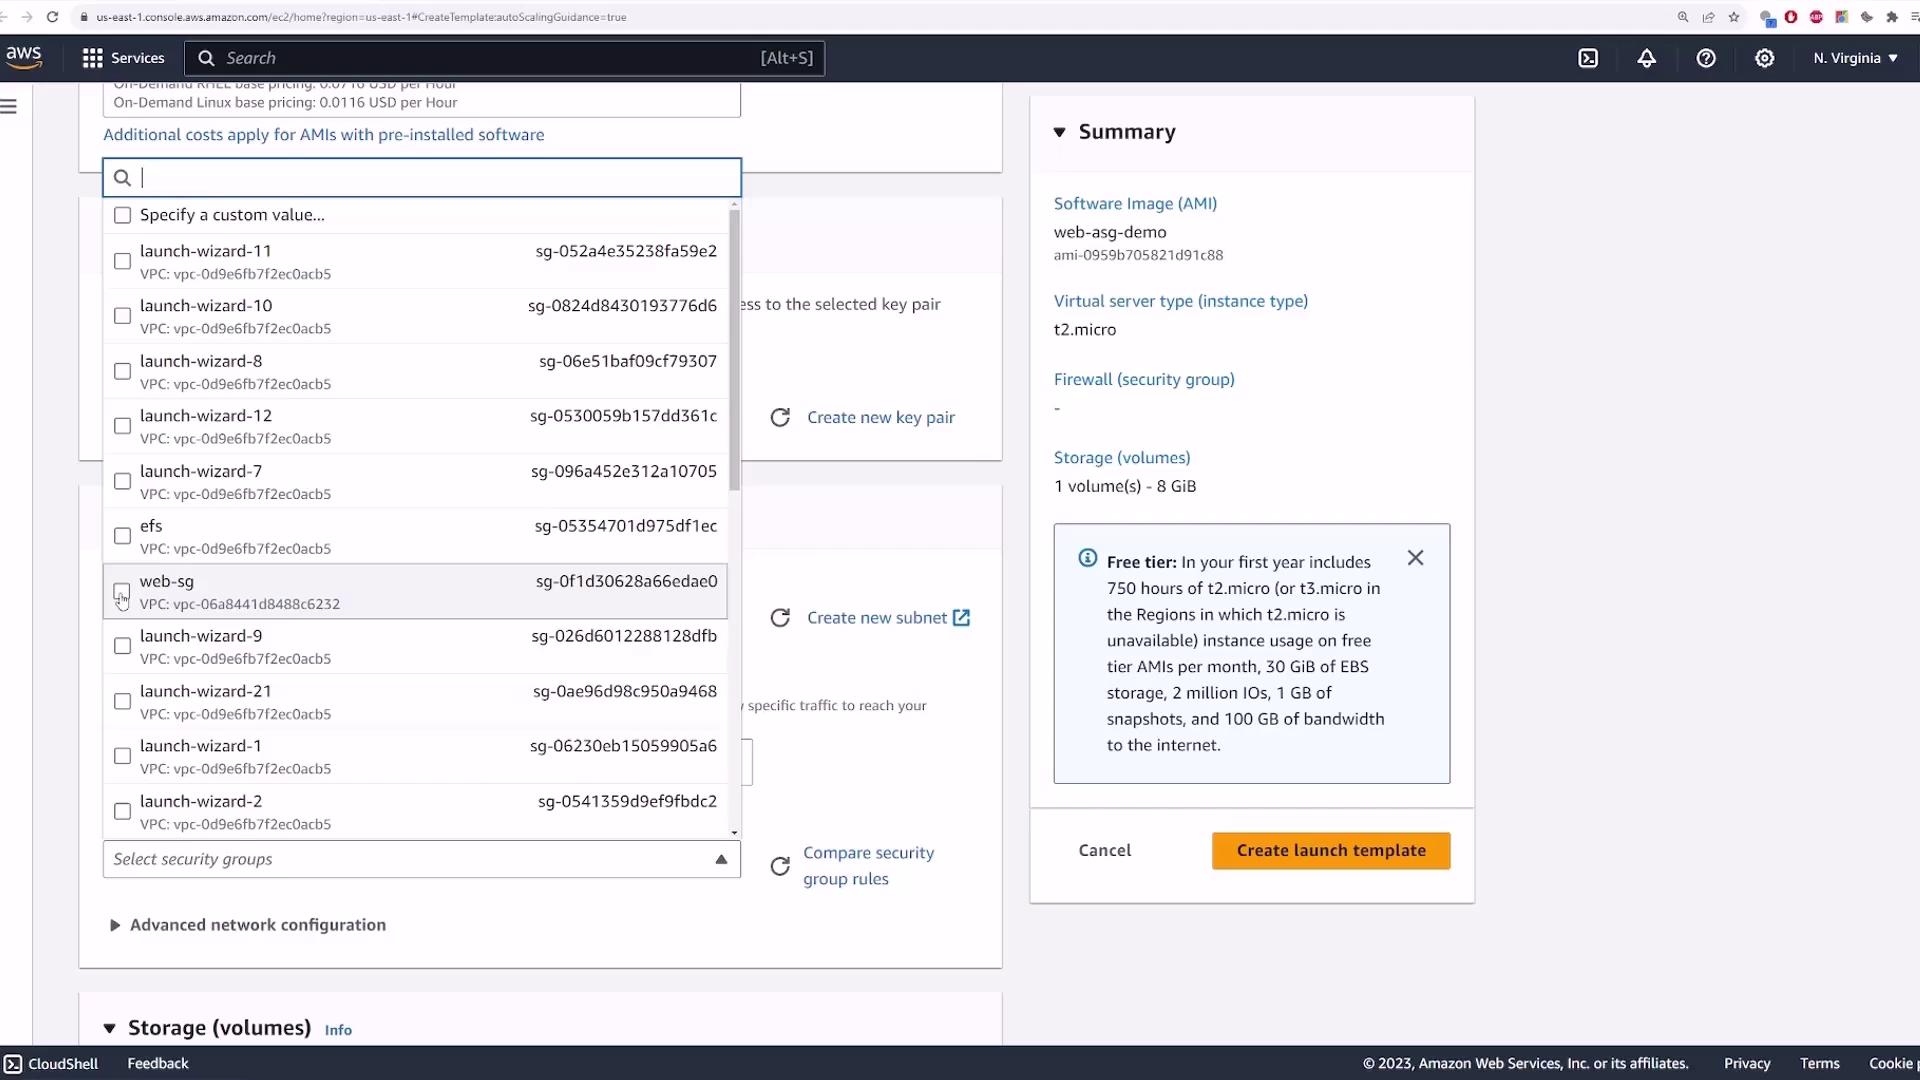
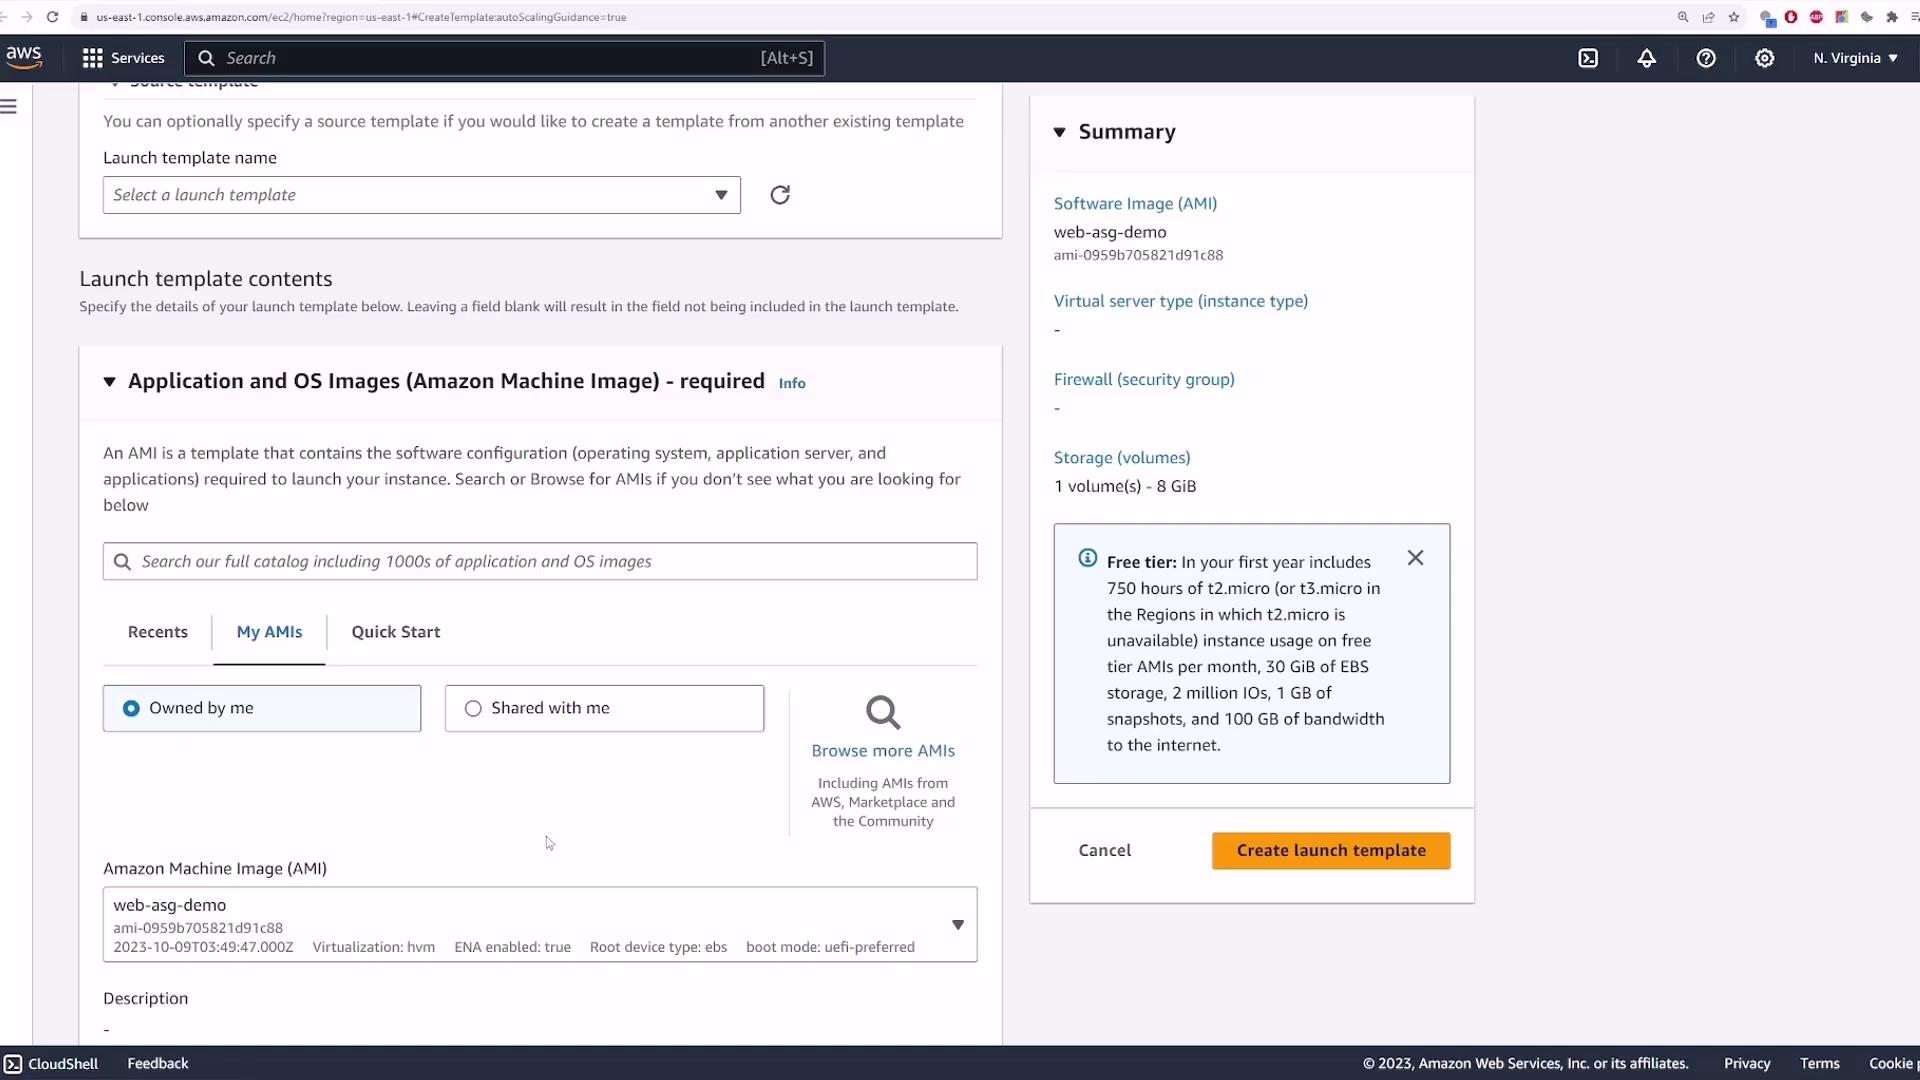
In the new tab, provide the following details:- Template Name: my web template
- Description: prod web server
- (Optional) Add tags or select a source template if you wish to build upon an existing configuration.

Configuring the Auto Scaling Group
Return to the Auto Scaling group tab and refresh the page to see your newly created launch template. Select my web template and ensure that version one is chosen. Scroll down to review and confirm your configuration. Next, choose the VPC (for example, “demo VPC”) and select the appropriate availability zones and subnets for deployment. If you plan to use a load balancer that sits in public subnets, deploy the EC2 instances in private subnets.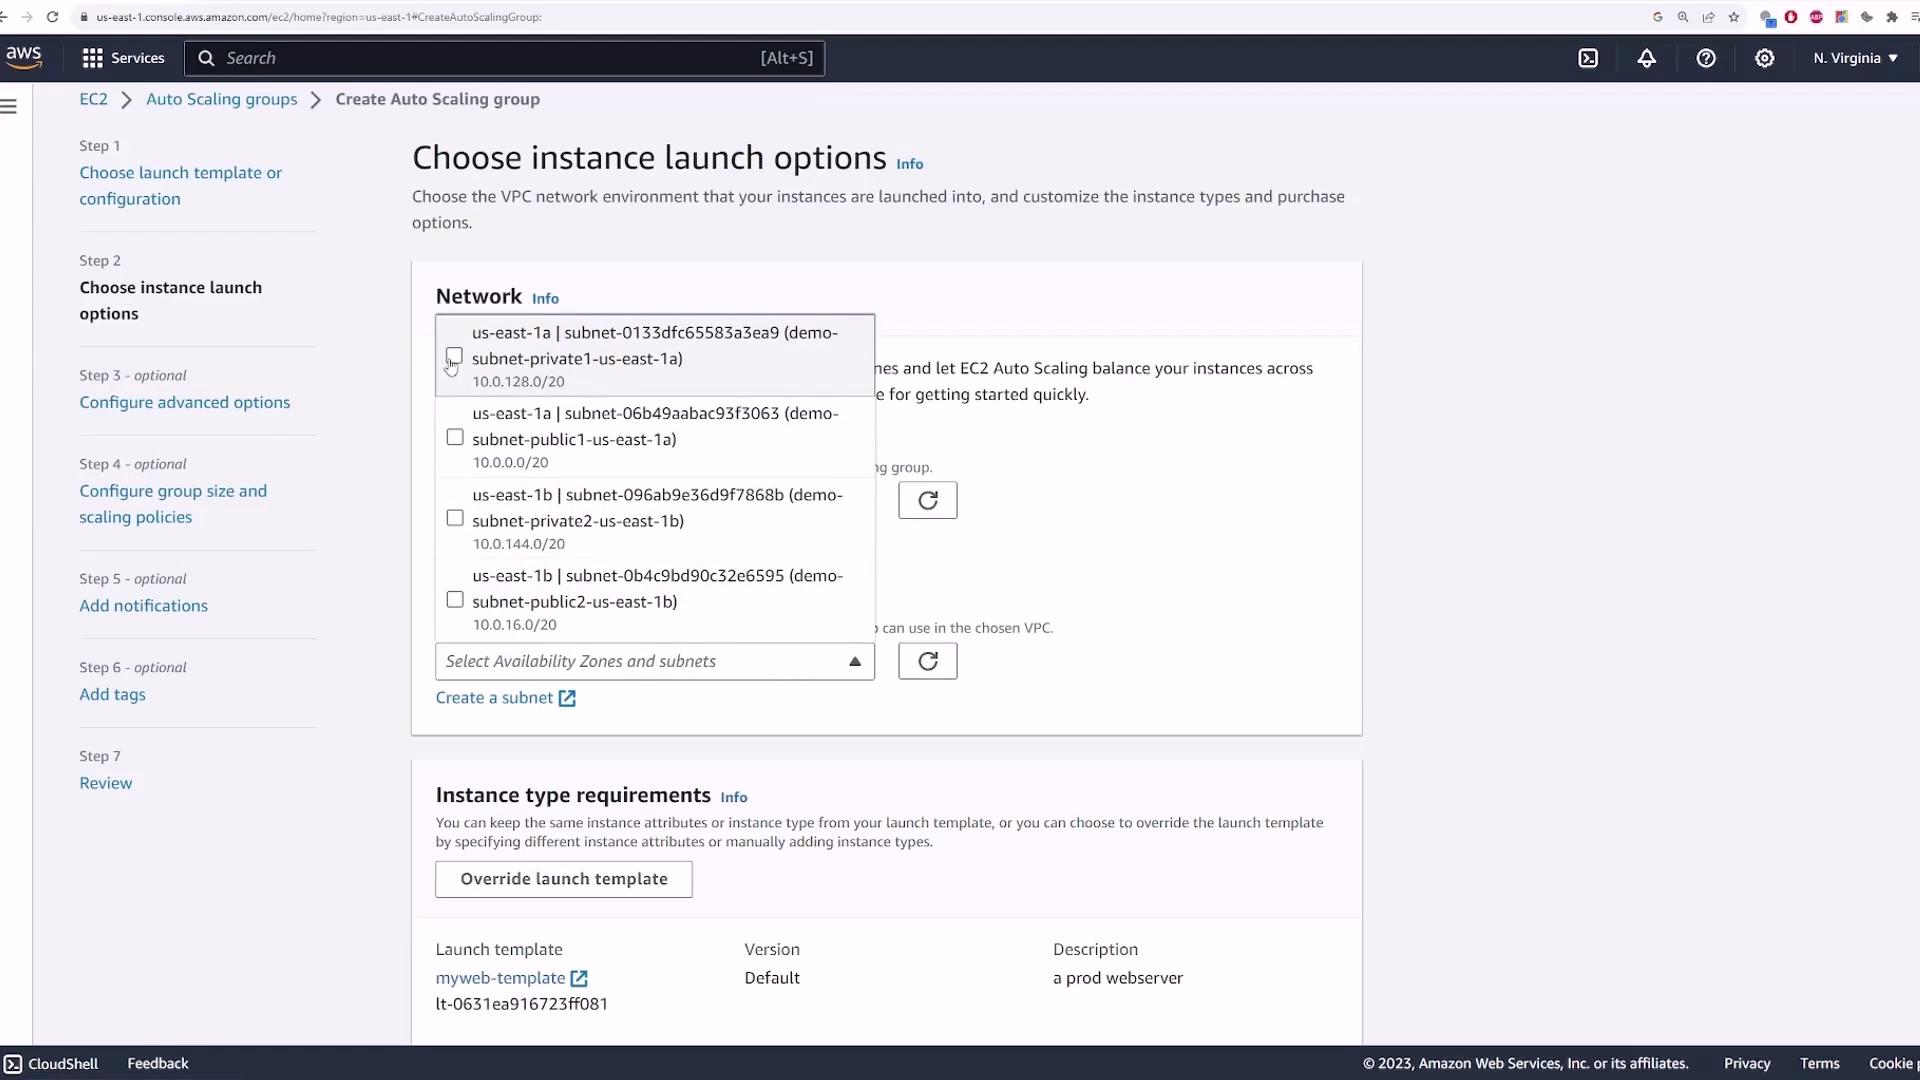
Configuring the Load Balancer
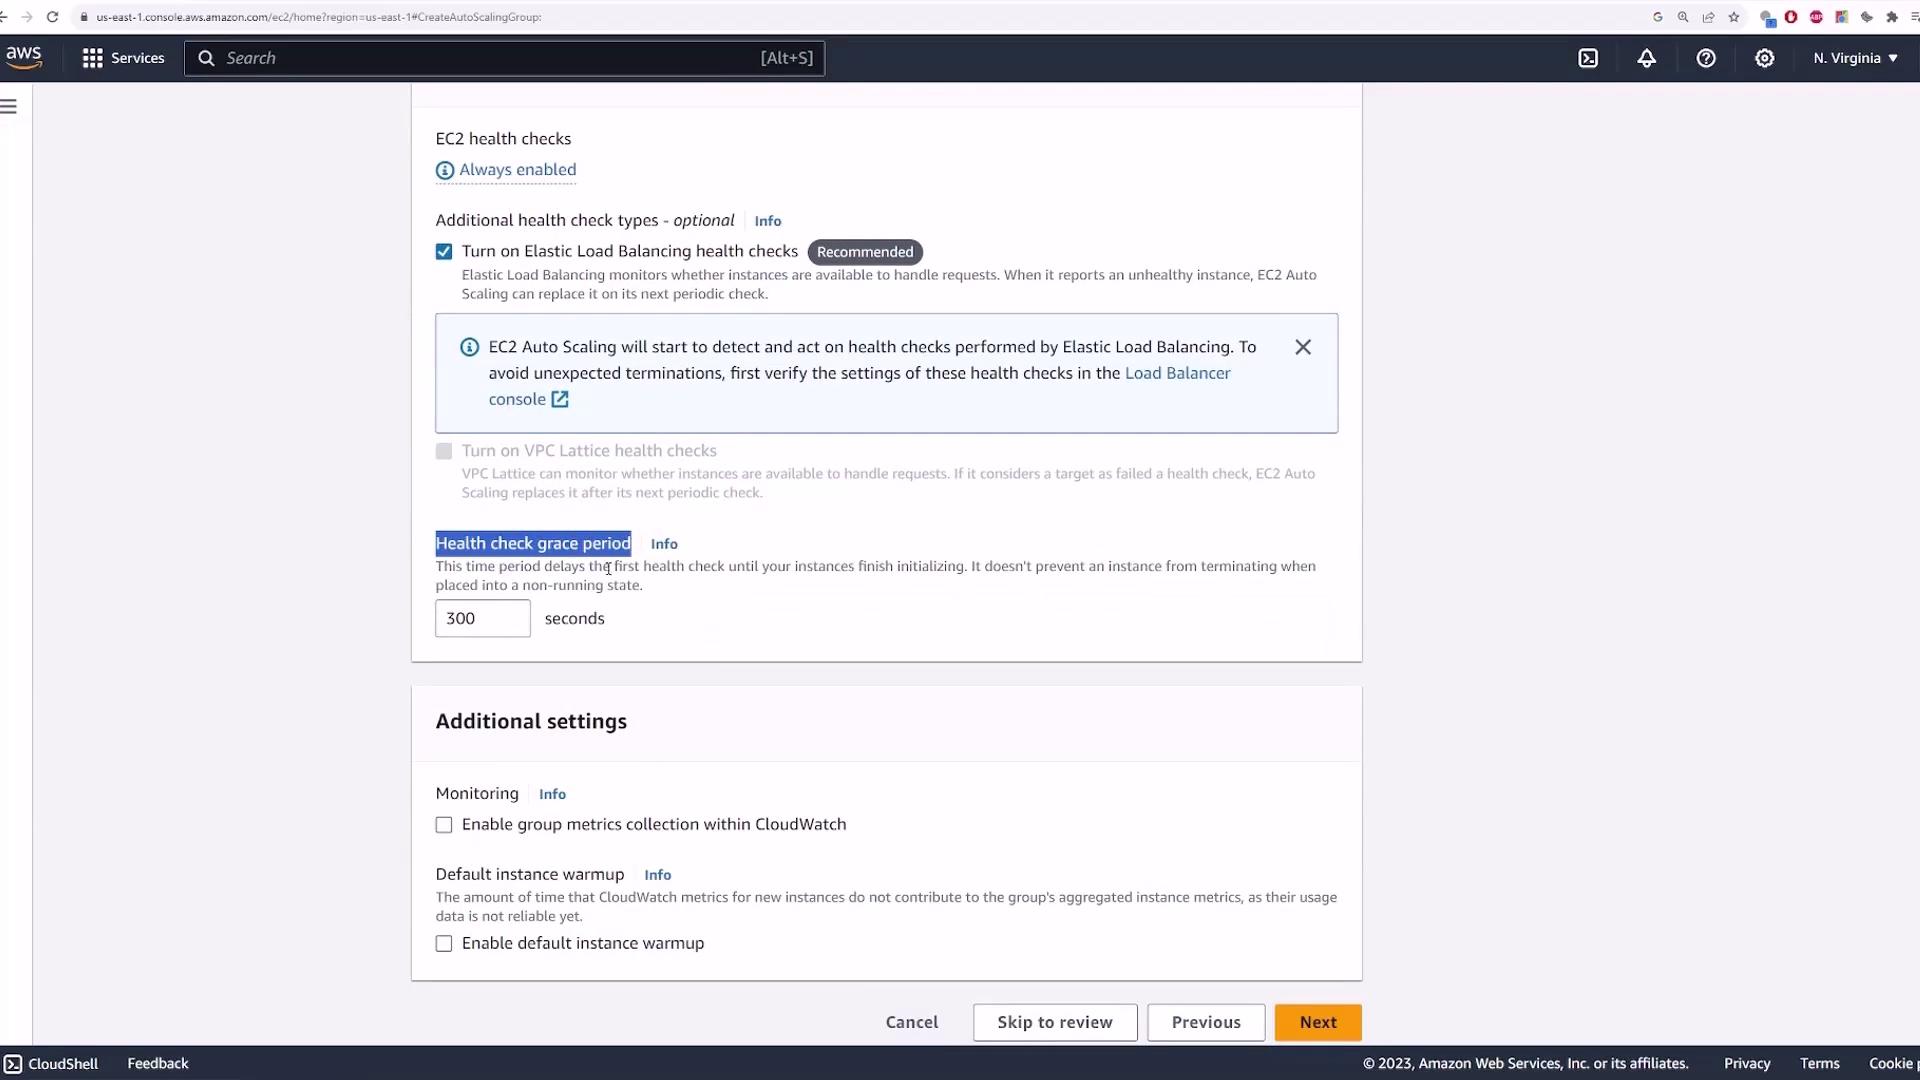
At the next step, select the option to create a load balancer. Choose Create a new load balancer and then select an Application Load Balancer—a suitable choice for web servers. Use a default name (e.g., “web auto scale one”) and select internet facing as the scheme to handle public HTTP traffic. Select the public subnets for your load balancer. By default, HTTP traffic is handled on port 80. You will also need to create a target group to forward the load balancer traffic to your EC2 instances. Name the target group (e.g., “web auto scale one tg”) and add any optional tags if required. Additional settings like VPC peering, health checks (with a default grace period of 300 seconds), and CloudWatch metrics can also be configured.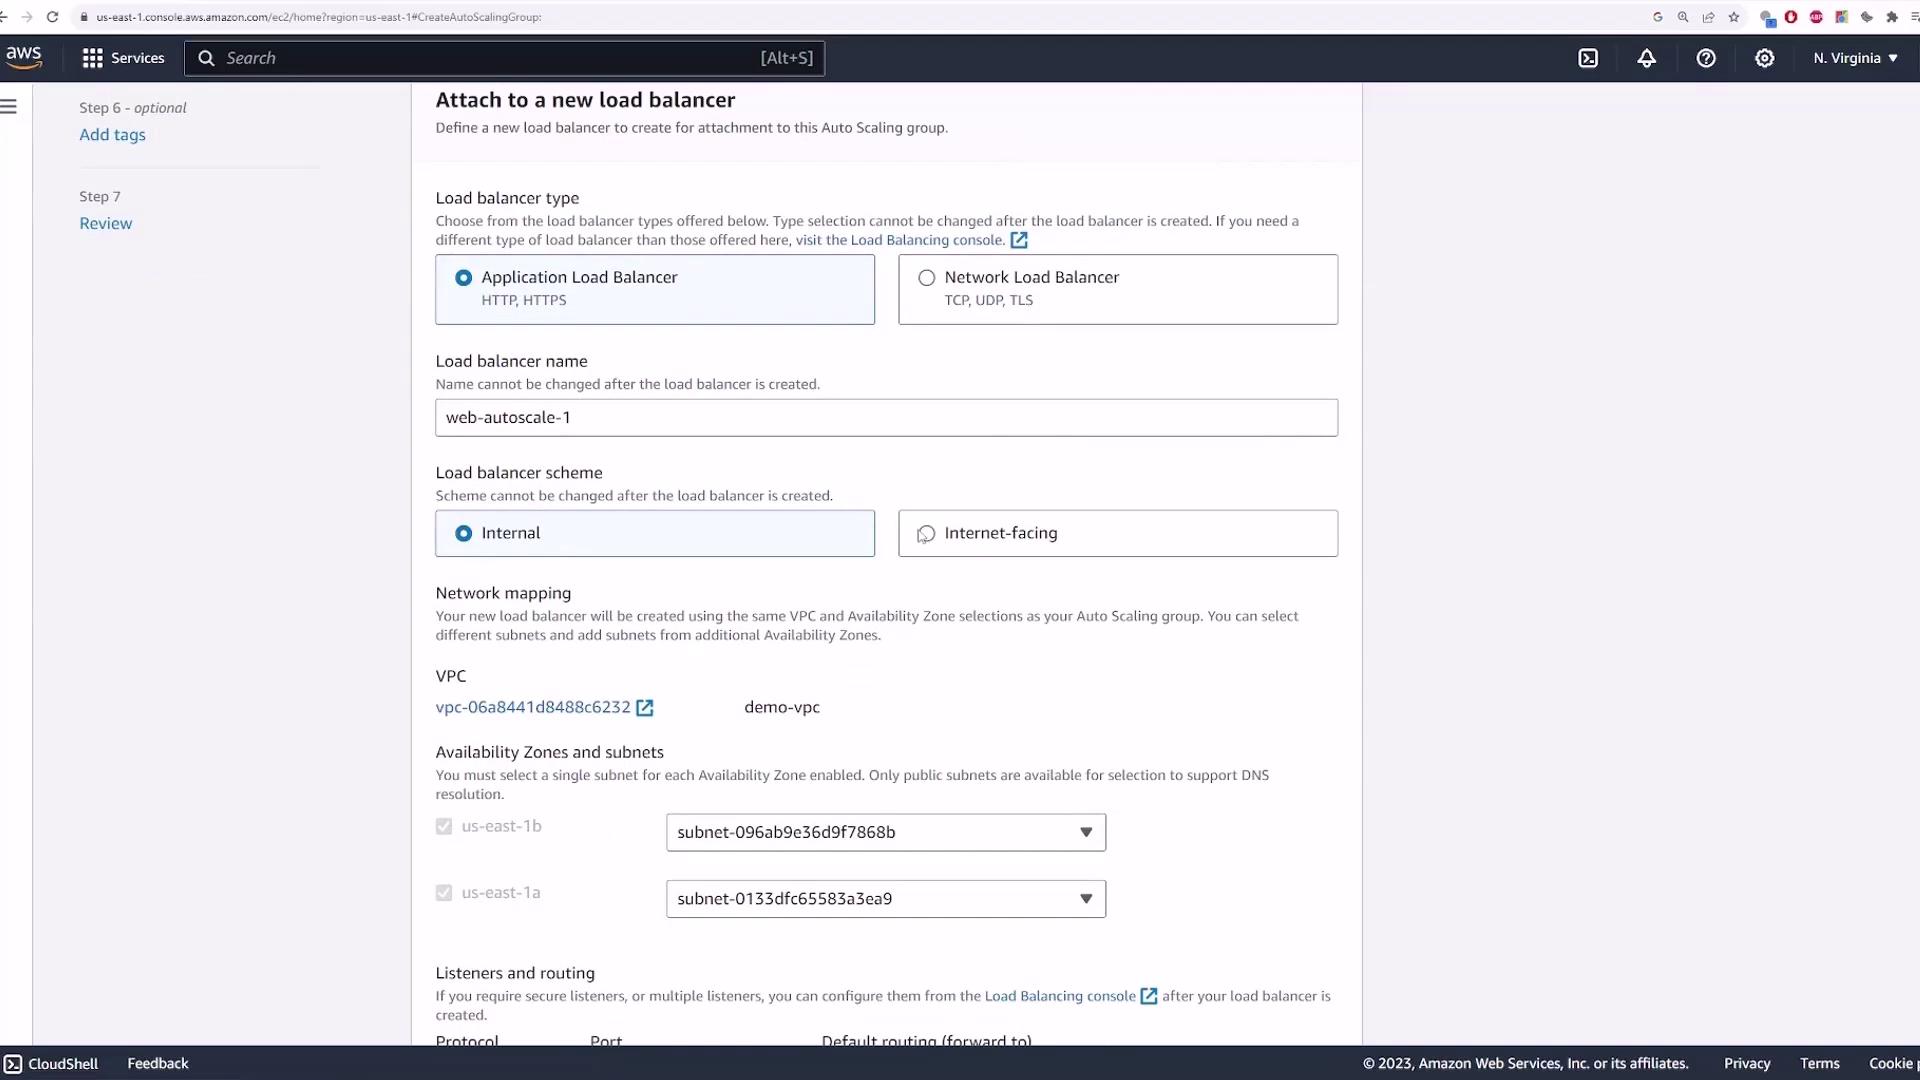
- Desired Capacity: 1
- Minimum Capacity: 1 (ensuring at least one server is always active)
- Maximum Capacity: 3 (to handle high load scenarios)
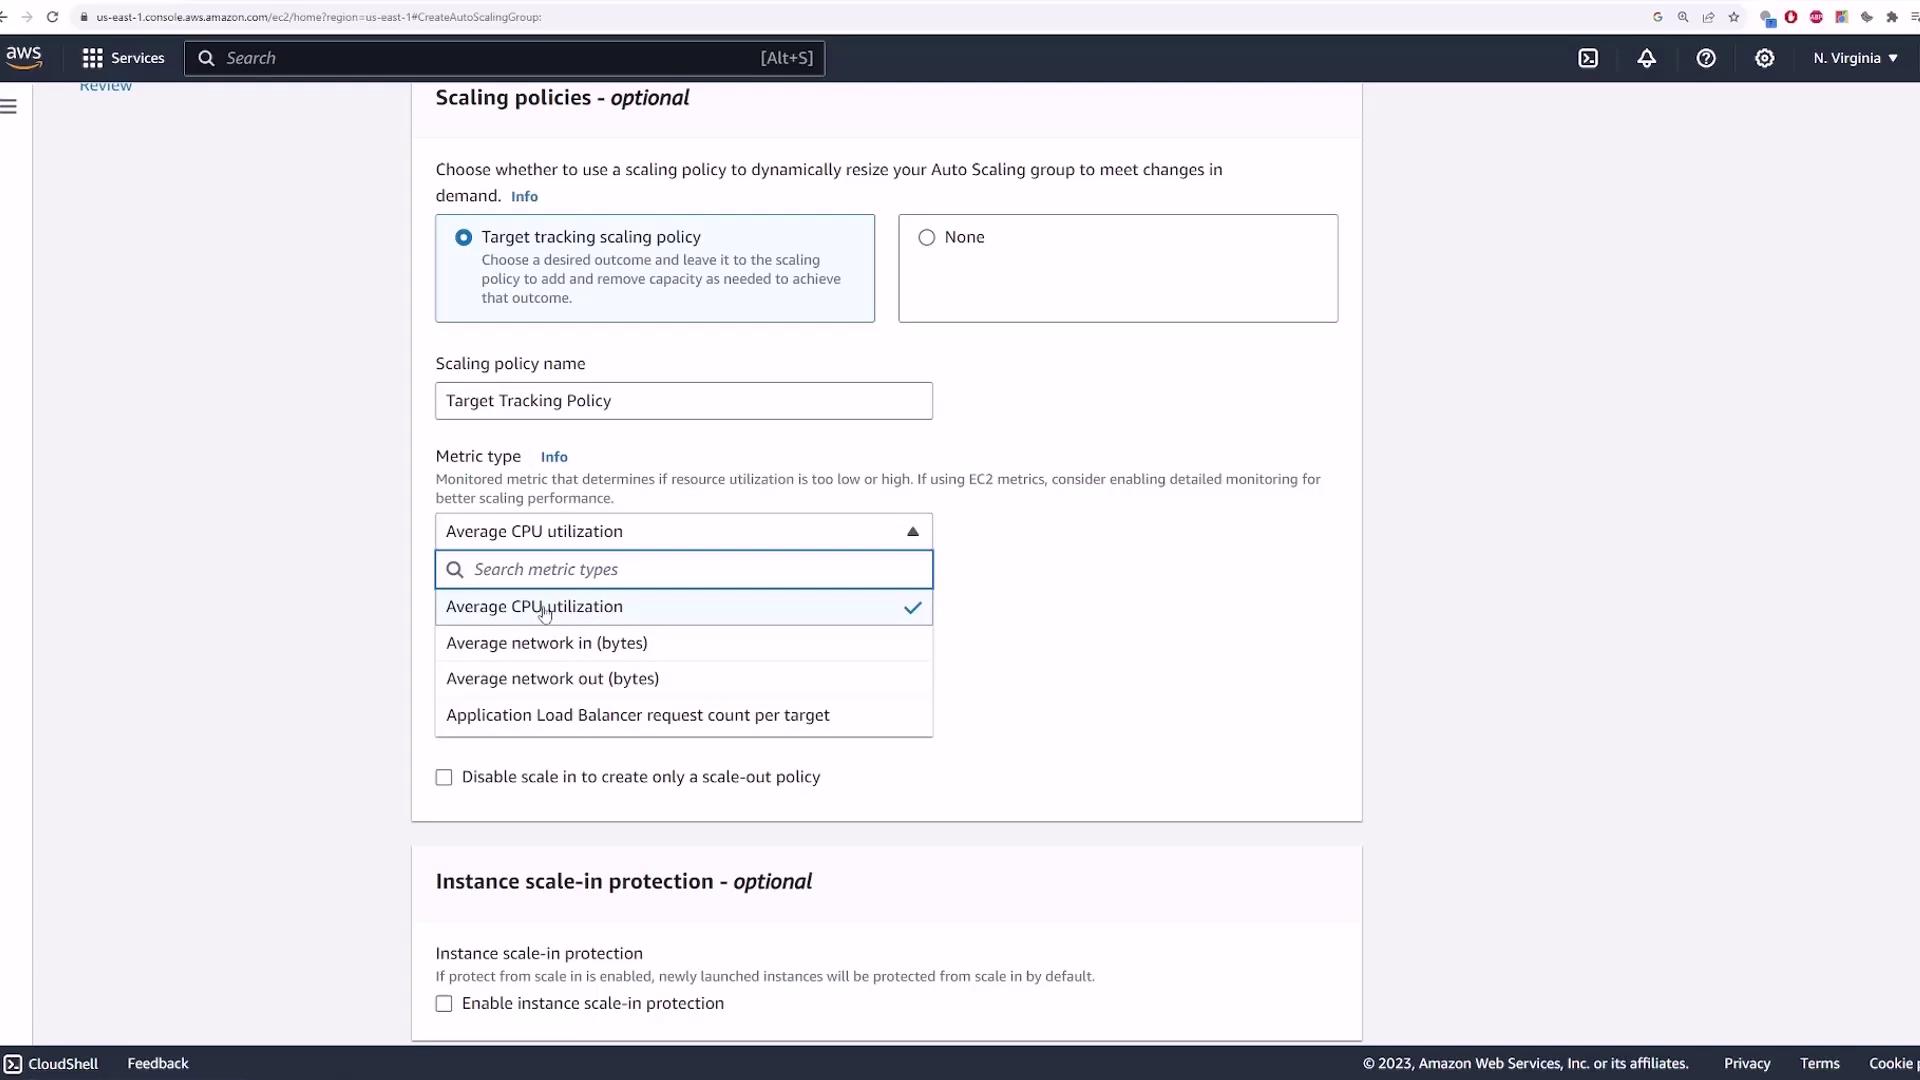
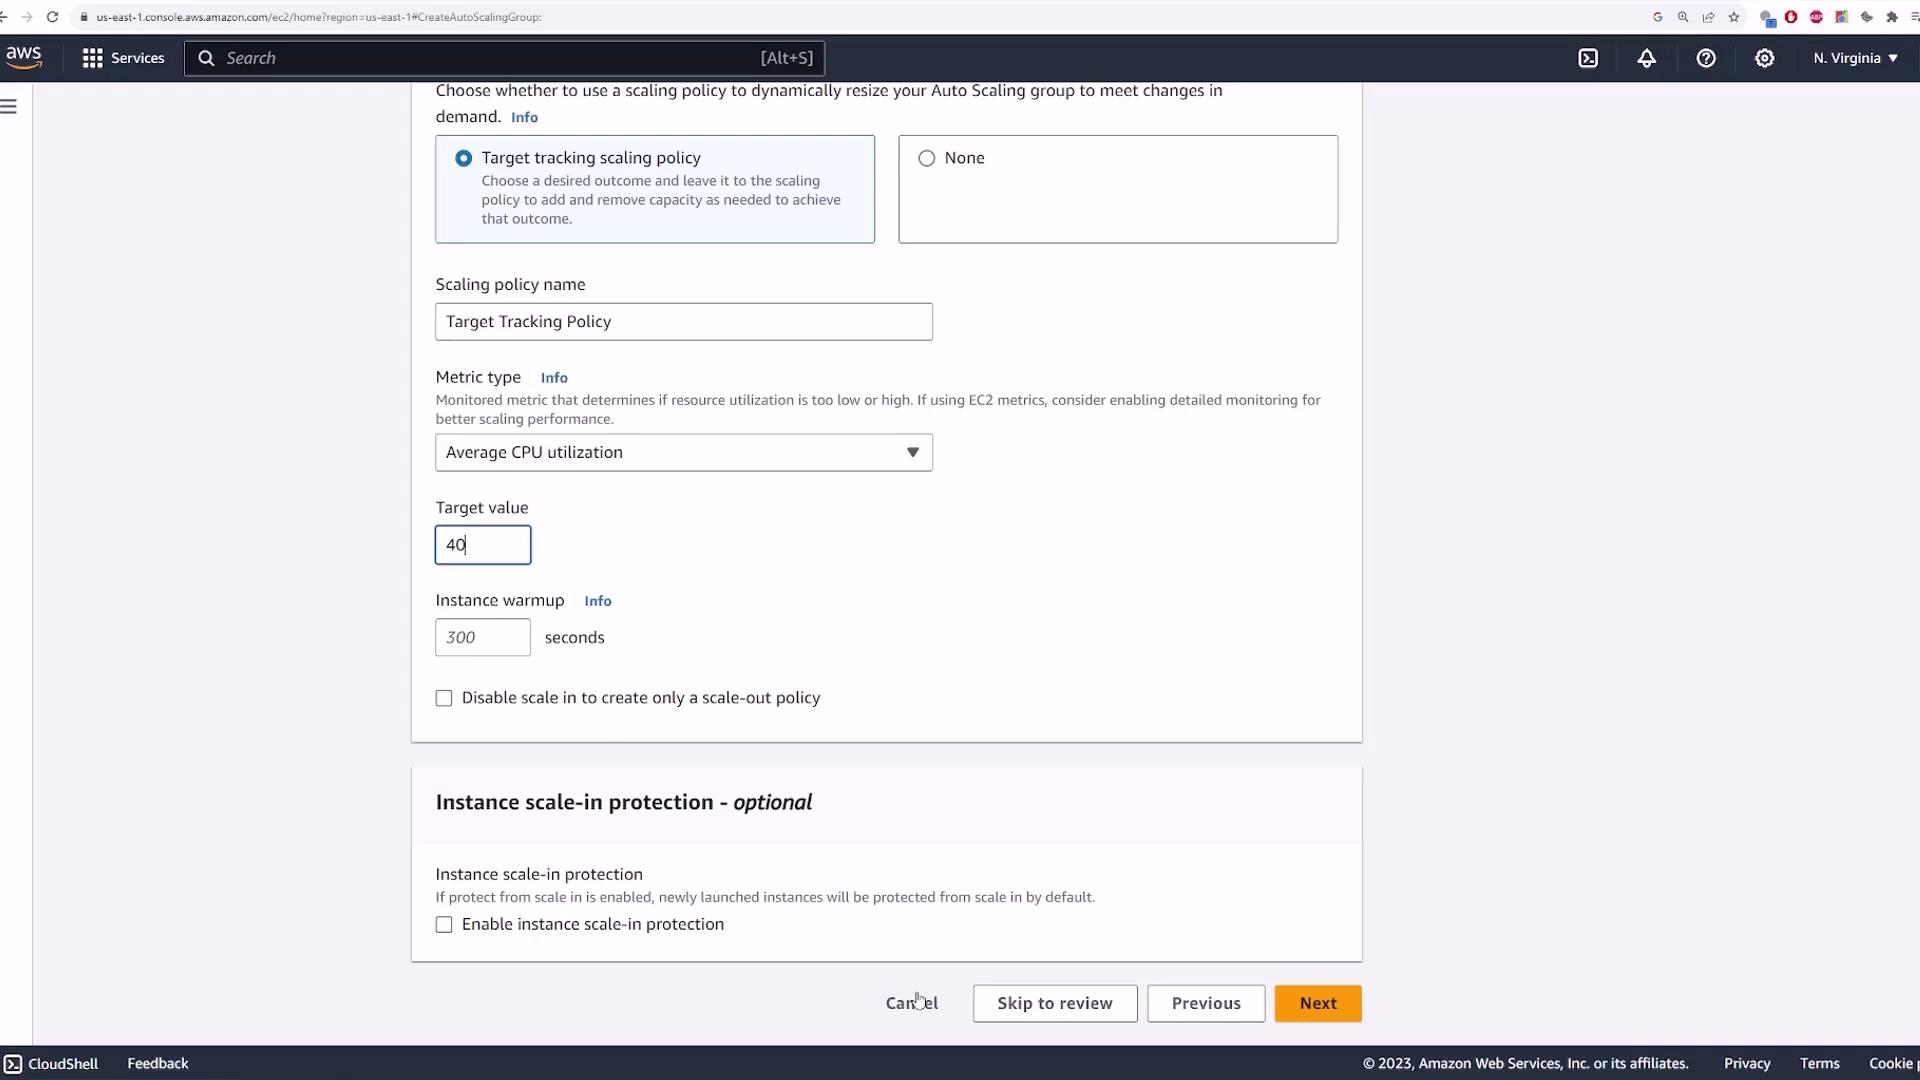
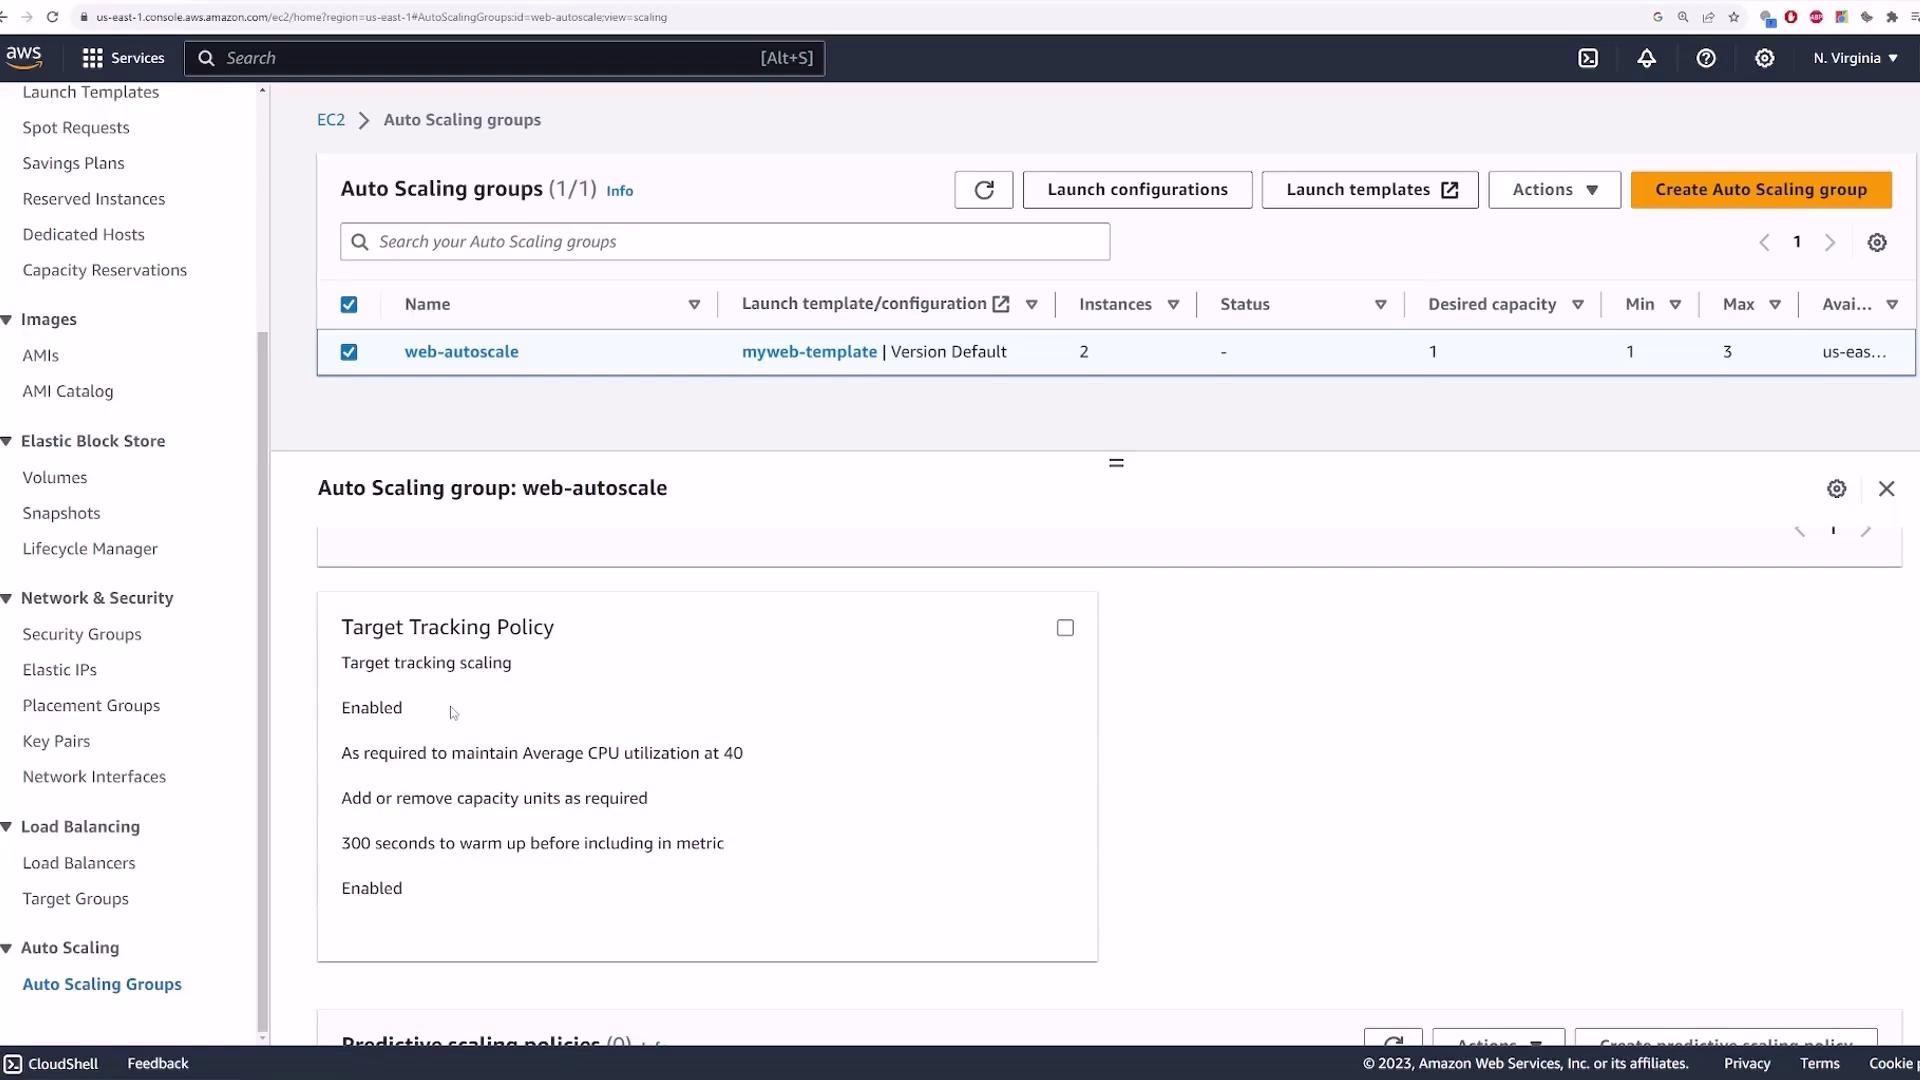
- Set the Metric Type to “Average CPU utilization.”
- Define the target value to maintain around 40% CPU usage (adjust according to your application requirements).
Verification and Activity Review
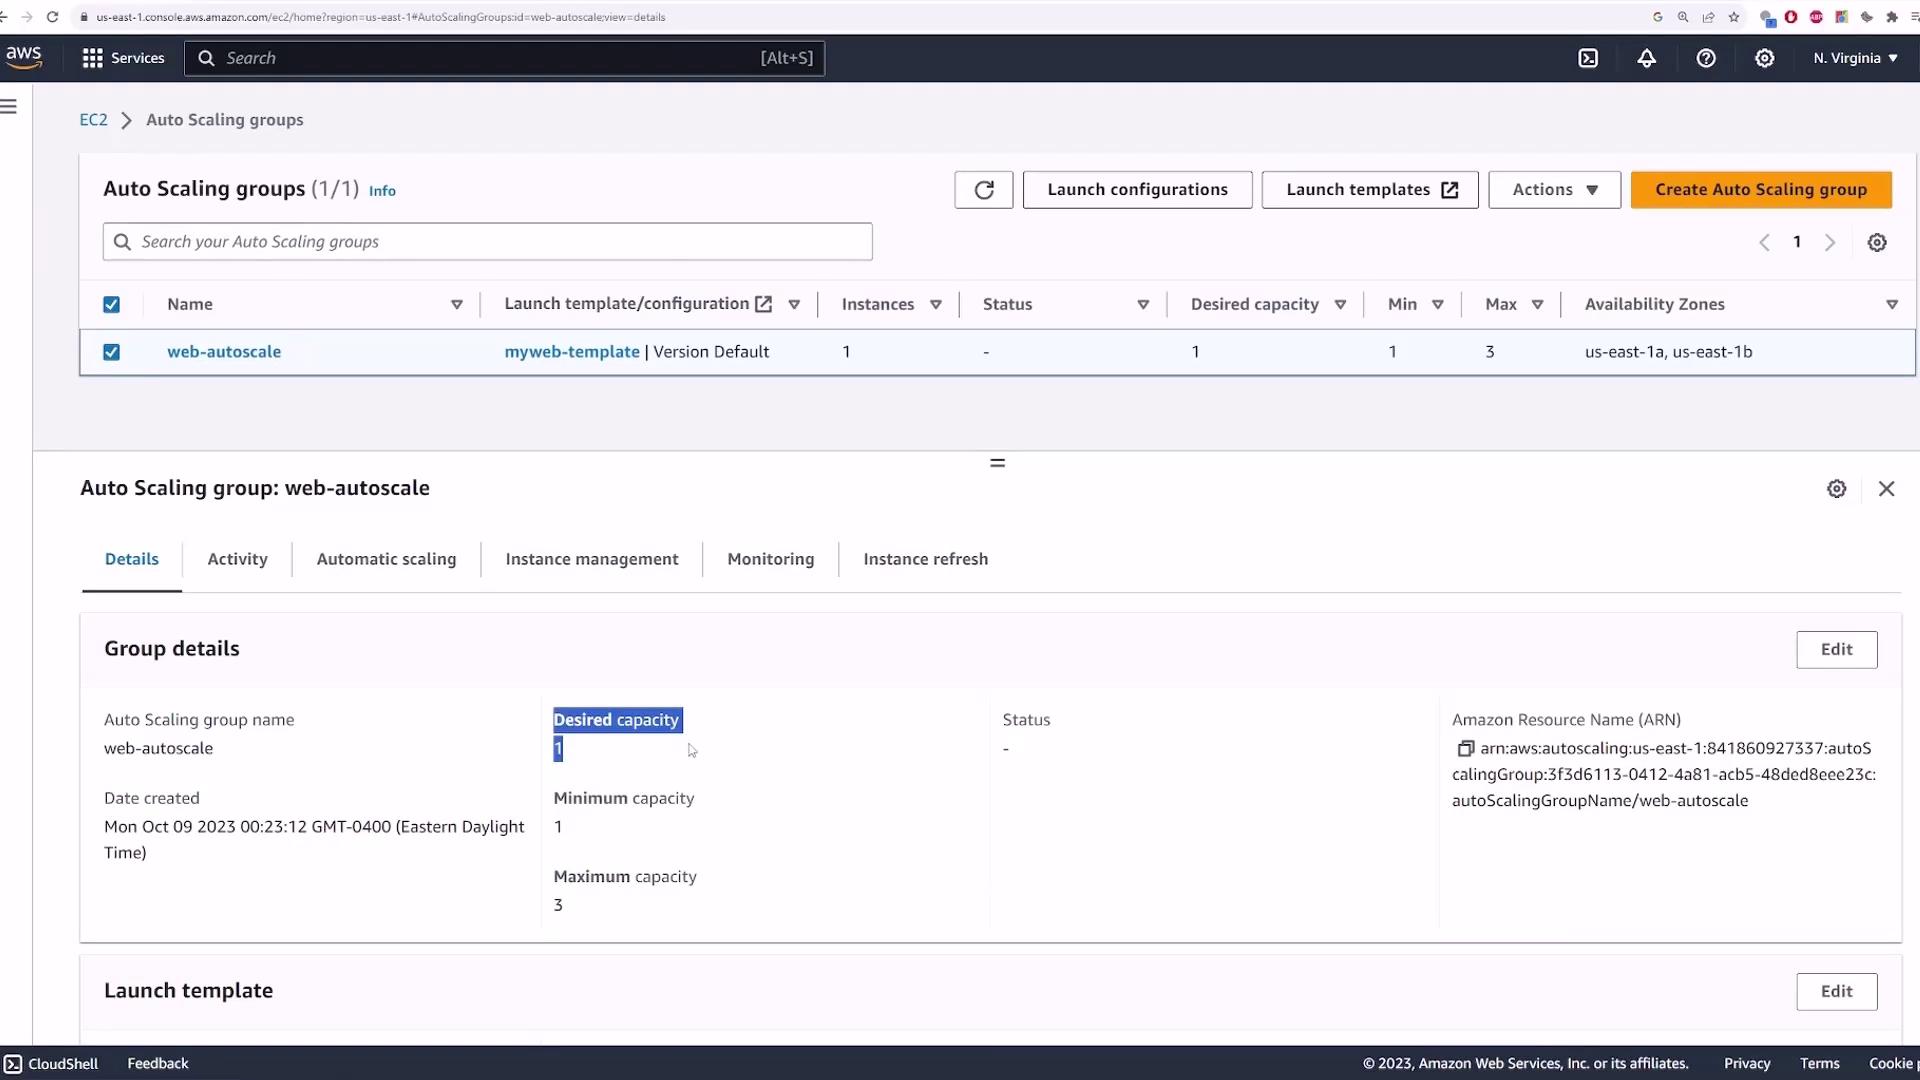
After creation, click on your Auto Scaling group to verify its settings:- Desired Capacity: 1
- Minimum Capacity: 1
- Maximum Capacity: 3
Testing Auto Scaling Functionality
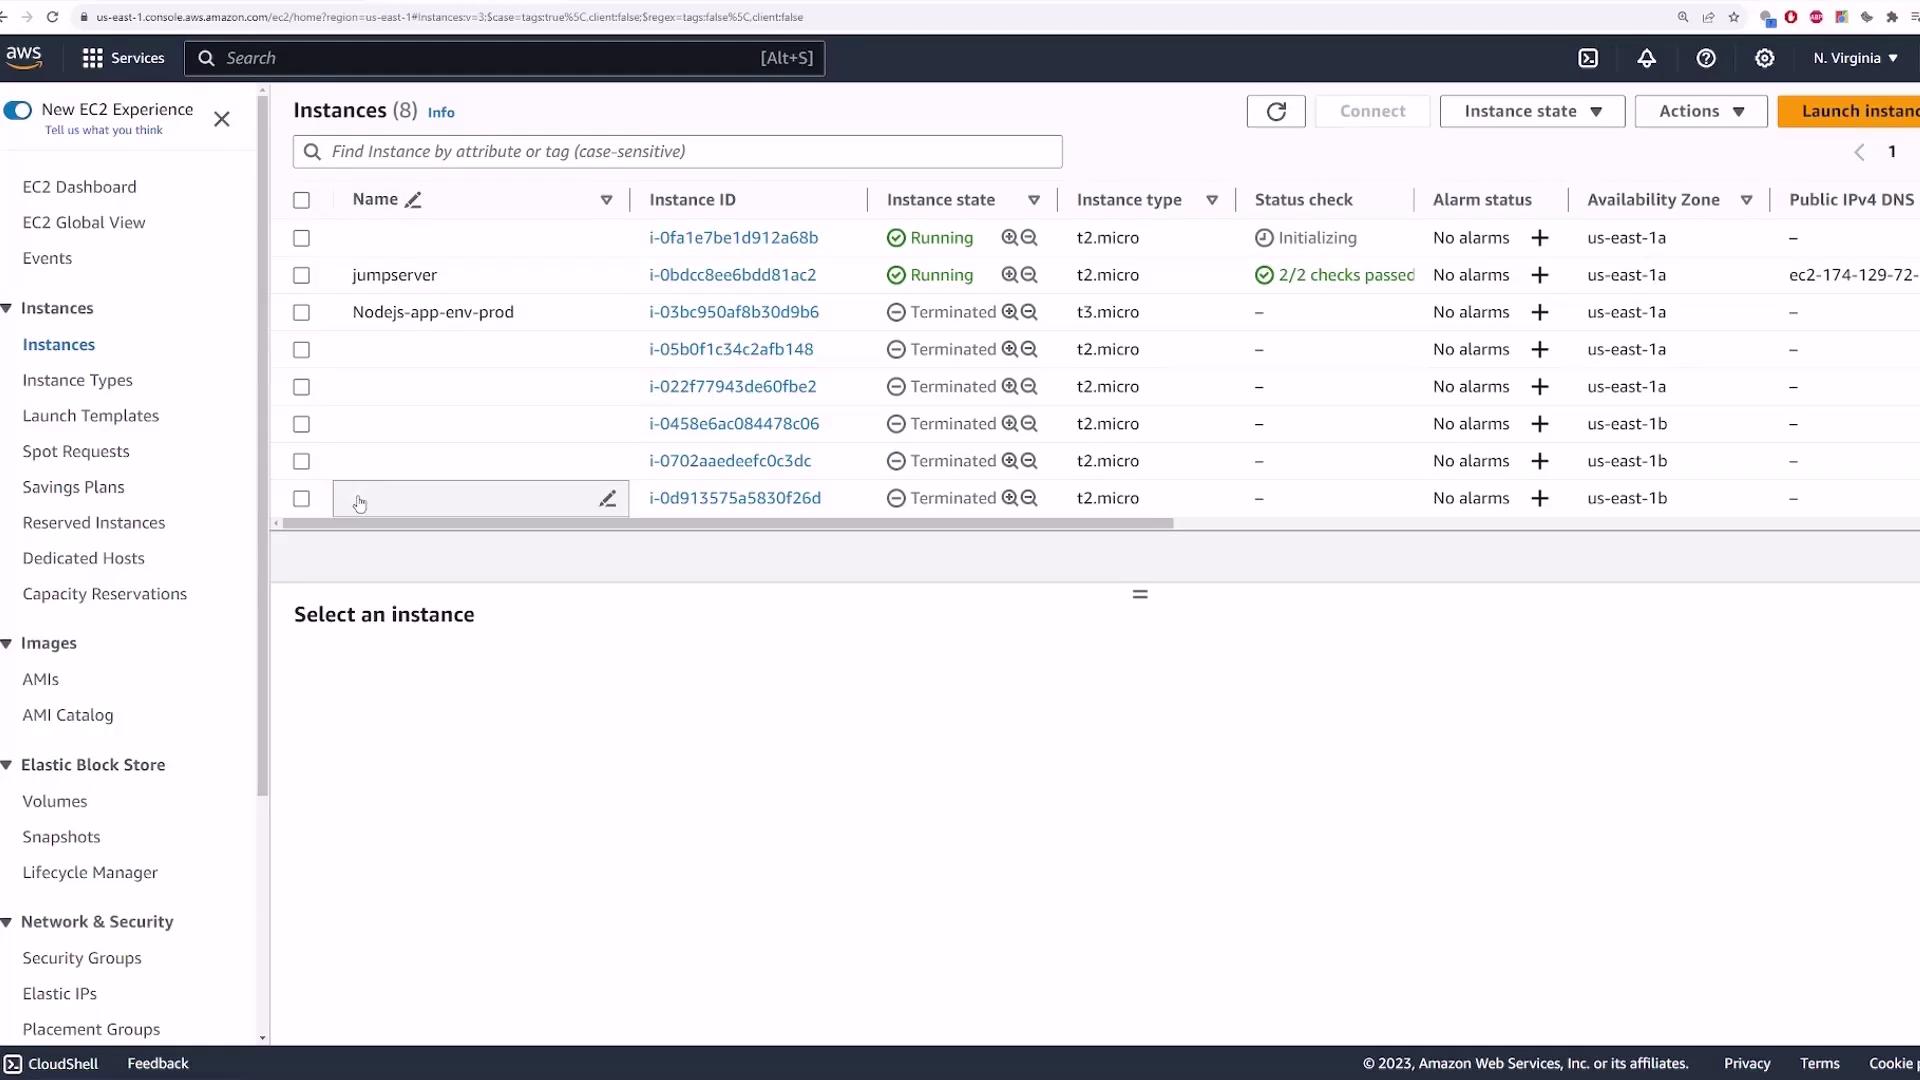
To test the Auto Scaling behavior, manually terminate the EC2 instance managed by the Auto Scaling group. This action simulates a failure and forces the group to launch a new instance to meet the desired capacity.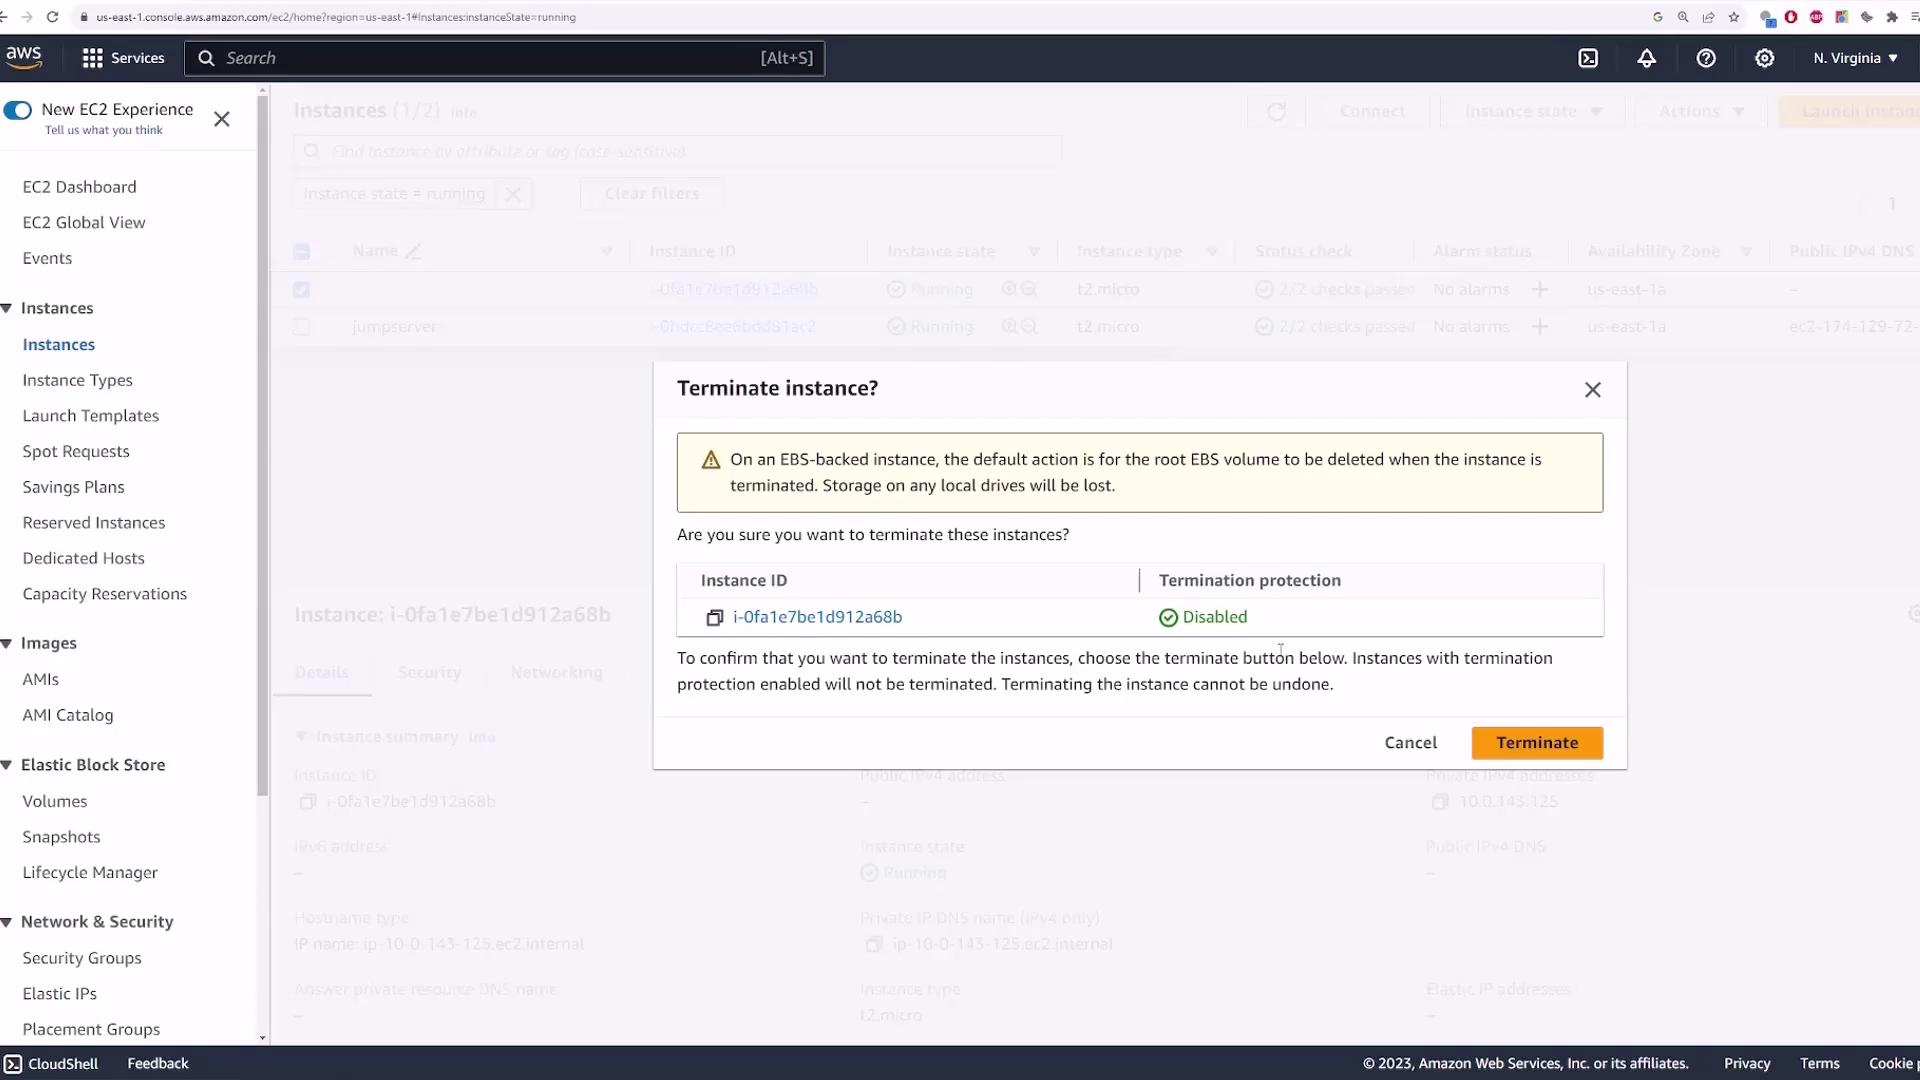

Simulating High CPU Utilization
To further verify the efficiency of the scaling policy, simulate high CPU usage on your instance. Follow these steps:-
Connect to your EC2 instance via SSH:
-
Once connected, run the following command to monitor CPU usage:
-
Trigger a stress test to simulate high CPU load:
-
After starting the stress test, run
topagain to verify the CPU usage spikes to 100%:
Summary and Cleanup
This lesson covered the following key steps:- Creating and configuring an Auto Scaling group.
- Building a launch template with custom settings.
- Associating a load balancer and target group.
- Setting up a target tracking scaling policy based on CPU utilization.
- Testing the Auto Scaling behavior by terminating an instance and simulating high CPU loads.
Remember to delete your Auto Scaling group after testing by selecting it and choosing the delete option. This will remove the Auto Scaling group along with its associated resources.