Step 1: Creating the VPC
First, navigate to your AWS Management Console and search for “VPC”. From the search results, select the VPC service.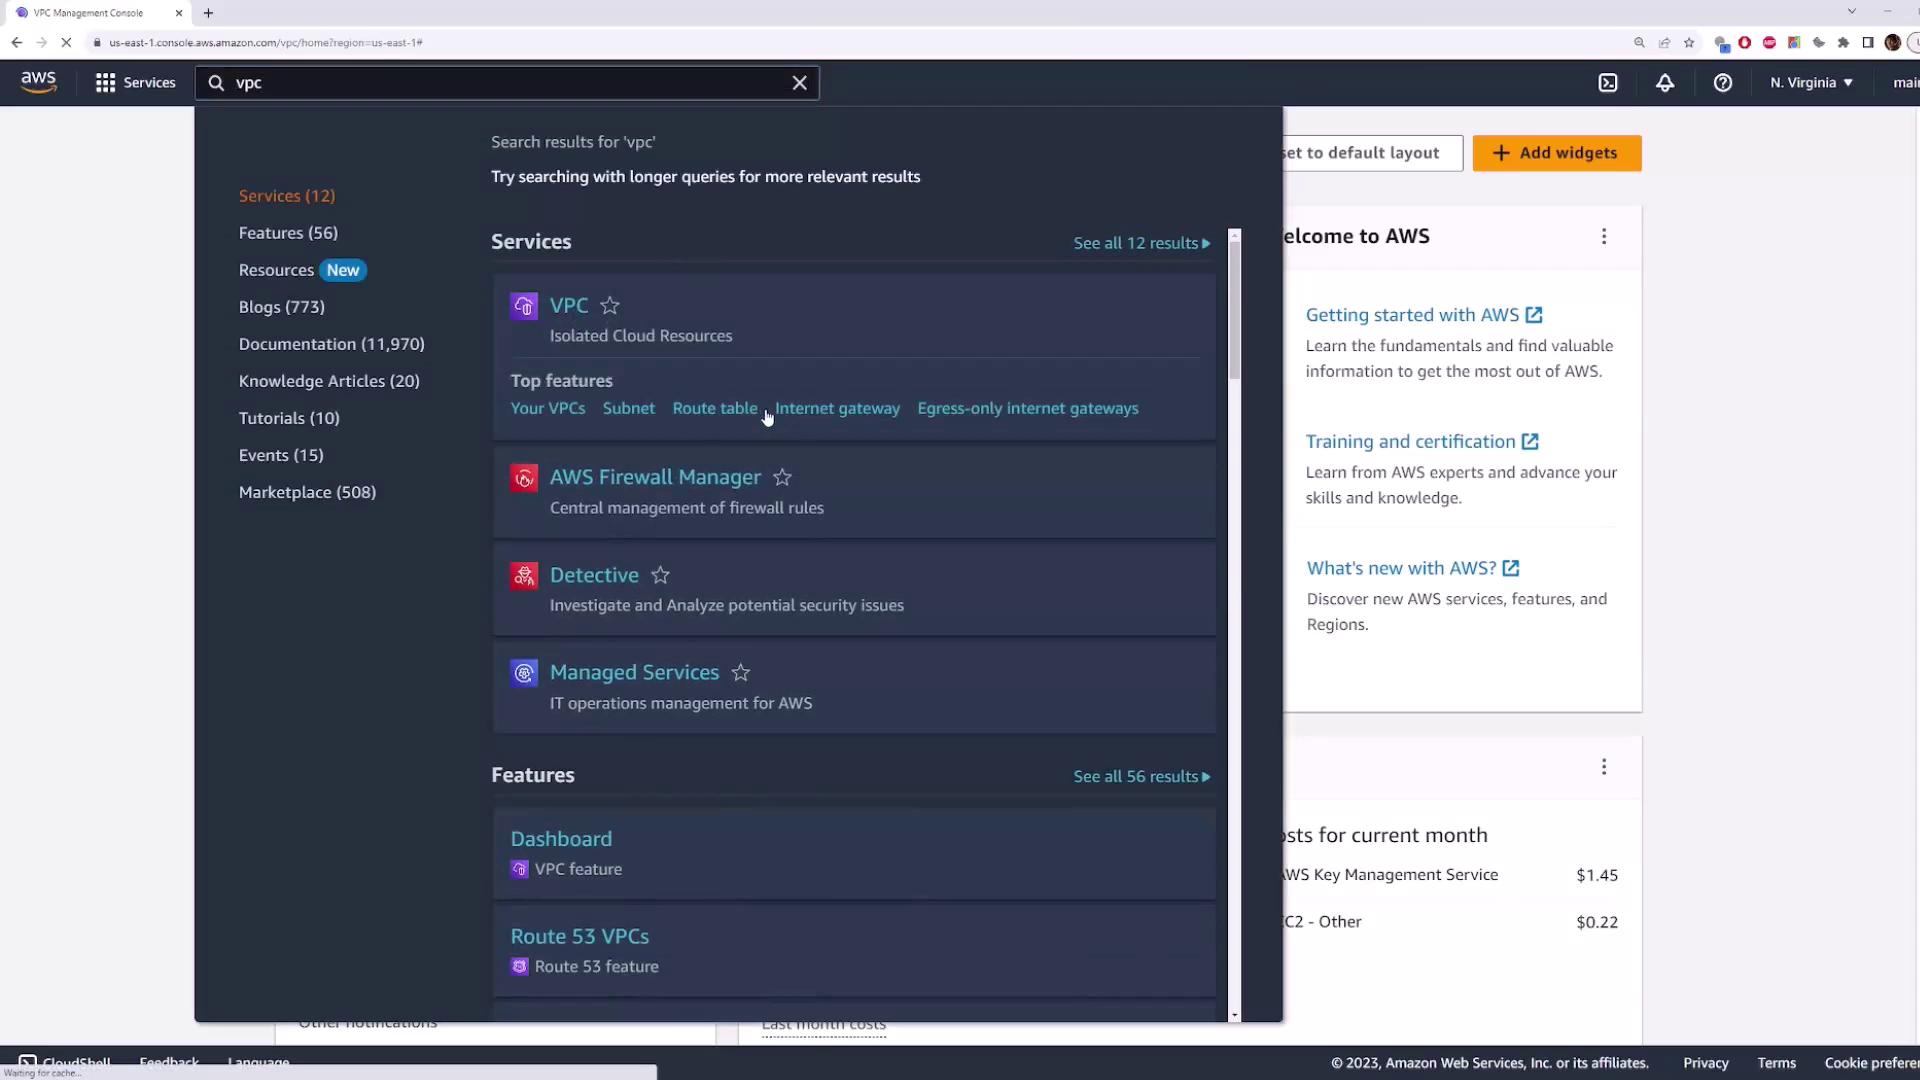
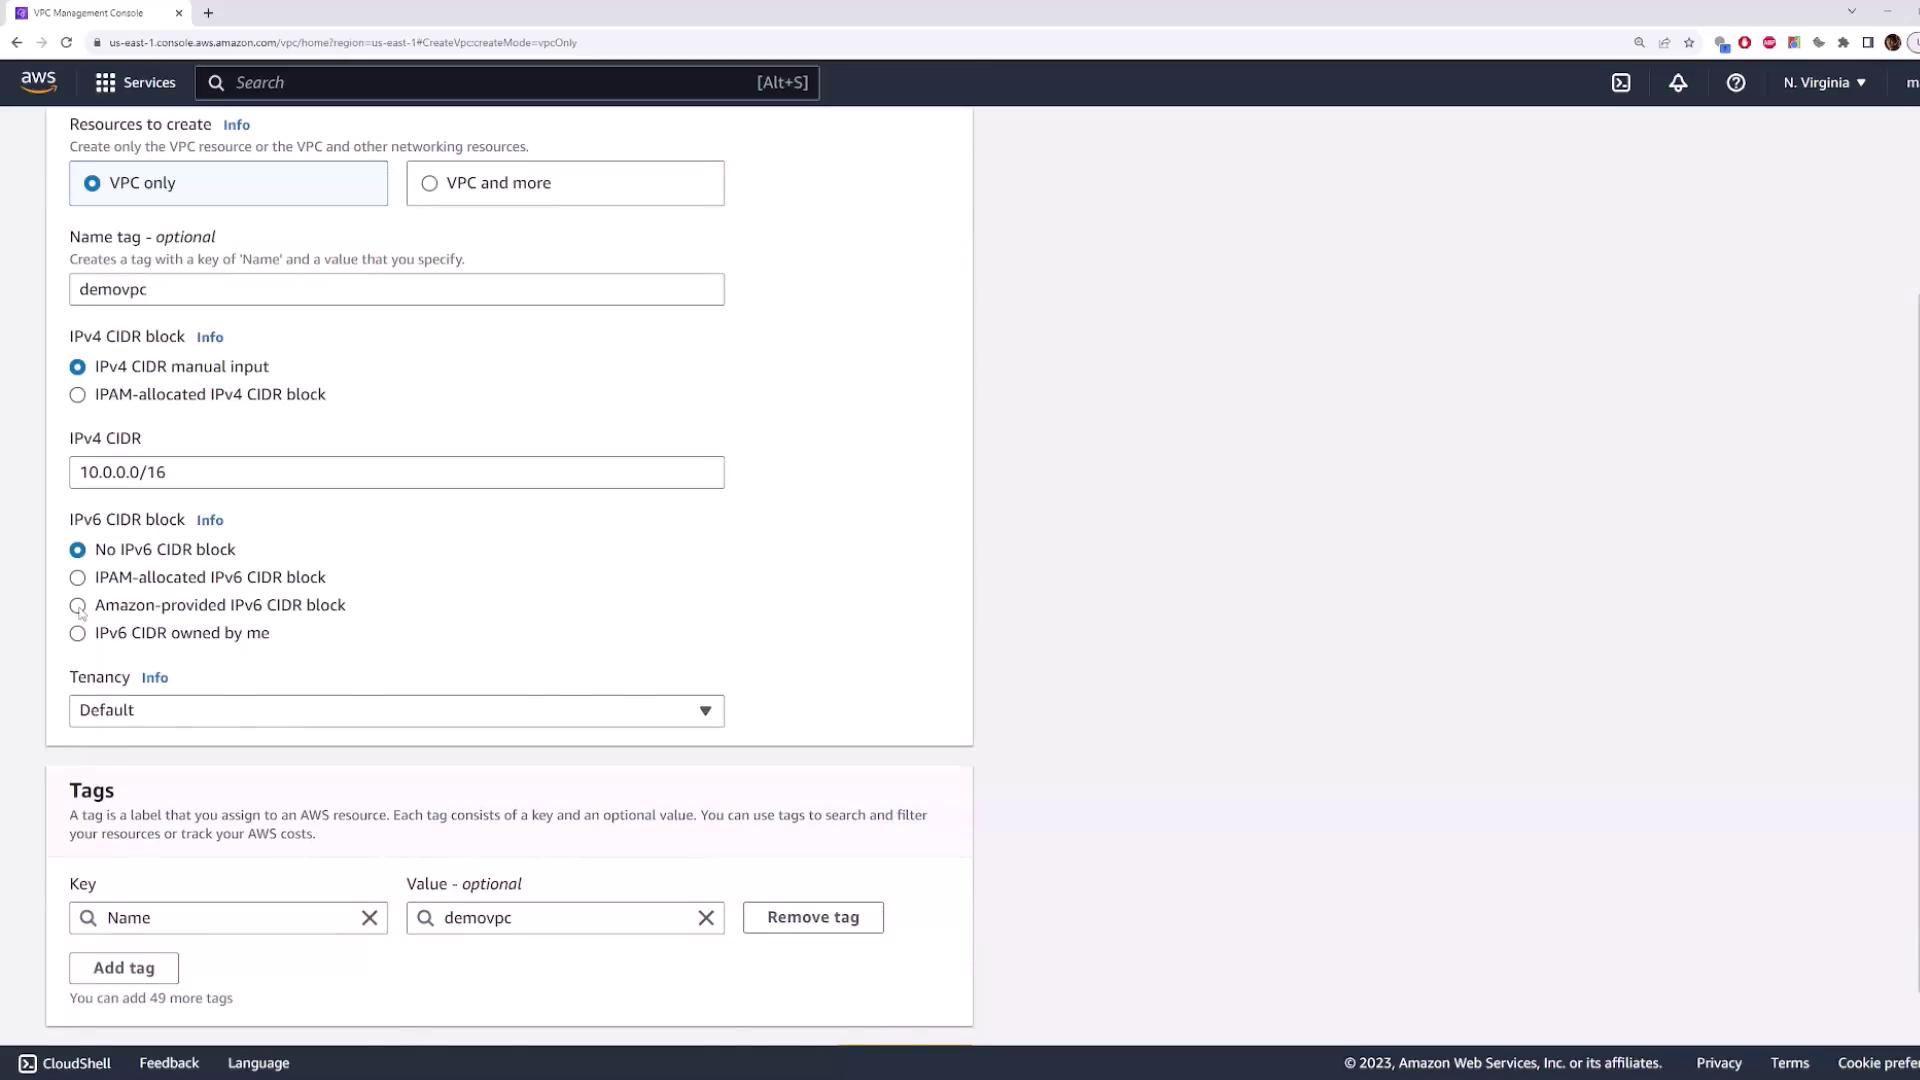
10.0.0.0/16. If necessary, enable the Amazon provided IPv6 CIDR block. Once these details are confirmed, create the VPC.
Step 2: Creating the First Subnet
Proceed to the subnet section. Click on Create Subnet and select the VPC you just created. Name the first subnet “subnet one” and choose an availability zone—such as “US East 1D” in the Northern Virginia region.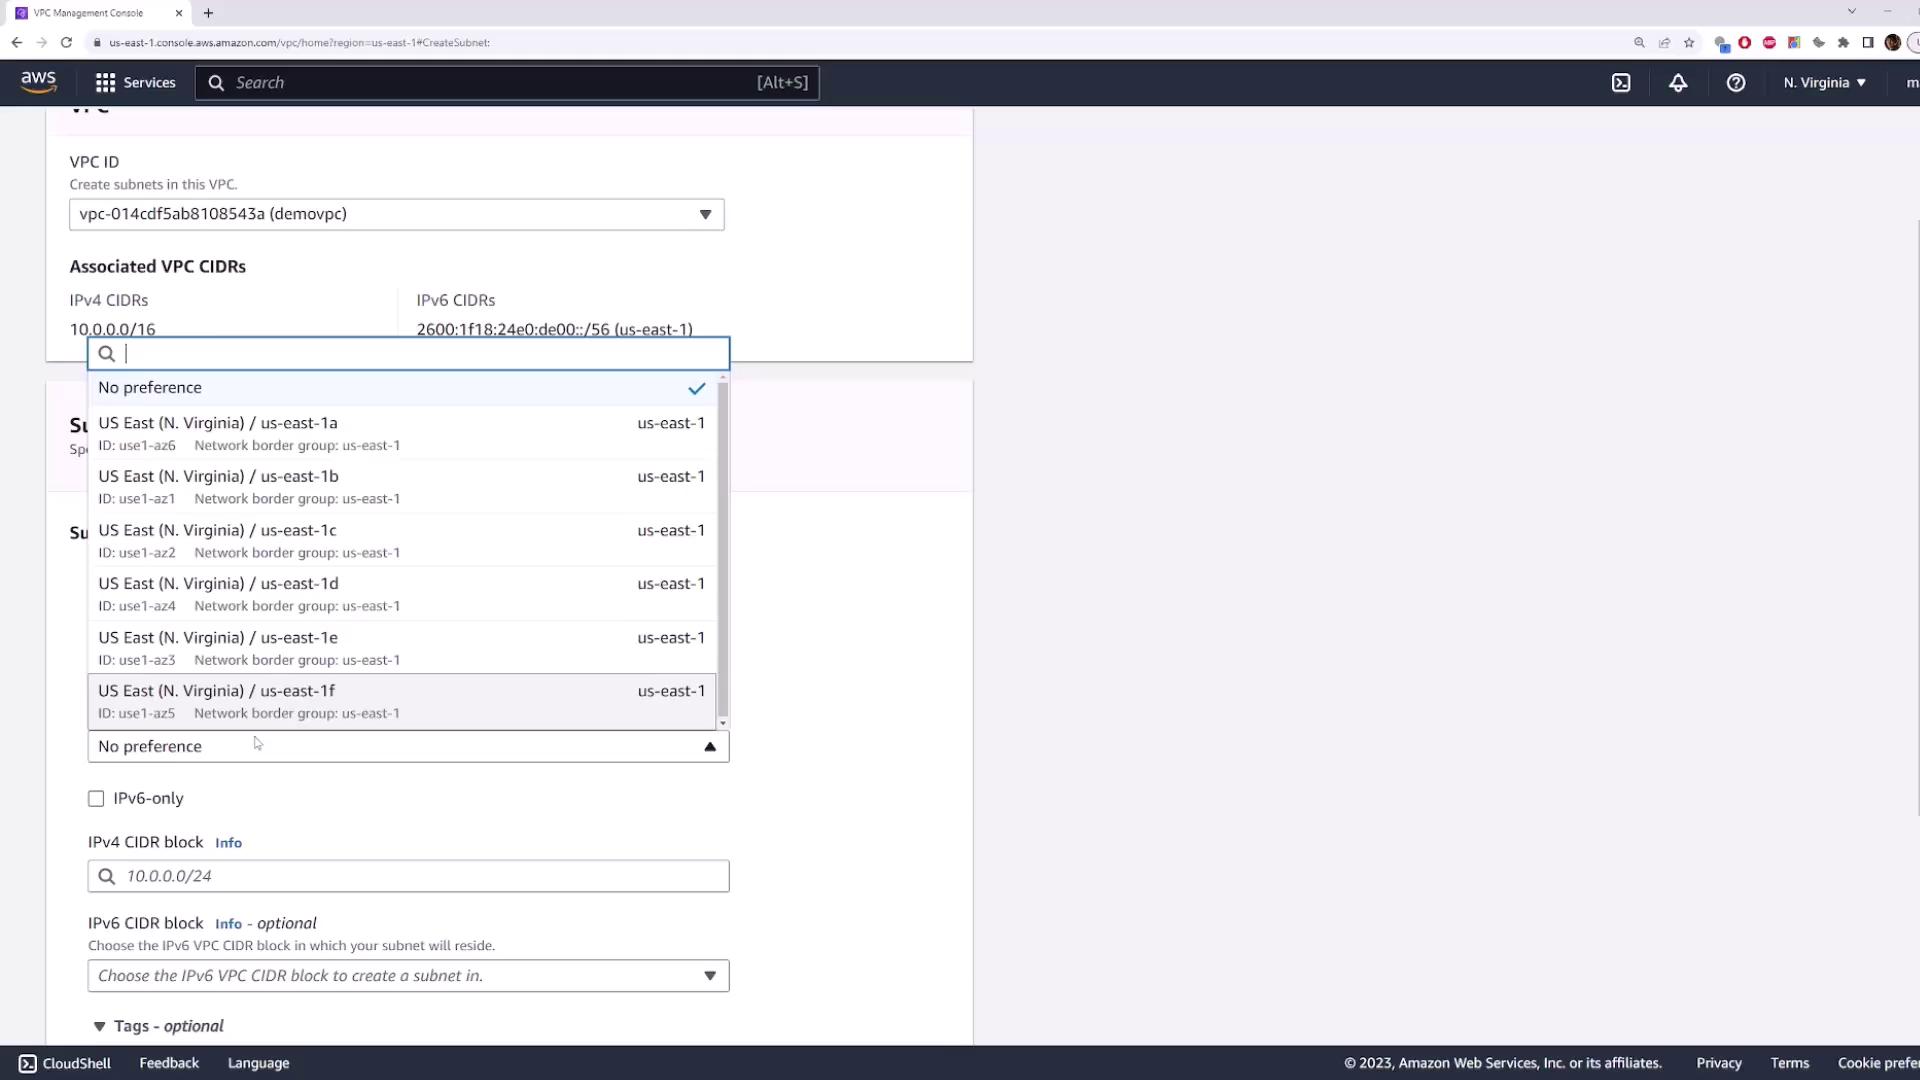
Ensure you select a valid CIDR block that fits within your VPC’s CIDR block. For example, using
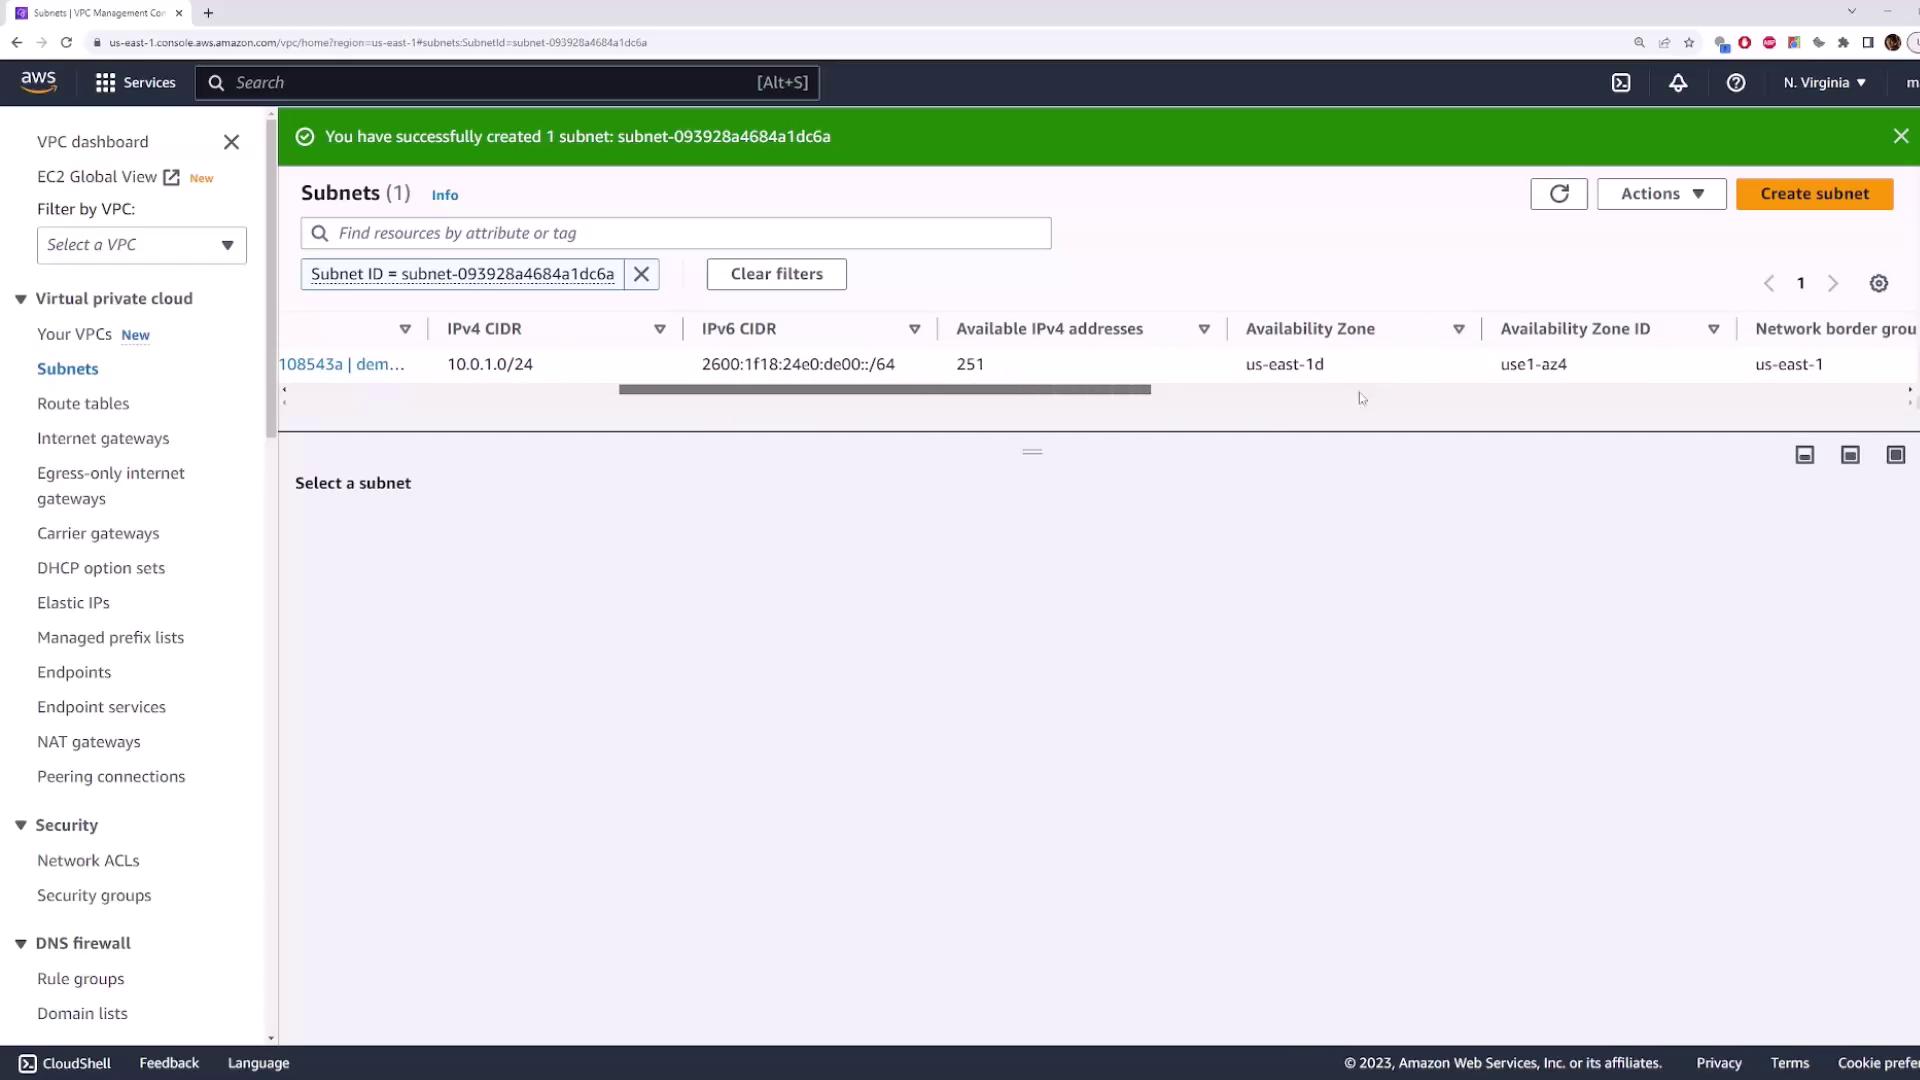
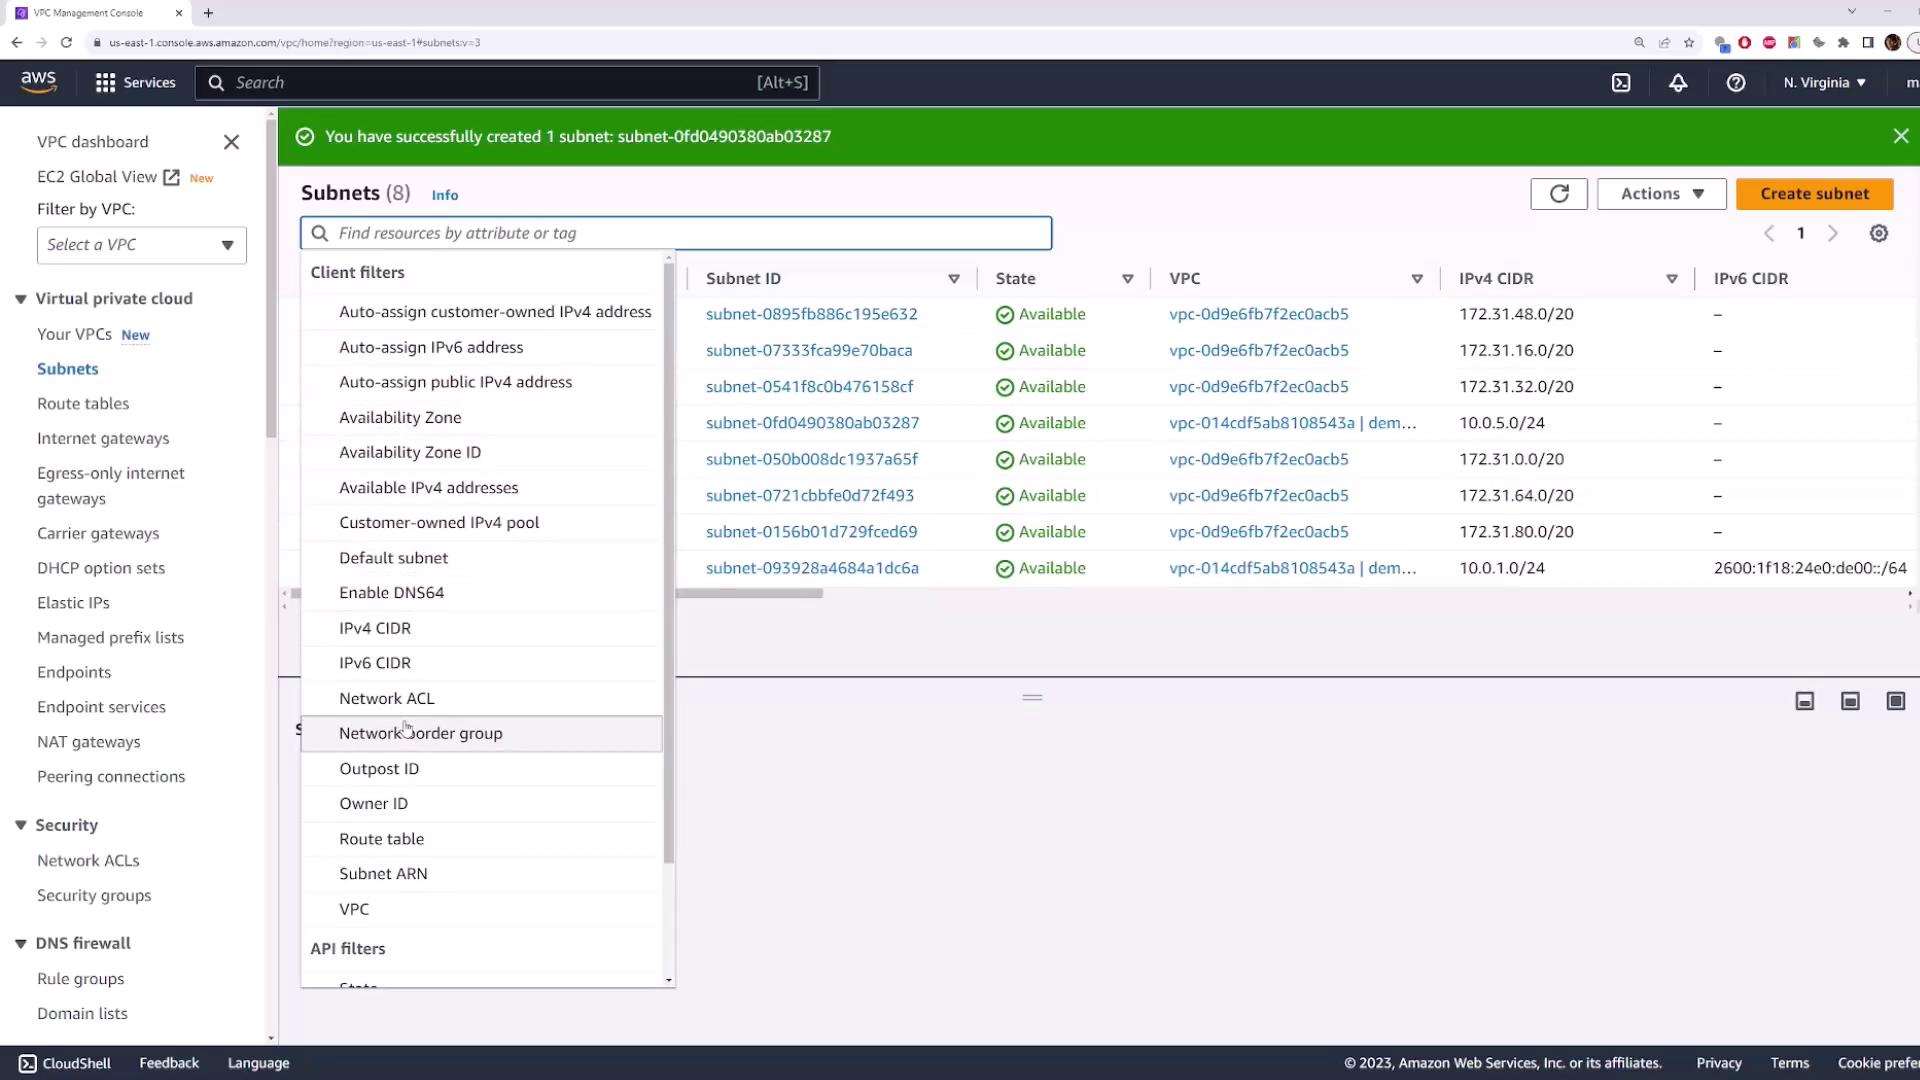
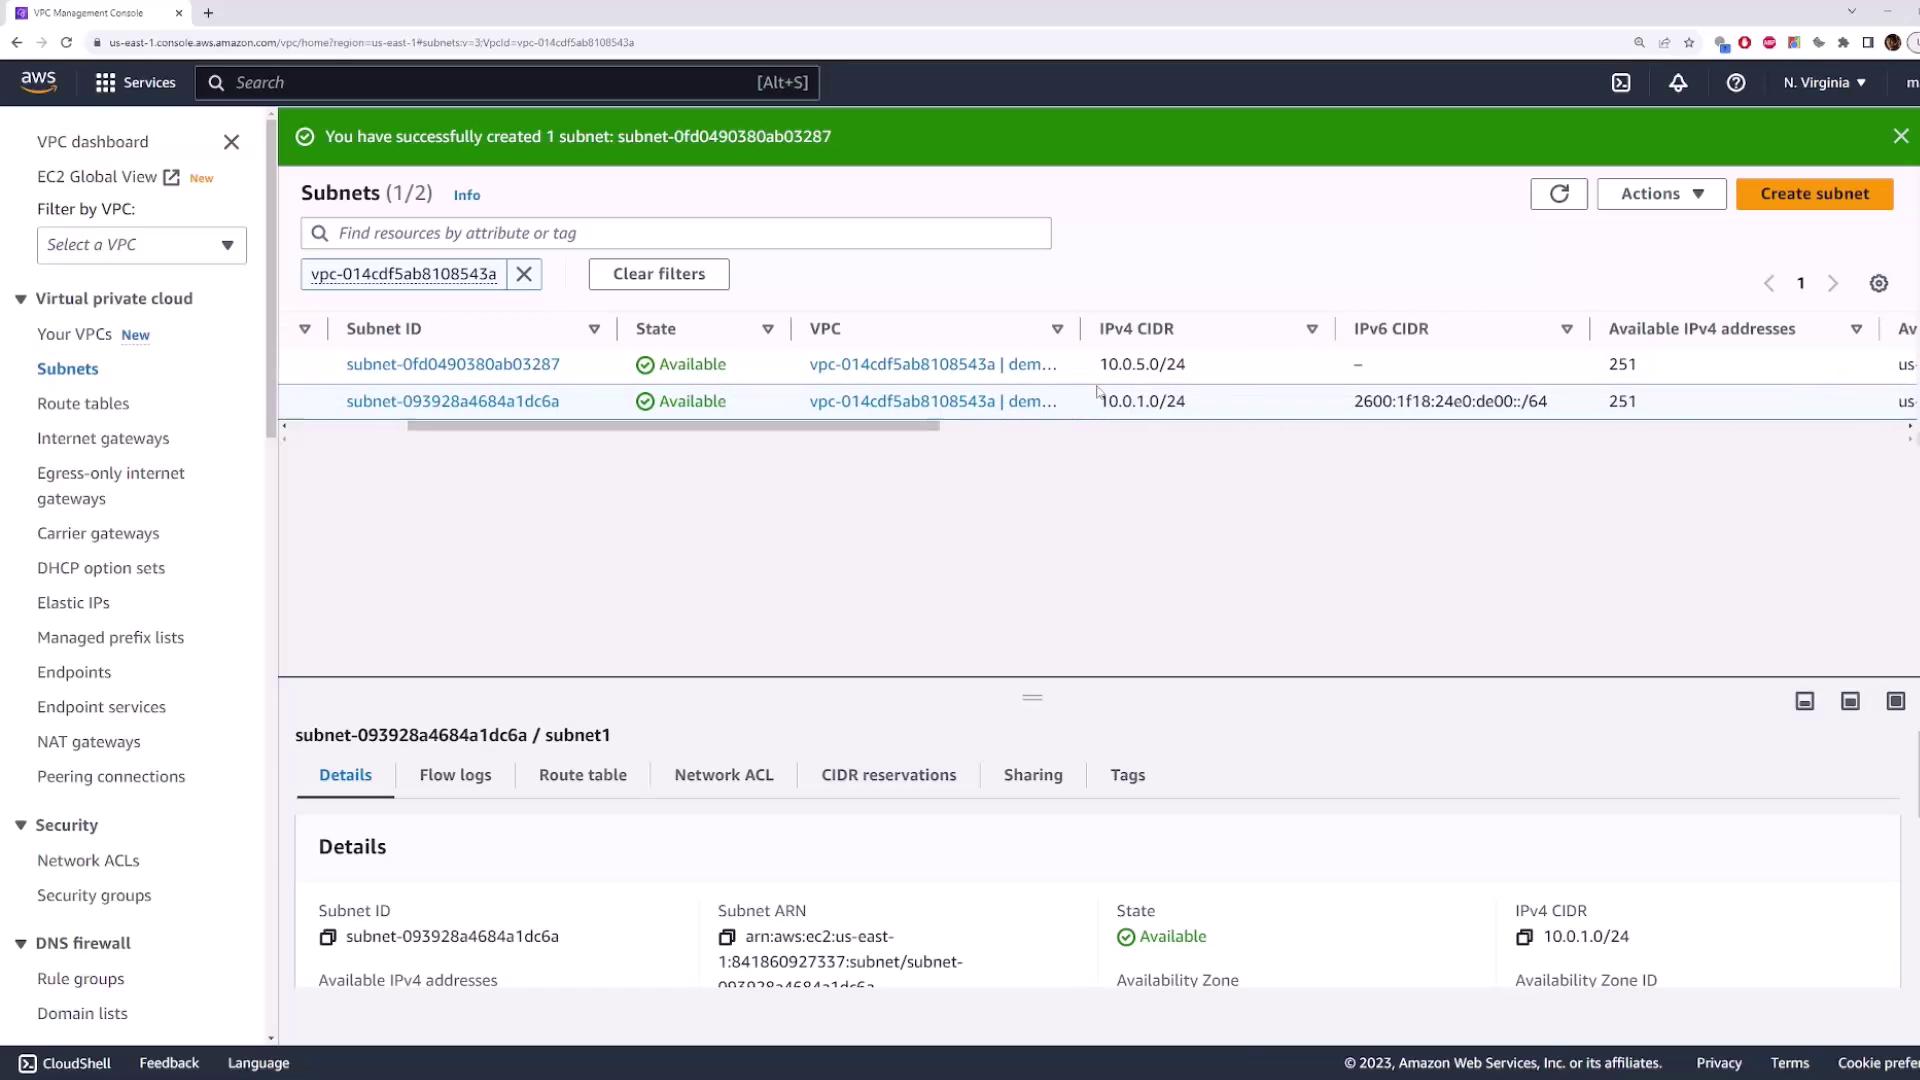
192.168.1.0/24 is invalid when your VPC is 10.0.0.0/16. Use a valid CIDR block such as 10.0.1.0/24.00). After setting the values, click Create Subnet. The created subnet will appear in the “US East 1D” availability zone.
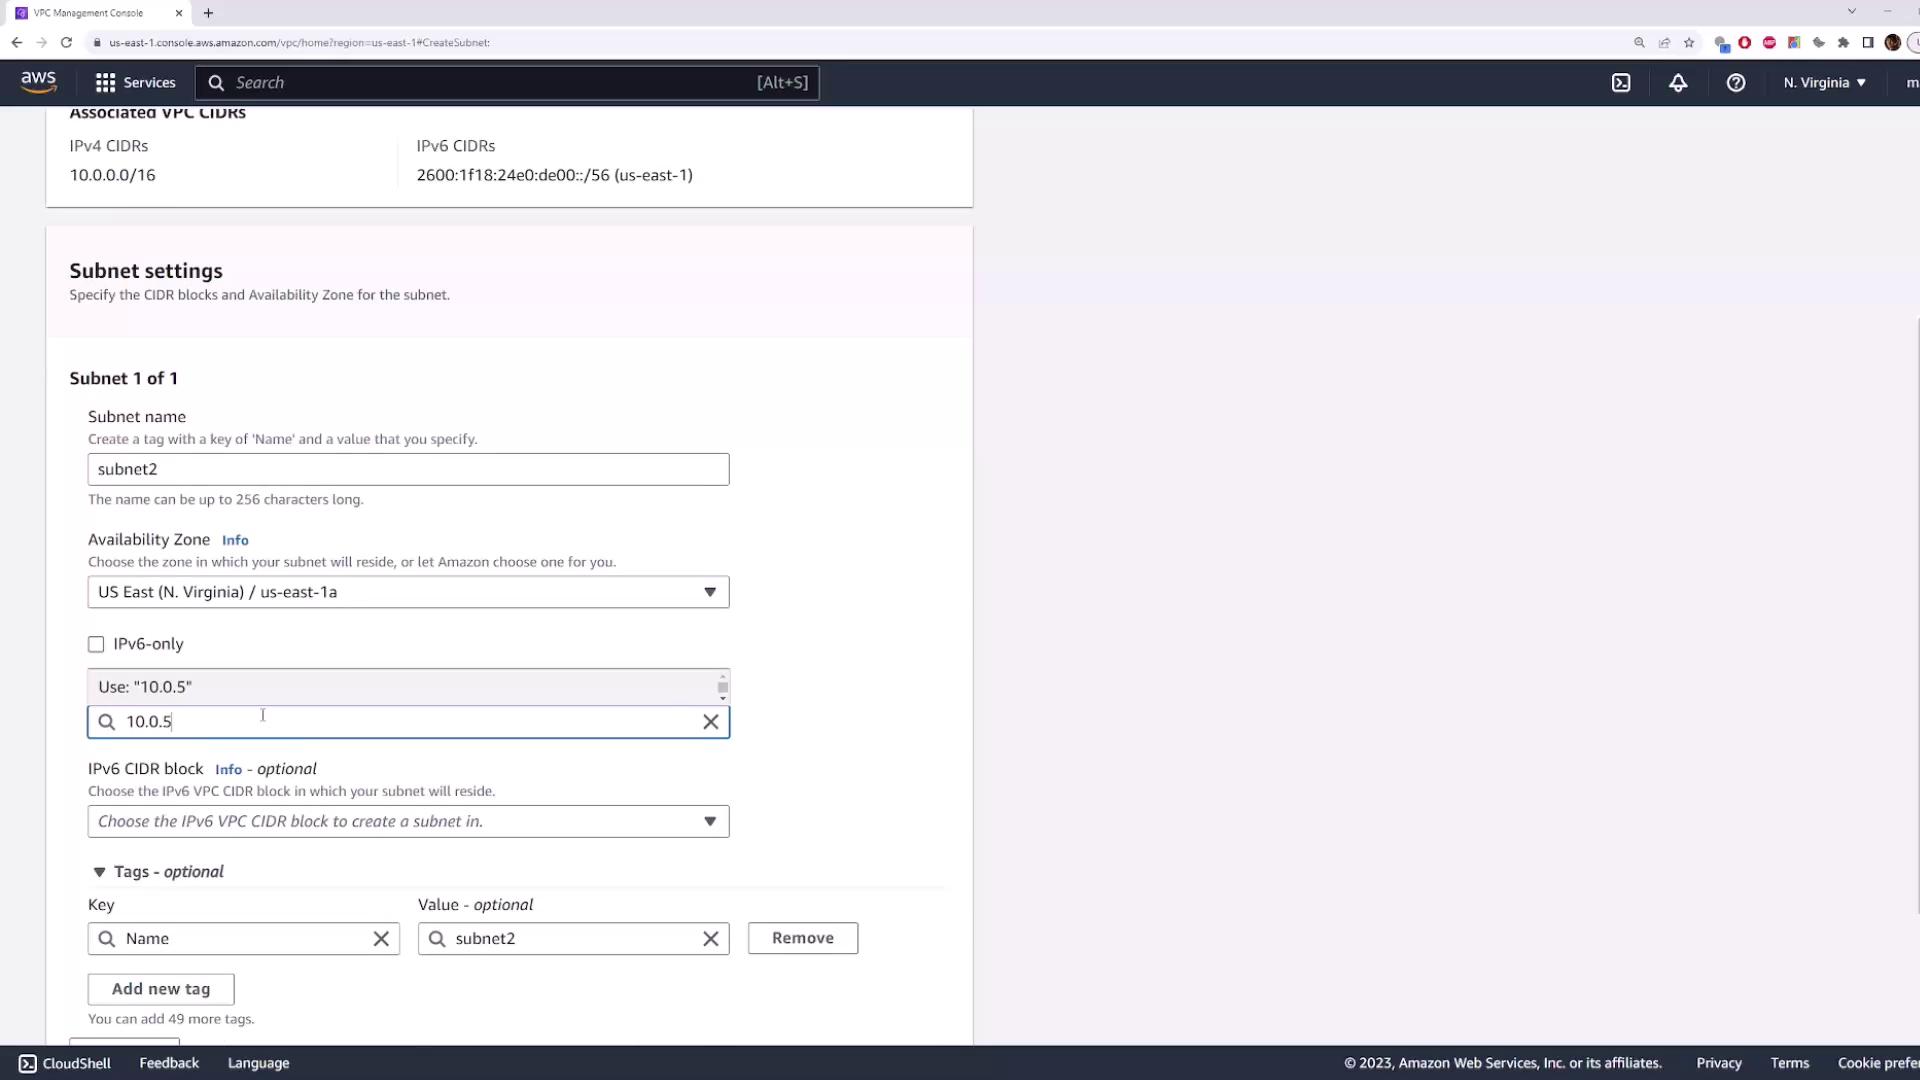
Step 3: Creating the Second Subnet
Repeat the process to create another subnet. Click on Create Subnet, select your VPC, and name this subnet “subnet 2”. Choose a different availability zone, such as “US East 1A”, and assign a CIDR block like10.0.5.0/24.
Step 4: Deploying an EC2 Instance into a Specific Subnet
To deploy a server into a specific availability zone, you must choose the relevant subnet during the EC2 instance launch. For instance, deploying an instance in “subnet one” will place it in “US East 1D” and assign an IP from the10.0.1.0/24 range.
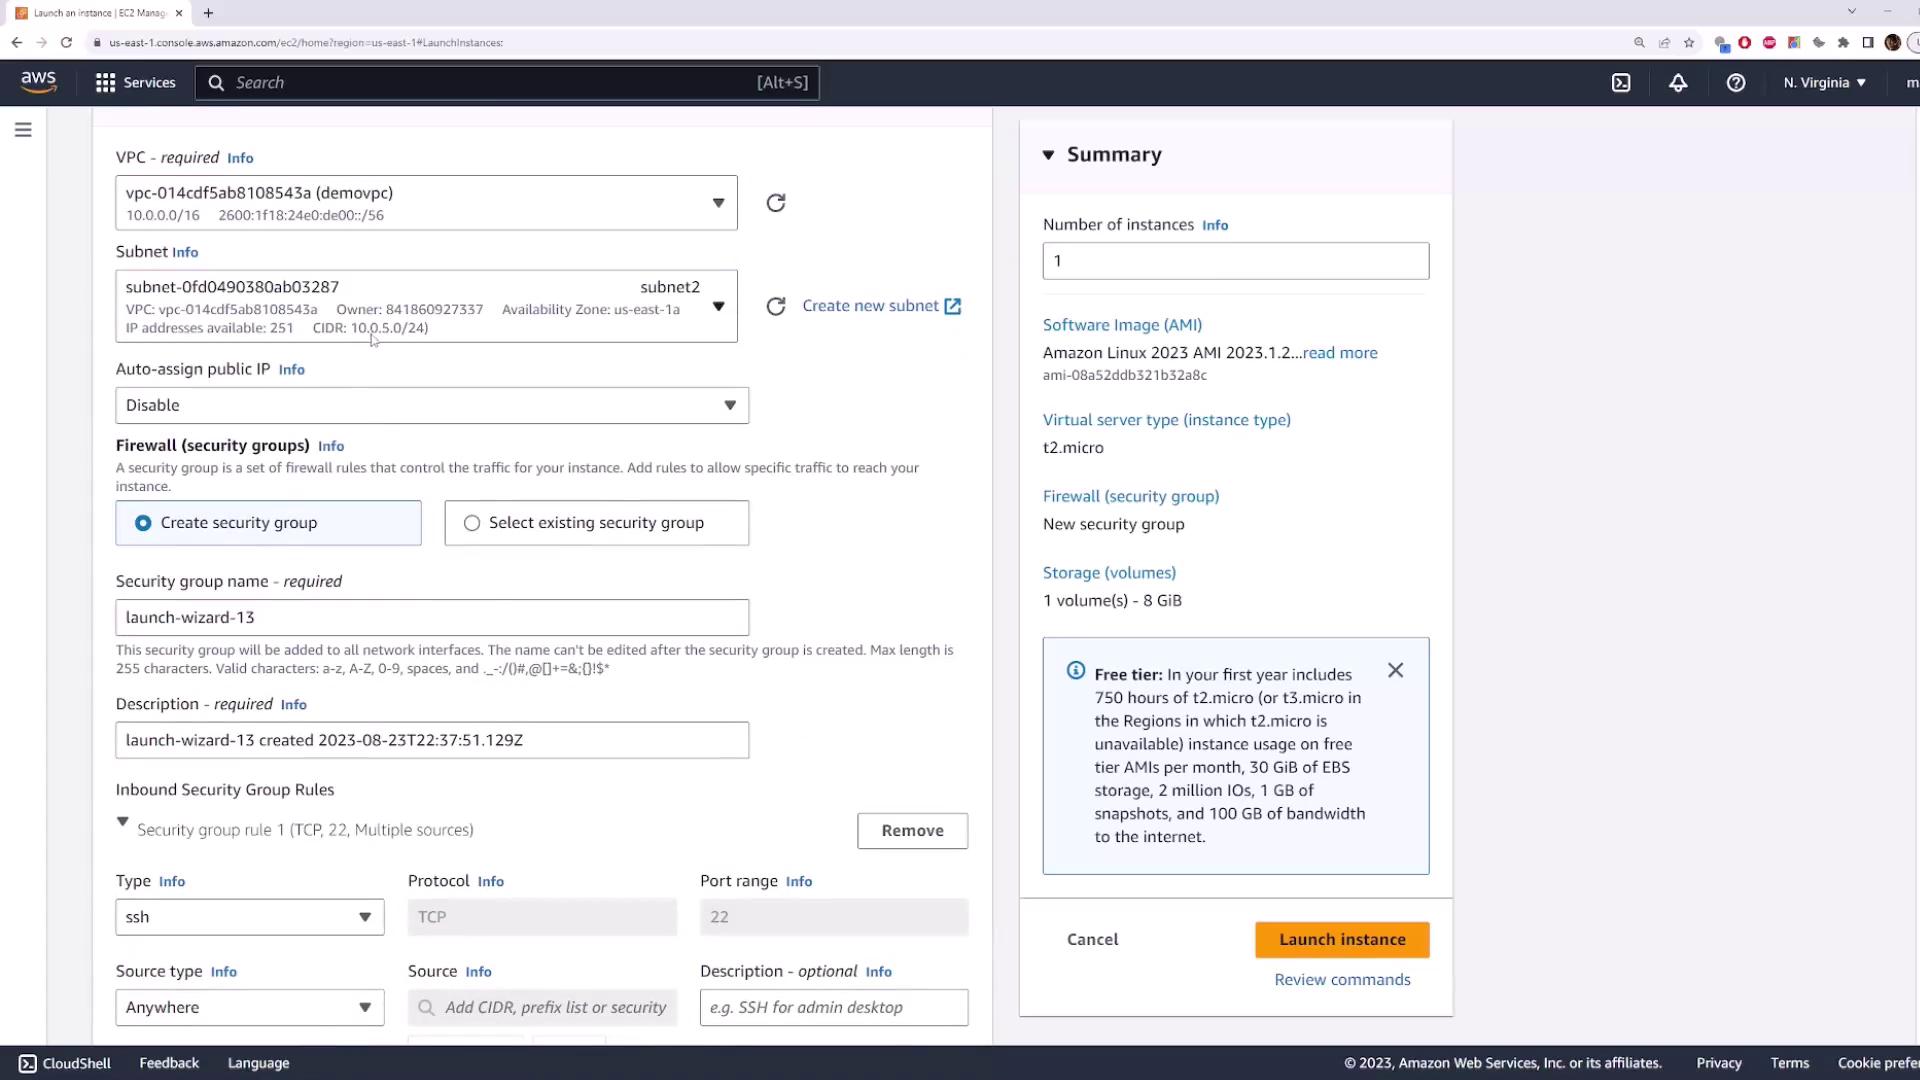
Launching Your Instance
- Navigate to Instances in the AWS Management Console.
- Click Launch Instance.
- Name the instance (e.g., “instance one”) and select your preferred image.
- Choose a key pair if necessary.
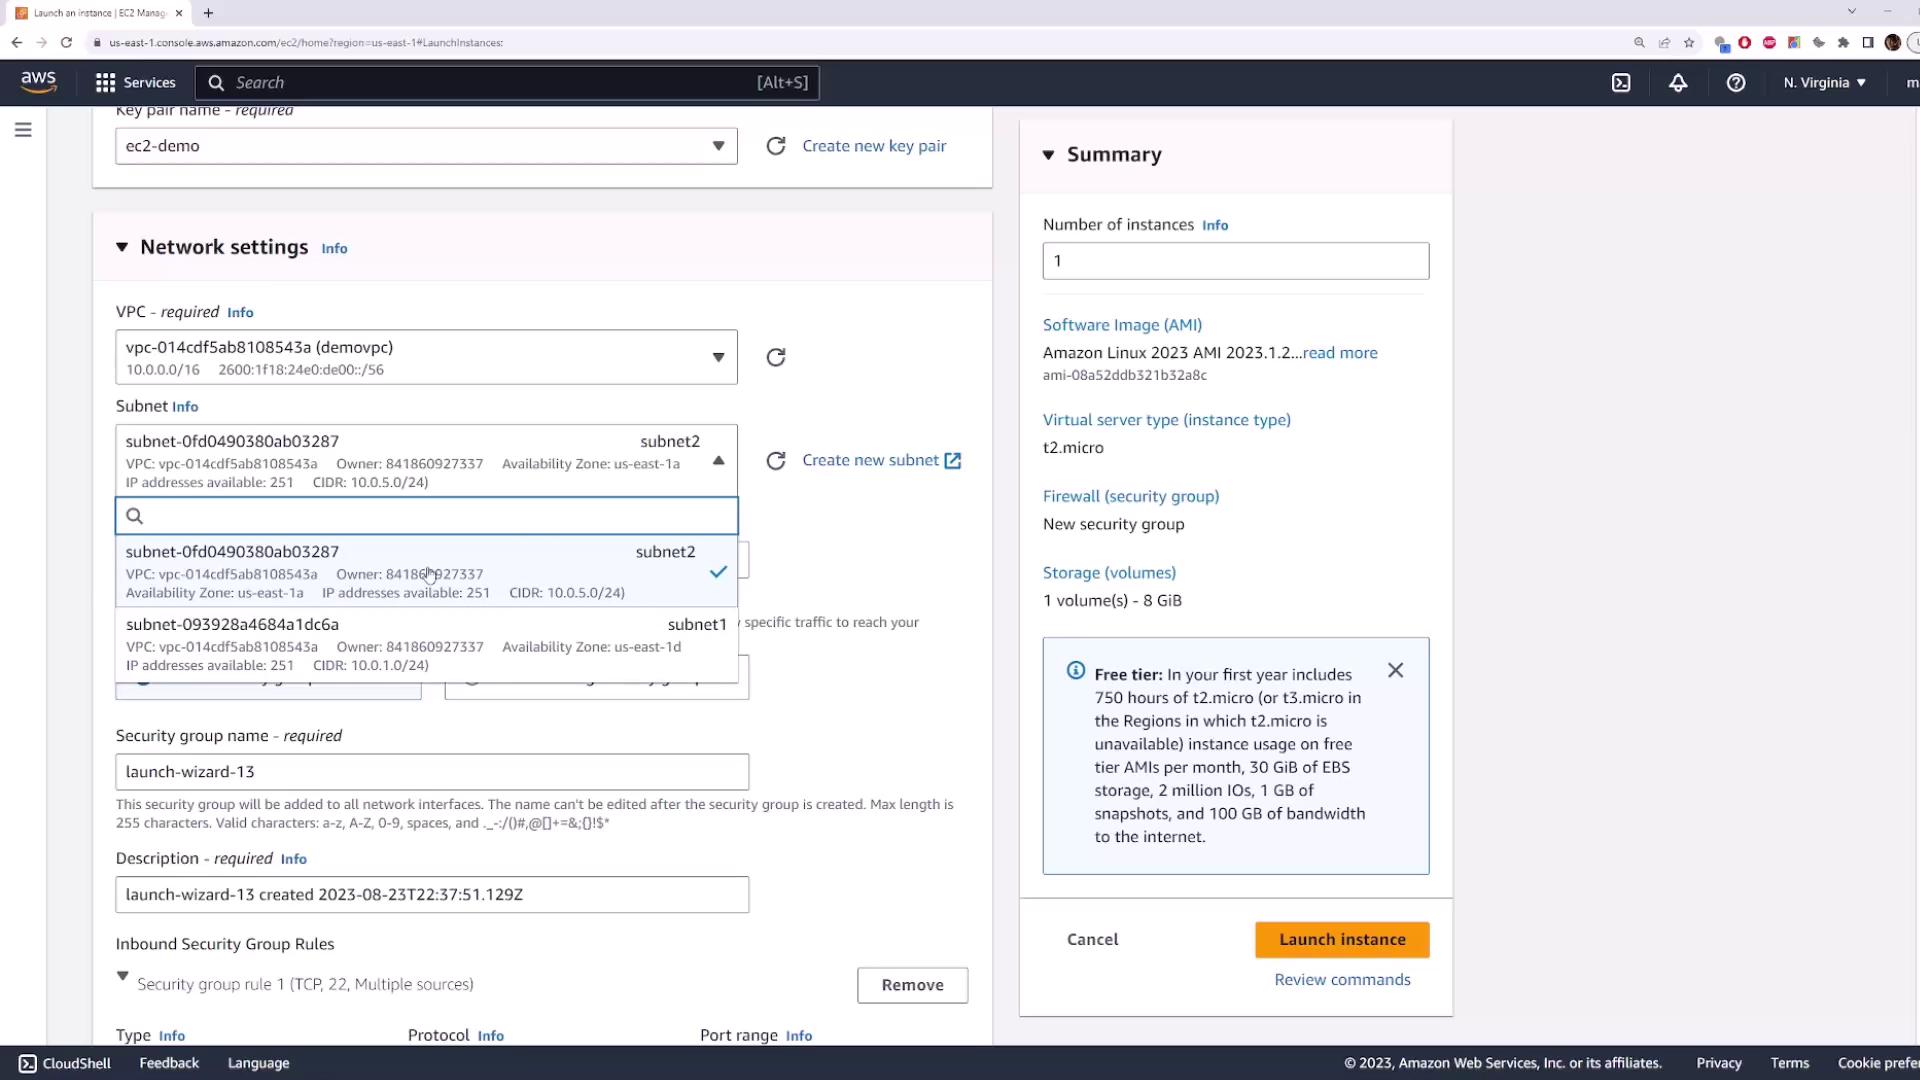
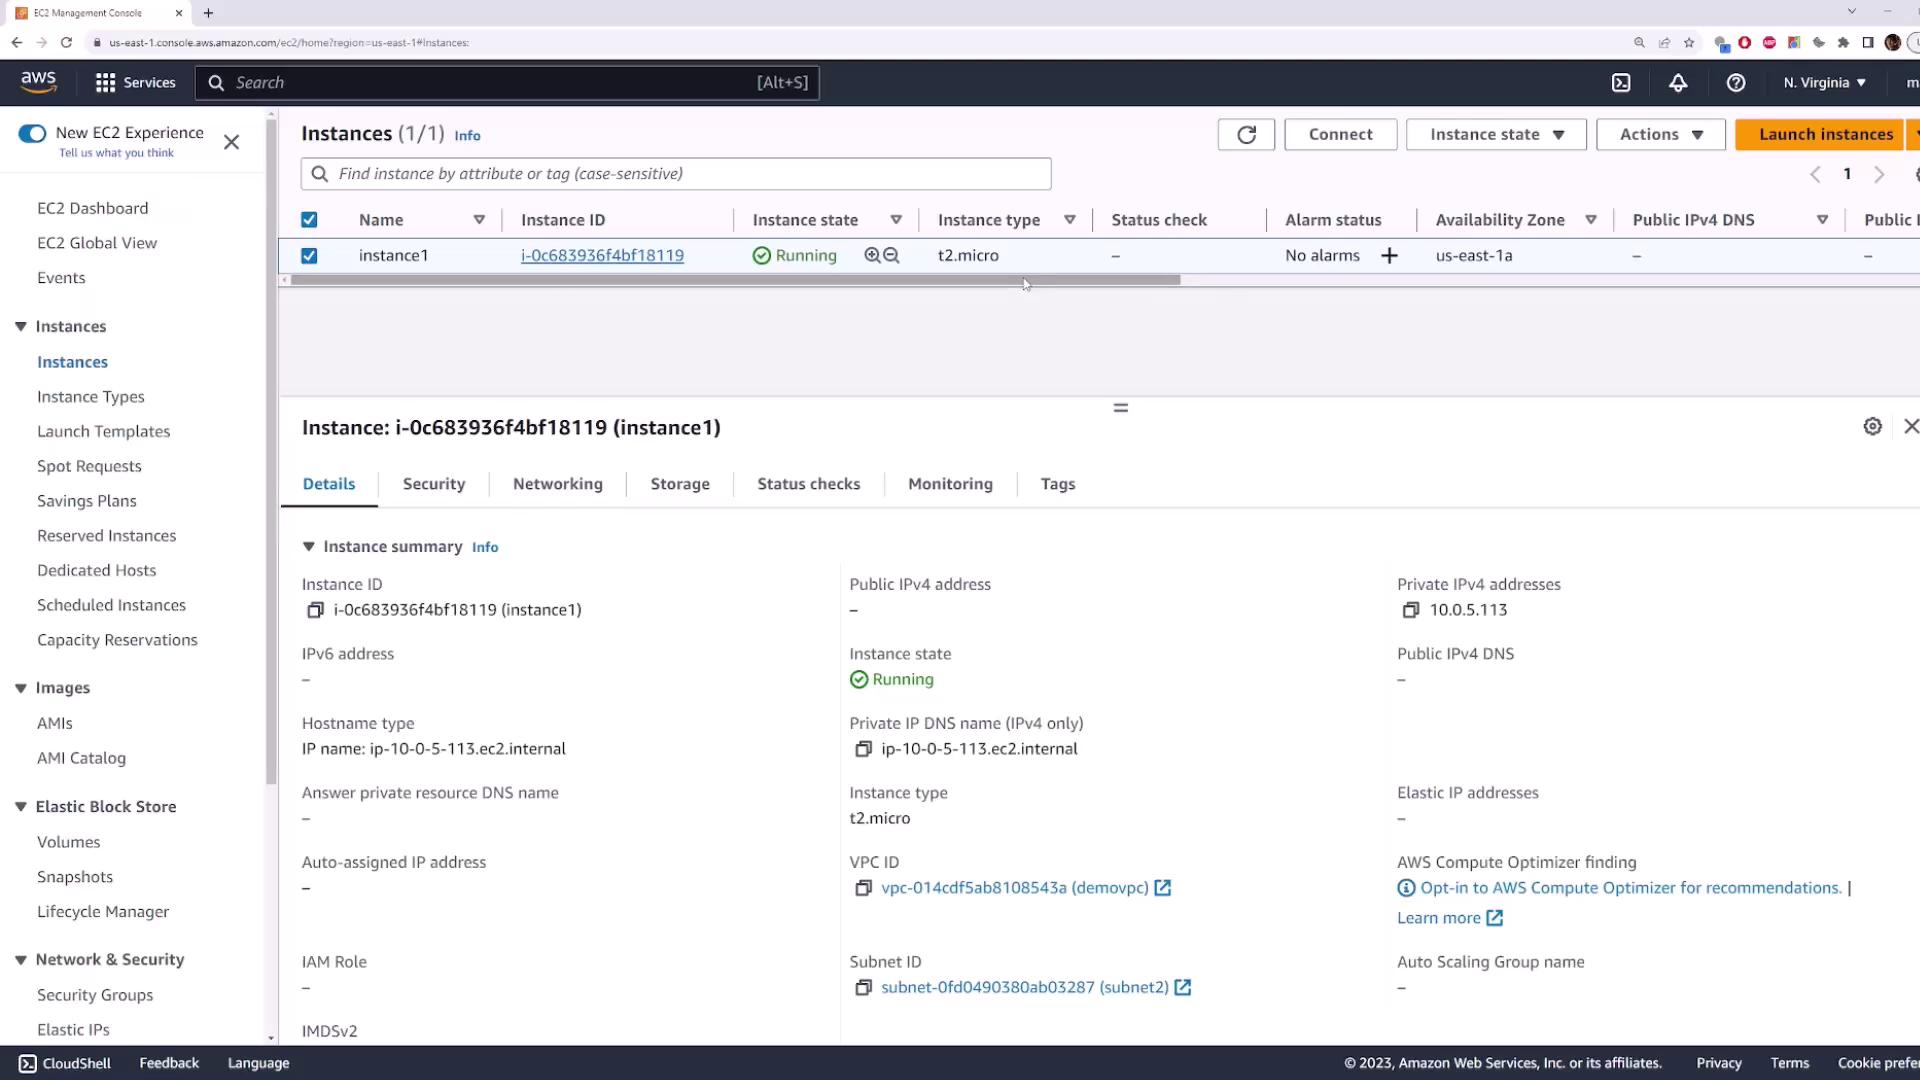
- Under the networking settings, select your previously created VPC. Both subnets will be visible; choose “subnet two” if you wish to deploy the instance in “US East 1A” with the CIDR block
10.0.5.0/24. - If the subnet is public, you may opt to assign a public IP automatically.
- Use the default security group settings and complete the launch process.
10.0.5.113, taken from the available range.
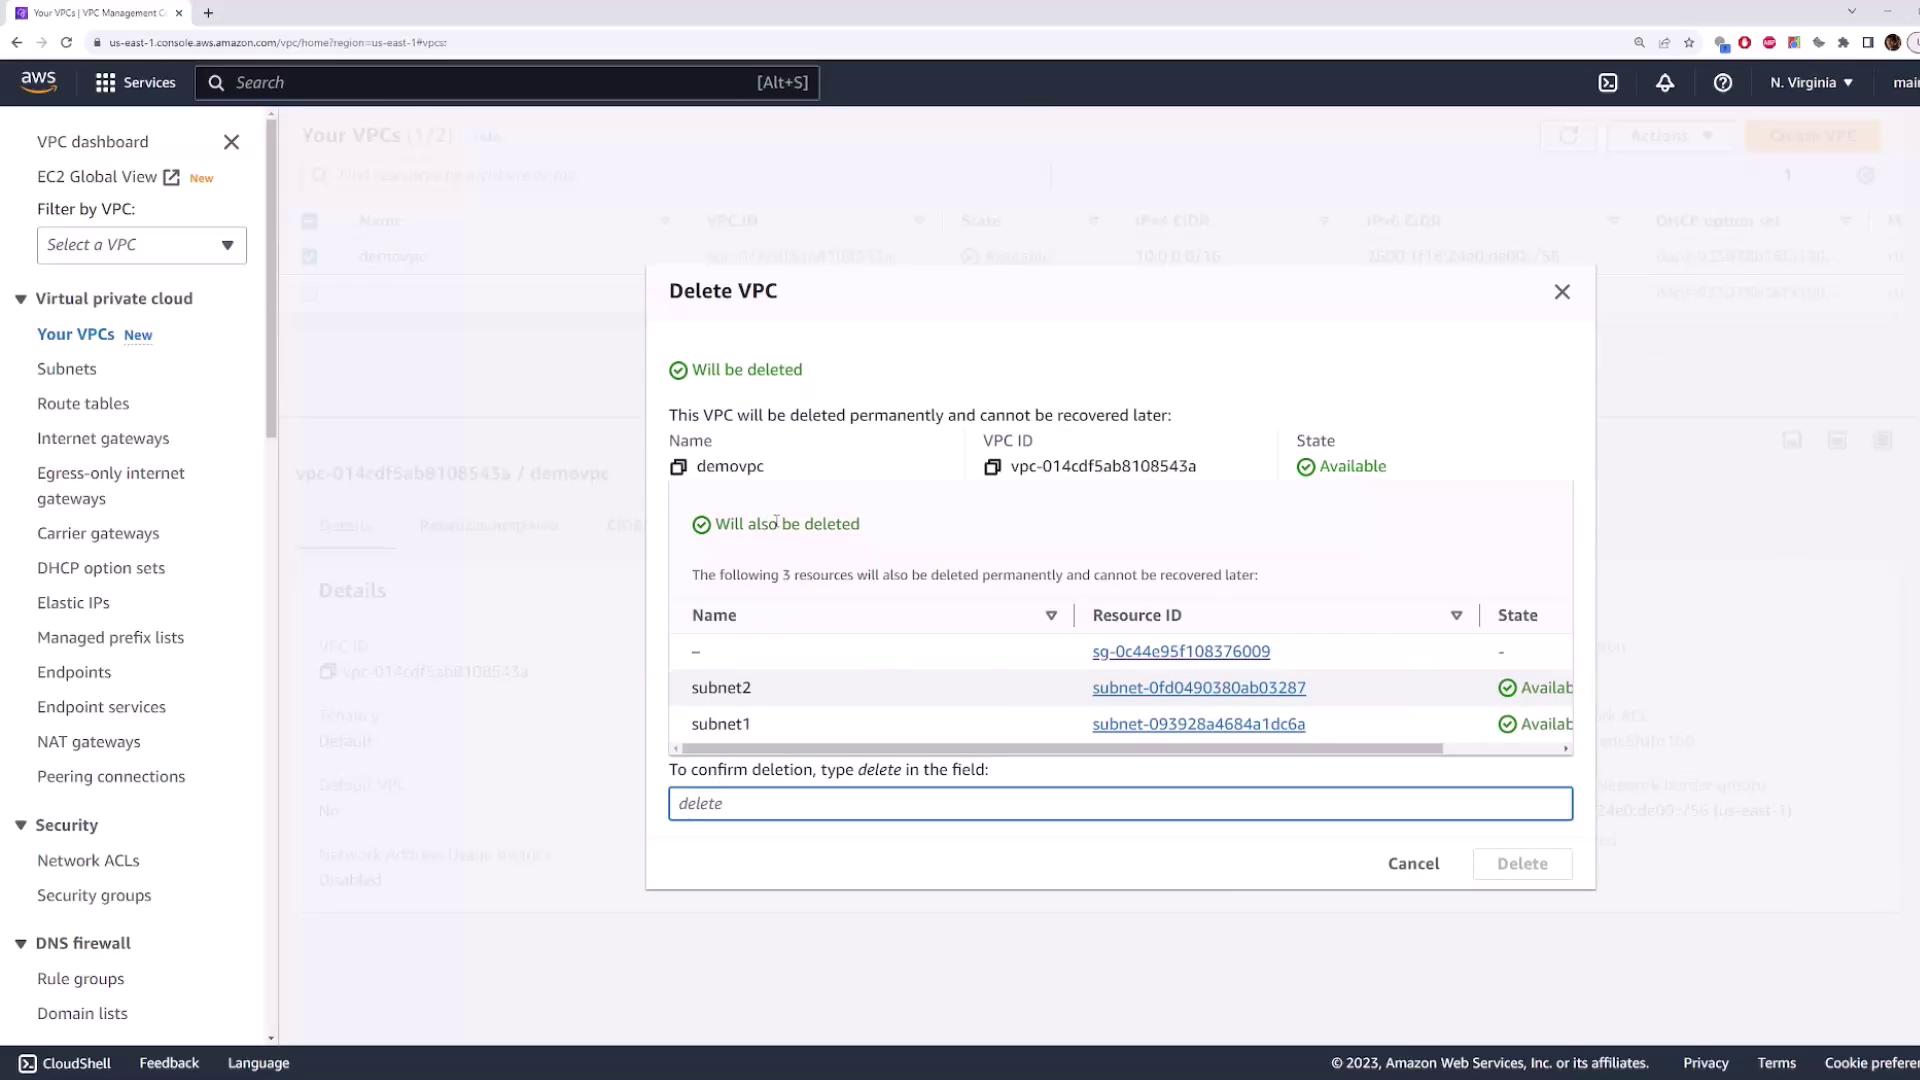
Step 5: Cleaning Up Resources
Once your demonstration is complete, it’s important to clean up to avoid unnecessary resource usage. Follow these steps:- Delete the launched EC2 instance.
- Navigate to your demo VPC, click on Actions, and select Delete VPC.
Deleting the VPC will also remove all associated subnets. If the instance is still shutting down, you might receive an error. Wait a few seconds and try again.
This concludes the subnet demonstration. Following these steps will help you effectively manage your network architecture within AWS. Happy networking!