Table Creation and Session Data
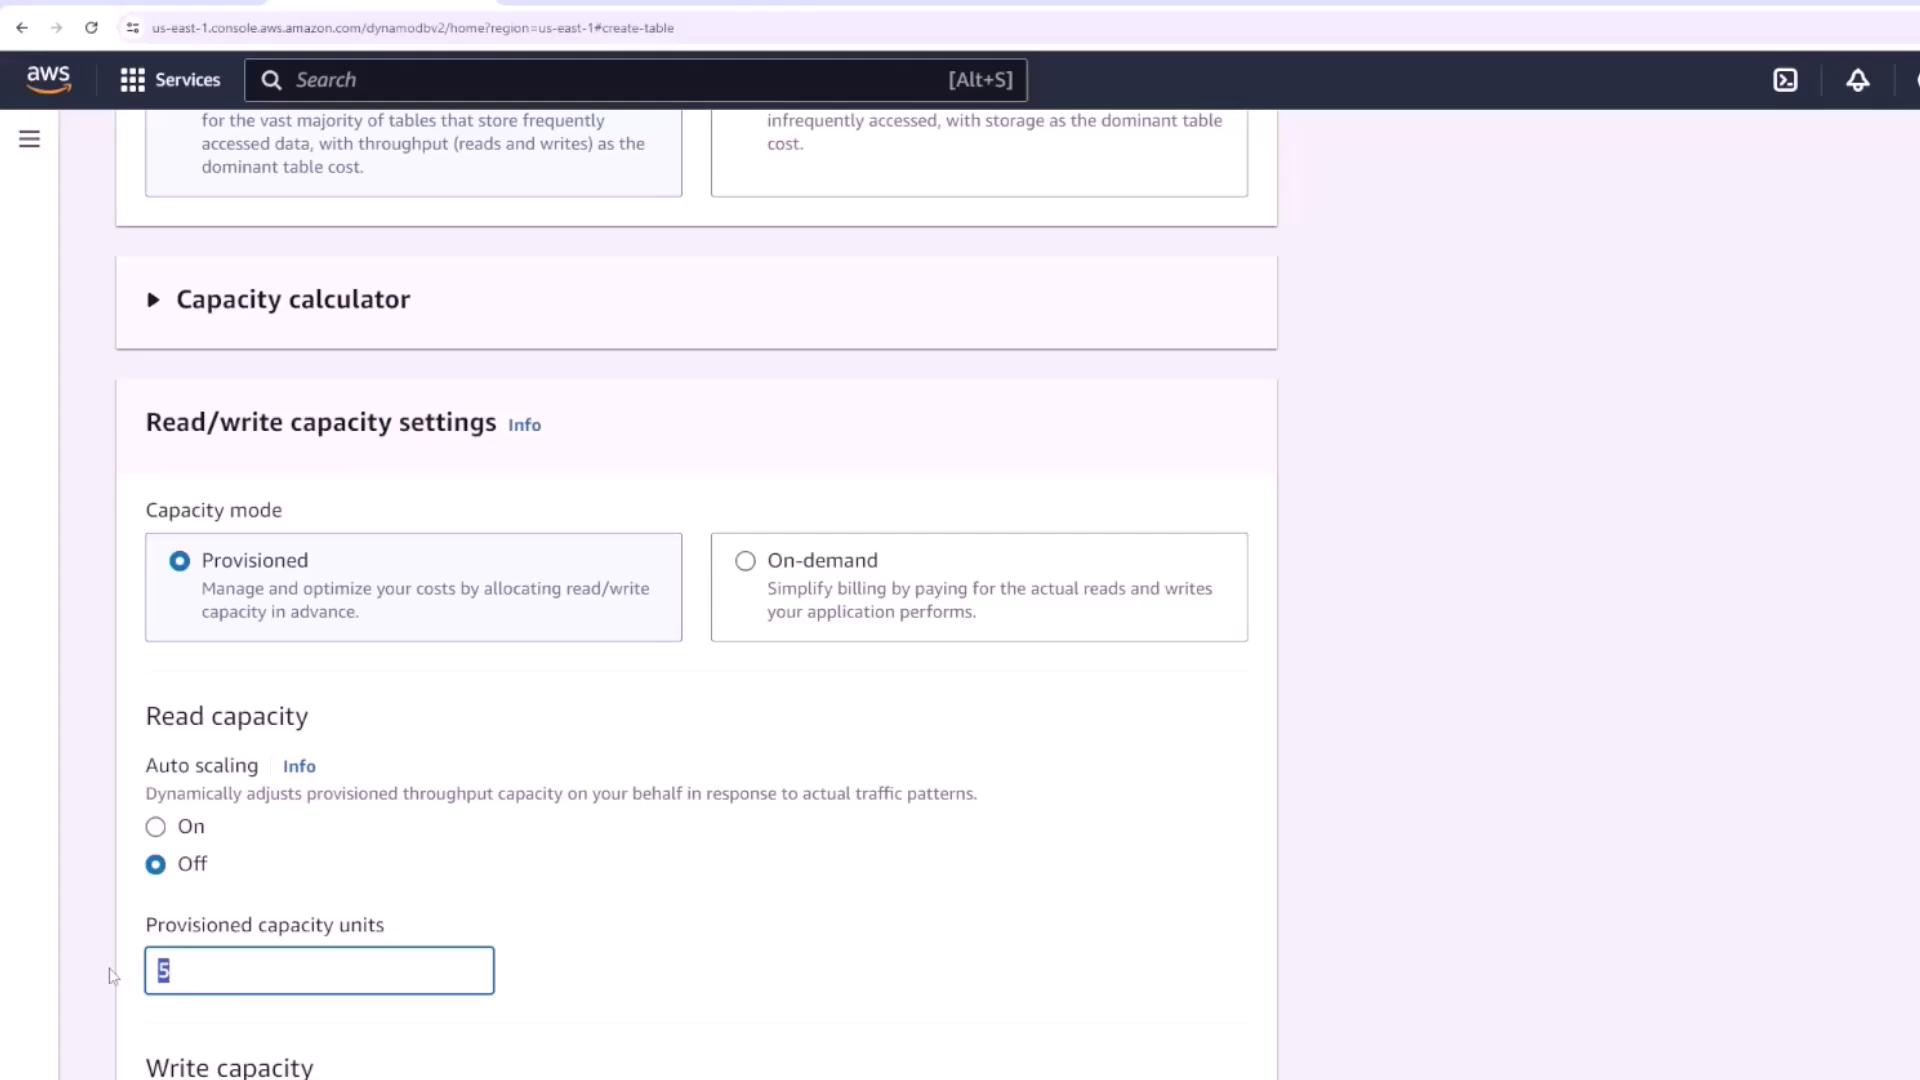
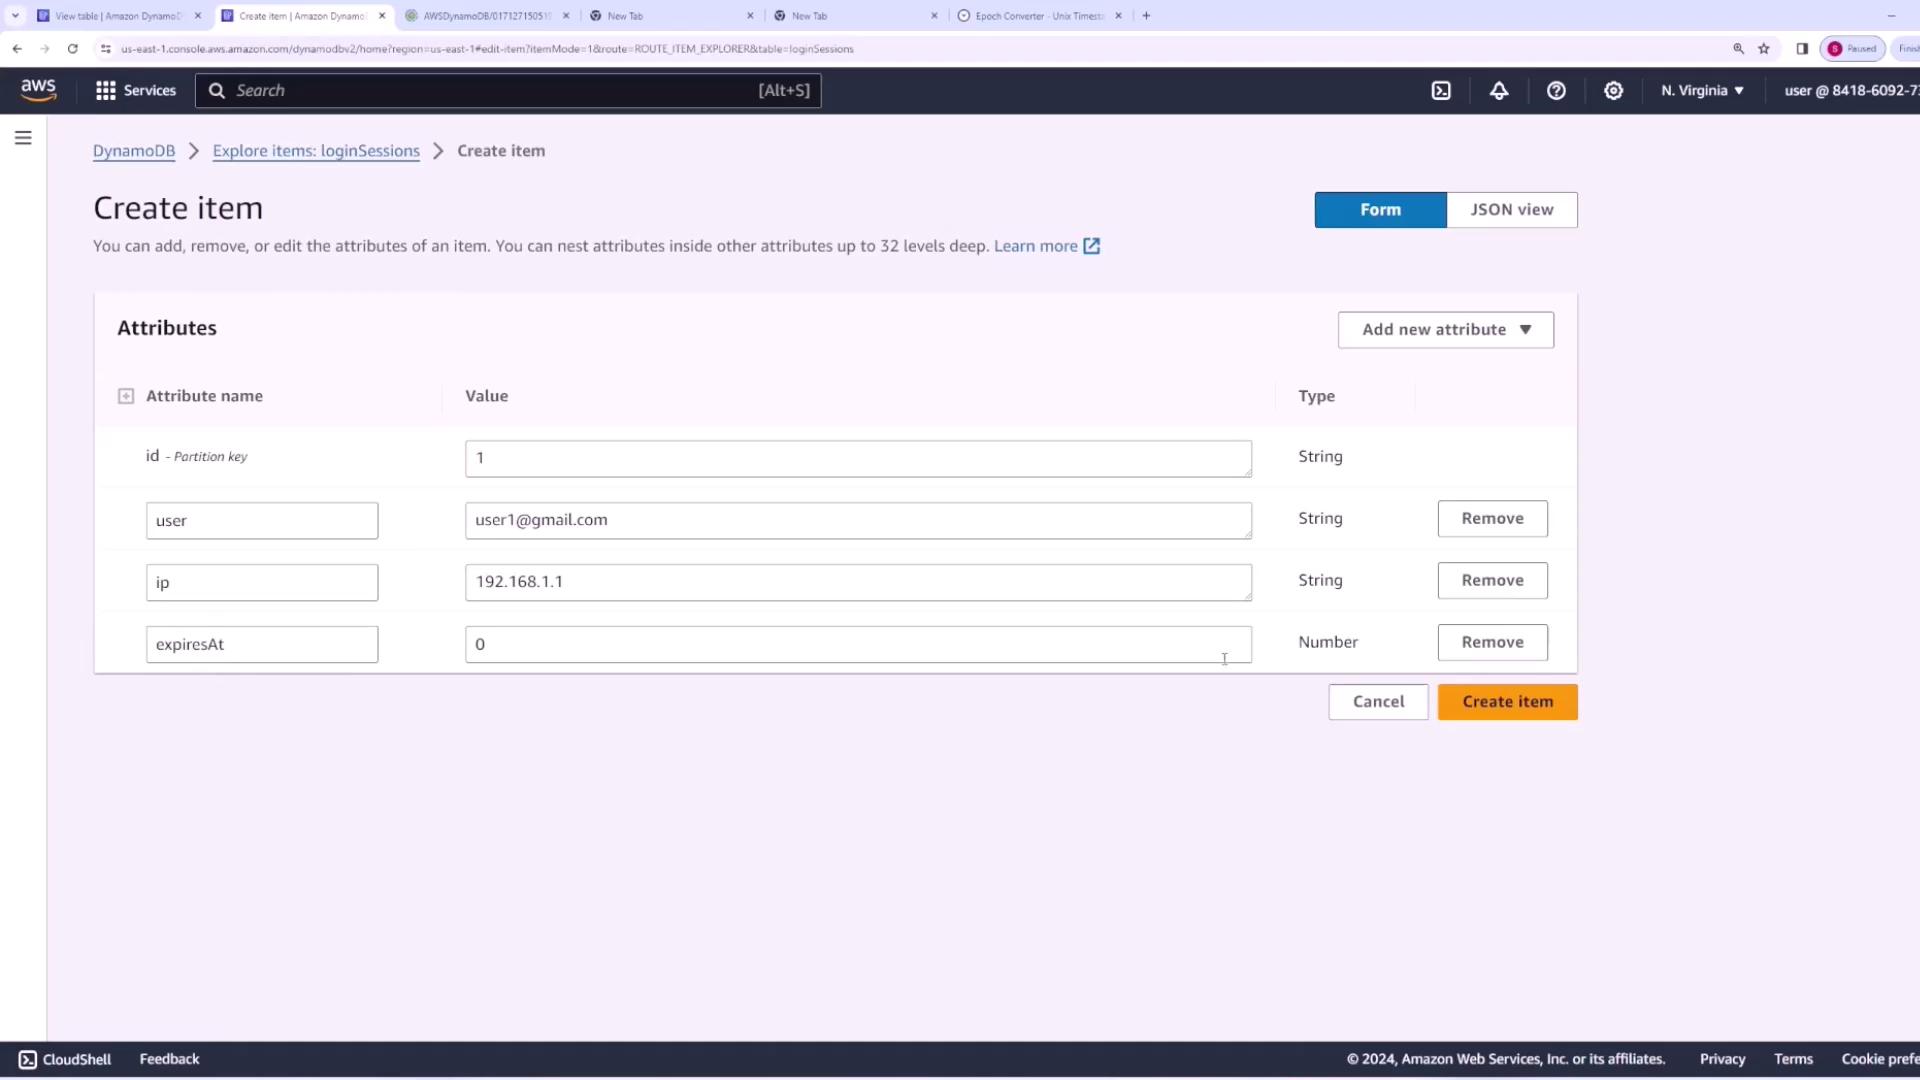
Begin by creating a table named “login sessions.” In this table, each time a user logs in, a new session entry is generated with a unique ID as the partition key. There is no need for a sort key in this context, and we will disable auto scaling by setting lower provisioned capacity units for a more controlled setup.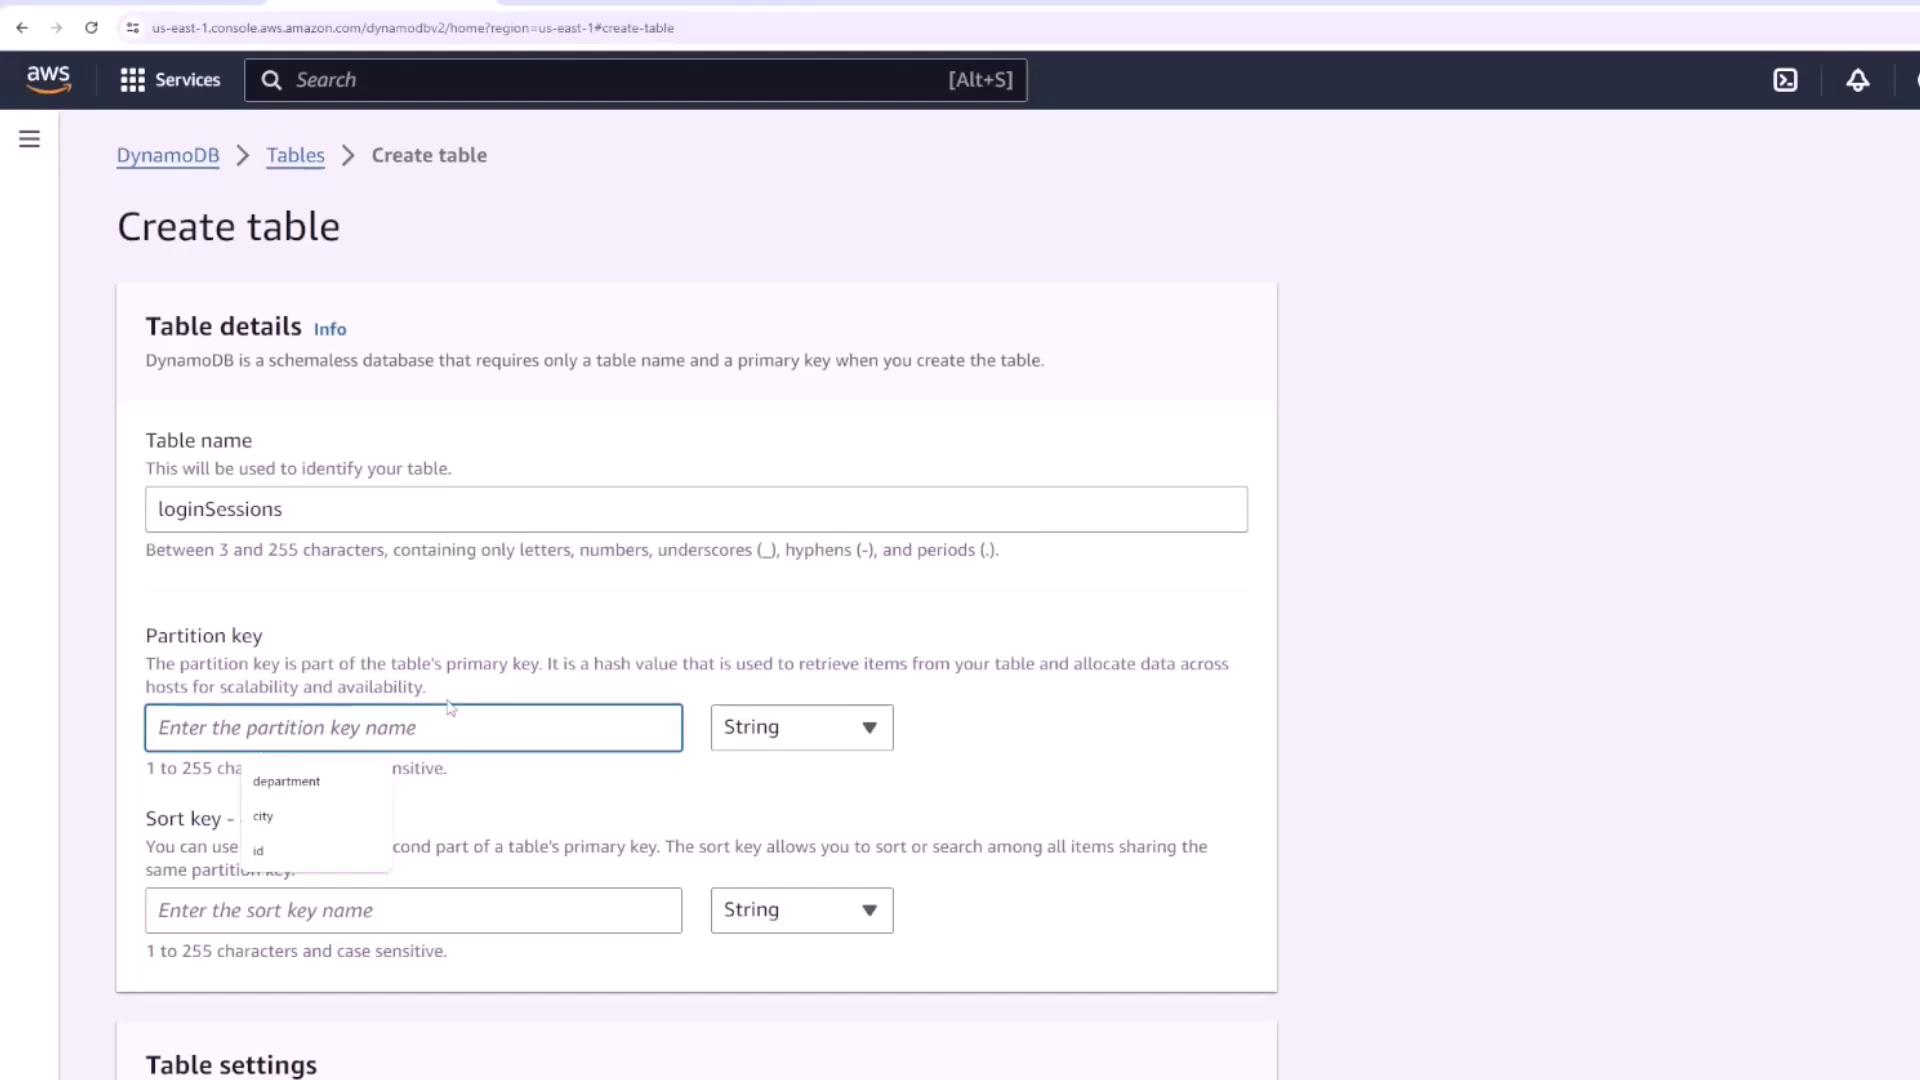
- A unique session ID.
- A user attribute (email, username, or user ID—in our case, “user1@gmail.com”).
- Optional additional data such as the IP address or device type from which the user logged in.
- An expiration attribute that defines when the session should terminate.
- ID: 1
- User: user1@gmail.com
- IP Address: [the user’s IP address]
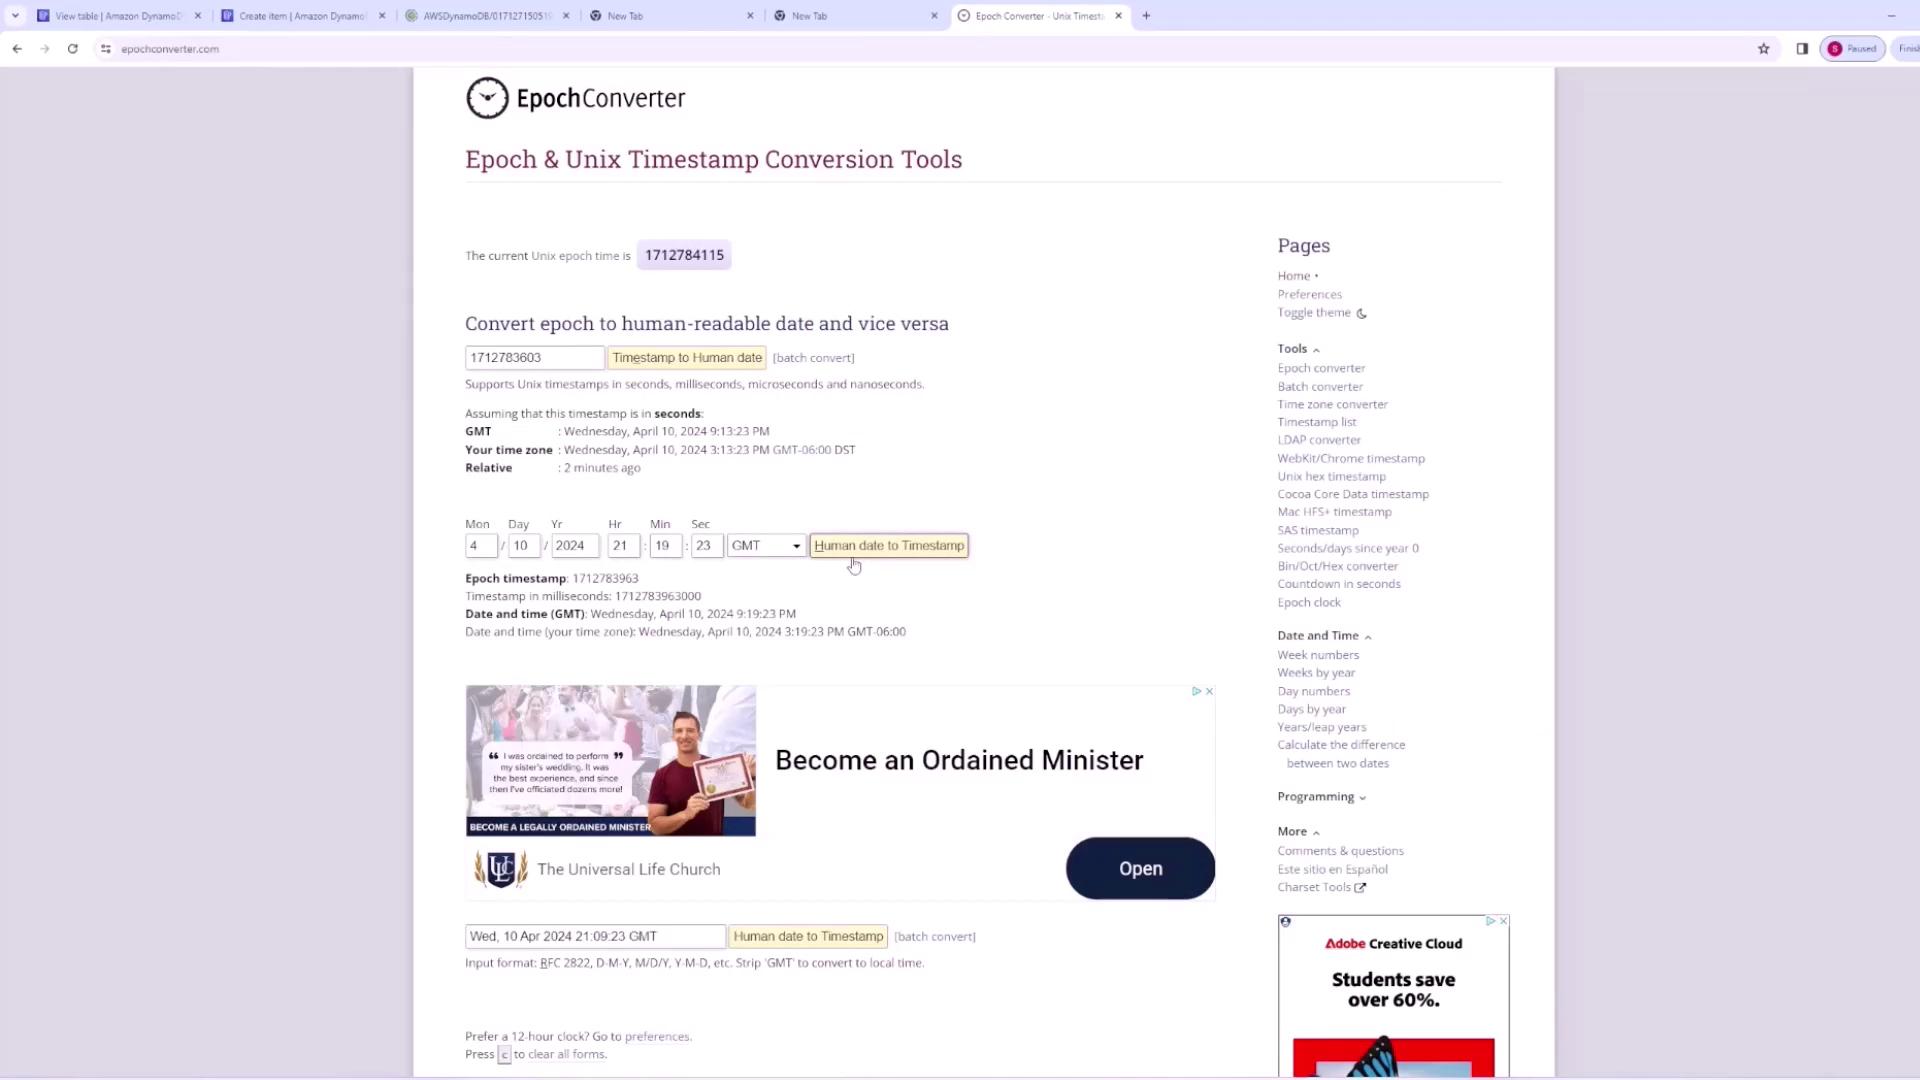
- Expires: [epoch timestamp representing the session expiration time]
Enabling TTL on the DynamoDB Table
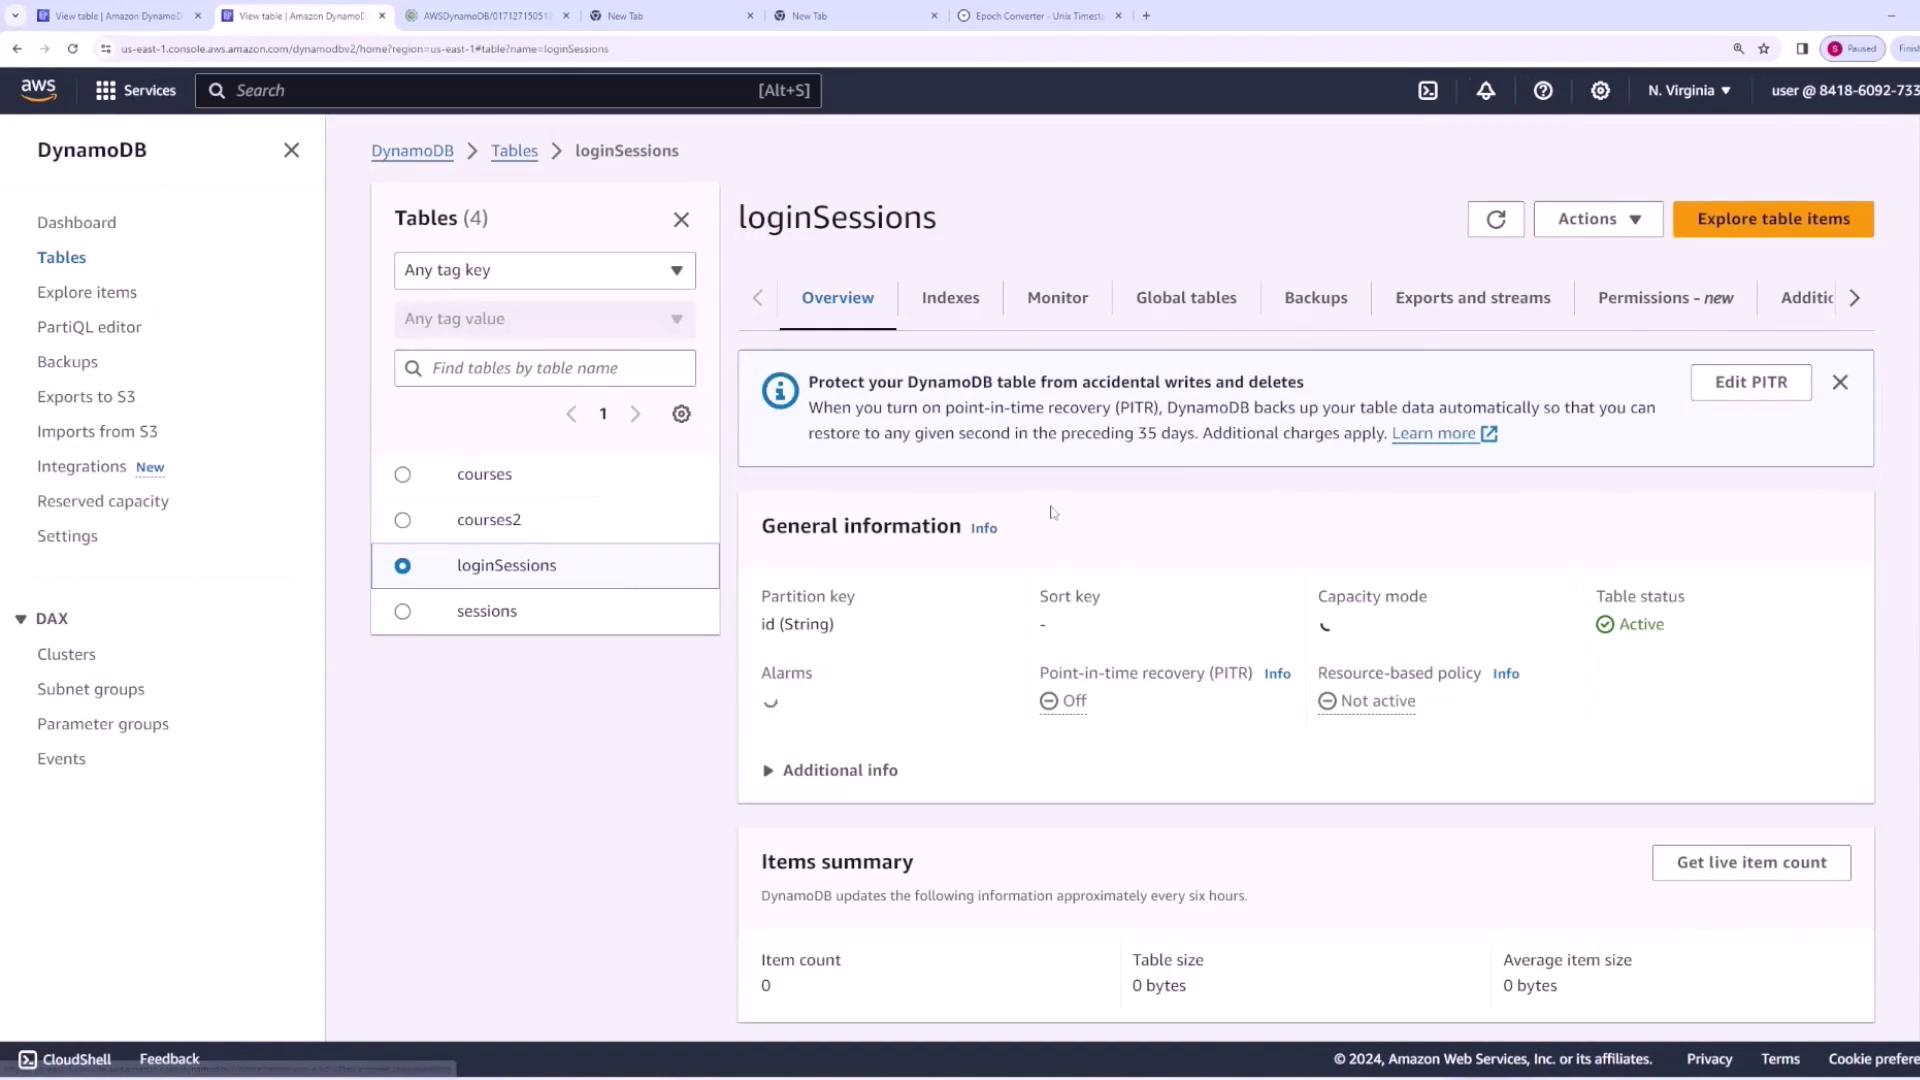
Next, enable TTL on your “login sessions” table by following these steps:- Navigate to the “login sessions” table in the AWS DynamoDB console.
- Go to the “Additional settings” section.
- Select the “Time to Live” option.
- Enter the TTL attribute name (e.g., “expires” or “expiresAt”) that the table will use to determine when an item should expire.
- Use the preview functionality to simulate expiration. For example, if you set the expiration to one hour in the future and refresh the current timestamp, no items should be eligible for deletion at that moment.
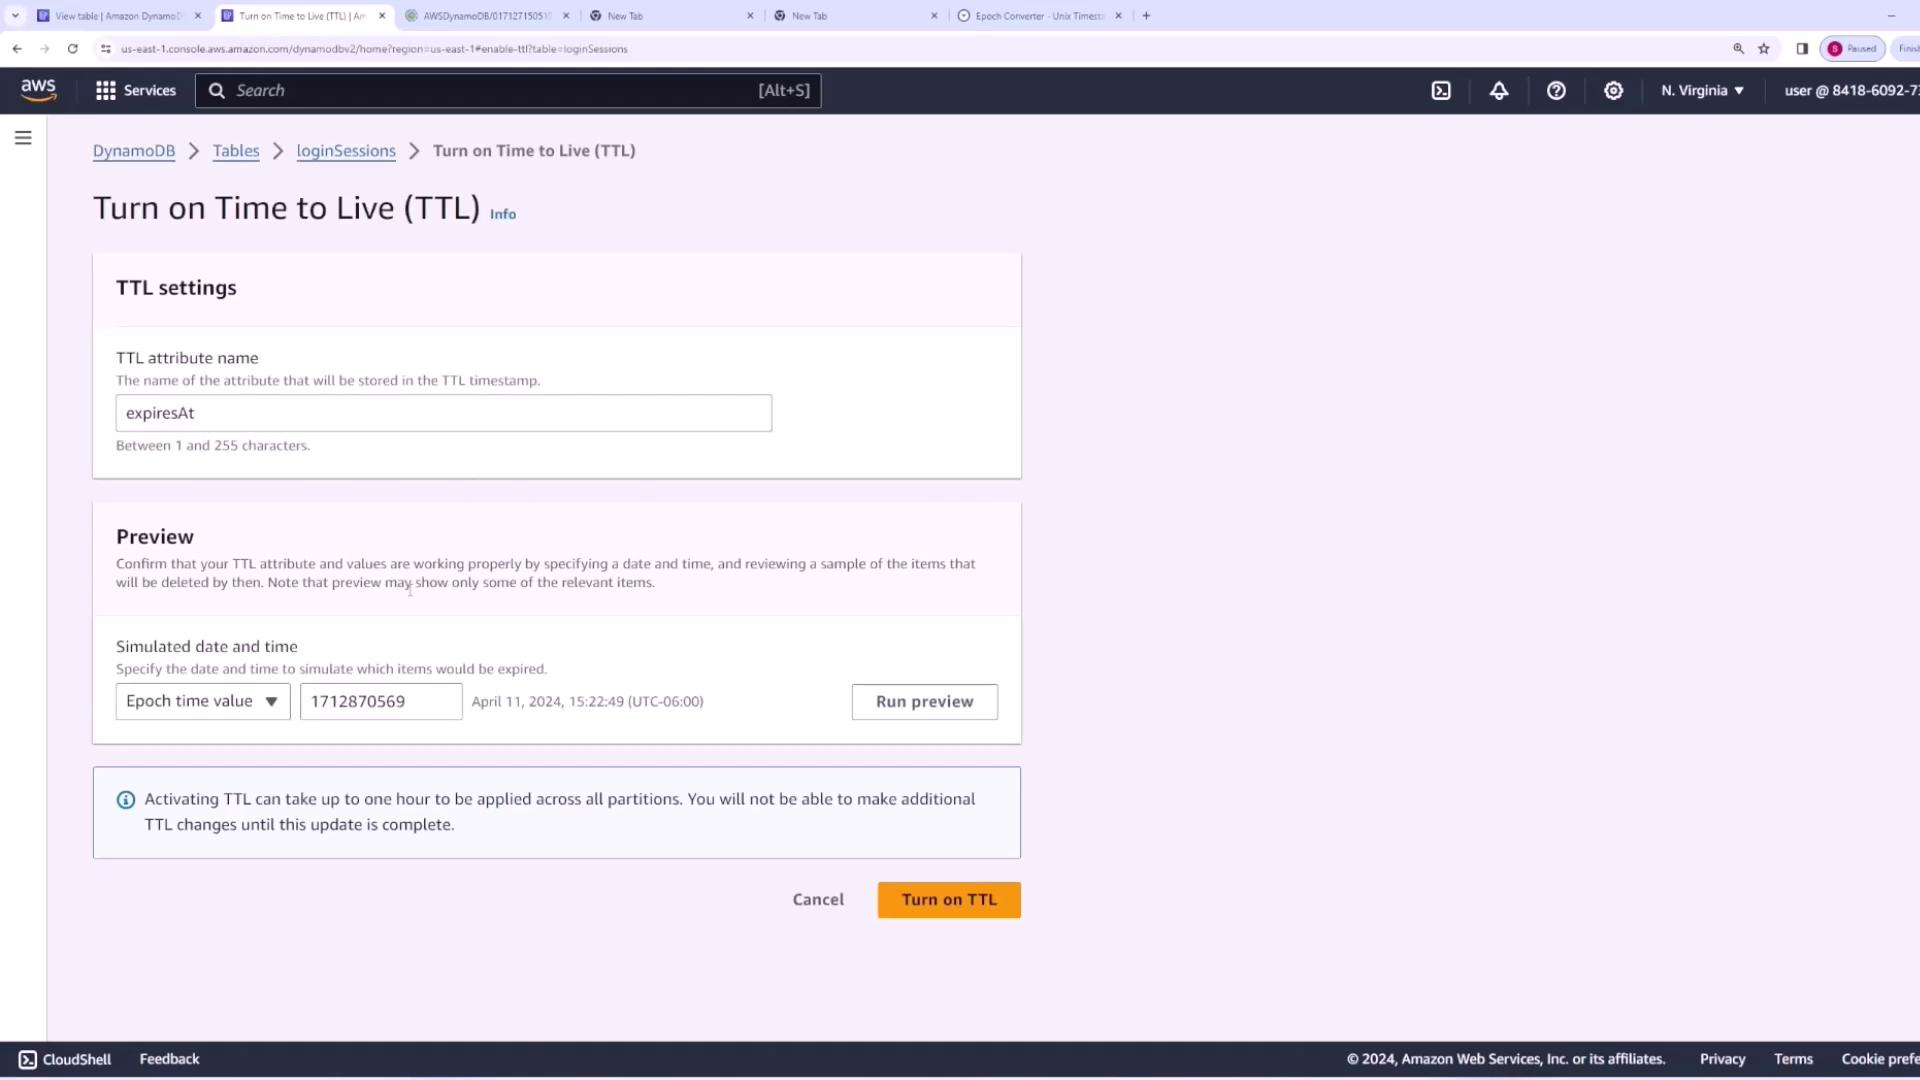
To observe TTL in action, simulate a future time (e.g., two hours ahead). DynamoDB will indicate that items with expired TTL values are ready for deletion. Once you are satisfied with the preview, activate TTL.

Conclusion
By following the steps outlined above, you have successfully configured TTL for your DynamoDB table. This feature automates session management by automatically deleting expired items, ensuring that your table remains efficient and performant. The key steps include:- Defining an expiration attribute using an epoch timestamp.
- Enabling TTL in the DynamoDB console settings.
- Verifying the TTL behavior with the preview functionality.