Table Creation and Key Configuration
Begin by accessing the DynamoDB service from the AWS Console. Then, start creating a new table by providing the necessary details:- Table Name: orders (You can choose any name suitable for your application.)
- Partition Key: customerId (A unique identifier for each customer)
- Sort Key: orderId (Ensures uniqueness when a customer places multiple orders)
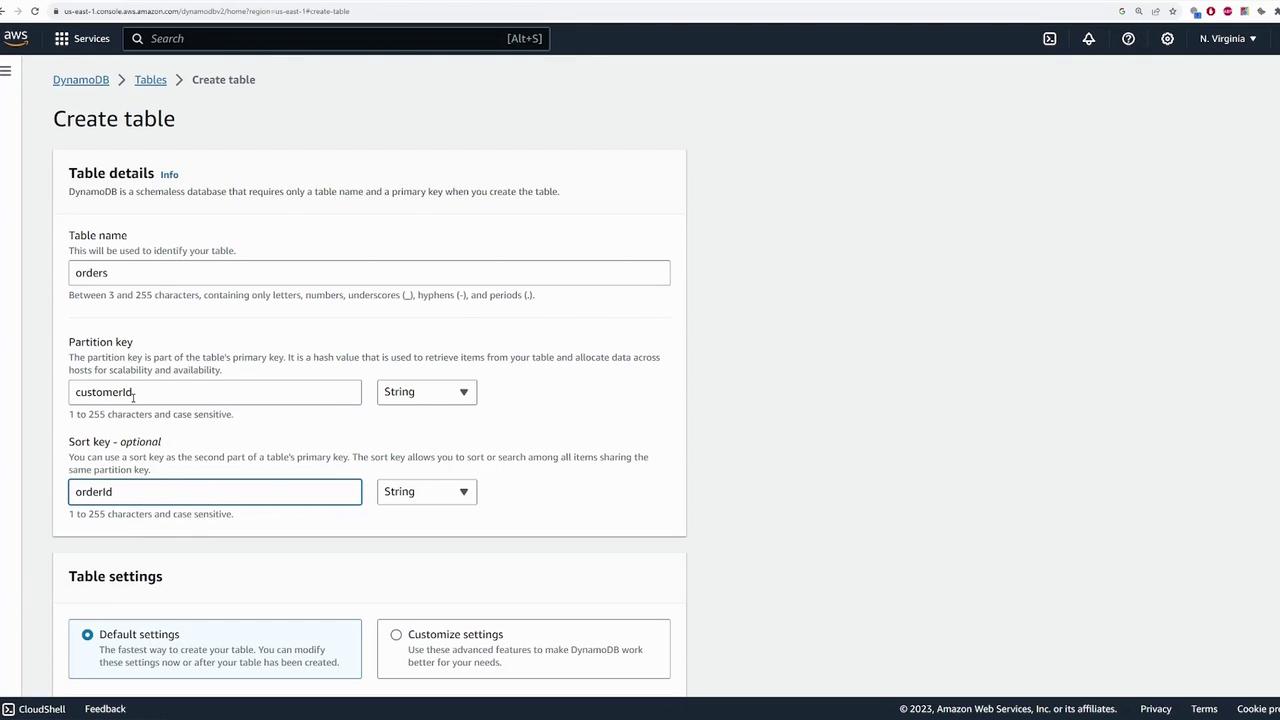
Table Settings and Provisioned Throughput
After setting up the keys, you can customize your table settings or use the defaults. The key configuration options include:-
Table Class:
- Default is DynamoDB Standard.
- Option to choose DynamoDB Standard Infrequent Access for less frequently accessed data.
-
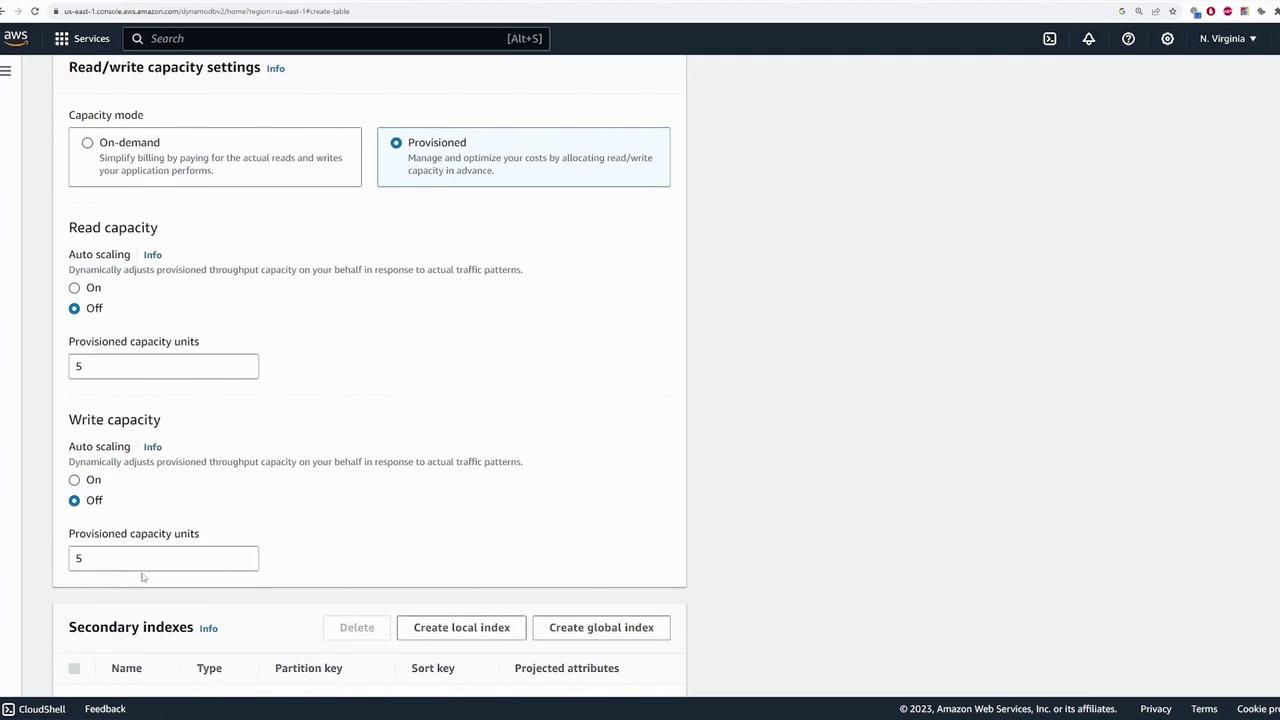
Provisioned Throughput:
- Choose between fixed provisioned capacity and auto-scaling.
- When auto-scaling is enabled, configure the minimum and maximum capacity units and set the target utilization (70% in this demo) so that DynamoDB adjusts throughput based on workload.
-
Additional Settings:
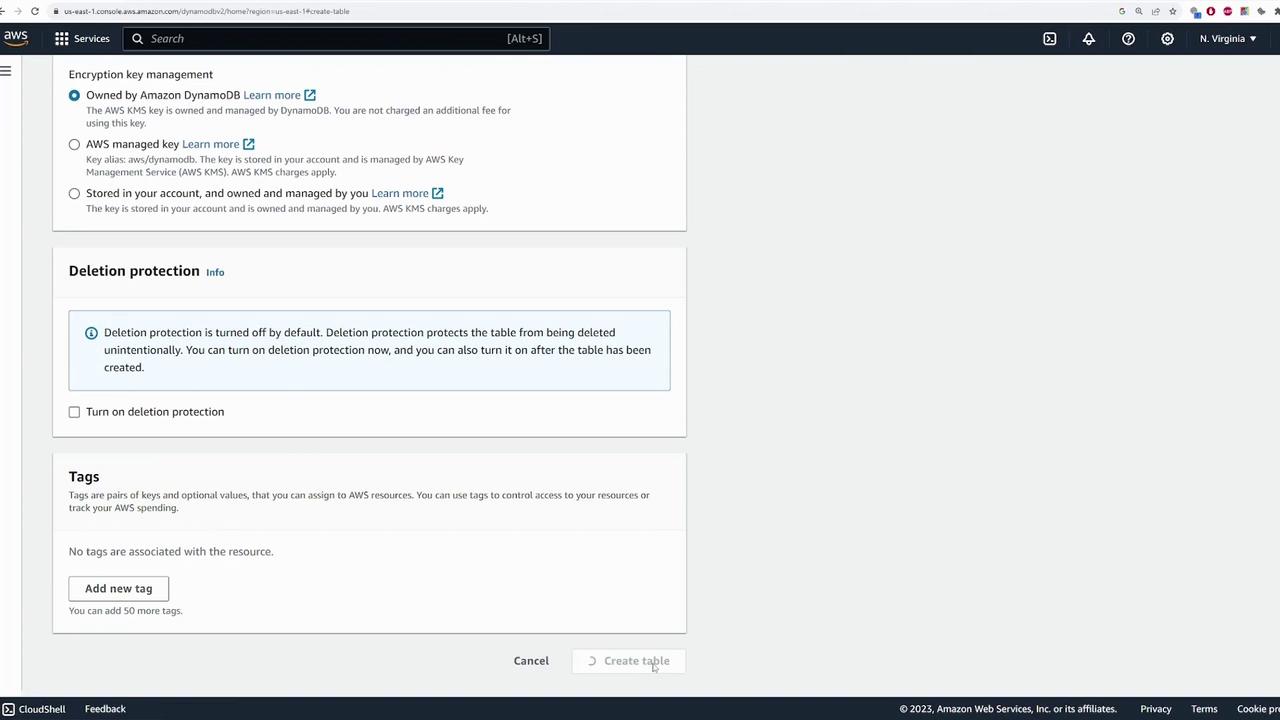
- Configure secondary indexes, encryption options, and deletion protection.

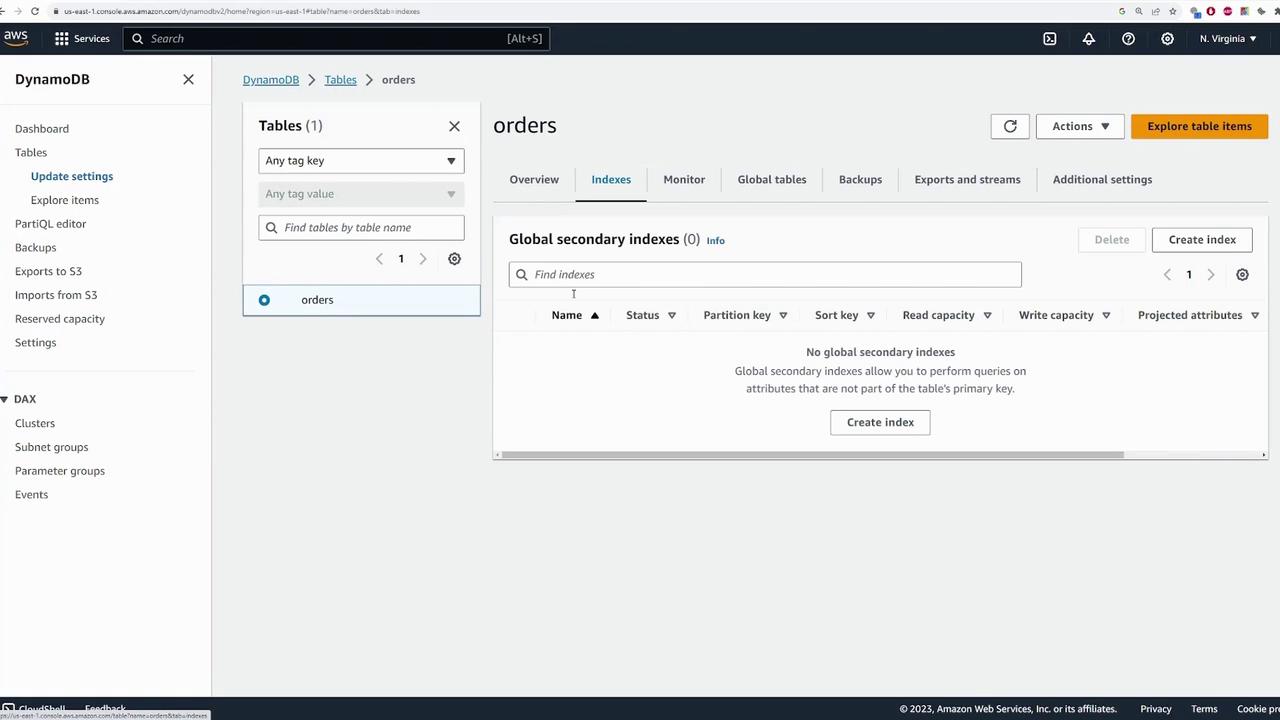
Exploring the Table
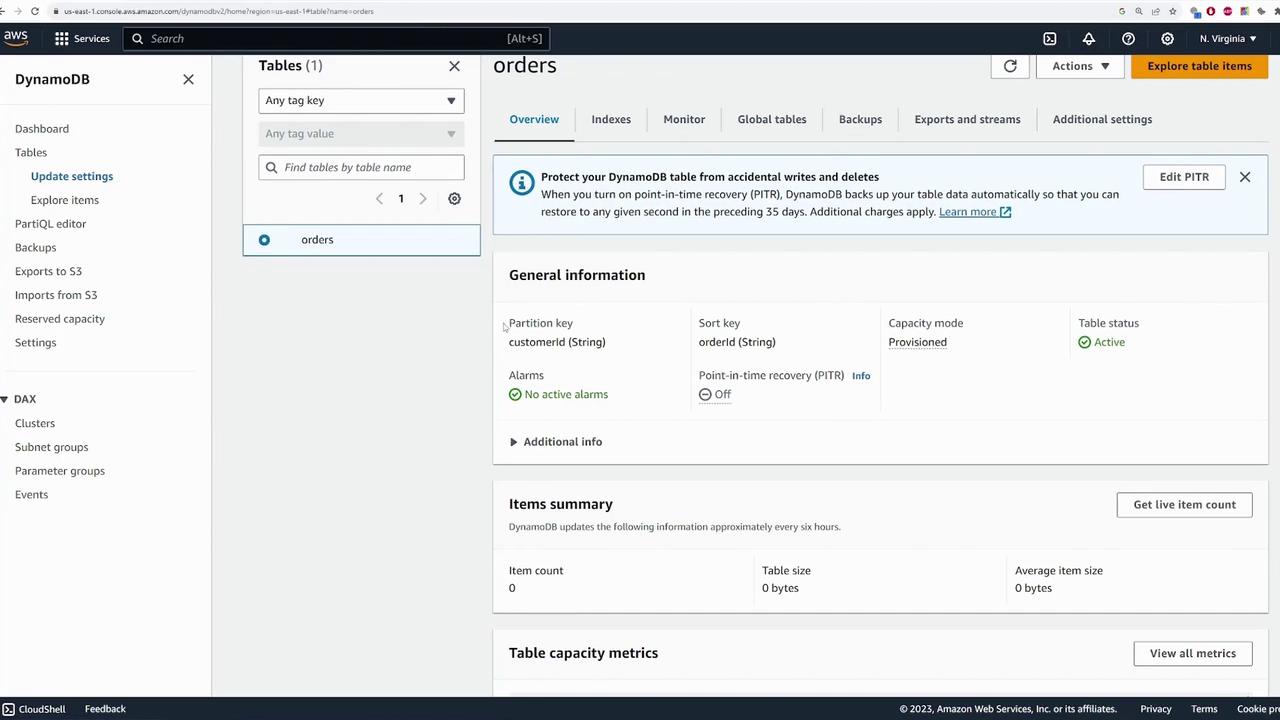
After the table activation, select the table to explore its details. The table overview pane displays:- Table Configurations: Partition key (customerId), sort key (orderId), capacity mode, and other metrics.
- Indexes Tab: Displays any configured secondary indexes.
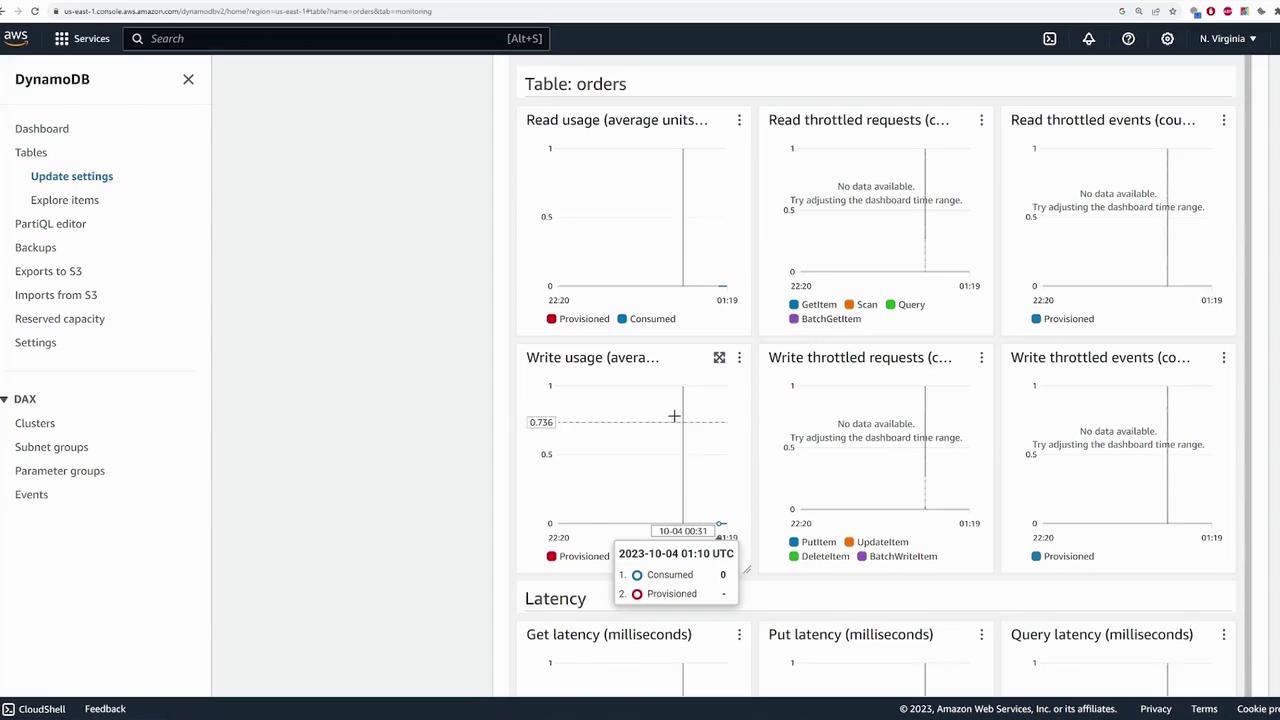
- Monitor Tab: Provides CloudWatch metrics such as read/write usage and latency.
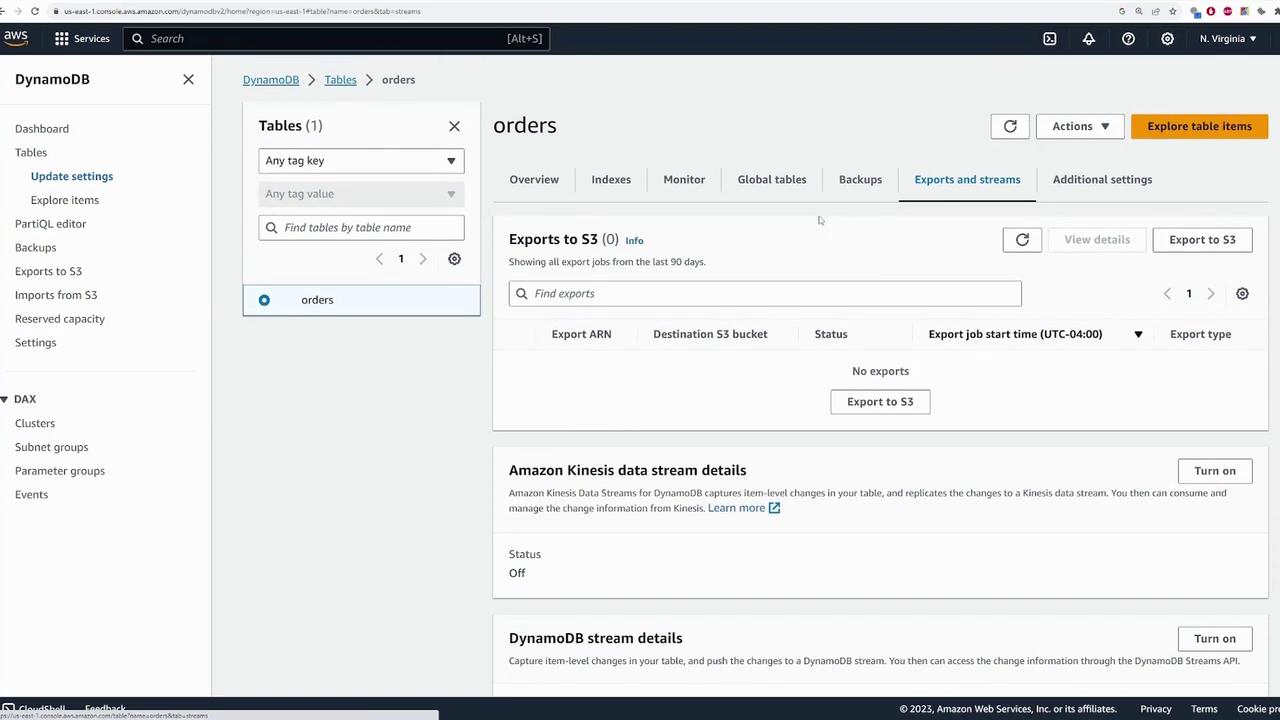
- Exports and Streams Tab: Facilitates setting up data exports and streams for further processing.
Adding Data to the Table
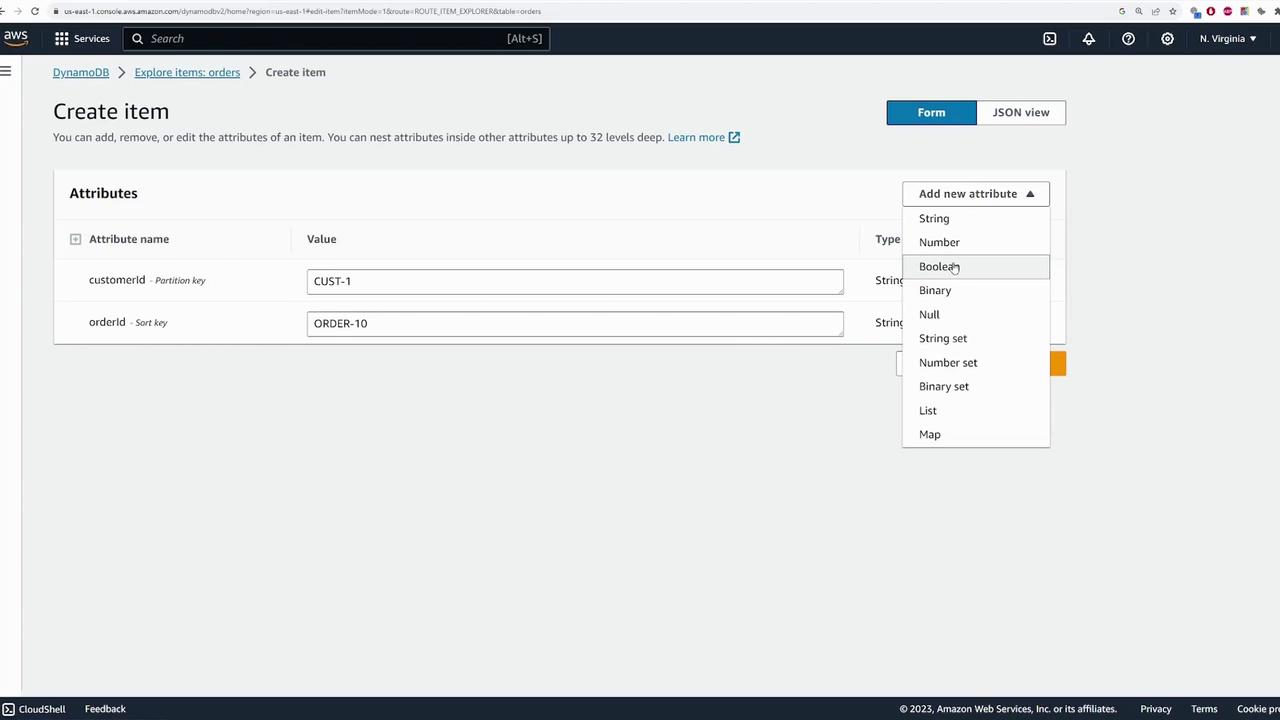
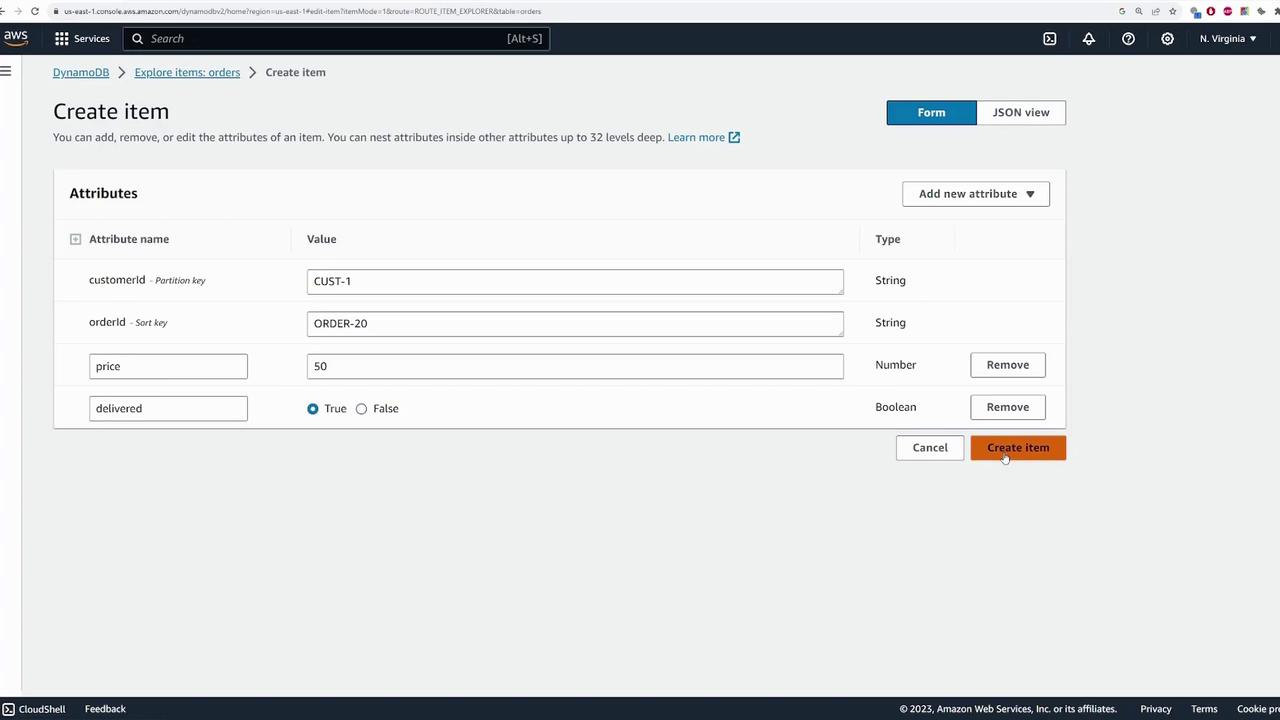
Next, add sample data using the “Explore Table Items” feature in the AWS Console. Although the AWS CLI or SDK are common for production use, the Console is ideal for demo purposes. Follow these steps:- Click “Create Item.”
- Set the partition key (customerId) and sort key (orderId). As an example:
- For the first item:
- customerId: “customer1”
- orderId: “order10”
- For the first item:
- Add additional attributes:
- price (number)
- delivered (Boolean)
- Item 1: customerId = “customer1”, orderId = “order10”, price = 100, delivered = false.
- Item 2: customerId = “customer1”, orderId = “order20”, price = 50, delivered = true.
- Item 3: customerId = “customer2”, orderId = “order30”, price = 35, delivered = false.

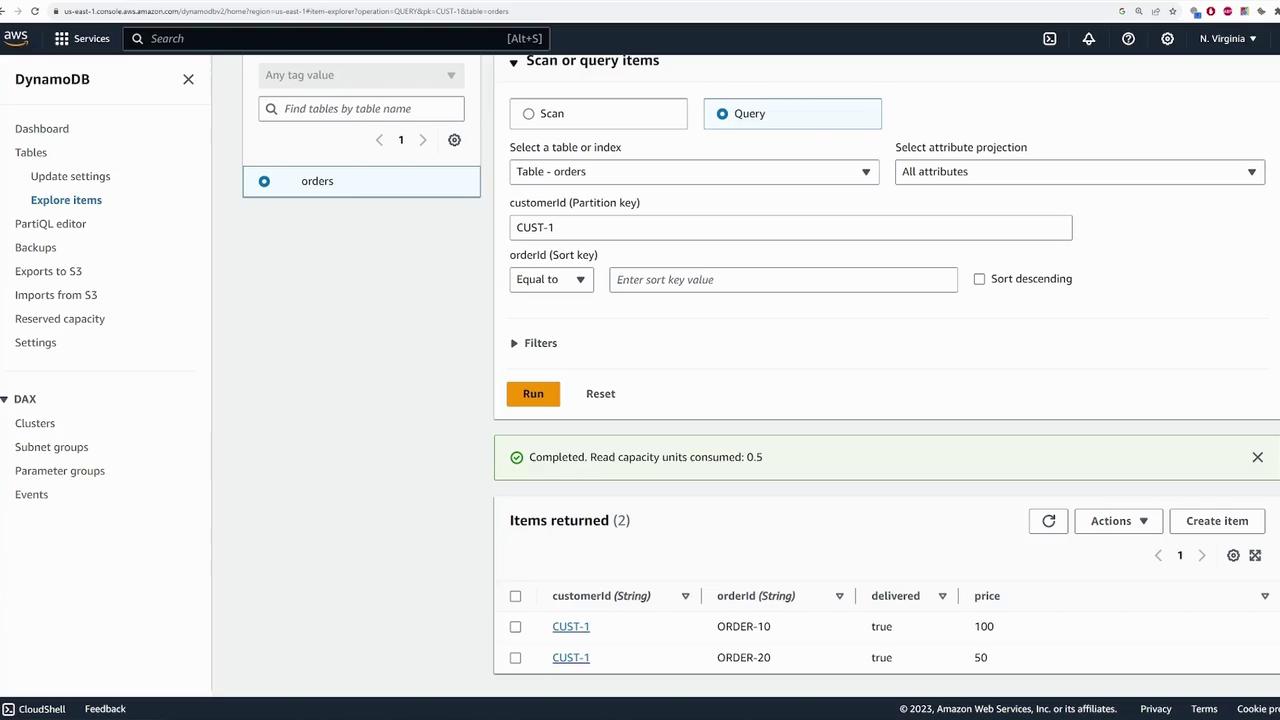
Querying Data
Use the “Query” feature for efficient data retrieval. To query all orders for “customer1,” follow these steps:- Choose the “Query” option.
- Specify the partition key value: customerId = “customer1”.
- Execute the query to display the relevant orders.
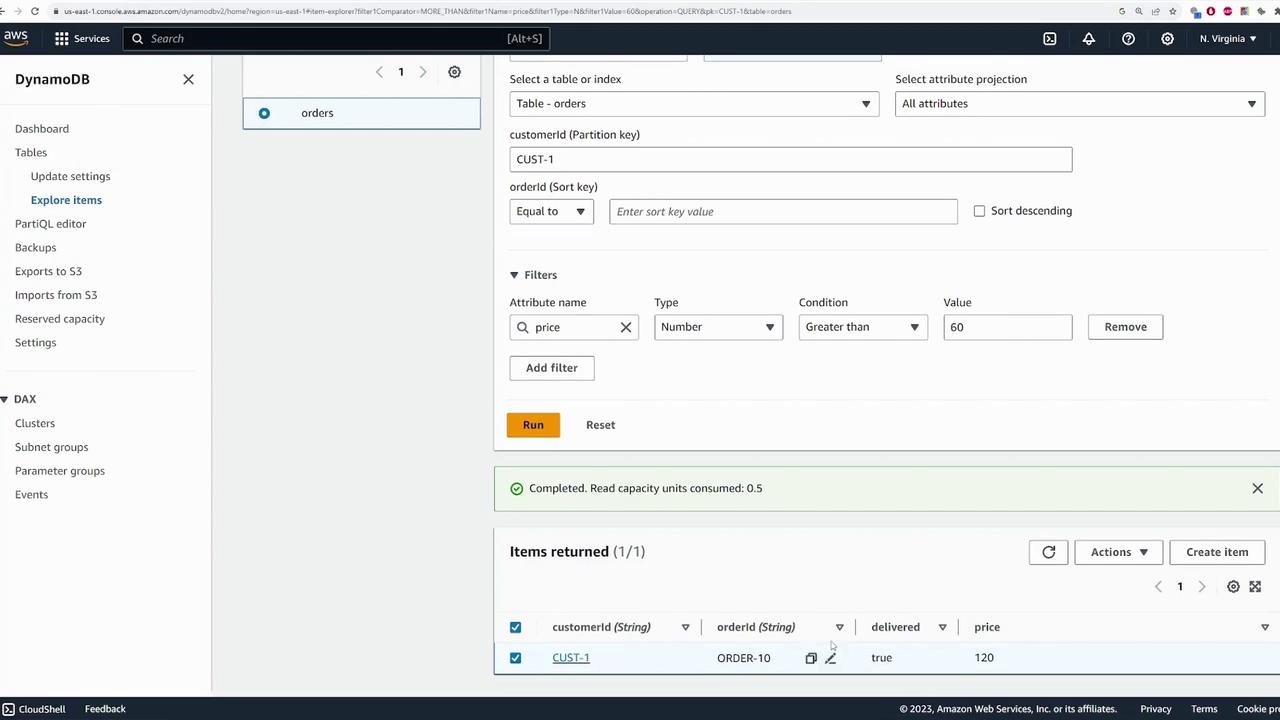
- Use the filter settings.
- Define the “price” attribute with the condition “greater than 60.”
- Run the query to see only the qualifying orders.
Editing and Deleting Items
Editing an item is straightforward:- Select an item and click “Edit Item.”
- Modify the desired fields (for example, change the price from 100 to 120).
- Save the changes to update the item.
- Select the item.
- Go to “Actions” and choose “Delete Item.”
- Confirm deletion when prompted.
Always back up your data before performing delete operations to avoid accidental loss.
Exploring Advanced Query Features
DynamoDB offers advanced query capabilities that mimic SQL-like syntax for users with a SQL background. While the underlying operations remain DynamoDB queries, this feature simplifies complex query logic.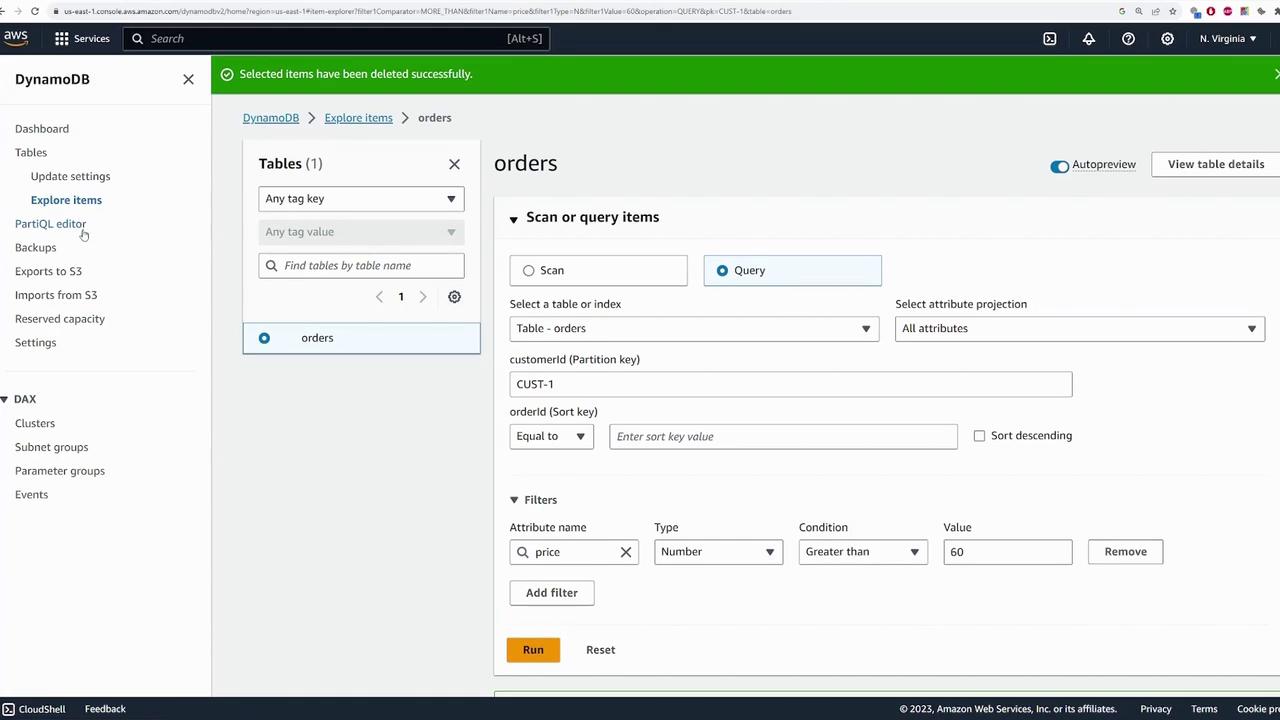
Monitoring and Table Deletion
Monitor your table’s performance through the “Monitor” tab. Here you can view metrics such as read/write usage, latency, and set up CloudWatch alarms for proactive management.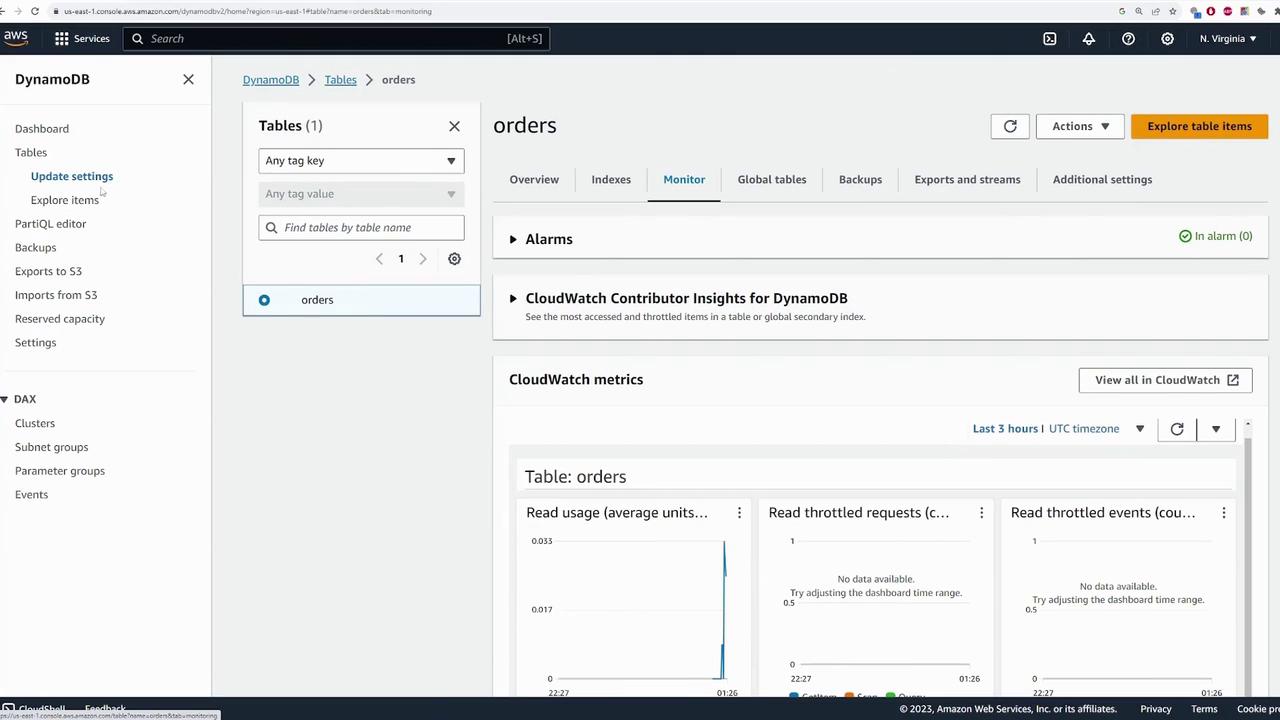
- Select the table.
- Click “Delete.”
- Confirm the deletion.
Be cautious when deleting tables, as the deletion process is irreversible and results in permanent data loss.