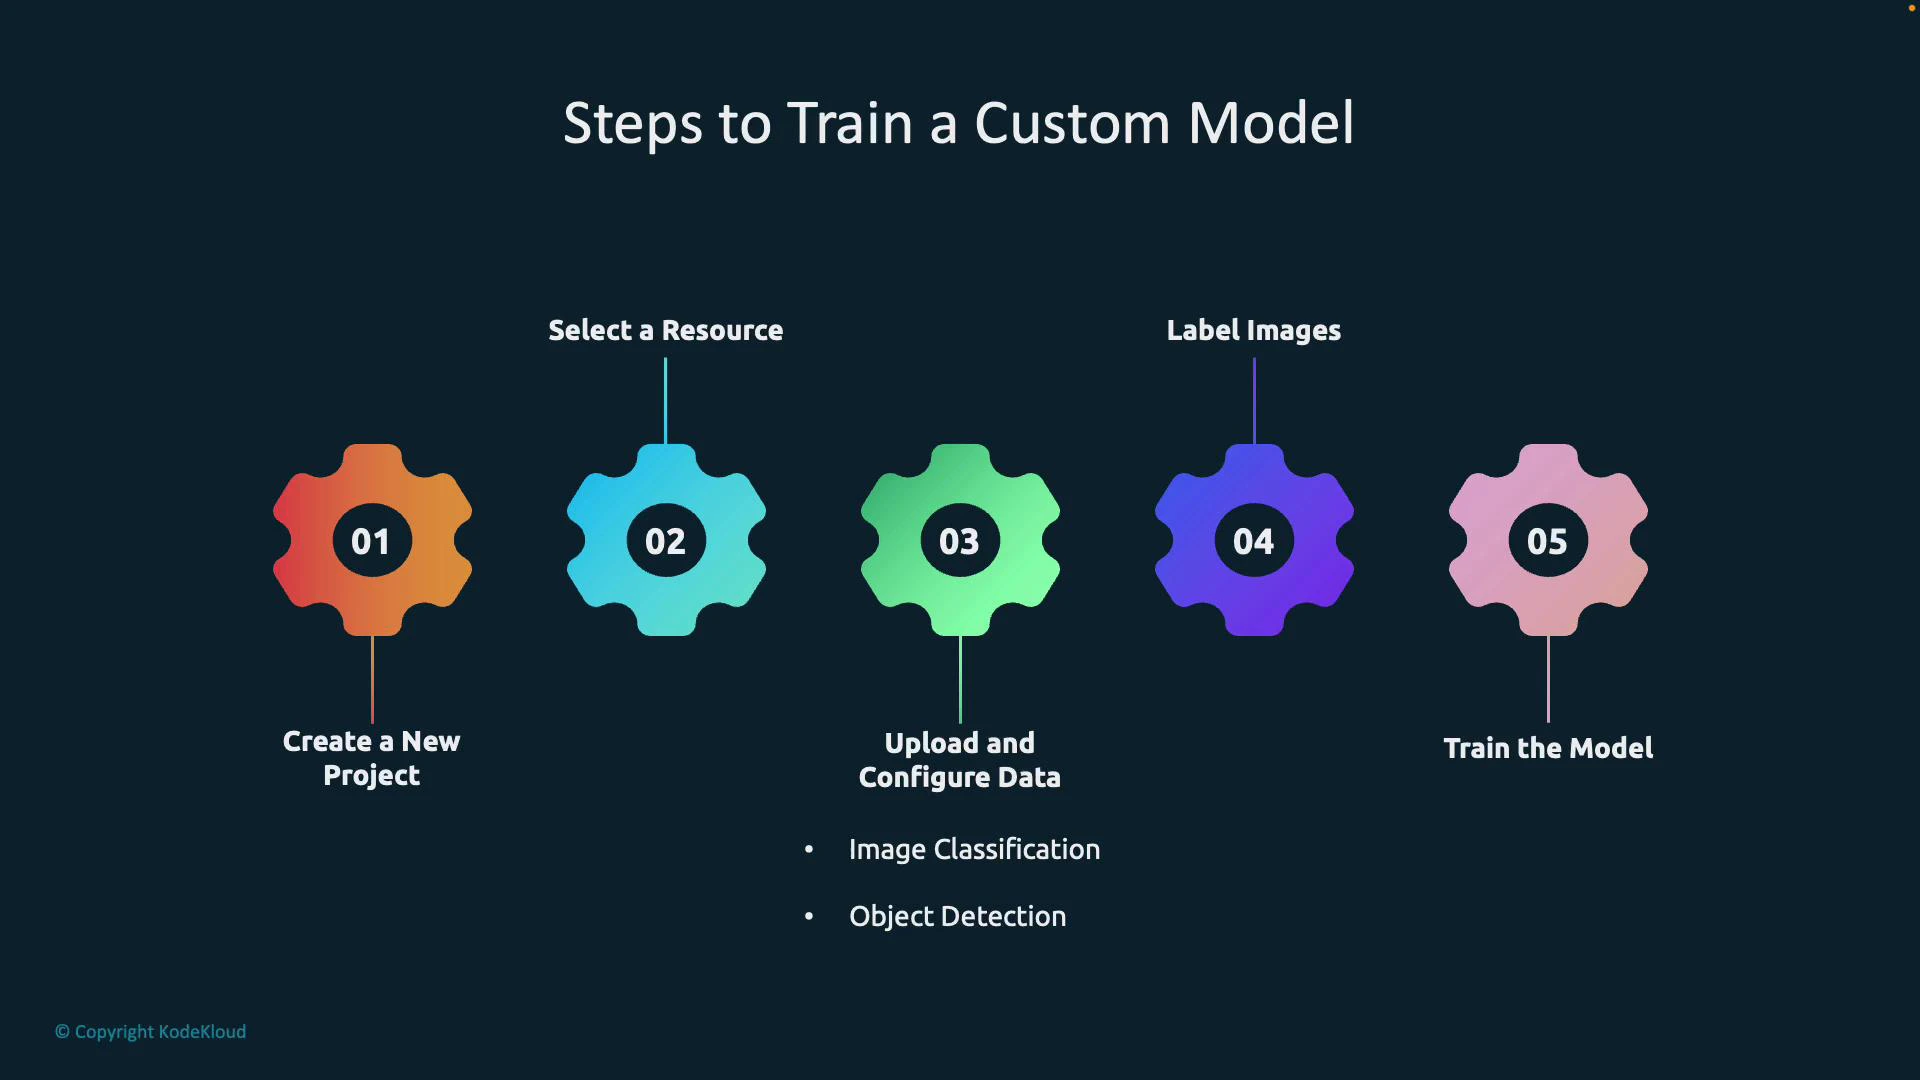
Guide to building, training, evaluating, and publishing image classification and object detection models with Azure Custom Vision Studio.
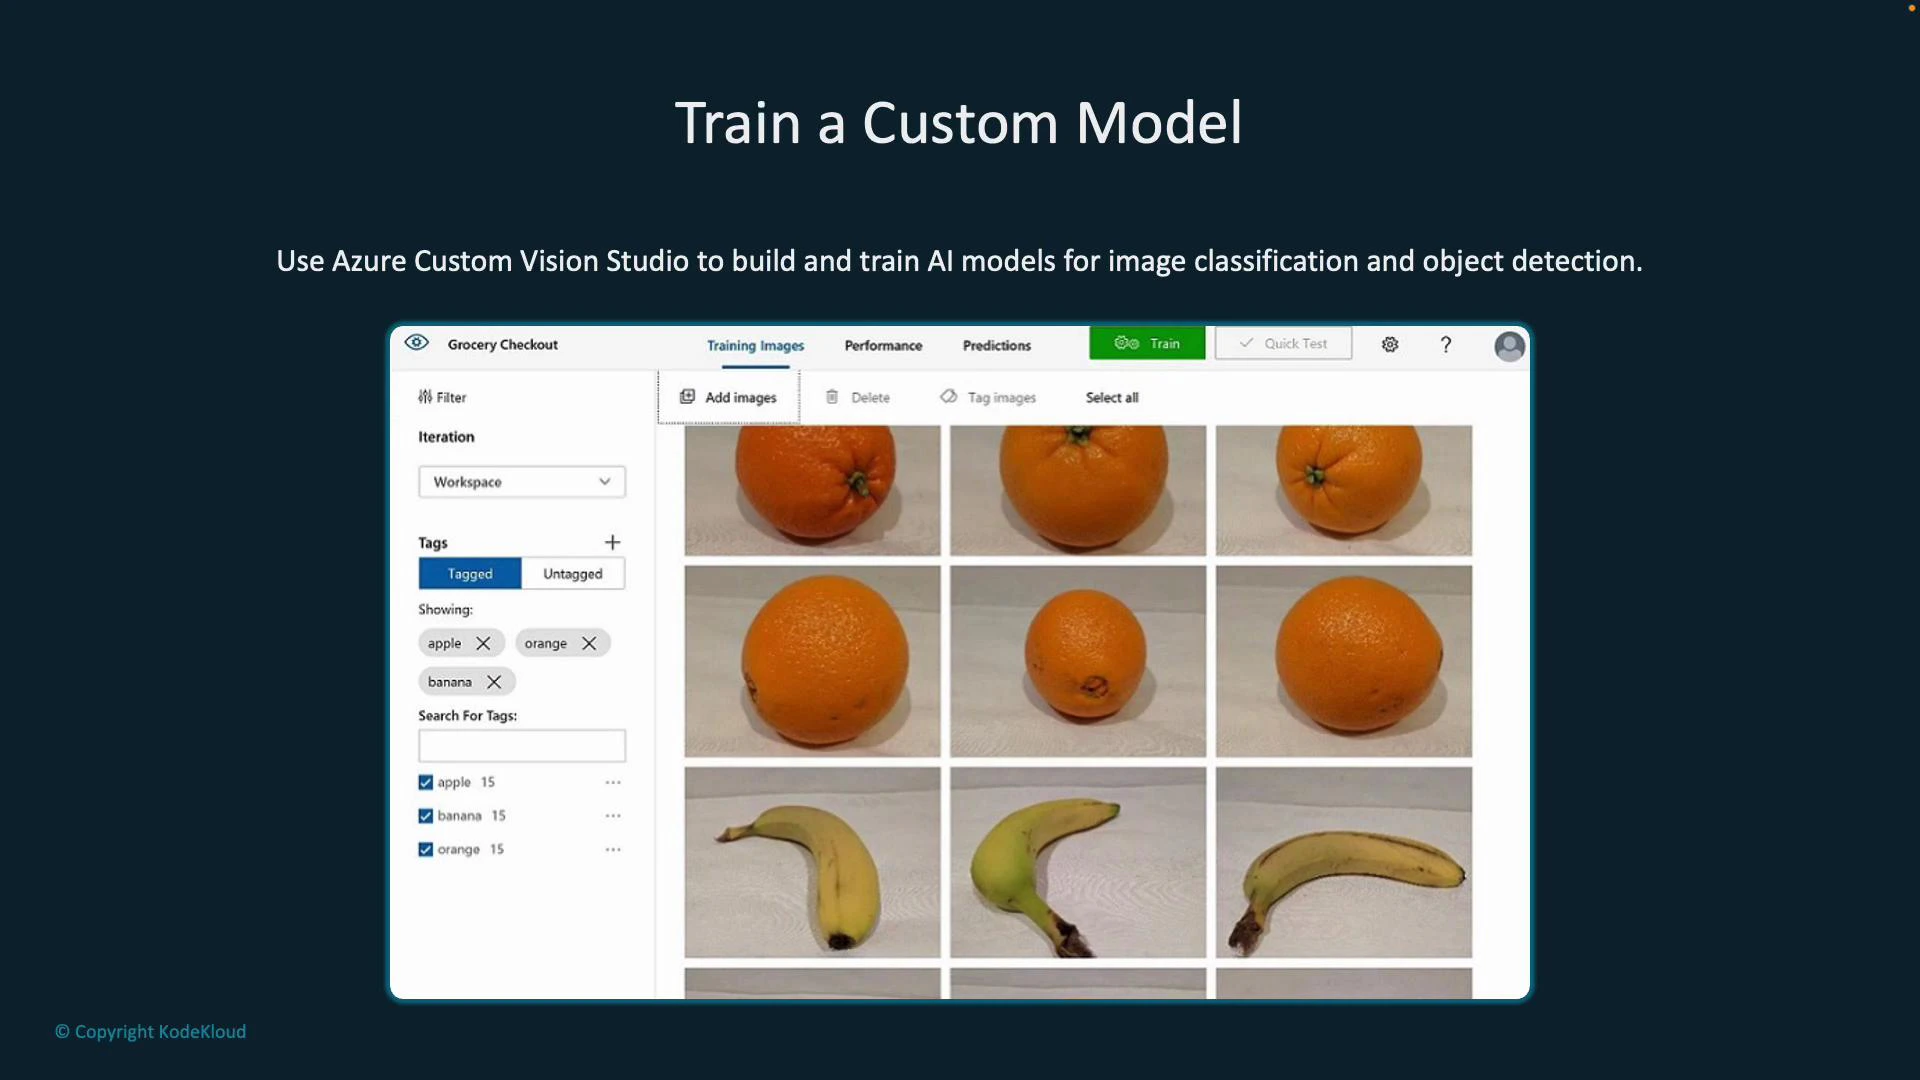
Train custom image classification and object detection models using Azure Custom Vision Studio: a visual, low-code interface for building, training, and publishing models that detect or classify objects in images. Start with labeled images (for example, apples, oranges, and bananas) and let Custom Vision do the heavy lifting of model training, evaluation, and publishing.Explore Custom Vision Studio: https://learn.microsoft.com/azure/cognitive-services/custom-vision-service/
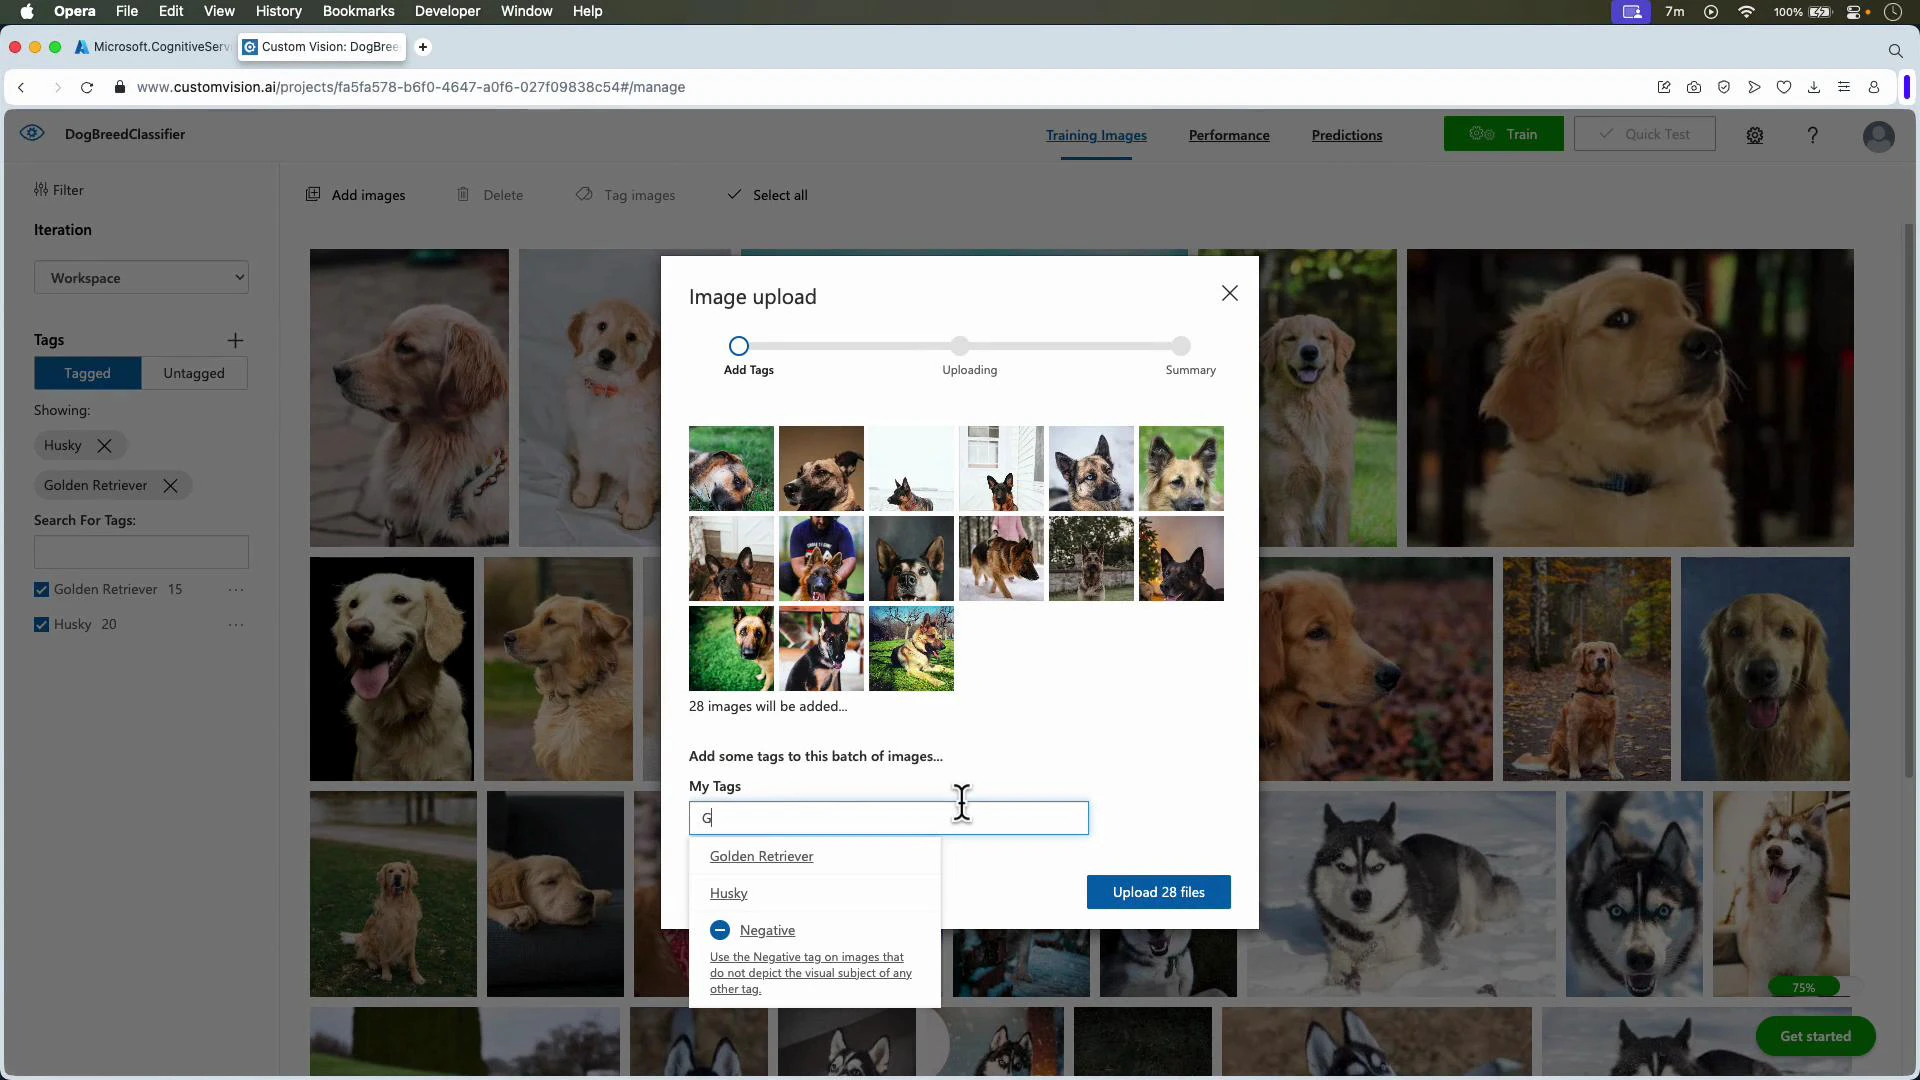
Once your images are uploaded and tagged, use the Train button (top of the project page) to start training. The UI guides you from upload → labeling → training → evaluation, making iteration straightforward.
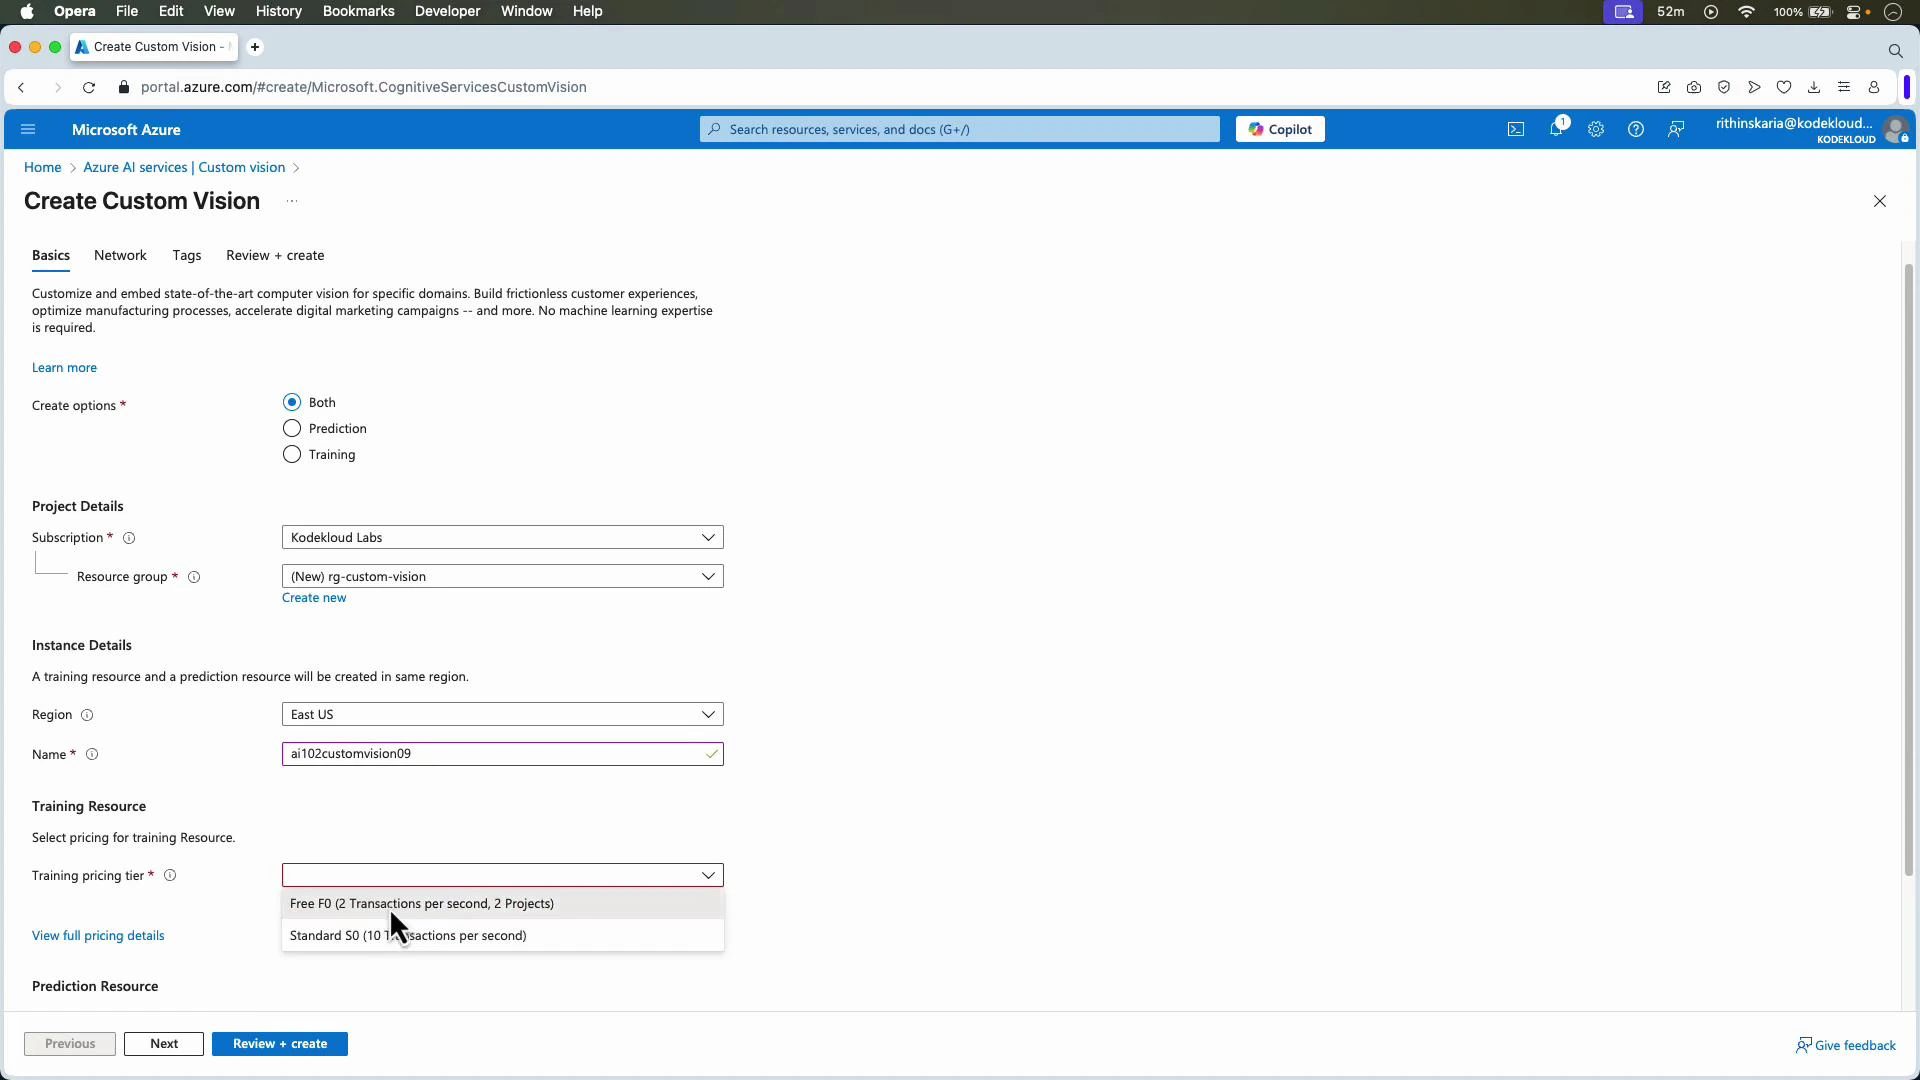
Create a Custom Vision resource in the Azure portal. You can enable both training and prediction on the same resource or separate them into training and prediction resources depending on your security and billing needs. Pick a subscription, resource group, region, and pricing tier (there is a free tier for testing).
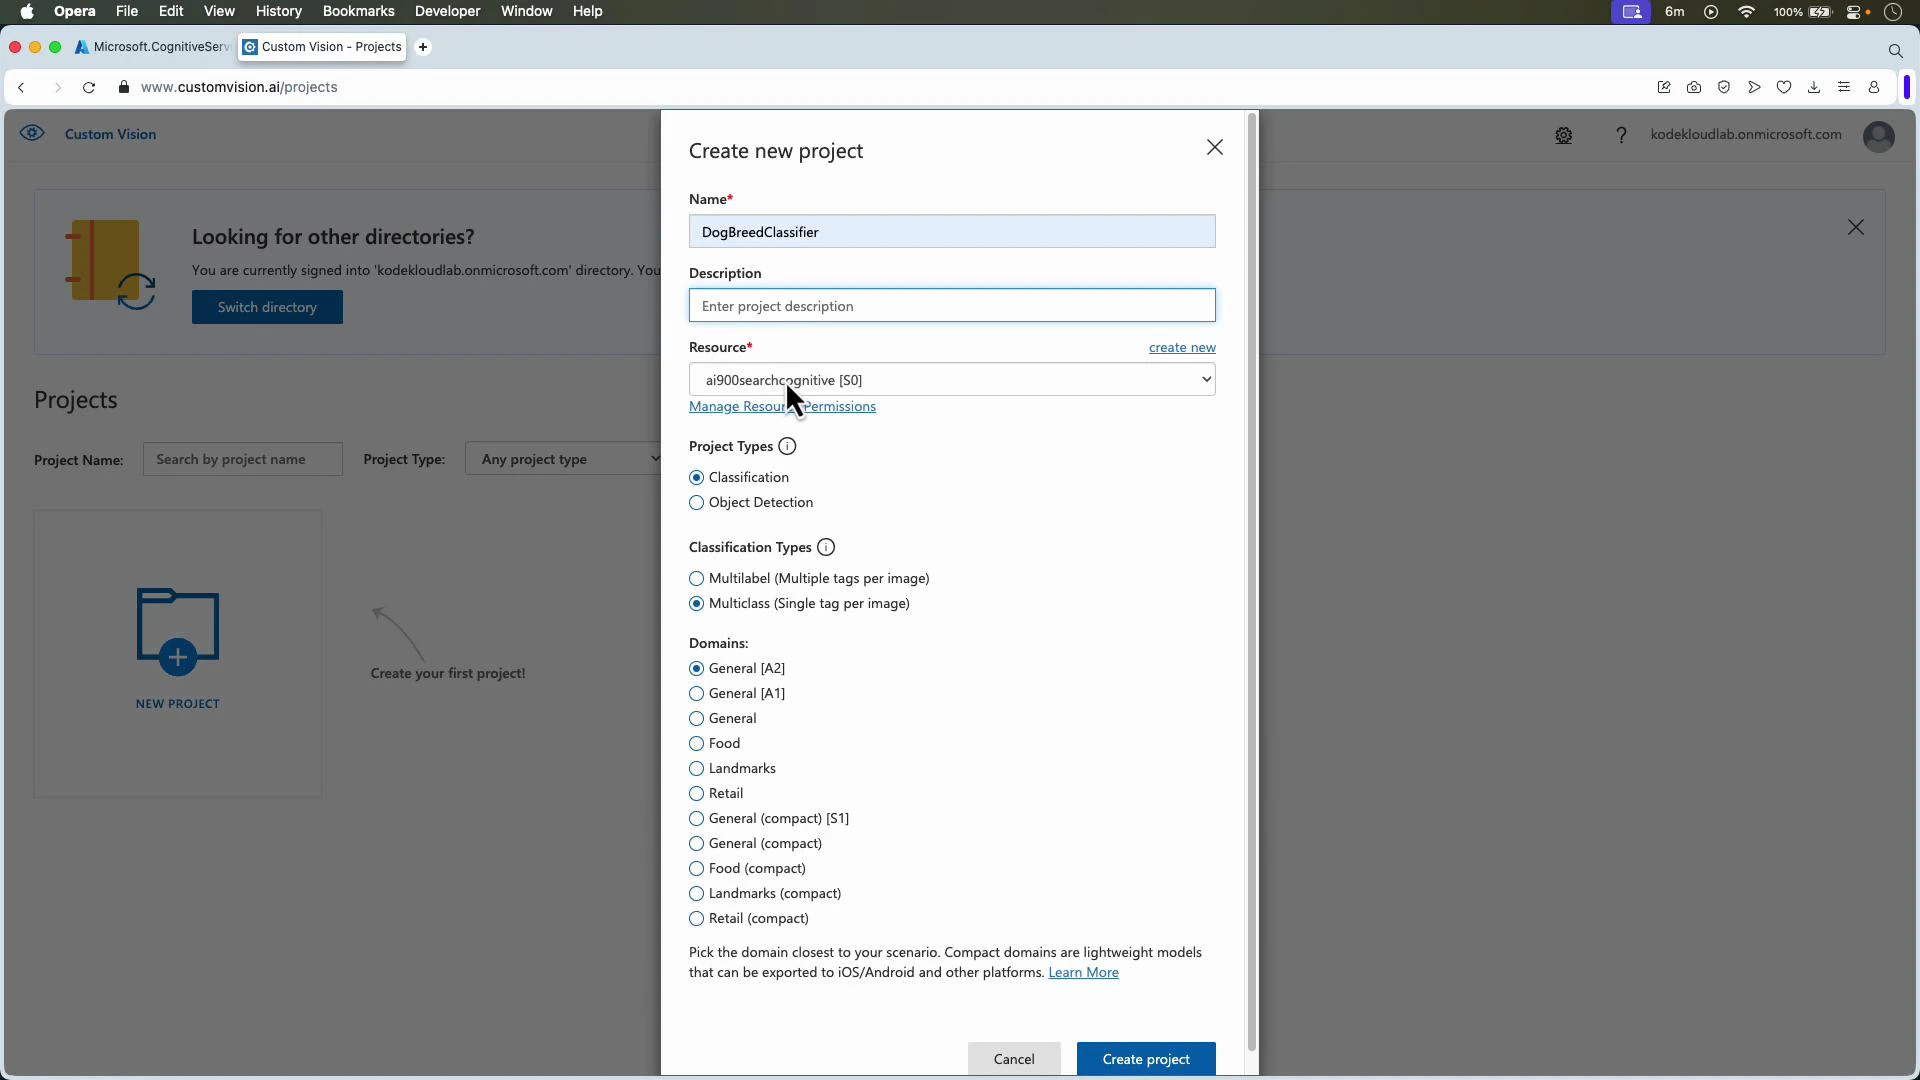
Open the Custom Vision web app (https://www.customvision.ai/) and create a new project. Provide a name and optional description, select the linked resource, then choose:
Project type:
Classification — whole-image labels (Multiclass: one tag per image; Multilabel: multiple tags per image).
Object detection — localize objects with bounding boxes and return tag predictions.
Domain — e.g., General, Food, Retail, Landmarks. Domains may optimize architecture or export options.
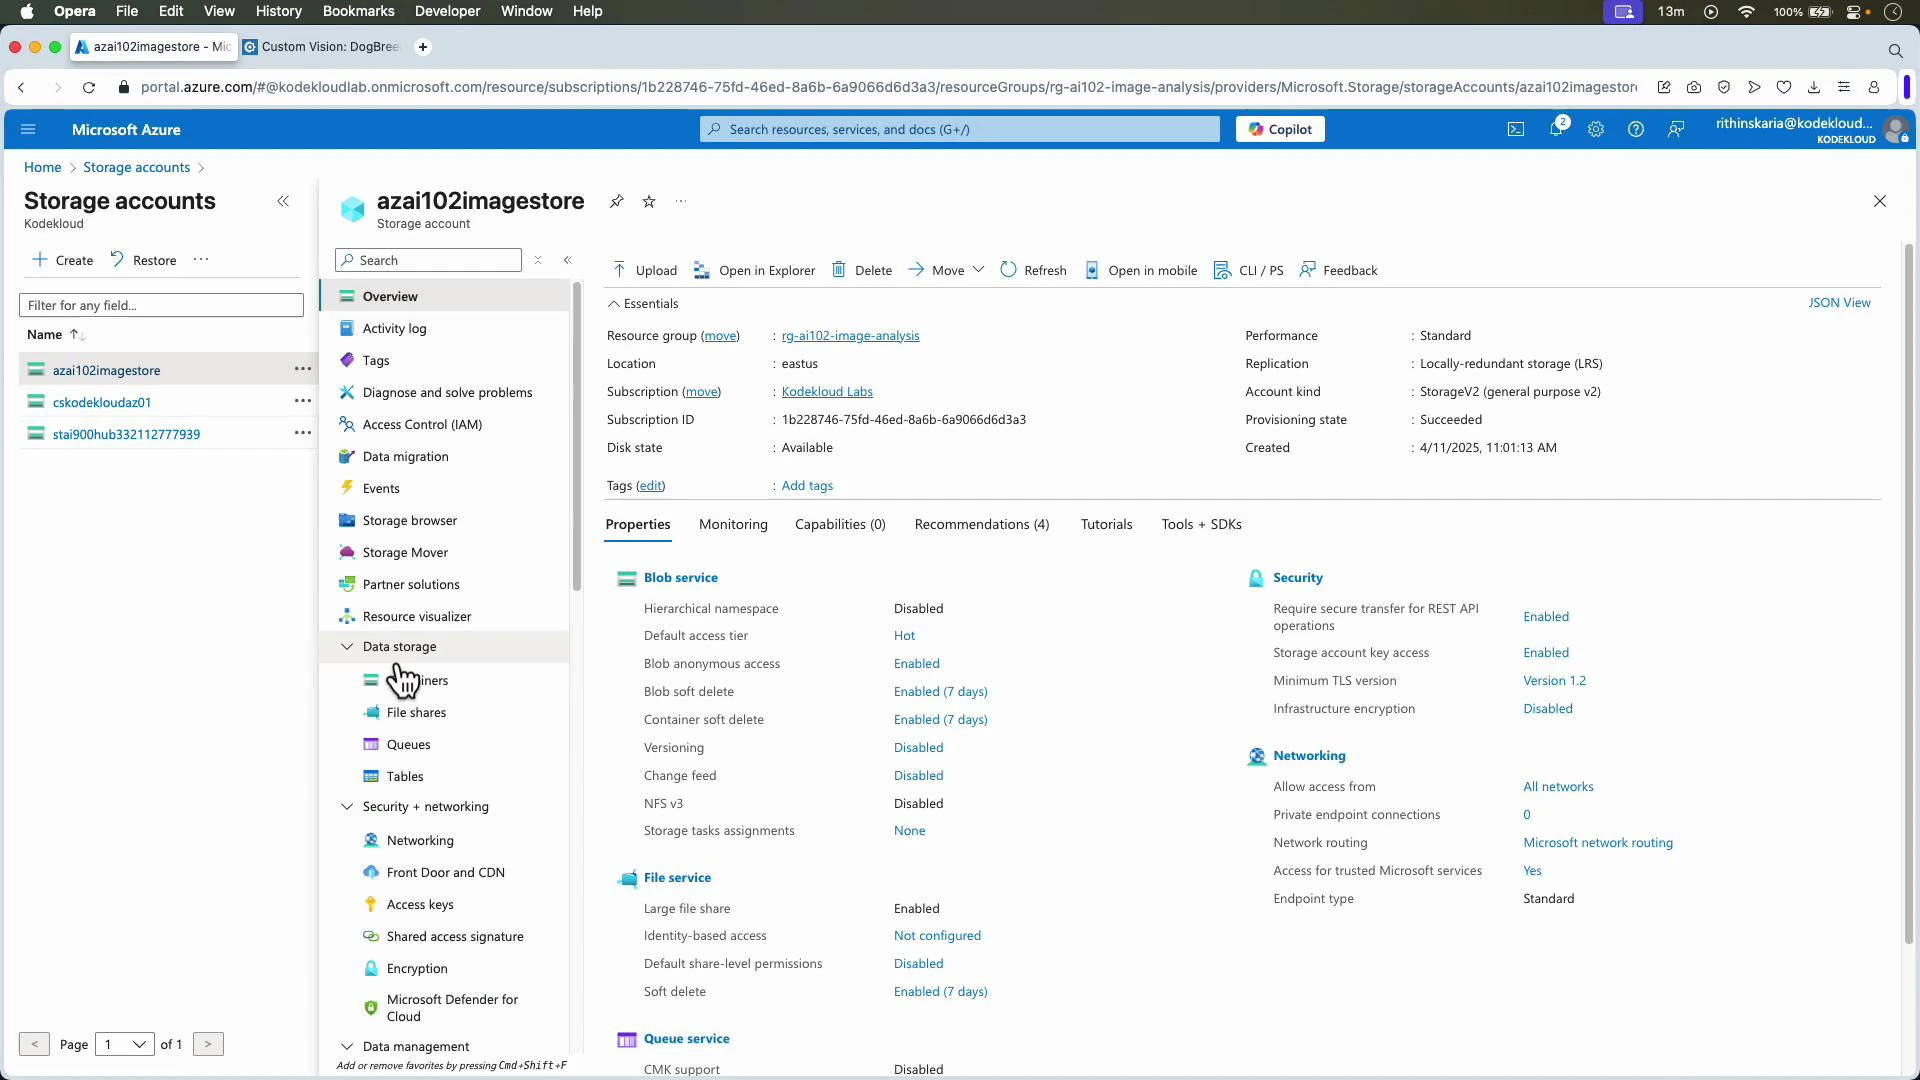
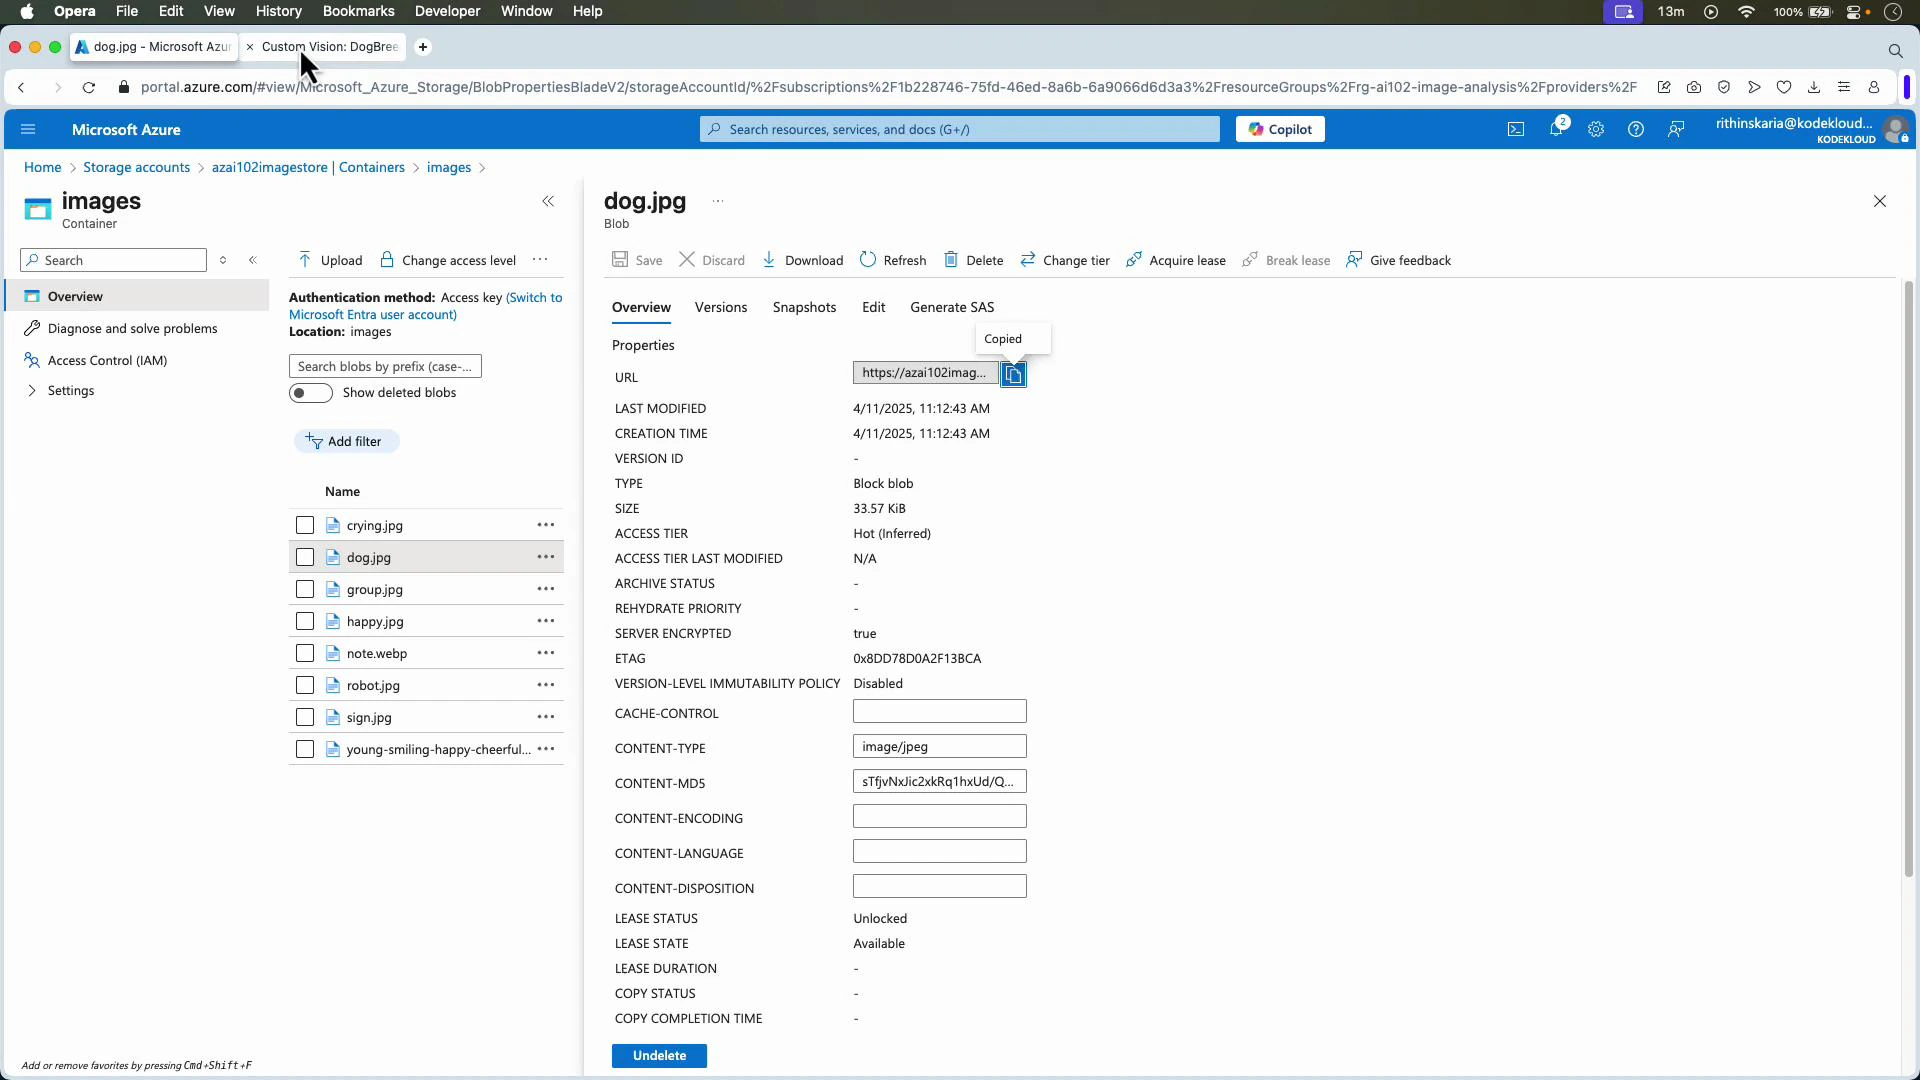
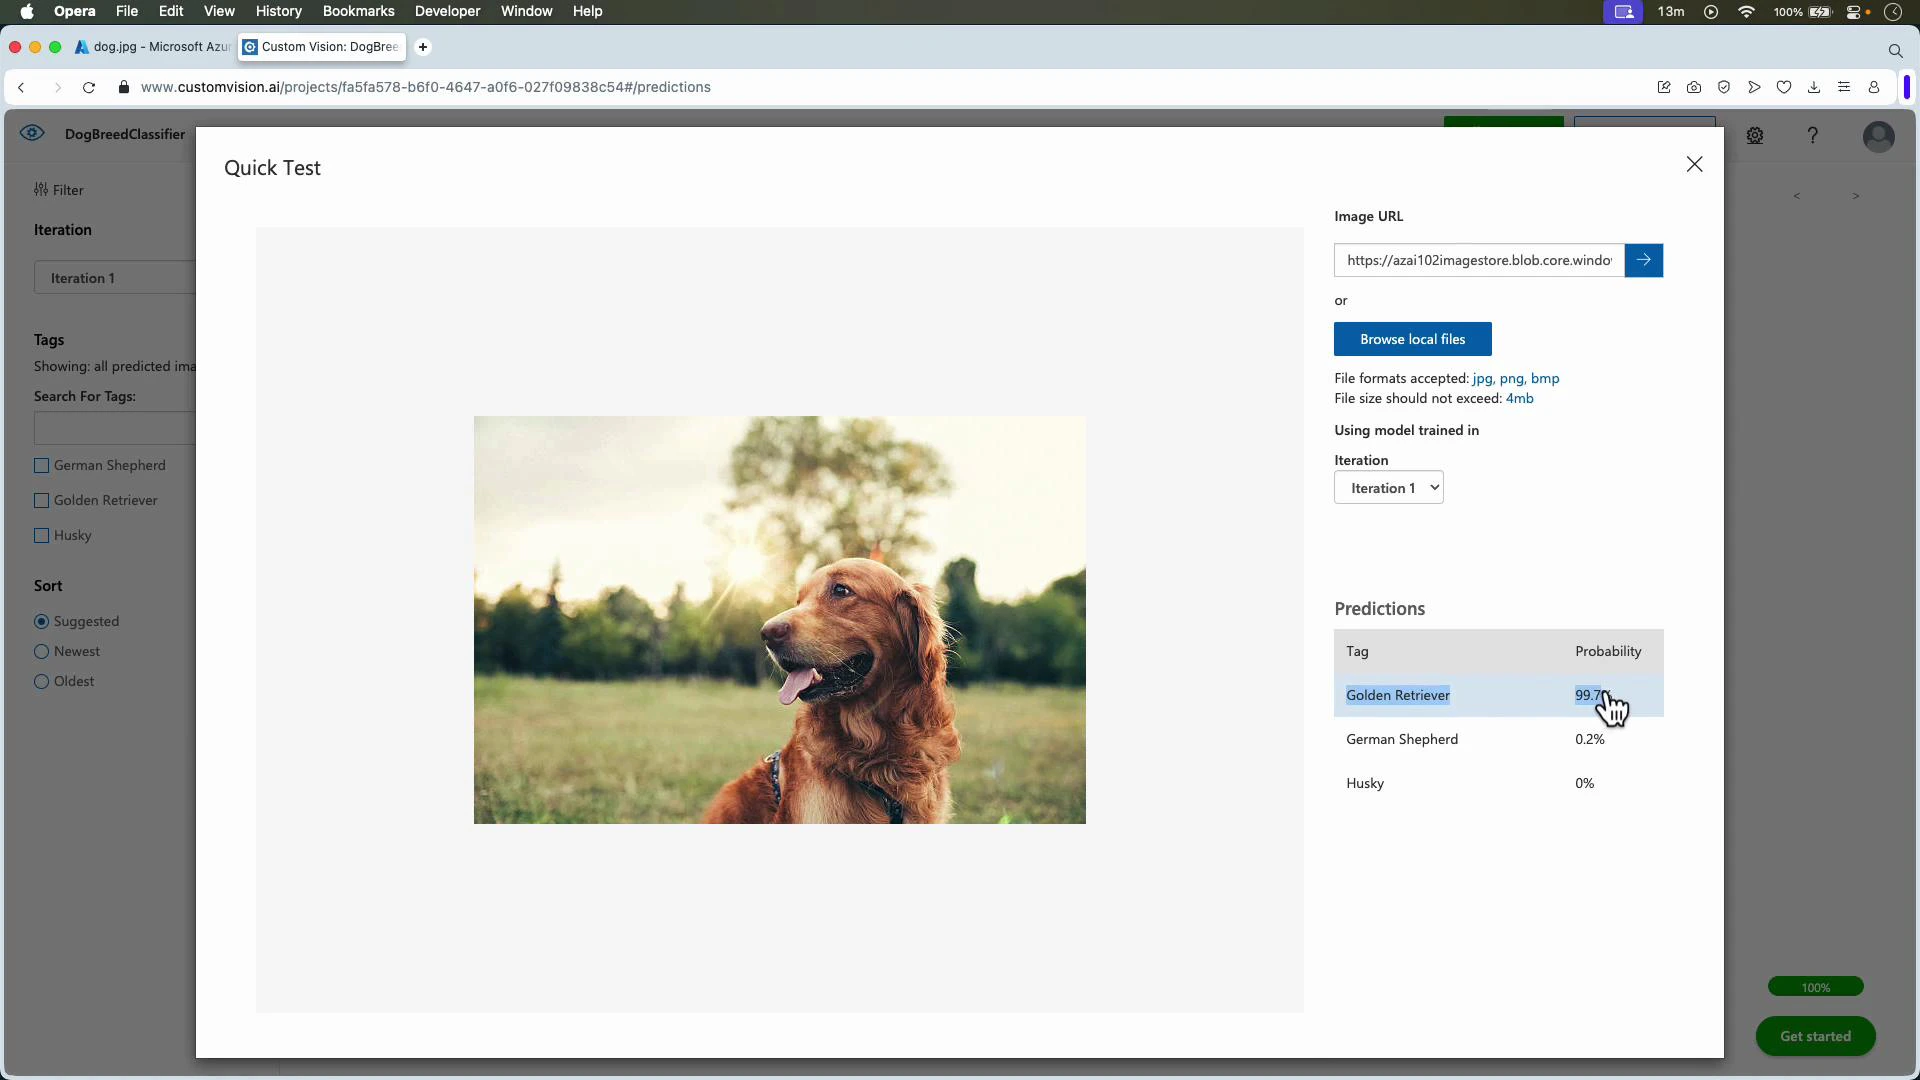
You can test images stored in Azure Blob Storage by copying the blob URL (make it public or use a SAS token) and pasting it into Quick Test or sending it via the Predictions API.
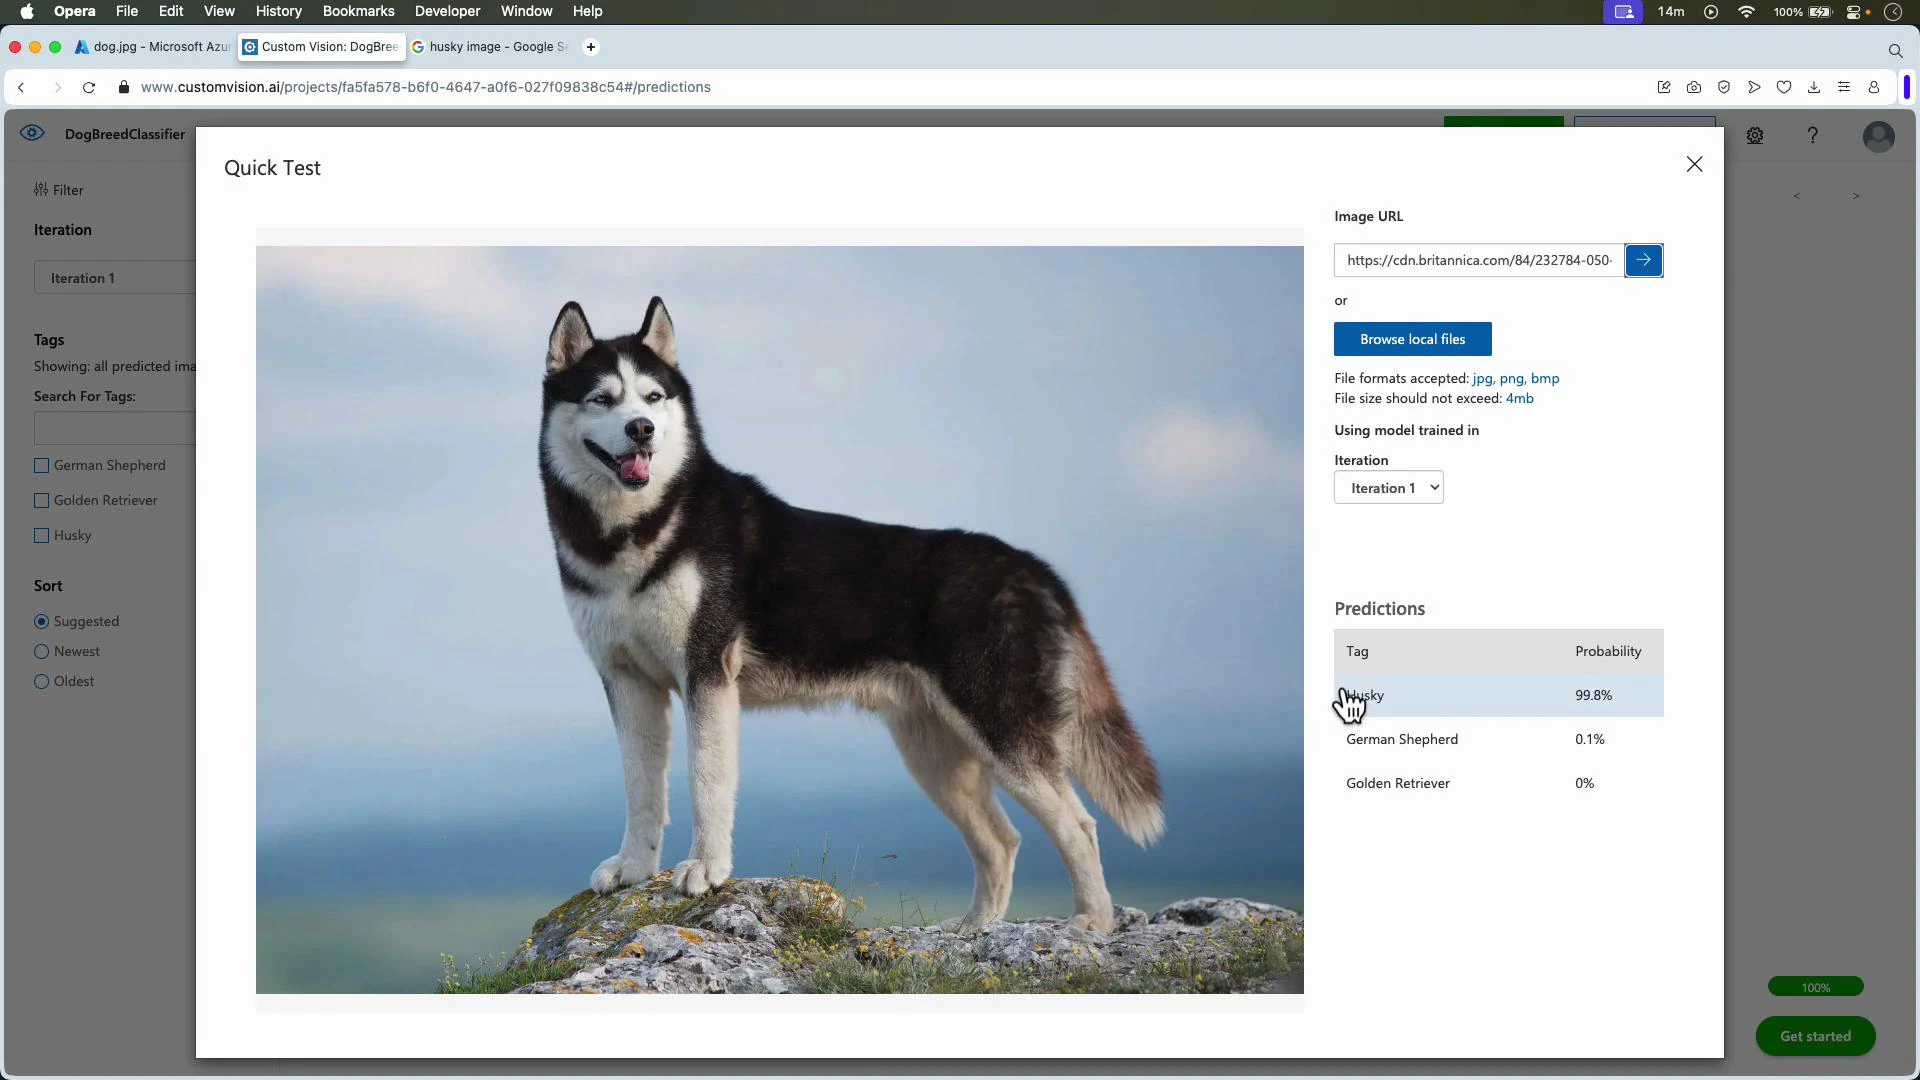
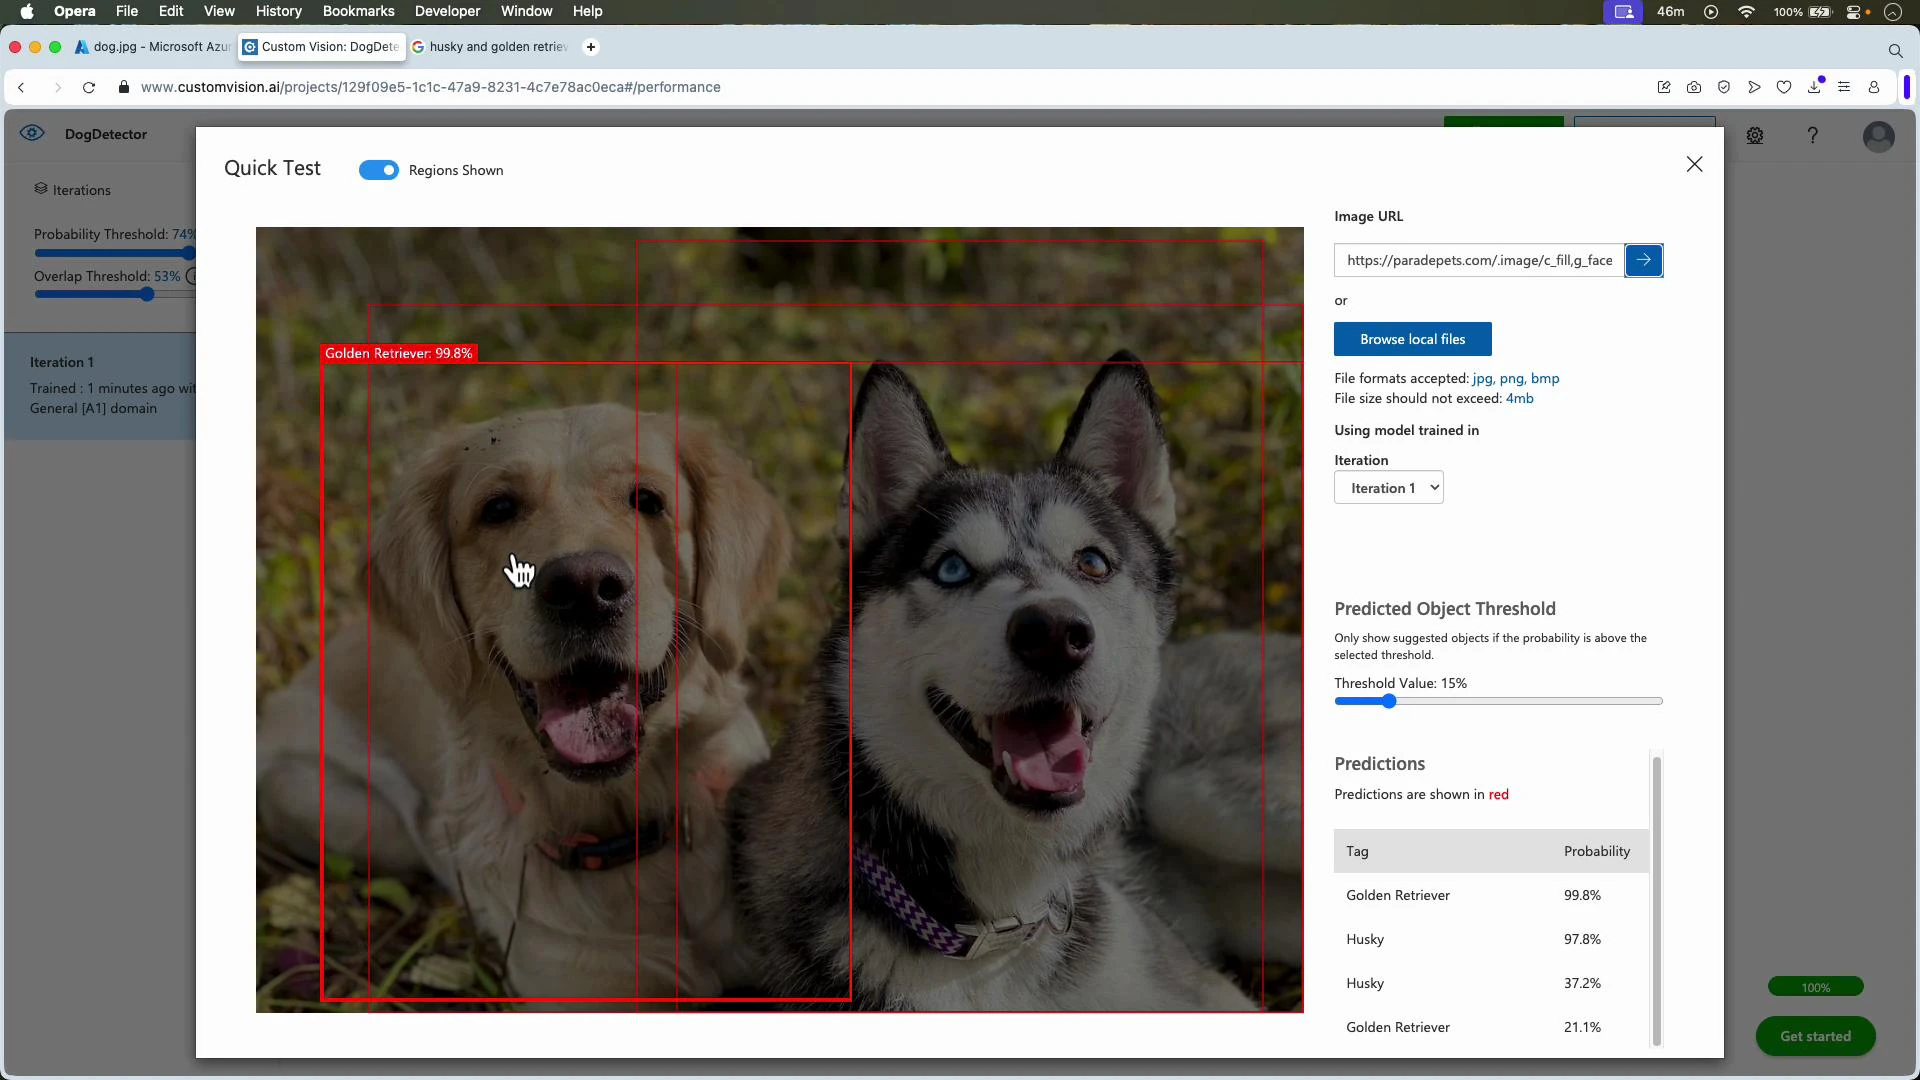
Quick Test displays predicted tags and probabilities for classification models. For example, a golden retriever image might return “Golden Retriever — 99.7%.”
Validate generalization by testing with diverse images, including web images and held-out datasets.
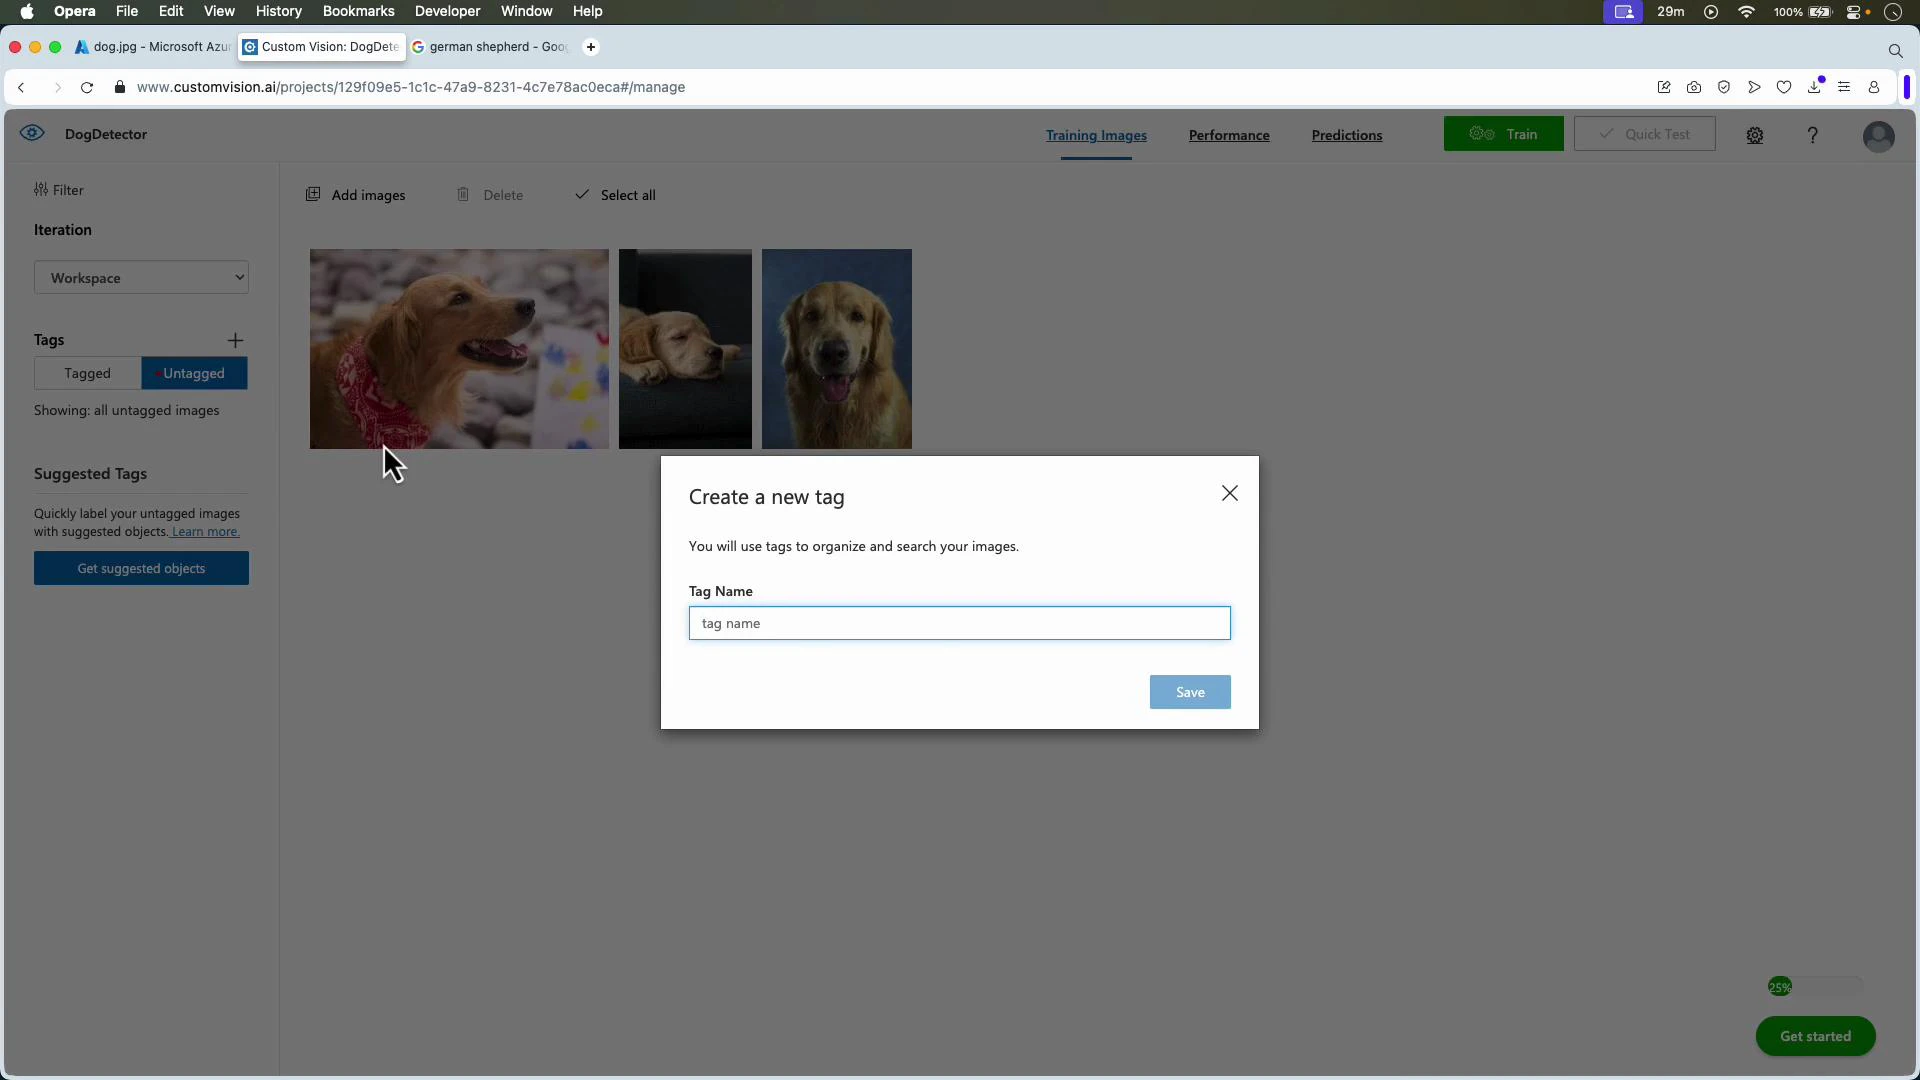
Object detection projects return both labels and bounding boxes. Workflow:
Create an object detection project (e.g., DogDetector).
Upload images.
Create tags (e.g., Golden Retriever, Husky).
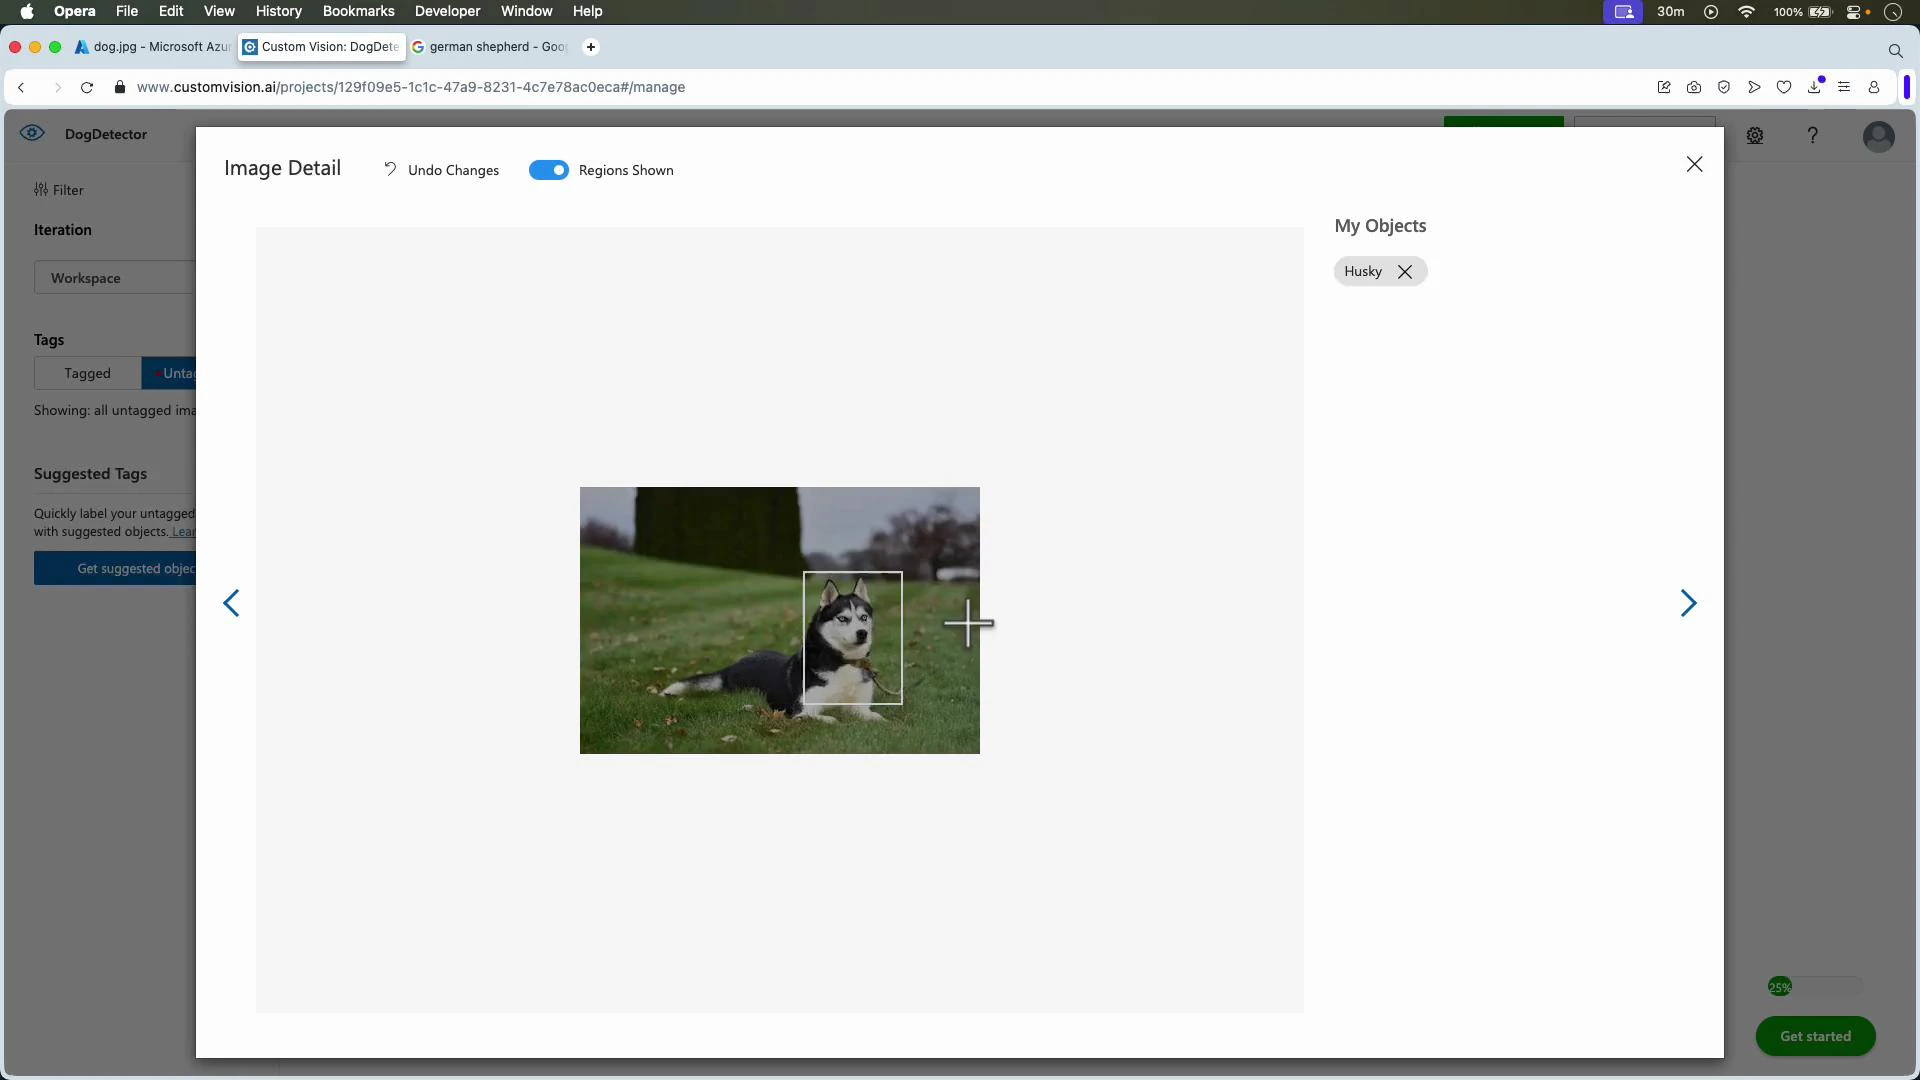
Select images, draw bounding boxes for each instance, and assign tags.
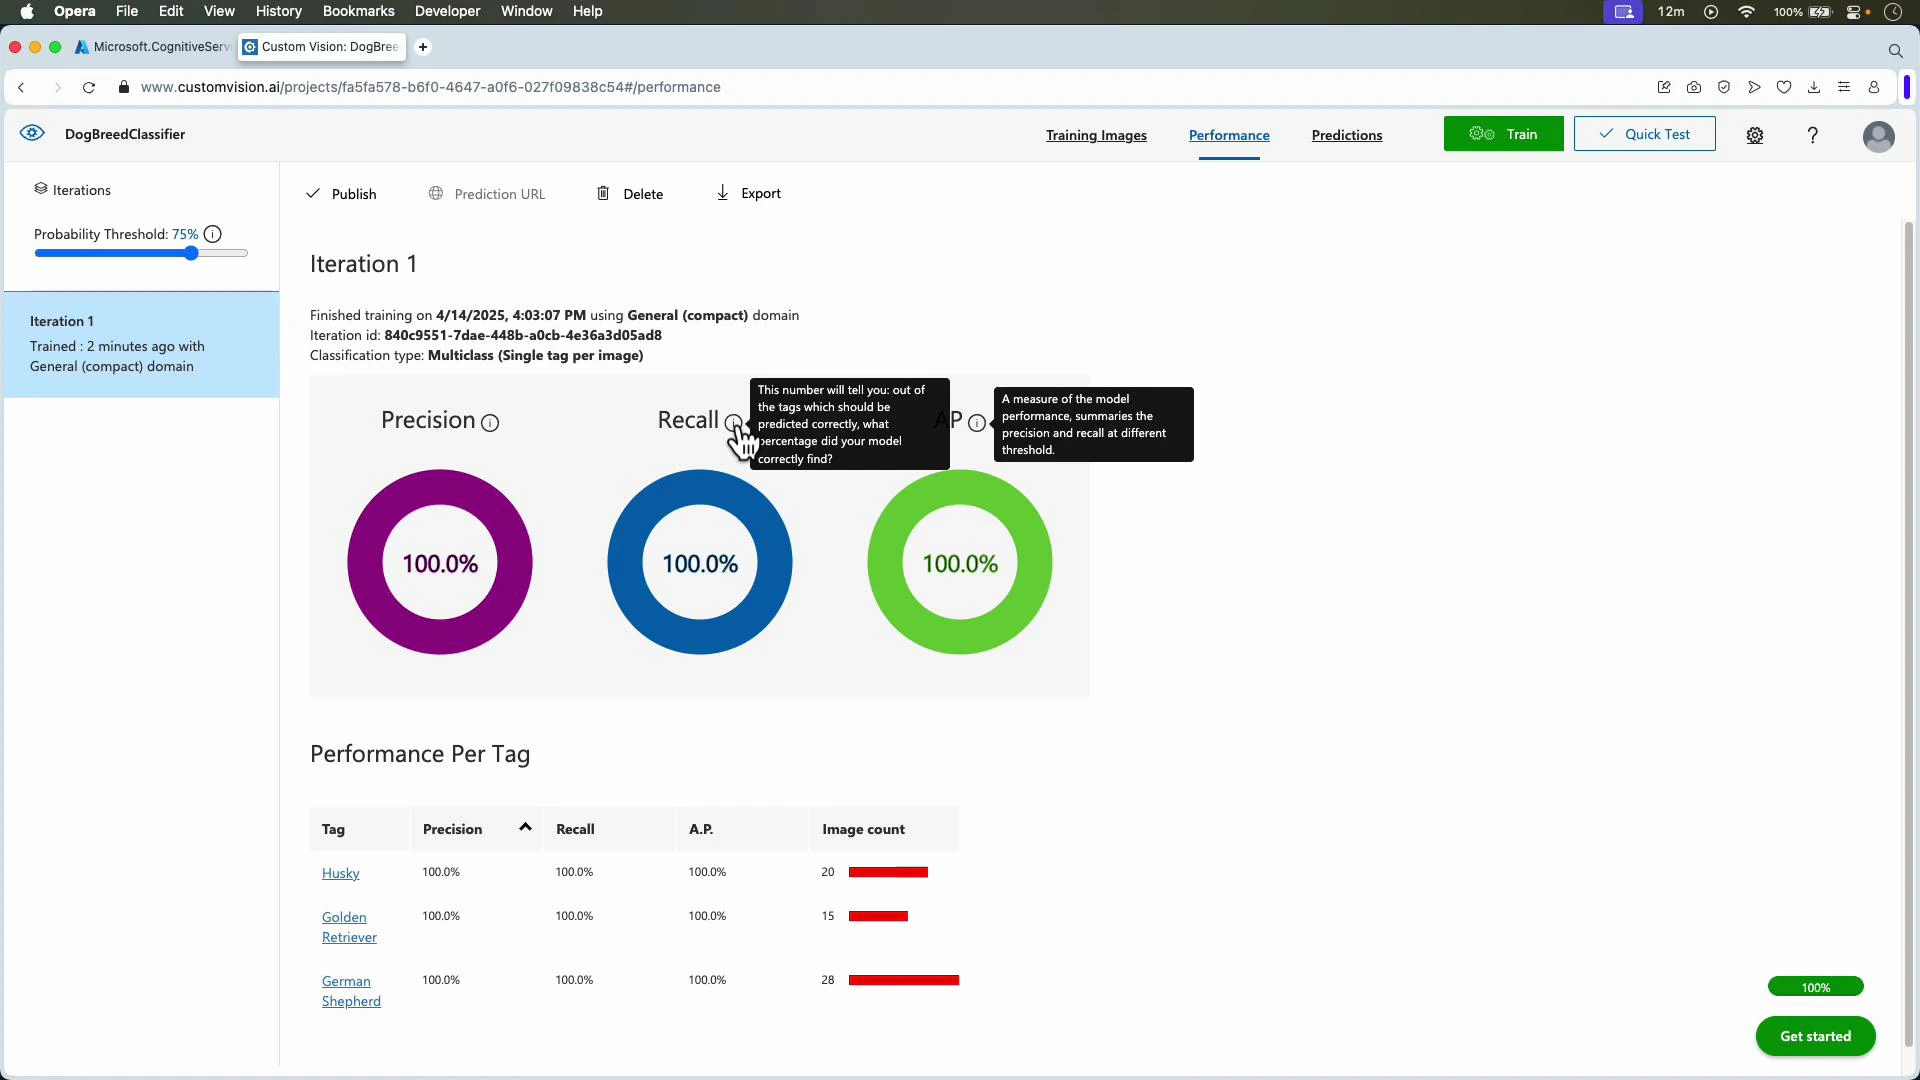
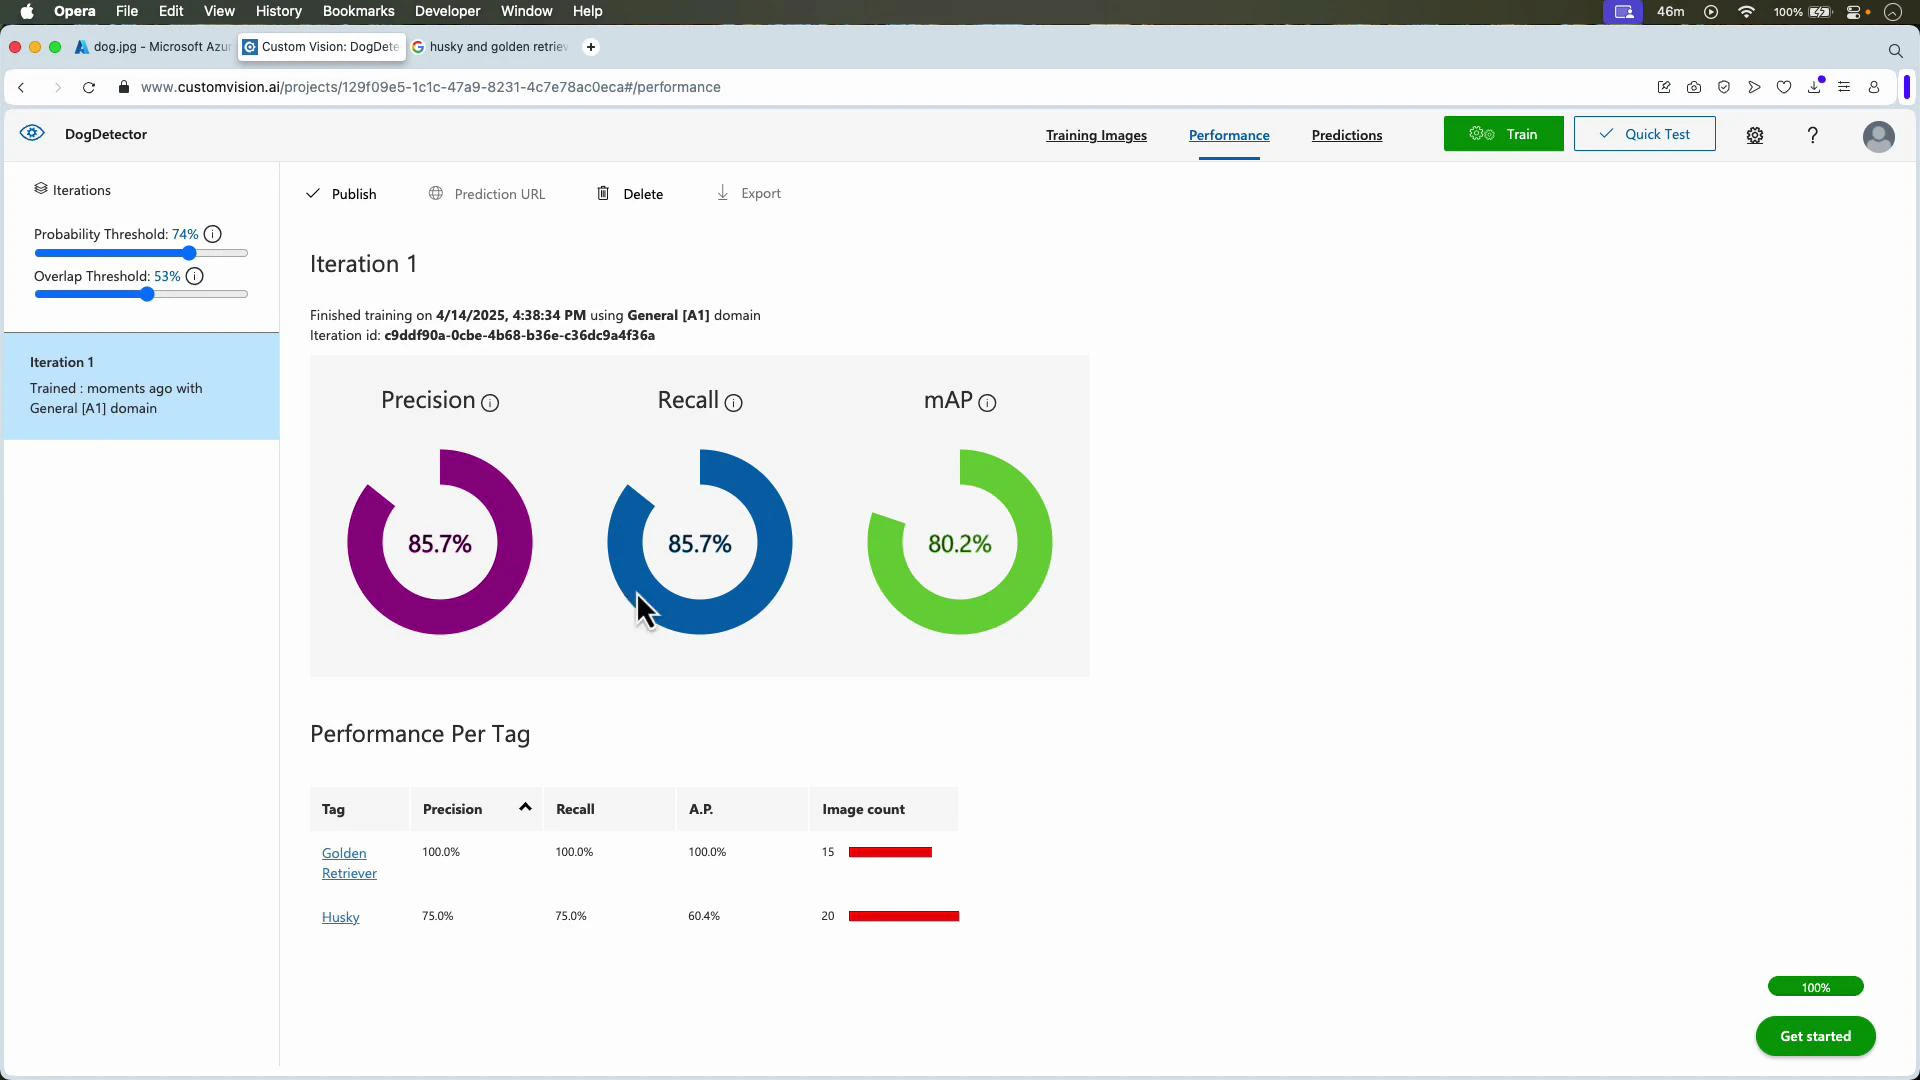
Train and review metrics (Precision, Recall, mAP).
For object detection, Custom Vision recommends a minimum of ~15 images per tag to start achieving reasonable results. More images, varied scenes, and tightly drawn bounding boxes significantly improve robustness and reduce false positives/negatives.
After annotating, train the model and inspect per-tag performance. Use Quick Test to verify bounding box outputs, confidence scores, and multiple detections per image.
If detection quality is insufficient:
Add images that increase variation (lighting, scale, occlusion, orientation).
When satisfied with an iteration, publish it to create a prediction endpoint and obtain keys/credentials. Use the SDK or REST Prediction API to integrate the model into web, mobile, or backend systems.API & SDK references:
Use Custom Vision Studio to create classification or object detection projects, upload and tag images, train iterations, evaluate precision/recall/mAP, and test with Quick Test.
Publish trained iterations to obtain prediction endpoints for programmatic integration.
Improve models iteratively—collect diverse labeled data, correct annotations, and retrain to improve real-world performance.