Explains Azure Cognitive Search enrichment pipeline converting raw files and images into structured searchable index documents using AI skills like language detection OCR key phrase extraction and entity recognition.
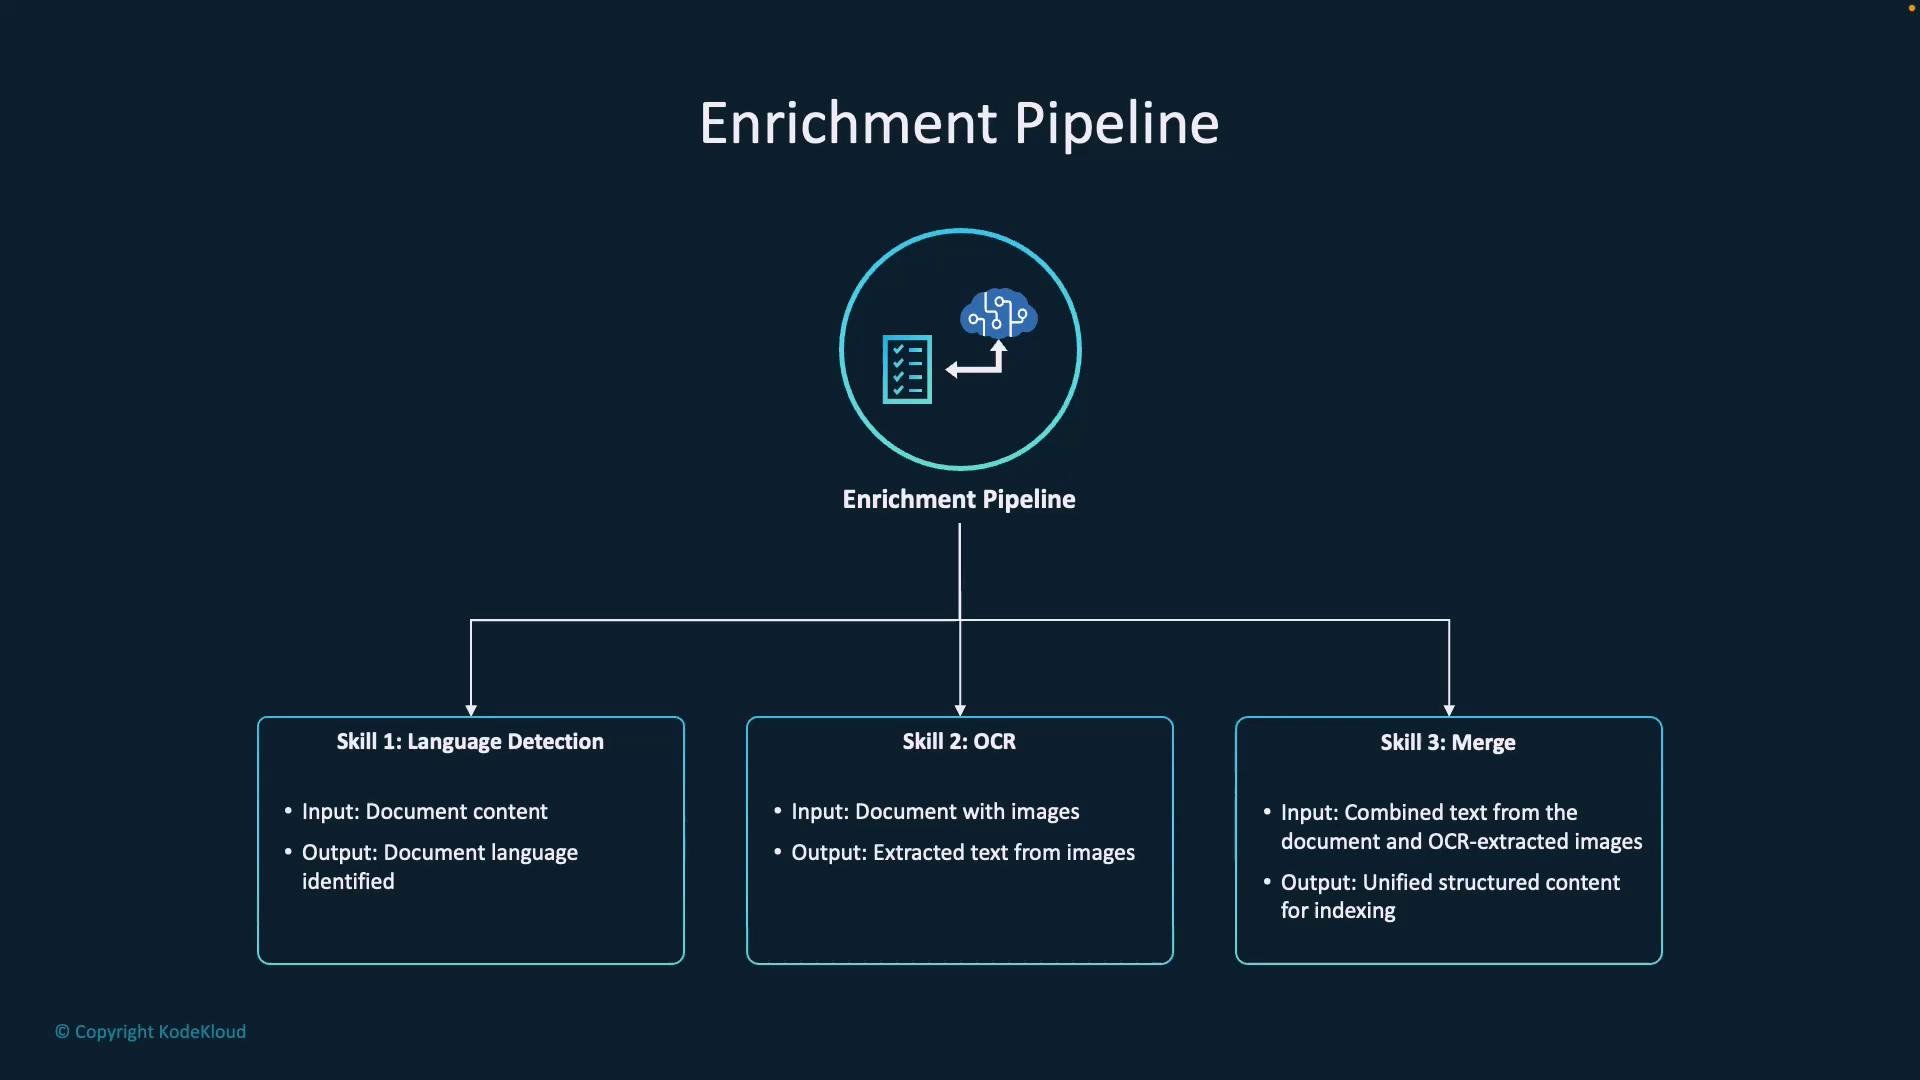
This lesson explains the enrichment pipeline in Azure Cognitive Search (AI Search): how raw files (text + images) are transformed by AI skills into structured, searchable index documents. The pipeline flow covers ingestion → AI enrichment (skills such as language detection, OCR, key-phrase extraction, entity recognition, merge) → indexing → searchable index documents.Why this matters
Turn unstructured content (PDFs, images, scanned docs) into searchable insights.
Use AI skills to extract language, text from images, key phrases, and named entities.
Support rich search experiences: full-text search, filters, facets, and entity-based queries.
Pipeline overviewThe pipeline starts with document ingestion and basic extraction (metadata and any embedded text). The indexer then invokes a skillset (AI skills) to enrich the document. Outputs from the skillset are mapped into an index schema and stored for query-time usage.
Common skills and outputs
Skill
Purpose
Typical output field(s)
Language Detection
Detect document language to enable language-aware analyzers
language: “en”
OCR (Optical Character Recognition)
Extract text from images/pages
images[i].text
Merge / MergeSkill
Combine original content + OCR text into a single text field
merged_text / document_text
Key Phrase Extraction
Pull out salient phrases for indexing/faceting
keyPhrases (collection)
Entity Recognition
Identify people, locations, organizations
people, locations, organizations (collections)
Input document exampleBefore enrichment, documents generally arrive as JSON with metadata, a content field, and an images array. The indexer processes this JSON as the pipeline input:
{ "metadata_source": "file_system", "metadata_creator": "John Doe", "content": "Original text extracted from the file (if any).", "images": [ { "name": "page1.png", "text": null } ]}
How language detection, OCR, and merge work (example)
Language detection reads the content and writes a language code:
output: "language": "en"
OCR scans each image in the images array and populates the text field per image:
images[0].text = "Scanned text extracted from image"
The merge skill concatenates the original content and the OCR-extracted texts into one unified field suitable for indexing:
output: "merged_text": "Full structured text including OCR-extracted data"
After enrichment, the document becomes a structured JSON object ready for indexing:
{ "metadata_source": "file_system", "metadata_creator": "John Doe", "content": "Original text extracted from the file (if any).", "images": [ { "name": "page1.png", "text": "Scanned text extracted from image" } ], "language": "en", "merged_text": "Full structured text including OCR-extracted data"}
Indexed document exampleWhen fields are projected into an index suitable for queries, the index document typically contains metadata and the merged/document text fields that applications will query:
{ "file_name": "contract.pdf", "creator": "John Doe", "language": "en", "document_text": "Full structured text including OCR-extracted data"}
Walkthrough — create an AI Search pipeline in the Azure portalThis walkthrough outlines the high-level steps in the Azure portal. Screenshots below correspond to each step.
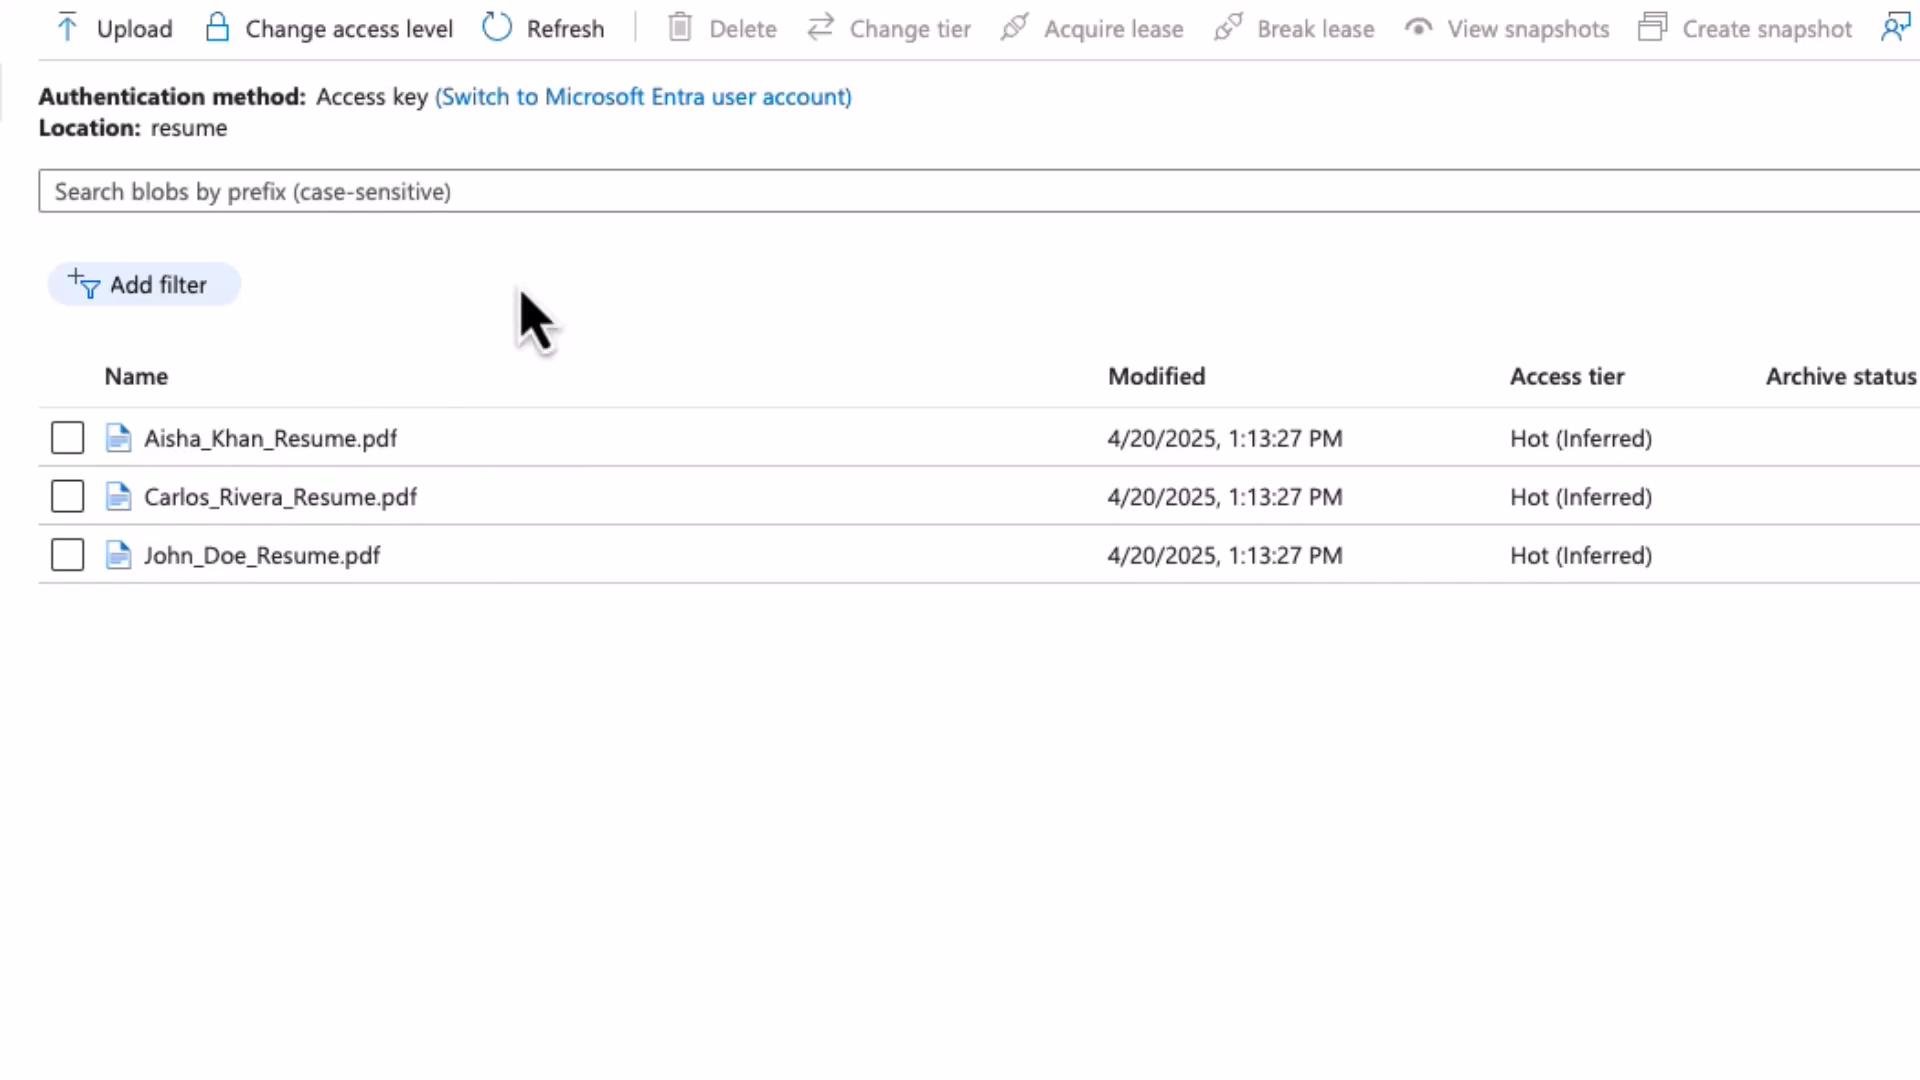
Store files in Azure Blob Storage
Example: a resume container containing PDF resumes (source for the indexer).
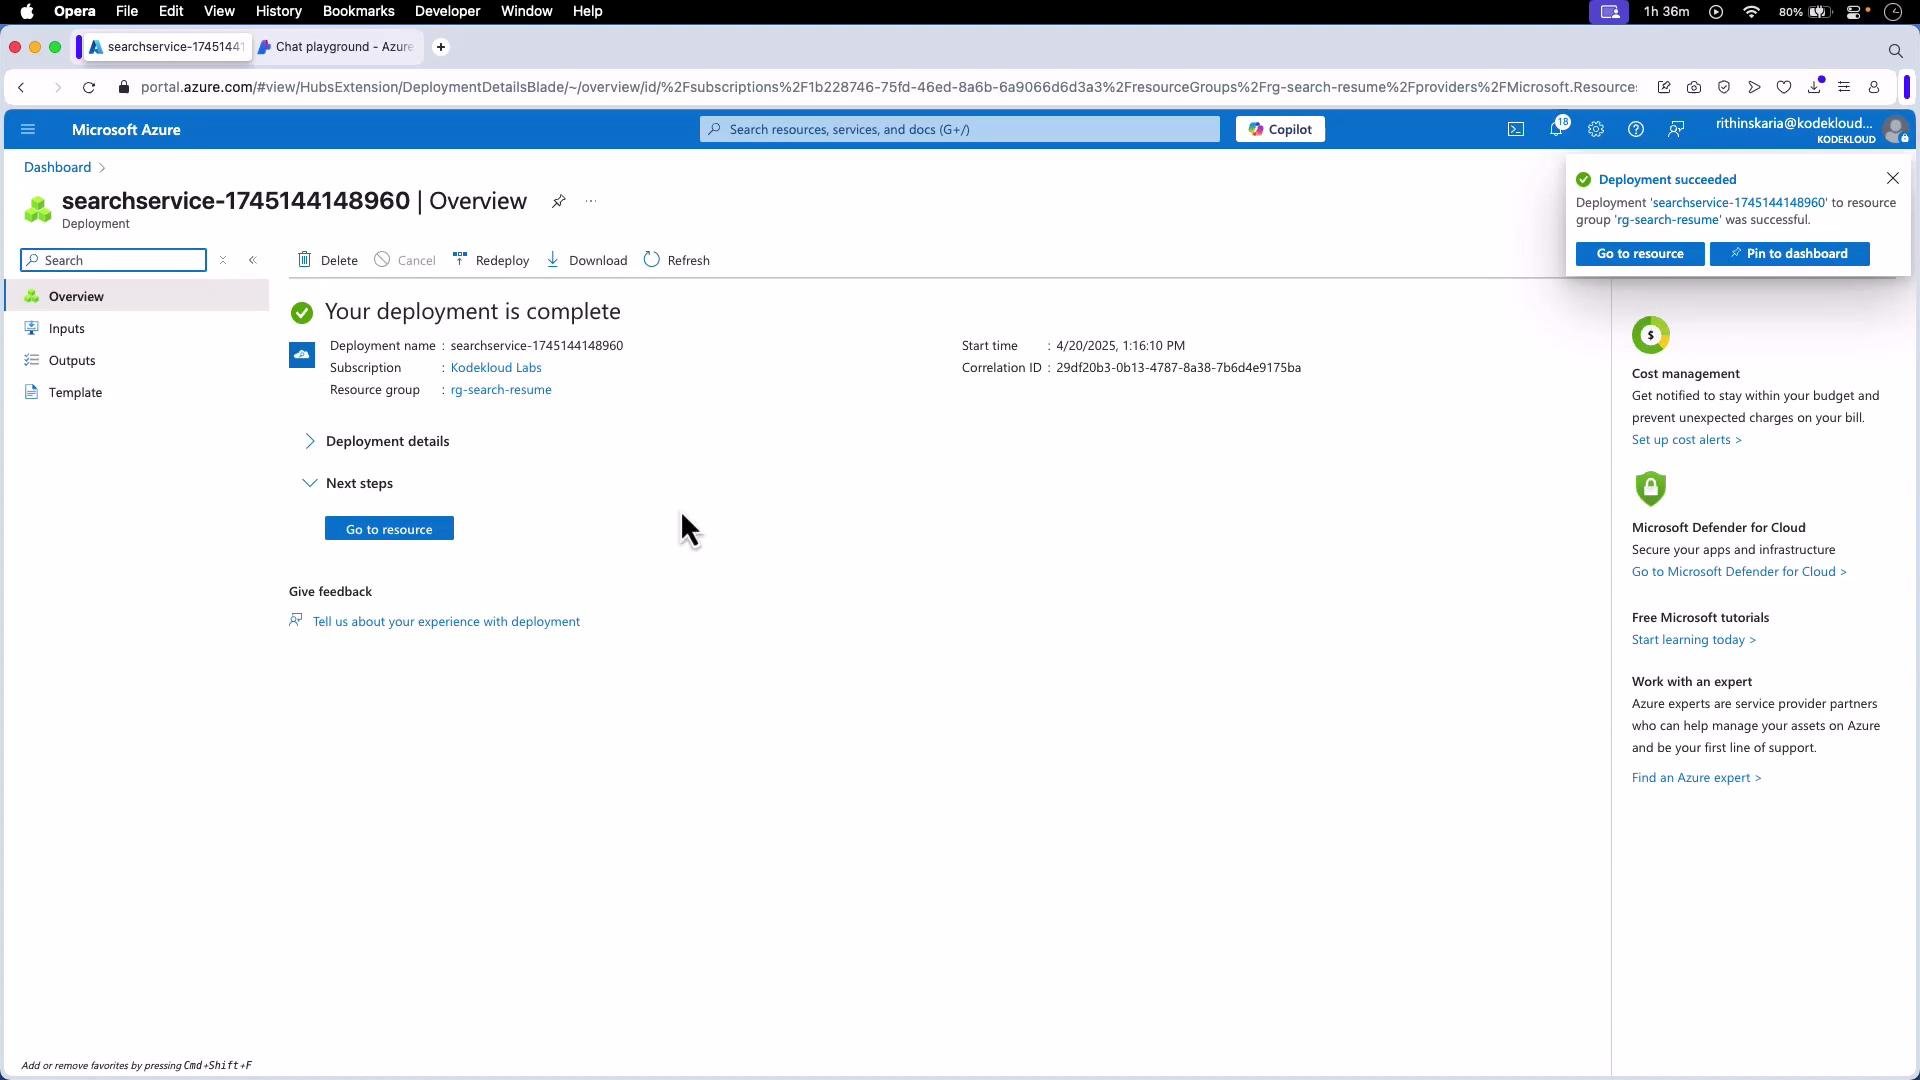
Create an Azure Cognitive Search service
Deploy an Azure Cognitive Search (AI Search) resource in your subscription and open the resource.
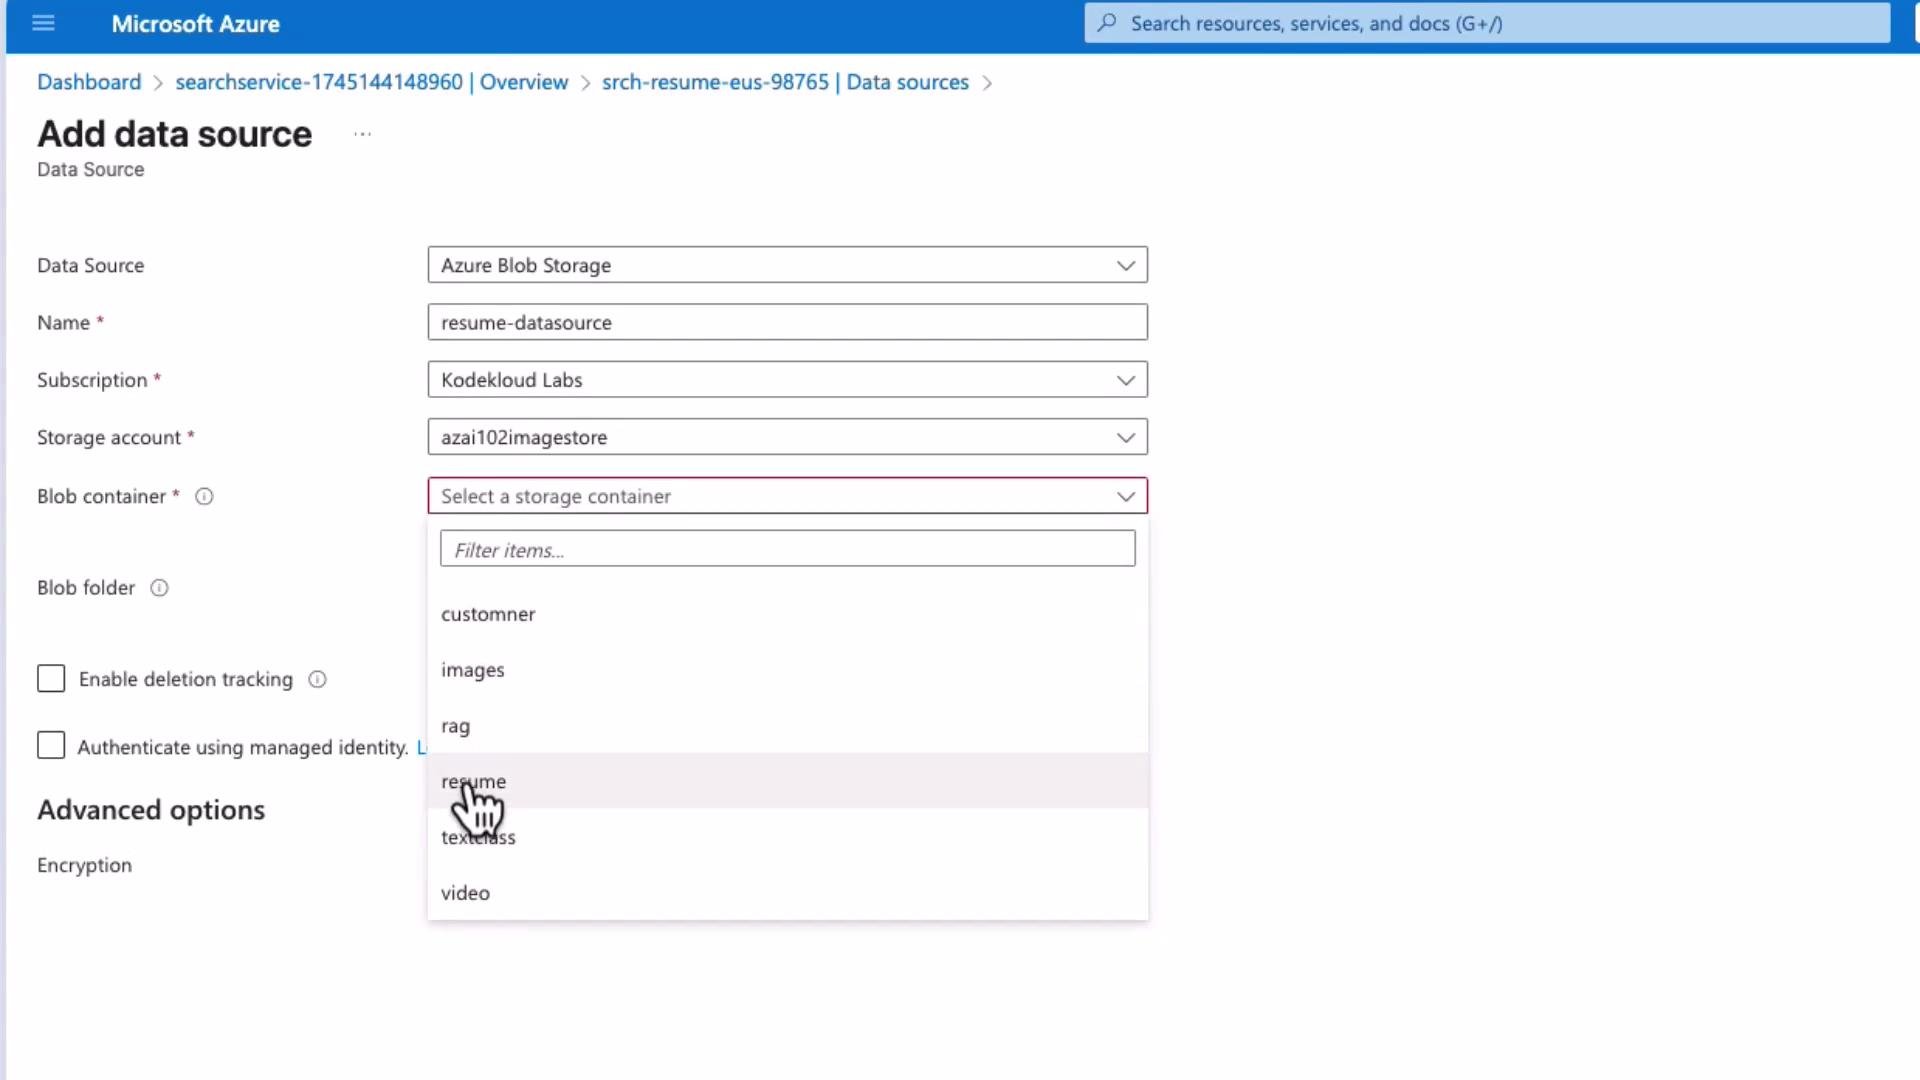
Add a data source that points to your Blob Storage container
Configure the data source to point to the container (e.g., resume). Optionally enable deletion detection to reflect deleted blobs in the index.
You must connect an AI resource to enable AI enrichment skills. This can be an Azure Cognitive Services resource or Azure OpenAI. Provide that cognitive service when creating the skillset so skills like OCR, key-phrase extraction, and entity recognition run correctly.
Create a skillset (AI skills)
A skillset contains the set of AI skills the indexer will execute. Below is a simplified skillset JSON with a key-phrase extraction skill and an entity recognition skill. Replace the cognitive services subdomain with your resource endpoint or use key-based config.
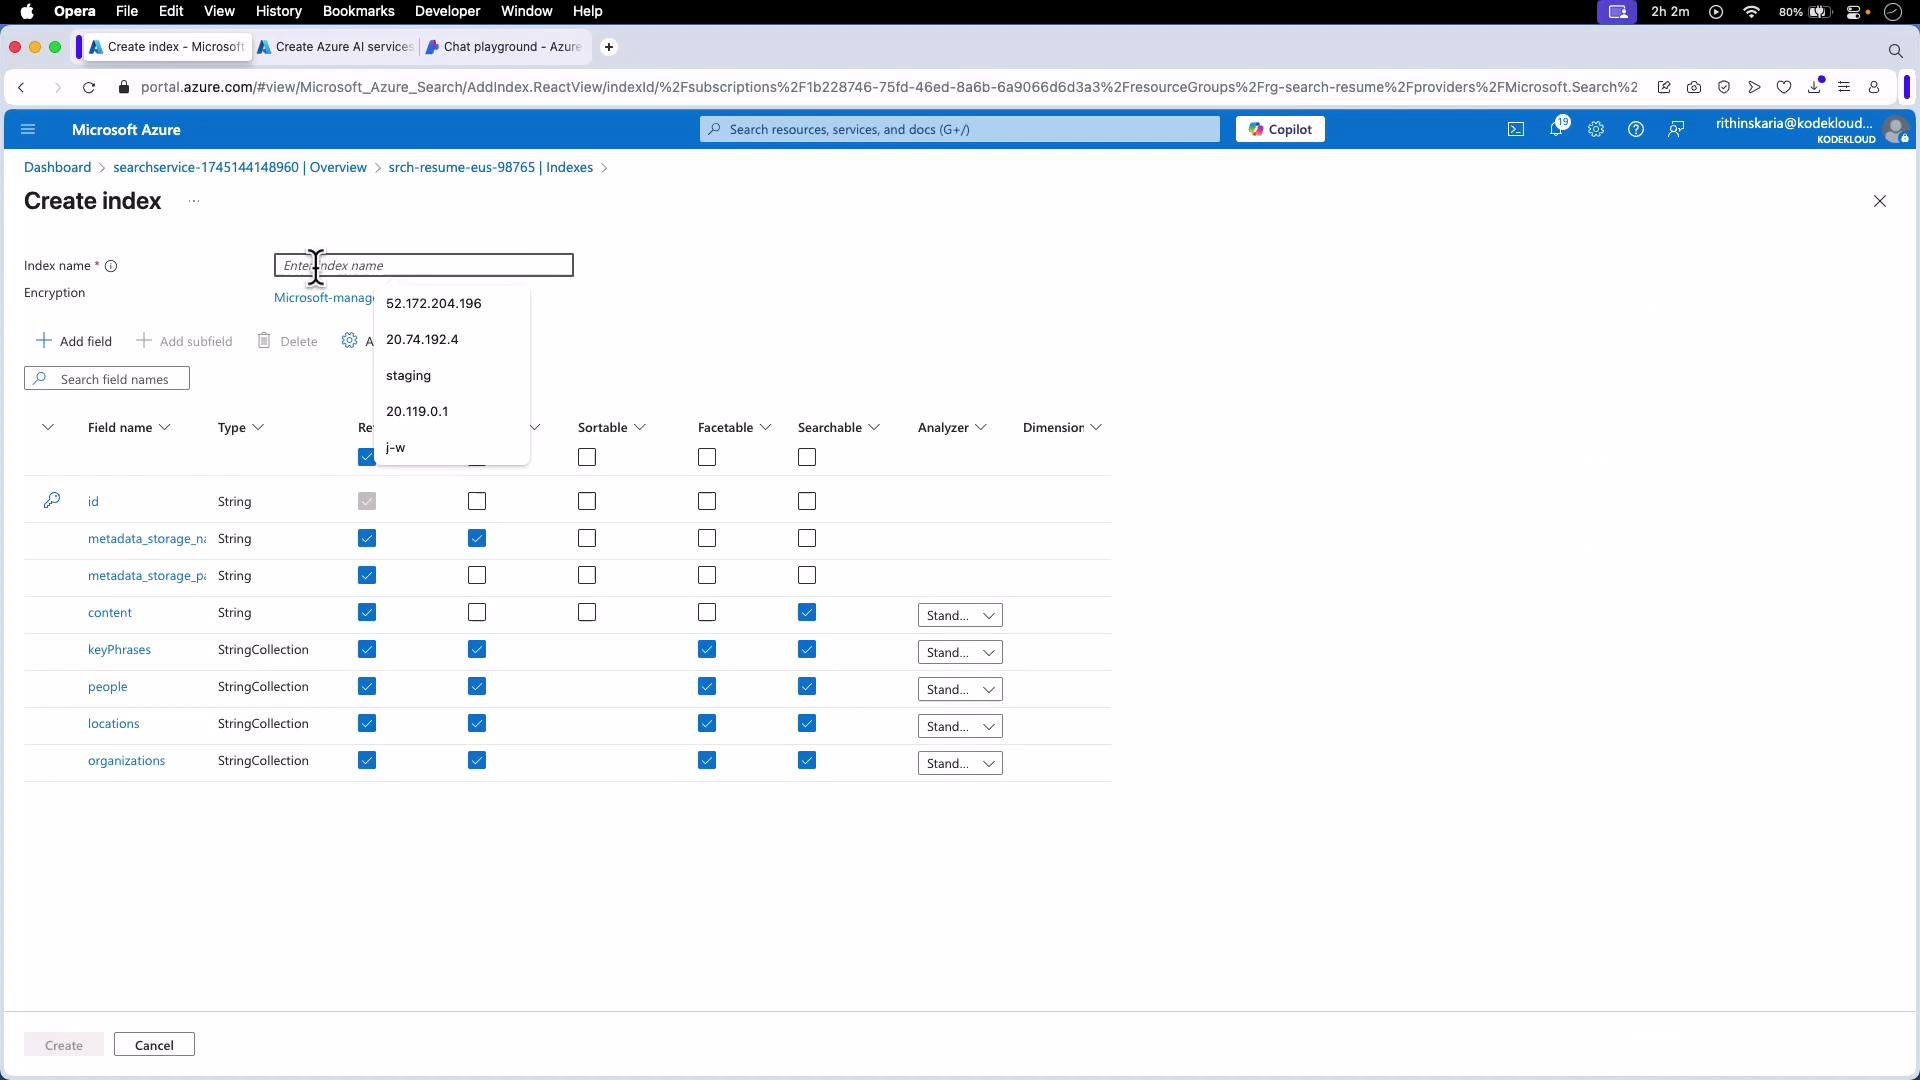
Design an index schema that includes fields produced by your skillset (e.g., keyPhrases, people, locations, organizations) and standard metadata fields. Choose analyzers and field attributes (searchable, retrievable, filterable, facetable) based on how you plan to query/filter results.Typical fields you’ll add in the portal:
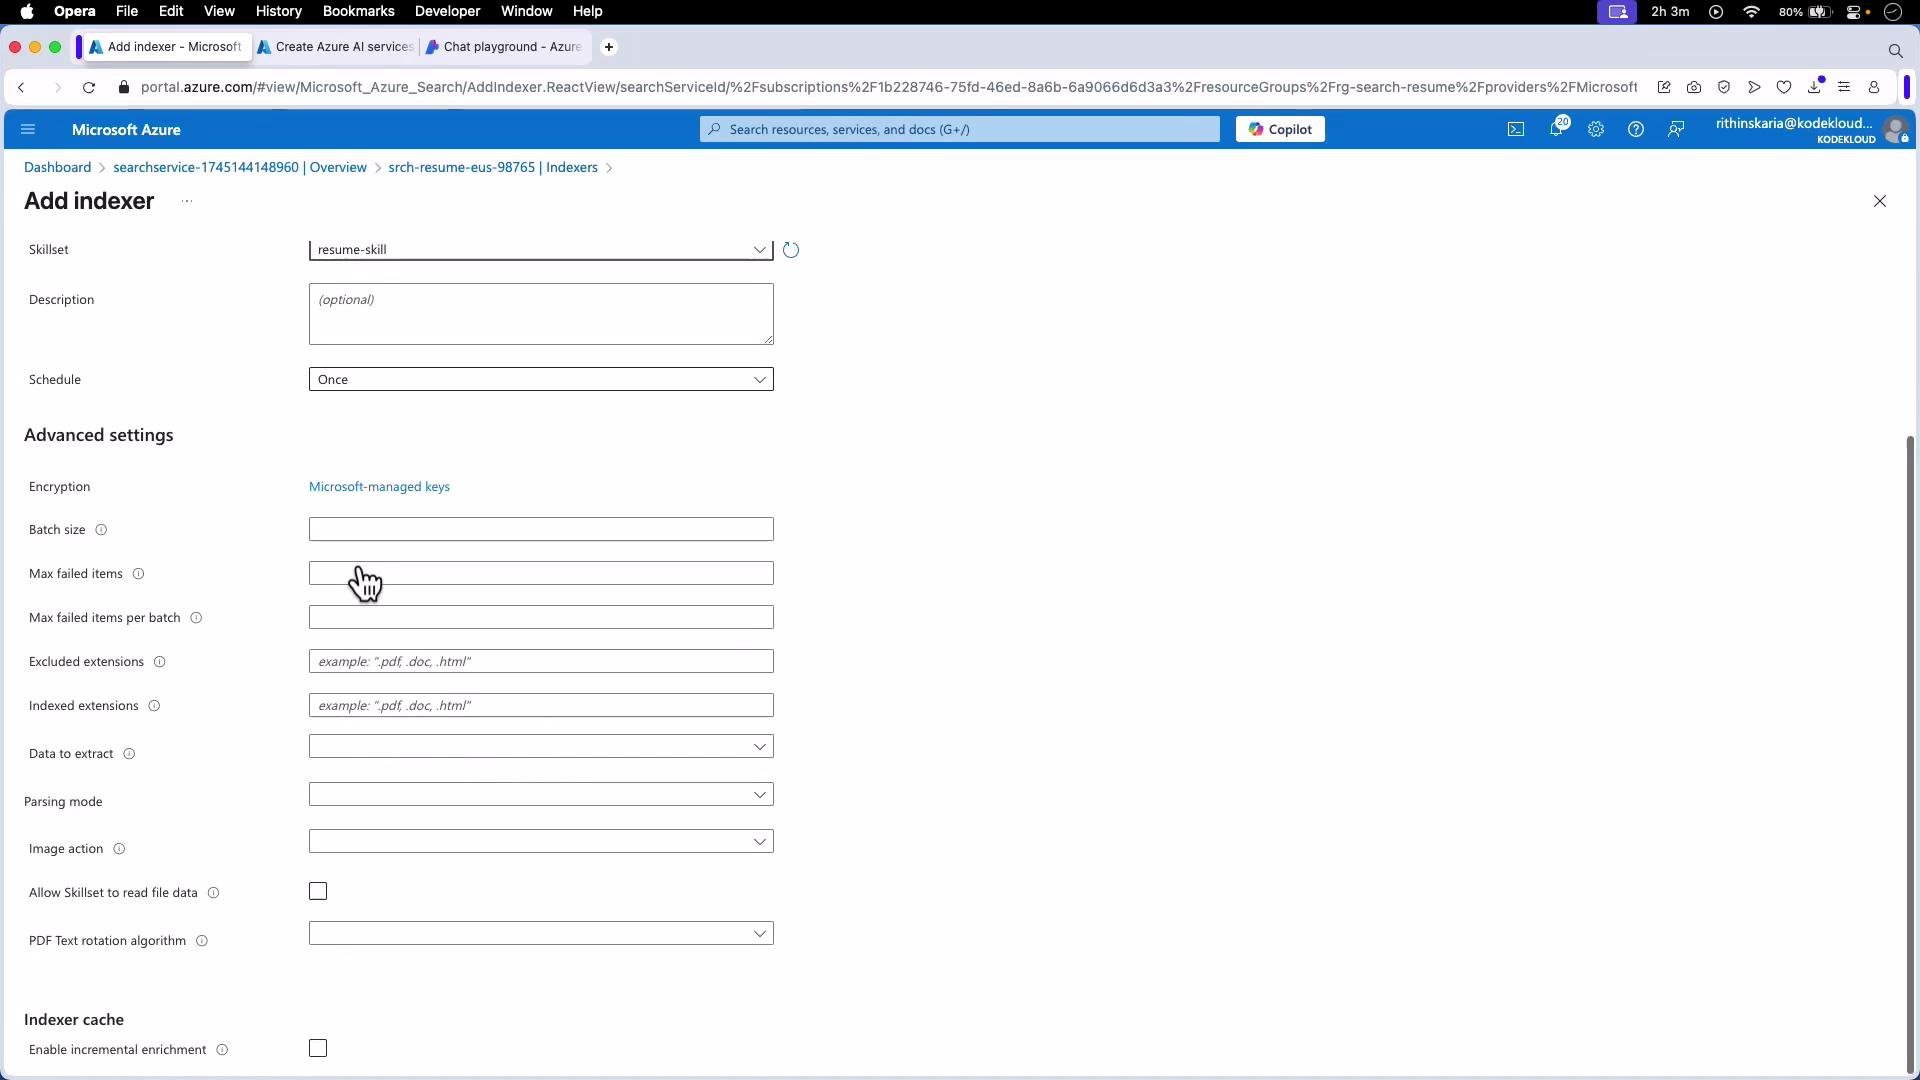
Create an indexer (connect data source, skillset, and index)
The indexer orchestrates ingestion and enrichment: it reads from the data source, invokes the skillset, and pushes transformed documents into the index. Configure:
Schedule (continuous or cron)
Parsing mode (default vs. try-legacy)
Allowed/excluded file extensions
Batch size and retry settings
Image action (if OCR is required)
Run the indexer and monitor results
After the indexer runs, review success counts, errors, and warnings in the portal. Once indexing is complete, open the index and run queries to inspect results.Example search result (sample)
Full-text search: keyword queries on document_text return relevance-ranked matches.
Filters & facets: narrow results by locations, people, or keyPhrases (e.g., filter by location = “Dubai”).
Skill-driven search: search the keyPhrases collection to locate candidates with specific skills like “Python” or “DevOps”.
Summary and best practices
The enrichment pipeline converts raw files (including scanned images) into structured, searchable documents by chaining AI skills (OCR, language detection, key-phrase extraction, entity recognition, merge).
Portal sequence: create a data source → create/connect a Cognitive Services or Azure OpenAI resource → create a skillset → create an index → create an indexer → run and monitor the indexer.
Index design matters: choose correct analyzers and field attributes (searchable/filterable/facetable) to support the queries your application requires.
Extendability: add custom skills, translation, or additional classification/NER skills to meet specialized requirements.