How the translation pipeline works
The typical flow for speech translation is:- Configure the Speech Translation Config: set your service region, subscription key, the spoken (recognition) language (for example,
en-US), and one or more target languages (for example,es,fr). - Define the Audio Config: specify the audio input source — microphone, audio file, or a custom stream.
- Create the Translation Recognizer: combine the translation configuration and audio input in a
TranslationRecognizer. This component performs speech recognition and forwards the transcribed text to the translation model. - Invoke recognition: call
recognize_once_async()(or use streaming/event-based handlers) to perform recognition and receive translated output.
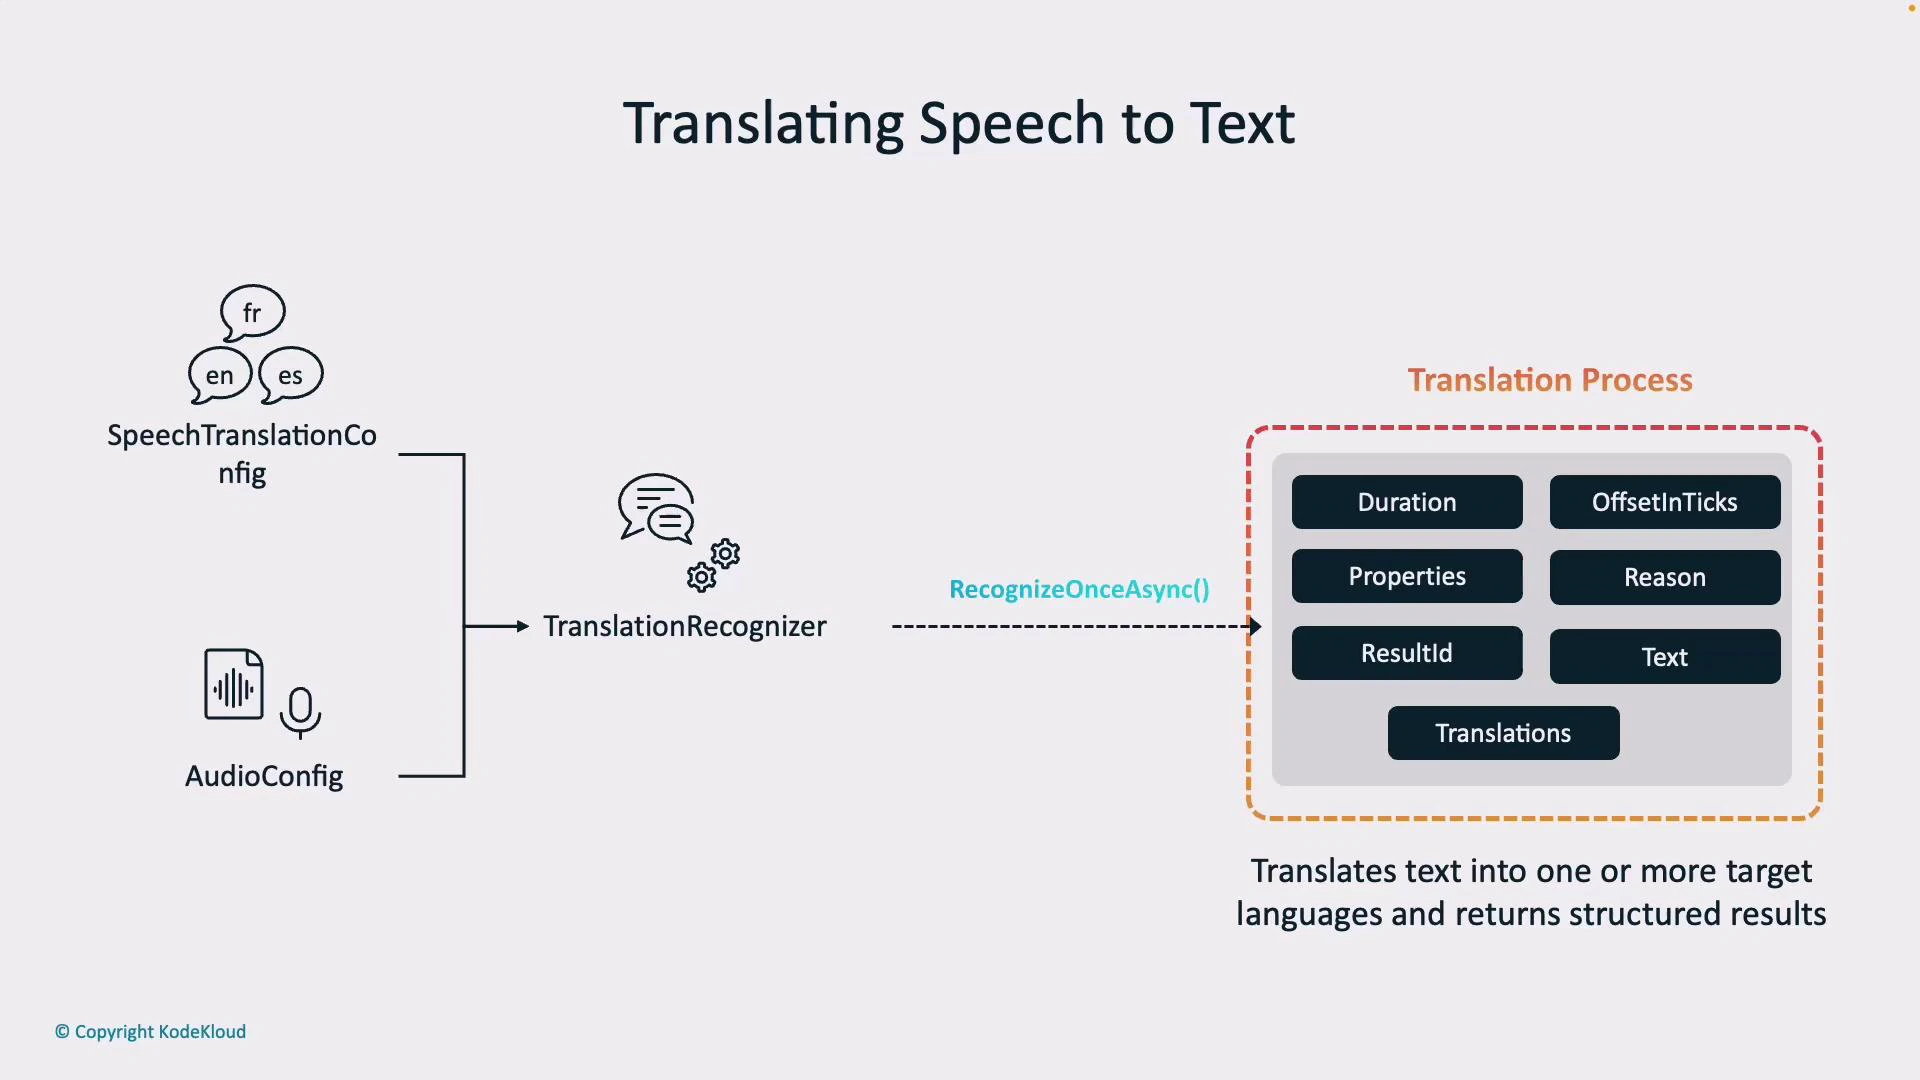
Recognition result structure
When a translation operation completes, the recognizer returns a structured result. Key attributes help you interpret, log, and debug outputs.| Attribute | Description | Example |
|---|---|---|
text | Original recognized transcription (source language) | Hello, how are you? |
translations | Mapping of target language codes to translated text | { "es": "Hola, ¿cómo estás?" } |
duration | Length of the recognized audio segment | 00:00:02.500 |
offsetInTicks | Timestamp (ticks) when recognition started | 637... |
properties | Metadata and diagnostic properties | e.g., engine or model info |
reason | Why the result was returned (e.g., TranslatedSpeech, NoMatch, Canceled) | TranslatedSpeech |
resultId | Unique identifier for the recognition result | 3a9f... |
translations contains a translated string for each target language you configured. The recognition → translation two-step pipeline lets you obtain both the original transcript and multilingual outputs for downstream workflows (display, storage, or synthesis).
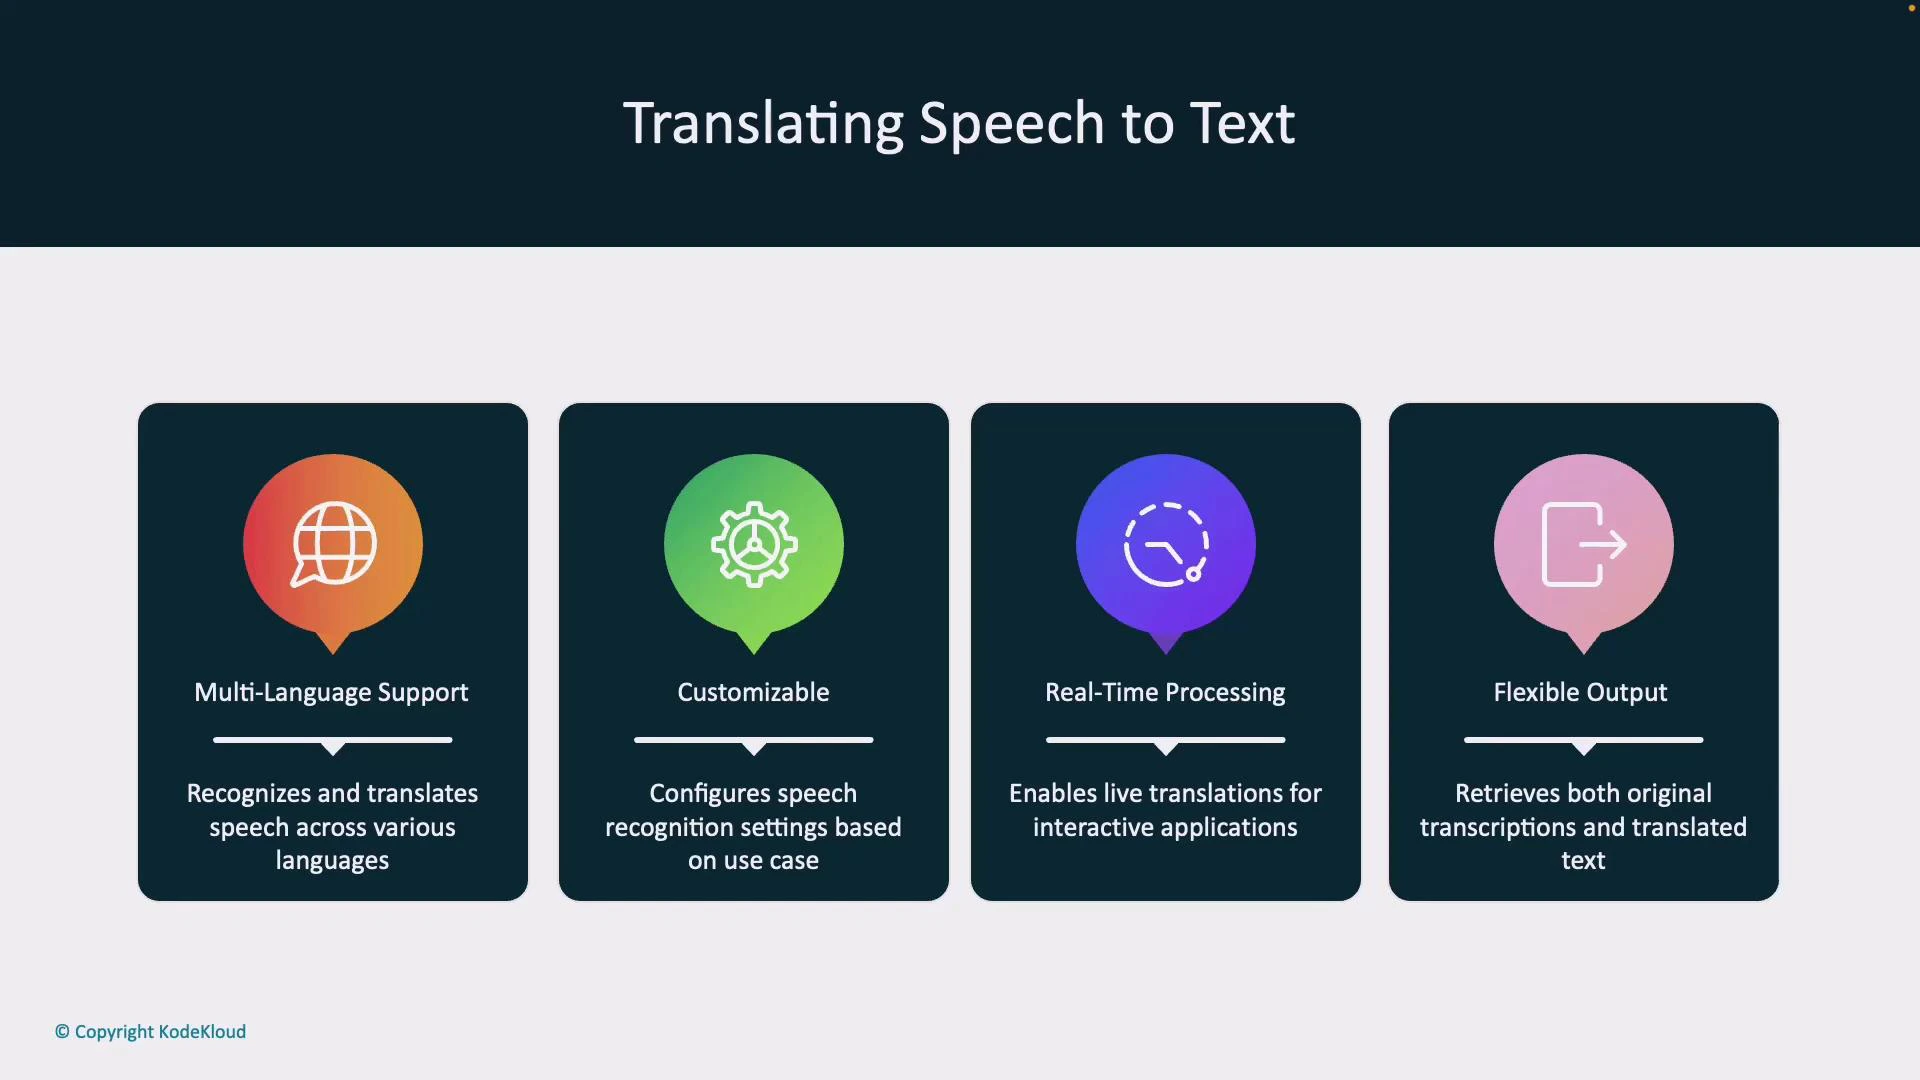
Benefits of Azure Speech translation
- Multi-language support: real-time recognition and translation across many languages.
- Customizable: adjust recognition or translation settings for domain-specific vocabularies.
- Real-time processing: low-latency translations for interactive scenarios (meetings, support).
- Flexible output: get original transcription and translations (text and optional synthesized audio).
Example JSON response
A typical JSON-like structure returned by translation workflows:Working in Speech Studio (Azure Portal)
Use Speech Studio at https://speech.microsoft.com/ to quickly try speech translation and video translation scenarios without writing code. In Speech Studio you can:- Select the spoken language (e.g., English (United States)).
- Pick one or more target languages (e.g., French).
- Choose the voice for synthesized translated audio (e.g.,
Dennis). - Record or upload audio, view the transcription, and listen to or download translated audio.
Calling the Translation service from code (Python)
Install the Speech SDK:Ensure your Speech resource key and region are set correctly. For safety, store them as environment variables rather than embedding secrets in code.
- Configures the translation recognizer,
- Recognizes and translates speech from a WAV file to Spanish, and
- Synthesizes the translated Spanish text to the default audio output.
Event-based vs Manual speech synthesis
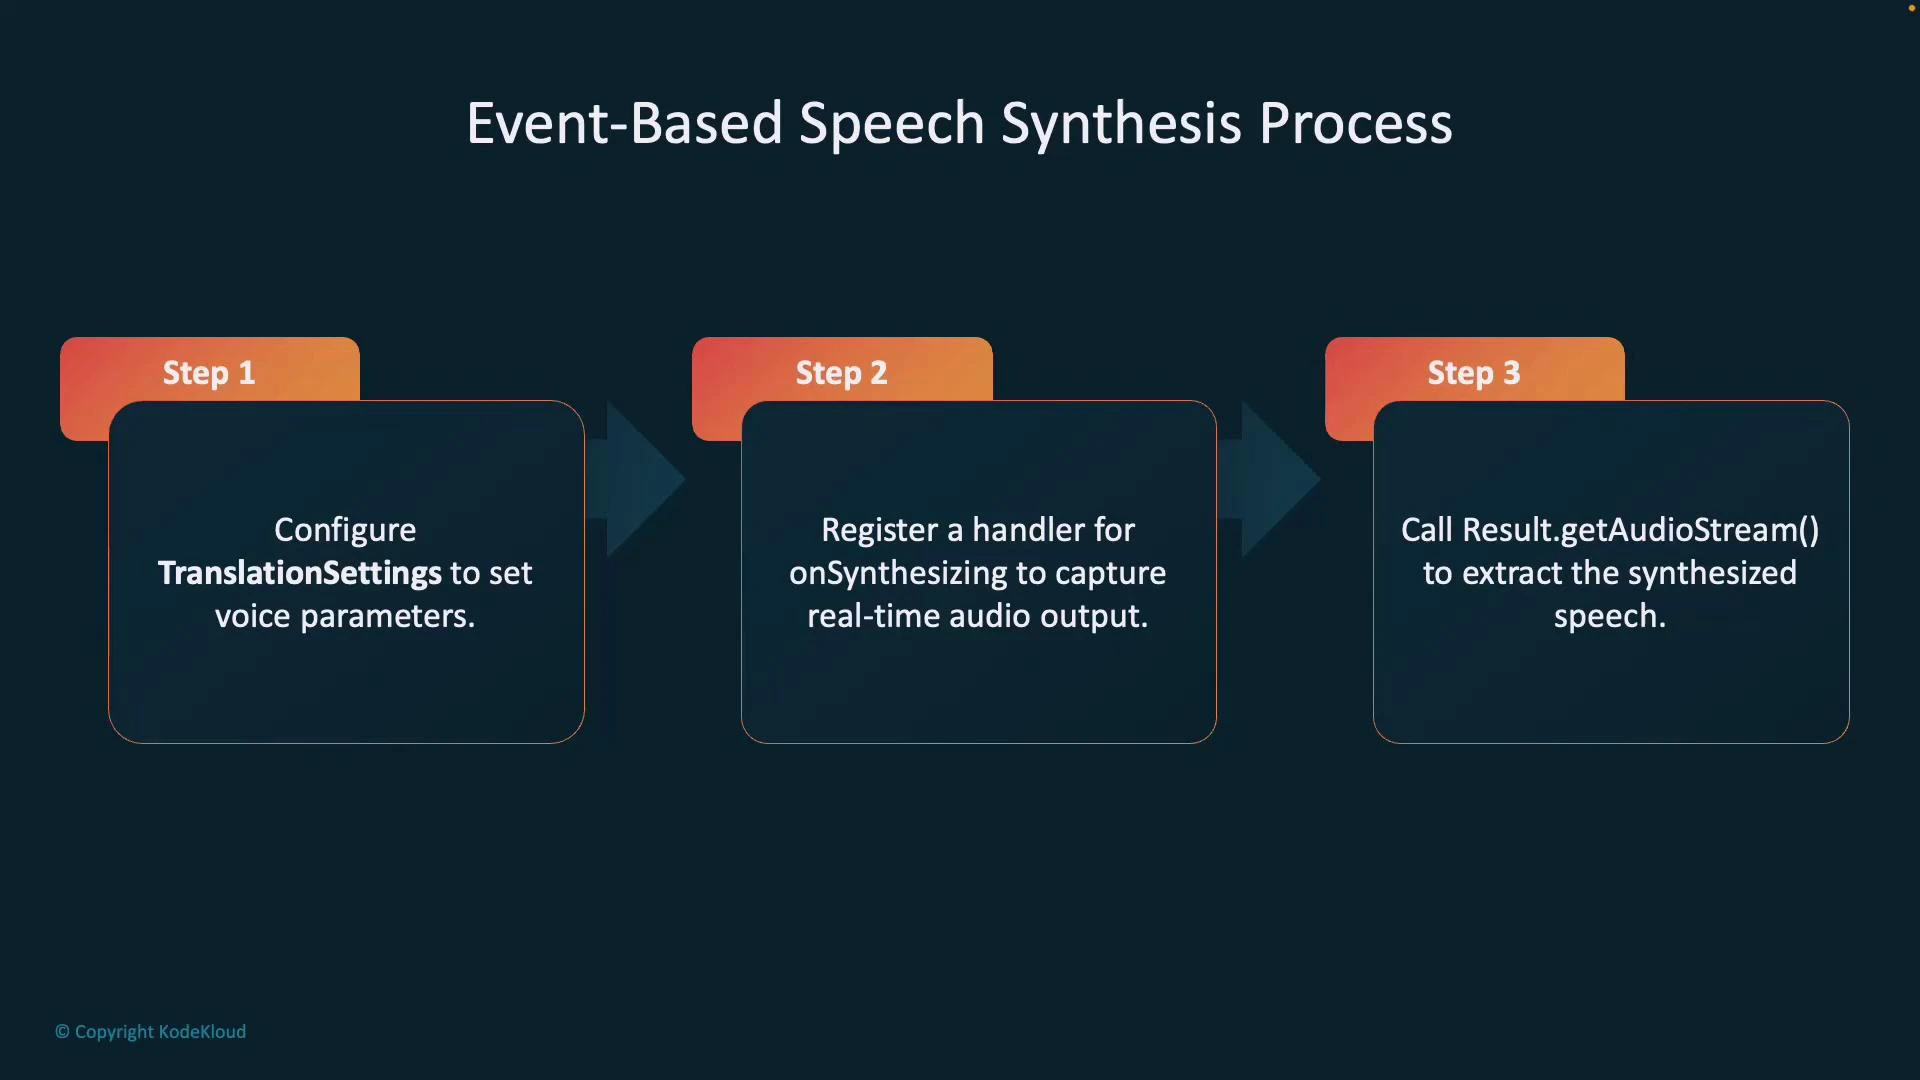
Choose the synthesis approach that matches your scenario:- Event-based speech synthesis:
- Translates and synthesizes in a streaming fashion.
- Returns audio chunks in real time (low latency).
- Best for live translator apps, calls, or scenarios where a single output language is streamed as audio.
- Configure translation settings (including voice selection).
- Register an
onSynthesizinghandler to capture audio as it is produced. - Call
getAudioStream()or handle audio events to retrieve synthesized audio in real-time.
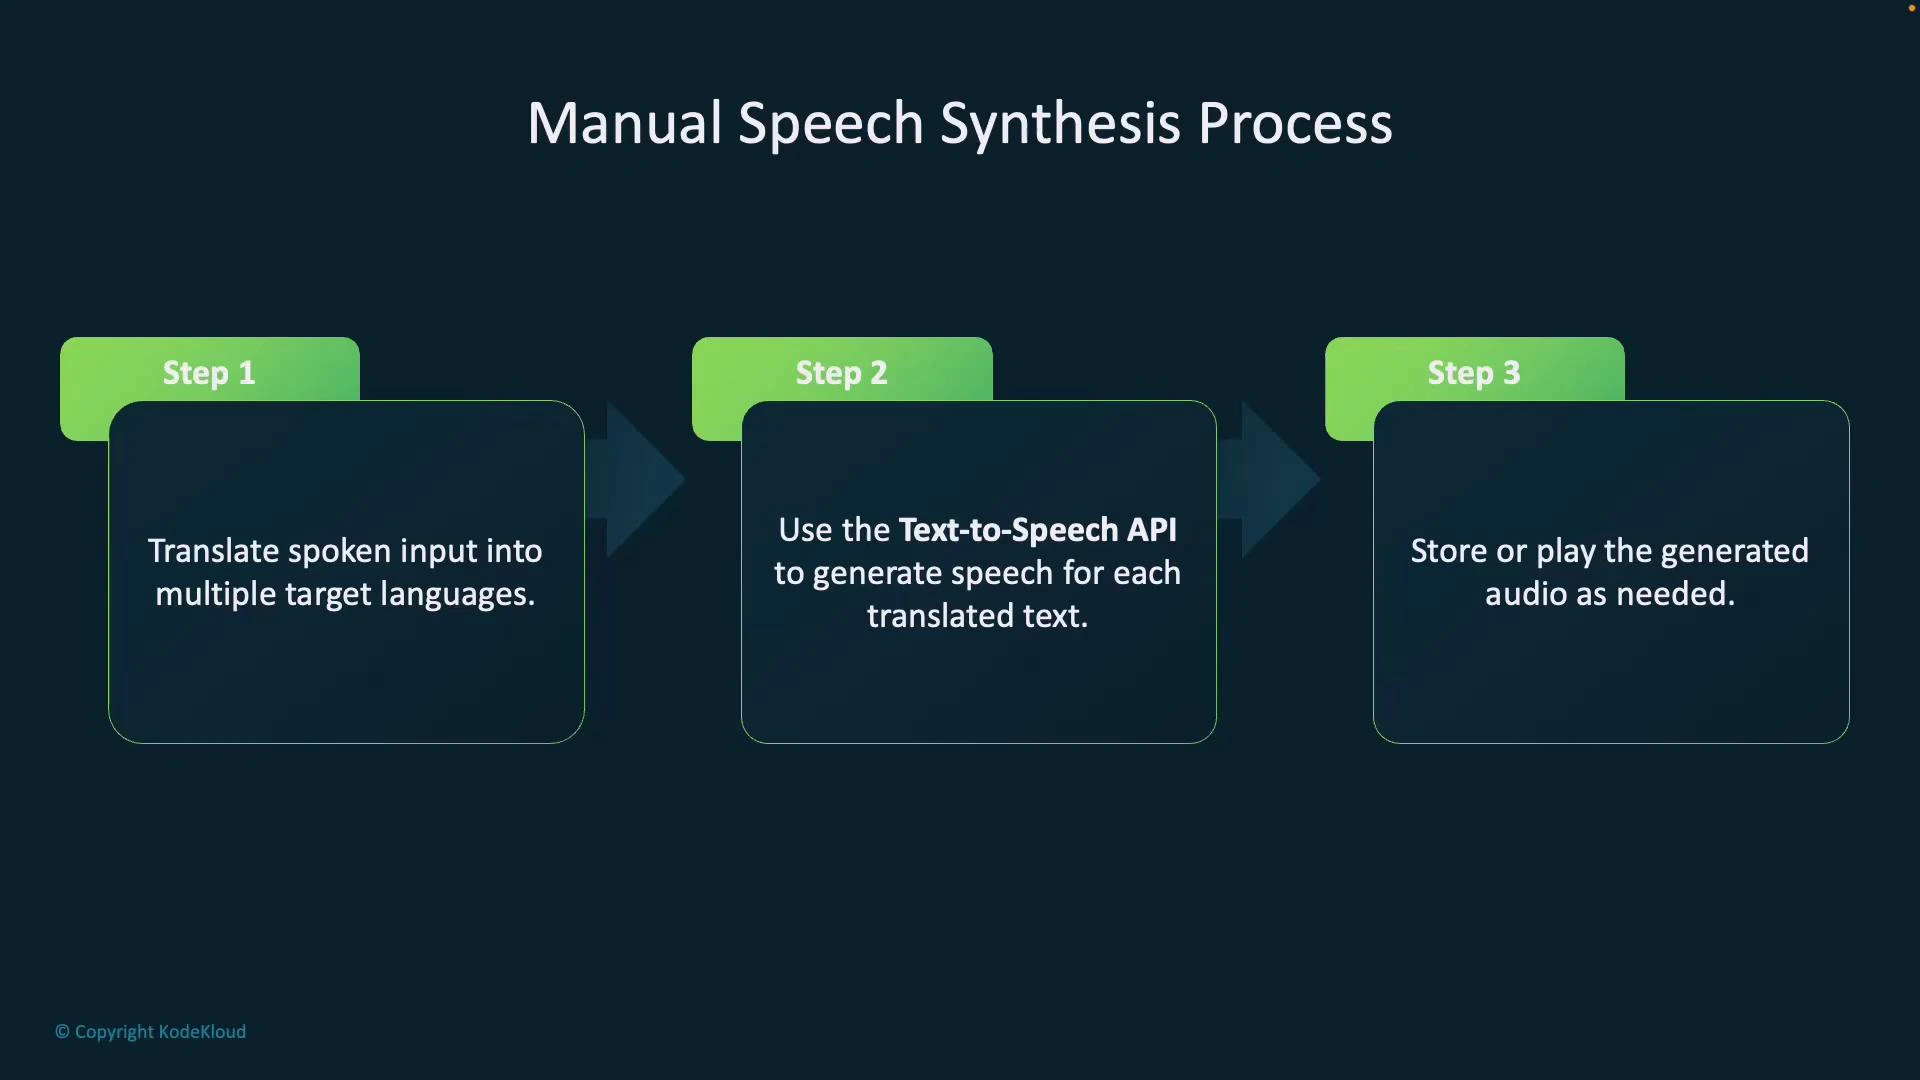
- Manual speech synthesis:
- First translate into one or more target languages.
- For each translation, call the Text-to-Speech API to generate audio.
- Ideal for multilingual outputs, batch processing, or when you need per-language synthesis control.
- Translate the spoken input into each target language.
- For each translation, call the Text-to-Speech API to generate audio.
- Store or play each generated audio file as required.
Links and references
- Speech Studio: https://speech.microsoft.com/
- Azure Speech SDK (Python): https://pypi.org/project/azure-cognitiveservices-speech/
- Azure Speech documentation: https://learn.microsoft.com/azure/cognitive-services/speech-service/