

- Open SageMaker Studio and locate the model you want to deploy (JumpStart or a model you registered).
- If required, train, register, and verify the model artifact and inference container/image.
- From the SageMaker AI homepage, go to Deployments and inference → Endpoints.
- Create a new endpoint: choose a name and select or create an endpoint configuration.
- Pick hosting mode (serverless or provisioned), configure encryption/KMS if required, and define model variants (production/shadow).
- Create the endpoint and call it via the InvokeEndpoint API, SDK, or AWS CLI for real-time predictions.
Step-by-step details
- Locate and prepare your model in SageMaker Studio
- If you used JumpStart, you can reuse that JumpStart model. If you trained a model in Studio, ensure it’s registered and shows up in the SageMaker model list.
- Verify the model artifact S3 location and the container image (inference specification) are correctly set on the model resource. Confirm that IAM roles used by SageMaker have access to the S3 artifact and ECR (if applicable).
- Create an endpoint from SageMaker AI → Endpoints
- From the SageMaker AI homepage, open Deployments and inference → Endpoints.
- Click “Create endpoint” and provide a meaningful endpoint name (e.g.,
my-model-prod-v1).
- Endpoint configuration: create or reuse
- If you don’t already have an endpoint configuration, create one. An endpoint configuration specifies how the model is exposed (compute settings, variants, encryption).
- Choose between hosting modes:
- Serverless: SageMaker runs the model on-demand without instance management. Ideal for bursty or low-throughput workloads and quick deployments.
- Provisioned: You select instance families and counts. Use this for predictable, sustained throughput or when you need GPU acceleration.
Serverless endpoints reduce management overhead and are a good starting point for many applications. Choose provisioned endpoints when you need consistent low latency, predictable throughput, or custom instance types (for example, GPU instances).
- Encryption (optional)
- If your security posture requires it, provide a KMS Customer Managed Key to encrypt model artifacts and endpoint resources at rest. If you don’t specify a KMS key, AWS-managed keys are used by default.
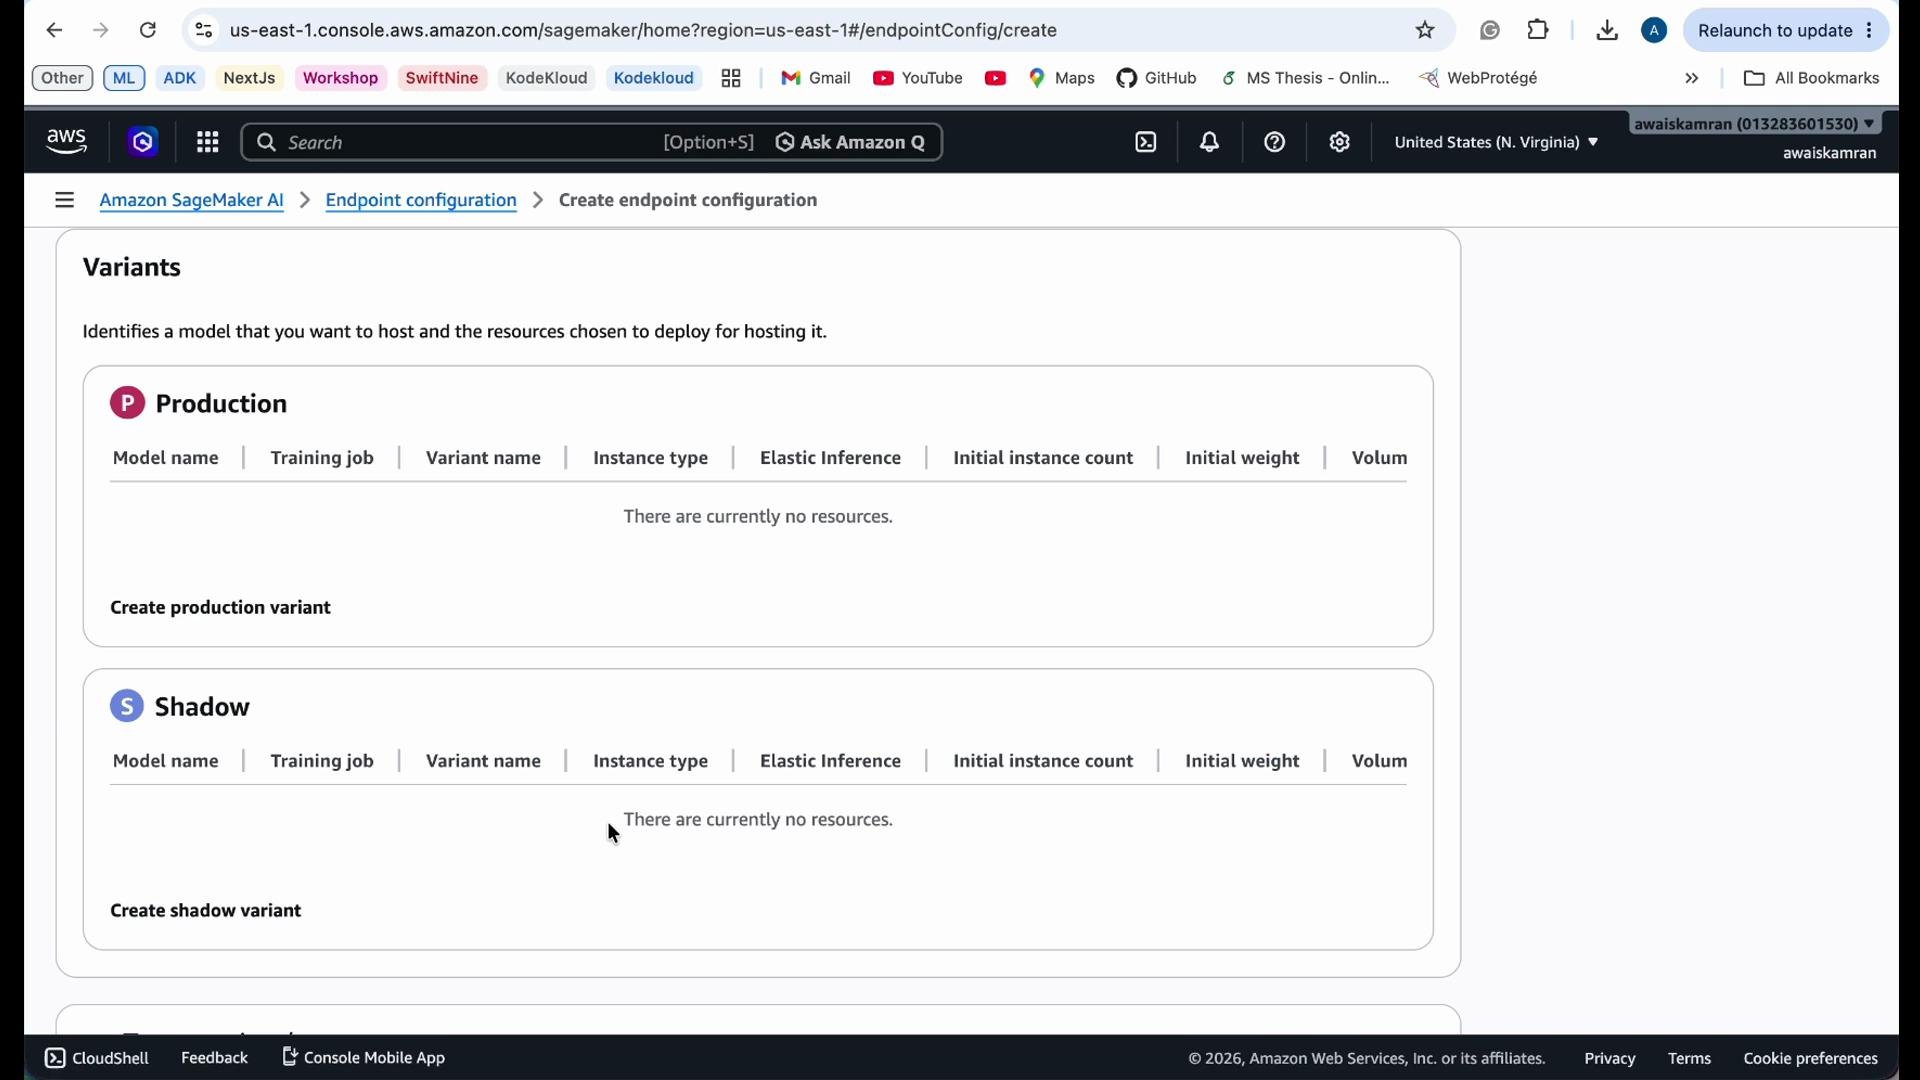
- Configure model variants
- An endpoint can host one or more model variants. Variants let you run multiple model versions under a single endpoint — for example, a “production” variant and one or more “shadow” variants for testing or A/B evaluation.
- While creating the configuration you will:
- Select the model(s) to include.
- Assign each model to production or shadow roles.
- (Provisioned only) assign instance types and instance counts to each variant.
- Finalize and create the endpoint
- Review the endpoint configuration (variant assignments, serverless/provisioned settings, and encryption).
- Create the endpoint. Provisioned endpoints can take several minutes to spin up depending on instance types. Serverless endpoints deploy faster but still might need a moment to become available.
- When the endpoint status is
InServiceyou can call it using the AWS SDKs (e.g., boto3), AWS CLI, or the SageMaker console for real-time inference.
- Monitor endpoint metrics (latency, invocation count, error rate) in CloudWatch to detect regressions and to drive autoscaling or variant adjustments.
- Implement structured logging and content validation (request/response schema checks) to avoid corrupt data reaching models.
- Use model shadowing for safe evaluation of new model versions: route a small percentage of live traffic to the shadow variant and compare metrics before full rollout.
- For GPU workloads or strict latency SLAs, prefer provisioned hosting with appropriate instance types and consider autoscaling policies.
- Track costs: provisioned endpoints incur instance-hour charges even when idle — serverless endpoints can reduce idle cost but may have different performance profiles.
Provisioned endpoints incur ongoing instance costs. Ensure you choose instance sizes and scaling policies that match your throughput and latency requirements to avoid unnecessary spend.
- Endpoint stuck in creating: check IAM permissions, VPC configuration (if using VPC endpoints), and service limits (quota on instance types).
- Invocation errors: validate ContentType, payload format, and model input schema.
- High latency: review instance family and size, enable provisioned concurrency or add instances, and profile model performance.
- Preparing and registering models
- Choosing between serverless and provisioned hosting
- Configuring encryption and KMS keys
- Using model variants for safe deployments (blue-green / canary)
- Invoking endpoints with the AWS SDK
- SageMaker Studio and Endpoints: https://learn.kodekloud.com/user/courses/aws-sagemaker
- boto3 documentation: https://boto3.amazonaws.com/v1/documentation/api/latest/index.html
- AWS CLI: https://docs.aws.amazon.com/cli/latest/userguide/cli-chap-welcome.html
- CloudWatch monitoring: https://learn.kodekloud.com/user/courses/aws-cloudwatch