Learn to connect to virtual machines using public IPs, jumpboxes, and Azure Bastion, covering methods, benefits, and security considerations.
In this lesson, you’ll learn how to connect to the virtual machines (VMs) created in the previous lesson using different methods. We will cover accessing VMs via public IP addresses, jumpboxes, and Azure Bastion. Each method has its own benefits and security considerations.
One common method to access a virtual machine is by using its public IP address. With a public IP, you can:
Use an SSH client (for Linux)
Use an RDP client (for Windows)
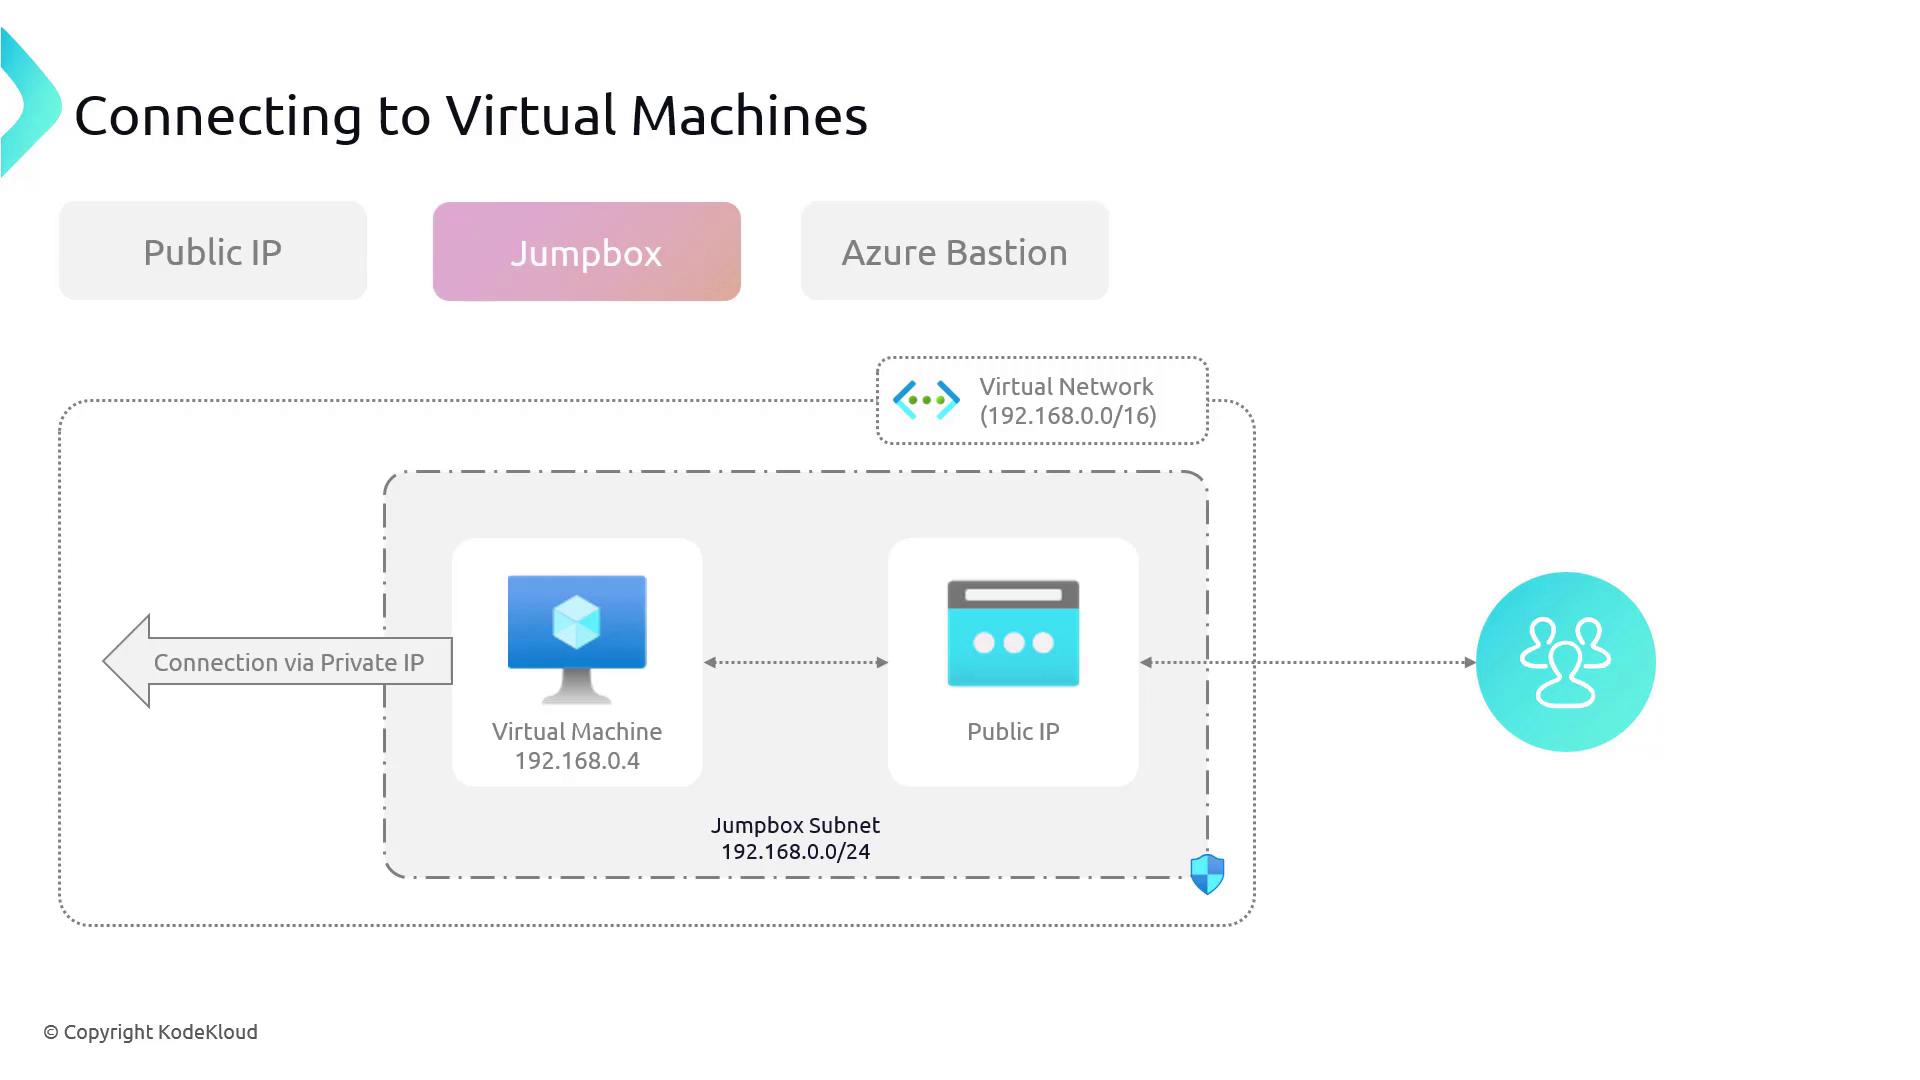
Another secure option is to connect via a jumpbox. A jumpbox is a machine with a public IP address placed within a dedicated subnet, while your workloads run in a different, private subnet within the same virtual network. By connecting to the jumpbox, you can then access other machines securely on the private network.
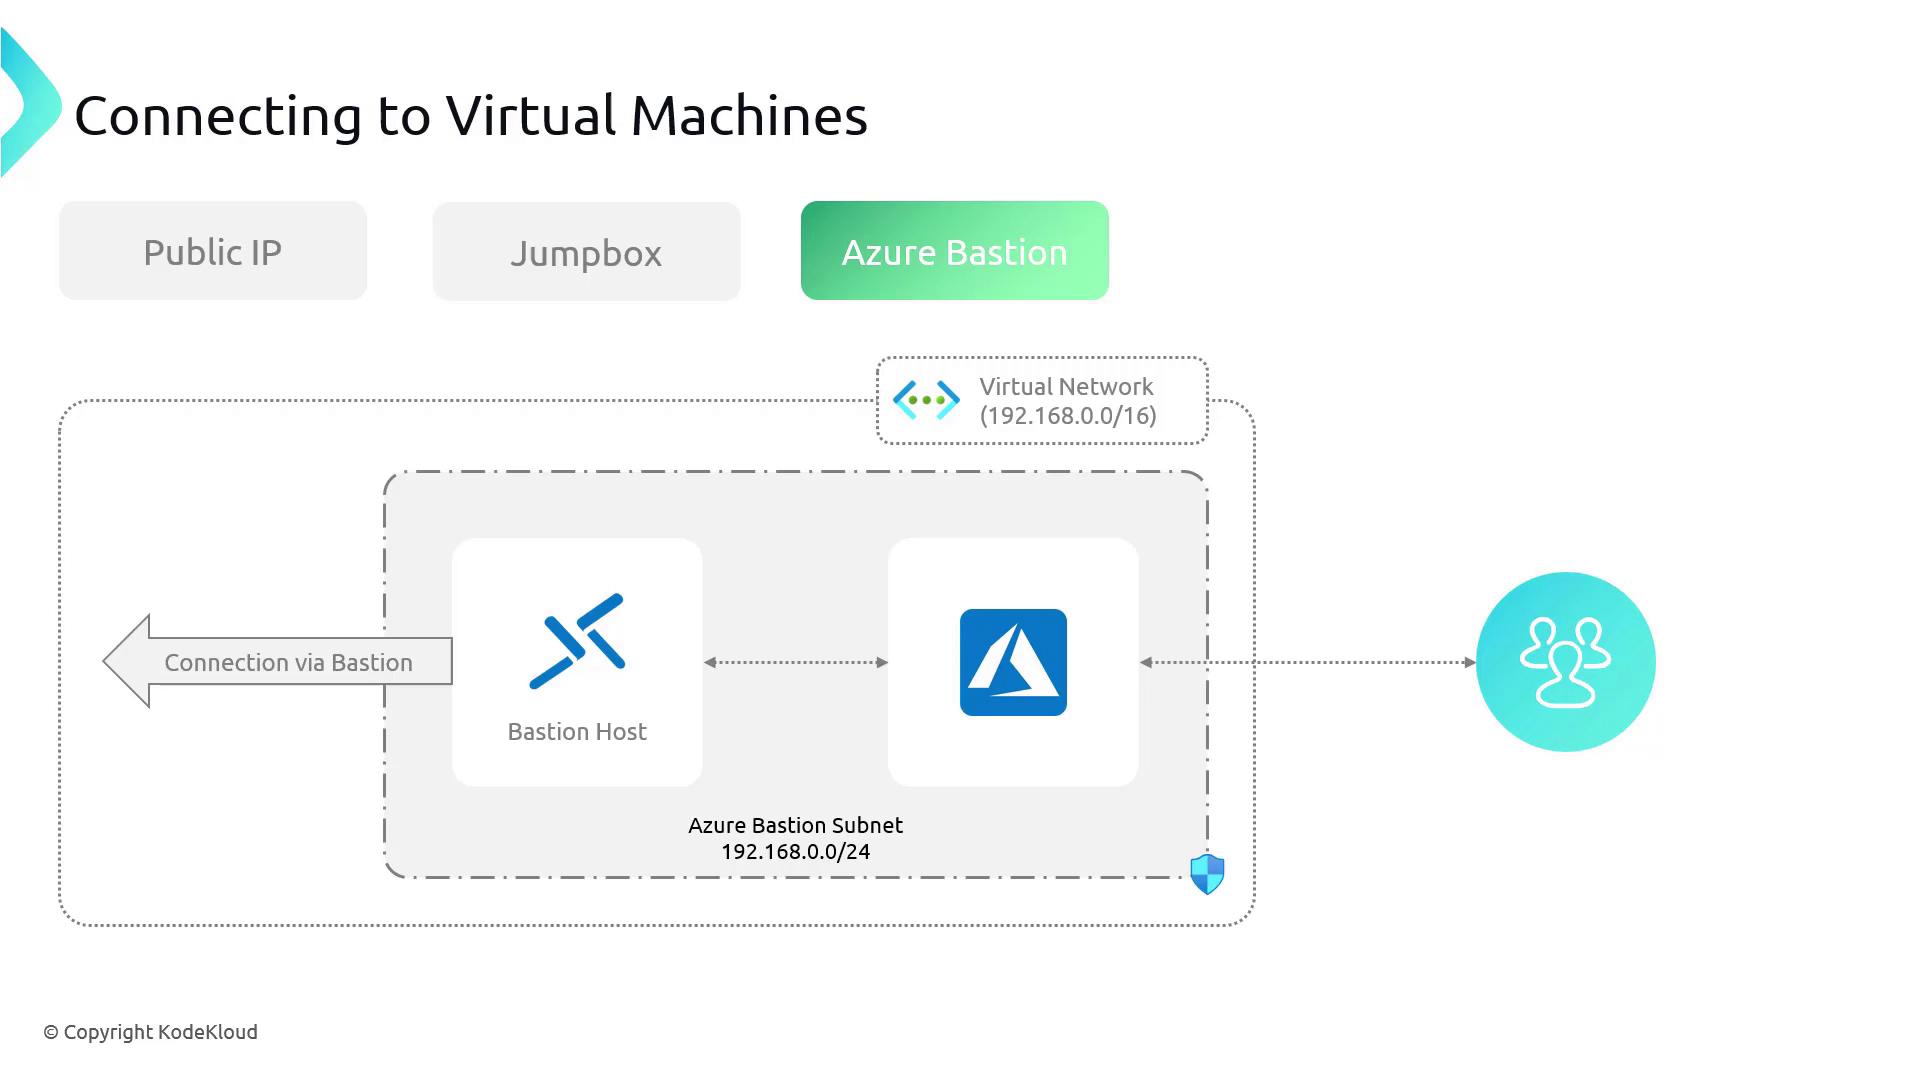
Azure Bastion is a managed service that simplifies VM connectivity by allowing secure, direct browser-based access to your VMs. This method eliminates the need to deploy and manage jumpbox VMs, download special clients, or expose any ports directly to the internet.
Azure Bastion enhances security by ensuring that no public ports are exposed, which helps protect your infrastructure from potential attackers.
To connect to a Linux VM using its public IP address, open your terminal and run:
ssh kodekloud@20.124.250.11
When you run the command, you will be prompted to verify the host authenticity and enter the password:
The authenticity of host '20.124.250.11 (20.124.250.11)' can't be established.ED25519 key fingerprint is SHA256:WF3fDk9RW5FBHx6A619YVajH2O27TNQGyGPdCZZU.This key is not known by any other names.Are you sure you want to continue connecting (yes/no/[fingerprint])? yesWarning: Permanently added '20.124.250.11' (ED25519) to the list of known hosts.kodekloud@20.124.250.11's password:
Once authenticated, you are connected to the VM using its public IP address. Alternatively, you can reconnect using the jumpbox that was set up earlier.Below is a sample output of system information from one of our VMs to confirm connectivity via the jumpbox:
System information as of Sun Dec 10 18:11:58 UTC 2023System load: 0.0 Processes: 100Usage of /: 1.1% of 28.9GB Users logged in: 0Memory usage: 31% IPv4 address for eth0: 10.0.0.4Swap usage: 0%Expanded Security Maintenance for Applications is not enabled.0 updates can be applied immediately.Enable ESM Apps to receive additional future security updates.See https://ubuntu.com/esm or run: sudo pro statusThe programs included with the Ubuntu system are free software;the exact distribution terms for each program are described inindividual files in /usr/share/doc/*/copyright.Ubuntu comes with ABSOLUTELY NO WARRANTY, to the extent permitted byapplicable law.kodeKLOUD@az-vm-01:~$
Now, let’s explore how to use Azure Bastion. The following PowerShell script creates two VMs—one Linux and one Windows—both with private IP addresses. These VMs are ideal for secure access via Bastion.
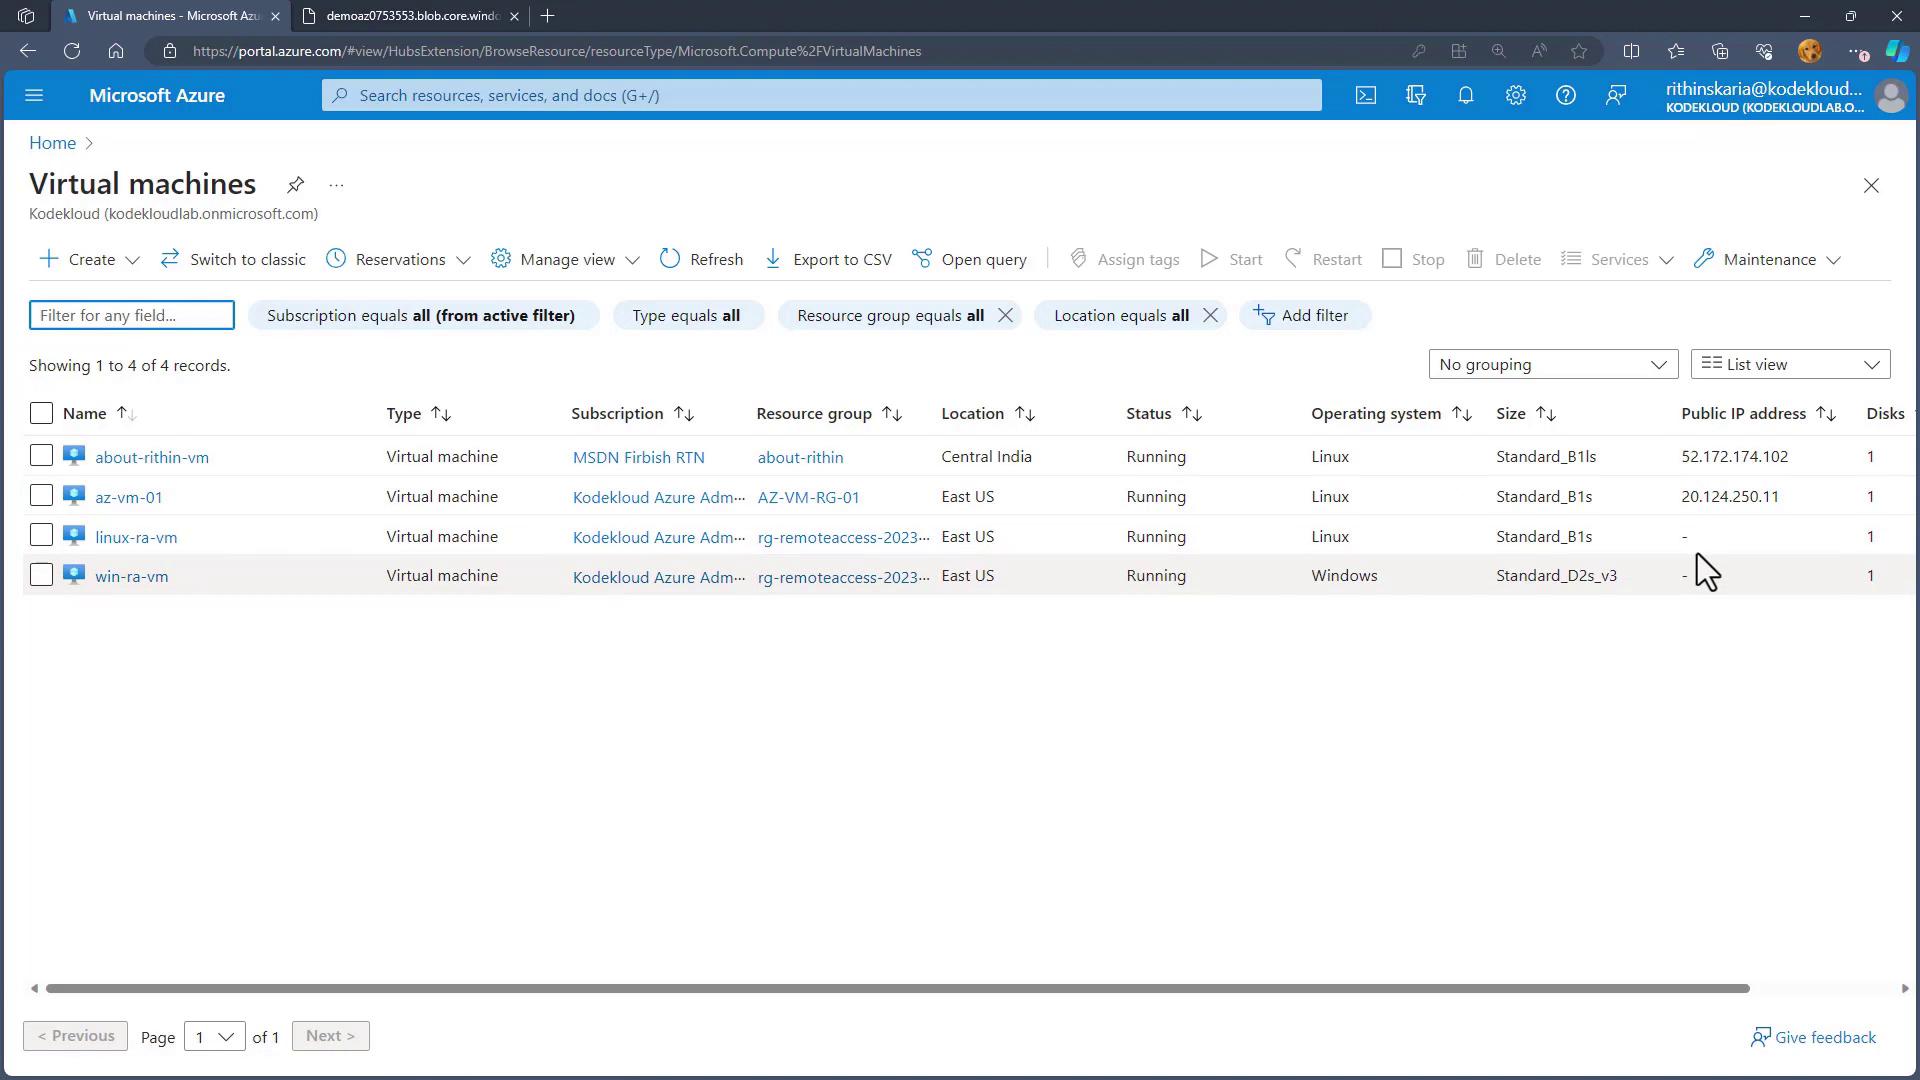
After the script completes, verify that the VMs appear in the virtual machines list. Since these VMs do not have public IP addresses, they are perfectly suited for private access using Azure Bastion.
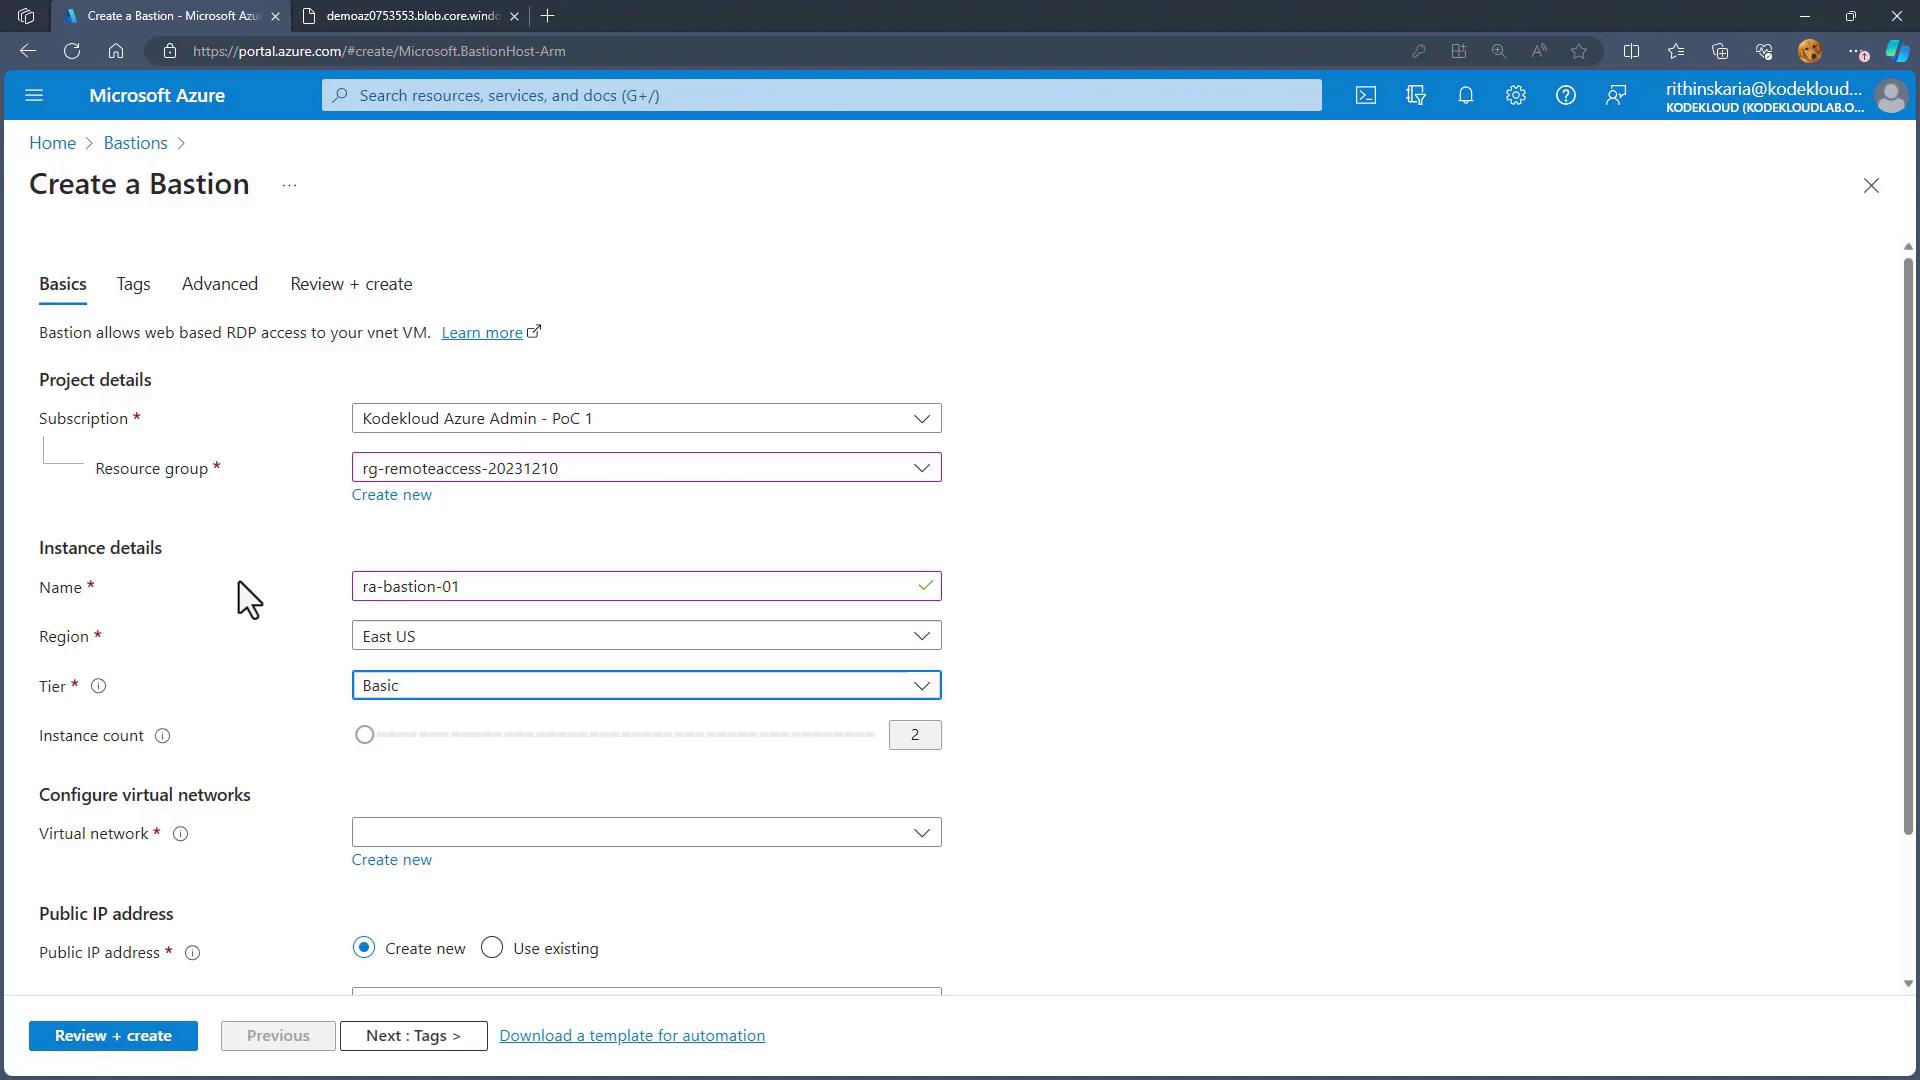
Navigate to the Bastion resource in the Azure portal.
Create a new Bastion host with the settings below:
Resource Group: Remote Access
Name: RABastion01
Region: East US
Tier: Basic (to minimize costs)
Choose the virtual network (vnet-remoteaccess) and ensure Bastion has a dedicated subnet named “AzureBastionSubnet” by clicking on “Manage subnet configuration.”
Create a new public IP address.
Click “Review and Create” to deploy Bastion.
Once the Bastion host is deployed, you can connect to your VMs privately through your browser.
In the next lesson, we will explore how to configure high availability for your virtual machines. By following these best practices, you’ll enhance the security and efficiency of your remote access setup.For more information, refer to the following resources: