

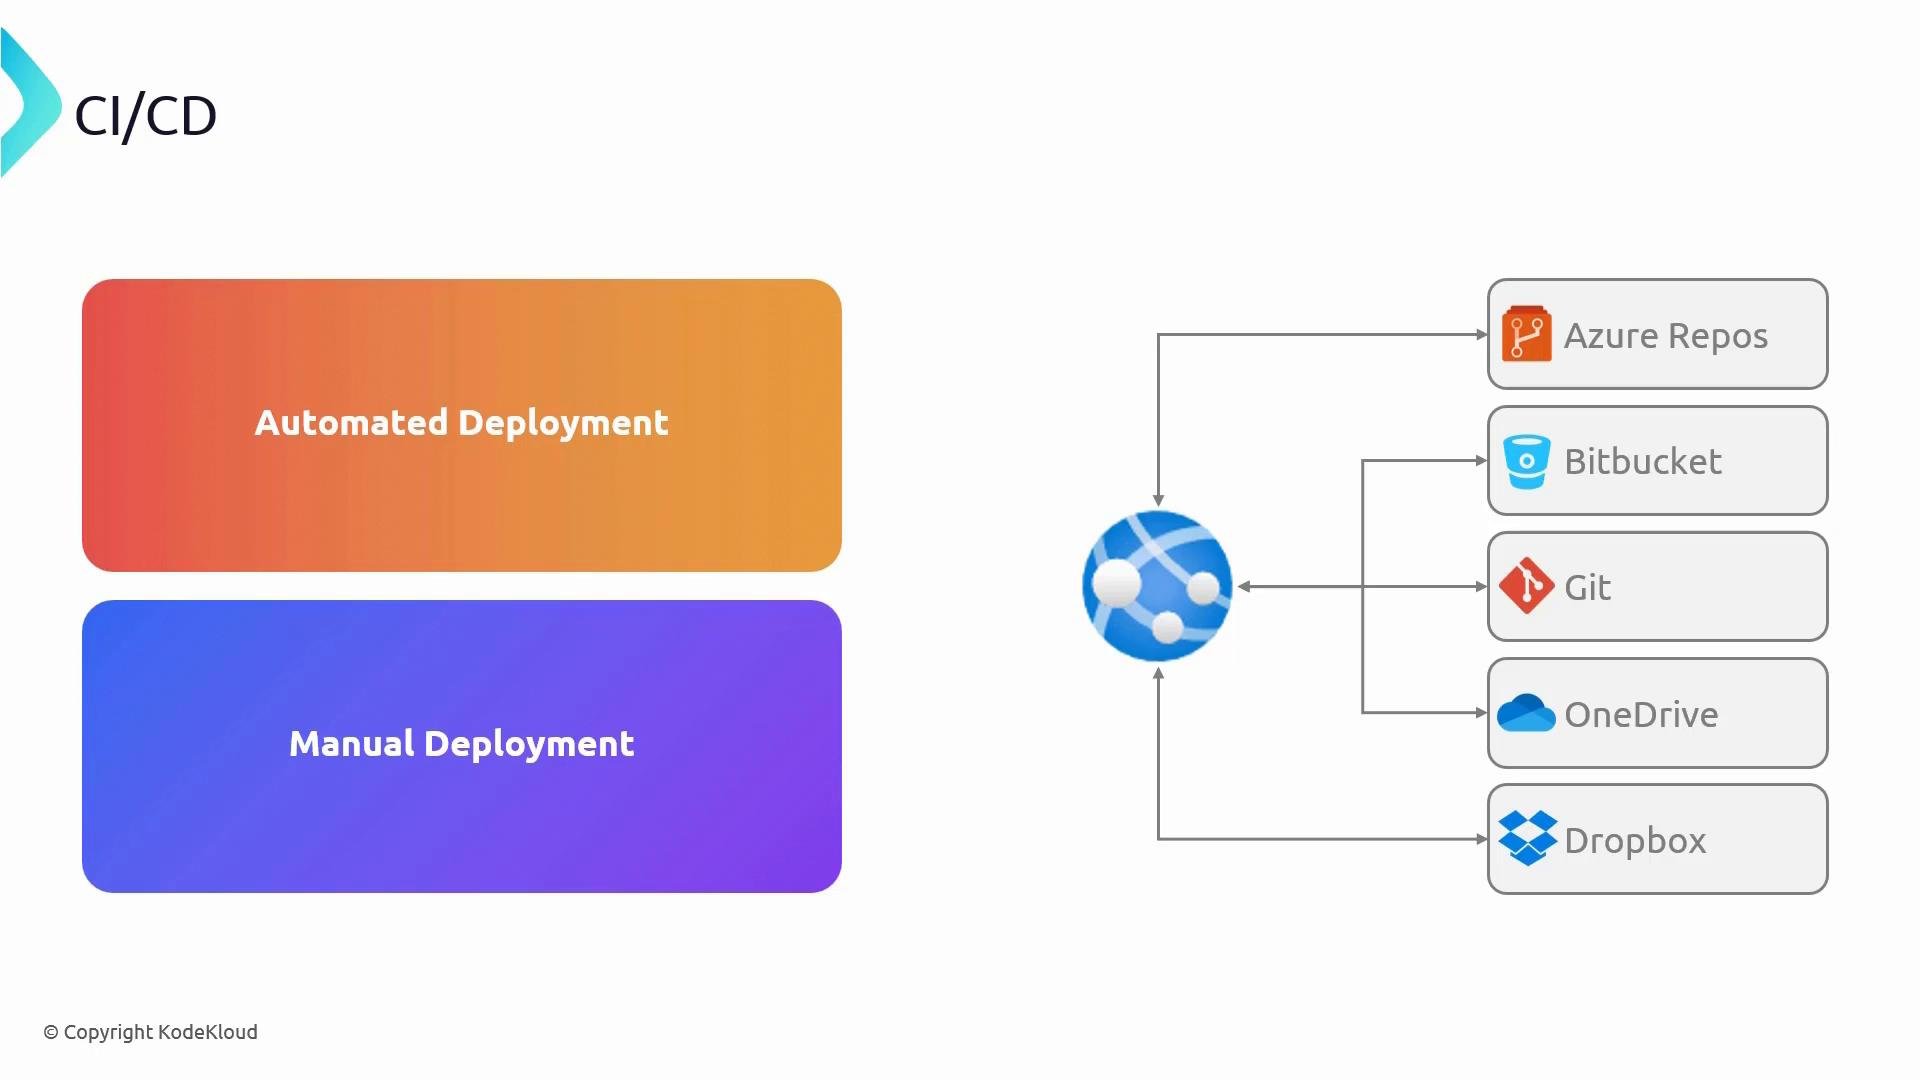
- Automated deployment — Connect App Service to a repository (GitHub, Bitbucket, Local Git, or Azure Repos). Commits to the chosen branch trigger builds and automatic deployments.
- Manual deployment — Push artifacts to storage or a location that App Service pulls from. Note: integrations with OneDrive and Dropbox for App Service and Azure Functions were retired on September 30, 2023 — disable and migrate any such integrations.
Automated deployments are recommended for frequent changes and multiple contributors. Manual deployments can be appropriate for single, infrequent updates or specific artifact workflows, but confirm that your storage integration is supported and secure.
- Make a code change locally and push it to the chosen branch in your repository.
- App Service Deployment Center detects the new commit, triggers a build, and deploys the artifact to the configured App Service instance.
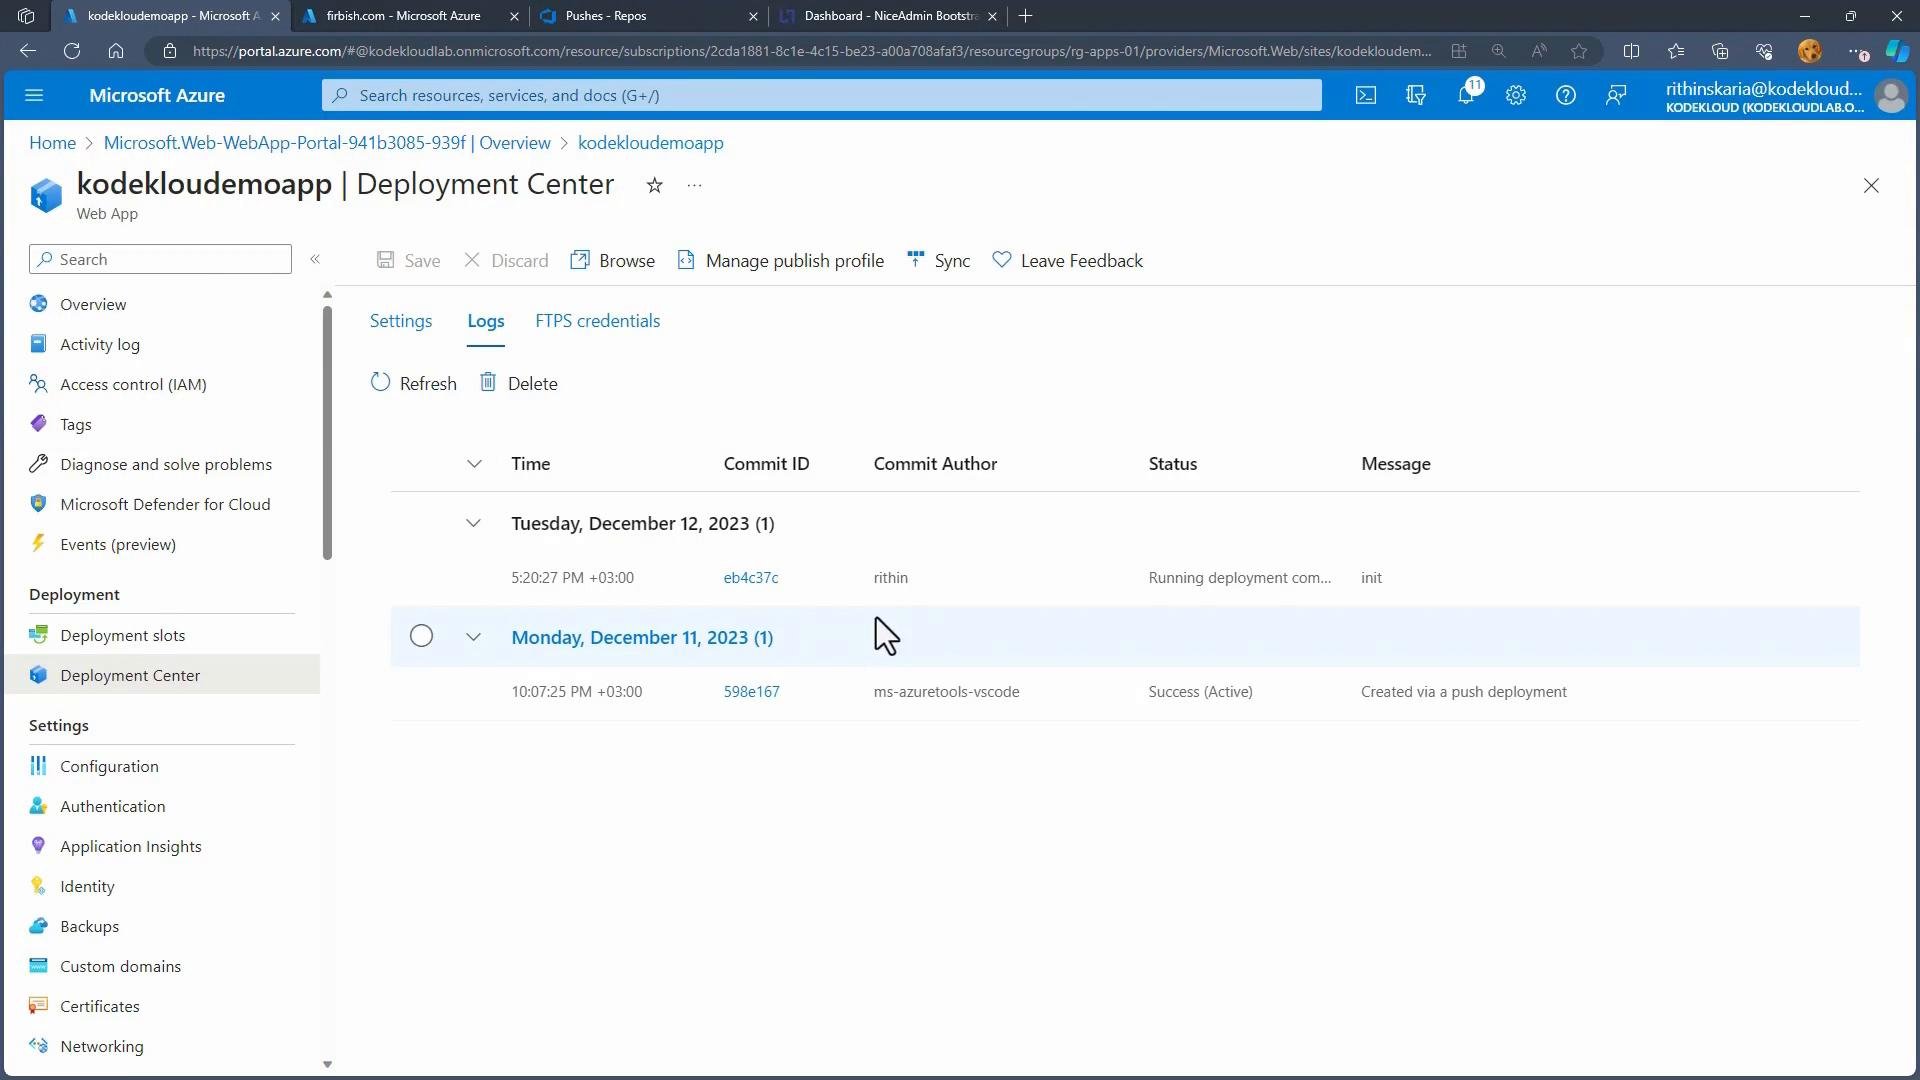
- Verify the change by refreshing your web app or checking Deployment Center logs.
- Edit a simple header in
index.html. Example excerpt:
- Commit and push to Azure Repos (or another supported provider). Example (abbreviated) git output:
- In the Azure portal, open your App Service → Deployment Center. Select the source (Azure Repos, GitHub, etc.), pick organization/project/repository and the branch you want to deploy, and save the configuration. After saving, Deployment Center logs display build and deployment events triggered by commits.
- Commit code to a development branch → CI/CD deploys to a non-production slot (for example,
dev). - Validate the app in that slot using its unique URL.
- Promote validated changes to production by merging the branch to
main(triggering production CI/CD) or by swapping the slot into production.
- Reduces downtime and cold starts by swapping warmed-up instances.
- Provides a fast rollback path by swapping back to the previous slot.
Slot configuration: sticky vs swapped
- By default, most app settings and connection strings are part of the site configuration and are swapped between slots.
- Mark a setting as a “slot setting” to make it sticky to that slot (it will not swap).
- Other configuration items are not swapped (examples include custom domains, scale settings, VNet integration, TLS/SSL certificates, and certain diagnostic settings).
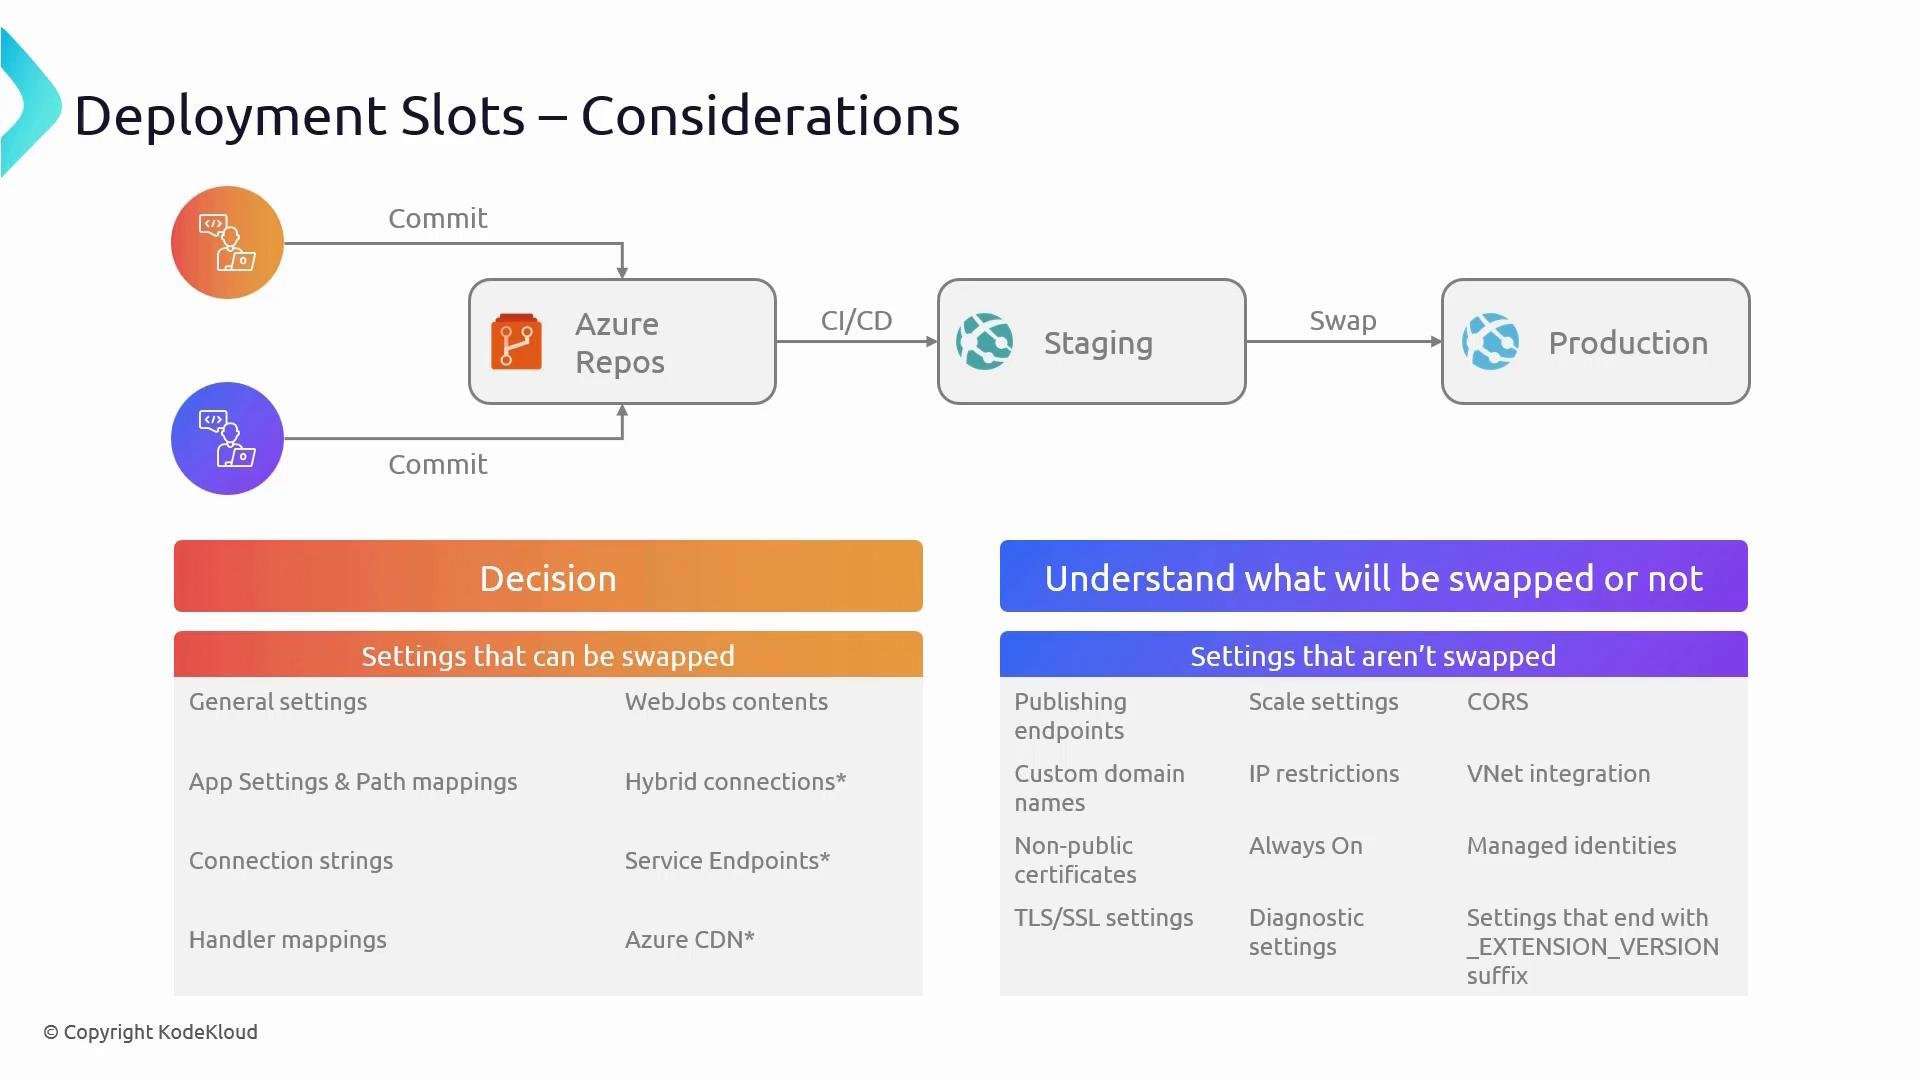
dev branch, a dev slot, deploy to slot, then swap
-
Create a
devbranch in Azure Repos (or locally and push). In Azure DevOps you can create branches from the Files view. -
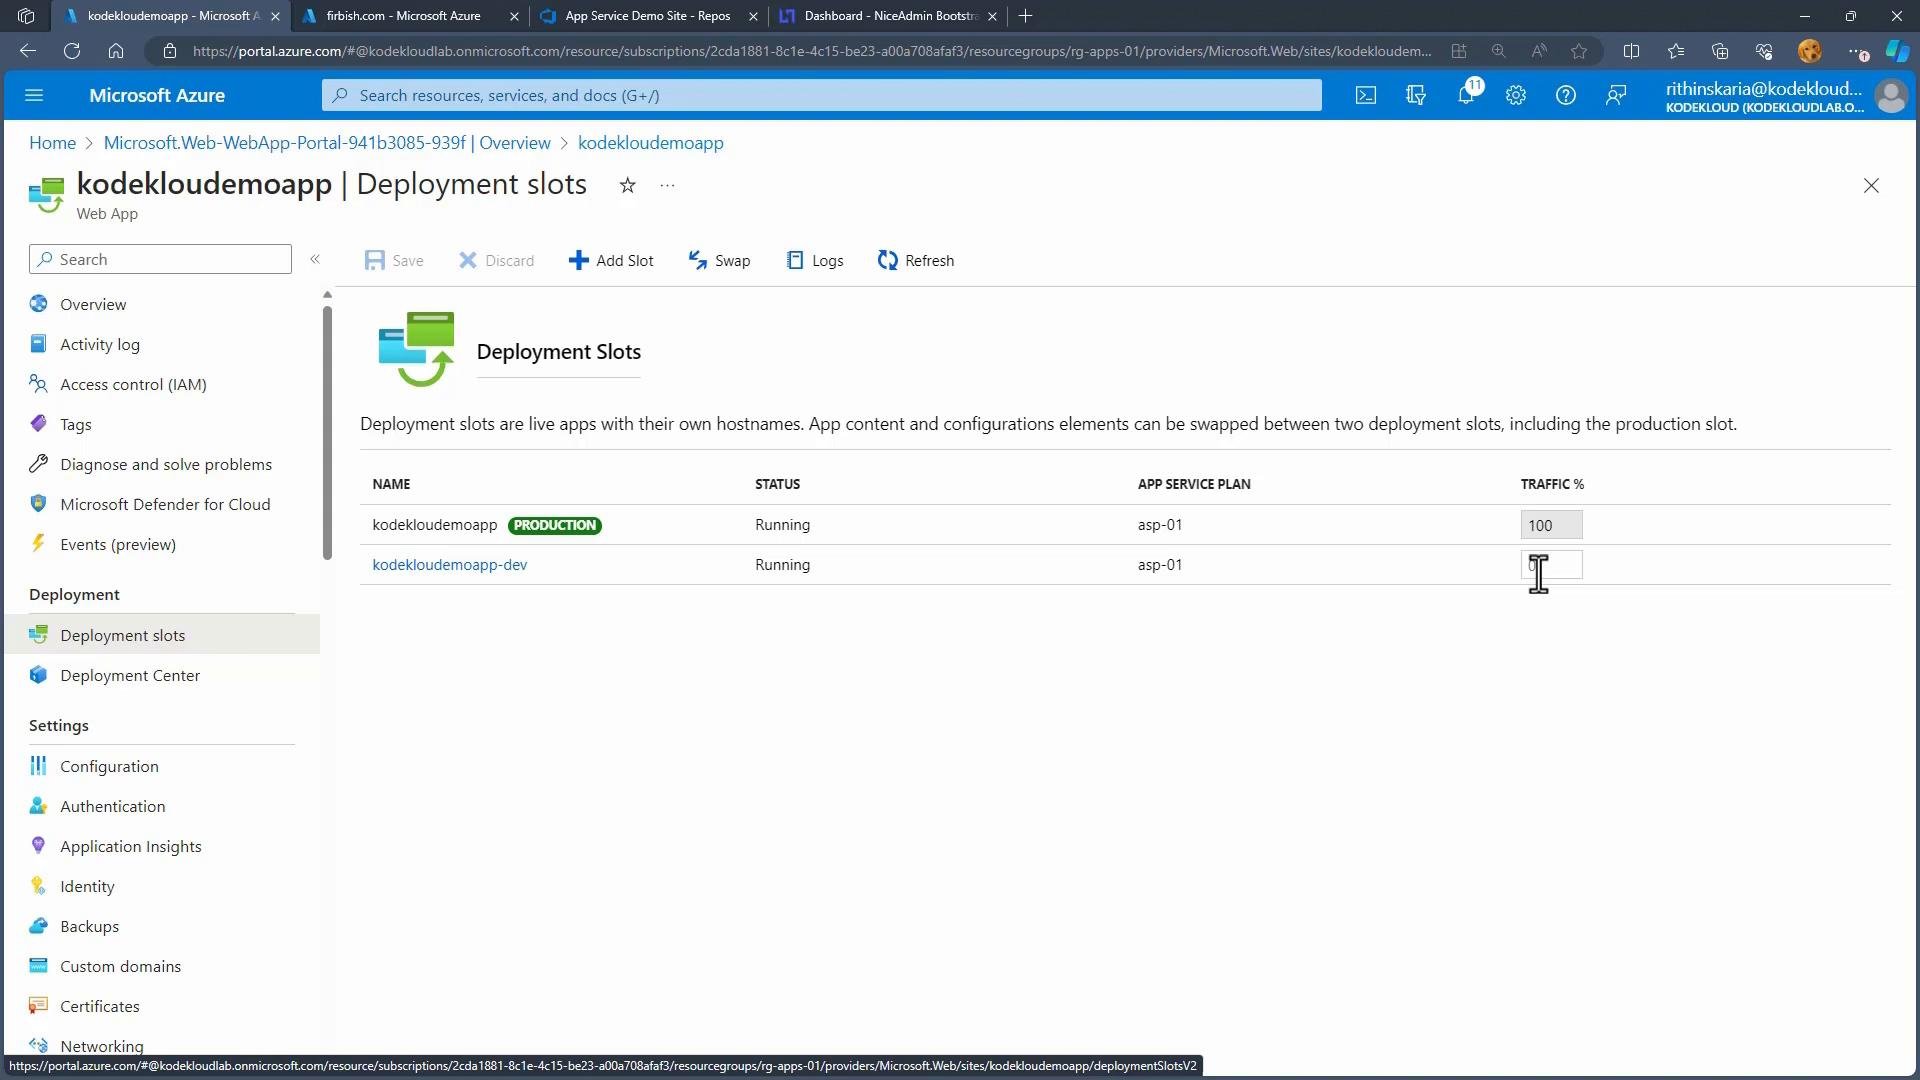
In the App Service blade, open Deployment slots → Add. Choose a slot name (for example,
dev) and select whether to clone the production configuration. In this example we choose “Do not clone settings” to keep the slot independent.
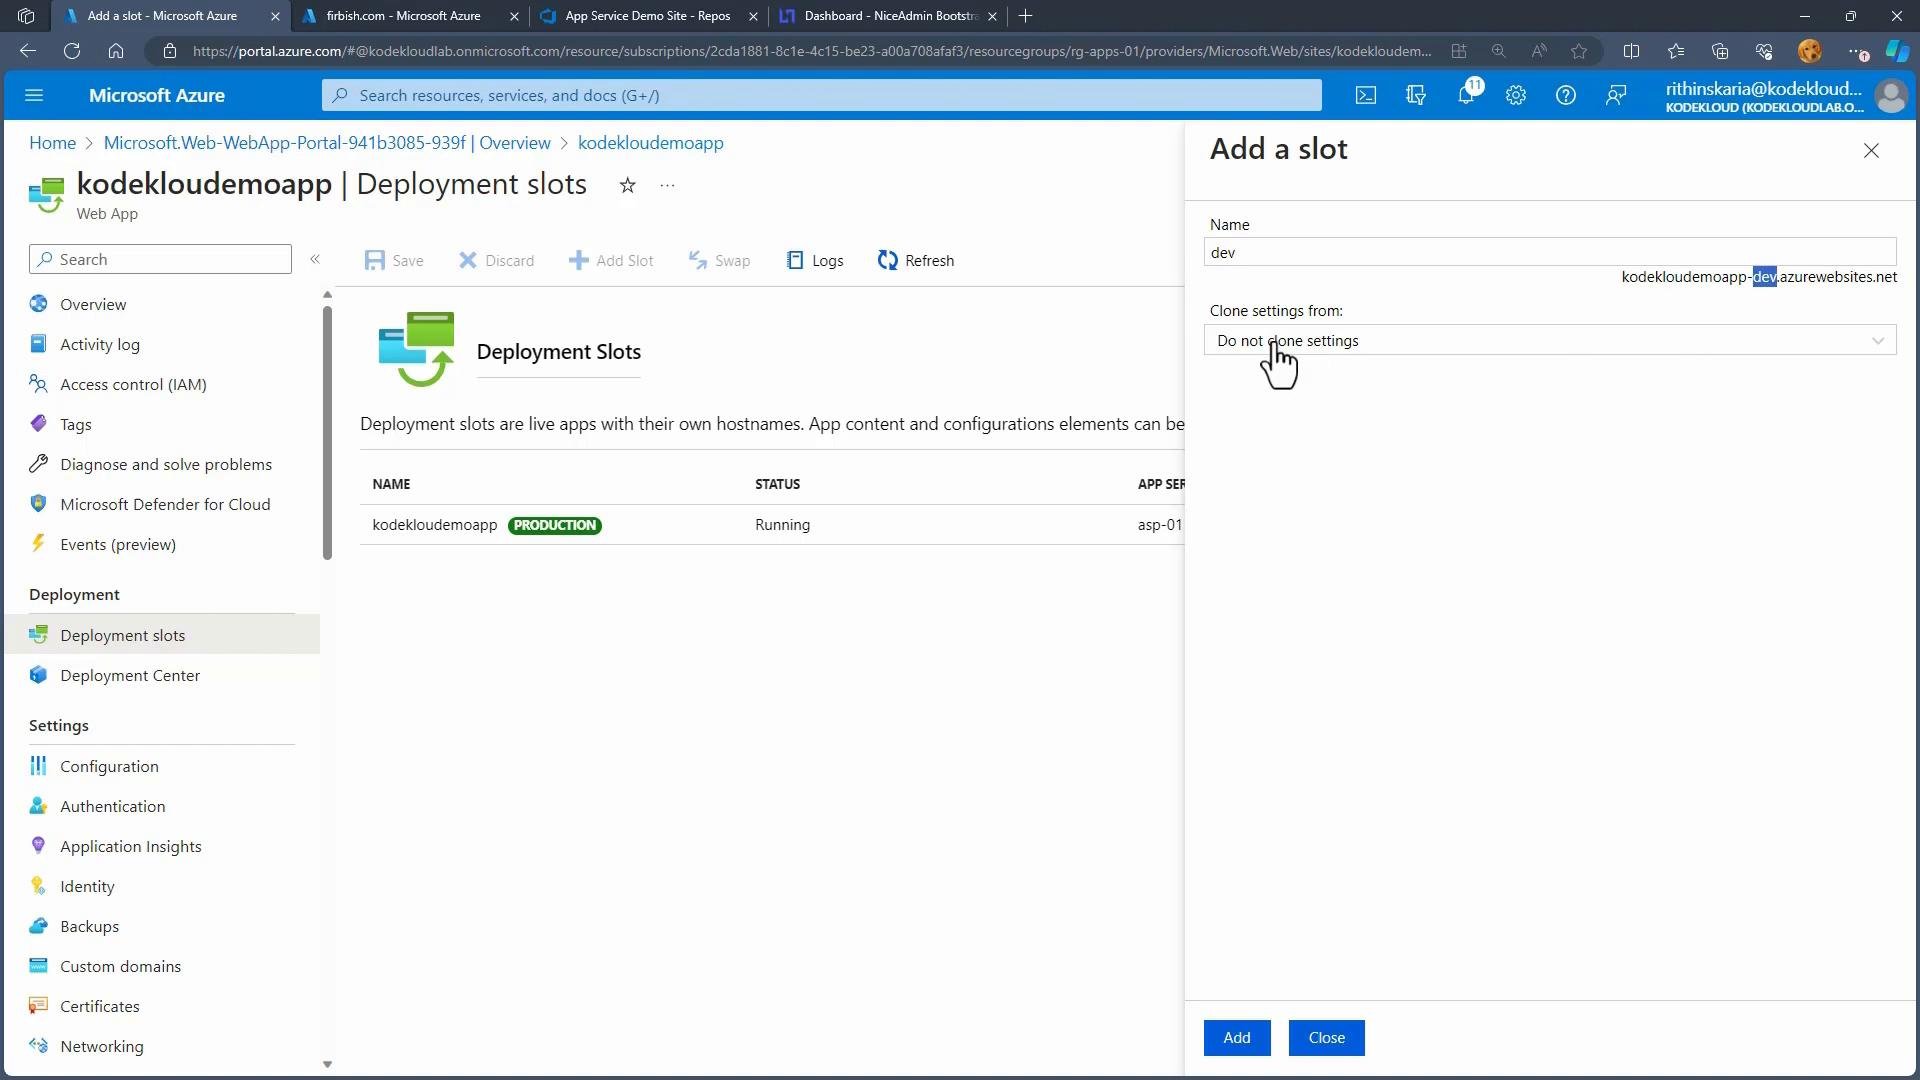
- After creation, the slot runs as a separate instance with its own URL. Configure a CI/CD pipeline (Deployment Center) to deploy commits from the
devbranch to thedevslot.
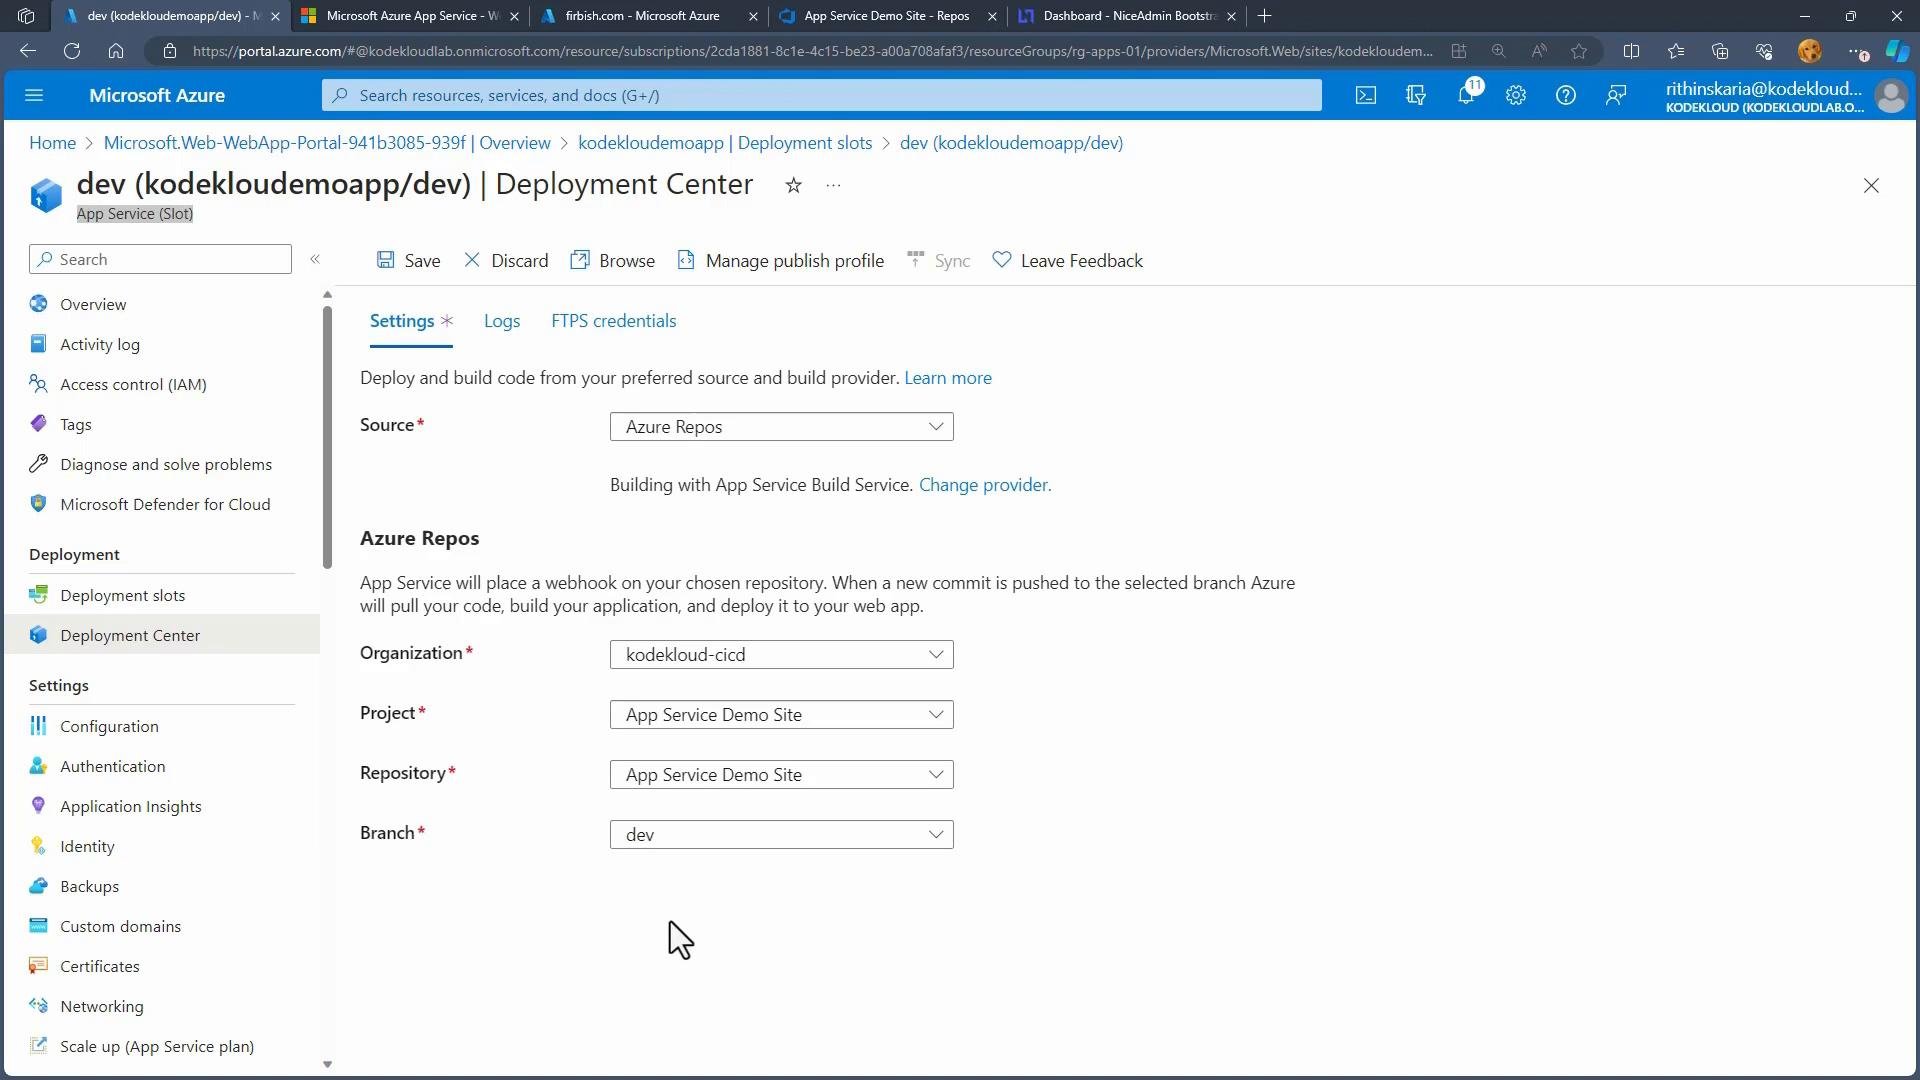
- Configure Deployment Center for the
devslot and select Azure Repos →devbranch as the source. The slot will build and deploy automatically on commits.
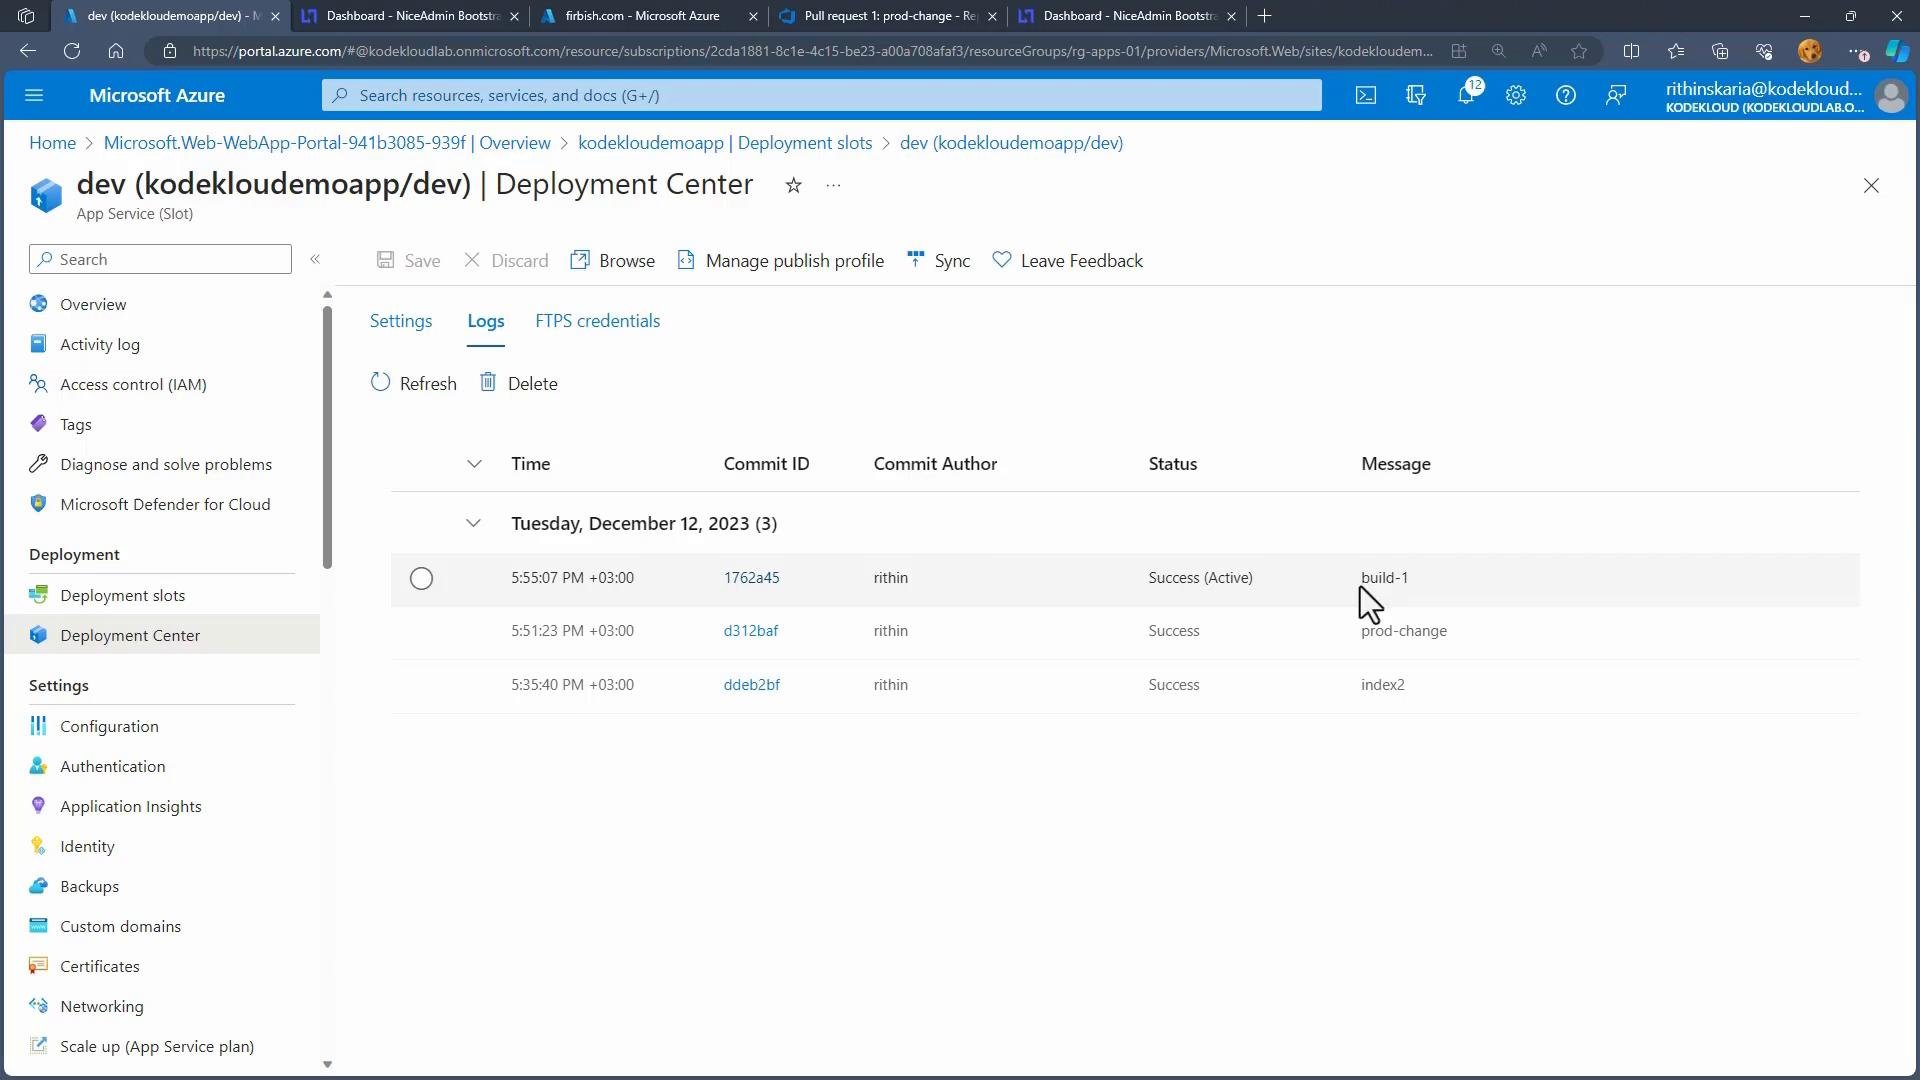
- Push a change to the
devbranch. Confirm success in thedevslot’s Deployment Center logs.
- Promote the change to production when ready:
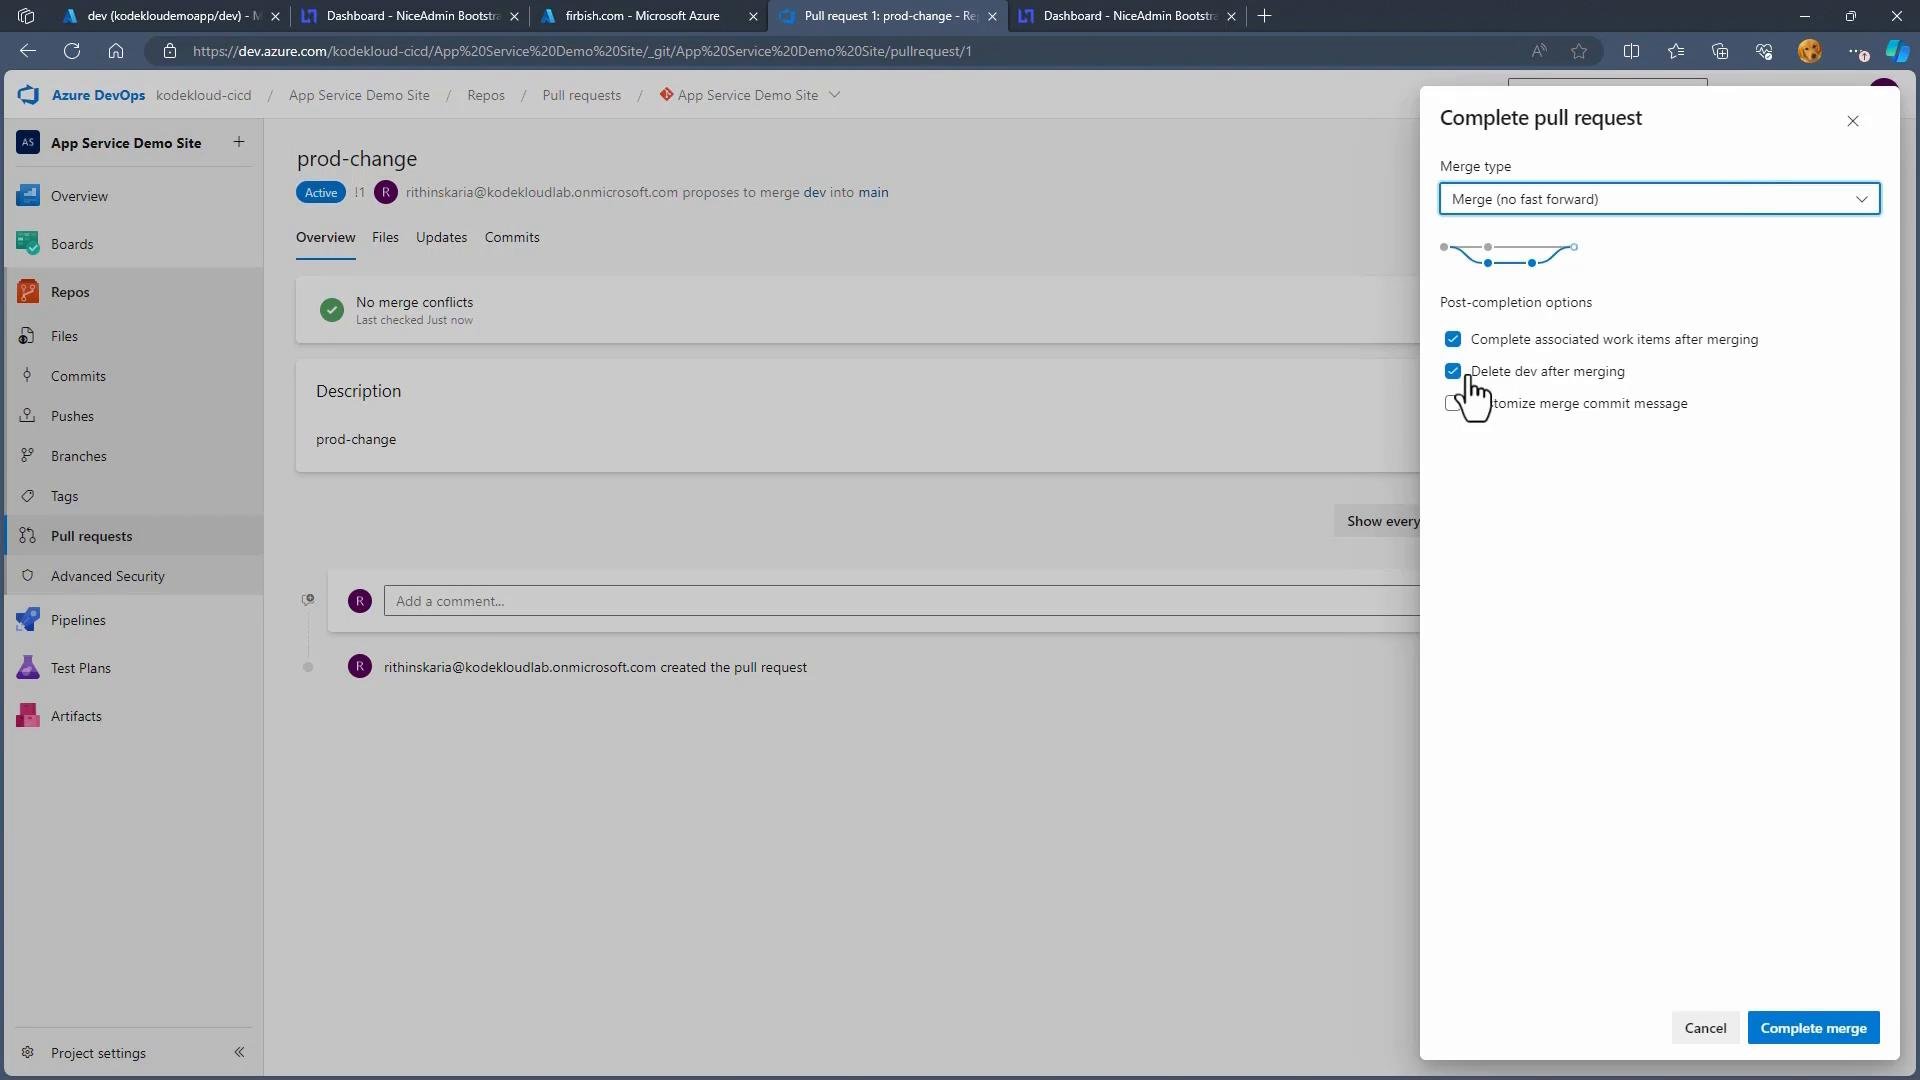
- Option 1: Create and complete a pull request from
dev→main. The merge triggers CI/CD formainand deploys to production. - Option 2: Swap the
devslot into production to instantly promote the validated slot without a code merge.
- Option 1: Create and complete a pull request from
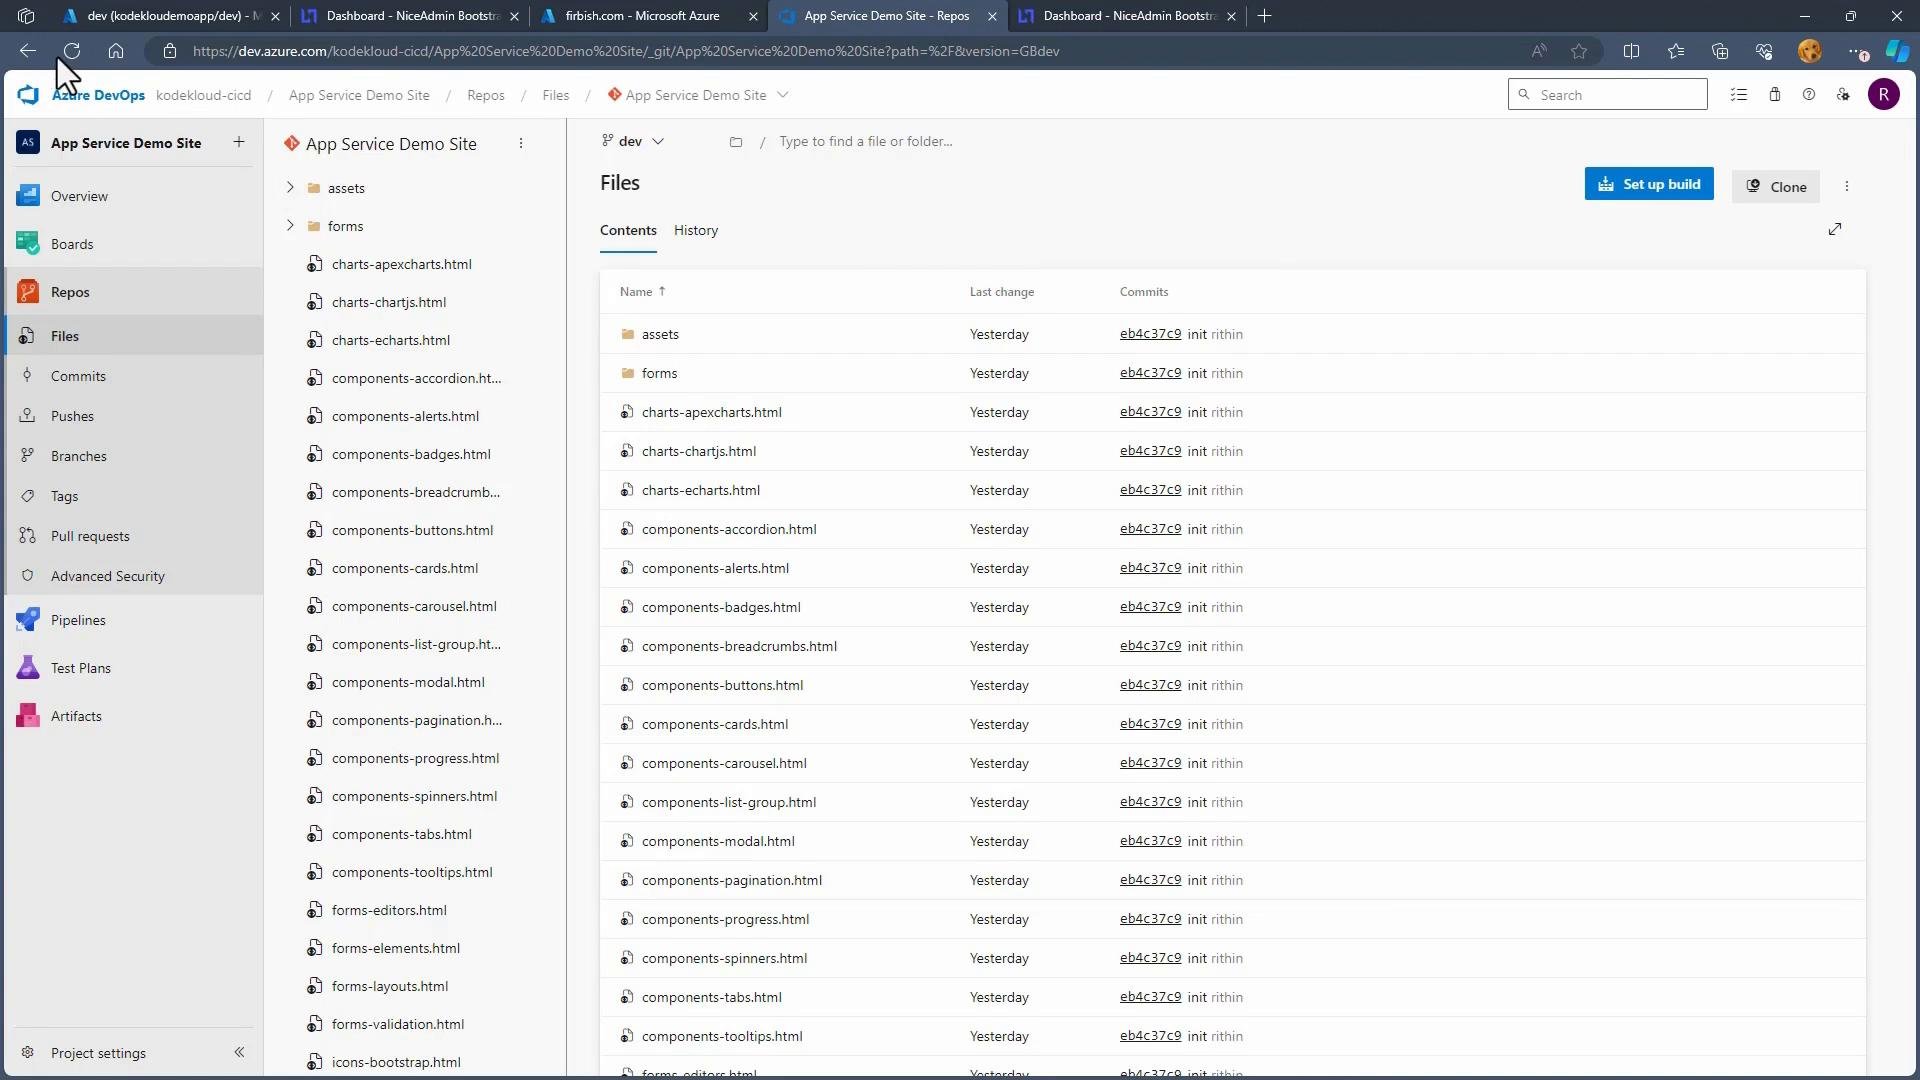
dev to main, Deployment Center for the production slot will detect the new commit and deploy it to production.
- In the App Service blade, open Deployment slots → Swap.
- Choose the source slot (for example,
kodekloudemoapp-dev) and the target (production), review the configuration changes that will apply, and confirm.
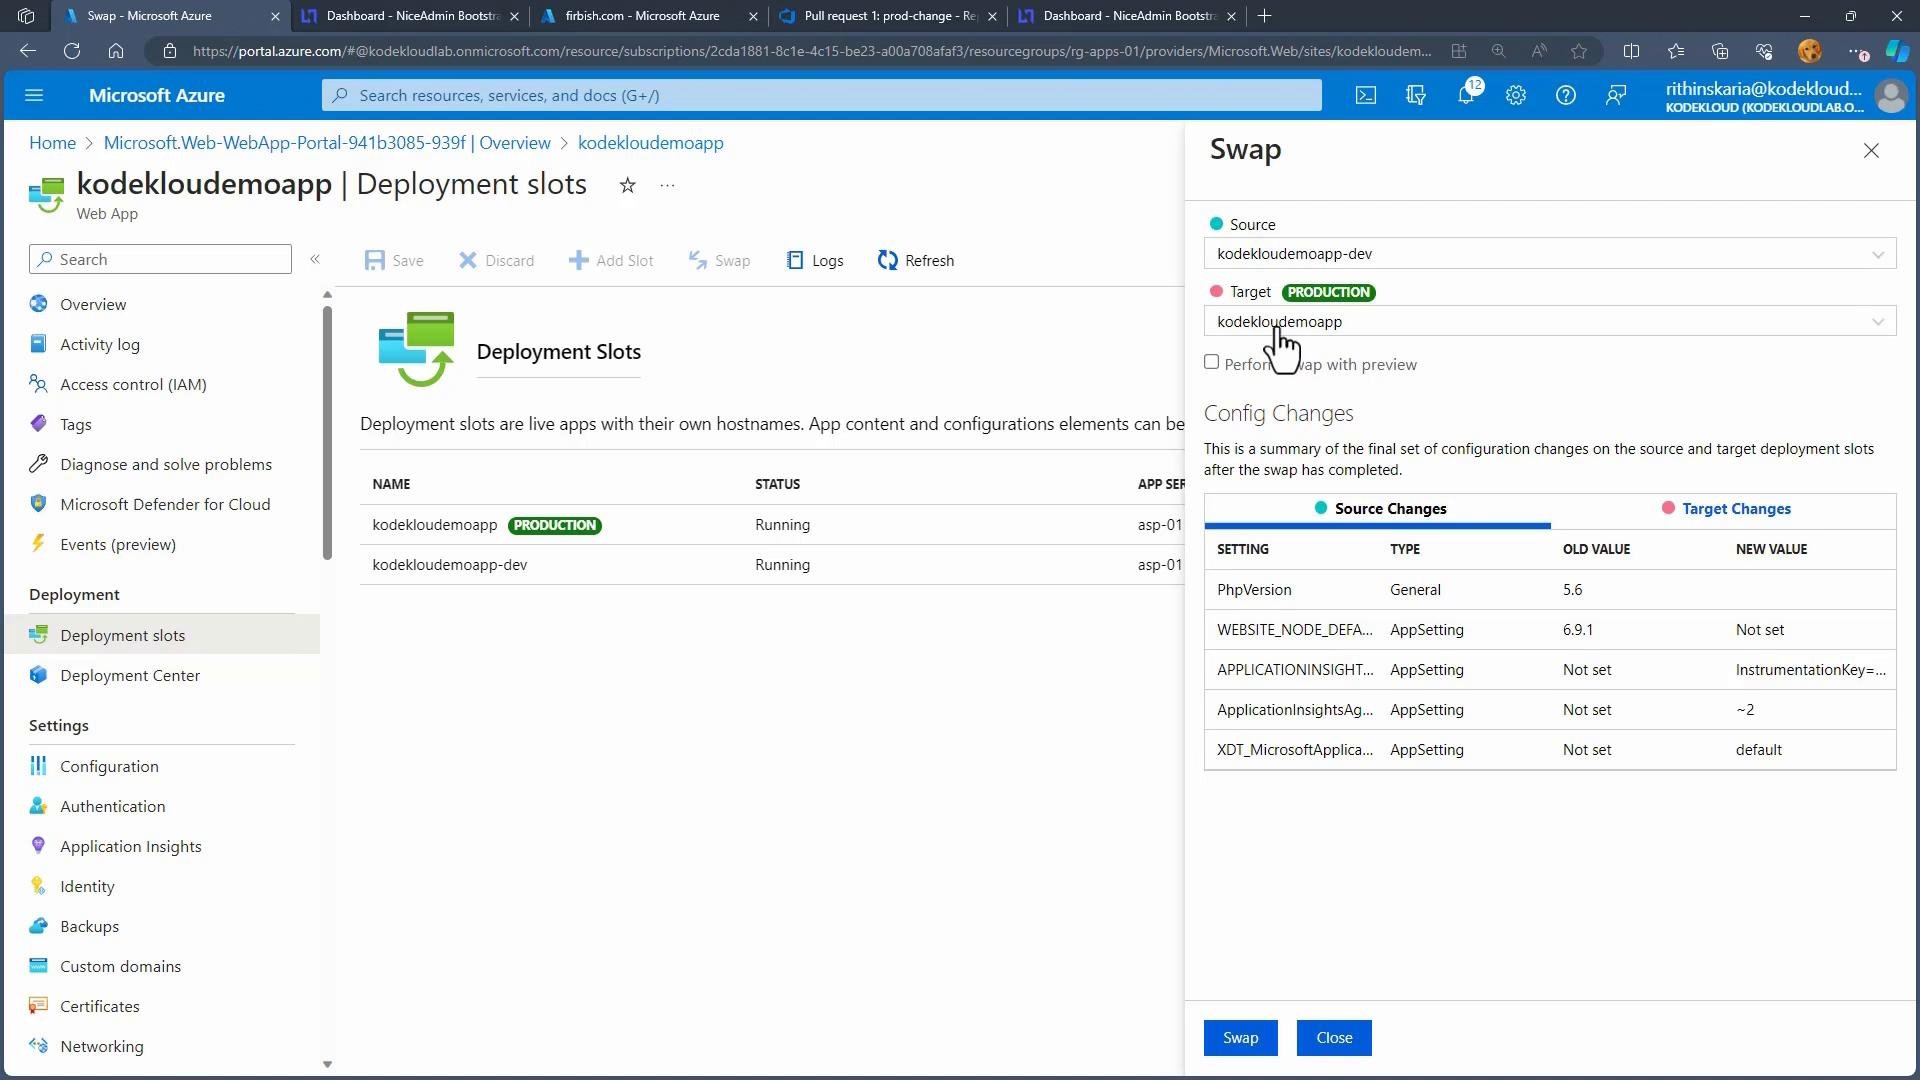
- Production immediately serves the dev changes.
- The dev slot now contains the previous production code, enabling a quick rollback by swapping back.
- Check CI/CD logs and slot deployment logs to review deployments and swap history.
If you previously relied on OneDrive or Dropbox continuous deployments, migrate those workflows before September 30, 2023, to avoid service interruptions. Use supported sources such as Azure Repos, GitHub, or Bitbucket.
- Azure App Service deployment slots: https://learn.microsoft.com/en-us/azure/app-service/deploy-staging-slots
- Azure App Service Deployment Center (CI/CD): https://learn.microsoft.com/en-us/azure/app-service/deploy-continuous-deployment
- Azure DevOps Repos: https://learn.microsoft.com/en-us/azure/devops/repos/