

- Management groups (root → nested groups)
- Subscriptions (one or more under management groups)
- Resource groups (within subscriptions)
- Resources (virtual machines, databases, storage accounts, etc.)
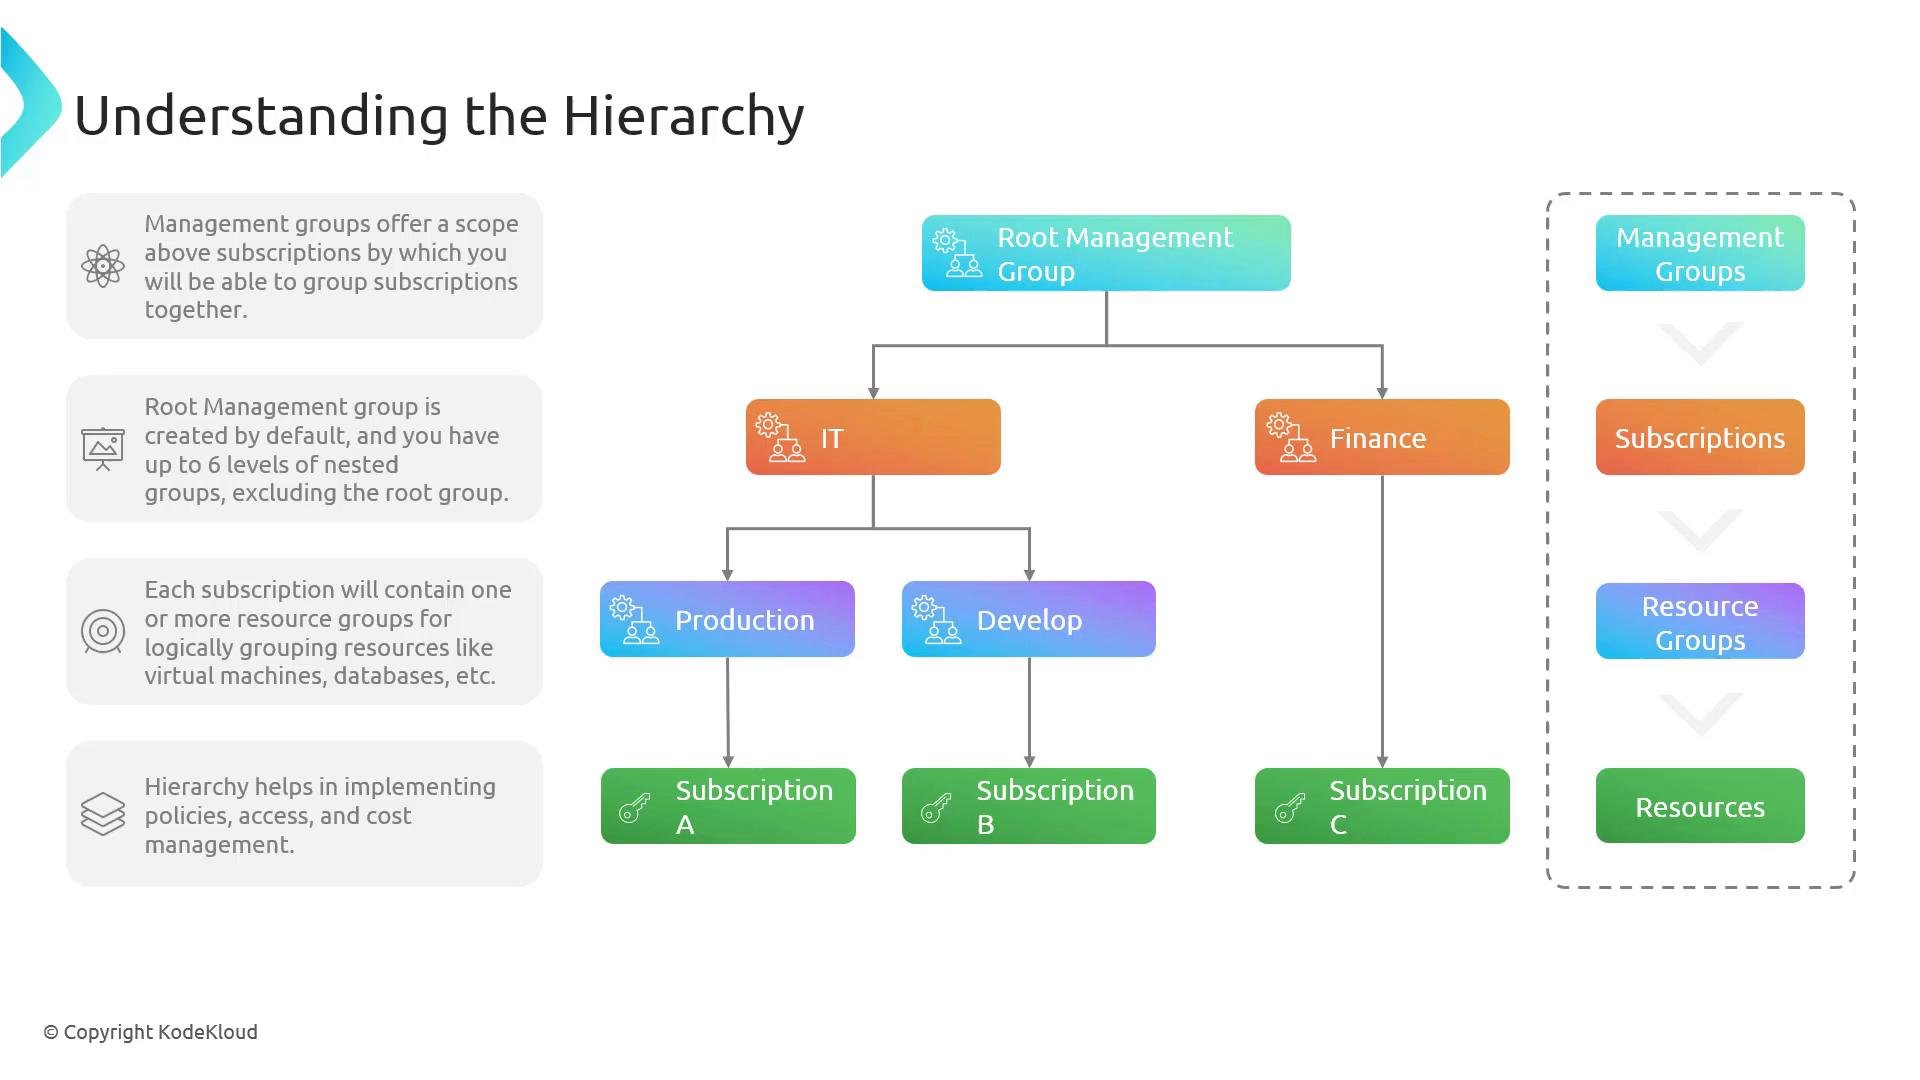
- Assignments (policies, initiatives, and RBAC roles) inherit downward, so applying them at a higher scope reduces repetitive configuration.
- Management groups provide a single place to manage security baselines, compliance rules, and cost controls across multiple subscriptions.
- A well-planned hierarchy reflects organizational boundaries (teams, departments), compliance domains, and cost centers, simplifying reporting and automation.
Assignments made at a management group level (policies, RBAC roles, and initiatives) inherit to all child management groups, subscriptions, resource groups, and resources. Plan your management group hierarchy to reflect organizational boundaries, compliance domains, and cost centers.
Azure supports up to six levels of nested management groups beneath the root (the root group itself is excluded from this limit). Be careful when reorganizing subscriptions—moving a subscription changes the inherited policies and role assignments that apply to it.
- In the Azure portal, open the Management groups blade. You will see the root management group and any existing nested groups or subscriptions.
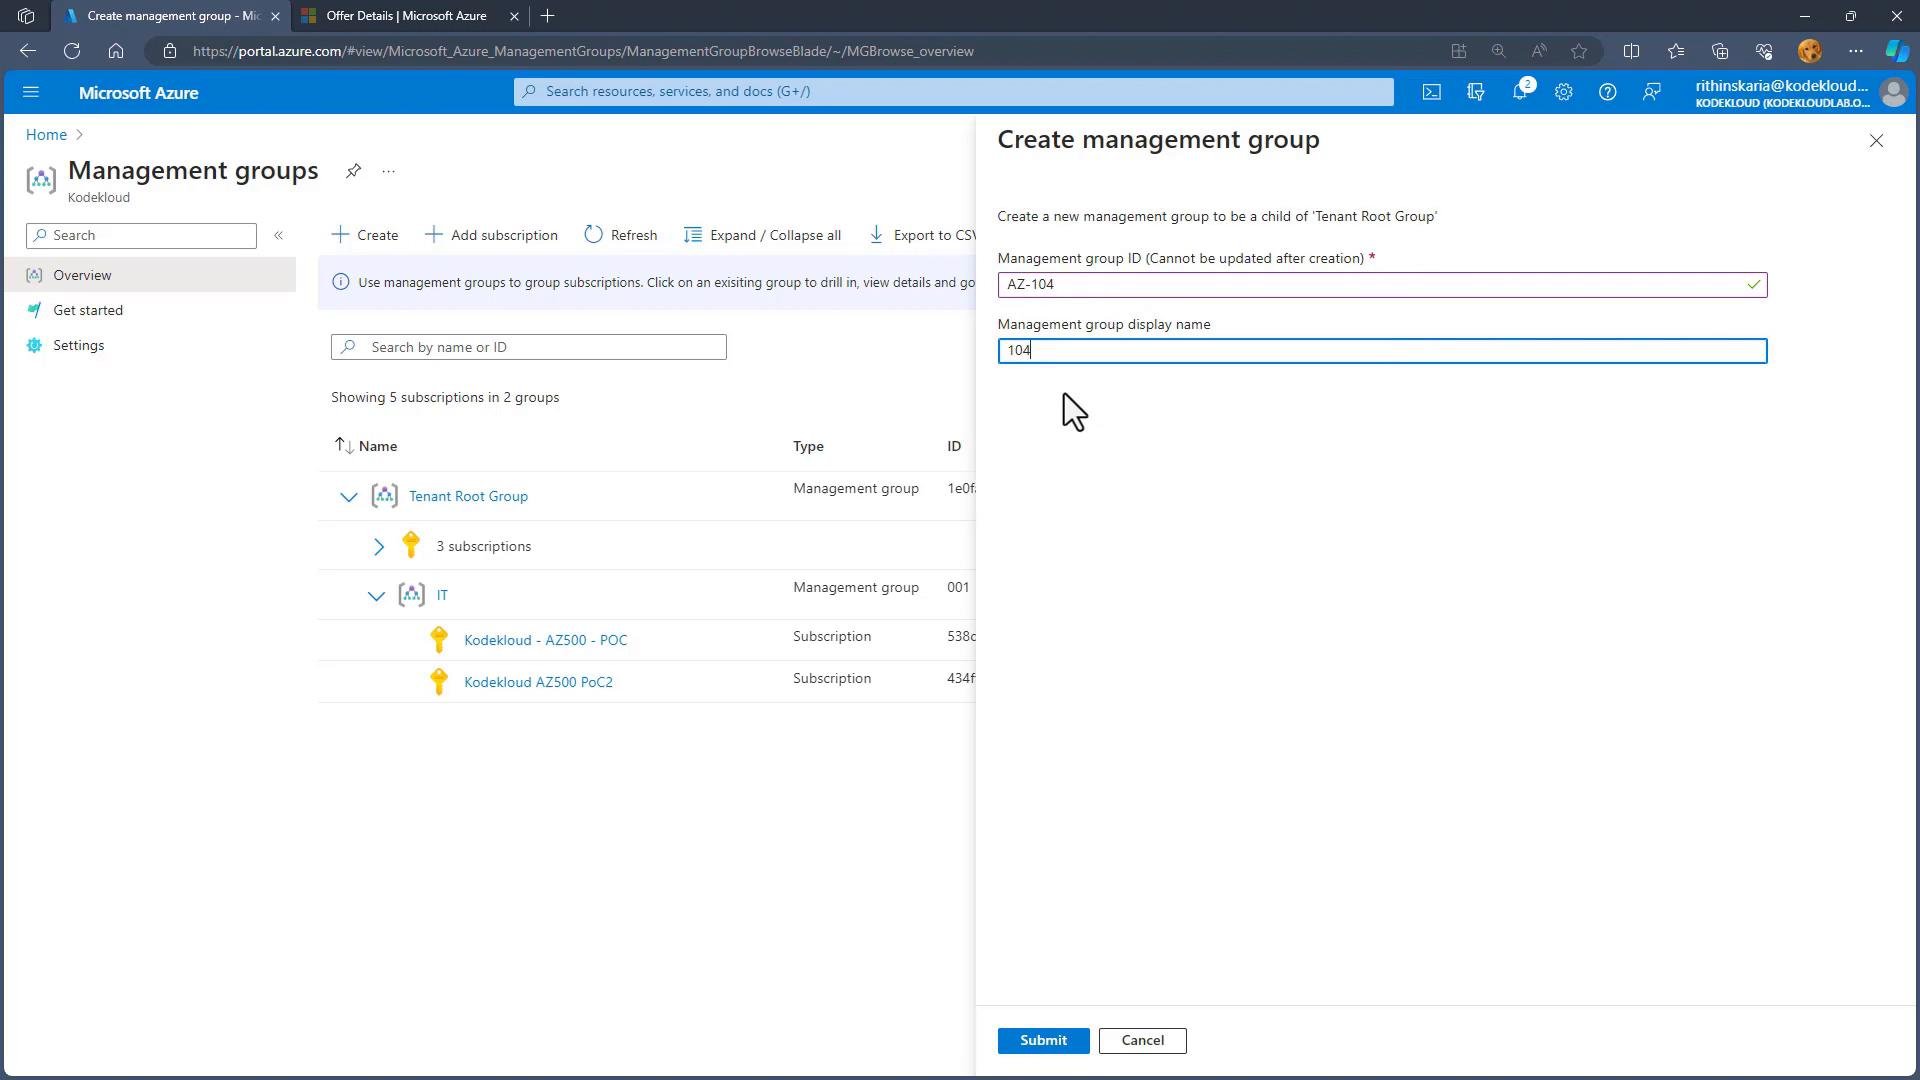
- Create a new management group by choosing Create management group and providing a unique management group ID and a display name.
- Example: ID =
AZ-104, Display name =104.
- Example: ID =
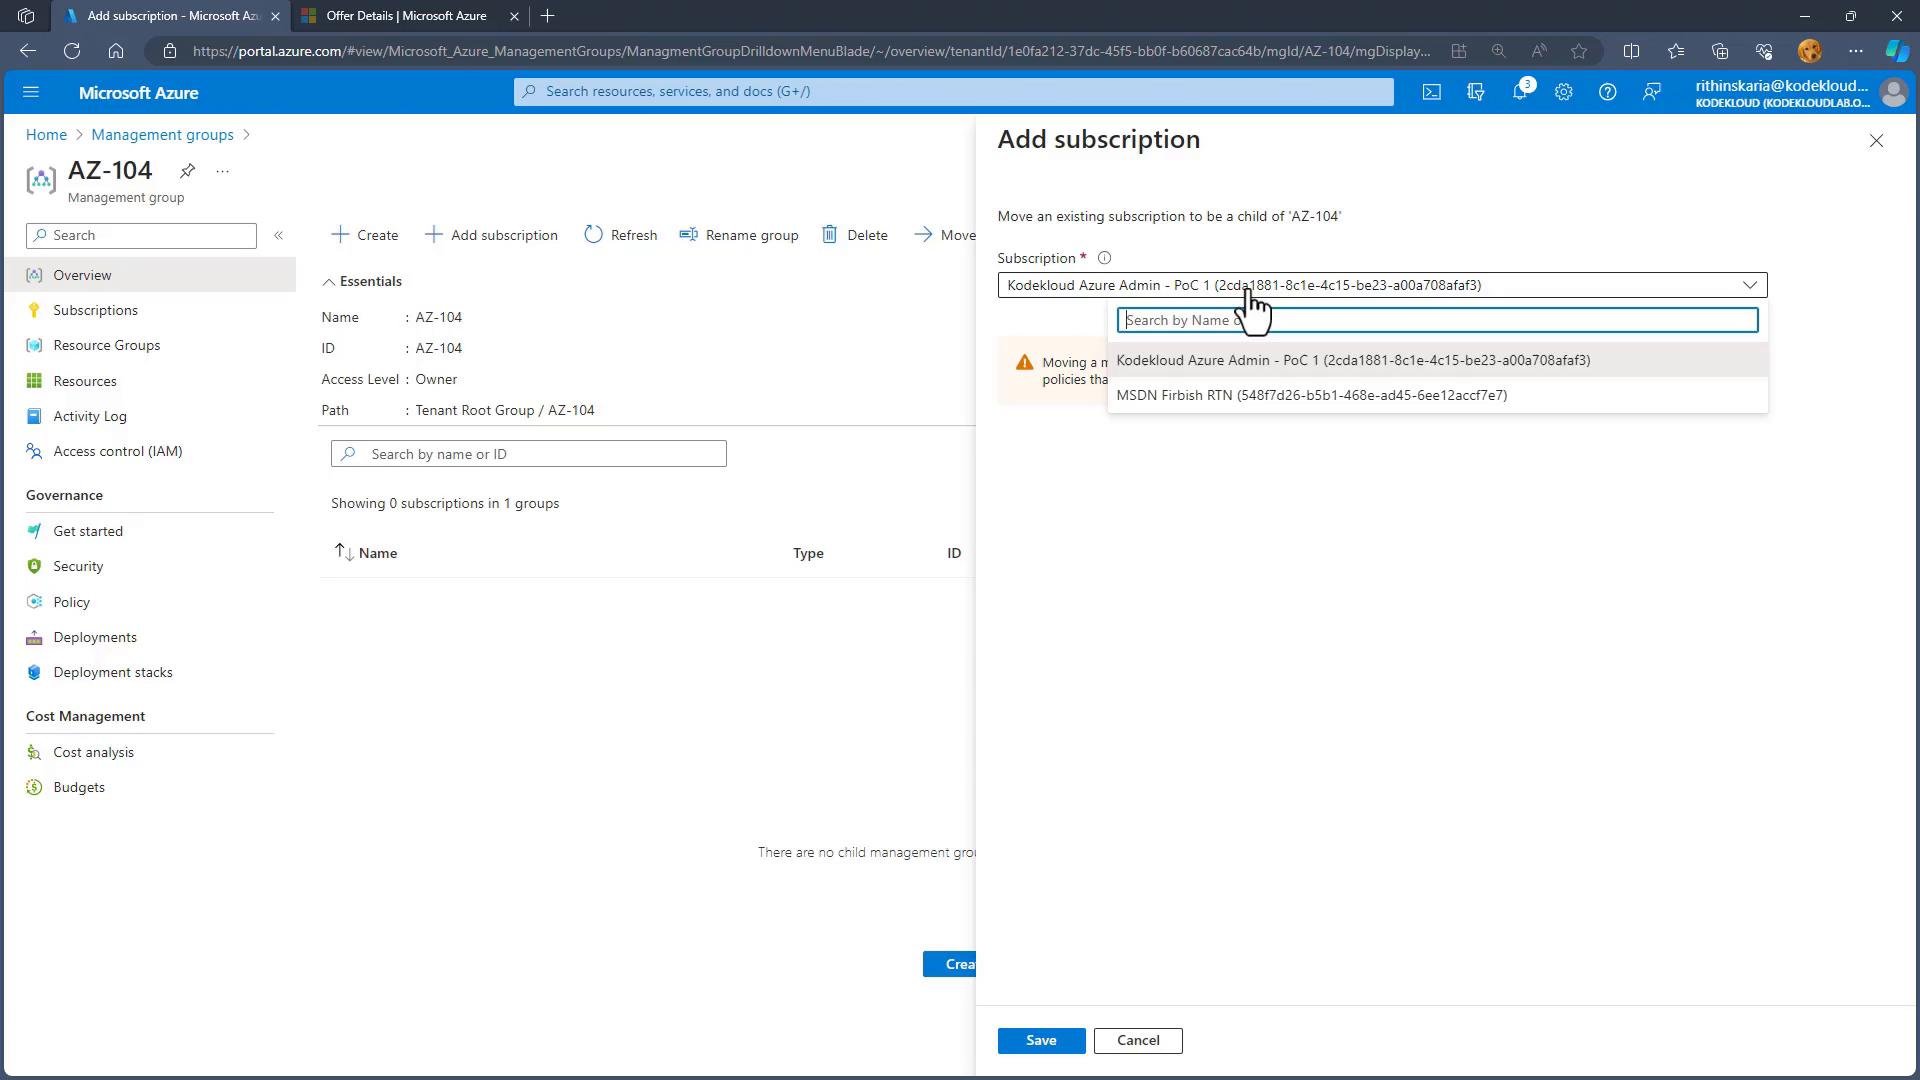
- After creating the group, it will appear with no subscriptions by default. Add existing subscriptions using the Add subscription option, selecting the subscriptions you want to include.
- To reorganize, select a subscription, choose Move, and pick the target management group. After saving, the subscription becomes a child of the selected management group and inherits its policies and role assignments.
- From the management group blade, use Add subscription and select one or more subscriptions to include.
- After adding, verify that expected policies and RBAC roles are applied to the subscriptions and resources beneath the group.
- You can move subscriptions between groups when organizational requirements change.
- Design your management group structure to match how teams, environments, and cost centers operate (e.g., Root → IT/Finance → Prod/Dev).
- Apply critical security and compliance policies at the highest practical level to ensure consistent enforcement.
- Use dedicated subscriptions for isolation of production workloads, compliance boundaries, or billing separation.
- Regularly review role assignments and policy effects after moving subscriptions to avoid unexpected access or restrictions.
- Azure Management Groups documentation: https://learn.microsoft.com/azure/governance/management-groups/
- Azure RBAC overview: https://learn.microsoft.com/azure/role-based-access-control/
- Azure Policy overview: https://learn.microsoft.com/azure/governance/policy/