

Overview of Private DNS Zones
Imagine a scenario where your subscription contains two virtual networks (VNet A and VNet B), each with its own address space. Virtual machines (VMs) within a single VNet can automatically resolve names due to Azure’s internal domain configuration. For instance, VM01 in VNet A can easily resolve VM02 within the same network. However, when you need to resolve names across different VNets—such as resolving VM04 in VNet B from VM01 in VNet A—a standard VNet DNS configuration is insufficient. This is where Private DNS Zones become vital. By creating a Private DNS Zone (for example, kodekloudinternal.com) and linking it to relevant virtual networks, you enable automatic registration and resolution of DNS records across multiple VNets. An auto-registration feature can be optionally enabled so that any new VM added to the linked networks automatically registers its DNS record.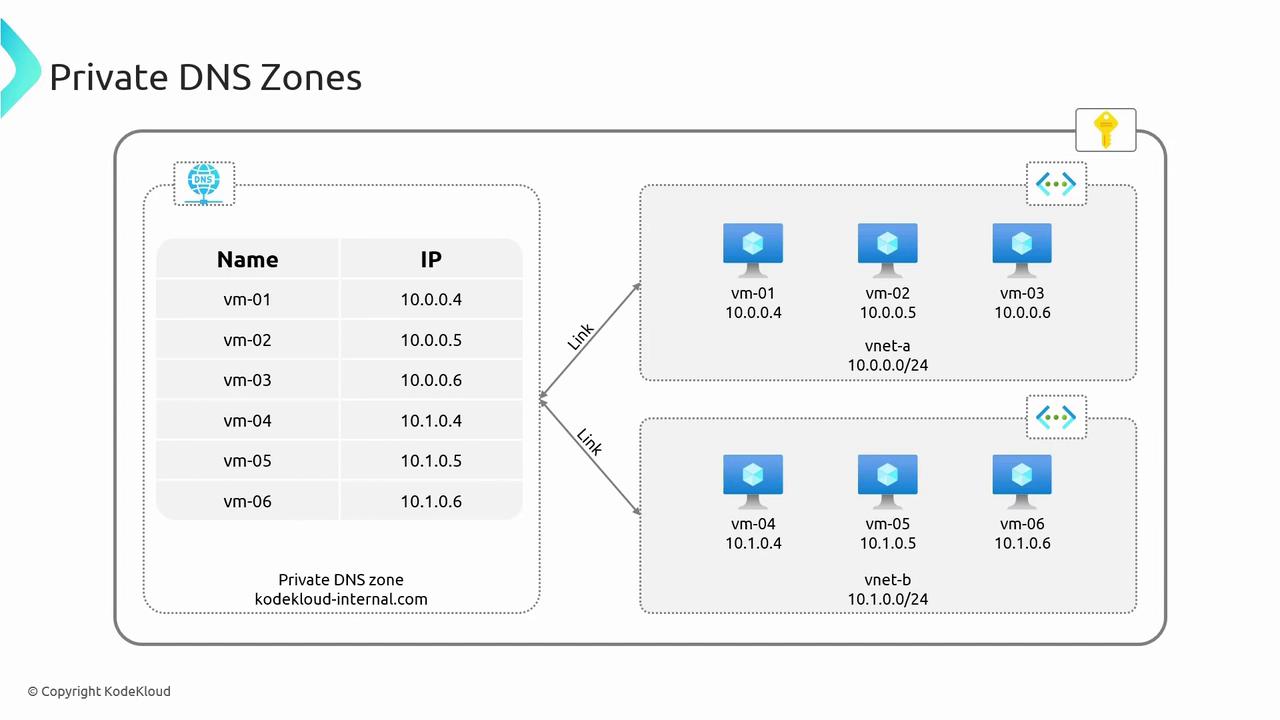
Configuring Private DNS Zones in the Azure Portal
To get started, follow these steps in the Azure Portal:- Search for “Private DNS Zones.”
- Create a new DNS zone within the appropriate resource group (e.g., kodecloudinternal.com, sometimes abbreviated as “int” for internal use).
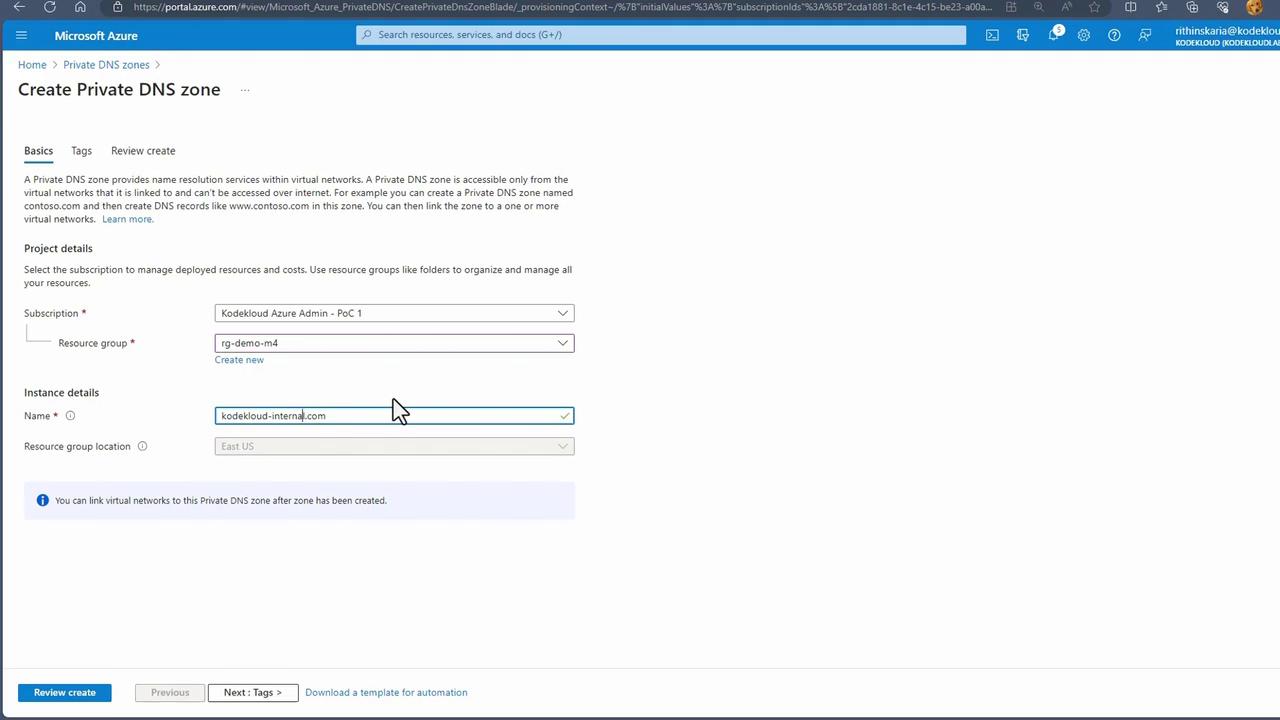
Private DNS Zones are global resources. You do not need to specify a resource location since the zone’s metadata is stored in the resource group’s location.
Example Terminal Session
Upon logging into VM1, you will notice that the DNS configuration file (/etc/resolv.conf) automatically includes an Azure-provided search domain. Next, perform an nslookup to resolve another VM in the same network:Deploying a Virtual Machine via Azure CLI
For testing, let’s deploy a virtual machine using the Azure CLI. First, verify you’re using the correct Azure subscription:Testing DNS Resolution: With and Without Private DNS Zones
Return to your terminal on workload VM1 and run a series of nslookup tests:Creating Virtual Network Links for Private DNS Zones
To enable automatic DNS record registration across virtual networks, configure virtual network links within your Private DNS Zone:- Open your Private DNS Zone in the Azure Portal.
- Click on “Add” to create a new virtual network link.
- Provide a descriptive link name (e.g., dnsdemovm_vnet).
- Select the appropriate virtual network.
- Enable auto-registration to allow both new and existing VMs to automatically add their DNS records.
- Repeat the process for a second virtual network (e.g., vnlvnetworkloads), linking it to your NSG workload VNet.
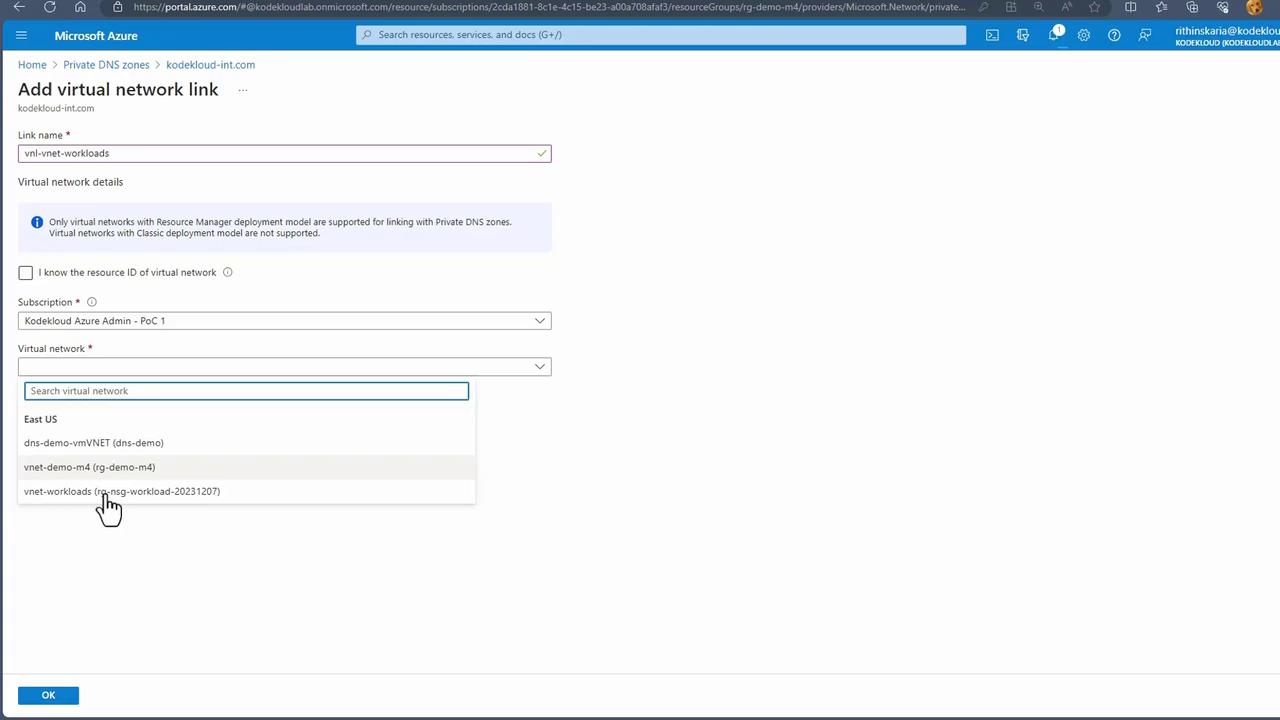
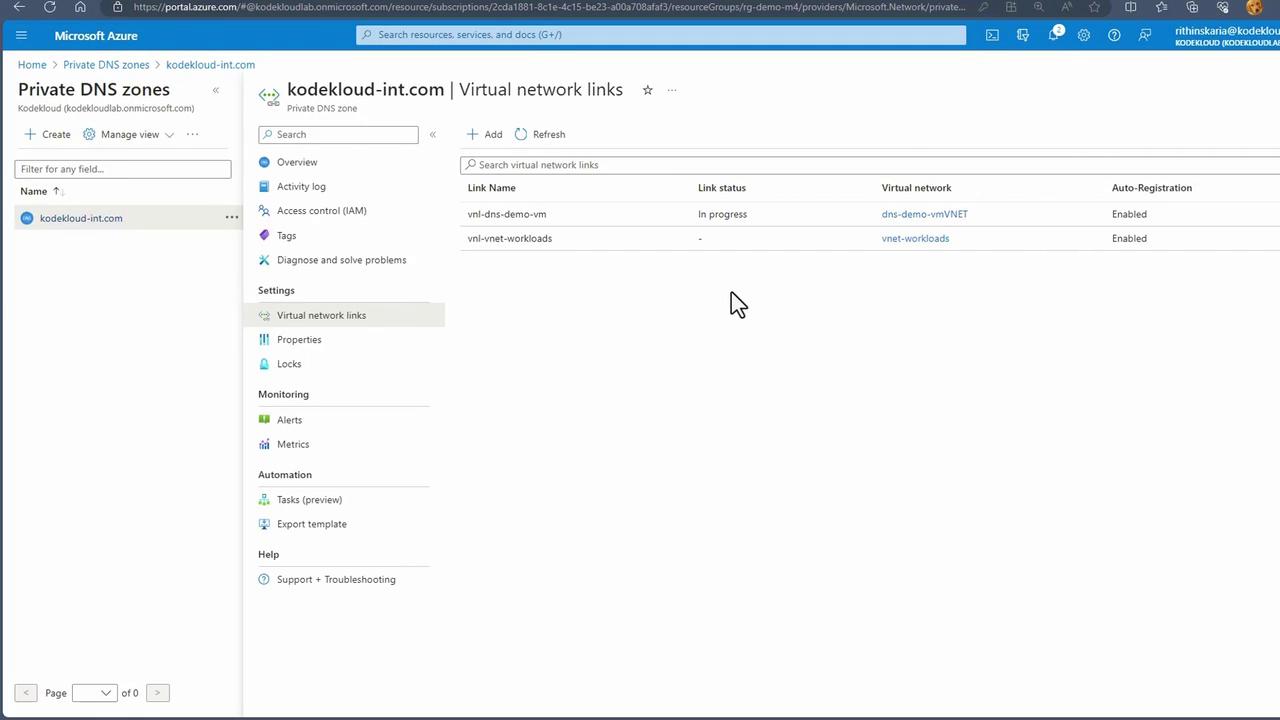
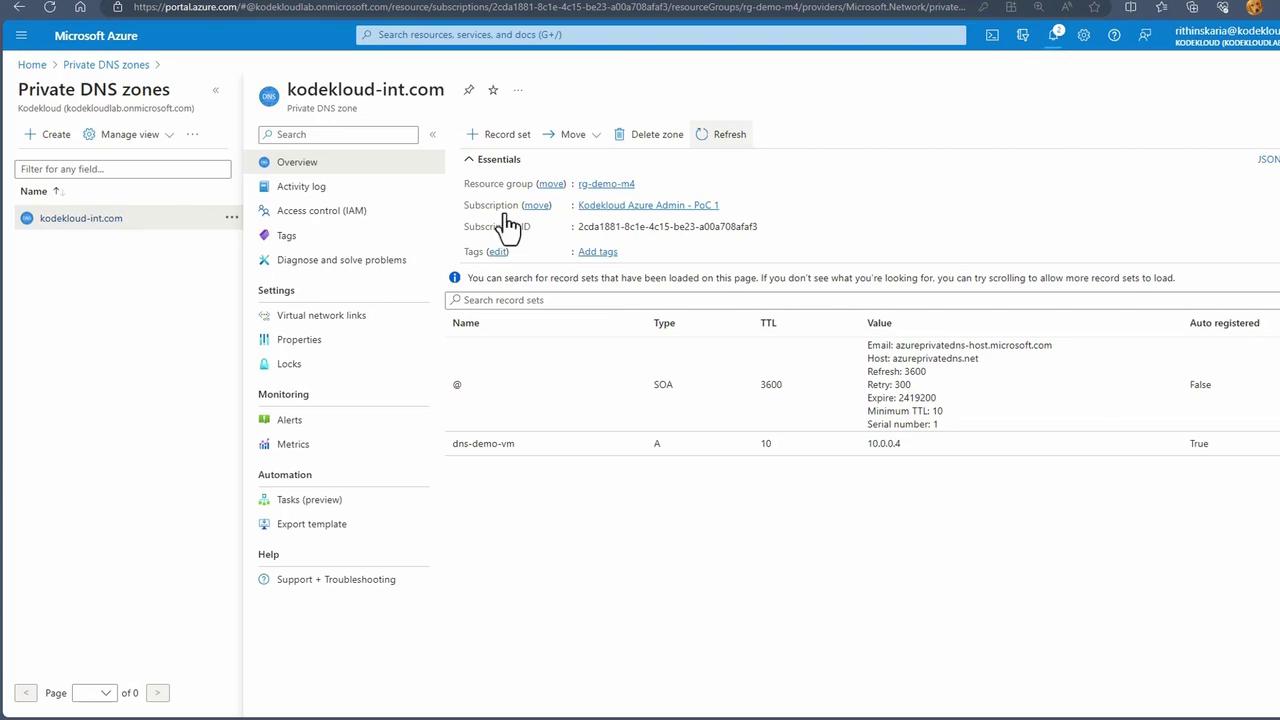
Verifying Enhanced DNS Resolution
Once the virtual network links are in place and DNS records are updated, test name resolution again from workload VM1:Conclusion
Private DNS Zones are essential for managing internal name resolution and establishing secure links between virtual networks without exposing internal IP addresses publicly. In this article, we covered:- The core concept and benefits of Private DNS Zones.
- How to create a Private DNS Zone using the Azure Portal.
- Deploying a virtual machine via the Azure CLI.
- Configuring virtual network links for automatic DNS registration.
- Verifying improved DNS resolution across different VNets.