

- Backup size limit: up to 10 GB per backup (app + database).
- Backups are stored in an Azure Storage account that you choose.
- Restore options: restore an existing app to a previous restore point or create a new web app from a backup.
App Service backup and restore features are available on Standard and higher App Service plans.
What is included in an App Service backup
Backup types
- Manual backups: Trigger a single backup immediately from the Azure portal, CLI, or script.
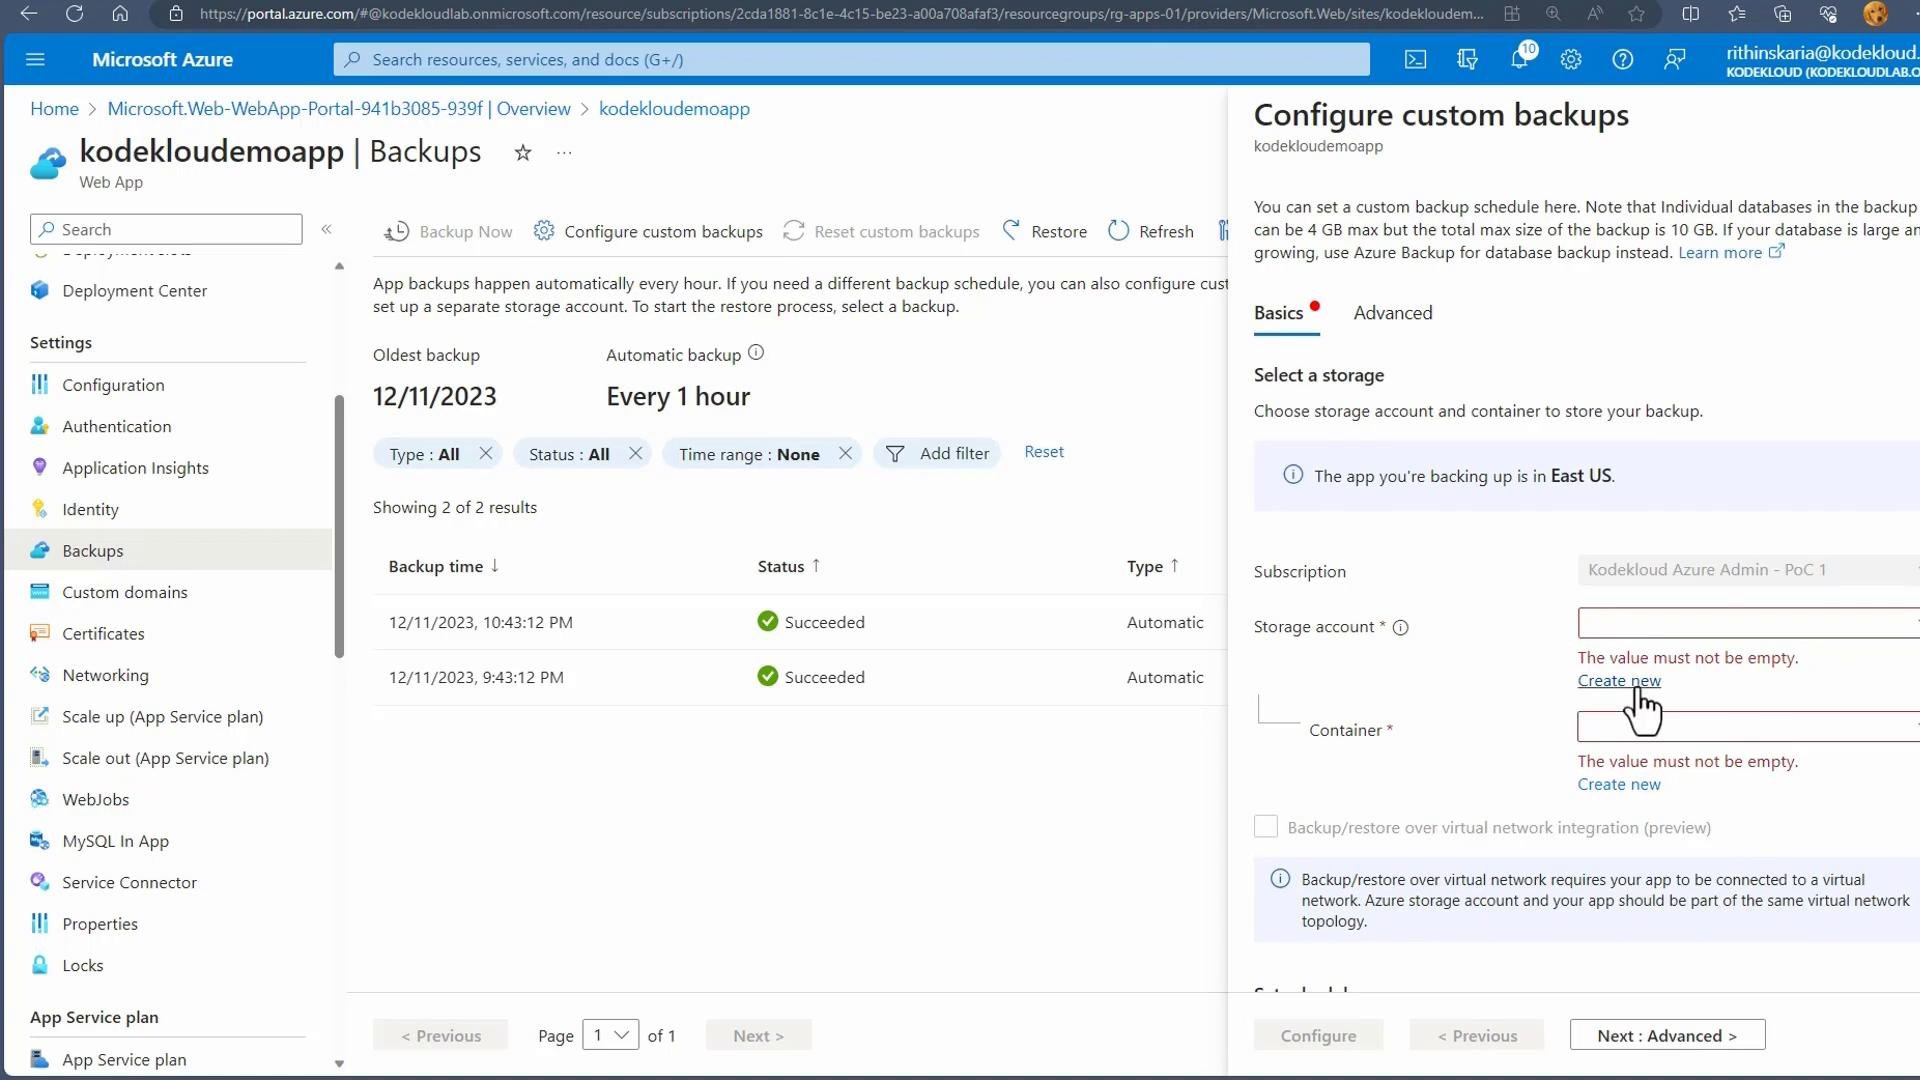
- Scheduled (custom) backups: Define a recurring schedule and retention policy. You select the target storage account and container where backups are stored.
Storage and retention
Backups are stored in an Azure Storage account you specify. For scheduled backups you must provide:- Storage account
- Container name
- Backup schedule (frequency)
- Retention policy (how many restore points to keep)
Configure backups in the Azure portal
To configure backups using the portal:- Open your App Service in the Azure portal.
- In the left-hand menu, select Backups.
- Select the storage account and container to store backups.
- Choose between triggering a manual backup or configuring a custom schedule and retention policy.
- View and manage available restore points from the Backups blade.
Restore options
You have two primary restore options:- Restore an existing App Service to a selected restore point (overwrites the existing app).
- Create a new App Service from a backup (useful for testing restores or creating a copy of the app).
Quick CLI examples
Trigger a backup using the Azure CLI (replace placeholders wrapped in backticks):Best practices
- Use Standard or higher App Service plans to access built-in backup features.
- Configure scheduled backups with a retention policy that meets your recovery and compliance requirements.
- Store backups in a dedicated storage account and secure it using RBAC and SAS tokens.
- Monitor backup jobs regularly and test restores periodically.
Links and references
- Azure App Service backup and restore documentation
- Azure Storage documentation
- Azure CLI reference: webapp config backup
Setting up CI/CD and deployment pipelines for the App Service is beyond the scope of this article. For pipeline-related backup integration, consider automating the CLI commands shown above in your pipeline scripts.