

Core VM families and when to use them
- General purpose
- Balanced CPU-to-memory ratio for a broad range of workloads such as development/test environments and small to medium databases. Representative families:
B-series(burstable) andD-series(general purpose).
- Balanced CPU-to-memory ratio for a broad range of workloads such as development/test environments and small to medium databases. Representative families:
- Compute optimized
- Higher CPU-to-memory ratio for compute-bound workloads like application servers and batch processing. Representative family:
F-series.
- Higher CPU-to-memory ratio for compute-bound workloads like application servers and batch processing. Representative family:
- Memory optimized
- Larger memory allocations for in-memory databases and analytics. Representative family:
E-series.
- Larger memory allocations for in-memory databases and analytics. Representative family:
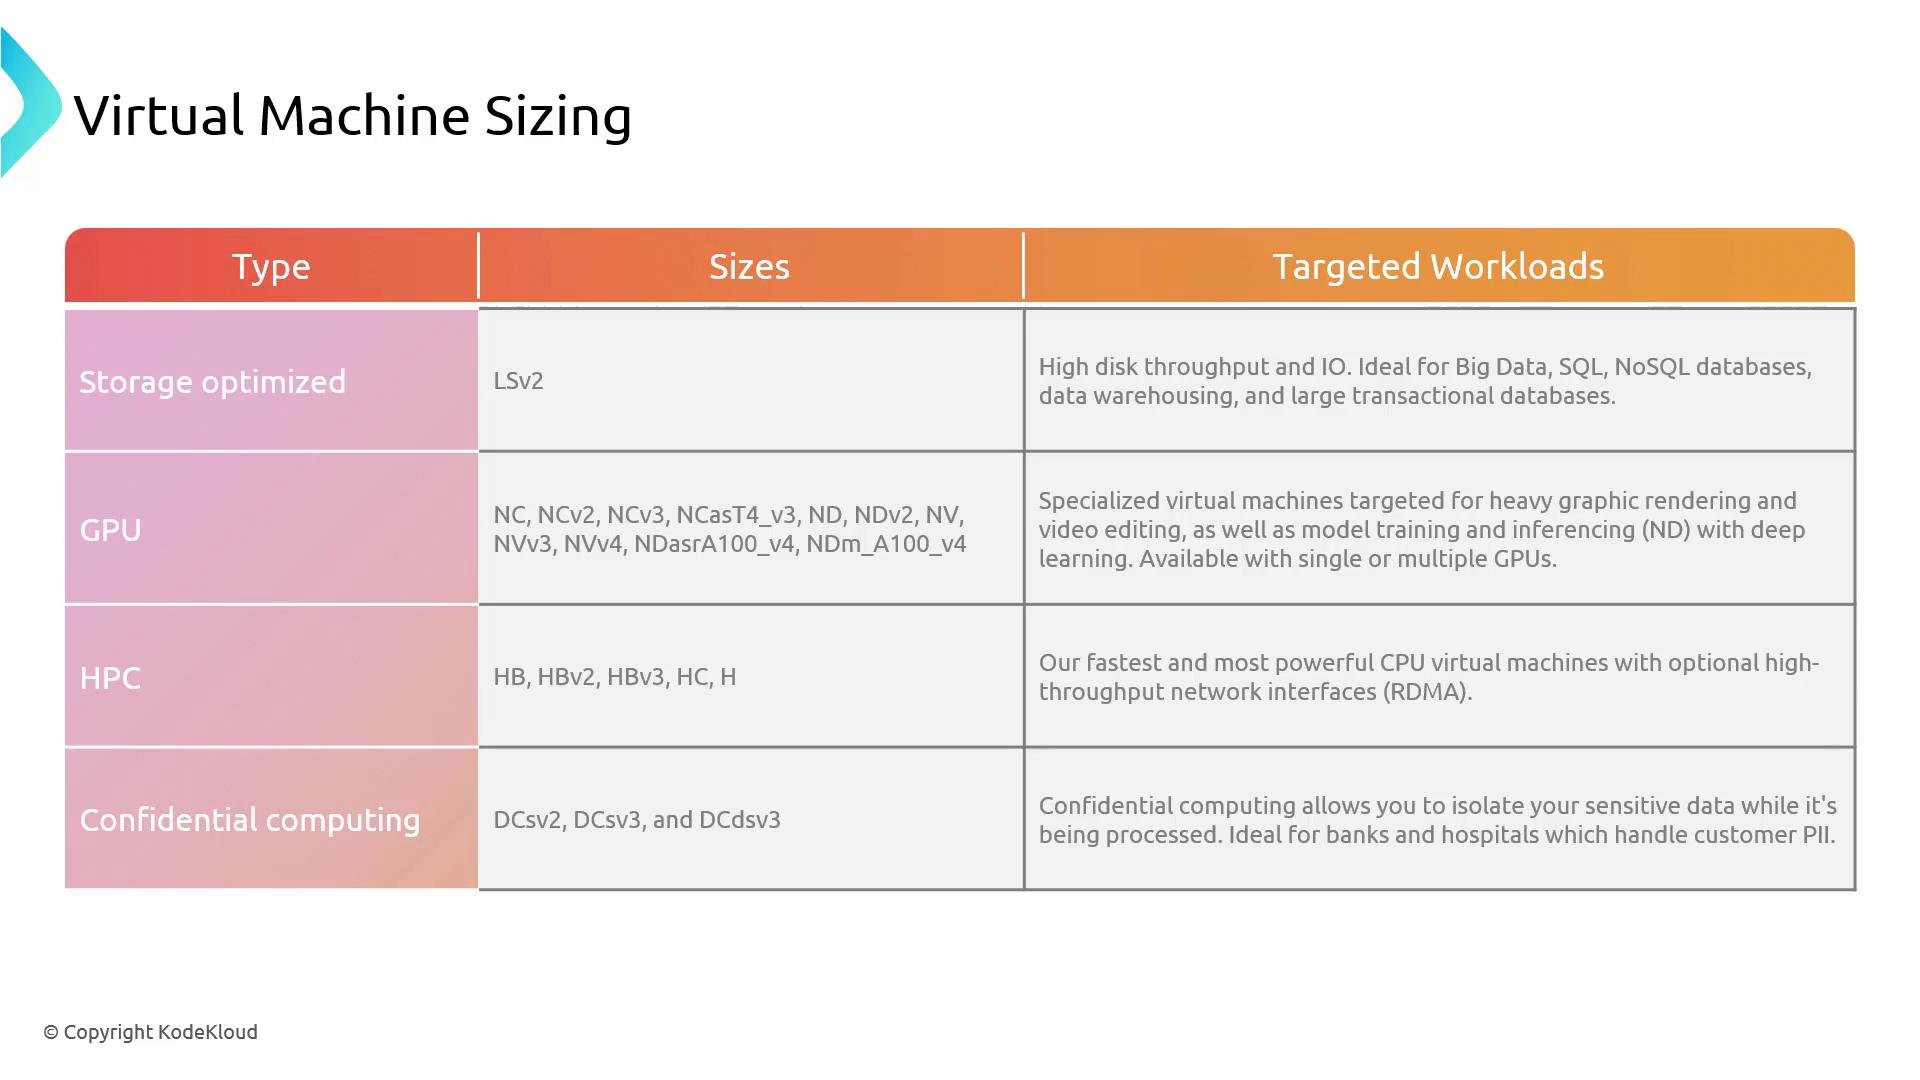
- Storage optimized
- Tuned for high disk throughput and IOPS — ideal for big data, large databases, and workloads requiring heavy local storage. Representative family:
Lsv2-series.
- Tuned for high disk throughput and IOPS — ideal for big data, large databases, and workloads requiring heavy local storage. Representative family:
- GPU
- Equipped with GPUs for graphics rendering, visualization, and machine learning training/inference. Representative family:
N-series.
- Equipped with GPUs for graphics rendering, visualization, and machine learning training/inference. Representative family:
- High-performance compute (HPC)
- Very high CPU performance and low-latency network throughput for tightly coupled compute jobs and HPC scenarios (e.g.,
H-series).
- Very high CPU performance and low-latency network throughput for tightly coupled compute jobs and HPC scenarios (e.g.,
- Confidential compute
- Hardware-based trusted execution environments to protect data in use for sensitive workloads.
Quick reference table
How to pick the right size
Choosing a VM size is more than matching raw specs. Follow this practical checklist:- Identify workload characteristics:
- CPU-bound: prefer compute-optimized sizes.
- Memory-bound: choose memory-optimized sizes.
- I/O-bound: select storage-optimized sizes and provision appropriate disk types (Premium SSD, Ultra Disk).
- GPU/accelerator needs: pick GPU series and confirm driver/runtime support.
- Select a scaling strategy:
- Scale up (vertical) — larger VM size for single-instance performance.
- Scale out (horizontal) — more instances with smaller sizes behind a load balancer or VM Scale Set.
- Consider storage and networking:
- Do you need ephemeral OS disks, accelerated networking, or specific disk throughput?
- Ensure selected VM supports the disk types and maximum IOPS required.
- Optimize cost and billing:
- Compare on-demand vs. reserved instances vs. spot VMs.
- Use tags and budgets to track costs.
- Confirm region availability and quotas:
- Not every SKU is available in every region.
- Check subscription quotas before provisioning.
Tools and documentation to validate choices
- Azure VM sizes catalog — detailed sizes, limits, and vCPU/memory info: https://learn.microsoft.com/azure/virtual-machines/sizes
- Resize operations and guidance: https://learn.microsoft.com/azure/virtual-machines/resize-vm
- Estimate cost and compare SKUs in the Azure Pricing Calculator: https://azure.microsoft.com/pricing/calculator/
Always verify VM availability and pricing in the target Azure region. Use the Azure VM sizes documentation, the Resize VM guide, and the Azure Pricing Calculator to validate performance and cost before provisioning.