

azurewebsites.net hostname. This guide explains how to prove domain ownership, map hostnames, and secure the domain with SSL/TLS so your app is served over HTTPS.
Why it matters: using a custom domain improves trust and discoverability (SEO) and lets you present a consistent brand to users.
Overview: domain validation and mapping
Before binding a custom domain to an App Service you must verify ownership. Azure App Service supports both CNAME (recommended for subdomains) and A record (required for apex/root domains) mappings — but both flows start with a TXT verification record (verification ID). Summary of DNS records needed:DNS changes can take time to propagate. If your DNS is delegated to Azure DNS, propagation and validation may be quicker.
Step-by-step: Add a custom domain in the Azure portal
- In the Azure portal open your App Service.
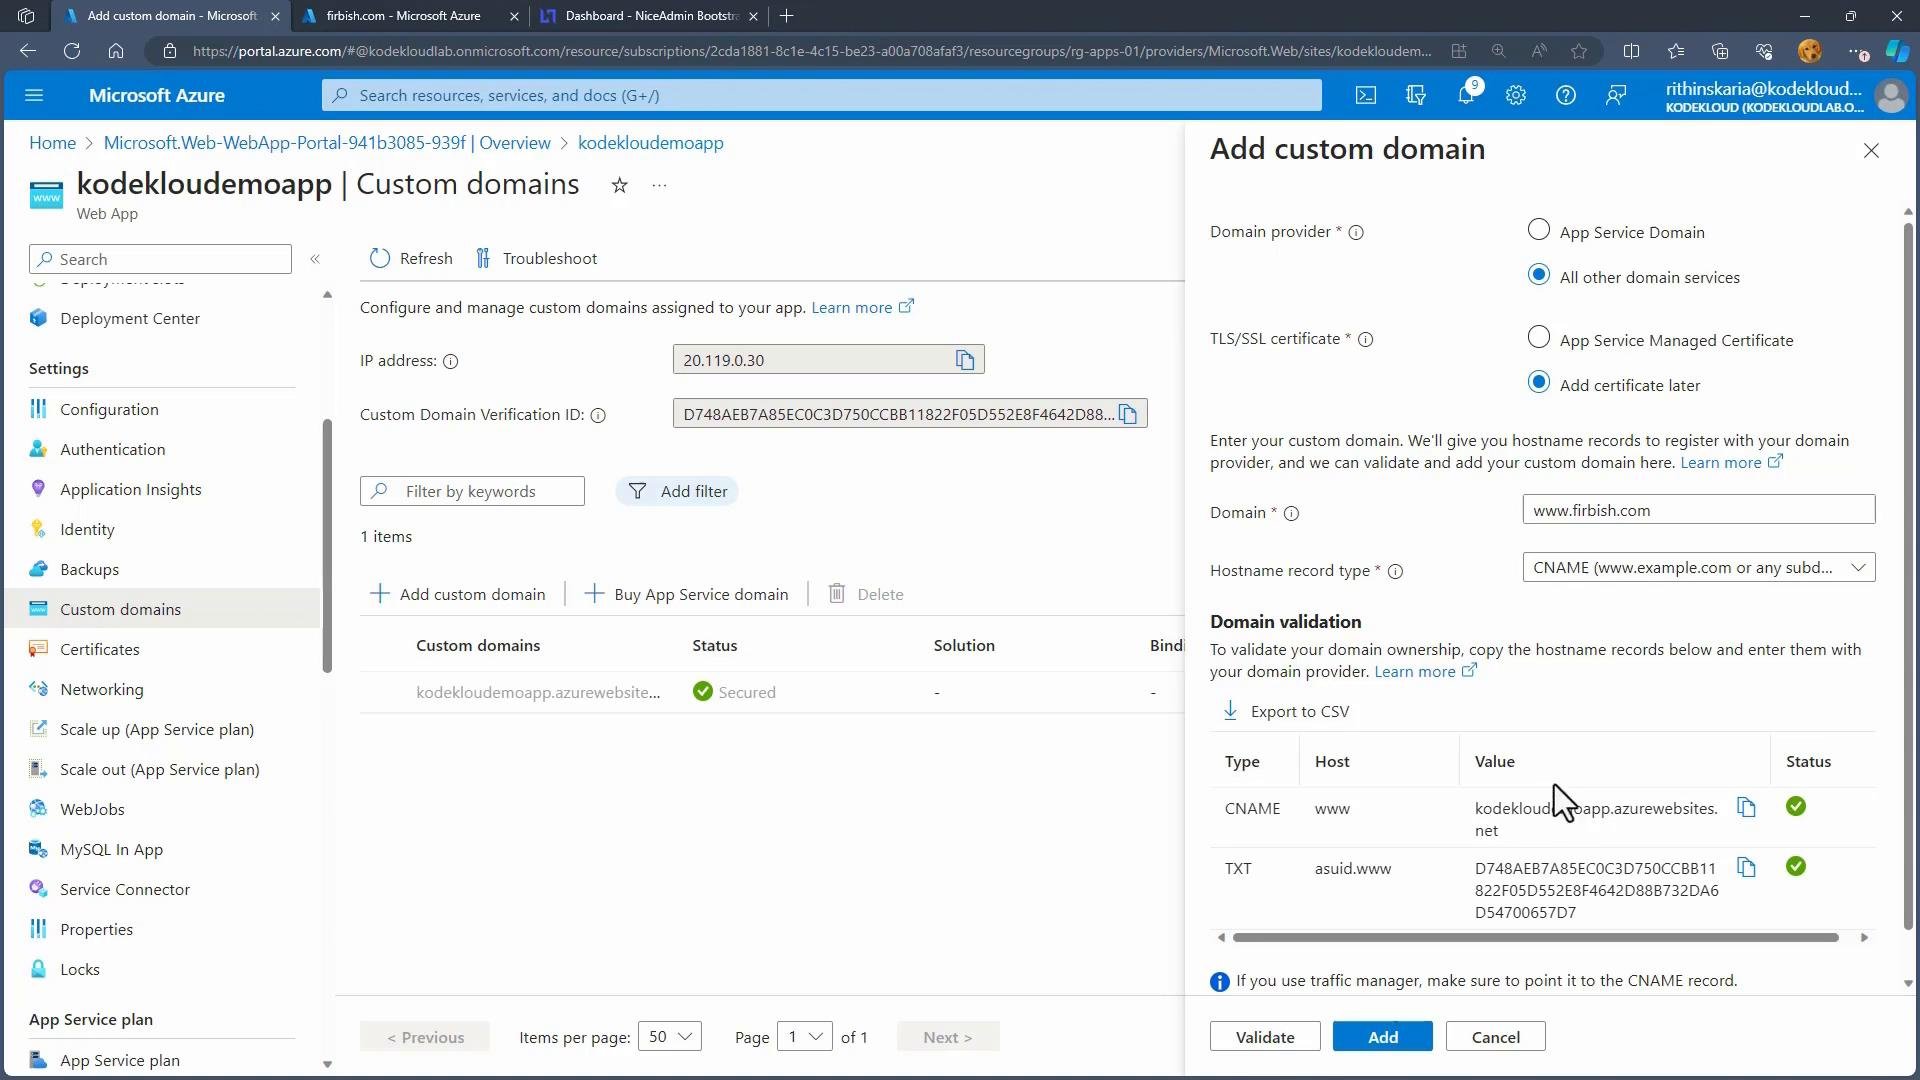
- Go to Custom domains → Add custom domain.
- Select whether the domain is an App Service Domain (purchased through Azure) or from another registrar.
- Enter the hostname to add (for example
www.furbis.com). - Choose the validation method:
- For subdomains choose CNAME validation. Azure will show the TXT verification record and the CNAME target.
- For apex/root domains choose A Record validation. Azure will show the TXT verification record and the A record target (App Service IP).
- Add the TXT verification record to your DNS zone (Azure displays the verification ID and the TXT record name/value). Then add the CNAME or A record as shown.
- After creating the DNS records, return to the portal and click Validate. Azure will query public DNS to ensure the TXT and mapping records exist.
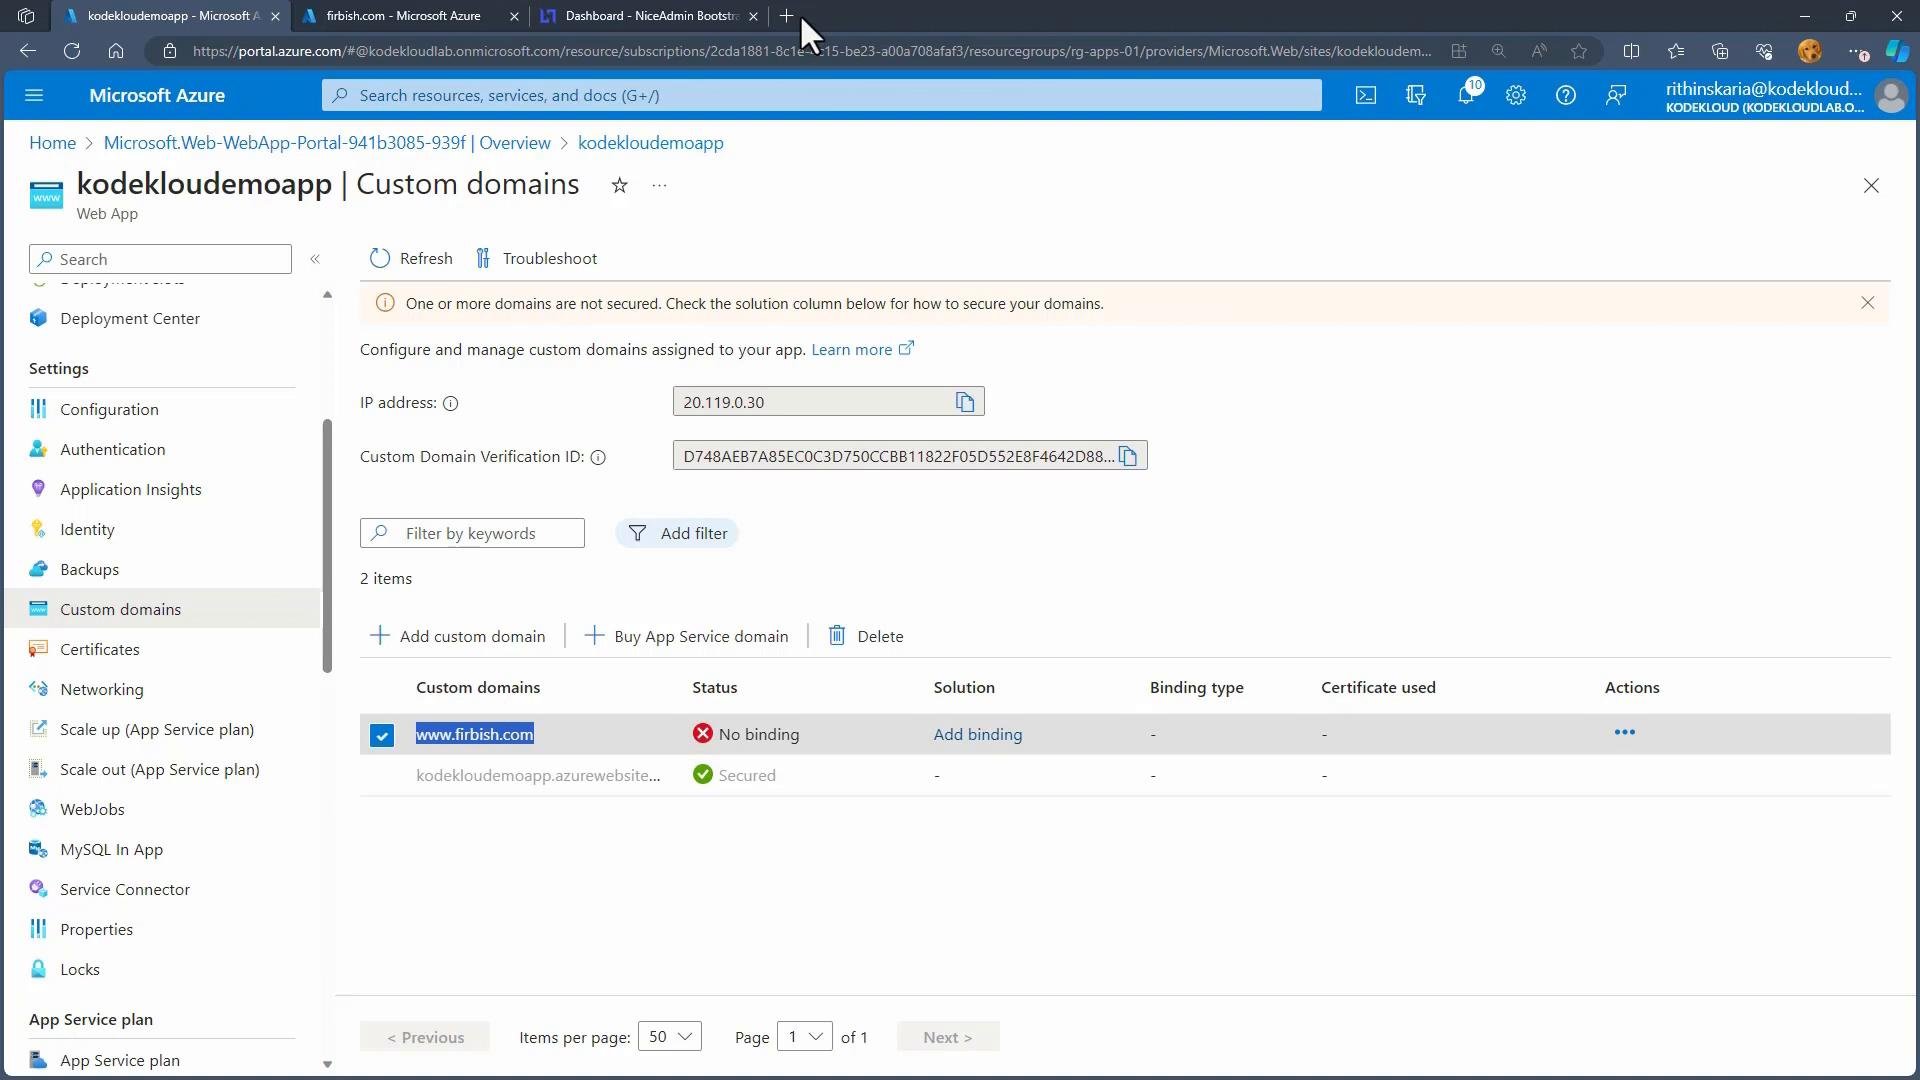
- If validation succeeds click Add to bind the hostname to the App Service.
Browsing before SSL is configured
If you visit the custom domain before adding a certificate, browsers may show a security warning because the certificate served by the App Service is not matched to your custom hostname. This is expected until you bind a proper certificate for that hostname.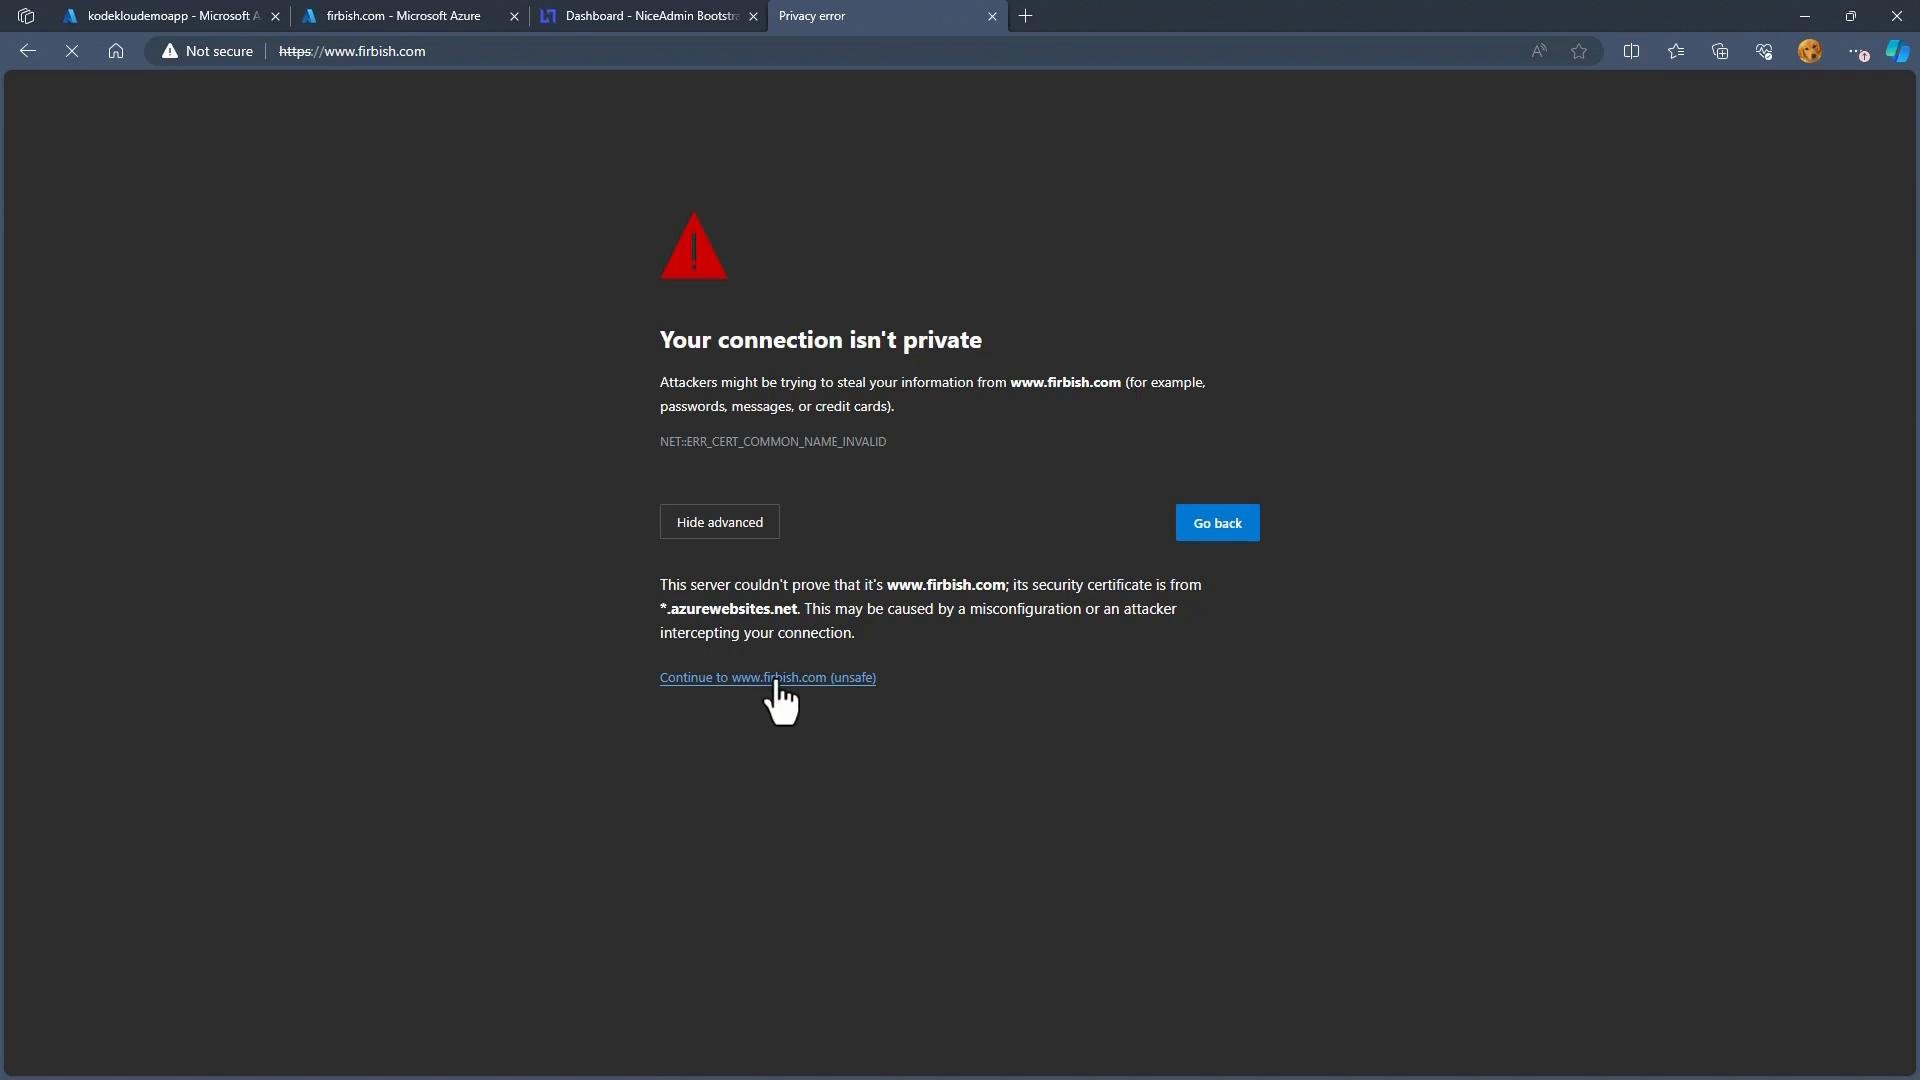
Securing the custom domain with SSL/TLS
To remove the “Not secure” warning:- Upload a certificate you own (PFX) to App Service and create an SSL binding for the hostname, or
- Use Azure App Service Managed Certificate (free) if your scenario meets the managed certificate restrictions (note: managed certificates have limitations such as no wildcard support and no root/apex binding in some cases).
Quick checklist
- Ensure your App Service plan is Basic or higher.
- Create TXT verification record in your DNS zone.
- Create CNAME (subdomain) or A record (apex/root) per Azure portal instructions.
- Click Validate and Add in the portal.
- Upload or create an SSL certificate and bind it to the hostname.
- Test over HTTPS and confirm there are no certificate warnings.
Custom domains require at least the Basic App Service plan. Attempting to add custom domains from Free or Shared tiers will fail.