Before you begin, ensure the AWS CLI is installed and configured with credentials that have permissions to create CloudFormation stacks, EC2 instances, and S3 buckets. Configure the CLI with
aws configure or set the credentials via environment variables.What you’ll create
- CloudFormation stack named
simple-s3-ec2-stack - An Amazon S3 bucket (name generated by CloudFormation)
- An Amazon EC2 instance (AMI selected via a region map)
CloudFormation template (cli.yaml)
Create a file namedcli.yaml in a project folder (for example, cf-project). This minimal template includes:
- A Mappings section with AMI IDs for a few regions
- A Parameter to control instance type (default:
t3.micro) - An S3 bucket resource
- An EC2 instance that selects the AMI using the Region map and intrinsic functions
cli.yaml:
!Ref, !FindInMap) so the AMI is chosen automatically based on the region where the stack is created.
Change to your project directory
Open a terminal and change into the folder containingcli.yaml.
Windows (Command Prompt or PowerShell):
cls (Windows) or clear (macOS/Linux).
Create the CloudFormation stack using the AWS CLI
Run the create-stack command and set the target region (example usesus-east-2):
Verify resources in the AWS Console
- CloudFormation console — view stack events and the resources created by the stack.
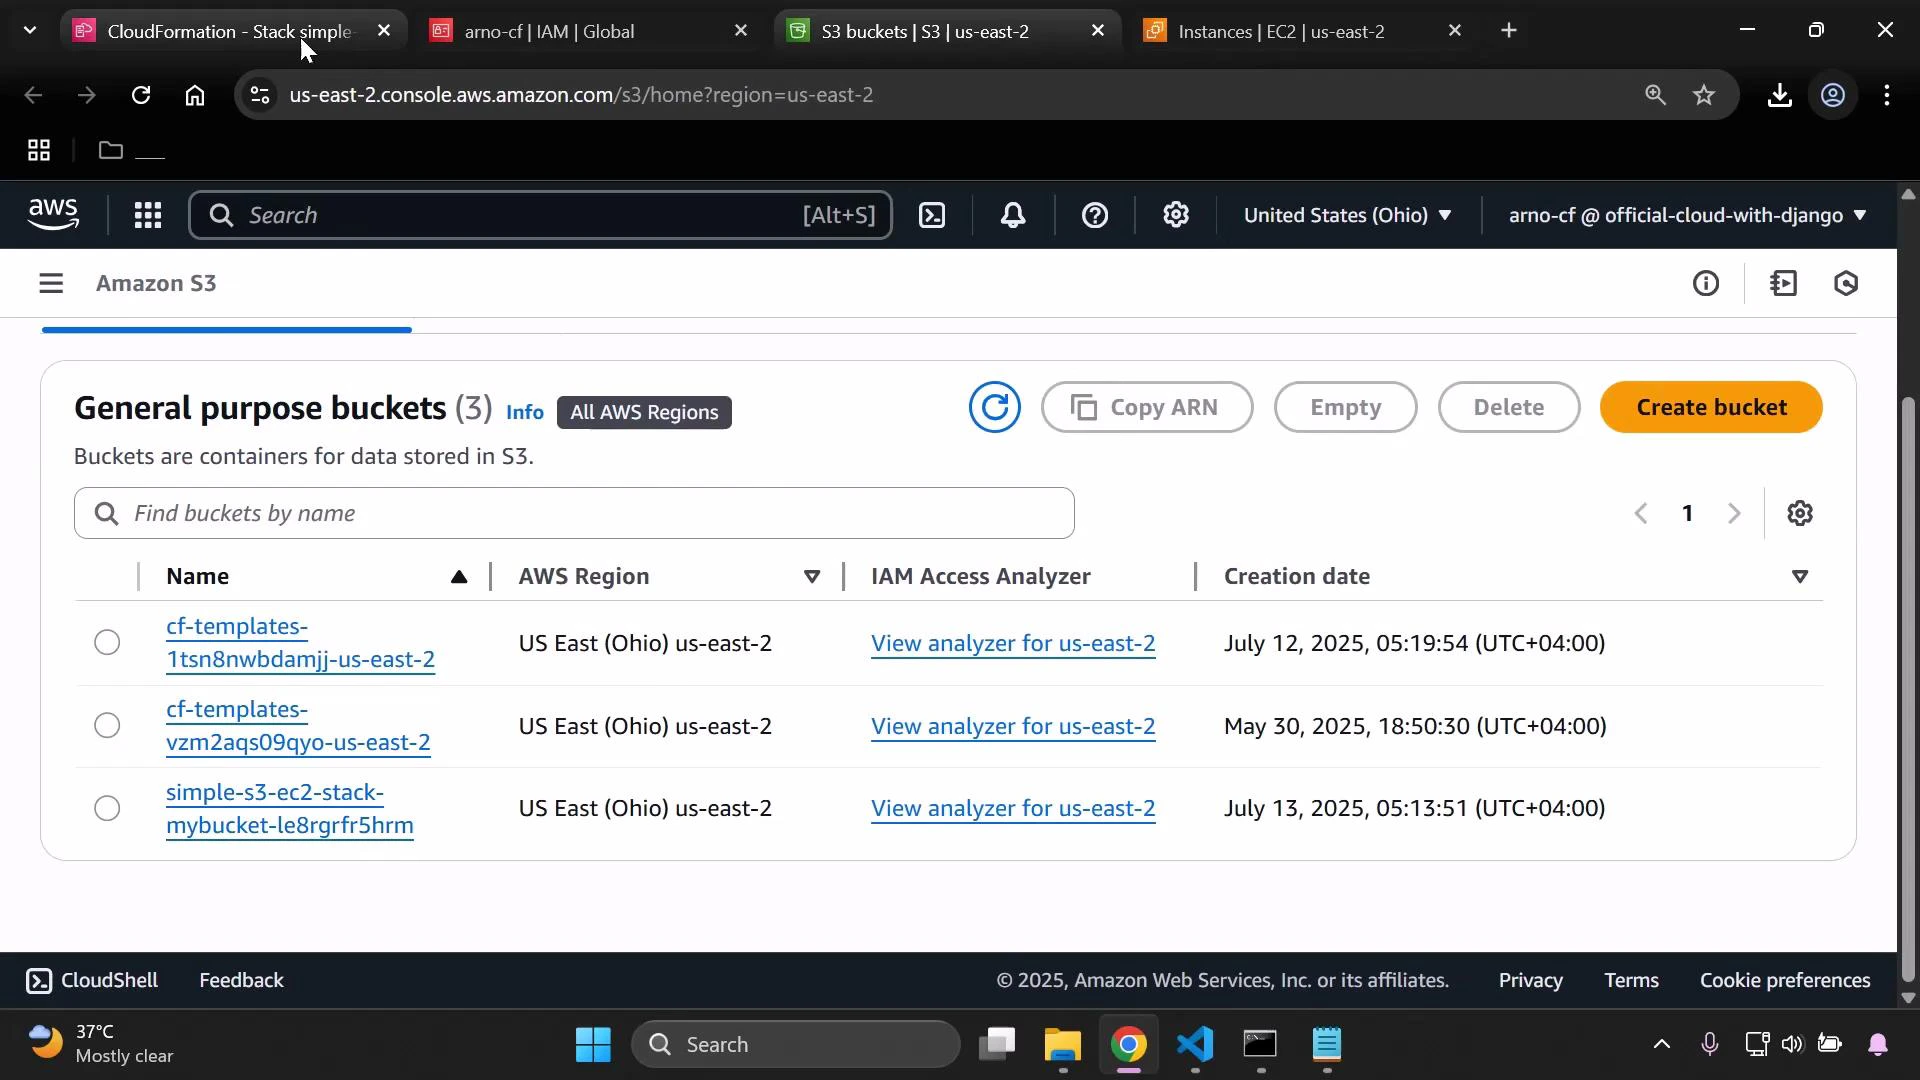
- S3 console (region
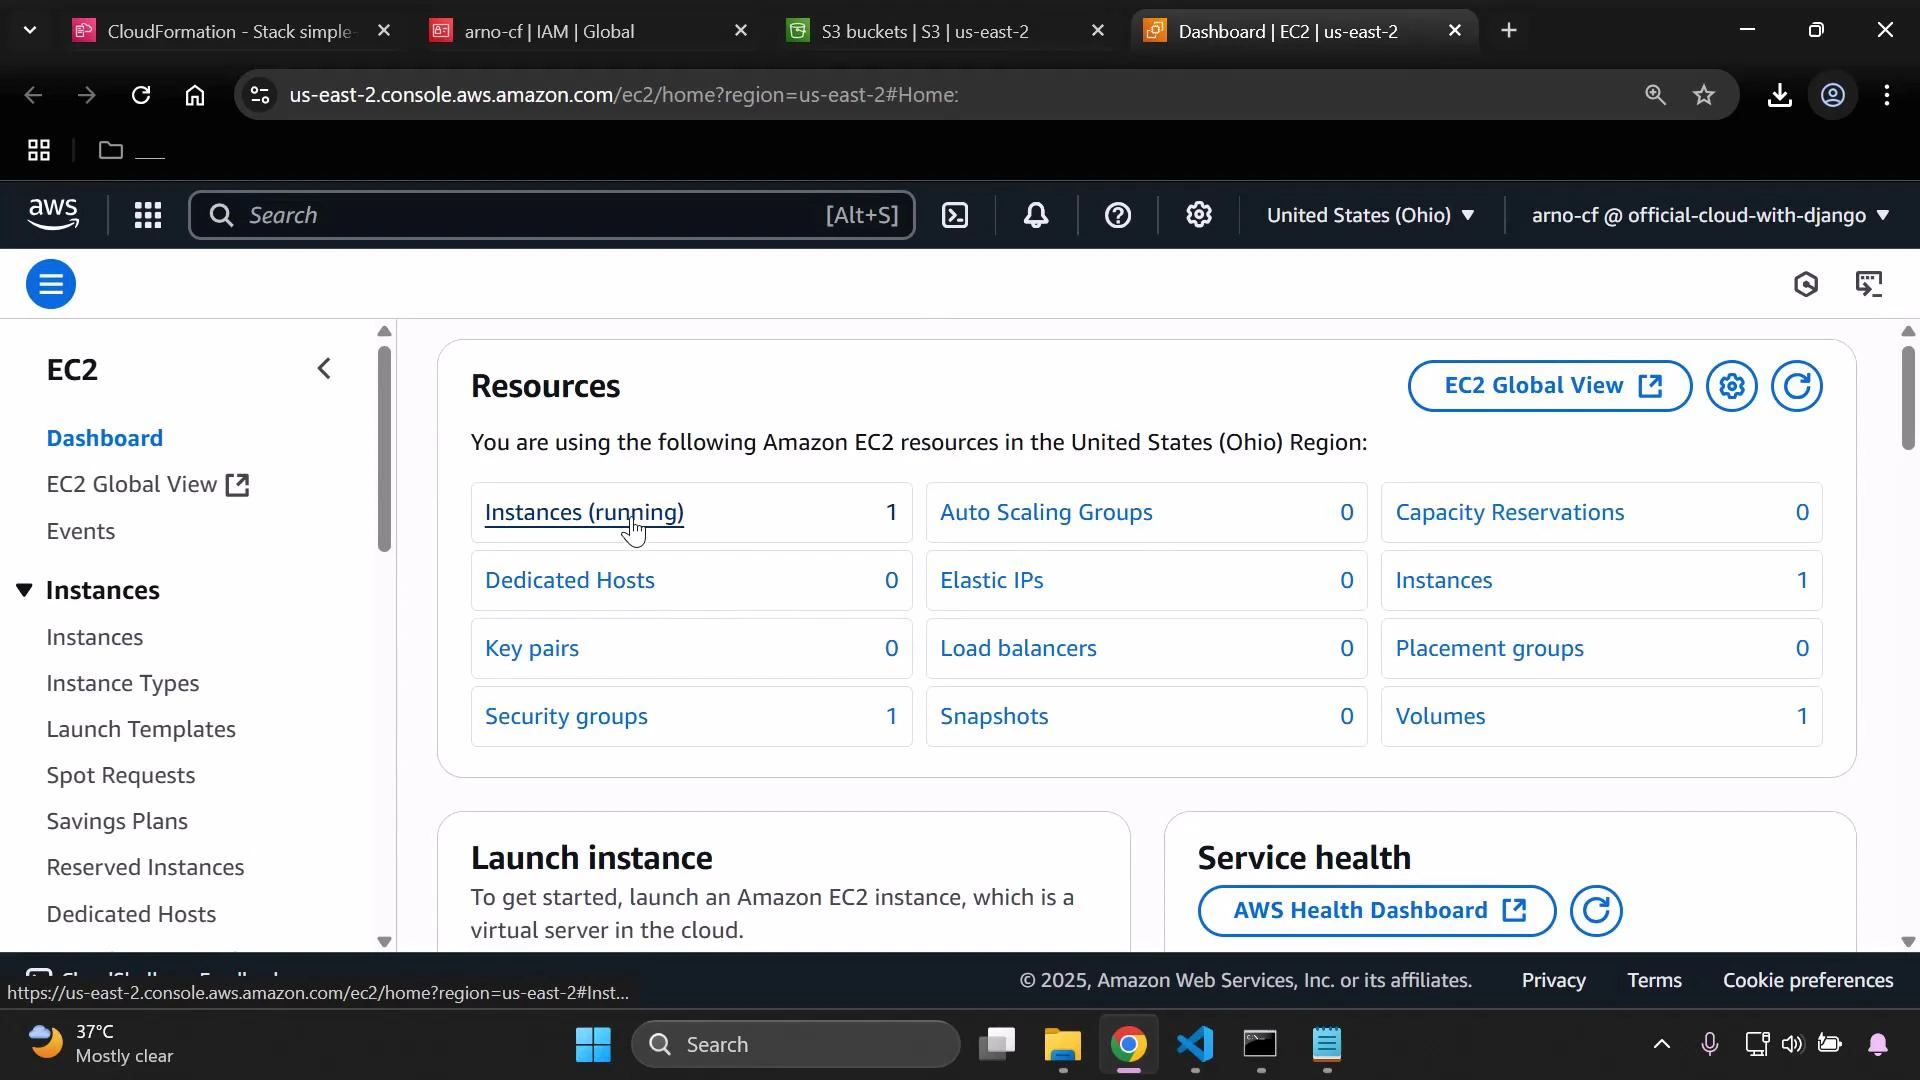
us-east-2) — find the bucket created by the stack (CloudFormation generates a name when none is provided). - EC2 console (region
us-east-2) — confirm the instance is running and was launched from the AMI defined in the region mapping.
Cleanup — delete the stack and resources
When you’re done, delete the CloudFormation stack to remove all resources it created:- CloudFormation deletes the S3 bucket and EC2 instance it created unless the bucket contains objects you uploaded manually. Objects in an S3 bucket prevent its automatic deletion.
- If you created temporary access keys for this demo, deactivate and delete them to reduce security risk.
Be careful when deleting stacks—confirm you are deleting the correct stack and verify there are no important objects in S3 buckets. Deletion can cause irreversible data loss and objects may block the stack from being removed.
Quick reference
| Action | CLI command | Notes |
|---|---|---|
| Create stack | aws cloudformation create-stack --stack-name simple-s3-ec2-stack --template-body file://cli.yaml --region <region> | Use --region to control where resources are created |
| Describe stack | aws cloudformation describe-stacks --stack-name simple-s3-ec2-stack --region <region> | Check status and outputs |
| List stack resources | aws cloudformation list-stack-resources --stack-name simple-s3-ec2-stack --region <region> | Lists logical/physical IDs |
| Delete stack | aws cloudformation delete-stack --stack-name simple-s3-ec2-stack --region <region> | Removes resources created by the stack |
Links and further reading
- AWS CLI documentation
- CloudFormation concepts
- Amazon S3 documentation
- Amazon EC2 documentation
- IAM best practices
Summary
- Author a minimal CloudFormation YAML template (
cli.yaml) defining an S3 bucket and EC2 instance. - Use the AWS CLI to create the stack:
aws cloudformation create-stack --stack-name ... --template-body file://cli.yaml --region <region>. - Verify the resources in the CloudFormation, S3, and EC2 consoles.
- Delete the stack to clean up resources and remove any temporary access keys.