- Create the stack
- In the CloudFormation console choose Create stack and upload your template (for example, a basic S3 template).
- Click Next, enter a stack name, continue through the wizard, and create the stack.

- Wait for the stack to reach CREATE_COMPLETE
- After the stack reaches CREATE_COMPLETE (or any active state), select it in the Stacks list.
- From the “Stack actions” menu choose Edit termination protection to change the setting.
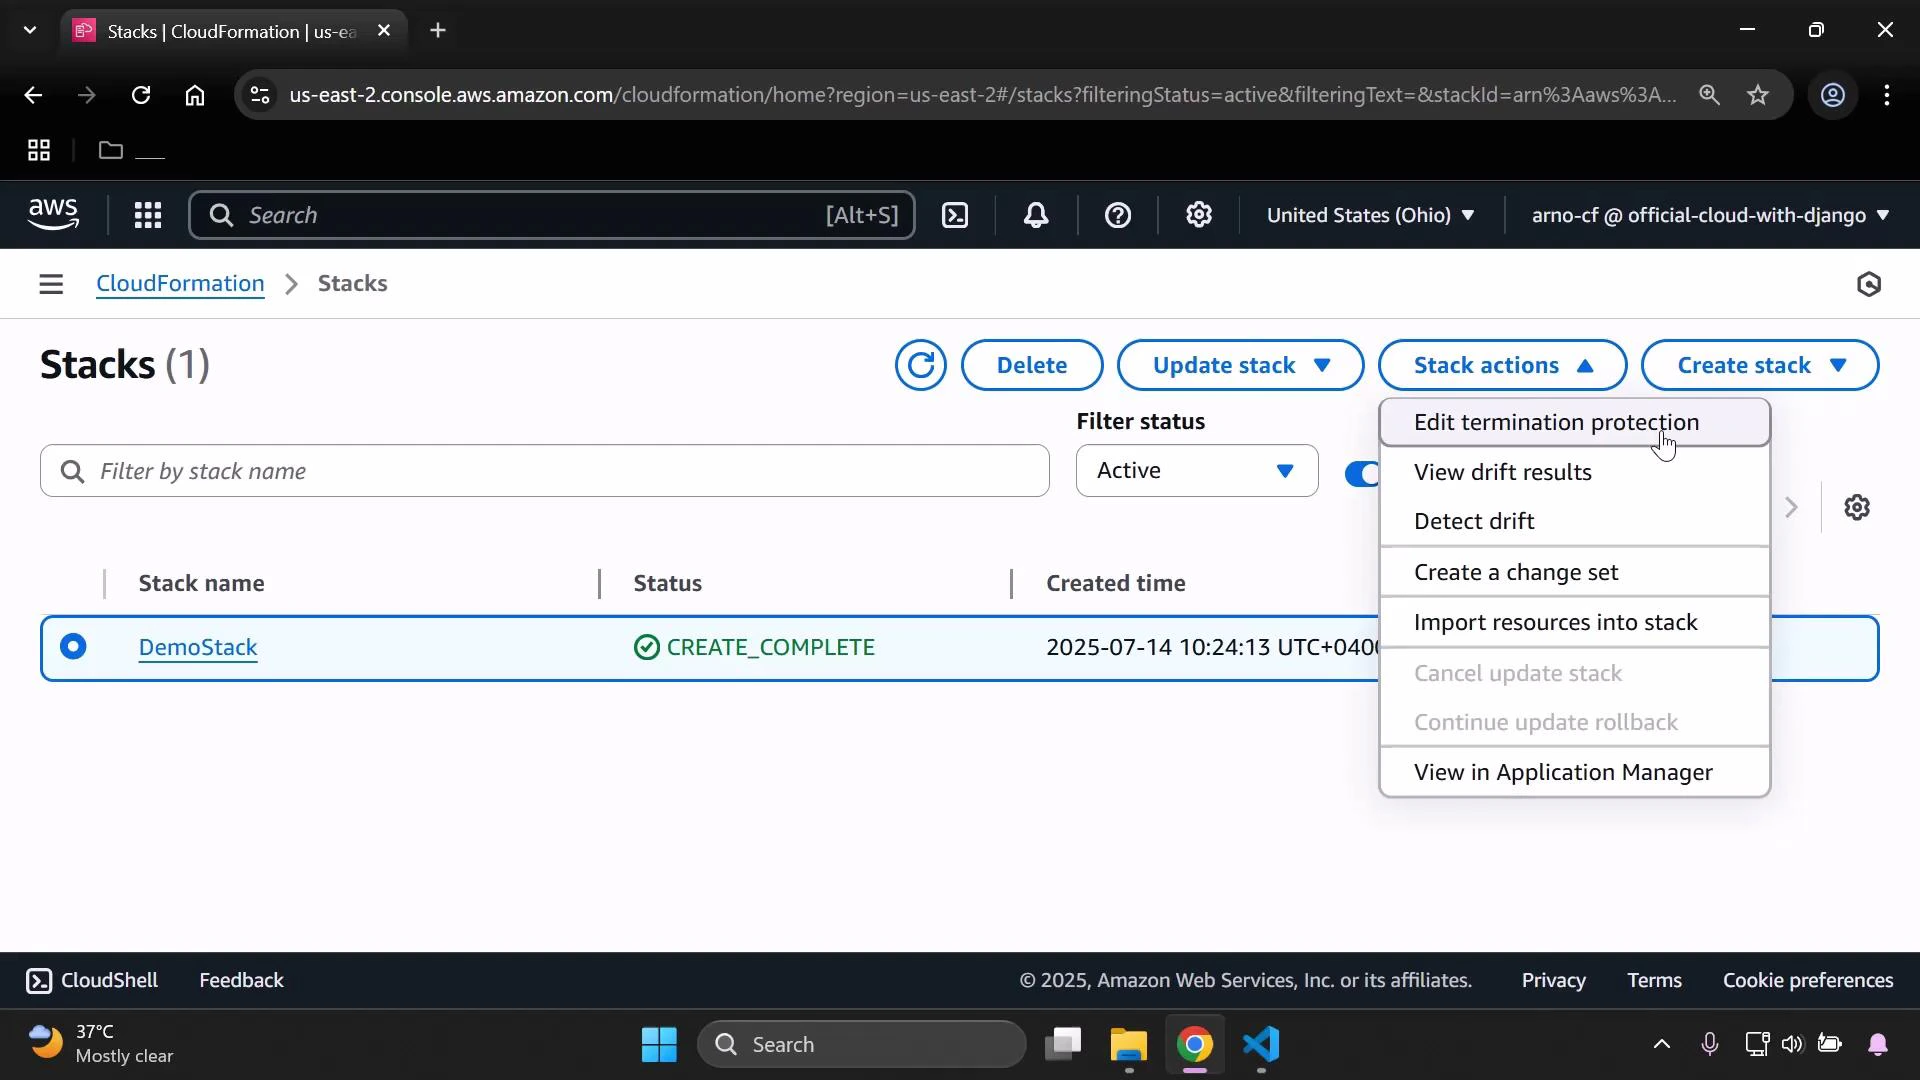
Termination protection prevents deletion of the entire CloudFormation stack through CloudFormation until you explicitly disable it. It does not block stack updates, nor does it stop direct modifications to individual resources made outside CloudFormation (those actions can still cause drift).
- What happens when you try to delete a protected stack
- If termination protection is enabled and you attempt to delete the stack, the console prevents the deletion and asks you to disable termination protection first.
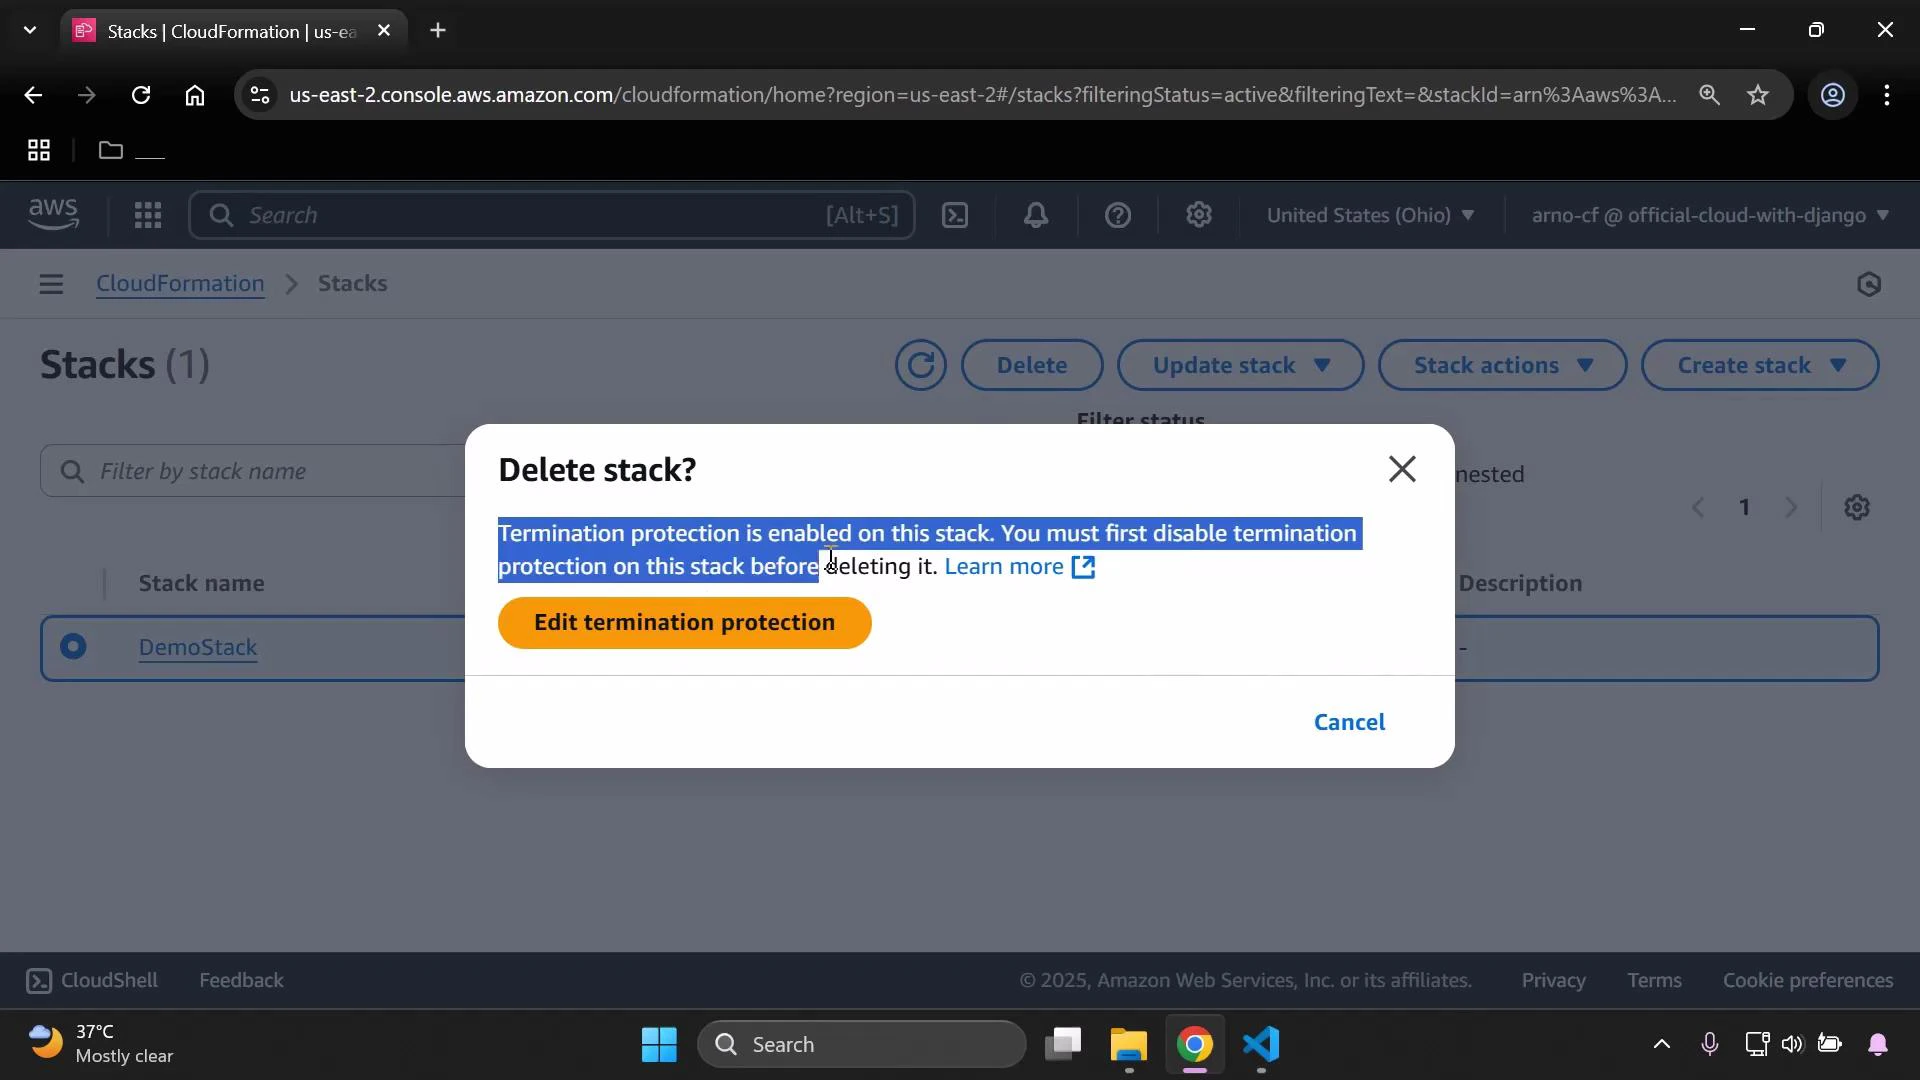
To delete a protected stack you must first turn off termination protection and save the change. Deleting without disabling termination protection via CloudFormation is blocked by the service.
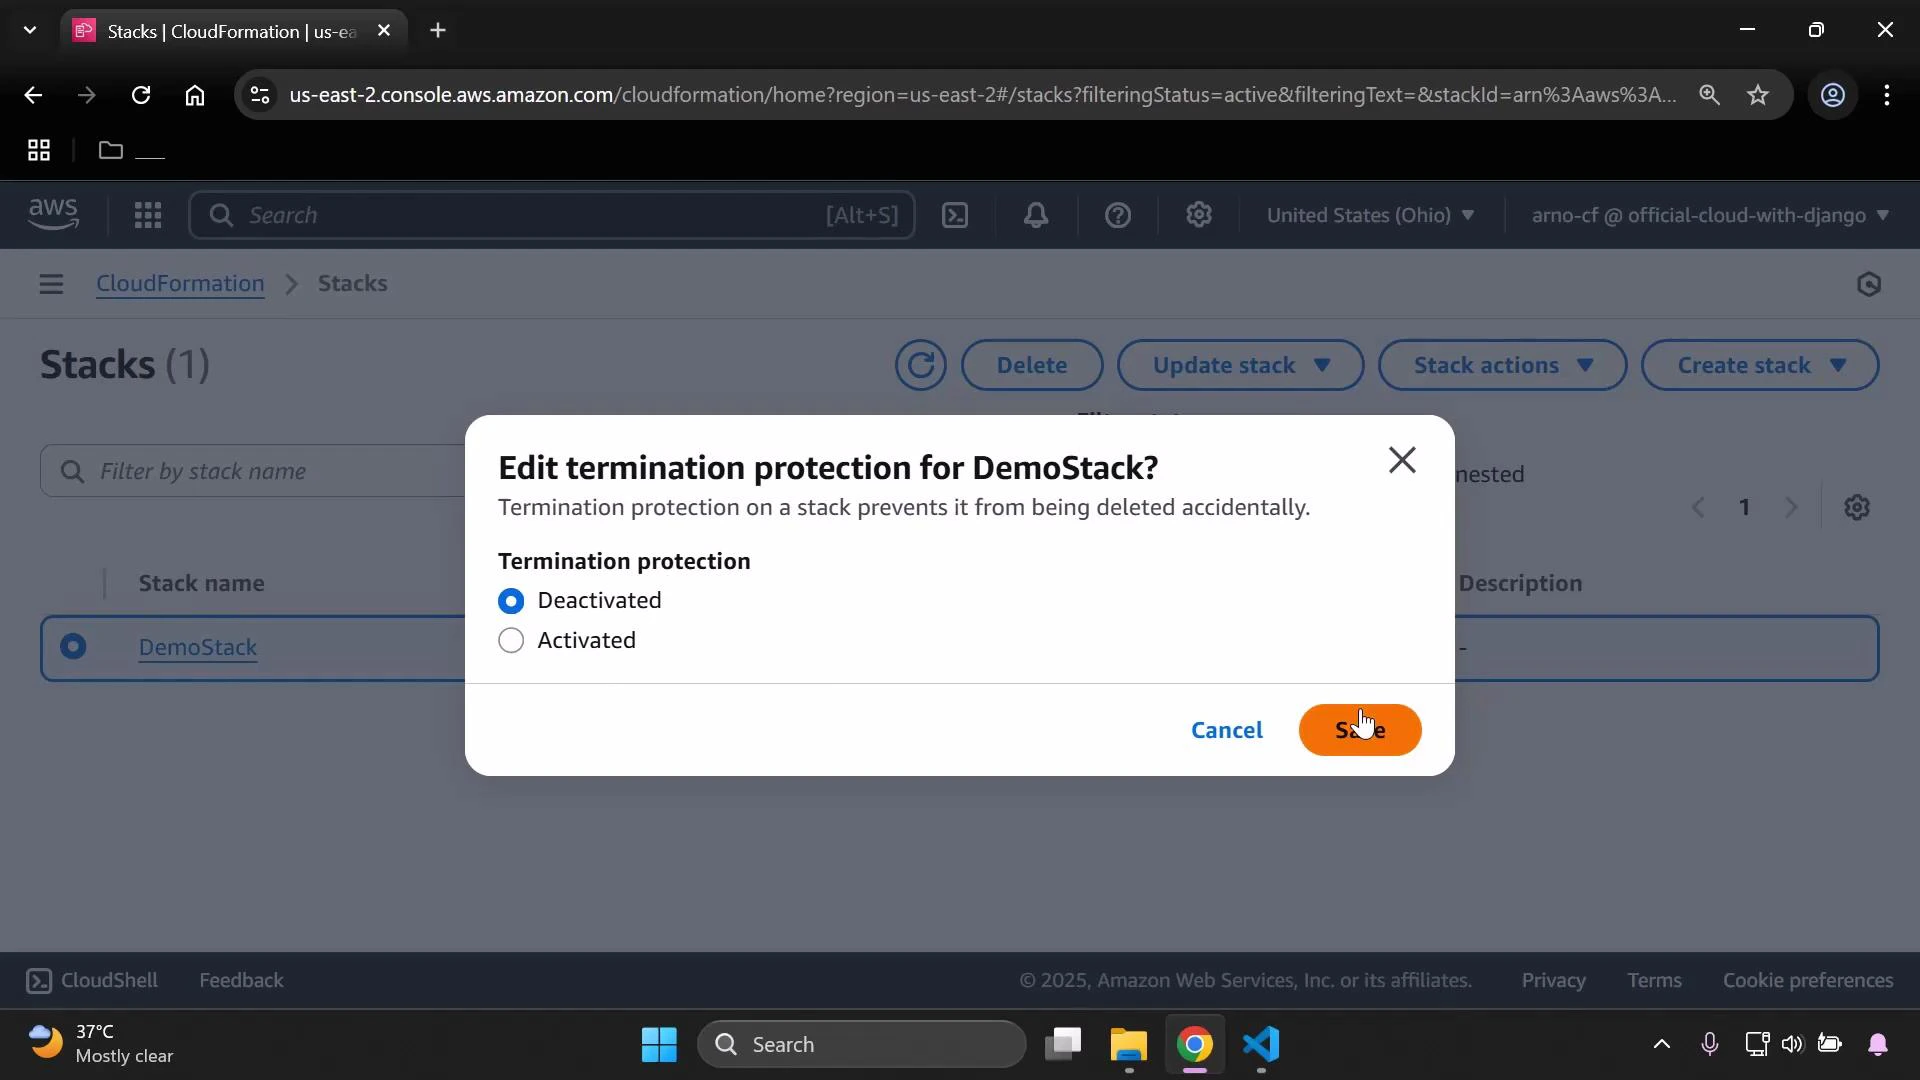
- Disable termination protection (if you want to delete)
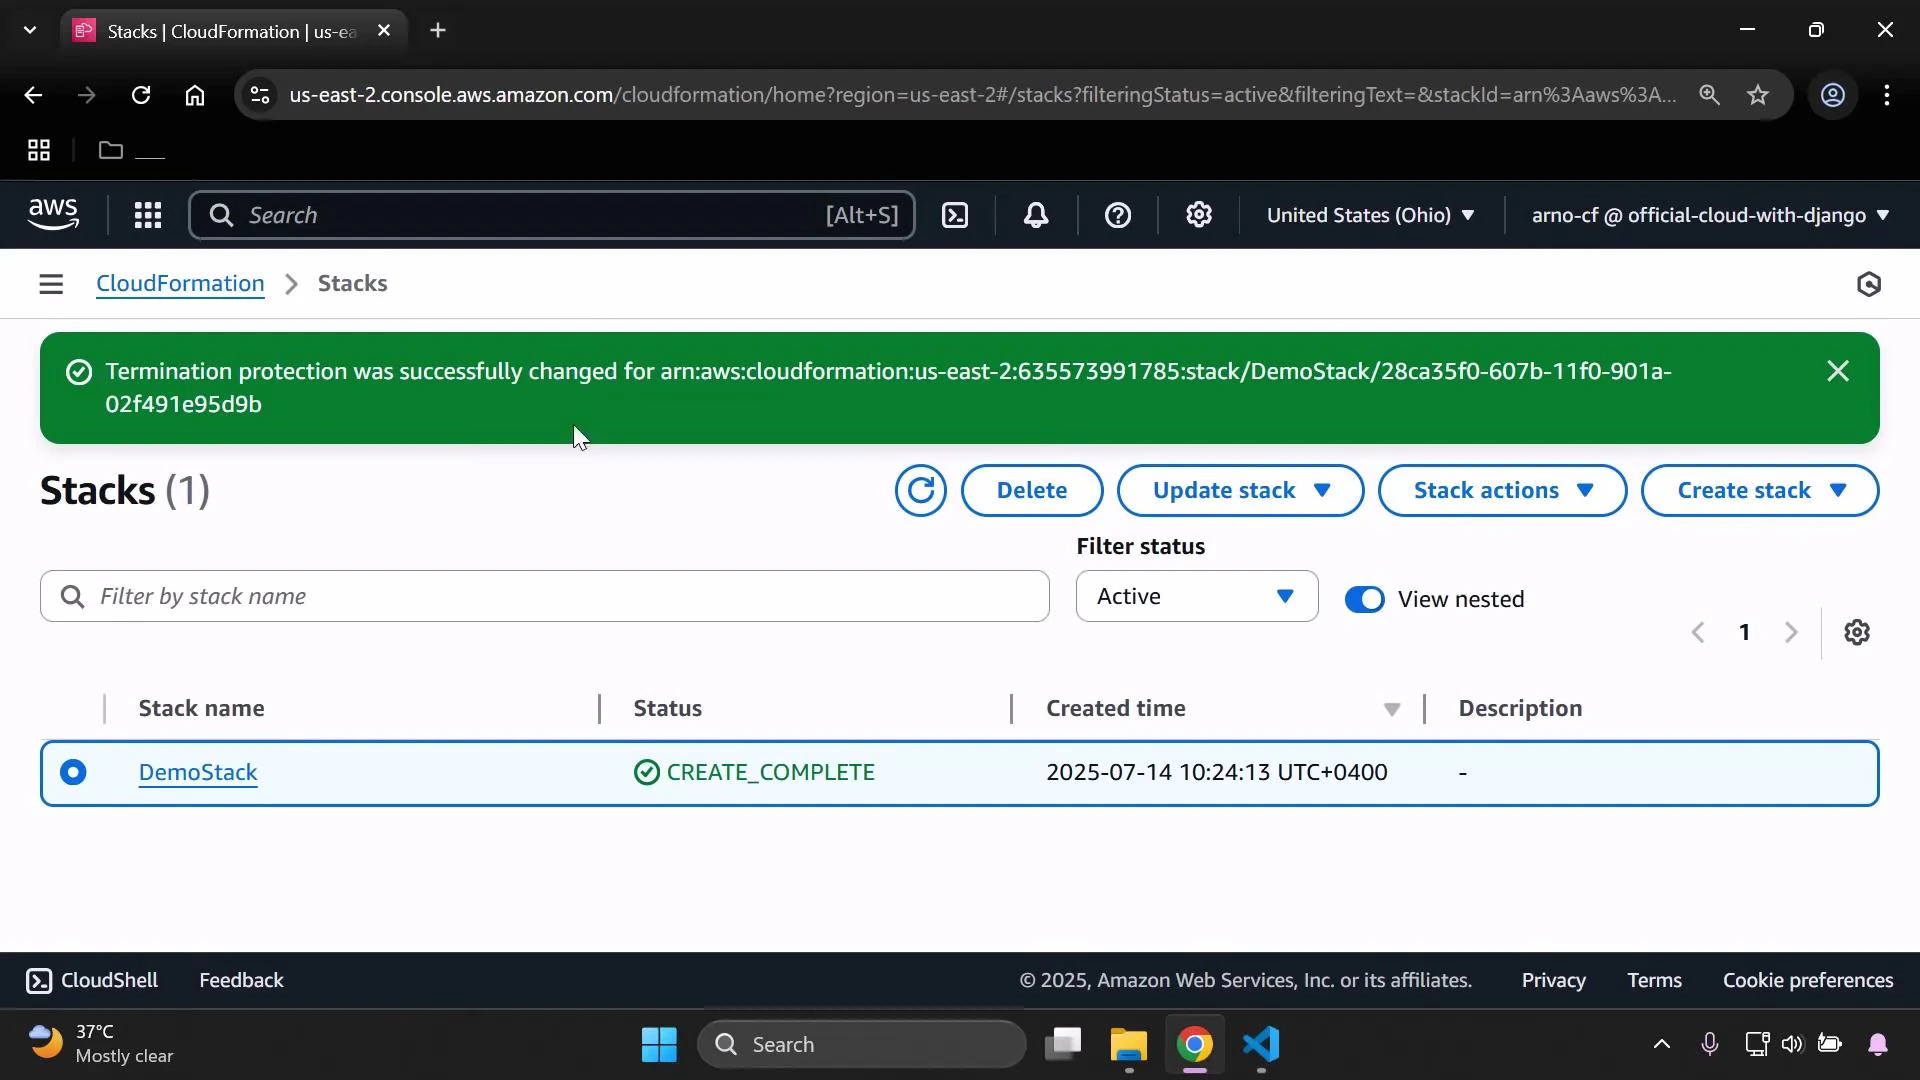
- Re-open Stack actions → Edit termination protection, set the option to Deactivated, and click Save.
- After saving, refresh the stack list — you will be able to delete the stack normally.
| Action | Console path | CLI / API |
|---|---|---|
| Enable termination protection | Stack actions → Edit termination protection → Activated → Save | Use the UpdateTerminationProtection API. See AWS docs for the exact CLI parameters. |
| Disable termination protection | Stack actions → Edit termination protection → Deactivated → Save | Use the UpdateTerminationProtection API (set EnableTerminationProtection to false). |
| Delete stack | Stacks list → Select stack → Delete | Stack deletion is blocked while termination protection is enabled. Disable protection first. |
- AWS CloudFormation — Stack deletion and termination protection
- AWS CloudFormation API: UpdateTerminationProtection
- Enable termination protection from Stack actions → Edit termination protection to guard against accidental stack deletion.
- To delete a stack, you must first deactivate termination protection and save the change.
- Termination protection prevents deletion via CloudFormation; it does not block updates or direct modifications to resources outside CloudFormation.