In this lesson we’ll add Metadata and Parameters to a CloudFormation template so you can choose the EC2 instance type at deploy time. This pattern is useful when you want to offer a small set of supported instance types (for example, free-tier eligible types) while keeping the template self-documenting for auditors and operators.

What you’ll learn

  • How to add top-level Metadata to a CloudFormation template for documentation.
  • How to expose an InstanceType as a Parameter with a dropdown (AllowedValues).
  • How to reference the parameter with the intrinsic function !Ref.
  • How to update a stack in the console and verify the resulting EC2 instance type.

Metadata

Add a top-level Metadata section near the top of the template. Metadata is for humans and auditing — CloudFormation doesn’t use top-level Metadata to change provisioning behavior, though resource-level Metadata can be used by helper tools (for example, cfn-init).
Metadata:
  Purpose: Basic EC2 instance with HTTP and SSH access
Top-level Metadata is for humans and documentation. CloudFormation itself does not directly use top-level Metadata to change provisioning behavior, although resource-level Metadata can be consumed by helper tools (for example, cfn-init) to influence instance configuration.

Choosing which instance types to allow (research)

Before defining the parameter, decide which EC2 instance types you’ll expose (for example, free-tier eligible types or sizes that match your workload and cost constraints). You can inspect instance types in the EC2 console.
A screenshot of the AWS EC2 console (United States — Ohio region) showing the Resources dashboard with counts for Instances (running), Security groups, Volumes, and other EC2 resources. The left sidebar shows EC2 navigation items and the top and bottom show the browser tabs and Windows taskbar.
Open the Launch Instance wizard to view the available instance types and confirm which types are offered in your region and account.
A screenshot of the AWS EC2 "Launch an instance" console showing AMI selection with quick-start tiles for Amazon Linux, macOS, Ubuntu, Windows, and Red Hat. A right-hand Summary pane displays the number of instances, selected AMI details, and a "Launch instance" button.
Common examples you might choose to expose:
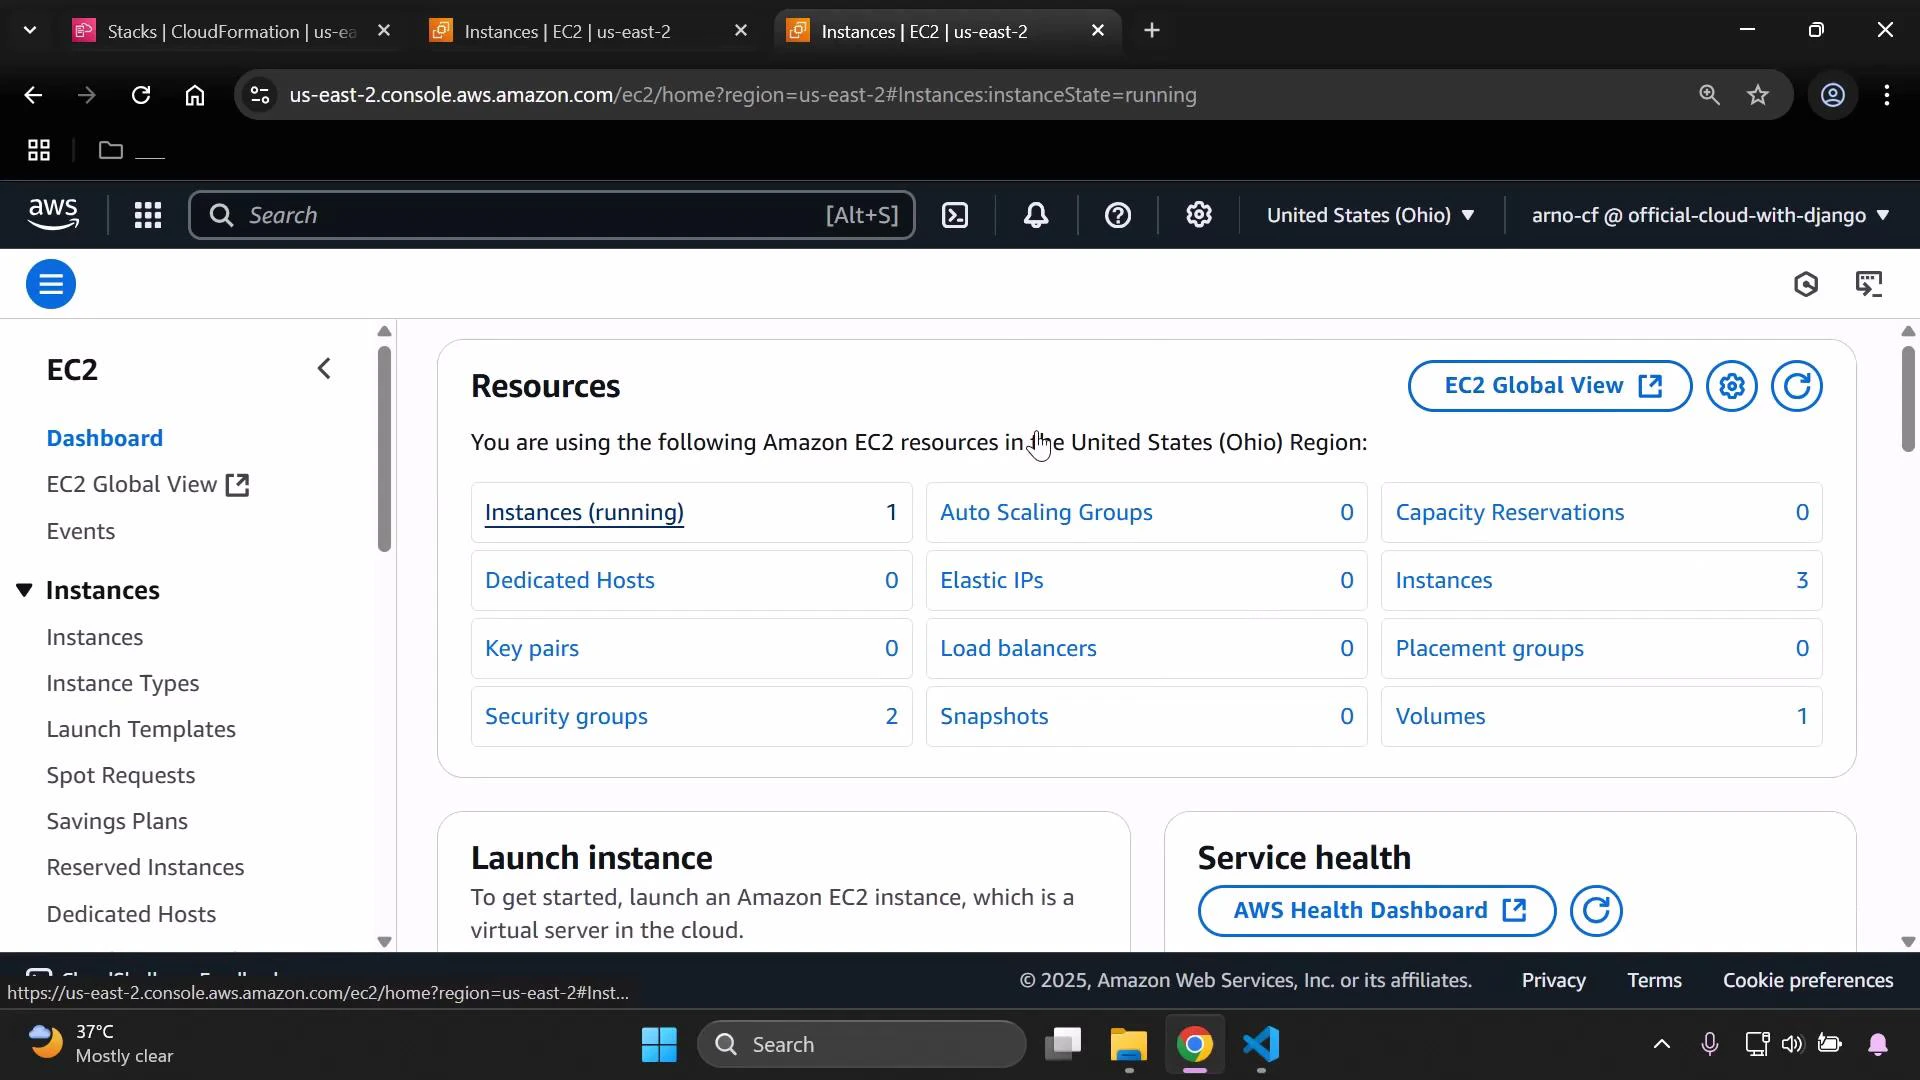
  • t3.micro (often free-tier eligible)
  • t3.small
After you decide which instance types to present to users, add a Parameters block to the template.

Parameters — make InstanceType configurable

Create a parameter named MyInstanceType (or another clear name). Add a Description and an AllowedValues list so the CloudFormation console presents a dropdown for selection.
Parameters:
  MyInstanceType:
    Type: String
    Description: Select your EC2 instance type
    AllowedValues:
      - t3.micro
      - t3.small
    Default: t3.micro
Parameters at a glance:
FieldPurposeExample
TypeData type for the parameterString
DescriptionShort help text shown in the consoleSelect your EC2 instance type
AllowedValuesLimits choices; shows a dropdown in the consolet3.micro, t3.small
DefaultValue used if the user doesn’t change the parametert3.micro
Refer to the parameter using the intrinsic function 
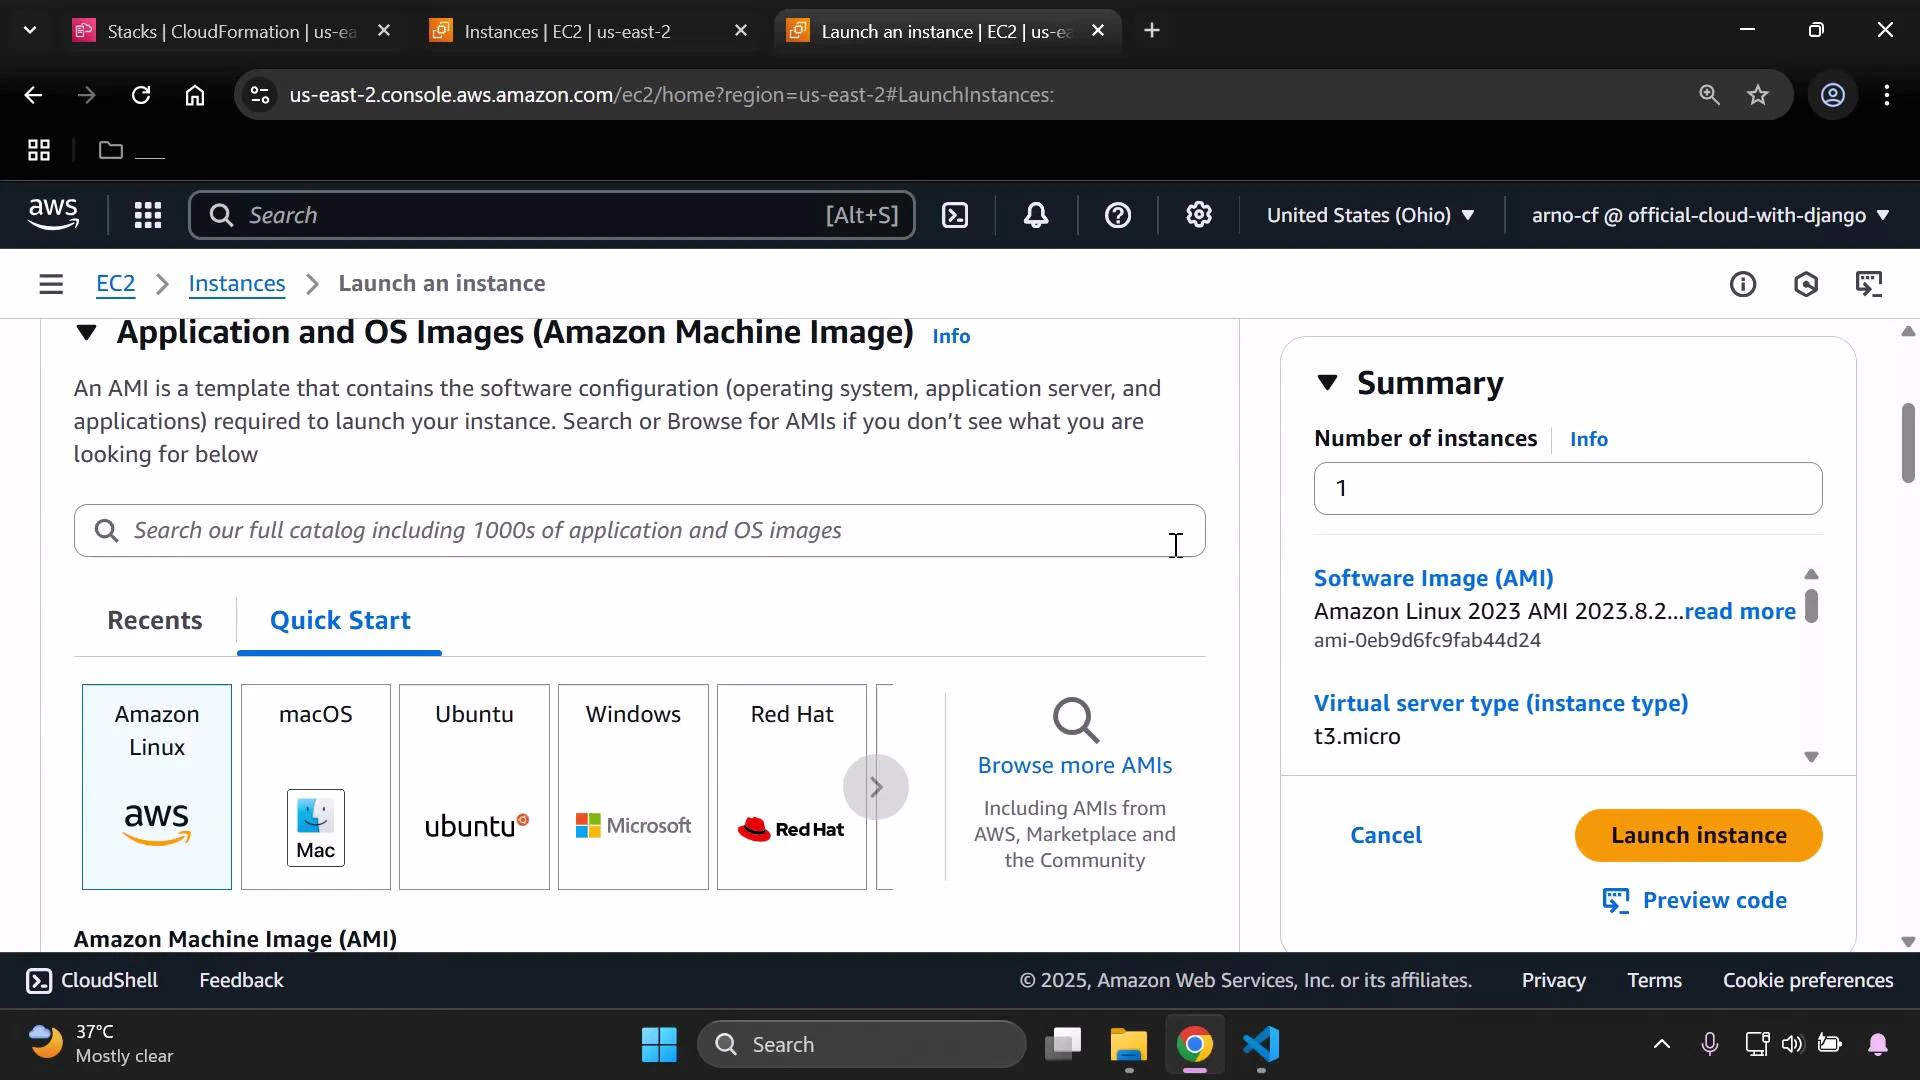
!Ref when setting the EC2 InstanceType property. Below is a minimal complete template that includes Metadata, the Parameter, a Security Group allowing HTTP and SSH, and an EC2 instance that references the parameter.
AWSTemplateFormatVersion: "2010-09-09"
Description: CloudFormation template to create a basic EC2 instance with HTTP and SSH access.

Metadata:
  Purpose: Basic EC2 instance with HTTP and SSH access

Parameters:
  MyInstanceType:
    Type: String
    Description: Select your EC2 instance type
    AllowedValues:
      - t3.micro
      - t3.small
    Default: t3.micro

Resources:
  MySecurityGroup:
    Type: AWS::EC2::SecurityGroup
    Properties:
      GroupDescription: Enable HTTP and SSH access
      SecurityGroupIngress:
        - IpProtocol: tcp
          FromPort: 22
          ToPort: 22
          CidrIp: 0.0.0.0/0
        - IpProtocol: tcp
          FromPort: 80
          ToPort: 80
          CidrIp: 0.0.0.0/0

  MyInstance:
    Type: AWS::EC2::Instance
    Properties:
      InstanceType: !Ref MyInstanceType
      ImageId: ami-0eb9d6fc9fab44d24
      SecurityGroupIds:
        - !Ref MySecurityGroup
The ImageId shown (ami-0eb9d6fc9fab44d24) is region-specific. Replace it with an AMI ID available in your target region (for example, an Amazon Linux 2 AMI). Also be aware that changing InstanceType may replace the instance (resulting in termination of the previous instance) depending on the property change behavior for EC2 instances.
Useful references:

Deploying or updating the stack

When creating or updating a stack in the CloudFormation console you can upload your template file or point to an S3 URL.
A browser screenshot of the AWS CloudFormation console showing the "Update stack" page where you can choose a template source (Amazon S3 URL or upload a template file). The page includes an input for the S3 URL and "Cancel" and "Next" buttons.
During stack creation or update the console displays parameter inputs. The 
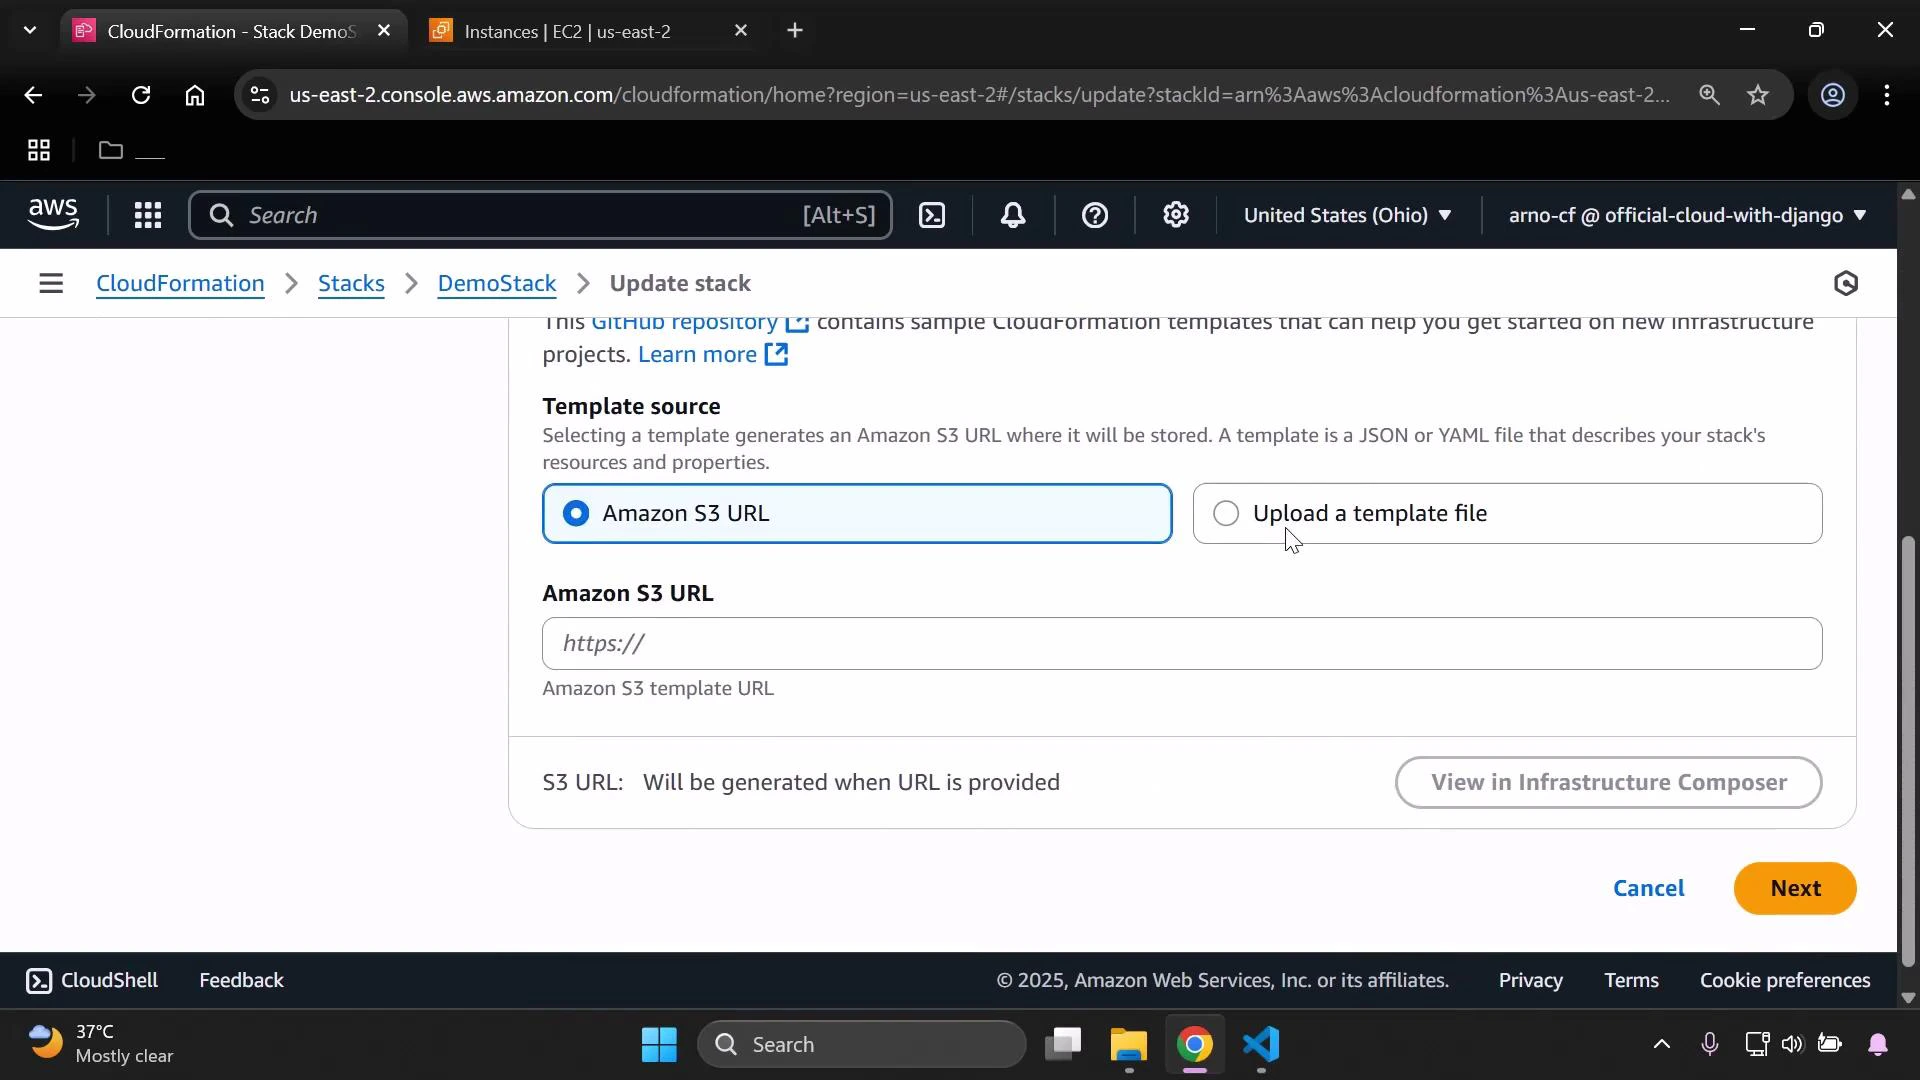
MyInstanceType parameter will show your Description and AllowedValues as a dropdown.
A screenshot of the AWS CloudFormation console on the "Specify stack details" step while updating a stack named DemoStack. The Parameters box shows MyInstanceType set to "t3.micro," and the cursor is hovering over the orange Next button.
Select the instance type you want (for example 
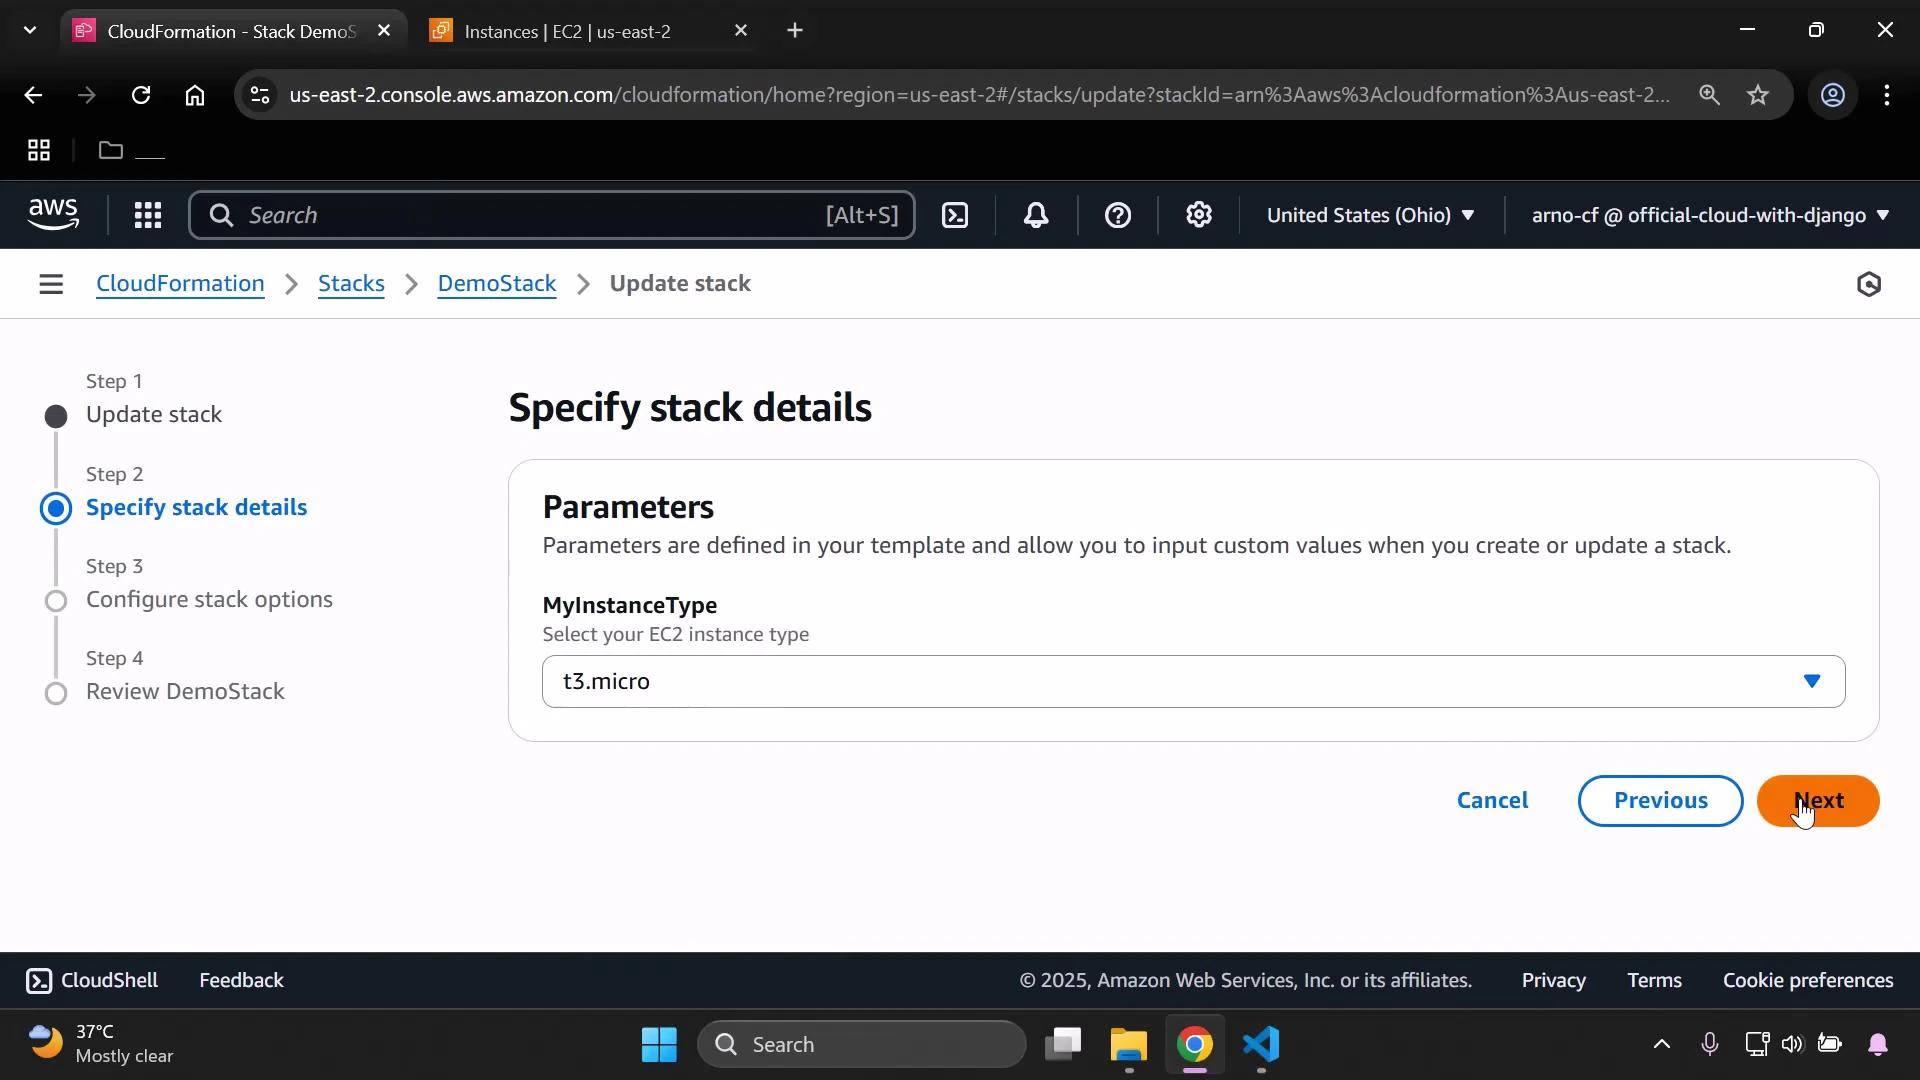
t3.small) and continue. CloudFormation will apply the change: it may modify the instance in place or replace it (terminating the previous instance and launching a new one) depending on the resource update behavior. 
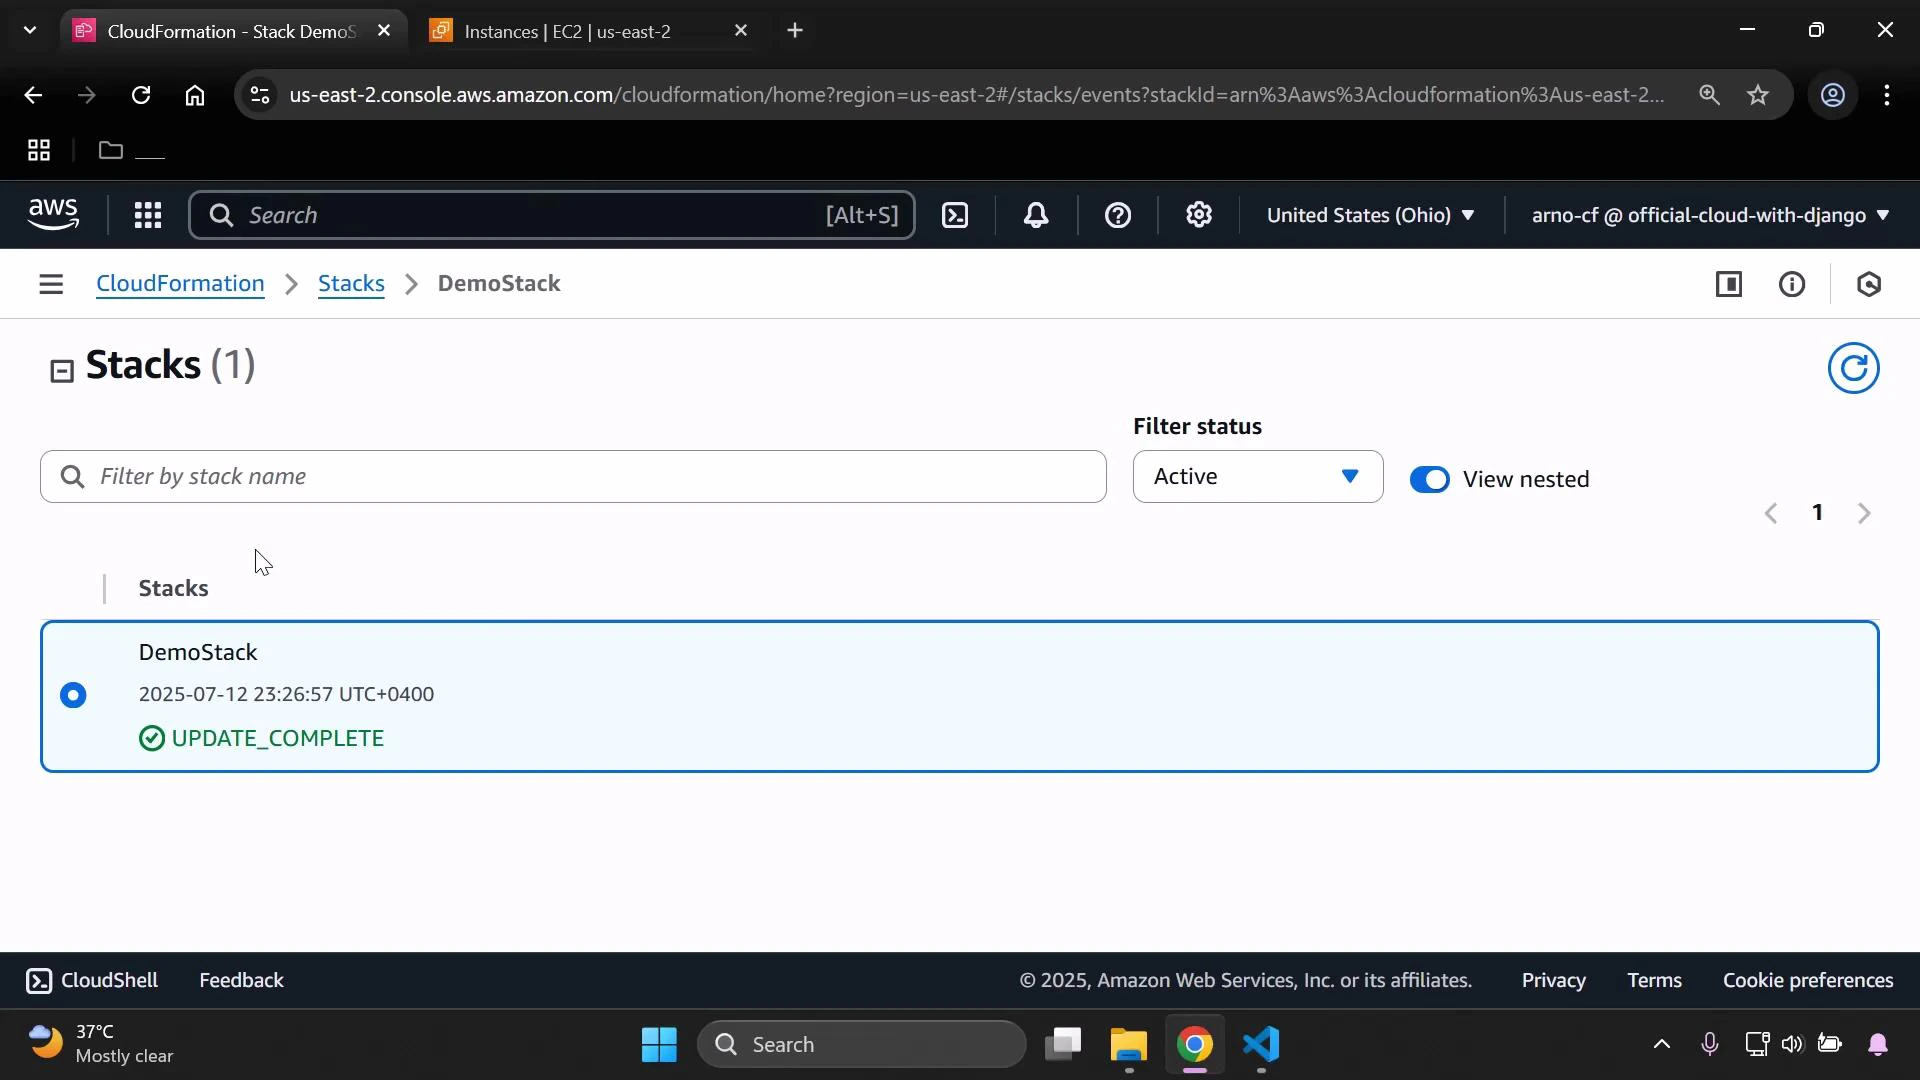
When the update completes successfully the stack will show an UPDATE_COMPLETE status.
A screenshot of the AWS CloudFormation console showing one stack named "DemoStack" with a timestamp and status "UPDATE_COMPLETE." The filter status is set to "Active" and the "View nested" toggle is on.
In the EC2 console you can verify the running instance reflects the selected InstanceType (for example, t3.small). You may also see terminated instances from the previous configuration in the console.
A screenshot of the AWS EC2 Instances console showing three instances in the us-east-2 region; one is Running (t3.small) while two are Terminated (t3.micro). The table displays instance IDs, status checks, availability zone, and the "Launch instances" action.
To revert, update the stack again and choose the original allowed value (for example, 
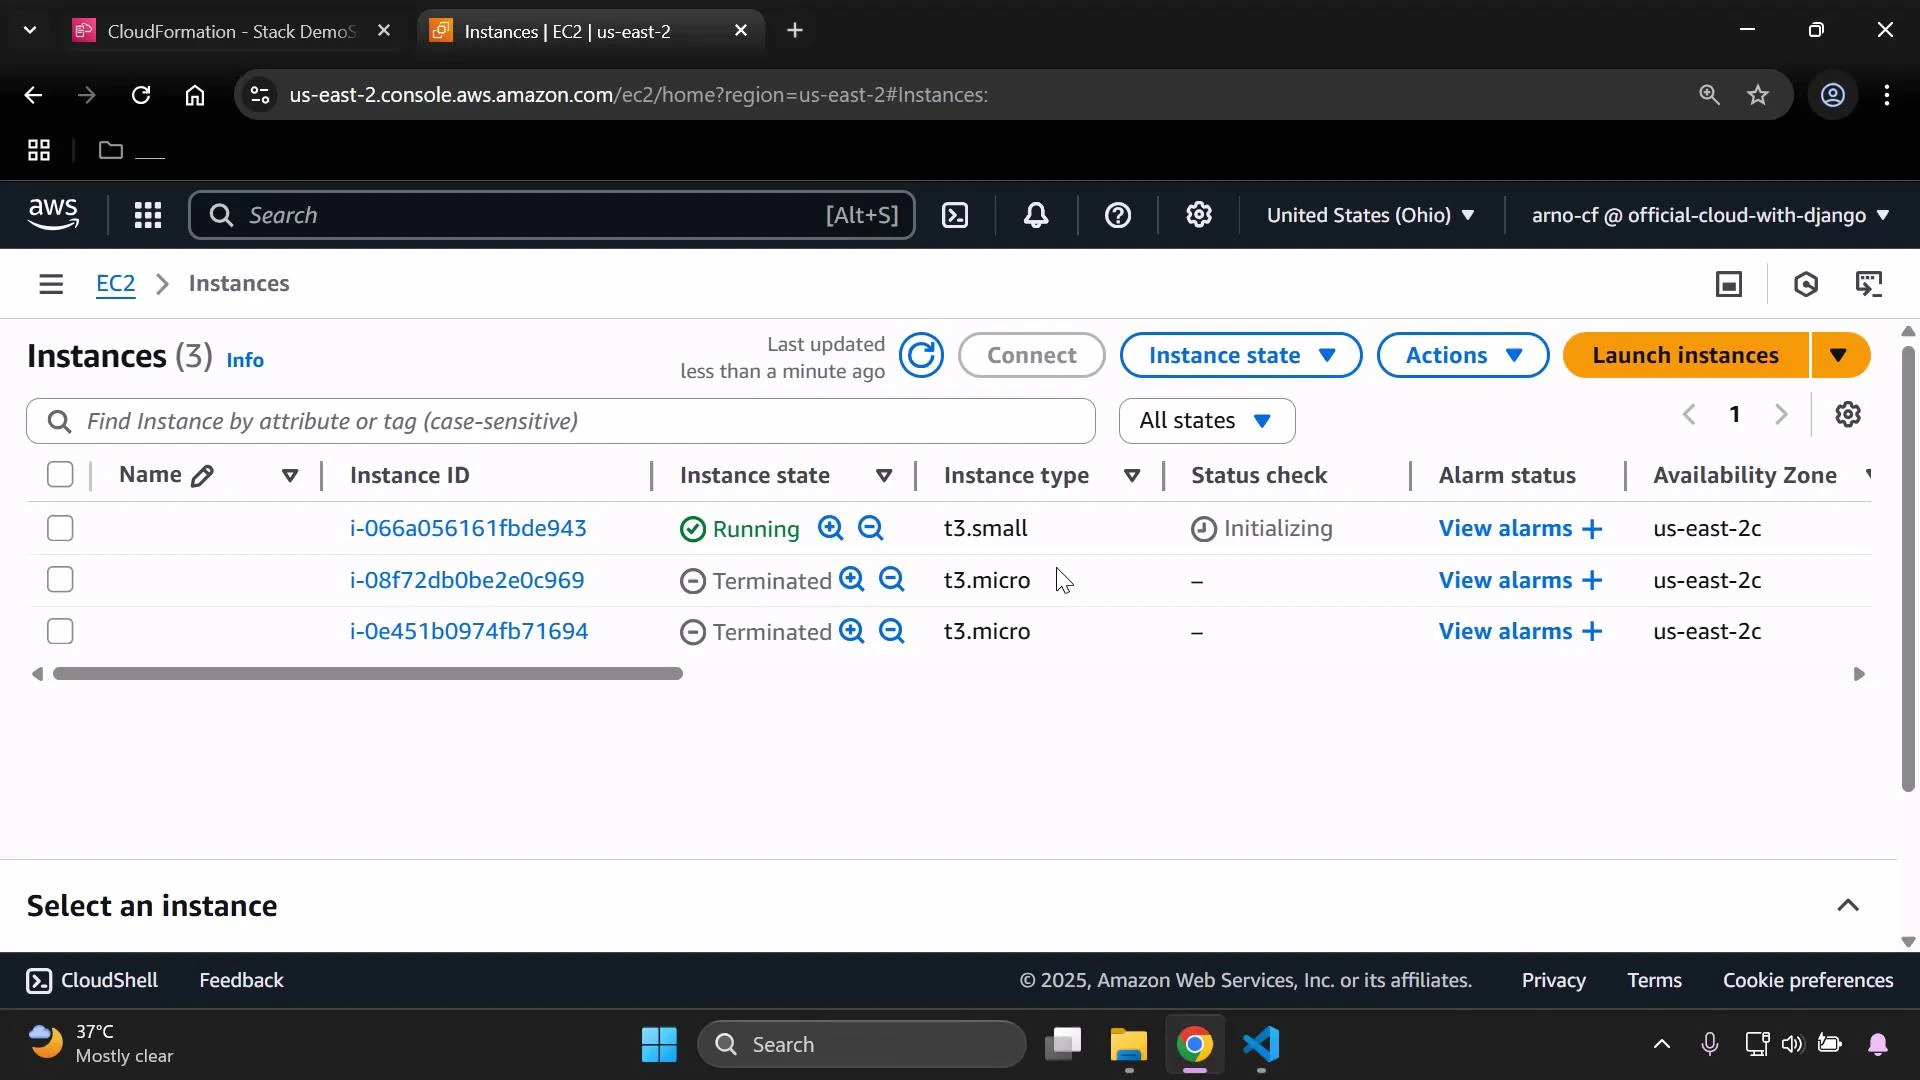
t3.micro) — CloudFormation will apply the update and change the instance accordingly.

Viewing the template and Metadata

Auditors and operators can view the template and the Metadata you added from the CloudFormation console by selecting the stack and opening the template view.
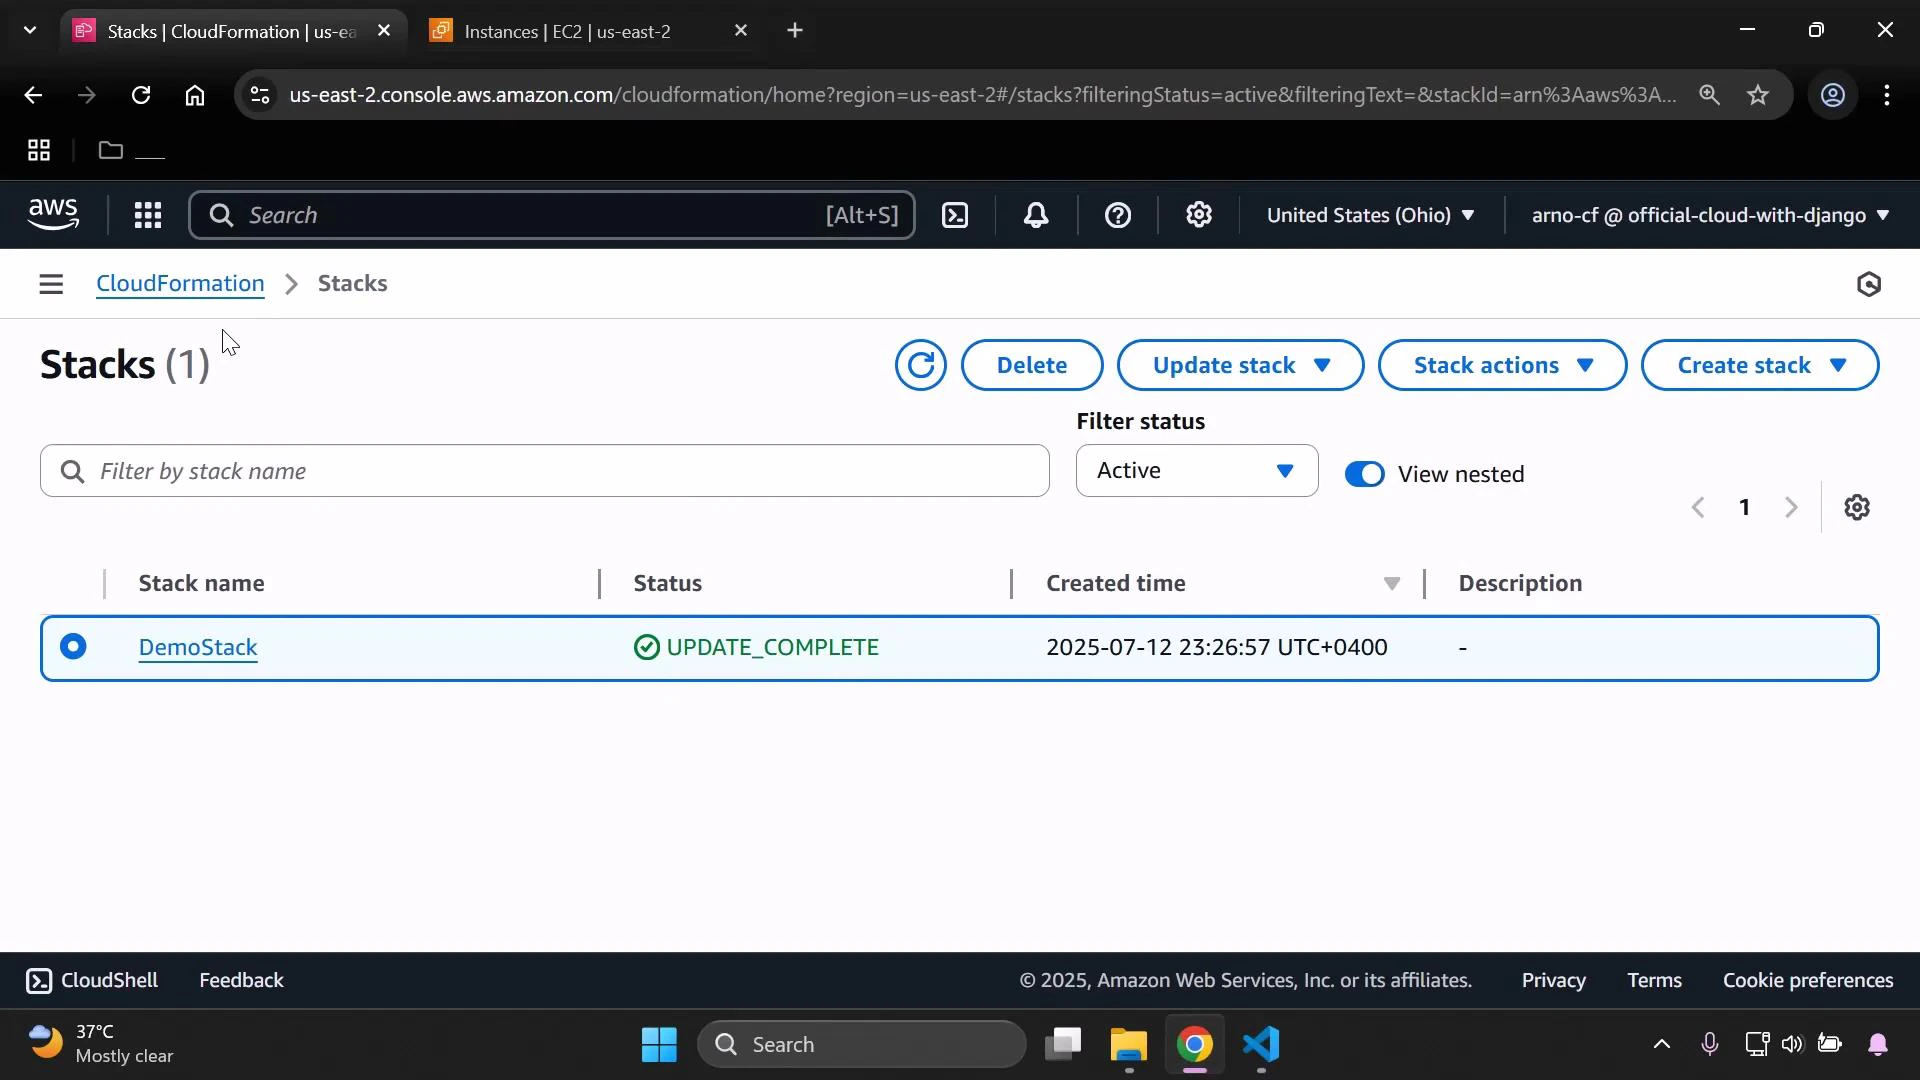
A screenshot of the AWS CloudFormation "Stacks" console. It shows a single stack named "DemoStack" with status "UPDATE_COMPLETE" and a created timestamp.

Summary checklist

  • Add a top-level Metadata section for documentation.
  • Define a Parameter for InstanceType with Description, AllowedValues, and Default.
  • Use !Ref to reference the parameter in the EC2 Instance resource.
  • Upload the template or provide an S3 URL in the CloudFormation console.
  • Select the desired InstanceType during stack creation/update and verify the result in EC2.
Further reading:

Watch Video