This walkthrough shows how to build a simple continuous-delivery pipeline that deploys a CloudFormation template stored in S3. The pipeline uses CodePipeline as the orchestrator and CloudFormation as the deploy provider. End result: CodePipeline pulls a ZIP artifact from S3, CloudFormation extracts the template inside the ZIP, and CloudFormation creates the resources (an EC2 instance in this demo). What you’ll do in this demo:
  • Create an S3 bucket (with versioning enabled) to store CloudFormation artifacts.
  • Upload a zipped CloudFormation template to S3.
  • Create an IAM role CloudFormation can assume to provision resources.
  • Create a CodePipeline that uses the S3 artifact as Source and CloudFormation as Deploy.
  • Verify the resulting CloudFormation stack and EC2 instance.
Step-by-step details follow.

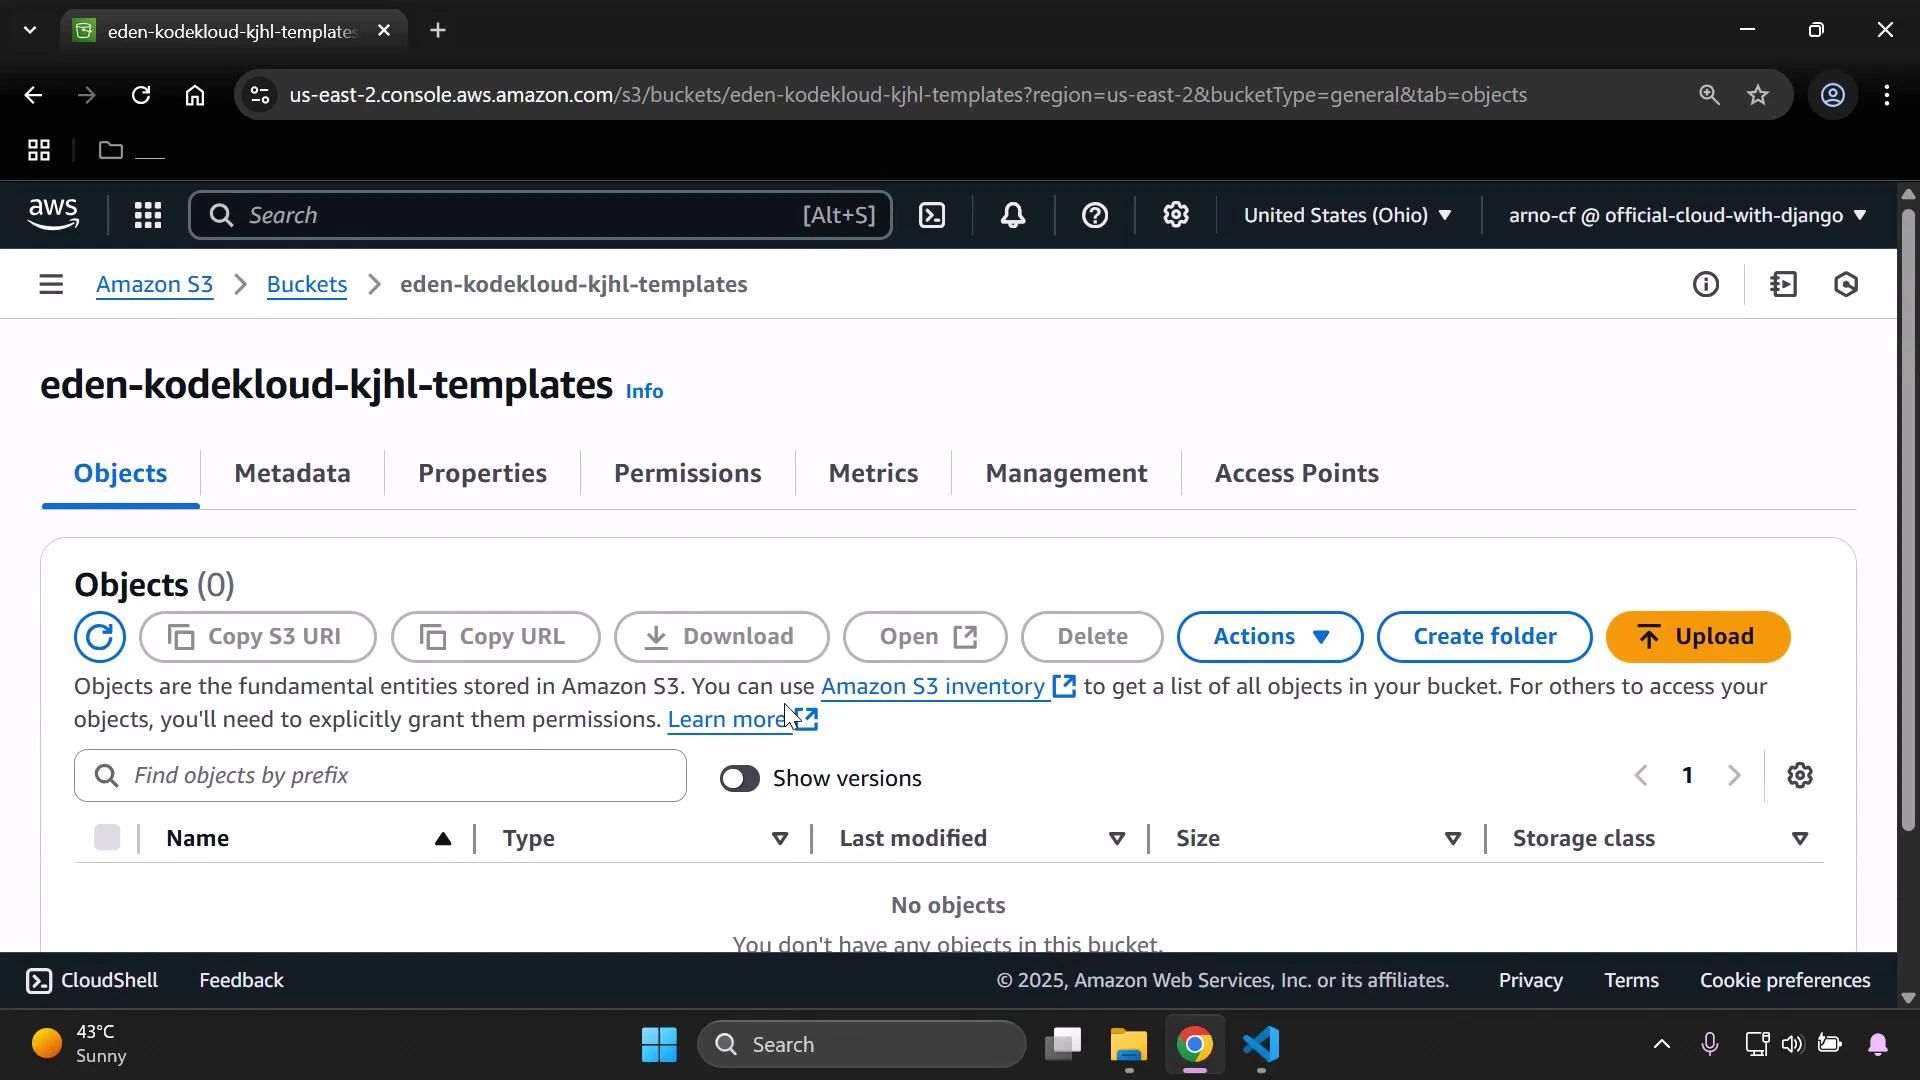
1 — Create an S3 bucket for pipeline artifacts

Create a dedicated bucket to hold CloudFormation templates/artifacts. CodePipeline benefits from object versioning so it can reference specific object versions for each release.
A screenshot of the AWS S3 "Create bucket" console showing the "General purpose" bucket type selected and a bucket name field filled with "eden-kodekloud-kjhl-templa". The page also shows an option to copy settings from an existing bucket and a "Choose bucket" button.
Enable versioning on the bucket before using it as a pipeline source.
A screenshot of the Amazon S3 "Create bucket" console showing the Bucket Versioning section with the "Enable" option selected. The Tags (optional) section is visible below along with the console header and navigation.
After creating the bucket, open it and confirm it is empty (ready for upload).
A screenshot of the Amazon S3 console for the bucket "eden-kodekloud-kjhl-templates," showing the Objects tab with a message saying there are no objects. The UI displays controls like Upload, Create folder, Actions, Copy S3 URI, and a search/filter field.

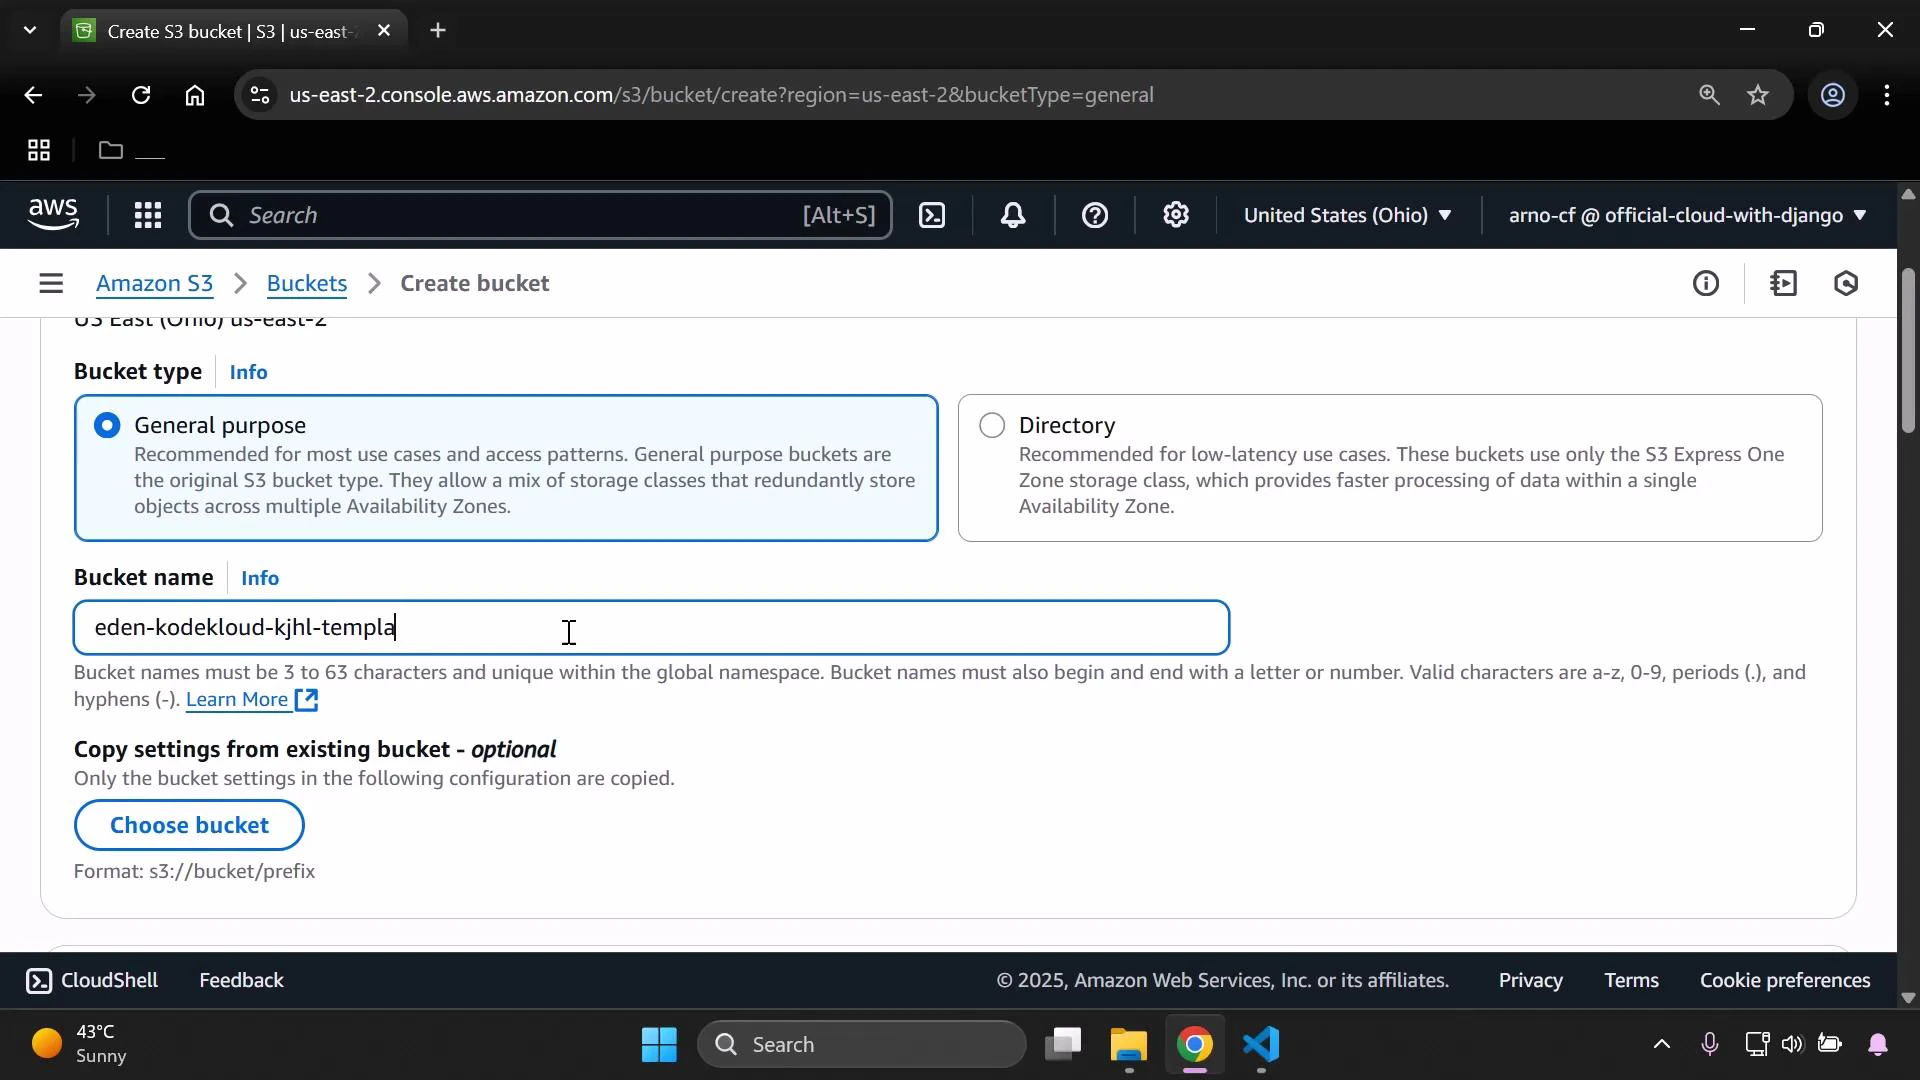
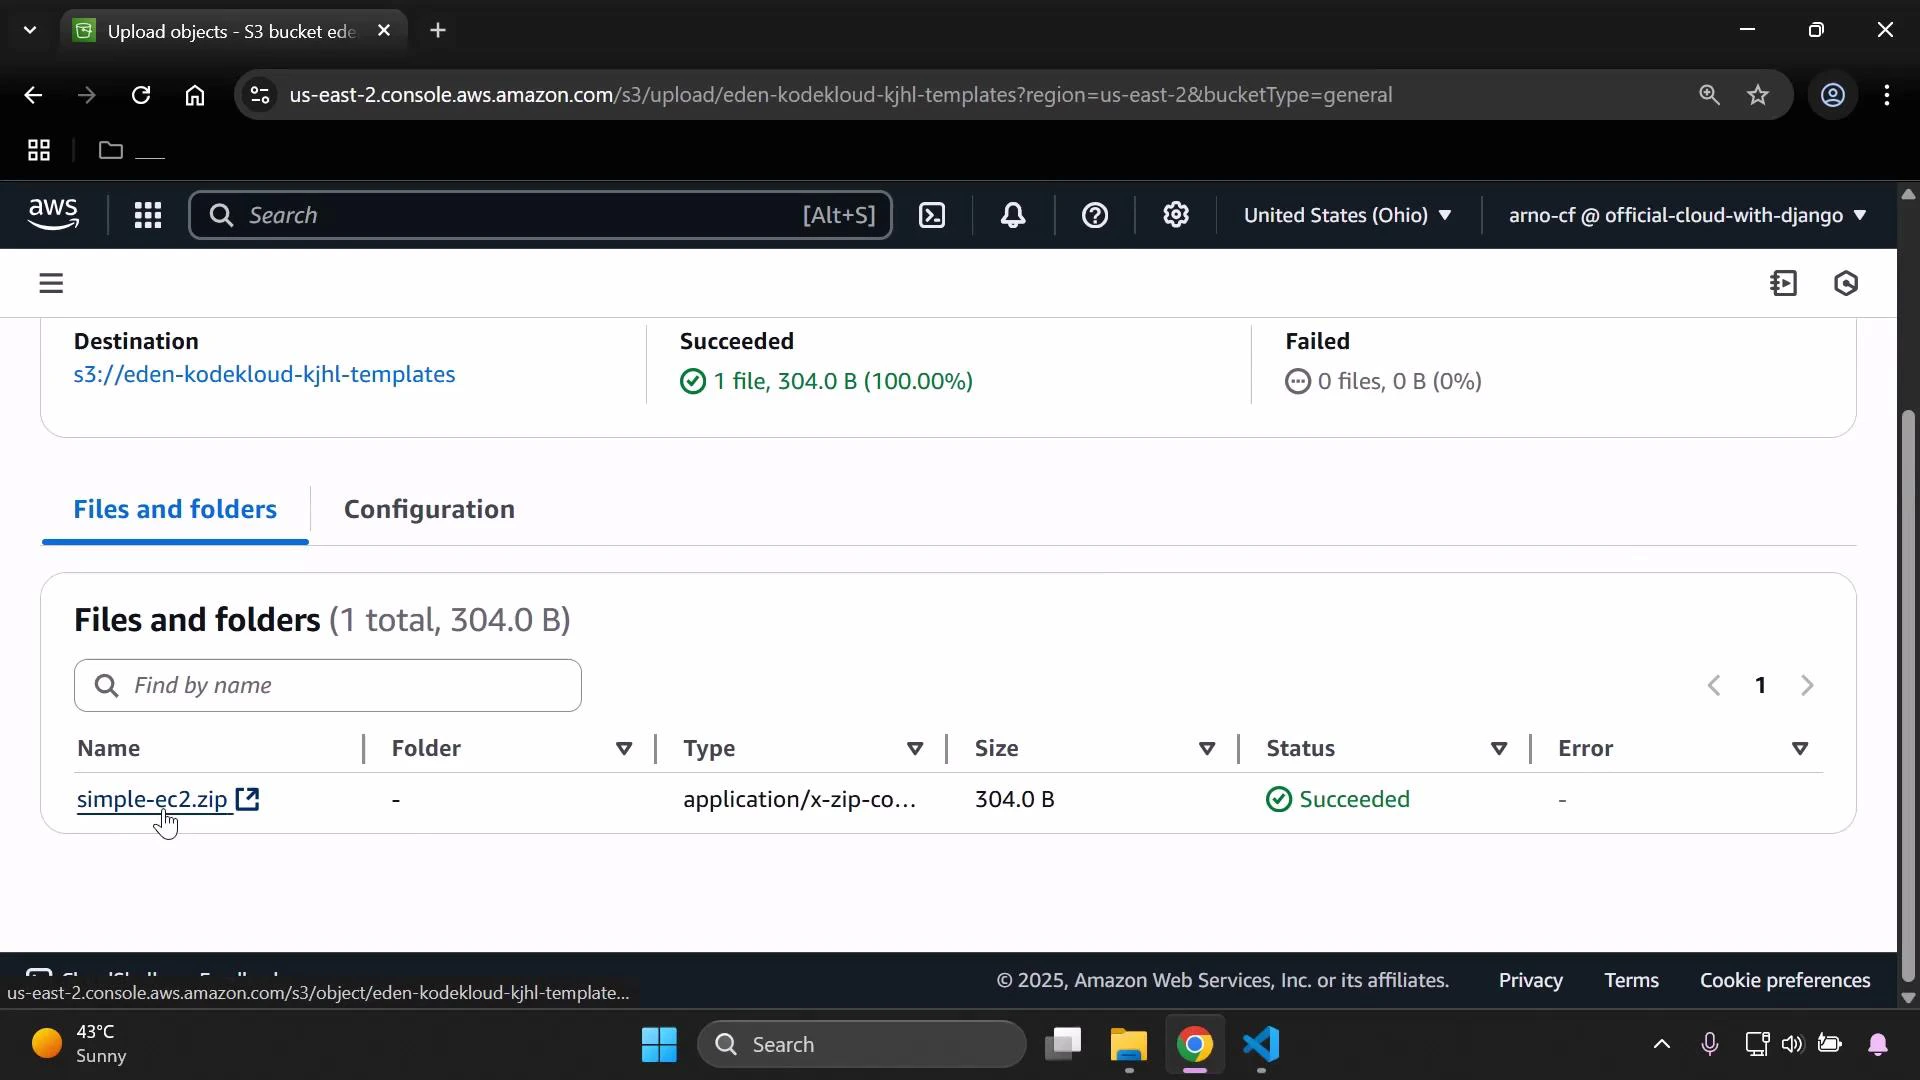
2 — Prepare and upload the CloudFormation artifact

For this demo we use a minimal CloudFormation template that creates a single EC2 instance. Save this content as simple-ec2.yaml:
Resources:
  MyInstance:
    Type: AWS::EC2::Instance
    Properties:
      InstanceType: t3.small
      ImageId: ami-0eb9d6fc9fab44d24
Zip the template (for example: simple-ec2.zip). The pipeline Source artifact will be the ZIP file uploaded to S3.
A Windows File Explorer window in dark mode showing the "cf-project" folder. The right pane lists CloudFormation-related YAML/JSON files (e.g., simple-ec2, s3-bucket, cfn-init) while the left pane shows common folders and navigation.
Upload the ZIP to your S3 bucket. After upload you should see the file listed, e.g. simple-ec2.zip.
A screenshot of the AWS S3 console showing a successful upload to the bucket s3://eden-kodekloud-kjhl-templates. The file "simple-ec2.zip" (304.0 B) is listed in the Files and folders pane with status "Succeeded."

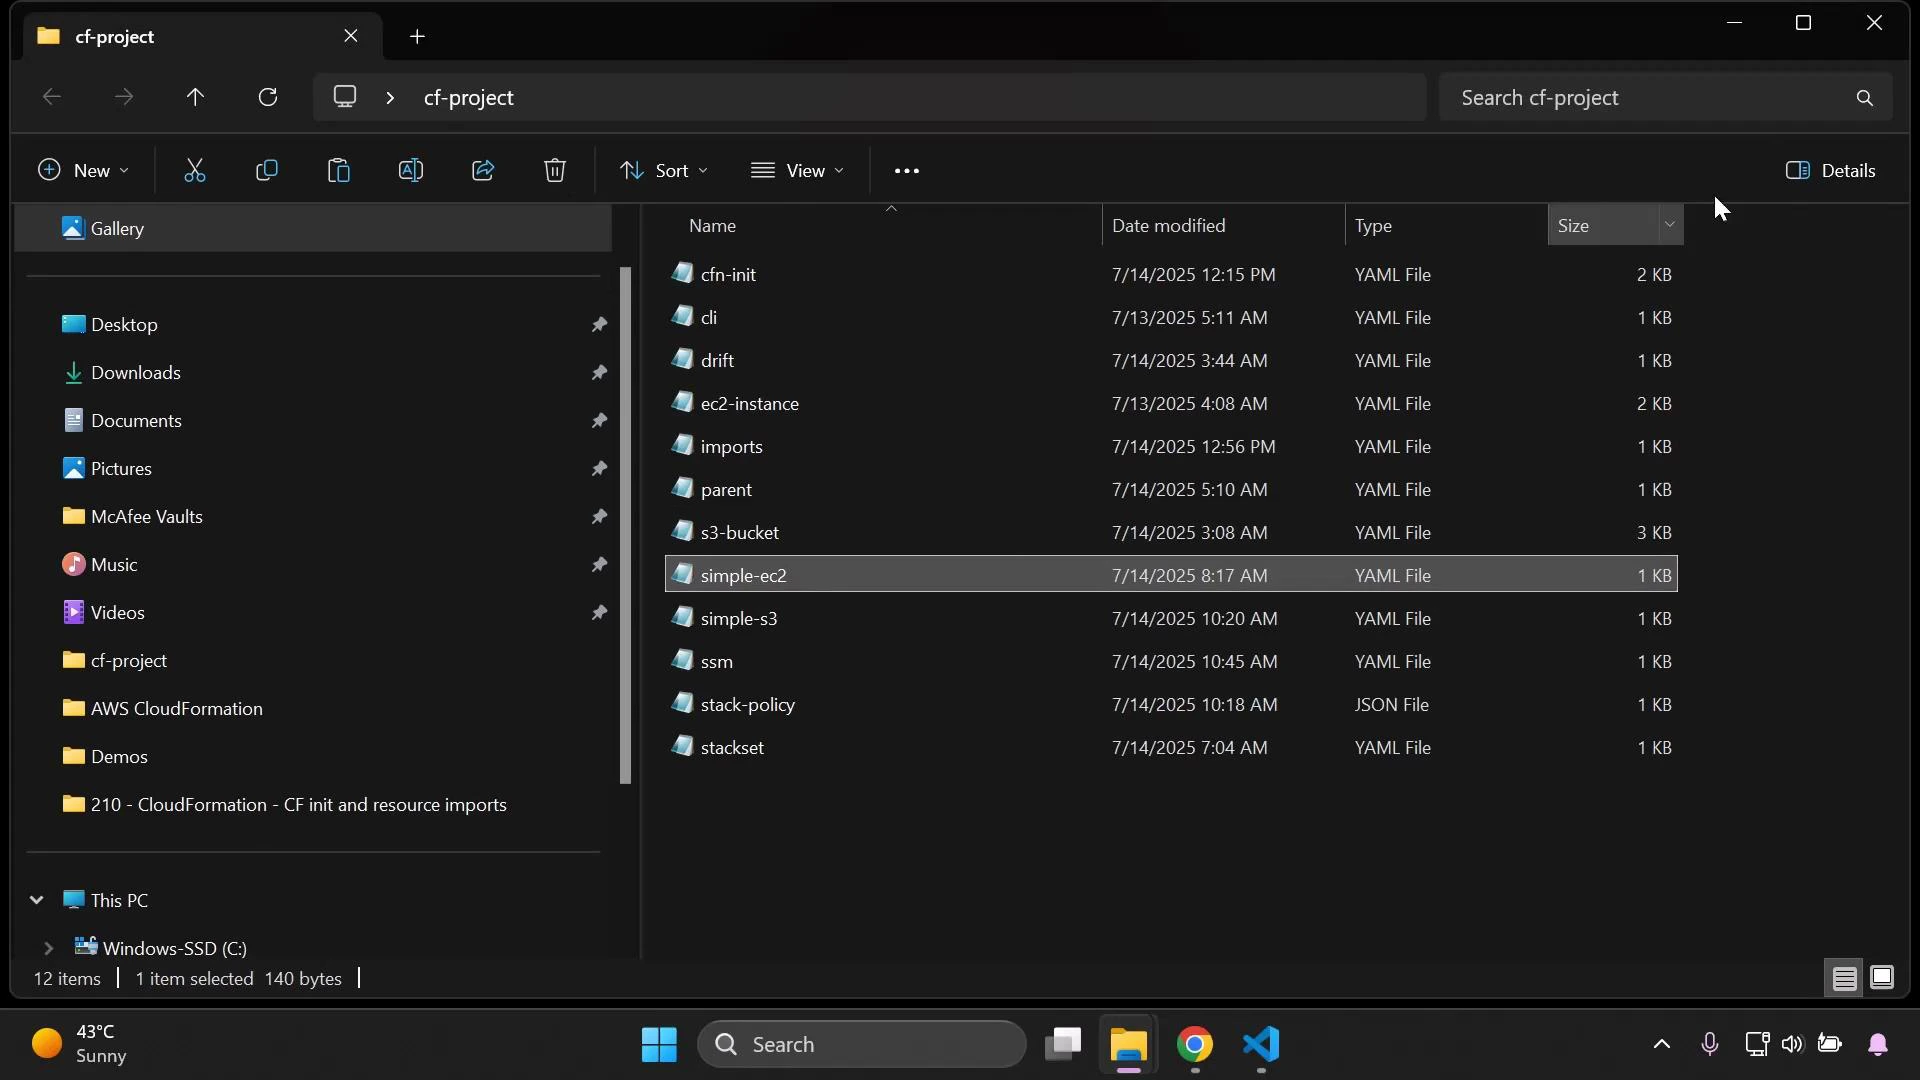
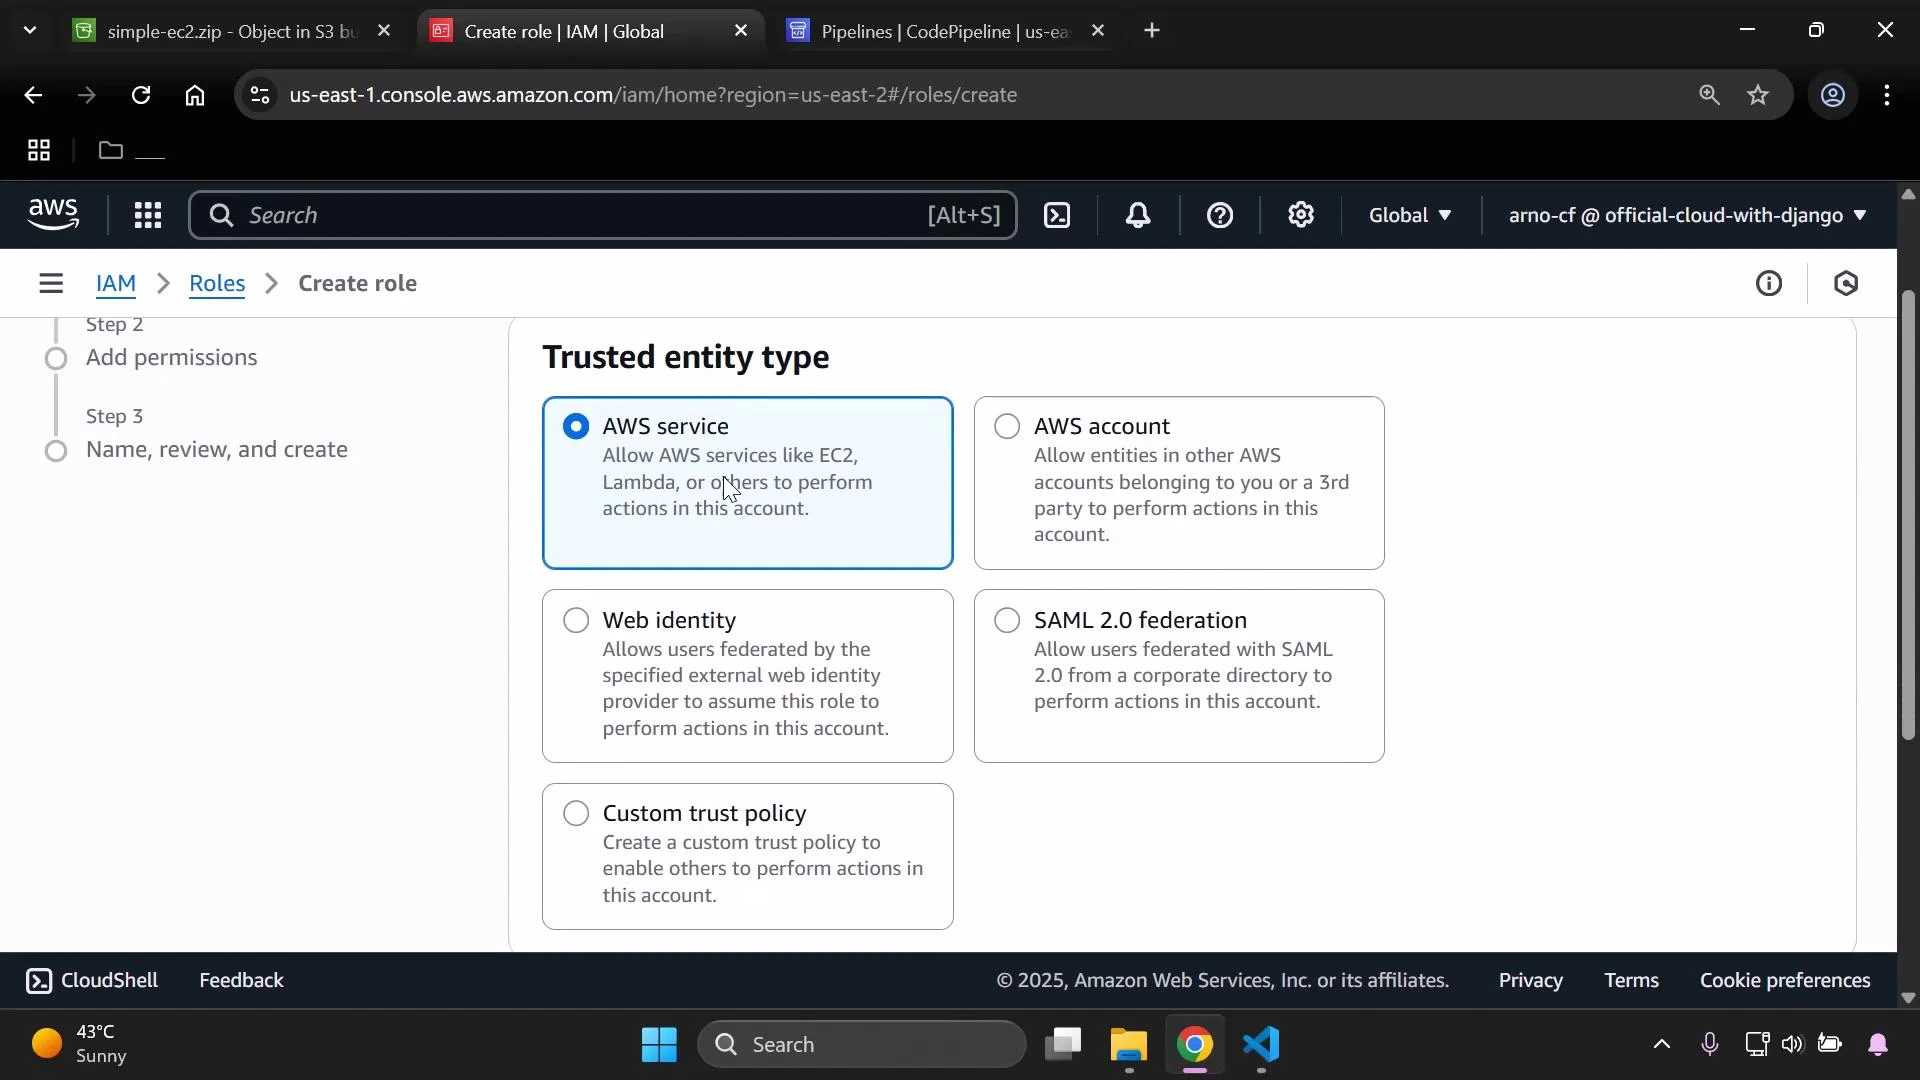
3 — Create an IAM role CloudFormation can assume

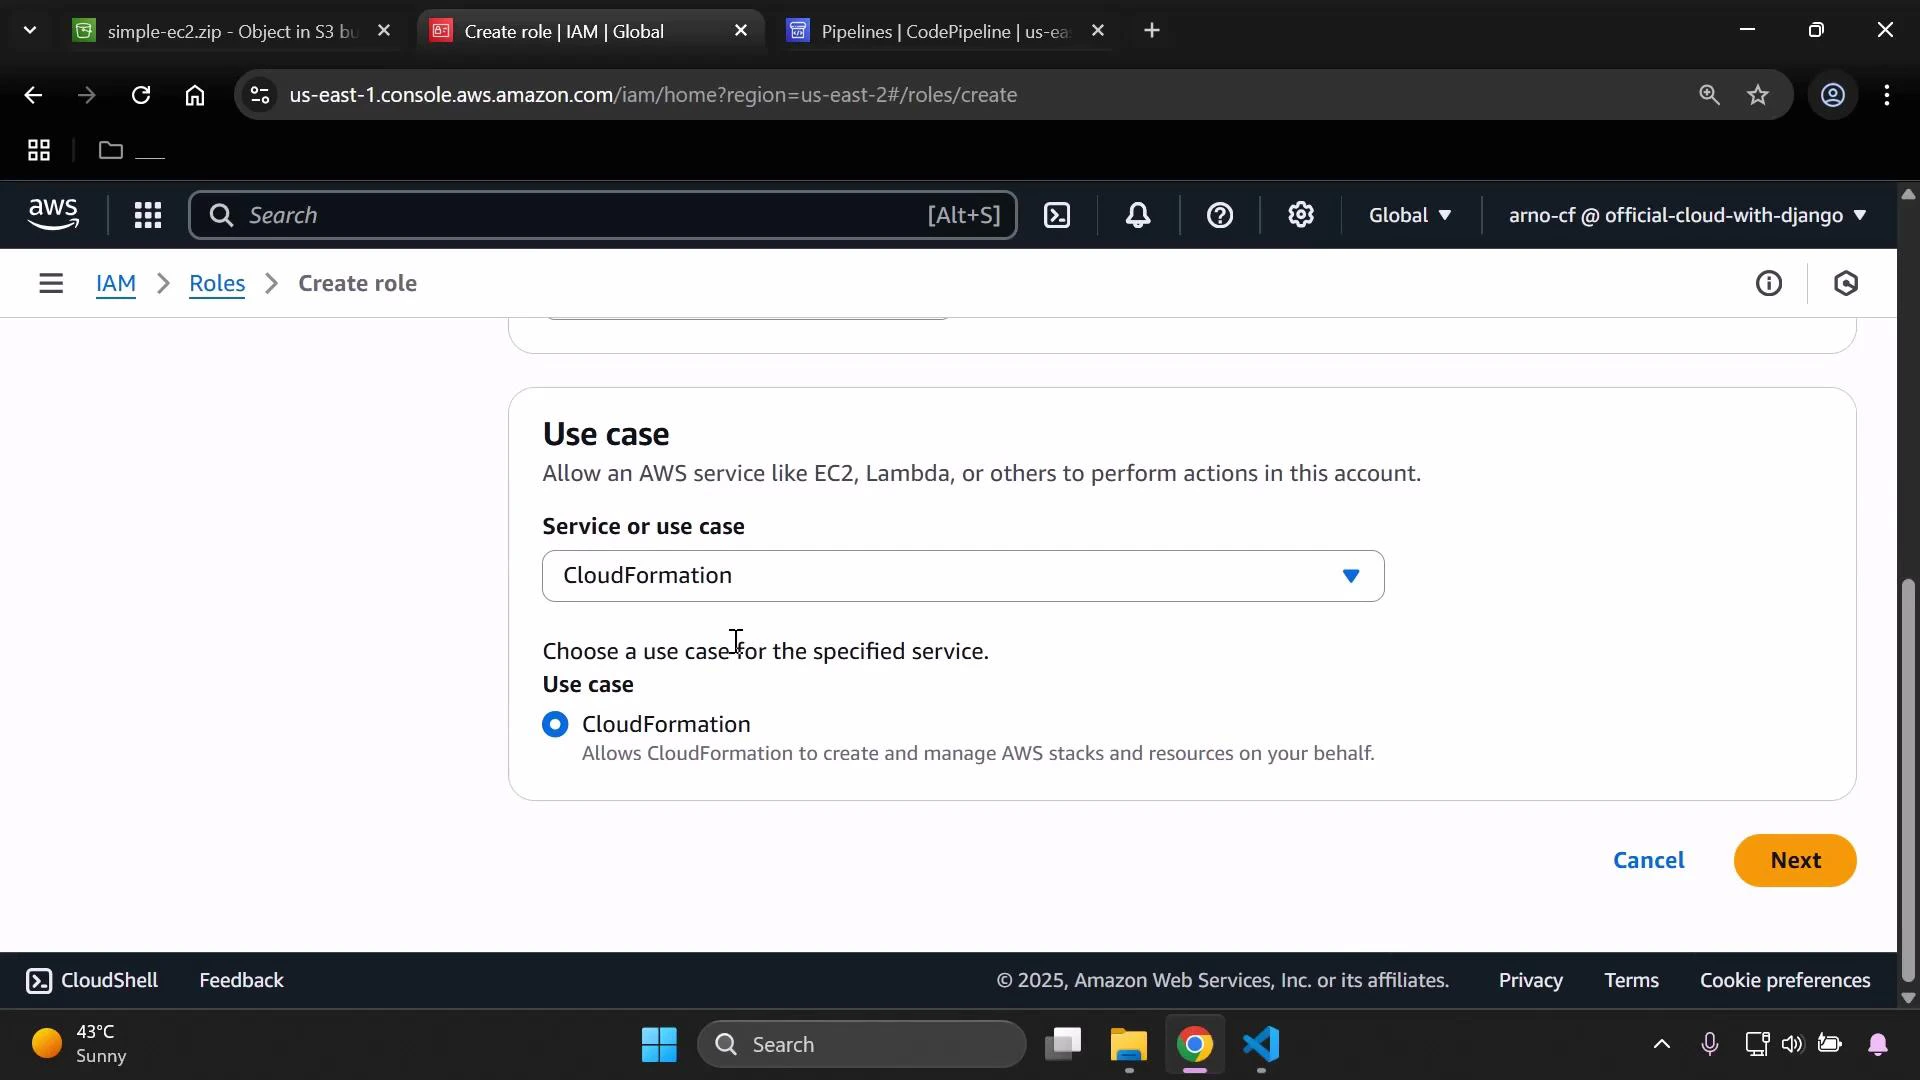
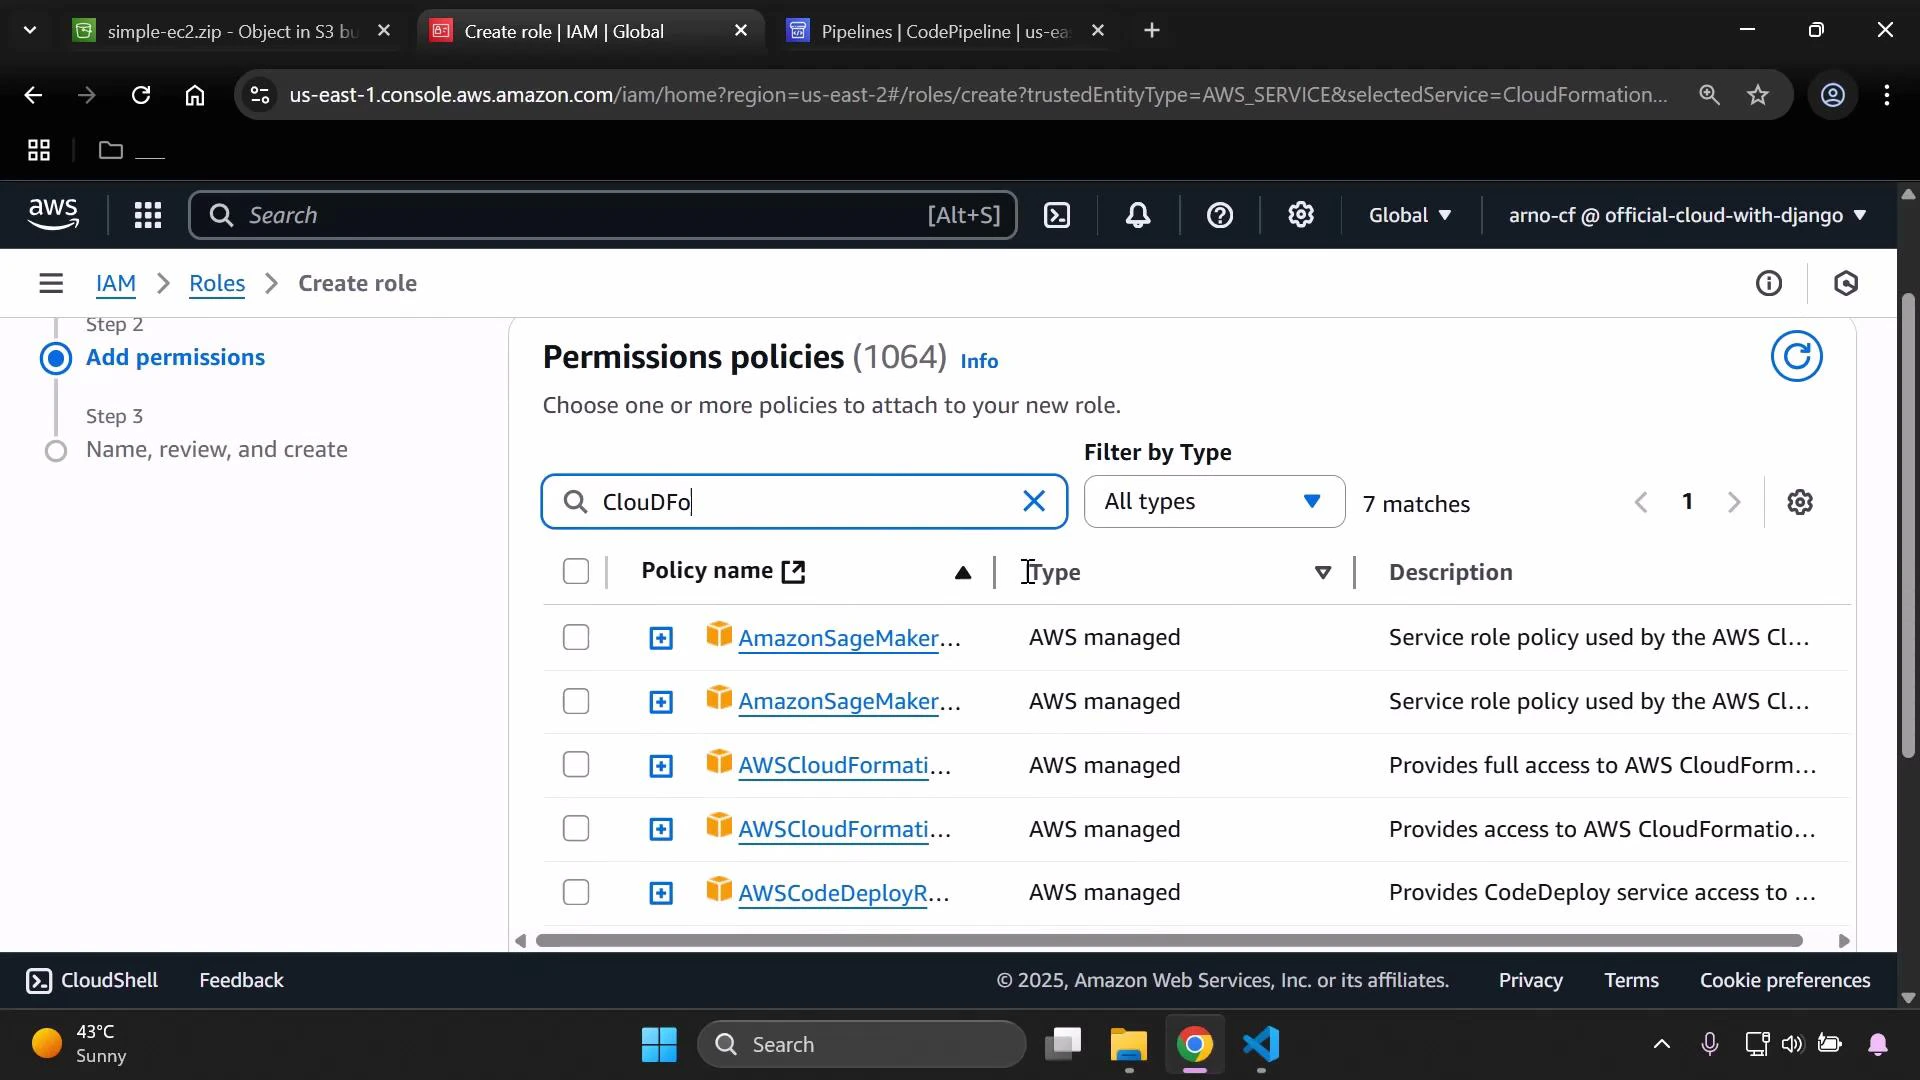
CloudFormation needs an execution role to create resources on your behalf. Create an IAM role with a trust policy allowing CloudFormation to assume the role, and attach the required policies (for this demo we attach CloudFormation and EC2 full access). Open IAM and create a new role:
  • Trusted entity: AWS service
  • Use case: CloudFormation
A screenshot of the AWS IAM "Create role" page showing the Trusted entity type options with "AWS service" selected. The browser tabs and Windows taskbar are also visible.
Proceed to Add permissions and attach the managed policies needed for CloudFormation to create EC2 instances (example policies: AWSCloudFormationFullAccess, AmazonEC2FullAccess).
A screenshot of the AWS IAM "Create role" console showing the "Use case" section with CloudFormation selected as the service/use case. The page shows the CloudFormation radio option, a dropdown for Service or use case, and Cancel/Next buttons.
Search and select the appropriate managed policies.
A screenshot of the AWS IAM console on the "Create role" -> "Add permissions" step, showing the "Permissions policies" list with a search for "CloudFo" and several AWS-managed policies (like AWSCloudFormation) listed. The browser window and taskbar are visible at the top and bottom of the screen.
Give the role a descriptive name (for example: PipelineForCFAndEC2) and an optional description. The role trust policy should allow CloudFormation to assume it; example trust policy:
{
  "Version": "2012-10-17",
  "Statement": [
    {
      "Sid": "",
      "Effect": "Allow",
      "Principal": {
        "Service": "cloudformation.amazonaws.com"
      },
      "Action": "sts:AssumeRole"
    }
  ]
}
Create the role when permissions and trust are configured.
A browser screenshot of the AWS Management Console showing the IAM "Create role" page where a role name "PipelineForCFAn..." is being entered and a description about CloudFormation is visible. The left panel shows the step progress (Select trusted entity → Add permissions → Name, review, and create).

4 — Create the CodePipeline

Open CodePipeline and create a new pipeline (use the wizard and select “Build a custom pipeline”). Choose a name (for example PipelineCF) and decide how to handle the service role (let CodePipeline create a service role or provide an existing role).
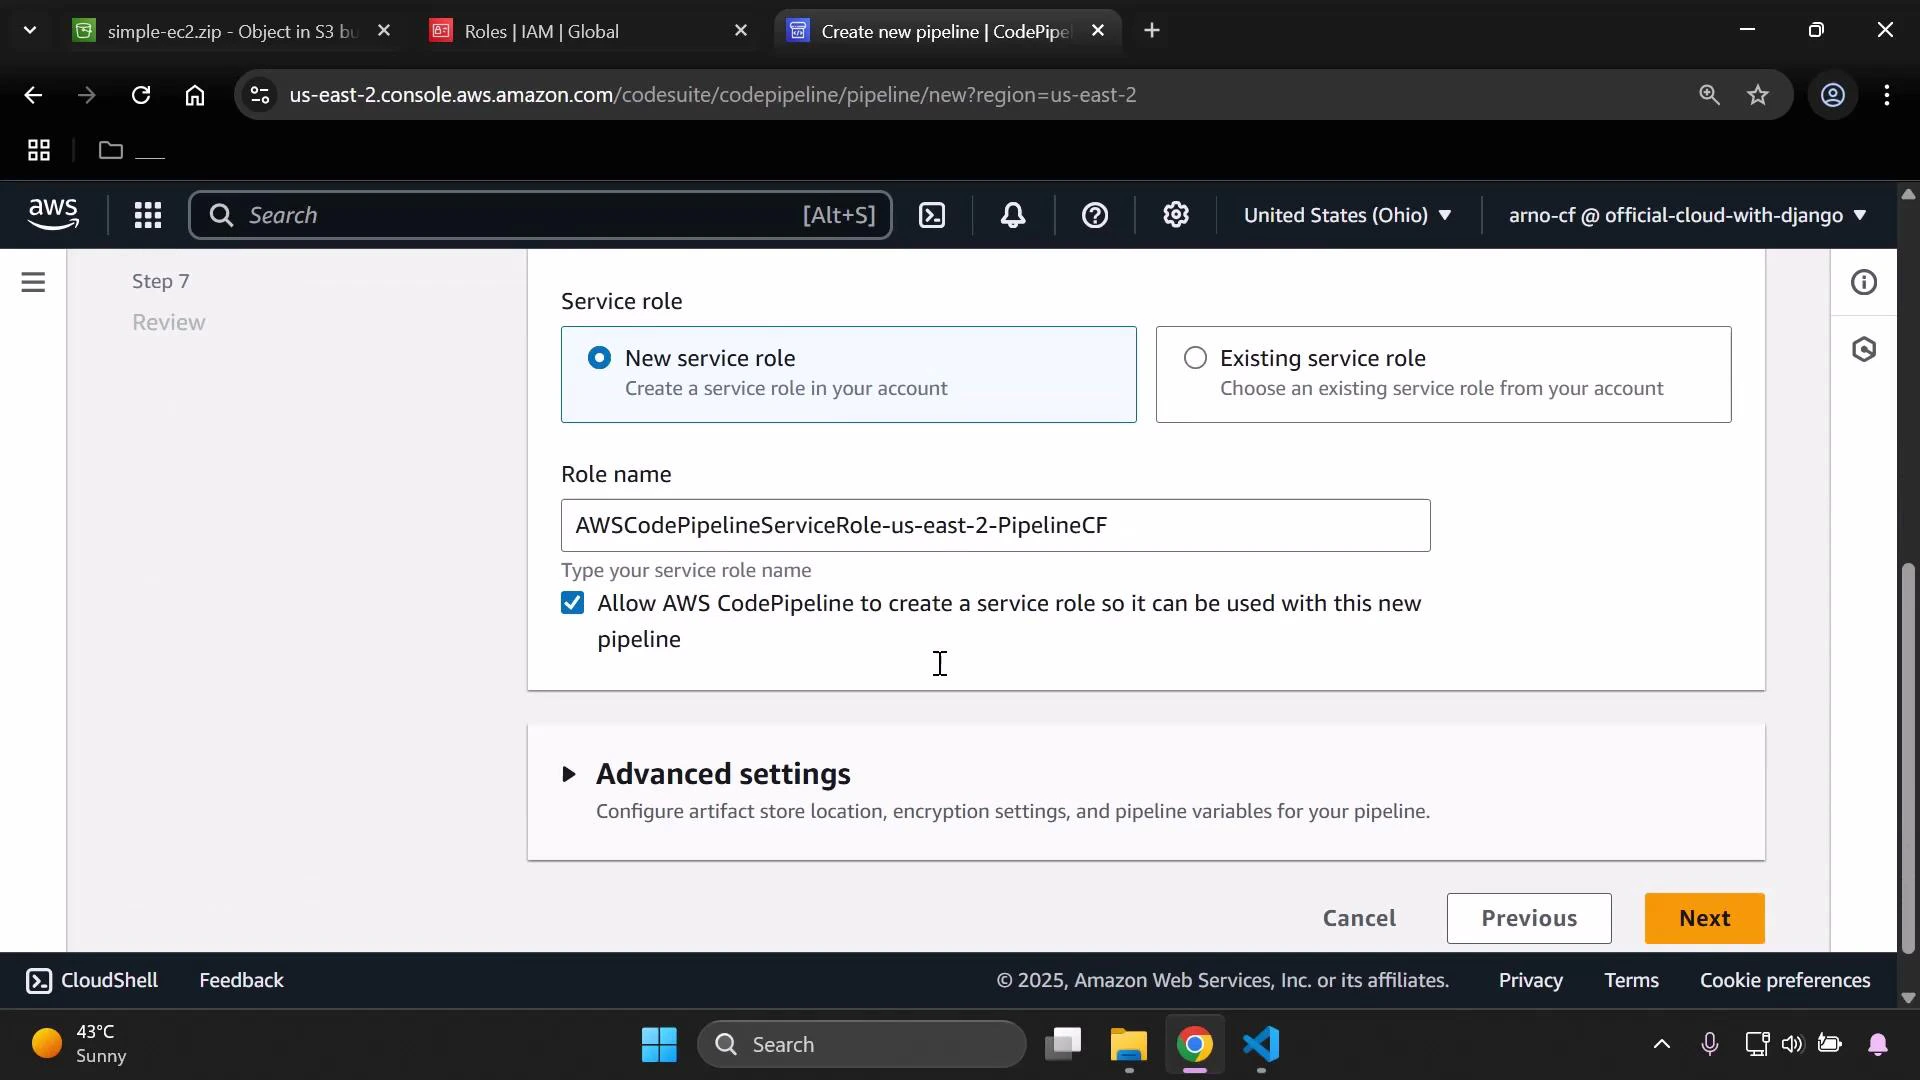
A screenshot of the AWS CodePipeline "Create new pipeline" page showing the Service role section with "New service role" selected and a role name filled in (AWSCodePipelineServiceRole-us-east-2-PipelineCF). The page also displays an option to let CodePipeline create the role, an "Advanced settings" panel, and navigation buttons (Previous, Next).
Configure pipeline stages:
  • Source
    • Provider: Amazon S3
    • Bucket: the bucket you created
    • Object key: the S3 object key for simple-ec2.zip (the ZIP you uploaded)
  • Skip Build and Test stages if not required
  • Deploy
    • Provider: AWS CloudFormation
    • Region: the region where you want resources created (example: us-east-2)
    • Action mode: Create/Replace stack (or Create stack when creating a new stack)
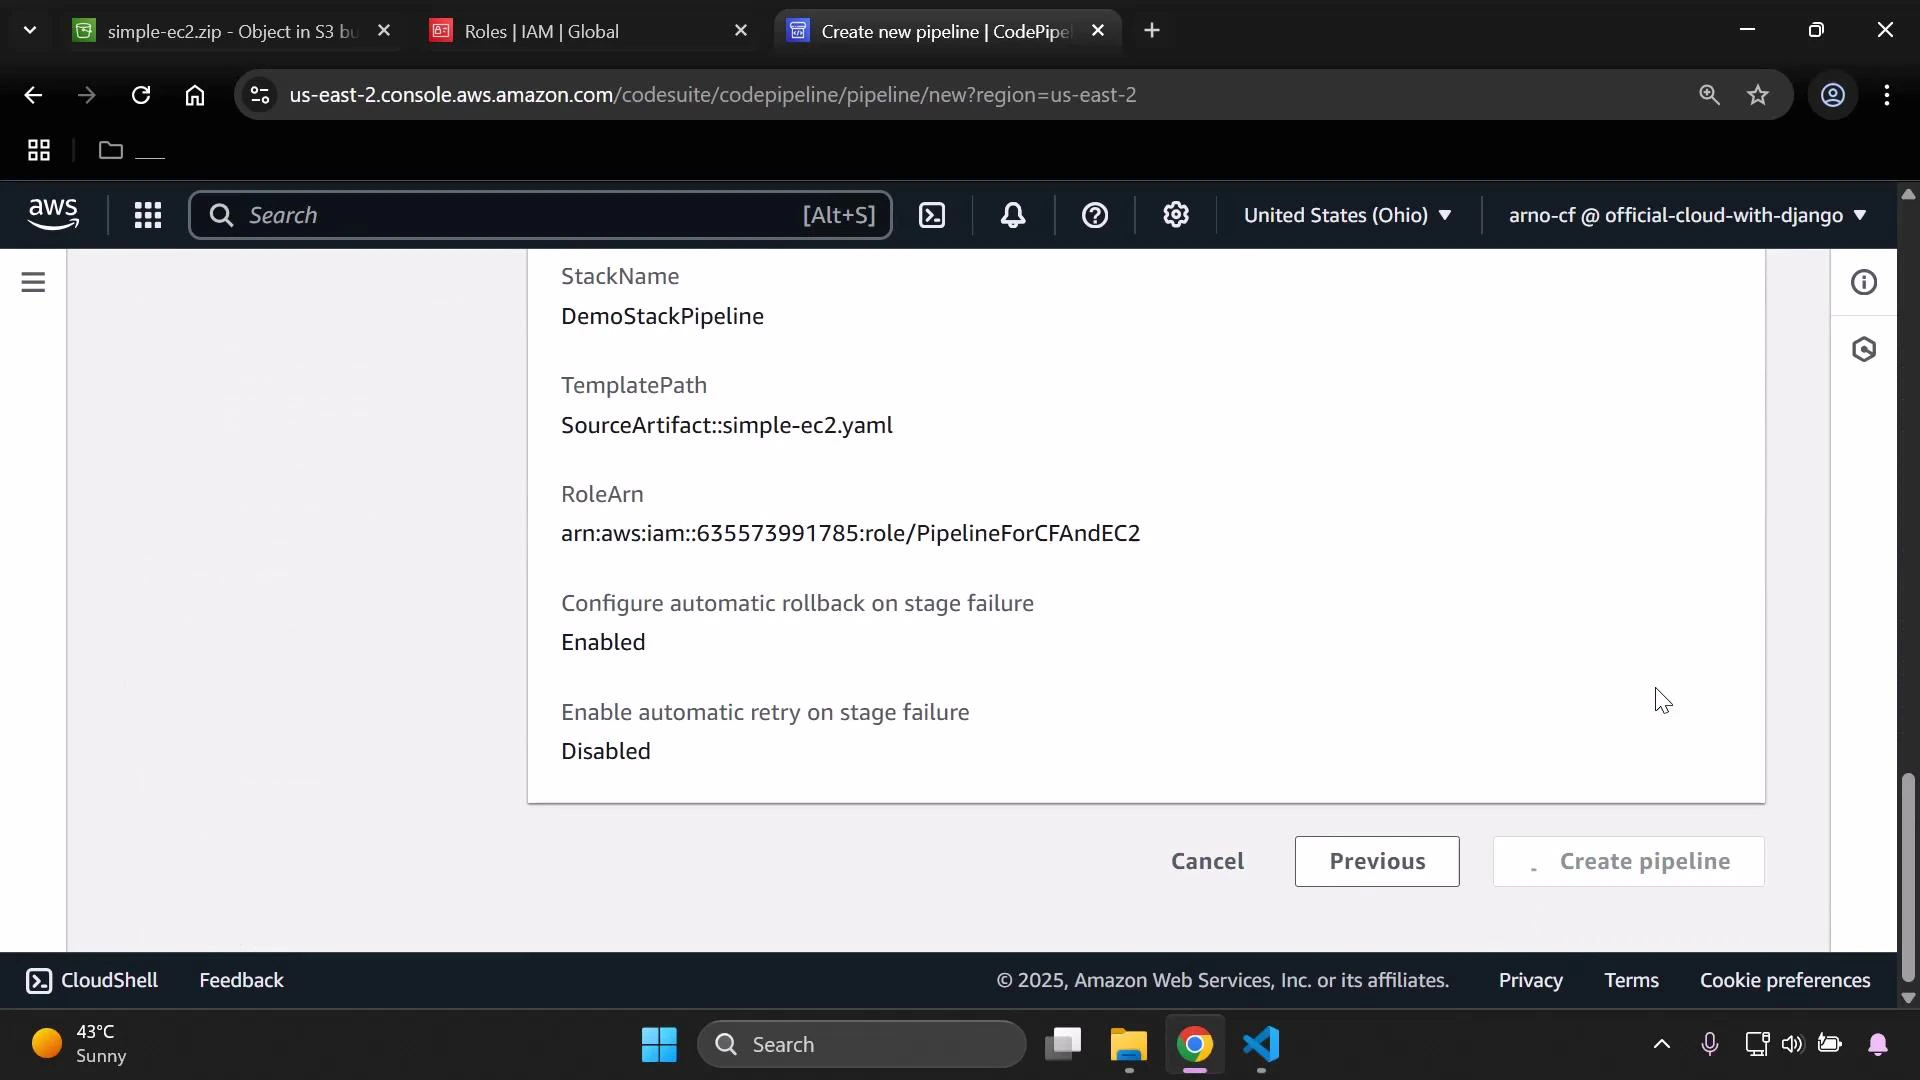
    • Stack name: choose a name (e.g., DemoStackPipeline)
    • Template file: path inside the ZIP to the template (format: SourceArtifact::simple-ec2.yaml)
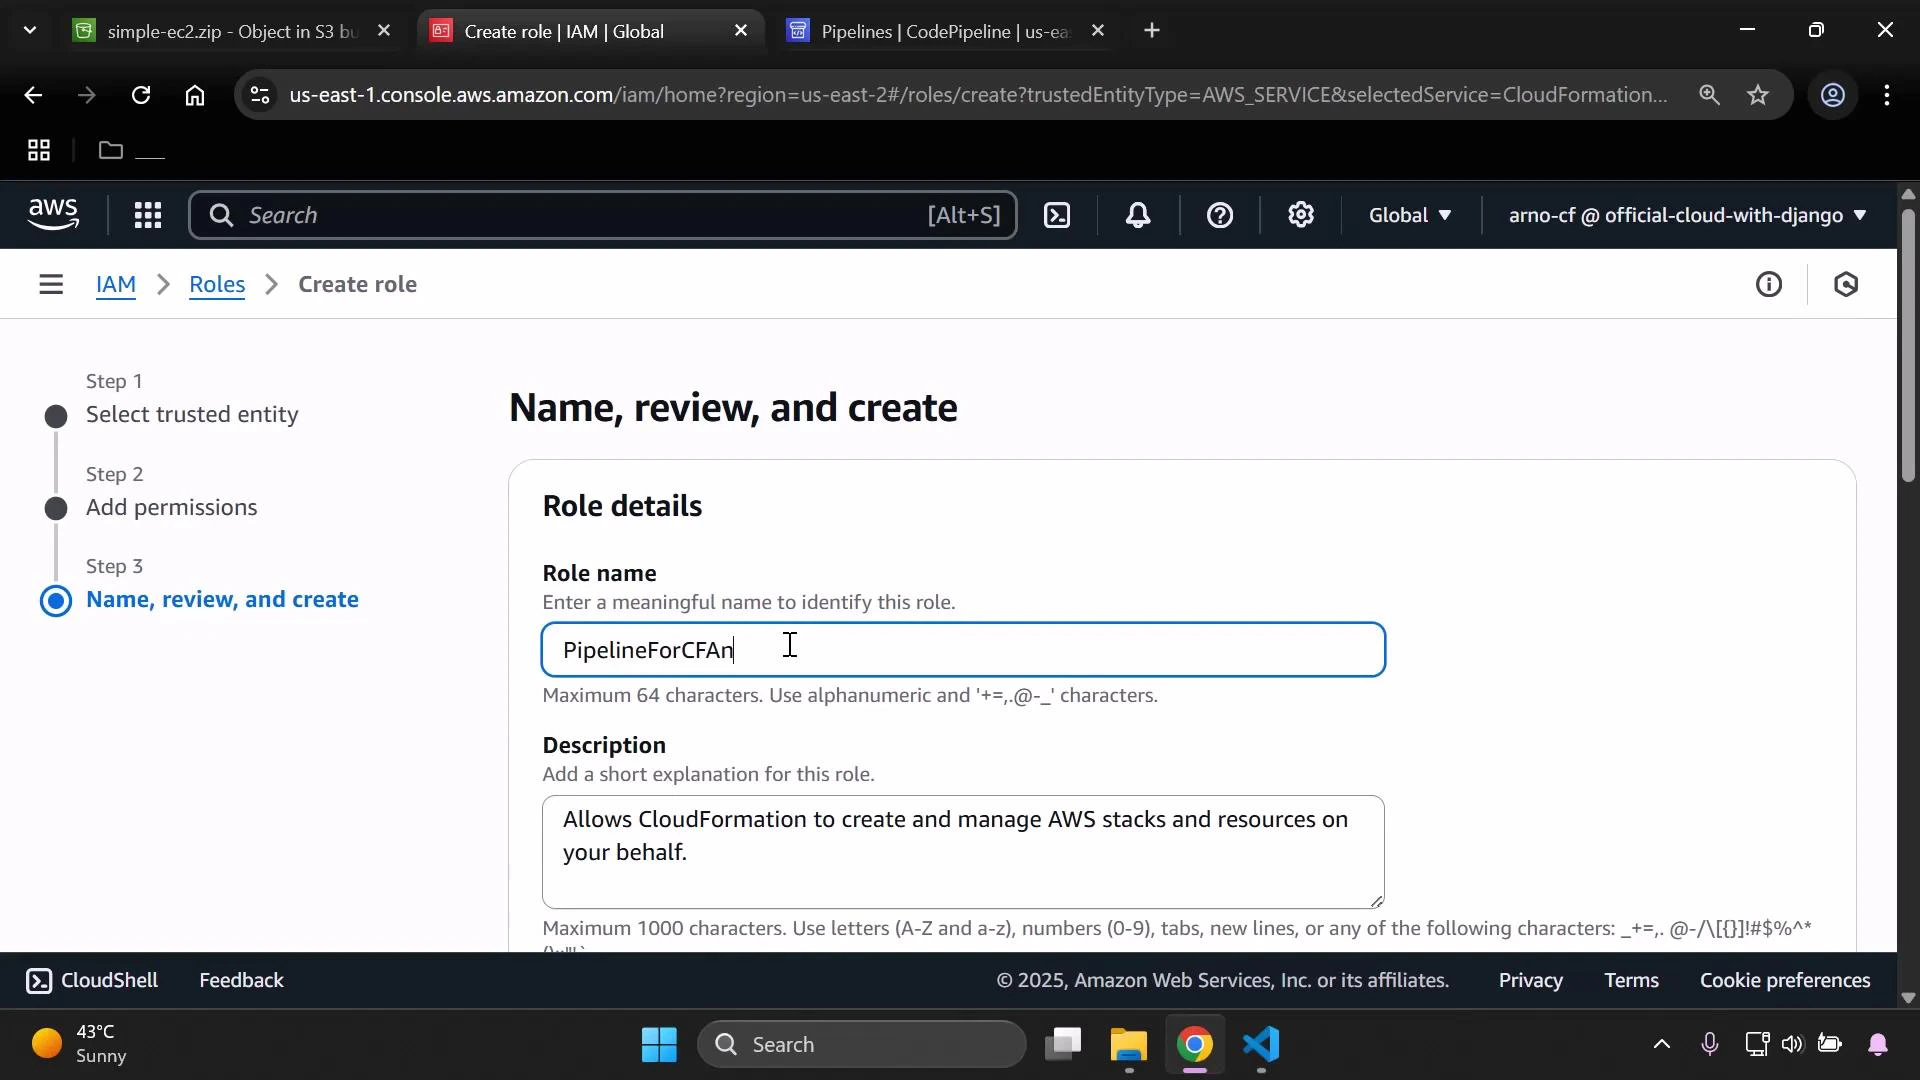
    • Role: choose the IAM role you created for CloudFormation (PipelineForCFAndEC2)
Specifying TemplatePath as SourceArtifact::simple-ec2.yaml instructs CloudFormation to extract simple-ec2.yaml from the source ZIP artifact and use it as the stack template. When you review and create the pipeline, CodePipeline will automatically start the first release: it downloads the ZIP from S3, extracts the template, and triggers CloudFormation.
A screenshot of the AWS CodePipeline "Create new pipeline" confirmation screen showing pipeline details: StackName "DemoStackPipeline", TemplatePath "SourceArtifact::simple-ec2.yaml", the IAM Role ARN, automatic rollback enabled and automatic retry disabled. The browser and Windows taskbar are visible around the console.
Monitor the pipeline execution in CodePipeline. Both Source and Deploy stages should show success if everything is configured correctly.
A screenshot of the AWS CodePipeline console showing a pipeline named "PipelineCF" with Source and Deploy stages (both actions succeeded). The top bar shows controls like Edit, Stop execution, Create trigger, Clone pipeline and an orange "Release change" button.

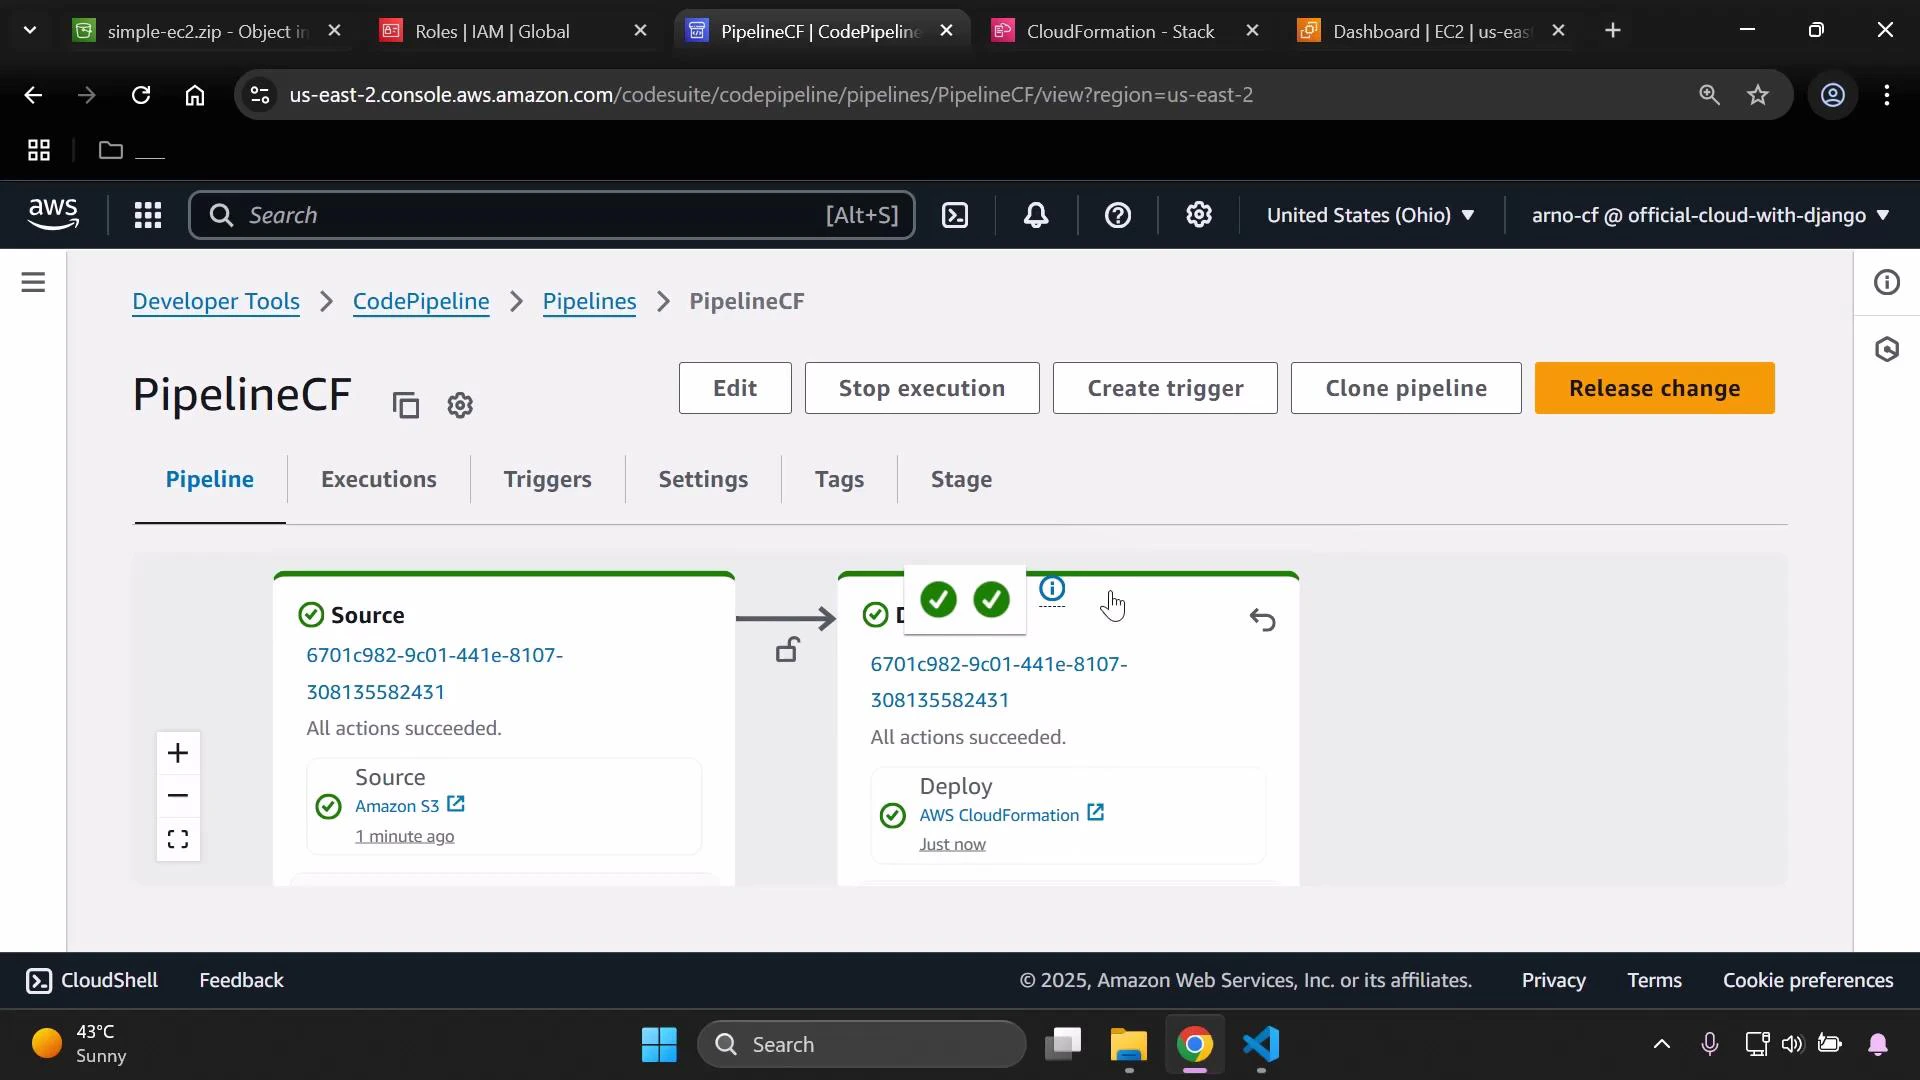
5 — Verify the deployment

  • Open CloudFormation and confirm the stack listed with the Stack name you specified.
  • Open EC2 and verify an instance exists and is in the running state, matching the properties in simple-ec2.yaml.
If the pipeline completed successfully and CloudFormation created the stack and EC2 instance, the end-to-end pipeline is functioning: CodePipeline pulled the ZIP from S3, CloudFormation used the template inside the ZIP, and resources were provisioned.

Quick reference: AWS resources used

ResourcePurposeExample/Notes
S3 bucketStore zipped CloudFormation templates/artifactsEnable versioning for Source artifact tracking
IAM roleCloudFormation execution role (assumed by CloudFormation)Attach AWSCloudFormationFullAccess and AmazonEC2FullAccess (demo)
CodePipelineOrchestrates Source → (Build) → Deploy stagesSource: Amazon S3; Deploy: CloudFormation
CloudFormationCreates and manages the stack/resourcesTemplate path: SourceArtifact::simple-ec2.yaml

Tips and troubleshooting

  • Ensure S3 bucket versioning is enabled so CodePipeline can reference object versions reliably.
  • Confirm the Template file path inside the ZIP matches the TemplatePath you configure in CodePipeline (format: SourceArtifact::file.yaml).
  • If stack creation fails, check CloudFormation events and logs for missing permissions or invalid parameters.
Enable S3 bucket versioning before using the bucket as a pipeline source so CodePipeline can reference and track specific object versions.
AMI IDs (ImageId) are region-specific. If the AMI in the template is not available in your target region, the CloudFormation stack will fail. Use a region-appropriate AMI or implement a parameterized AMI lookup.
That’s it — you now have a continuous-delivery pipeline that deploys a CloudFormation template stored in S3.

Watch Video