

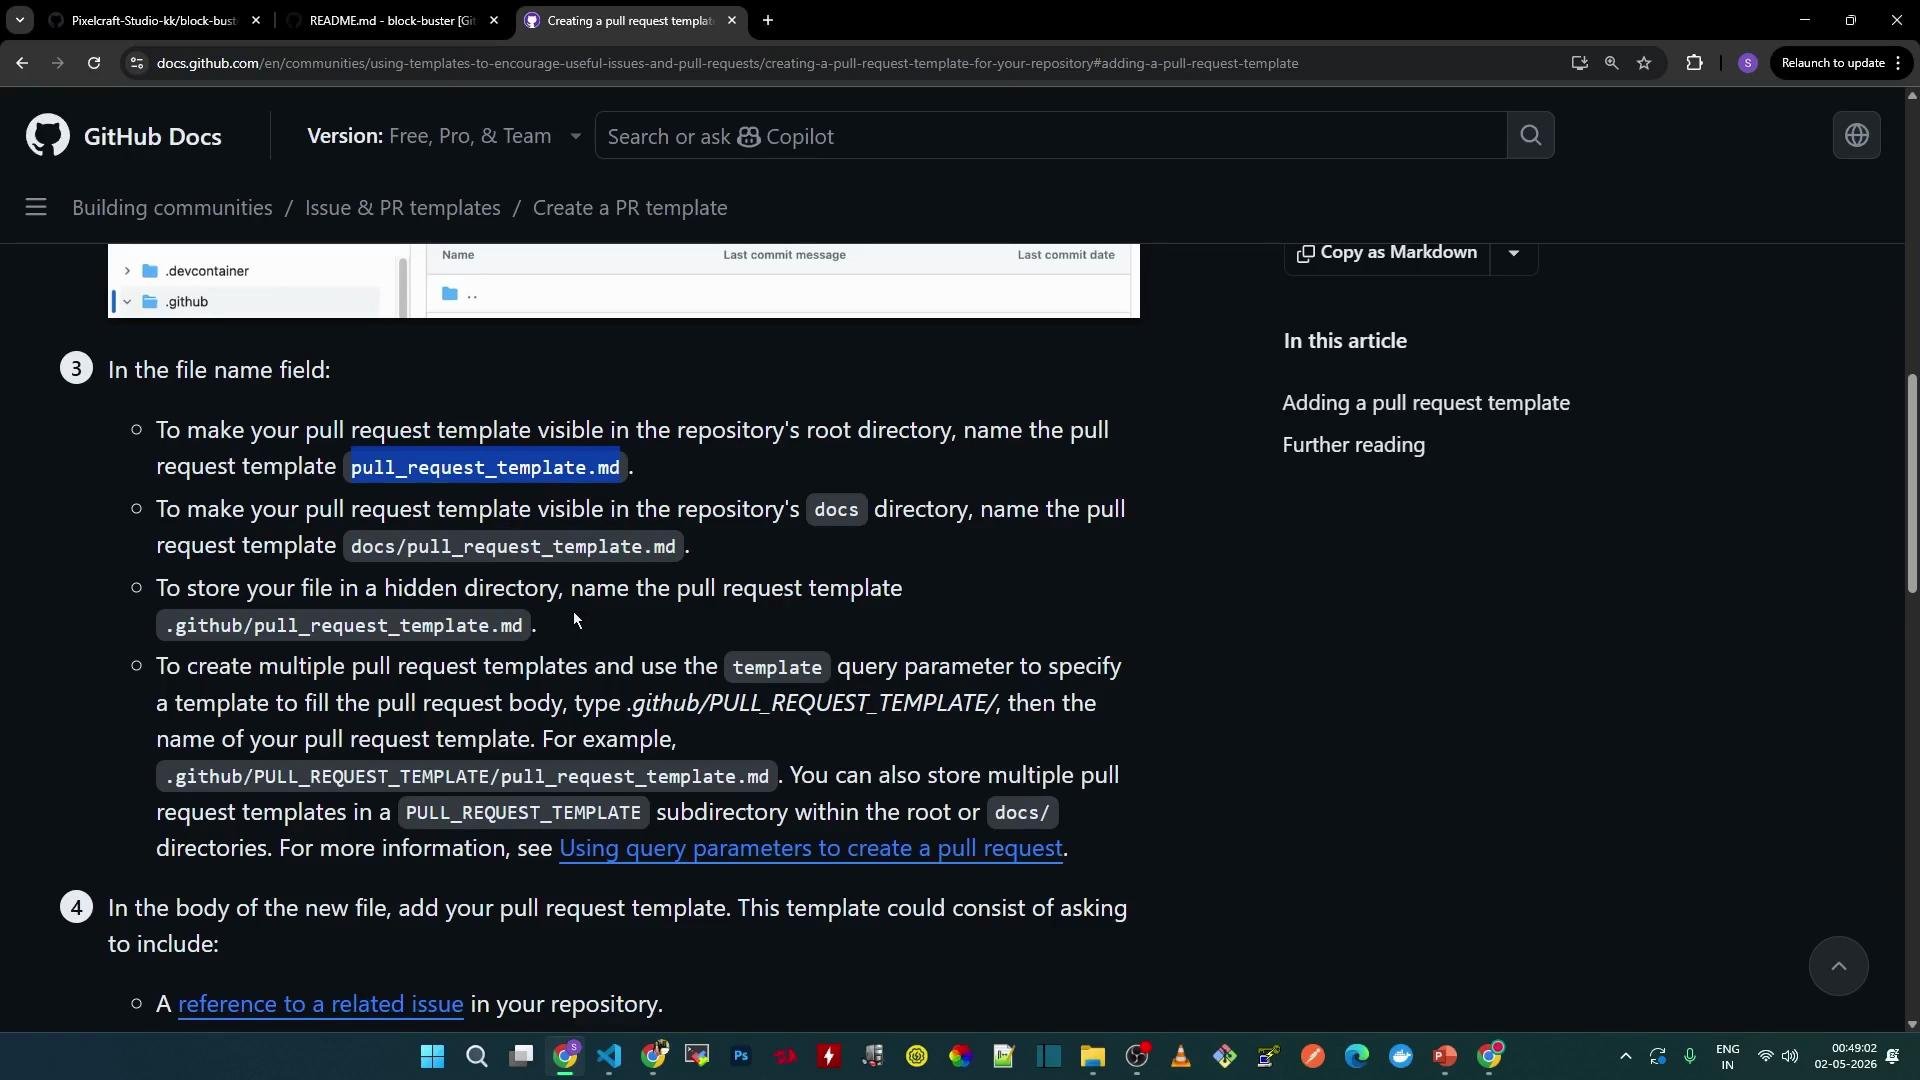
- Single template: Add a file named
pull_request_template.mdin one of these locations: repository root, thedocsdirectory, or the.githubdirectory. - Multiple templates: Create a folder such as
PULL_REQUEST_TEMPLATE/inside.githuband add multiple Markdown files there. GitHub will surface those templates when a contributor opens a new PR.
- Promote consistent PR descriptions that make reviews faster and more effective.
- Encourage contributors to link related issues and indicate the type of change.
- Ensure required checks or test confirmations are documented before merging.
Use the
.github directory to keep repository metadata centralized. If you store templates in docs or the repository root, make sure contributors know where to find them.- Create a single PR template file at
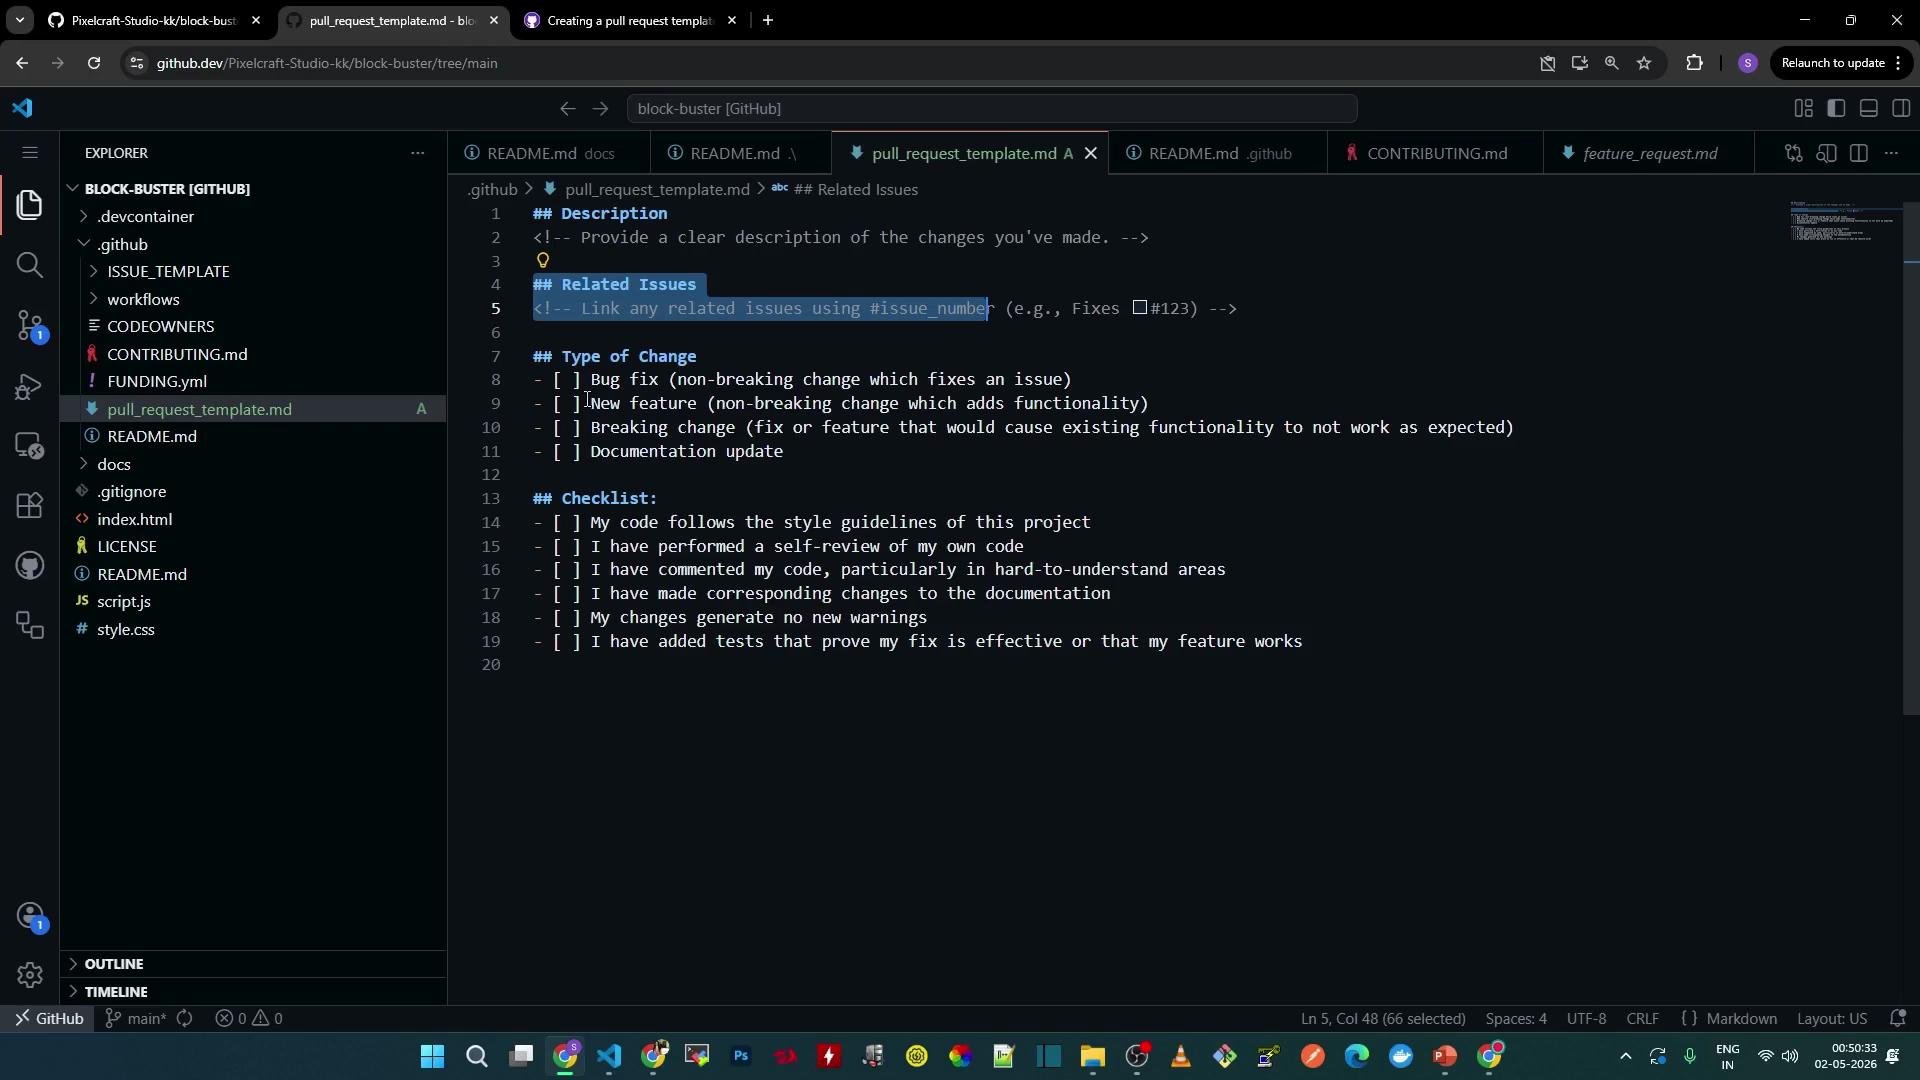
.github/pull_request_template.md. - The template should request a clear description, a reference to related issues, the type of change, and a minimal checklist to confirm tests and documentation.
pull_request_template.md and paste the following content (customize it to match your project’s workflow):
.github, and commit with a descriptive message like Add PR template.
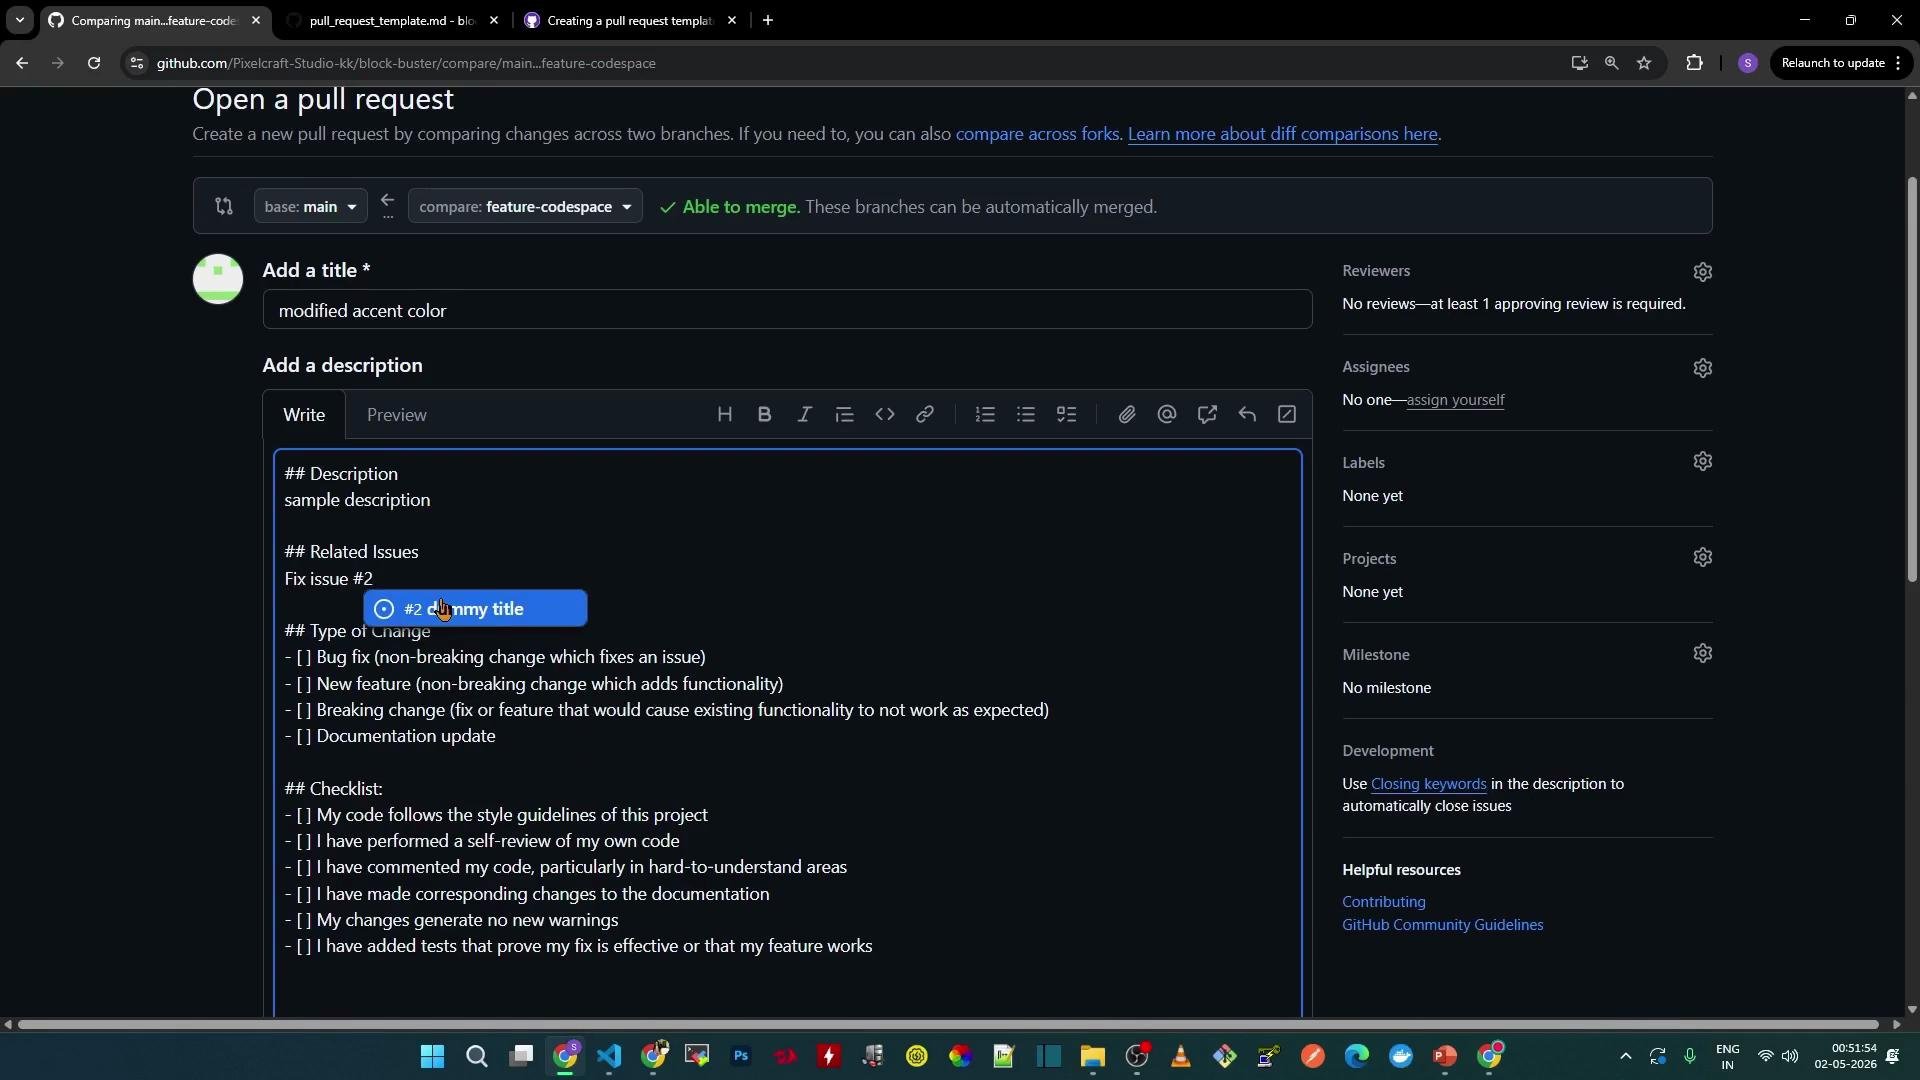
- When a contributor creates a new PR, GitHub automatically pre-populates the PR description with the template content.
- Contributors replace placeholders with the actual description, reference issues with
Fixes: #<issue-number>, and select the appropriate checkboxes. - If the PR includes code changes, the PR editor displays file diffs below the description area. For example, a CSS change might show:
- Keep templates concise and focused—use checkboxes for required confirmations (tests, docs, security review).
- Include example issue links using
Fixes: #<issue-number>so GitHub can auto-close linked issues when the PR is merged. - Avoid placing secrets or sensitive info in templates.
- Consider adding different templates for bug fixes, features, or release changes in a
.github/PULL_REQUEST_TEMPLATE/folder to help contributors select the right format.
Do not include sensitive data or credentials in PR templates. Templates are visible to all repository contributors and may be copied into PR histories.
- For a single template, add
pull_request_template.mdto.github,docs, or the repository root. - For multiple templates, create a folder inside
.github(for example,.github/PULL_REQUEST_TEMPLATE/) and add each Markdown file. - Templates standardize PR descriptions, streamline reviews, and help ensure contributors link issues and confirm required checks.