

Use repository templates to provide a clean starting point for new projects (e.g., starter kits, examples, or classroom assignments). Use forks when you need to continue work on a project while keeping the full history and a link to the upstream repository.
Fork vs Template — Key Differences
Below is a concise comparison of forks and repositories created from templates so you can choose the right workflow for your project.
For authoritative guidance see the GitHub documentation: https://docs.github.com/en/repositories/creating-and-managing-repositories/creating-a-repository-from-a-template
Create a repository from a template using the GitHub CLI
You can also generate a new repository from a template with the GitHub CLI. Example:my-new-repo using the repository owner/template-repo as the template source.
Now let’s walk through marking an existing repository as a template and creating a new repo from it.
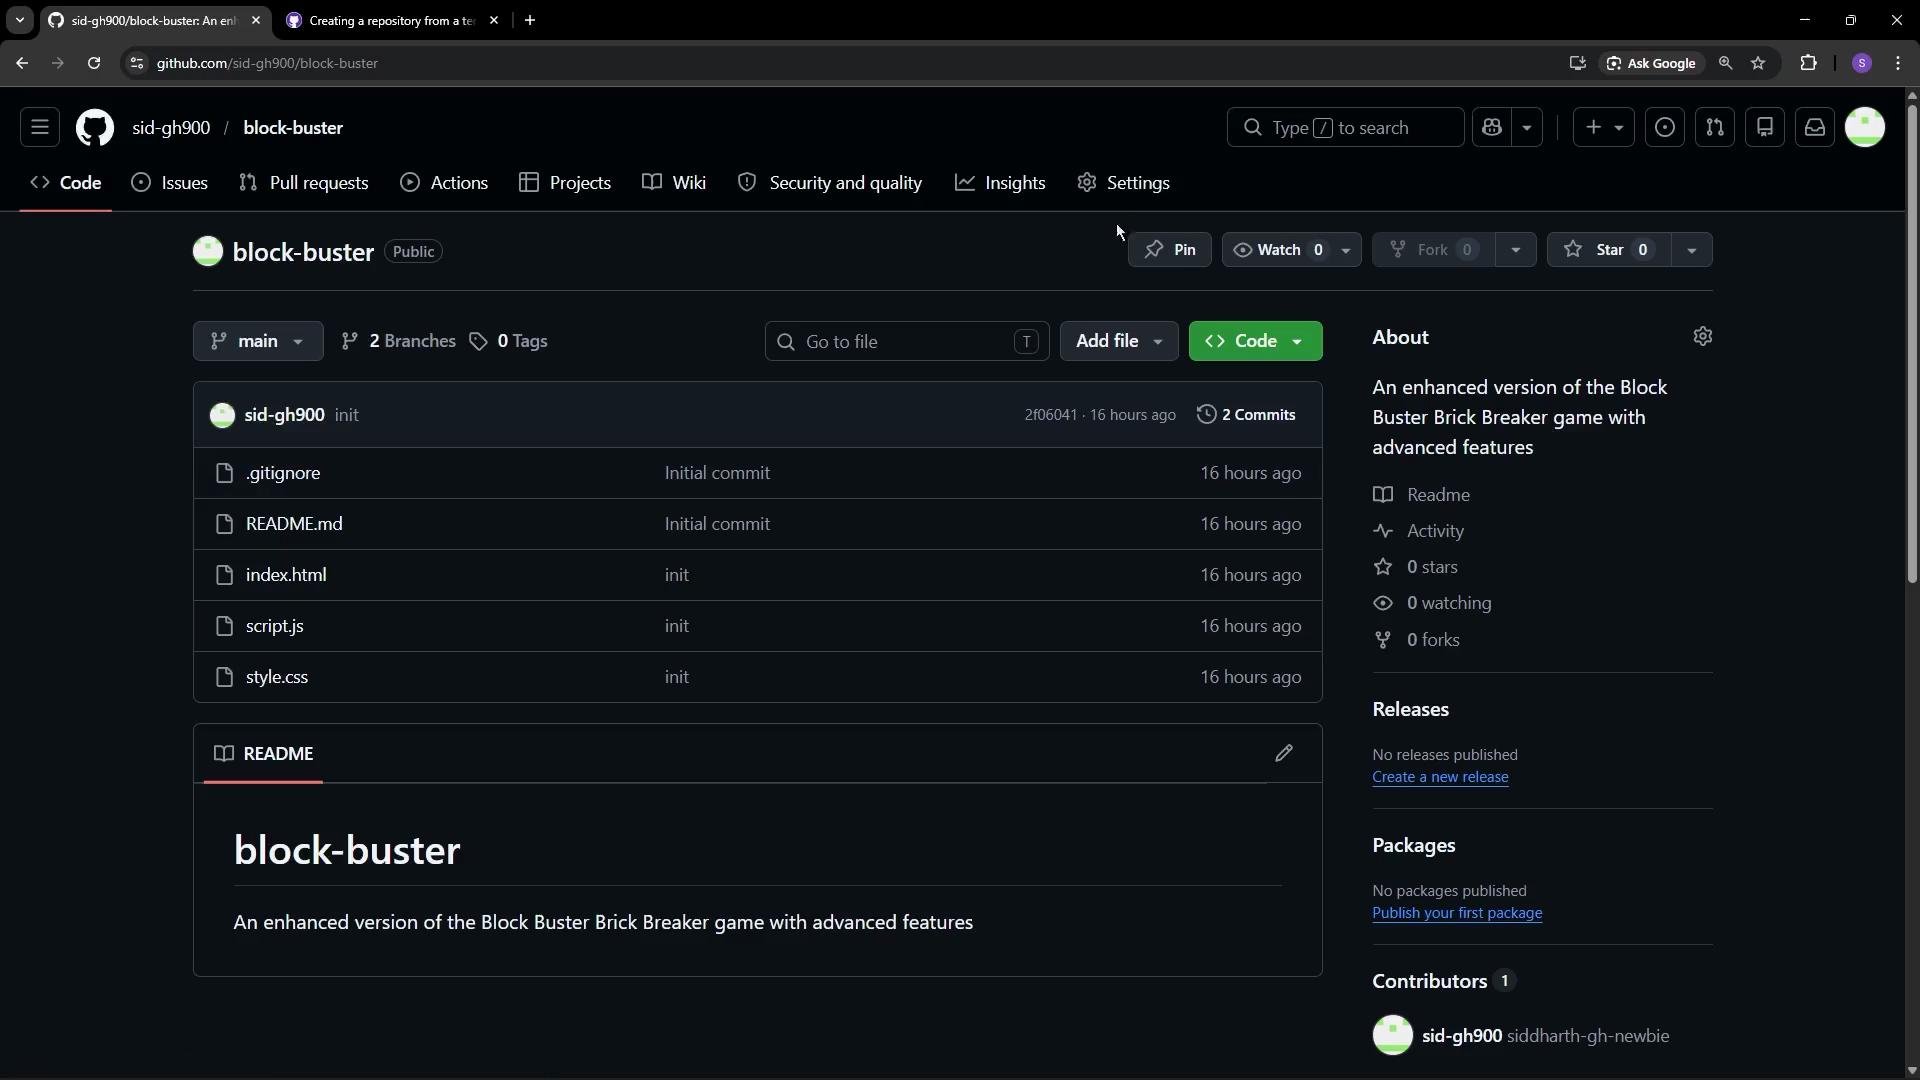
I’ll open the Block Buster repository in GitHub (this repository contains files such as .gitignore, README.md, index.html, script.js, and style.css).
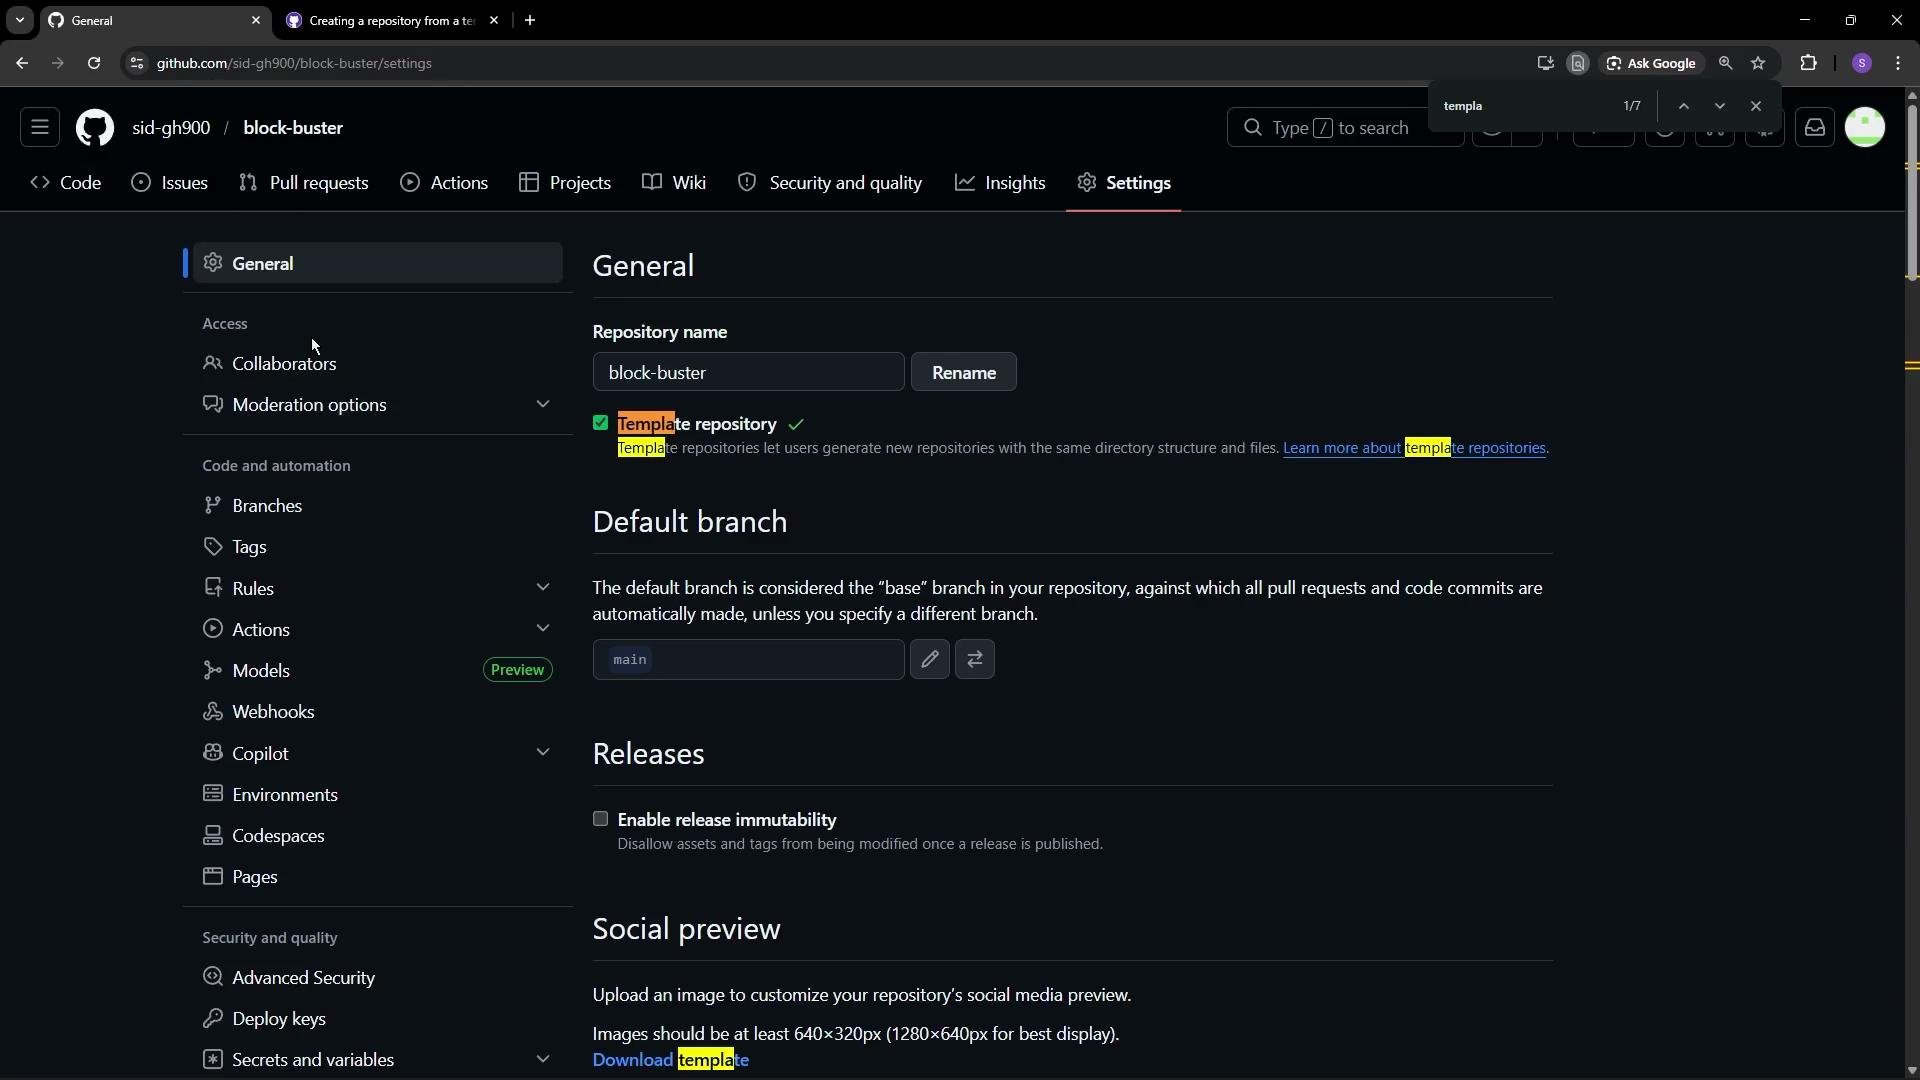
- Owner (your account or an organization)
- Repository name
- Description
- Visibility (public or private)
- Whether to include all branches from the template or only the default branch
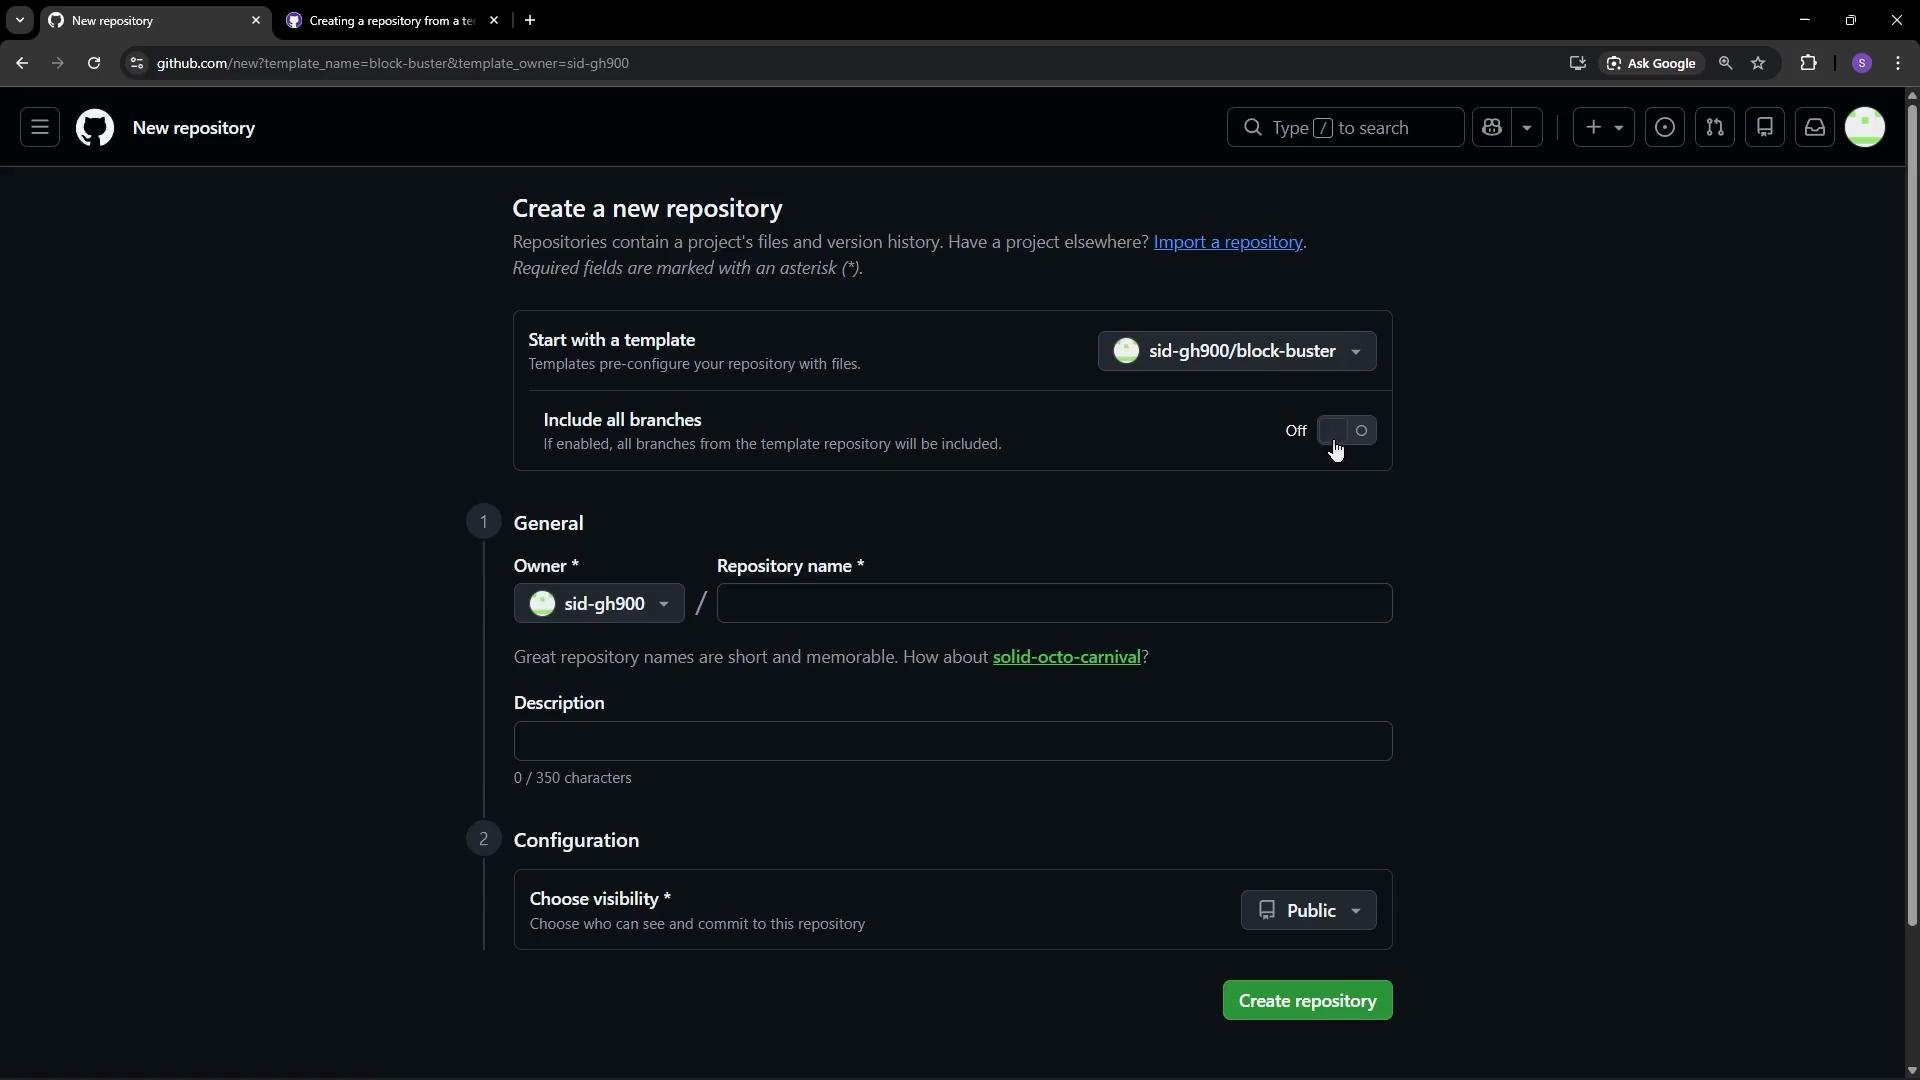
If you choose “only the default branch,” the new repository will start with a single commit (a snapshot of that branch). If you choose to include all branches, those branches (and their histories) will be copied into the new repository. Be intentional when including branches to avoid importing unwanted history.
- Choosing only the default branch creates a new repository with the template files and a single initial commit that represents the snapshot.
- Choosing to include all branches will copy the selected branches into the new repository.
- The new repository’s commit history is independent of the template (unless you include branches with history explicitly). It will not automatically contain the original repository’s full commit history unless those branches are included.
When to use templates vs forks (quick guidance)
- Use a repository template when you want to give users a starting point without exposing or carrying over the original commit history. Ideal for templates, examples, and classroom assignments.
- Use a fork to create a linked copy when you intend to continue development, retain full history, and contribute changes back to the upstream project.
Links and References
- GitHub Docs — Create a repository from a template: https://docs.github.com/en/repositories/creating-and-managing-repositories/creating-a-repository-from-a-template
- GitHub CLI docs —
gh repo create: https://cli.github.com/manual/gh_repo_create