

Issue templates help maintainers triage and reproduce problems faster by collecting structured information up front.
- Standardize incoming reports so they include key details (steps to reproduce, expected behavior, environment, logs, screenshots).
- Reduce back-and-forth clarifying questions.
- Improve triage speed and prioritization.
- Encourage contributors to include reproducible examples and relevant metadata.
- Open your repository and go to Settings.
- Confirm Issues are enabled for the repository. If they are disabled, enable them before proceeding.
- Scroll to the “Issues” section and click Set up issue templates (or the similarly named option in the settings).
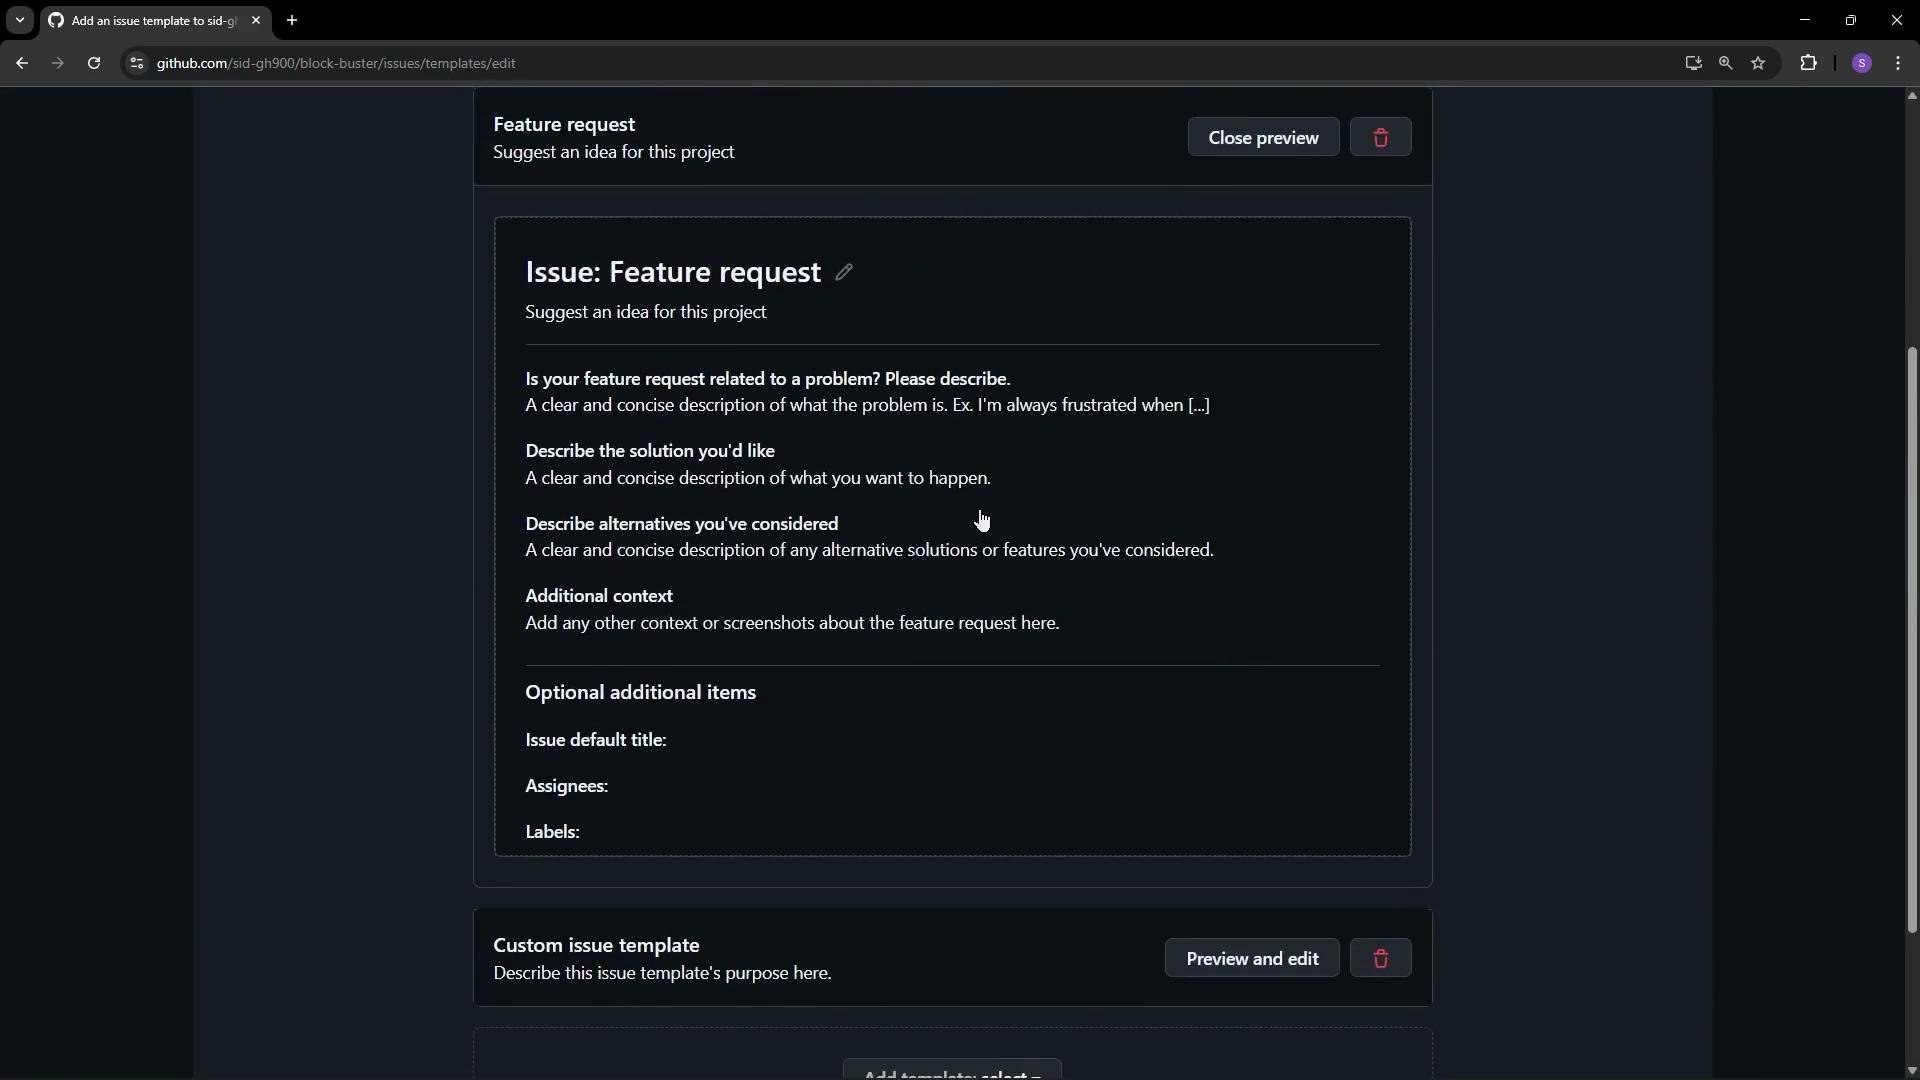
- Choose which templates to create: Bug report, Feature request, or create a Custom template. Preview and edit each template before saving.
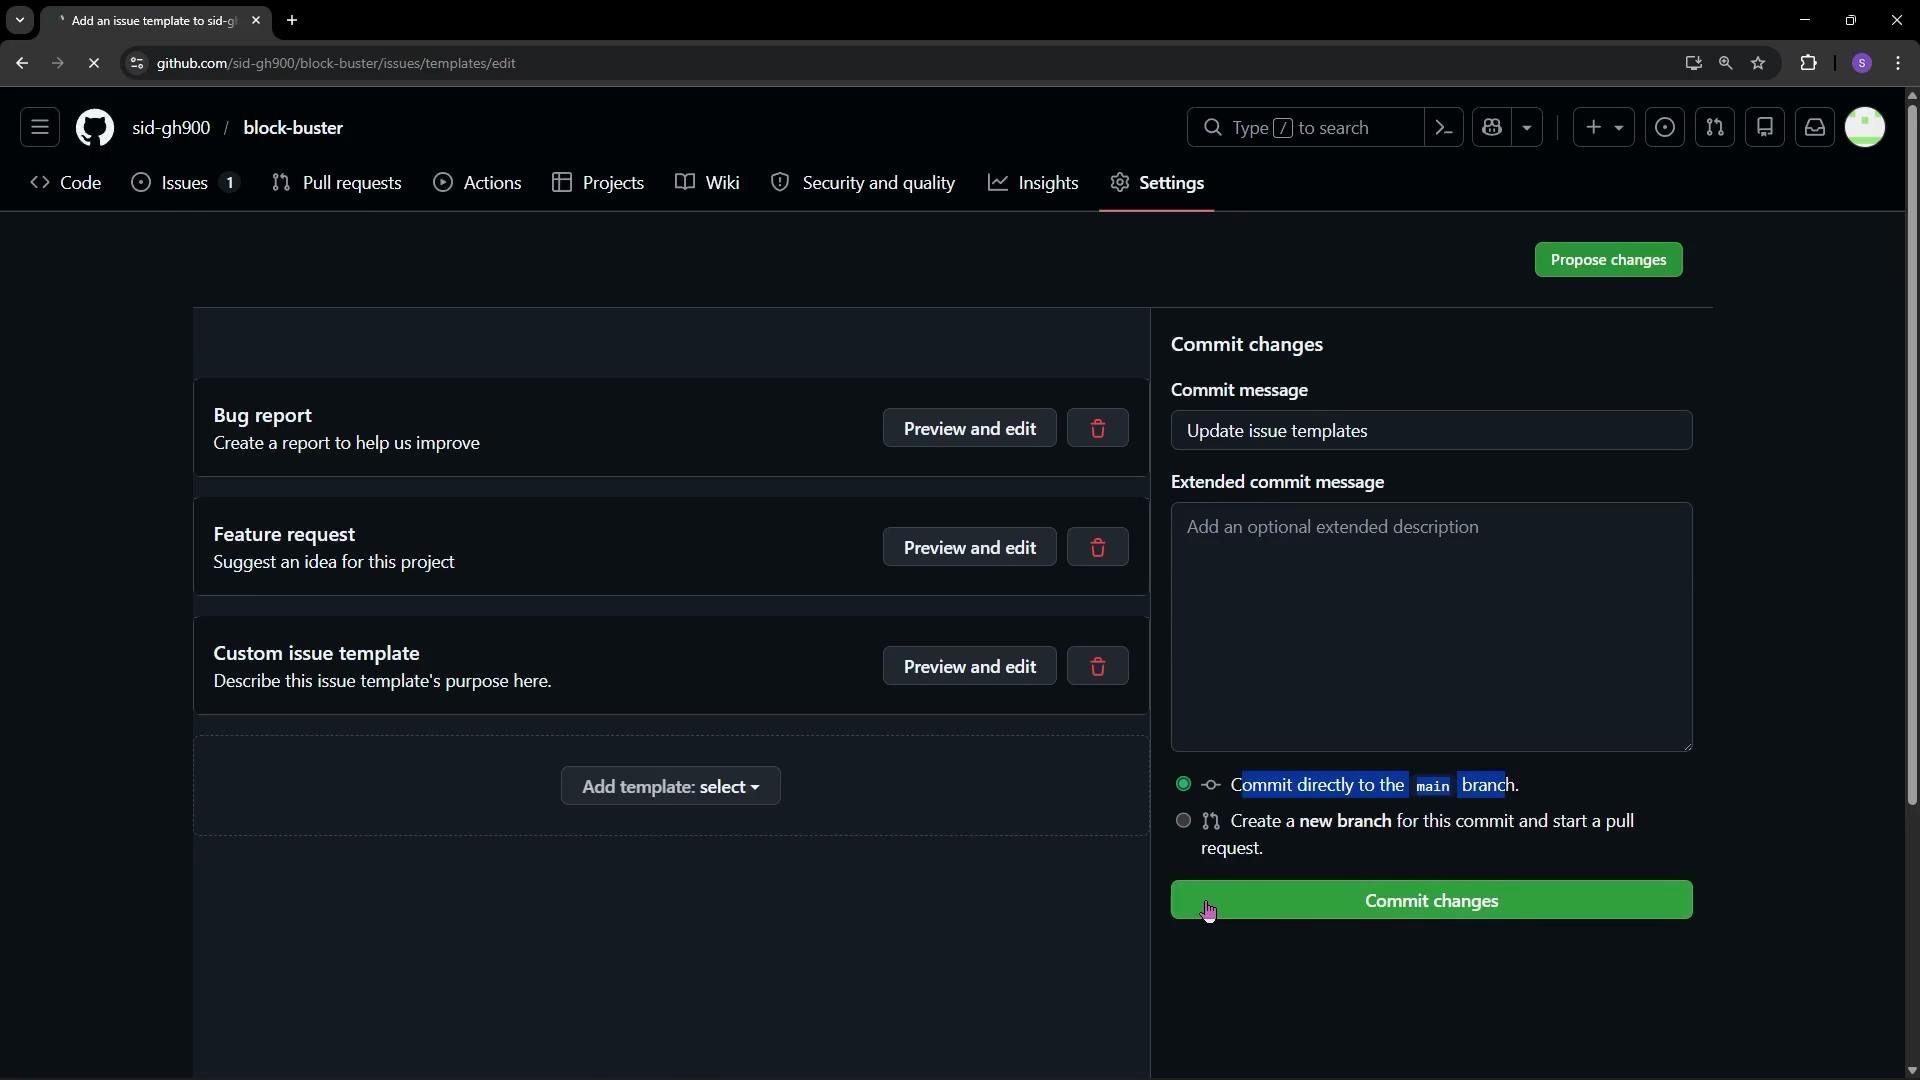
- After editing, propose changes and commit them. You can commit directly to the
mainbranch or create a branch and open a pull request. In this demo we commit directly tomain.
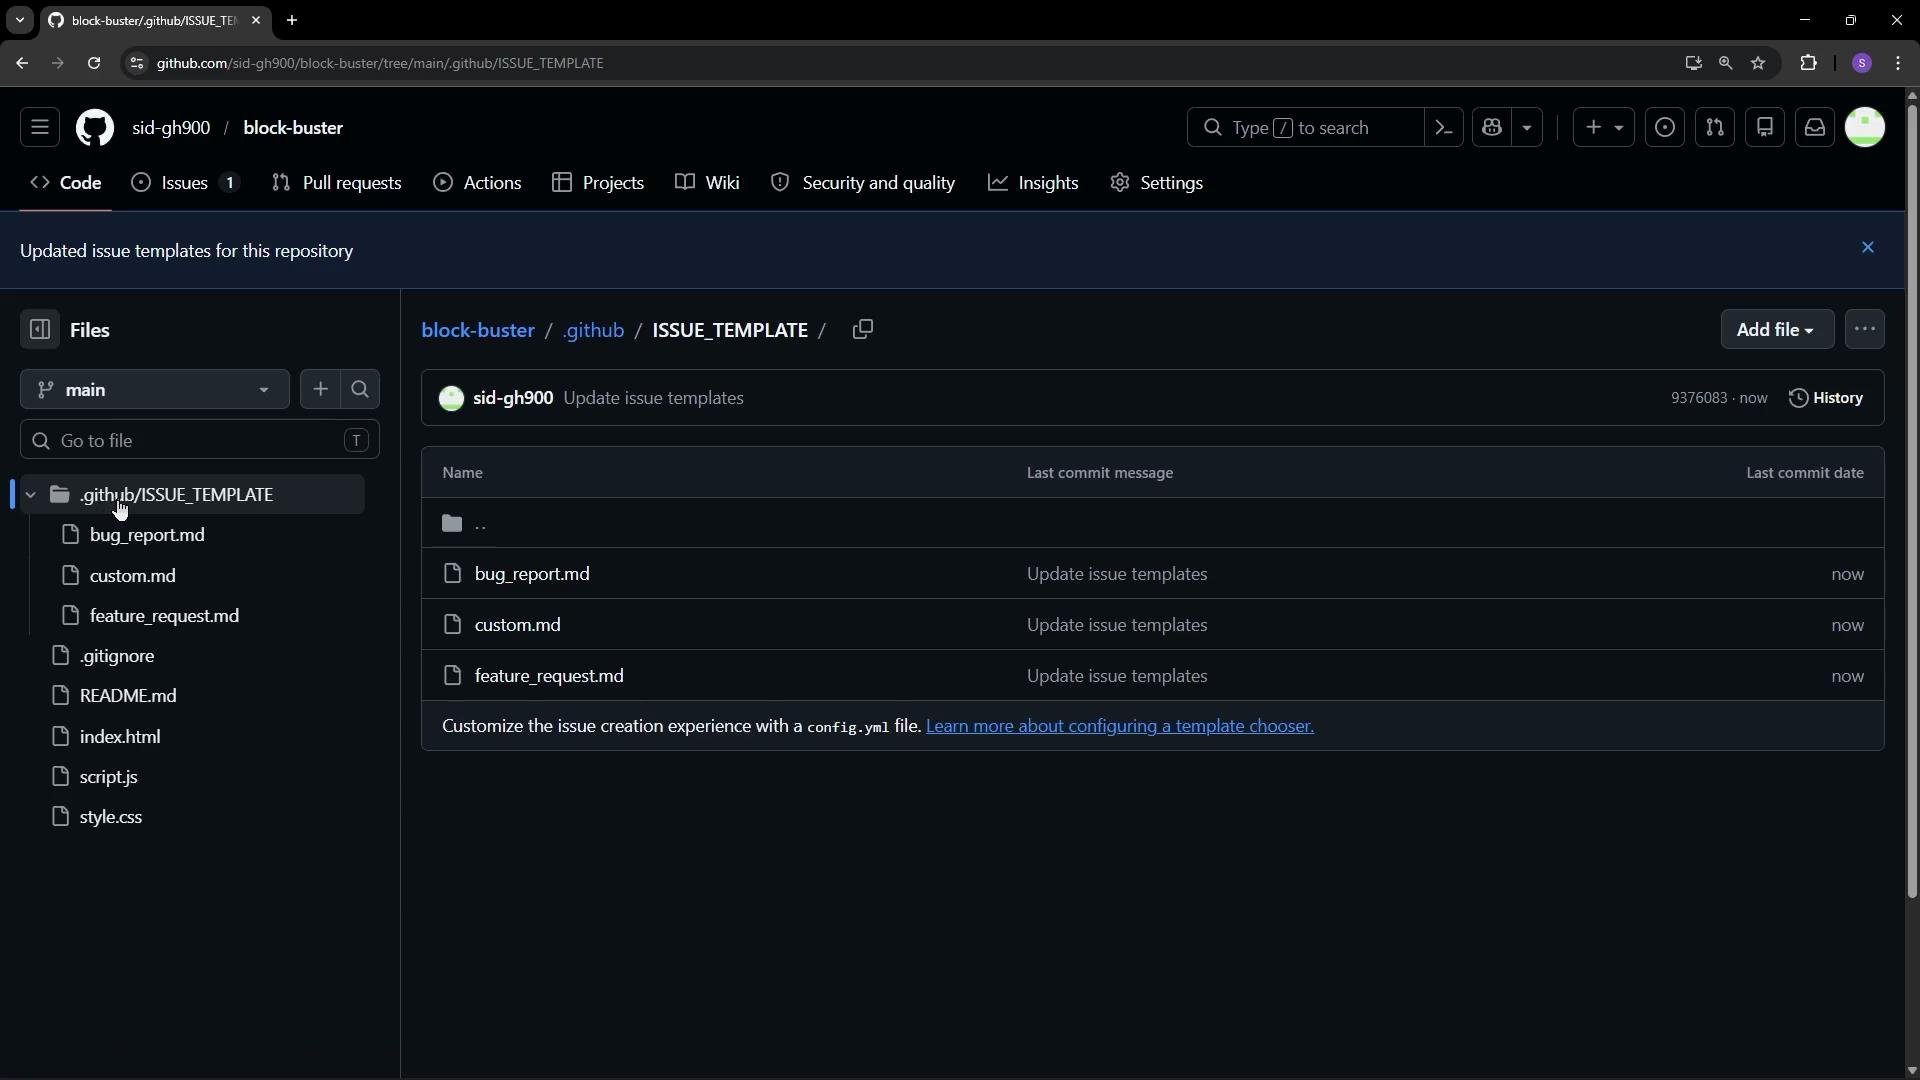
.github/ISSUE_TEMPLATE/ directory in the repository root. Each template is stored as a Markdown file (for example, bug_report.md, feature_request.md, custom.md) and typically contains YAML front matter for metadata such as default title, labels, and assignees.
Common template files and their purpose:
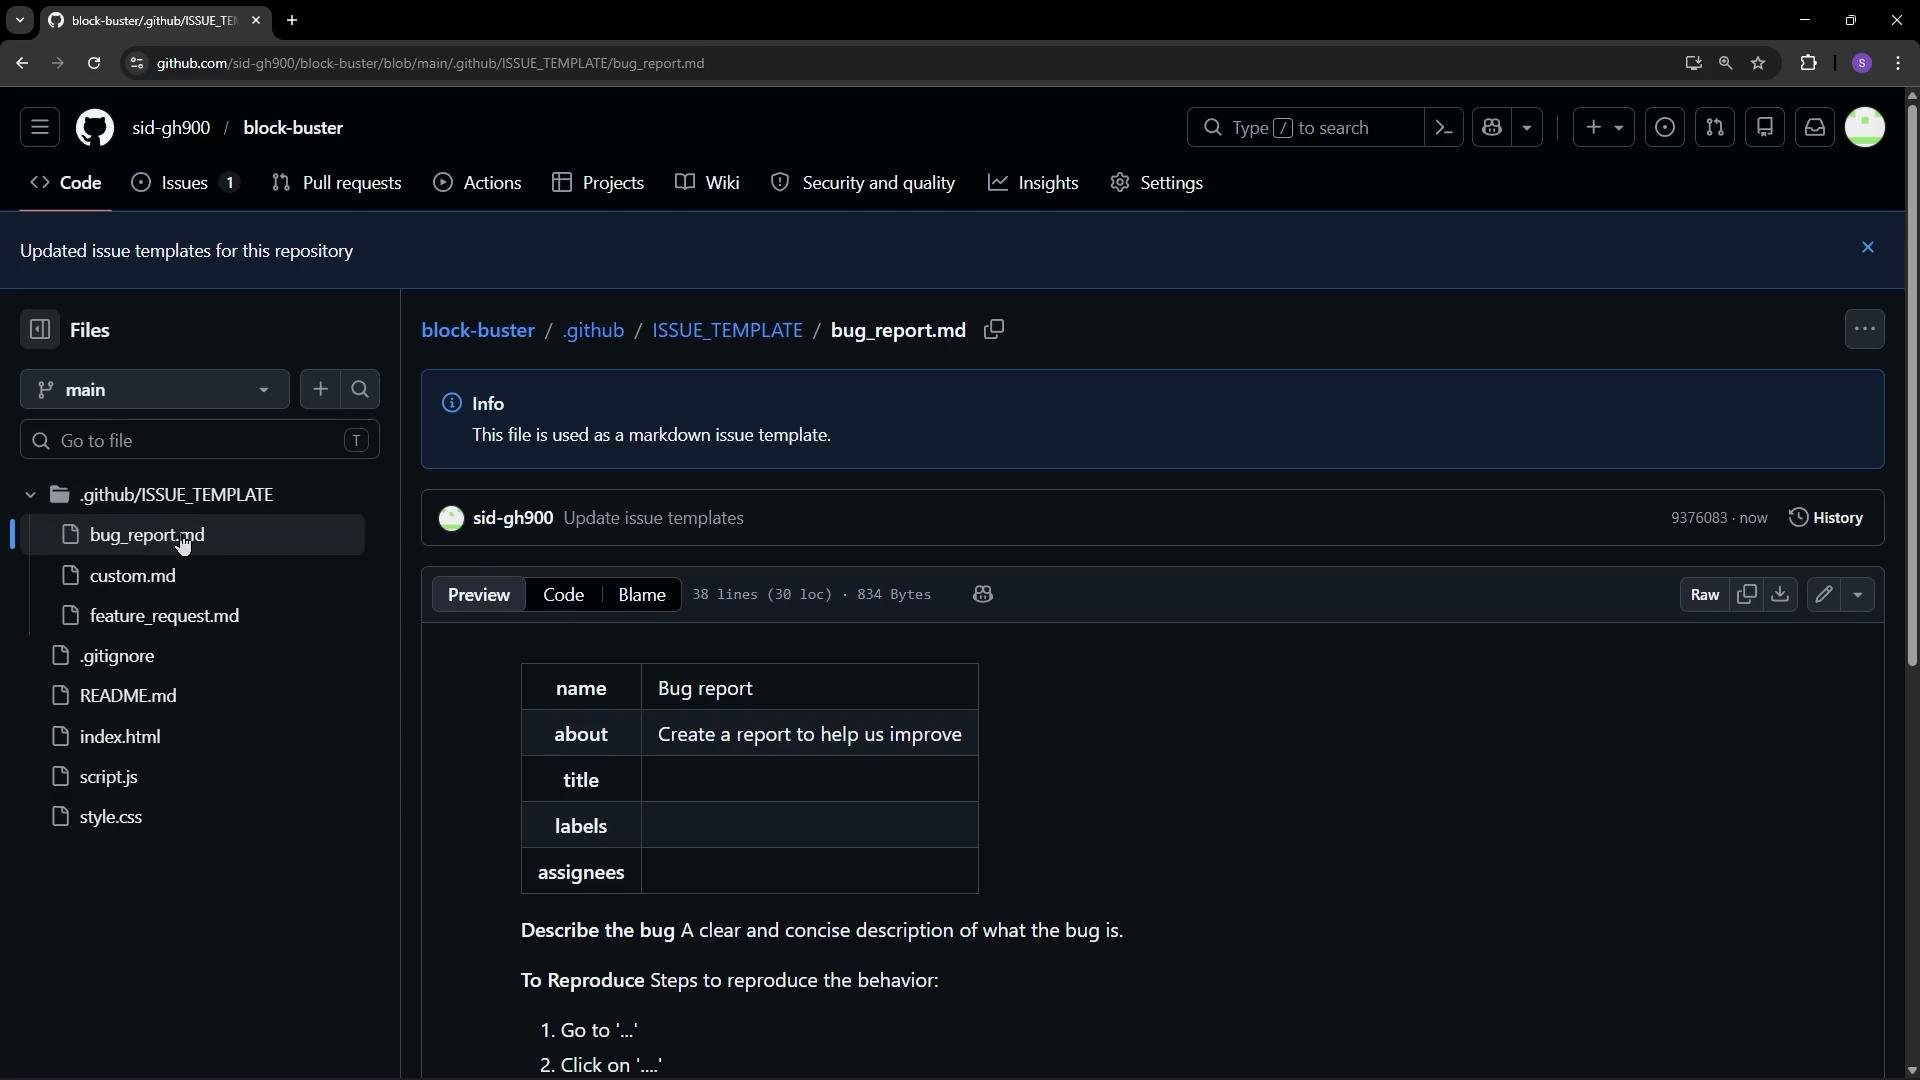
Example: front matter + body for a bug report template
- Go to the repository’s Issues tab and click New issue.
- You’ll see choices for a blank issue or any templates you configured. Select a template to preload its content into the issue body.
- Replace the placeholder text with real details: title, steps to reproduce, expected behavior, environment (OS, versions), logs, and screenshots.
- You can still attach files, assign people, add labels, and link the issue to projects or milestones.
- Click Create to open the issue with the template content applied.
- Keep templates focused and minimal—ask only for information that helps you triage and reproduce the issue.
- Use checkboxes for optional verification steps or triage checklists.
- Consider separate templates for security reports or support requests to route issues appropriately.
- Review and iterate on templates as your project and contributor base evolves.
- GitHub Docs: Creating issue templates for your repository
- GitHub Docs: Configuring issue template metadata
- Issue templates standardize incoming reports and requests, improving triage and resolution speed.
- Create them from Settings → Set up issue templates.
- GitHub stores them under
.github/ISSUE_TEMPLATE/as Markdown files with YAML front matter. - Contributors choose a template when opening an issue, ensuring you receive structured, actionable information.