

Use Discussions for general conversation, brainstorming, polls, Q&A, and announcements that don’t fit as issues or pull requests.
What you’ll do in this lesson
- Open the repository (example:
block-buster) with an account that has repository settings access (example user:AZ-1000). - Enable Discussions from the repository Settings.
- Create the first discussion and choose an appropriate category.
Quick prerequisites
- You must have repository settings access (Admin or maintain) to enable Discussions.
- Discussions are enabled per-repository; enabling in one repo does not enable them across an organization.
You need repository-level settings access to enable Discussions. If you don’t see the Discussions option in Settings, confirm your permission level or contact a repository admin.
Step 1 — Open repository and enable Discussions
- Open your repository (for example
block-buster) and sign in with an account that has repository settings access (e.g.AZ-1000). - Go to Settings → scroll to the Discussions section to enable it and configure defaults.
Discussion categories and when to use them
GitHub provides built-in categories so you can organize conversations by intent. Choose the category that best fits the content of your post.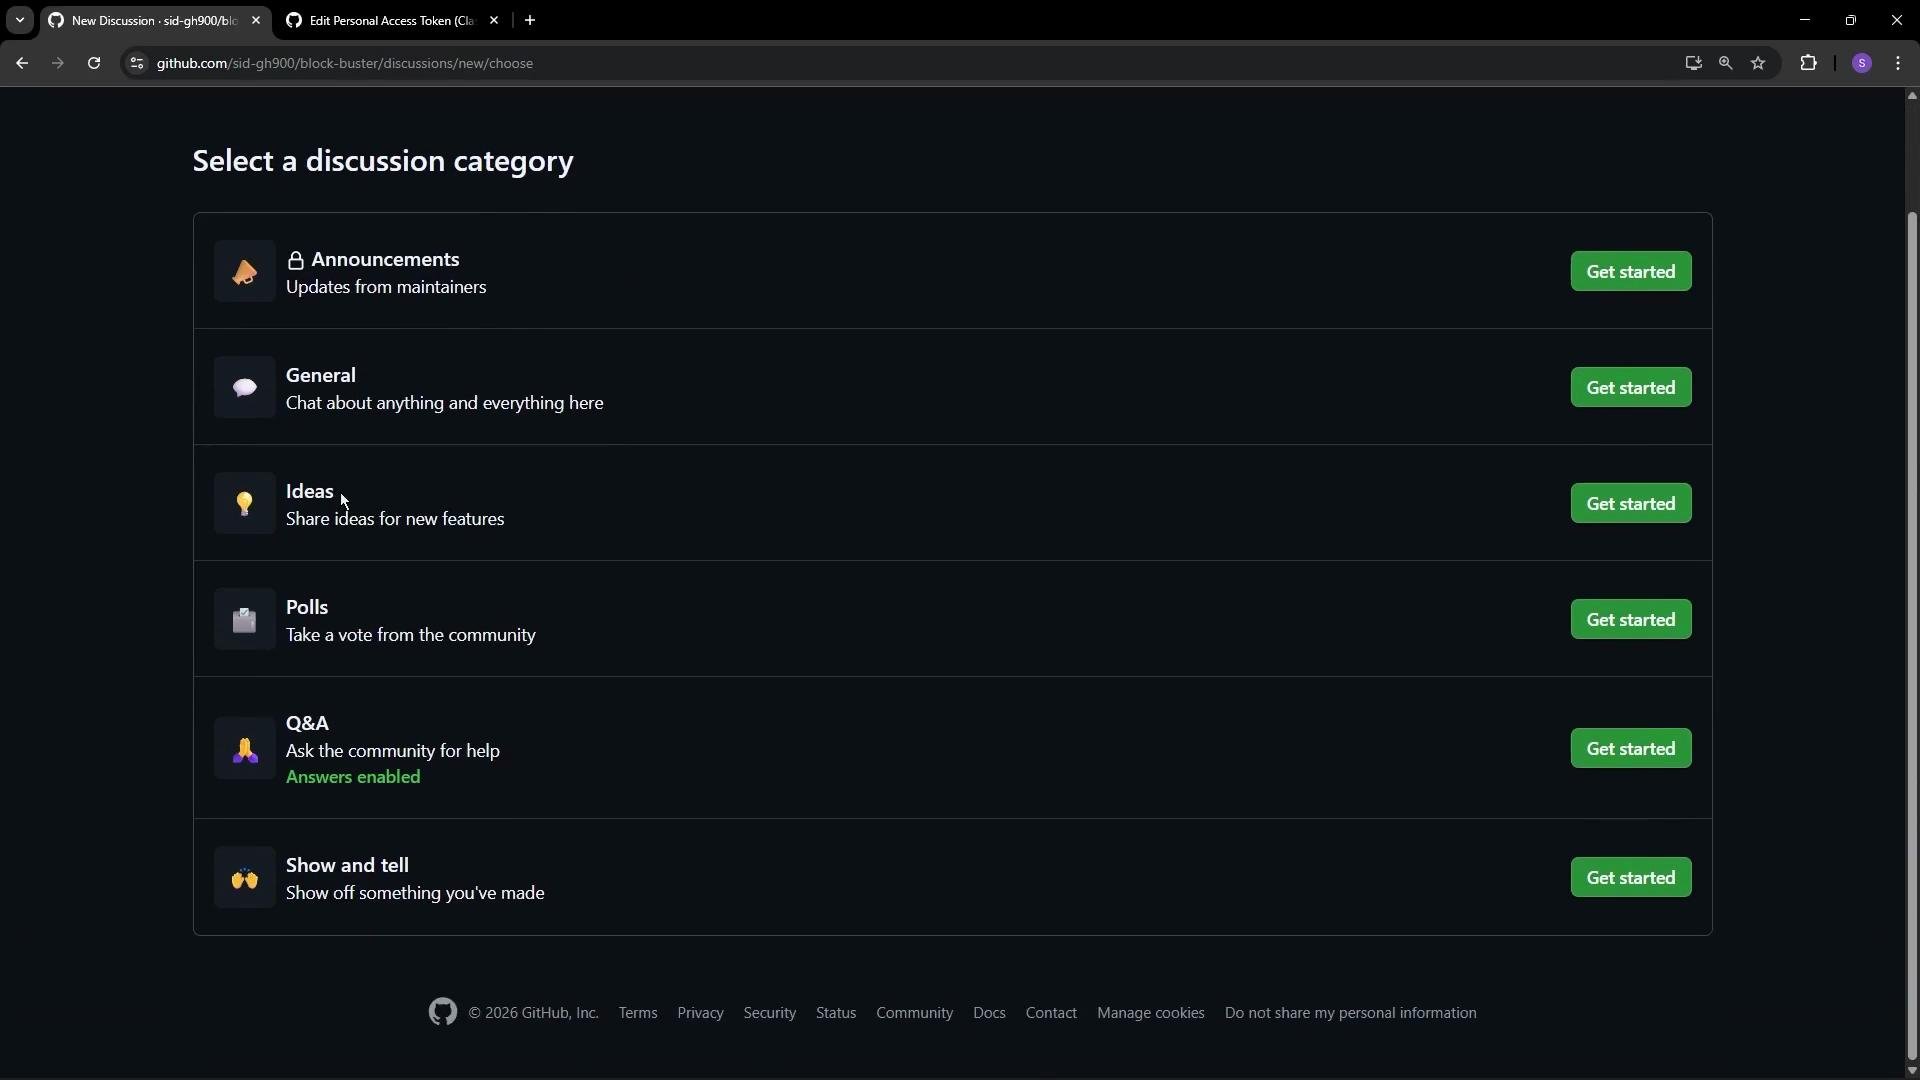
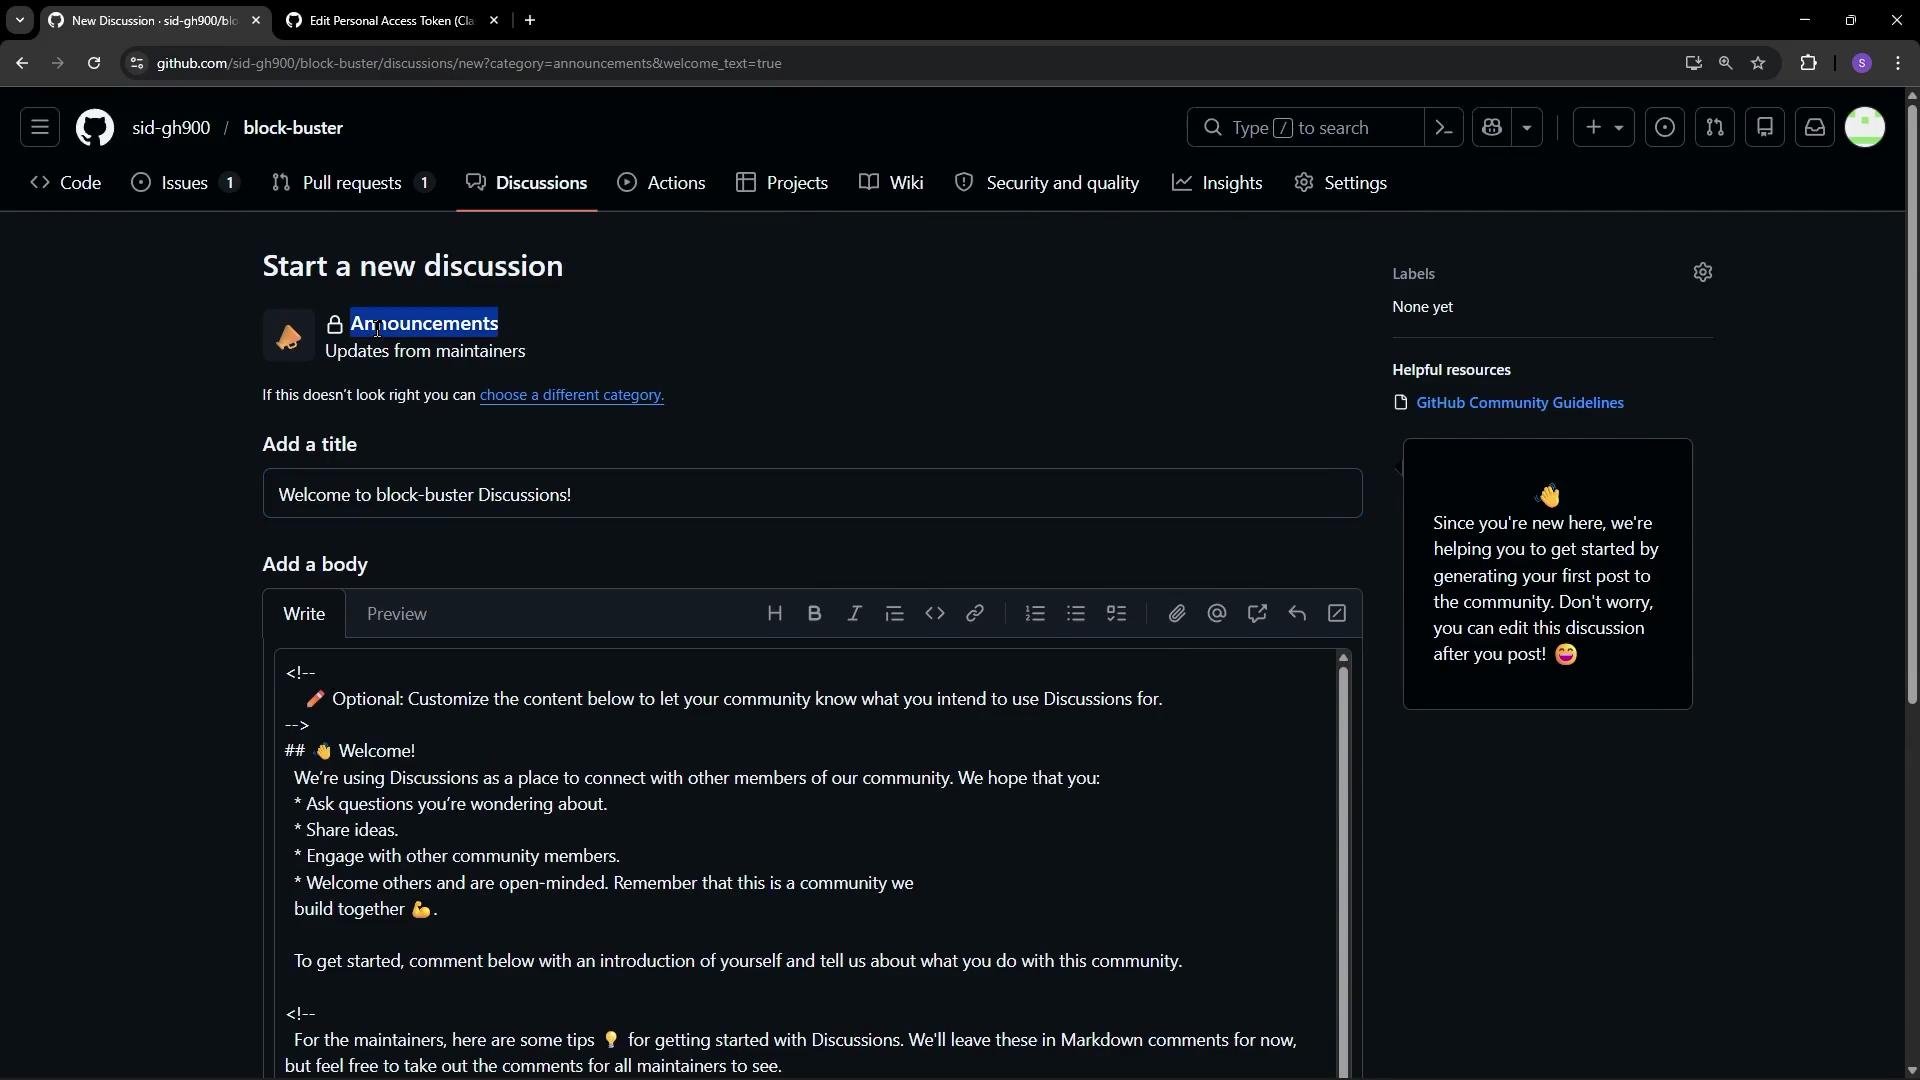
Step 2 — Create and publish the discussion
- Select the appropriate category (for this example, choose Announcements).
- Enter a clear title and body. Use formatting, code blocks, and links to make the post useful and searchable.
- Submit the discussion. After the first discussion is created, a Discussions tab appears in the repository navigation bar.
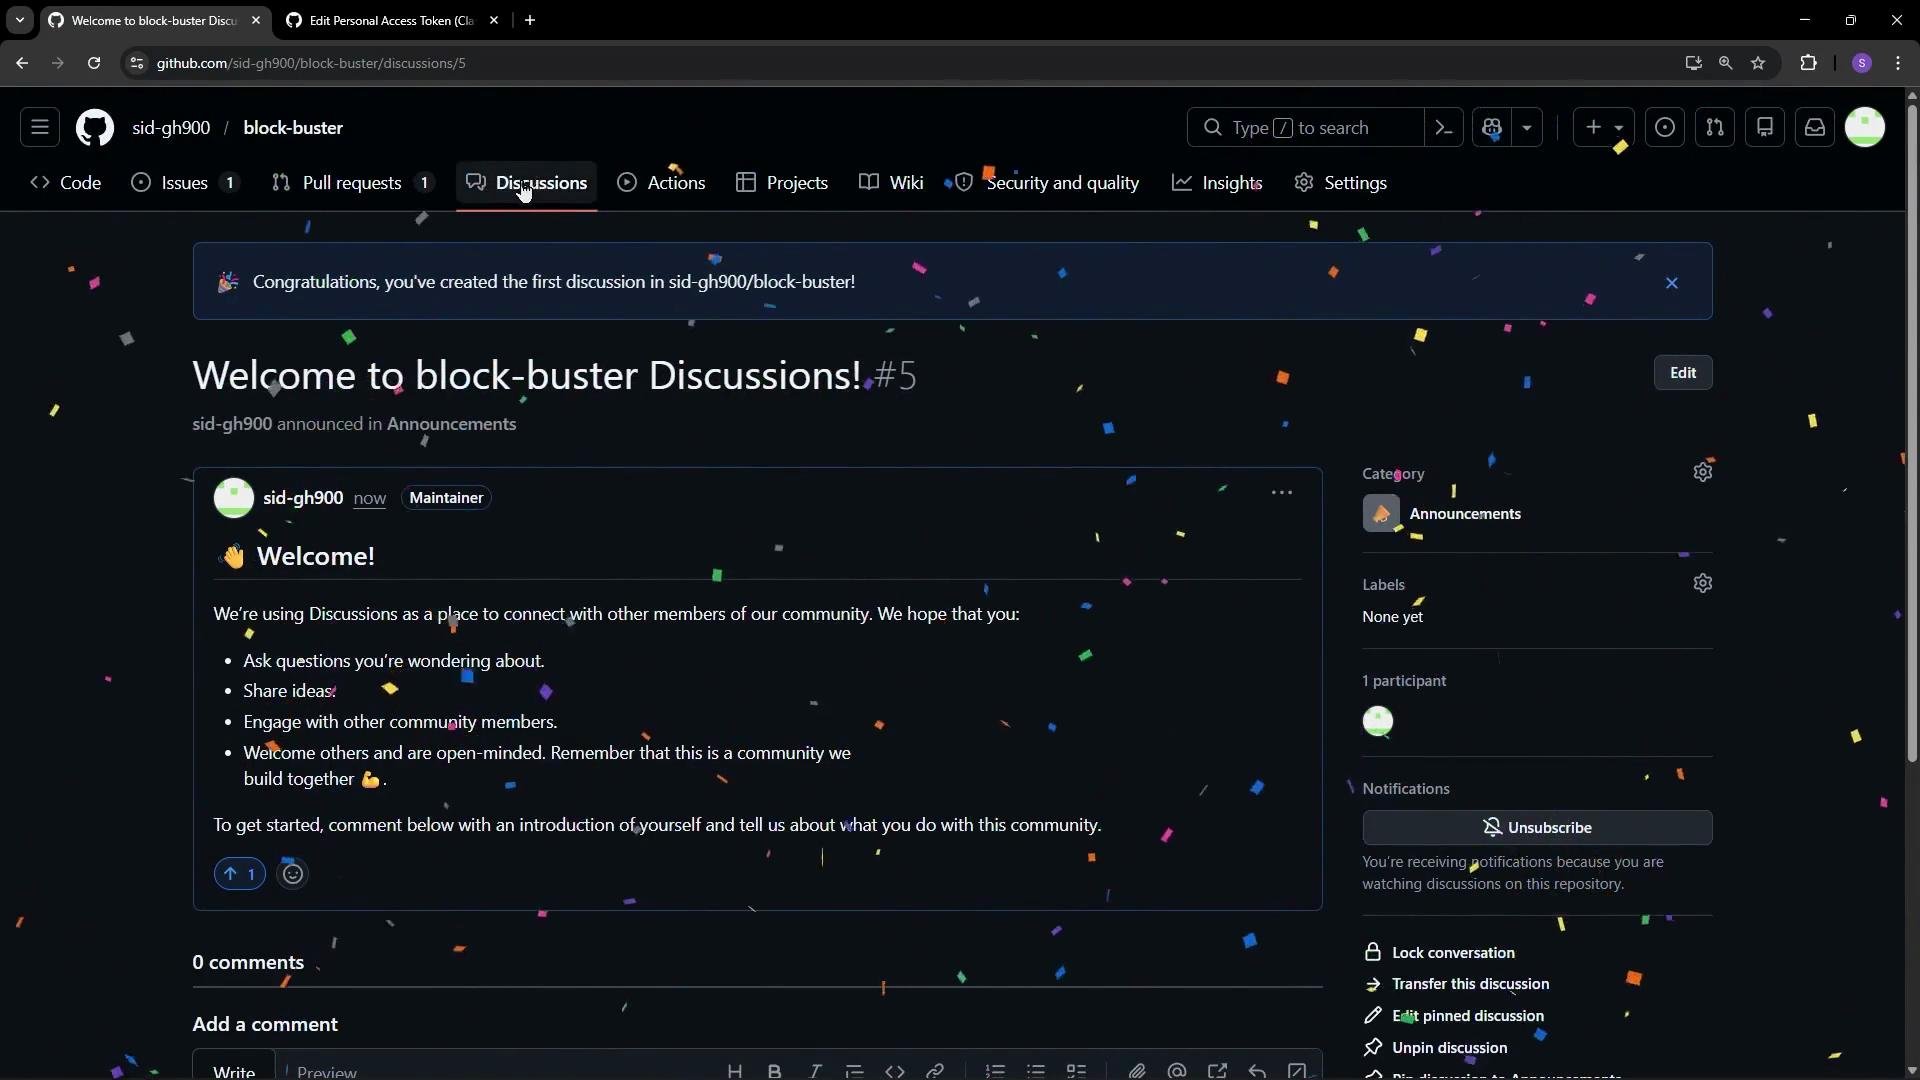
Managing discussions
Once created, discussions behave similarly to issues and include moderation and management features:- Pin important or featured discussions to keep them prominent.
- Lock conversations to prevent further replies when necessary.
- Convert or transfer a discussion to an issue for actionable items.
- Edit content and adjust labels or categories as needed.
- Use moderation tools to flag or remove inappropriate posts.
Best practices and tips
- Choose clear, descriptive titles to improve discoverability.
- Use categories consistently so users can find content quickly.
- Encourage maintainers and community members to respond and close conversations when resolved.
- Convert long-running proposals or actionable items into issues to track implementation.