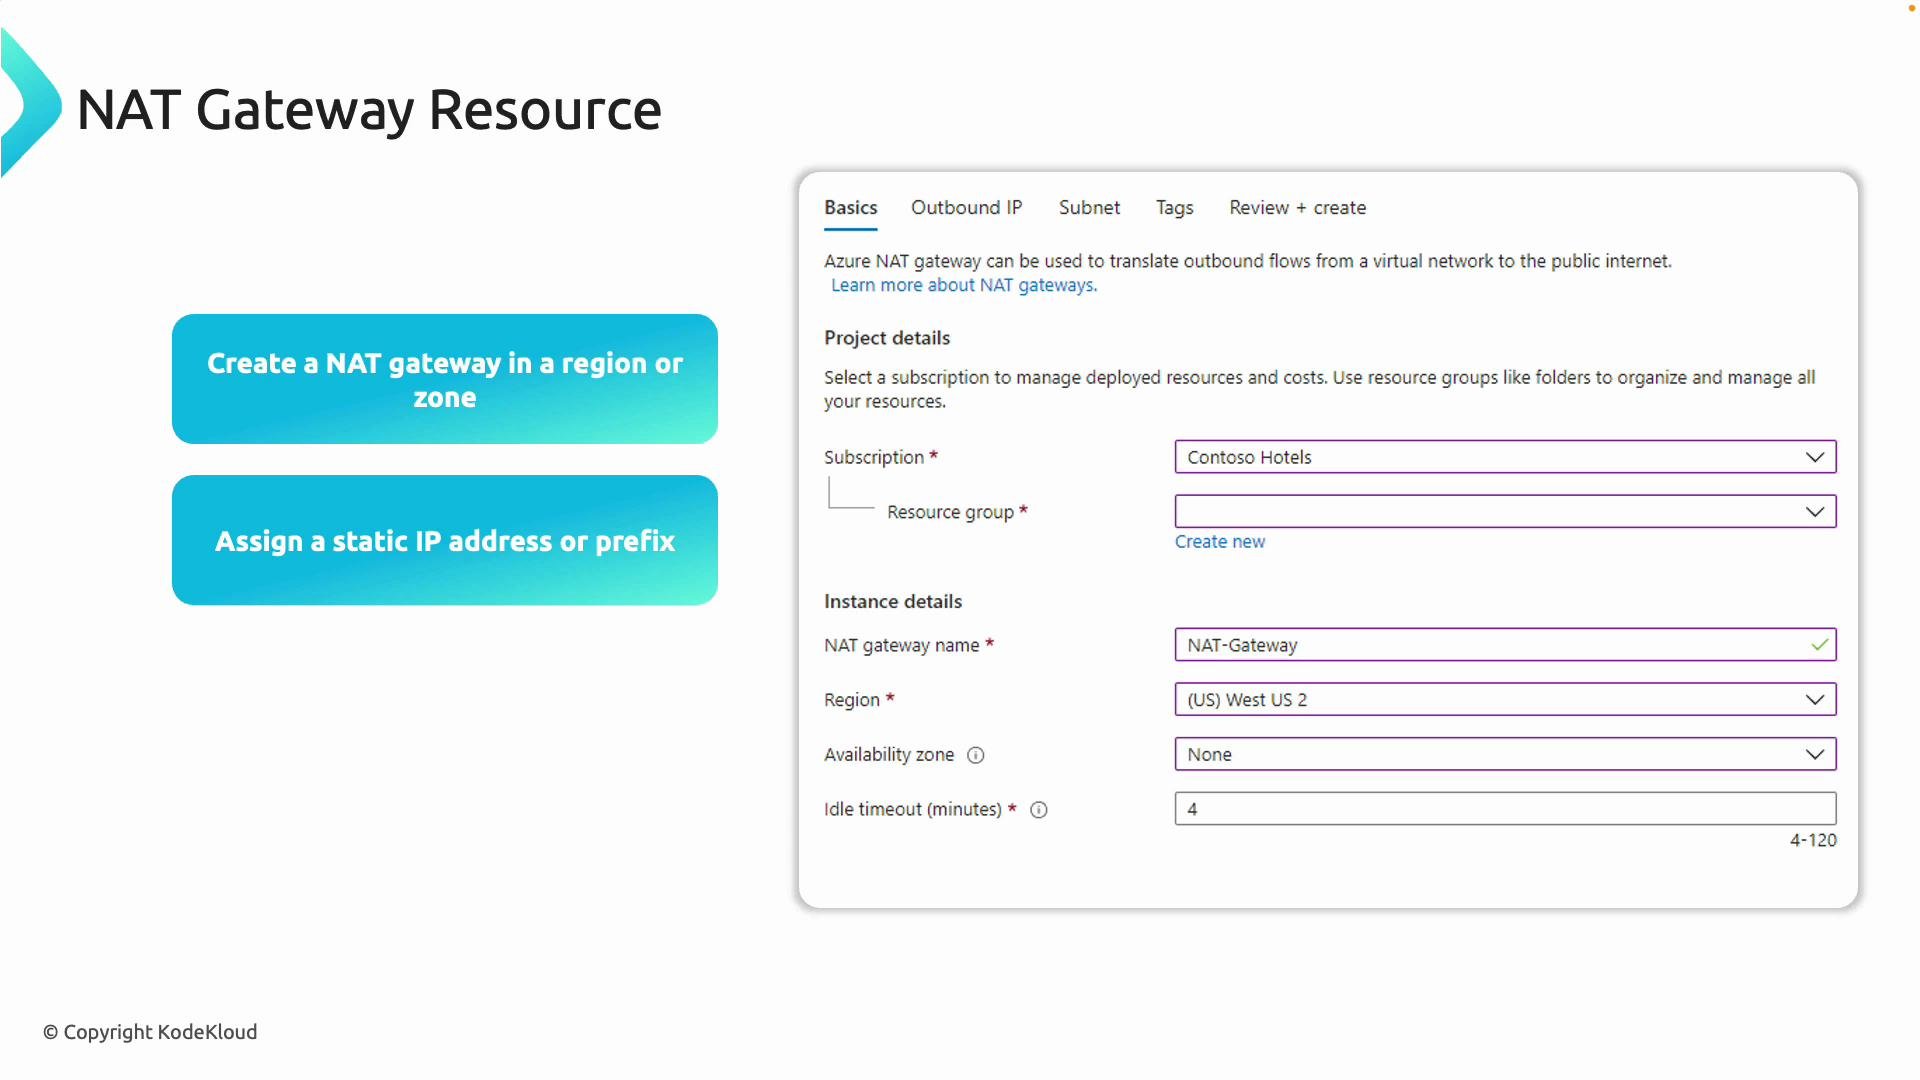
- Create an Azure NAT Gateway in your chosen region — it becomes the outbound gateway for all resources in attached subnets. (NAT gateways are regional resources; assigned public IPs can be zonal or zone-redundant.)
- Assign either a static Public IP or a Public IP Prefix so outbound connections use a predictable public IP range.
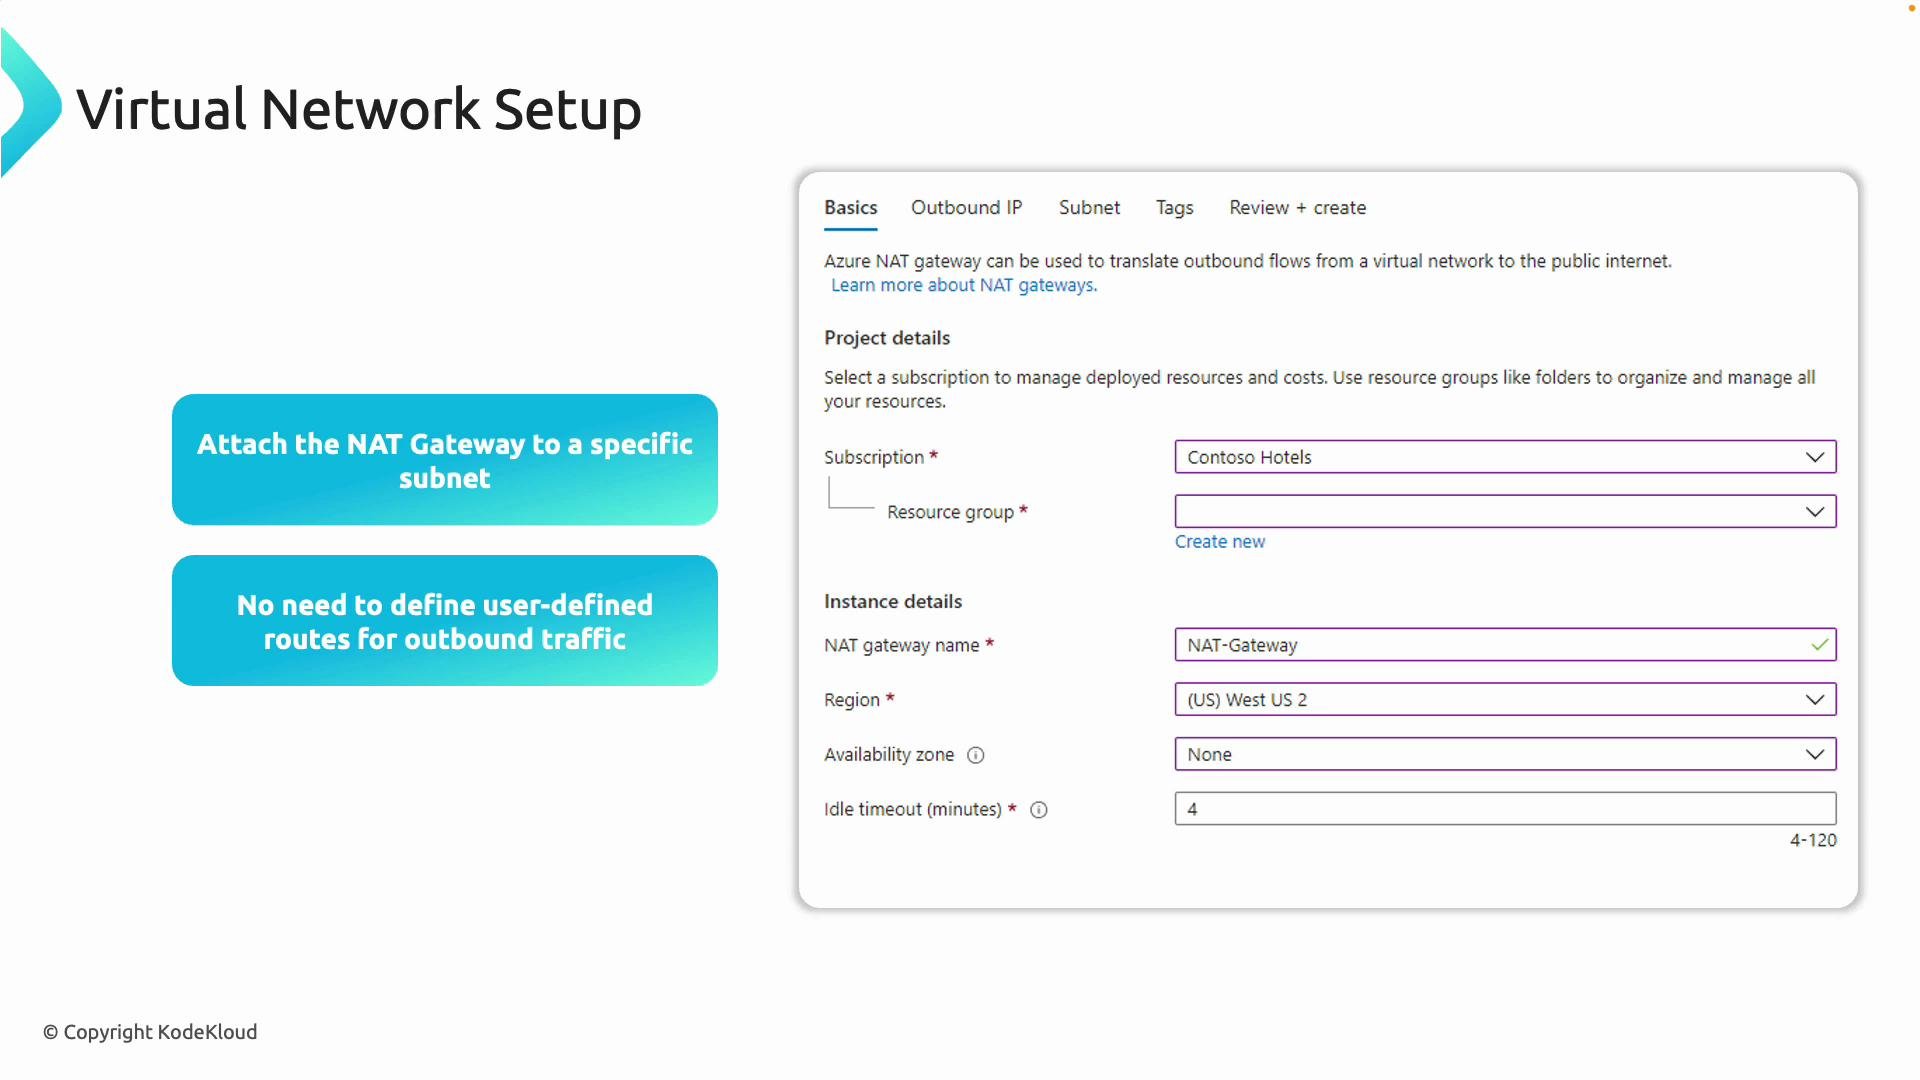
- Attach the NAT gateway to one or more subnets in a virtual network. Resources in those subnets without public IPs will egress through the NAT gateway.
- Azure manages outbound routing automatically for subnets with a NAT gateway attached — you do not need user-defined routes (UDRs) unless you have explicit routing requirements.
NAT gateways are regional resources. Public IPs assigned to them can be zonal or zone-redundant — choose based on availability needs.
- A NAT gateway can be associated with multiple subnets within the same virtual network.
- A single subnet can have at most one NAT gateway attached (you cannot attach multiple NAT gateways to the same subnet).
- Virtual machines with their own assigned public IP will still egress using that VM public IP; NAT gateway affects only resources without their own public IPs.
- Two VMs in the same VNet:
- Management VM has a public IP (used as a jump host for SSH).
- App VM does not have a public IP (initially uses dynamic Azure egress IP).
- Goal: Attach a NAT gateway to the app subnet so the app VM uses a deterministic outbound public IP.
- SSH from your workstation to the management VM (replace the IP with your management VM public IP):
- From the management VM, confirm its outbound public IP:
- From the management VM, SSH to the app VM using its private IP (example:
10.80.2.4):
- On the app VM, check the outbound IP before NAT gateway attachment (this is dynamic and can change):
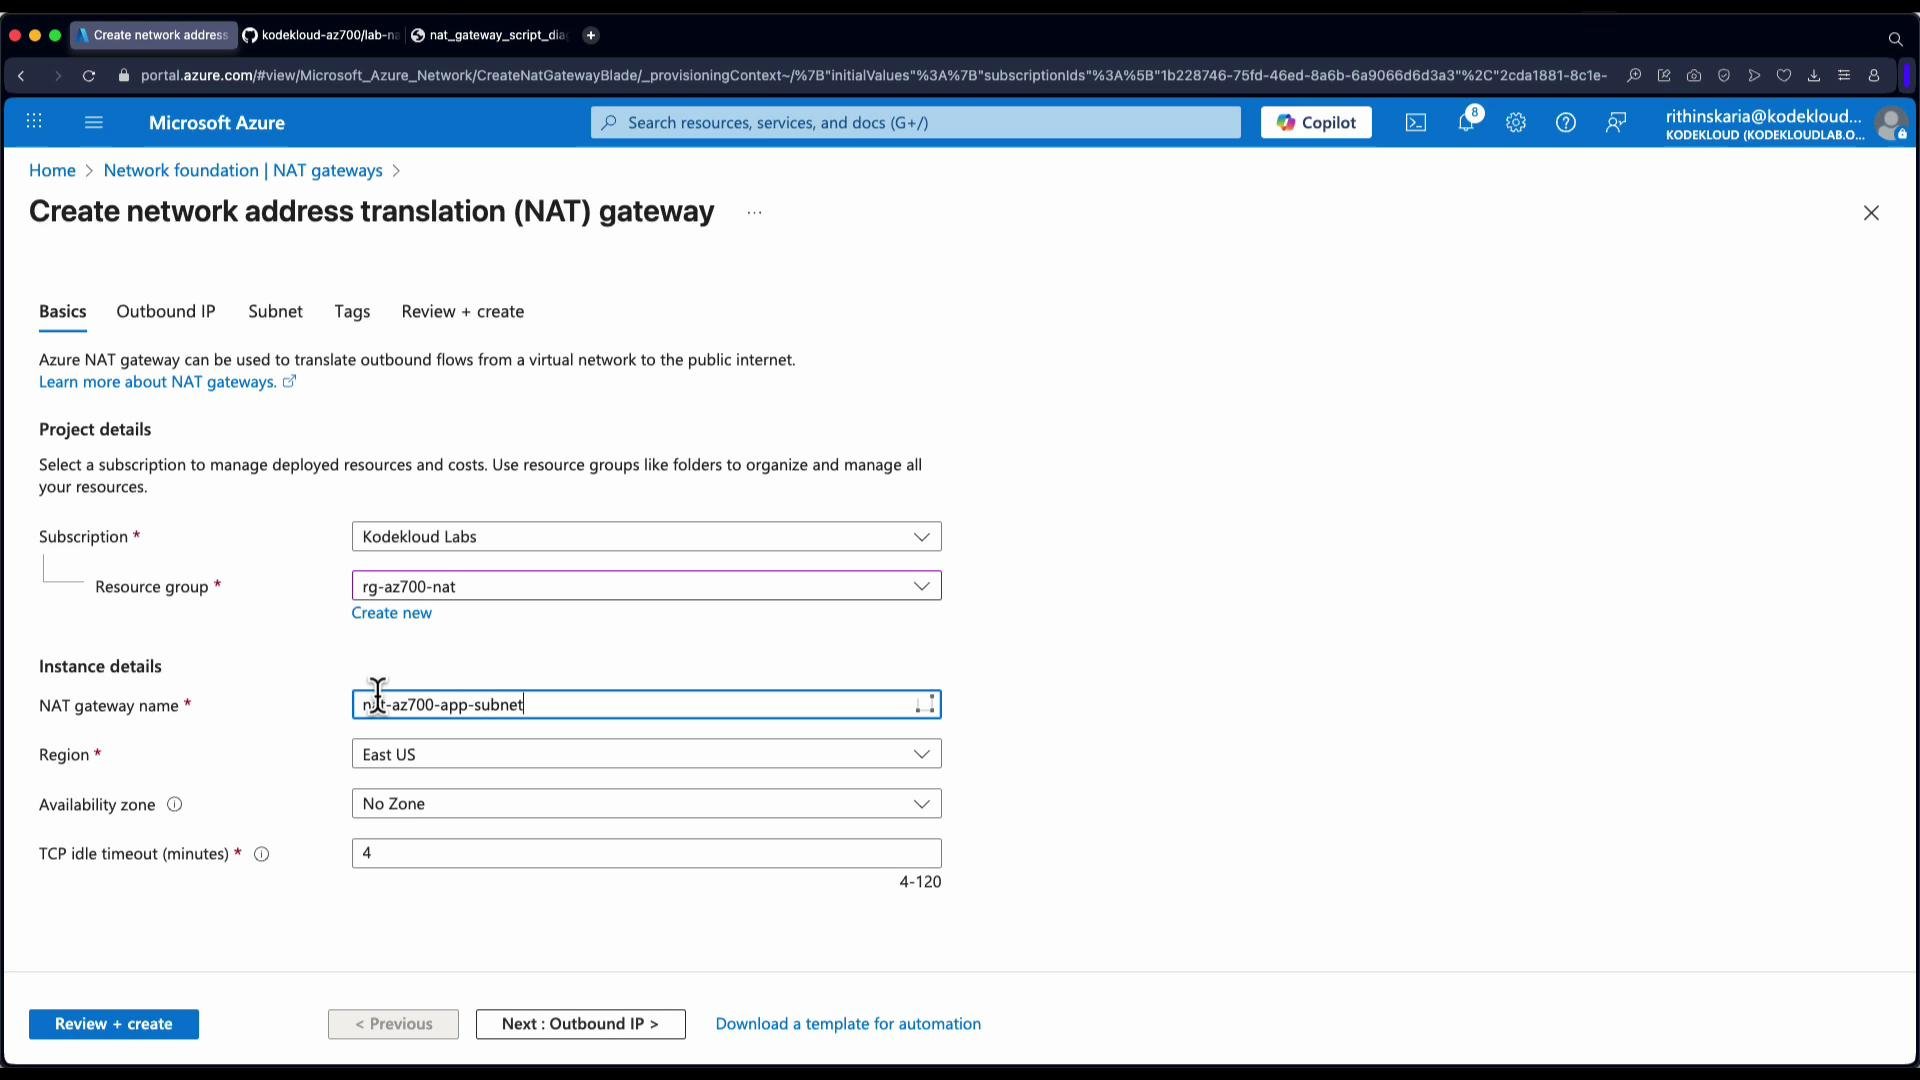
- In the Azure portal, create a new NAT gateway resource in the appropriate subscription, resource group, and region.
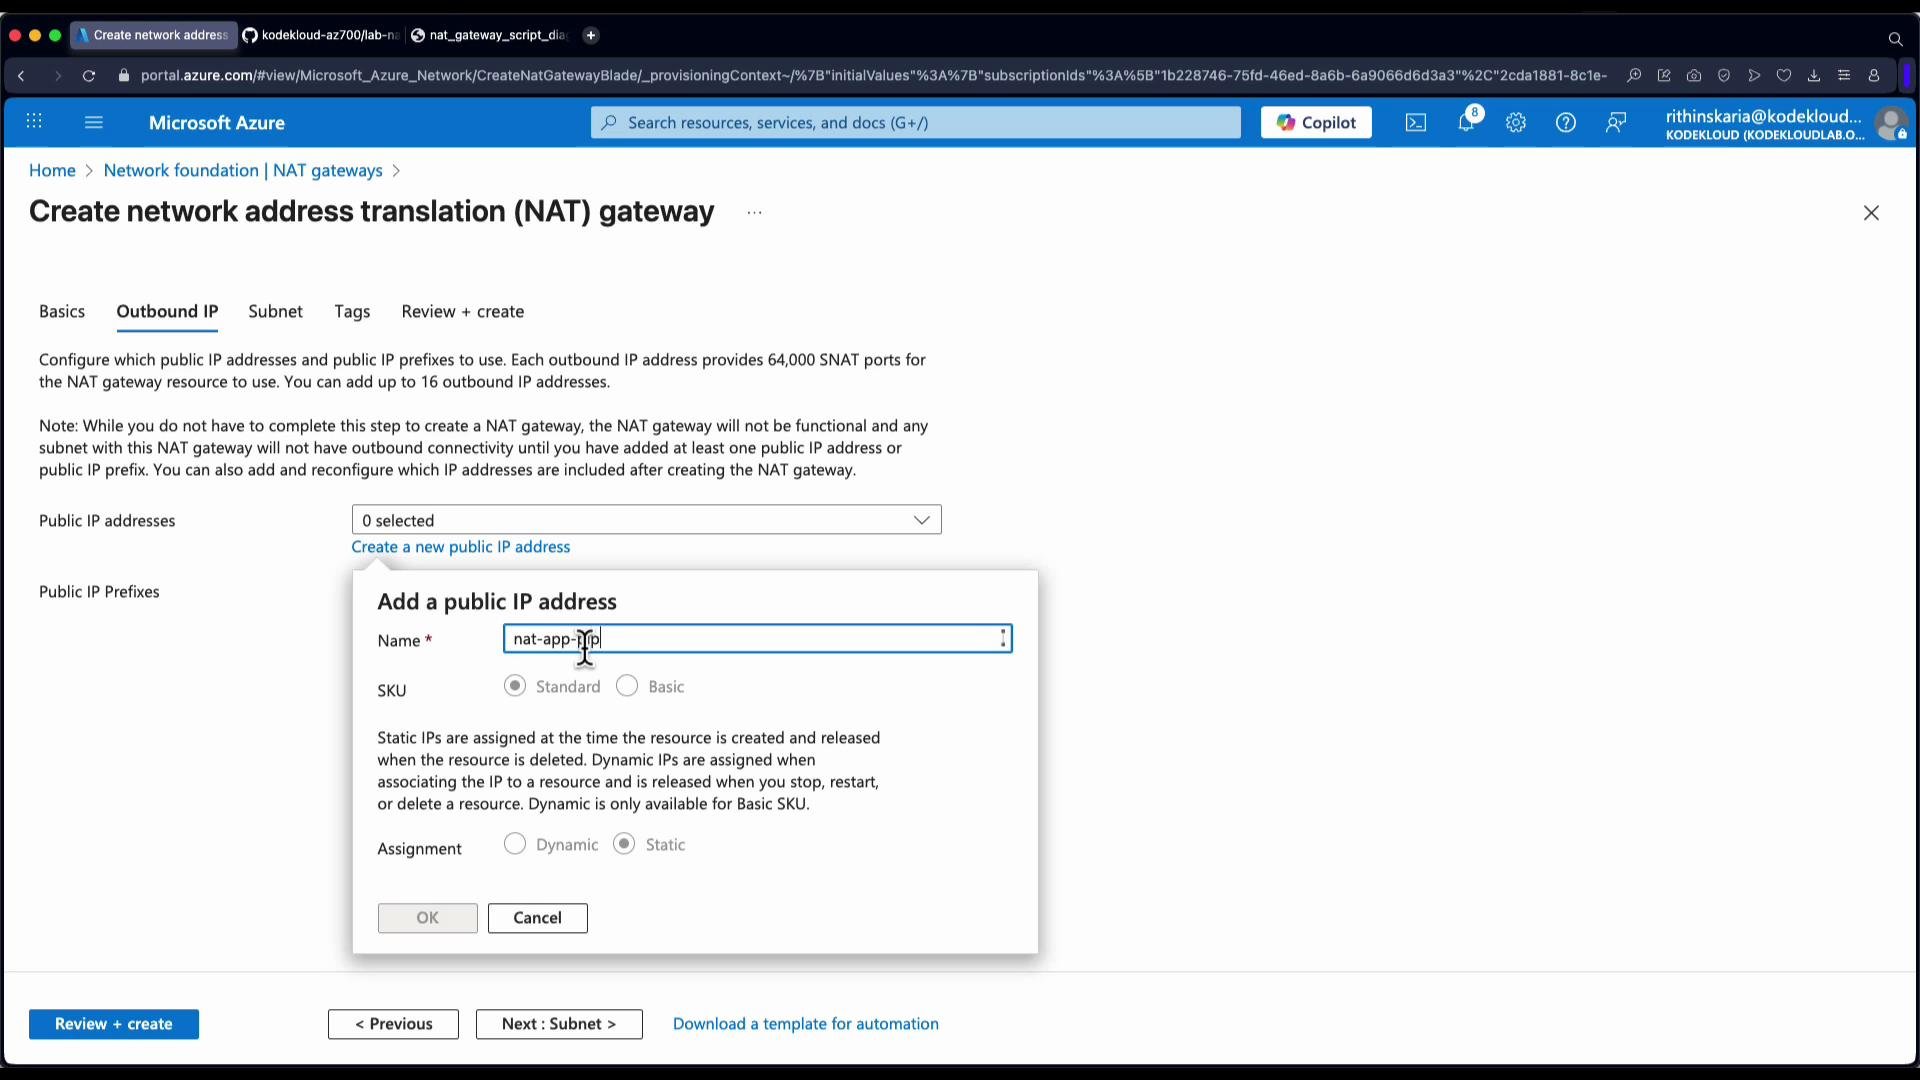
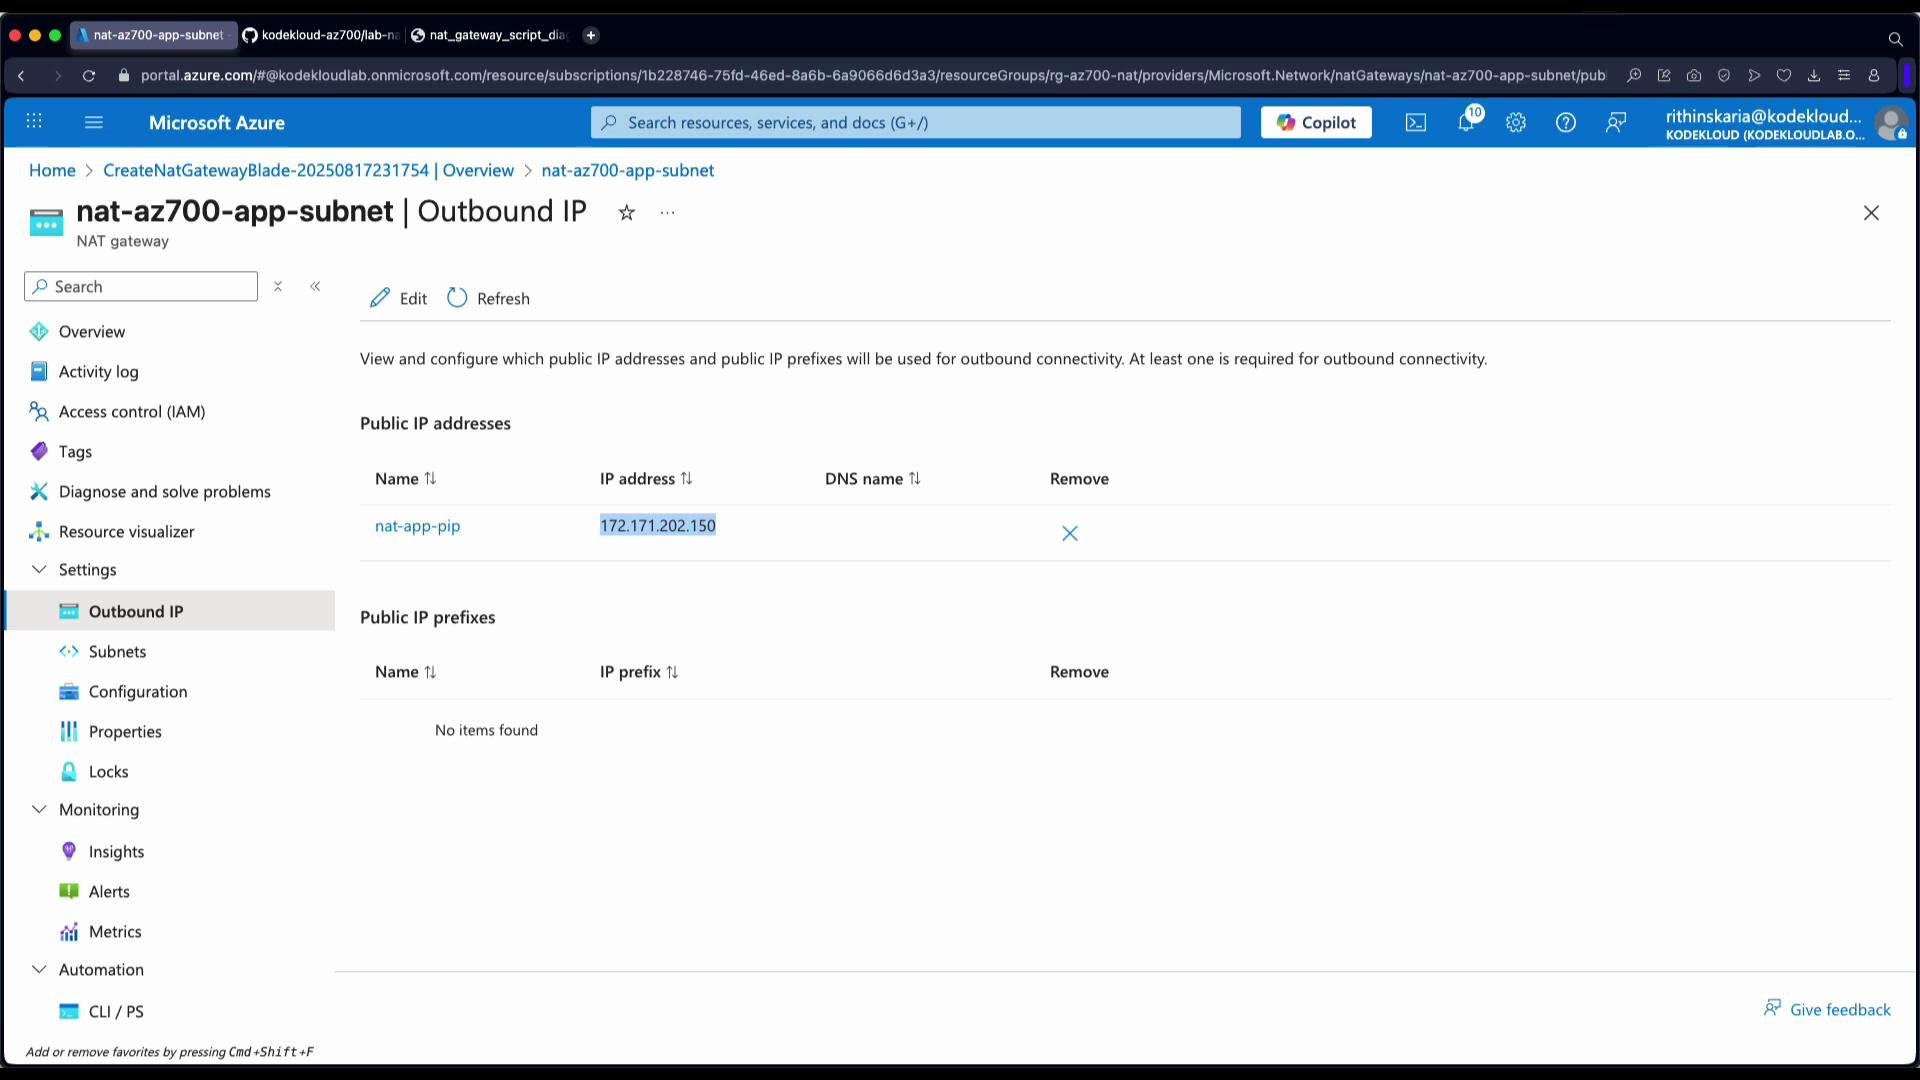
- Choose outbound IP addresses: select either a single Public IP or a Public IP Prefix. For this demo we create a single Public IP (named
NAT app PIP). - You can attach the NAT gateway to a subnet during creation or attach it afterwards. In this walkthrough we create the NAT gateway first and then attach it to the app subnet.
- After the NAT gateway resource is deployed, open it in the portal, go to the Subnets blade, select the app subnet, and click Save to attach the NAT gateway to that subnet.
- After attachment, most outbound traffic from VMs in that subnet will egress using the NAT gateway’s public IP(s).
- Note: VMs that already have their own public IPs will continue to egress using their assigned public IPs instead of the NAT gateway.
- Back on the app VM, re-run the outbound IP check after NAT gateway attachment:
- In the Azure portal, open the NAT gateway resource and view the associated public IP(s). Confirm the NAT gateway public IP matches the app VM’s observed outbound IP.
- Deploying a NAT gateway and attaching it to your subnet provides predictable, centrally managed, and scalable outbound connectivity for resources without public IPs.
- It eliminates the need for custom outbound routes for normal egress scenarios and simplifies SNAT IP management.
- If your workload needs very high concurrent outbound connections, plan for multiple public IPs or a public IP prefix to avoid SNAT port exhaustion.
A single public IP provides approximately 64k SNAT ports. If your workload opens many concurrent outbound connections, use multiple public IPs or a public IP prefix on the NAT gateway to avoid SNAT port exhaustion.
- Azure NAT gateway documentation: https://learn.microsoft.com/azure/virtual-network/nat-gateway
- Public IP and Public IP Prefix overview: https://learn.microsoft.com/azure/virtual-network/public-ip-address
- Azure networking concepts: https://learn.microsoft.com/azure/virtual-network/virtual-networks-overview